1
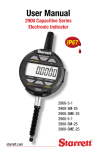
User Manual
2900 Series Electronic Indicator
starrett.com
2900 Indicator User Manual
Table of Contents
Guidelines for Indicator Care.......................................................................... 2
Operating Instructions.................................................................................... 3
Indicator Components, Dimensions & Layout................................................. 3
Button Functions............................................................................................ 4
2900 Indicator Models, Feature Level & Resolution........................................ 5
Resolution Selection*..................................................................................... 5
Setting the PRESET Function*........................................................................ 6
Setting MIN/MAX Limits (Go/No Go)**............................................................. 6
Displaying MIN/MAX/TIR Values**.................................................................. 8
Lock Mode*................................................................................................... 8
Data Output Connection................................................................................. 9
Battery Installation......................................................................................... 9
Appendix A: Technical Specifications............................................................ 10
Appendix B: Serial Output Connector............................................................ 11
*Available with Standard & Advanced Features
. ** Available only with Advanced Features
Guidelines for Indicator Care
1.
2.
3.
4.
5.
6.
7.
8.
9.
2
Avoid dropping the indicator.
Avoid extreme temperatures and direct sunlight for extended periods.
Avoid contact with liquids and dusty environments.
Avoid shocks to the contact point and spindle.
Do not apply radial force to the spindle.
If the indicator is stem-mounted, protect it from being hit or bumped to avoid
stem/case mechanical alignment damage.
Do not over-tighten the mounting mechanism. If possible, use clamp mounting
rather than set screws to prevent damage to the spindle.
Clean the spindle frequently with a dry cloth or a chamois to prevent sluggish
or sticky movement. Isopropyl alcohol may be used to remove gummy deposits
on metallic parts. Do not apply lubricant to the spindle or use solvents.
Do not disassemble or modify the indicator.
2900 Indicator User Manual
Operating Instructions
1.
2.
3.
4.
5.
6.
7.
8.
9.
Install batteries (included with indicator).
Lightly clean the contact point.
Secure the indicator to an appropriate holding device.
Press the ON/OFF button to turn the indicator on.
Select the unit of measure (inch or millimeter) by pressing the IN/mm button.
(Not applicable to metric indicator models).
Place the indicator perpendicular to the reference surface being measured.
Allow enough movement to be able to take a higher or lower measurement.
Press the ZERO button to reset the display.
Lift the spindle, remove the reference surface and place the work piece to
be measured. Put the spindle carefully on to its surface. The measured value
will be shown on the LCD.
Press and hold the ON/OFF button to turn the indicator off. If left unattended,
it will turn off automatically in 30 minutes.
Indicator Components, Dimensions & Layout
1-21/32"
(42.2mm)
Stem Cap
1/4"
(6.5mm)
2-5/64" (53mm)
Stem
3/8" (9.5mm)
Spindle
Bellows
Contact Point
Data
Cable
Spindle
Data
Output
Cover
Back Lug
1/4"
(6.5mm)
Battery
Drawer
starrett.com
3
2900 Indicator User Manual
Button Functions
LOCK, RES, LIMITS and PRESET,
printed in yellow, are used in
conjunction with the SHIFT
5
button.
6 & 12
2&7
To engage press the SHIFT
button first. The SET icon
will appear on the bottom
left corner. Then press
the button for the desired
function.
4&8
3, 9 & 10
1 & 11
1
2
3
Power button. Press and hold for 4 seconds.
Plus/Minus sets the direction of the reading
Half a second after releasing the ZERO button the display will zero. Do
not move from zero during that half second.
4 IN/mm
Toggles the display between English or Metric modes.
5 SHIFT/SET Dual function. To enable the Lock, Resolution Selection, Preset or Limits
(Go/No Go) function. When enabled, SET icon will show in the bottom left
corner of the display.
6 LOCK
Prevents operator modification to the Settings. Press SHIFT/SET button,
then press and hold the LOCK button (after setting the other functions).
7 RES
Resolution. First select the Unit (English/Metric). Press SHIFT/SET then
the RES (Plus/Minus) buttons. Press the RES button to scroll through
choices and press the SHIFT/SET to make the selection.
8 LIMITS
Sets the Min and Max values for the Go/No Go function.
9 PRESET
Press the SHIFT/SET button then press the PRESET button to enable the
PRESET function.
10 ZERO/ABS Dual Function. Press and hold for two seconds to activate the ABS mode
or to exit the ABS mode. To zero the display, see #3 above.
11 HOLD
Press HOLD momentarily to capture a reading. The captured reading will
flash on and off. To disable, press the HOLD button again.
12 MIN/MAX/ Displays the minimum or maximum values captured during operation.
TIR
The TIR function displays the difference between the captured readings.
4
ON/OFF
+/ZERO
2900 Indicator User Manual
2900 Indicator Models, Feature Level, Resolution & Range
Cat. No.
EDP
Description
Resolution
Range
2900-1
09980
Basic English/Metric
.00005"/.001mm
.5"/12mm
2900-2
09981
Basic English/Metric
.0001"/.001mm
.5"/12mm
Standard English/Metric
with Selectable Resolution
Advanced English/Metric
with Selectable Resolution
.0005"/.0001"/.00005"
.5"/12mm
.01mm /.001mm
.0005"/.0001"/.00005"
.5"/12mm
.01mm /.001mm
Basic Metric
.001mm
12mm
.01mm /.001mm
12mm
.01mm /.001mm
12mm
2900-4
09983
2900-6
09985
2900-1M
09986
2900-4M
09988
2900-6M
09990
Standard Metric
with Selectable Resolution
Advanced Metric
with Selectable Resolution
Resolution Selection*
Enter the resolution SET mode by pressing the
SHIFT/SET button followed by the RES button. The
choices are displayed sequentially from highest to
lowest. The round off accommodates the range of
values in the table (right).
After selecting the desired resolution,
press the SET/SHIFT button to exit the
resolution mode. When the mode is
entered, the resolution selection is
presented in the units previously set
(English or metric). Press IN/mm to
toggle units selection, as required.
Press
Press
Press
Then
Round Off
Condition
English
Metric
Inch Mode mm Mode
Round Off Enabled
000.00005 0000.001
Round Off Disabled
000.0001 0000.001
Round Off Enabled
000.0005
0000.01
Round Off Disabled
000.001
0000.01
to enter Resolution Mode
to cycle through the available resolutions
to pick the resolution and exit resolution mode
* Available with Standard & Advanced Features
starrett.com
5
2900 Indicator User Manual
Setting the PRESET Function*
1.
2.
3.
4.
5.
6.
7.
To set a value, press and hold the ZERO/ABS
button until the ABS icon appears in the upper
right corner of the LCD (right). The values can
be SET to: +/-99.99999" or +/-9999.999mm.
Press the SHIFT/SET followed by the PRESET
button. The SET and PRESET icons will appear
in the lower left corner of the LCD. The
PRESET icon will be flashing (middle right).
To move from the PRESET icon to a digit,
press the SHIFT/SET button. A flashing digit
indicates that it is ready to be SET (lower right).
Press the PRESET button to increment the
value. To set, press the SHIFT/SET button.
To move to the next digit press the SHIFT/SET
button and repeat step 3. Repeat steps 2 and
3 until all the digits are SET.
To set a negative value, press PRESET when
the plus/minus sign icon is flashing.
To exit the PRESET function, press the PRESET button when the PRESET icon is
flashing. The SET value will remain displayed.
Press and hold the ZERO/ABS button to return to the active measuring mode.
Press
Then
to enter Preset Mode
Press
to cycle from digit to digit and back to preset
Press
to increment the value of the digit or the plus/minus sign
*Available with Standard & Advanced Features
Setting MIN/MAX Limits (Go/No Go Function)**
1.
2.
3.
4.
5.
6
Select the units to be displayed.
Press the SHIFT/SET button. The SET icon will
appear in the lower left corner (right).
Press the LIMITS button. The MIN LIMIT icon
will appear in the upper middle of the display.
Press the SHIFT/SET button. The LIMIT icon
will flash on/off.
Adjust the spindle to the desired minimum value.
2900 Indicator User Manual
6. Press the SHIFT/SET button to capture the minimum value. The LIMIT icon will stop
flashing.
7. Press the LIMITS button. The MAX LIMIT icon
will appear on the LCD (right).
8. Press the SHIFT/SET button. The LIMIT icon will
flash on/off.
9. Adjust the spindle to the desired maximum value.
10.Press the SHIFT/SET button to capture the maximum value. The LIMIT icon will
stop flashing.
11.Press the LIMITS button. The LIMIT and the SET icon will remain on. The MAX and MIN
icons will stay off as long as the reading is within the set limits. If the measurement is
beyond the set limits the display will flash and the MIN or MAX LIMIT icon will indicate
the direction the limit have been exceeded. To exit Press the LIMITS button.
Press
Then
to enter Min Limit Mode
Press
The LIMIT icon will flash on/off
Press
to increment the value of the
digit or the plus/minus sign.
Then press
Press
To capture the minimum value.
The LIMIT icon will stop flashing.
The MAX icon will appear.
Press
The LIMIT icon will flash on/off.
Press
Adjust the spindle to
the value that you want
Then press
To capture the maximum limit.
The LIMIT icon will stop flashing.
Press
The Indicator is now set up with a
maximum and minimum limit range
Press
To exit the LIMIT mode.
** Available with Advanced Features
starrett.com
7
2900 Indicator User Manual
Displaying MIN/MAX/TIR Values**
(TIR is “Total Indicator Reading”)
Pressing the MIN/MAX/TIR button displays the MIN/
MAX/TIR values most recently measured.
Press once for MIN (above right), twice for MAX
(middle right) and three times for TIR (lower right).
Press a fourth time to exit. The MIN/MAX/TIR values
may be zeroed by pressing the SHIFT/SET button.
** Available with Advanced Features
Lock Mode*
The Lock Mode prevents intended or unintended operator modifications to the settings.
Before activating the Lock function, preset other functions to the desired settings: Plus/
Minus for spindle direction, ABS mode, PRESET Reading, Units, Limits setting, and MIN/
MAX/TIR settings. These values are stored in memory. Then, lock these settings as follows:
1. Press the SHIFT/SET then press and hold the
LOCK button.
2. The Lock icon will turn on and stay on (see right).
Once the lock mode has been activated, the
operator will not be able to change ABS/Normal
Mode, Limits, Units, PRESET, or MAX/MIN/TIR,
but will have access to the zero function and be able to view MIN/MAX/TIR readings.
3. To deactivate the lock mode repeat the process used to enter the mode. Press the
SHIFT/SET then the LOCK buttons. The lock icon will turn off and stay off.
Press
Then
to activate the Lock function
Press
Then
to deactivate the Lock function
*Available with Standard & Advanced Features
8
2900 Indicator User Manual
Data Output Connection
To connect an output cable, remove the two small Phillips screws as shown below.
Then, remove the output port cover.
Plug in the cable and secure it with the same screws that held the cover. Orient the
data cable plug as shown below. When not using output, replace the data cover to
protect the electronics
Battery Replacement
Remove the two Phillips screws that secure the battery drawer as shown below.
Remove the battery drawer and discard the old batteries.
Place two new CR2032 batteries into the tray with the positive (+) side facing up. Slide
the tray carefully into the indicator and secure with the two screws.
To order CR2032 batteries, specify: PT99492. EDP 65650
starrett.com
9
2900 Indicator User Manual
Appendix A: Technical Specifications
Power Requirements and Current Consumption
Battery
2 – CR2032 Lithium Coin Cells
Capacity 240 mAh
Automatic Sleep Time
30 minutes of non-use
SPC Serial Output
18 ASCII Characters
1 Space character
2 Status characters indicating the operating mode
BLANK Normal mode
OL Displacement outside Lower Limit
OU Displacement is outside the Upper Limit
MN Displacement is minimum peak displacement stored
MX Displacement is minimum peak displacement stored
TR Displacement is the T.I.R. stored
LL Displacement is the lower or minimum limit setting
LU Displacement is the upper or maximum limit setting
HL Displacement is a held displacement
1 Sign character (minus but no plus)
1 Space character (IN mode only)
6 Digits
1 Decimal point
2 Spaces
2 Character strings to indicate units “IN” or “mm”
1 Carriage return
1 Line feed
Communication Protocol
Baud Rate
4800
Data Bits
8
Parity
None
Stop Bits
2
Flow Control
None
Data Request and
Receive High to Low Momentary
Response Timing
Response Time Delay 120 ms
Transmit Time 45 ms
10
2900 Indicator User Manual
Appendix B: Serial Output Connector
Pin 1
Pin 2
Pin 3
Pin 4
GND – Signal return
Serial Receive Data Input (RX/RQST)
Serial Transmit Data Output (TX/DATA)
Remote Zero – Special Order Only
State Change High to Low
Serial Input Voltage Level Specification
Logic “0”
Vin < 1.30 Volts
Logic “1”
Vin > 1.98 Volts
Serial Output Voltage Level Specification
Pin 2
Pin 4
Pin 1
Pin 3
Minimum
Maximum
Low Level
Vss
Vss +0.25 @ -1.5mA Load
High Level
Vdd –0.25 @ 1.25 mA Load
Vdd
Note: Vss = 0 Volts, Vdd = 2.7 to 3.6 Volts
Environmental Consideration
Temperature
10-30 °C,
Humidity
30-85%RH (no condensation)
Atmosphere
Non-corrosive, Non-flammable
starrett.com
11
starrett.com
Form 966
09/11
1M/
Specifications subject to change.