Download User Manual DP500 Digital Readout
Transcript
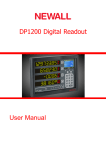
DP500 Digital Readout
User Manual
Contents
Specification
Electrical
Physical
Environment
Accreditation
Disposal
Input and Resolution
Page 3
Page 3
Page 3
Page 3
Page 3
Page 3
Page 3
Mounting Options
Mill Mount
Lathe Mount
Page 4
Page 4
Page 4
Connection Details
Important Information
Connections
Page 5
Page 5
Page 5
Display and Keypad
Understanding the Display
Understanding the Keypad
Page 6
Page 6
Page 6
Setting up the Unit
Navigating Complete Setup
Navigating Complete Setup (Continued)
Language Setup
Type Setup
Encoder Type Setup
Encoder Resolution Setup
Direction of Travel Setup
Radius / Diameter (Measure Setup)
Error Compensation
Linear Error Compensation
Linear Error Compensation Setup
Segmented Error Compensation Setup
Using Segmented Error Compensation
Plane Setup
Functions Setup
Beep Setup
Sleep Setup
Reset Setup
Page 7
Page 7
Page 8
Page 9
Page 9
Page 9
Page 9
Page 10
Page 10
Page 11
Page 12
Page 13
Page 14/15
Page 15
Page 15
Page 16
Page 16
Page 16
Page 17
Standard Functions
Absolute / Incremental
Inch / mm
Zero and Preset an Axis
Undo Function
1/2 Function / Centre Find
Reference
Page 18
Page 18
Page 18
Page 19
Page 19
Page 20
Page 20
Mill Functions
Pitch Circle Diameter (PCD) / Bolt Hole
Page 21
Page 21
Lathe Functions
Tool Offsets
Multiple Tool Datums
Page 22
Page 22/23
Page 24
Trouble Shooting
Page 25
2
Specification
Electrical
EU Directive 73/23/EEC (Low Voltage Directive)
BS EN 55022:1998 Class B
BS EN 55024:1998
Input to Power Supply Unit (Supplied)
100-240V (47-63Hz)
External switch-mode - Output voltage 15VDC
Input Voltage to DP500 15-24VDC ±10%
Conforms to Low Voltage Directive
Physical
Height
Width
170mm (6.69")
260mm (10.23")
Depth
Weight
48mm (1.89")
1.5kg (3.3lb)
Mounting Bolt: M10
Environmental
Climatic Range
Storage Temperature
Working Temperature
Working Humidity
IP-Ingress Protection
IP40 Stand Alone
-20°C to 70°C
-10°C to 50°C
95% R.H. at 31°C
Accreditation
CE
Disposal
At the end of its life, you should dispose of the DP500 system in a safe manner applicable to electrical
goods
Do not burn
The casework is suitable for recycling. Please consult local regulations on disposal of electrical equipment
Input & Resolutions
Only Spherosyn LT or Microsyn LT encoders can be used with the DP500 DRO
Resolutions
Spherosyn LT or Microsyn LT (10µm)
5µm (0.0002")
10µm (0.0005")
20µm (0.001")
50µm (0.002")
Newall Measurement Systems Limited reserves the right to make changes to this specification without
notice
3
Mounting Options
This chapter details the various mounting options for the DP500, both the standard version and the
panel mount version.
Mill Mount (Non Adjustable)
Lathe Mount (Non Adjustable)
4
Connection Details
This chapter details the cable connections for the DP500.
Important Details
You can only use the DP500 with Newall Spherosyn LT and Microsyn LT analogue encoders.
You need to ensure that:
You secure all the cables to prevent the connectors from dropping into hazardous
positions (for example the floor or coolant tray) when you unplug them.
You route all cables to prevent them from being caught on moving parts.
The DP500 is grounded to the machine, using the braided grounding lead provided,
before you turn on the machine supply.
The power has been disconnected, before you connect the encoder(s).
Do not connect this unit directly to the mains supply.
If an encoder connected to the DP500 travels over 2.2m an error code (2.1) will be displayed in the X
axis and the other axes will go blank. See the trouble shooting guide for further details on page 25.
Connections
Encoder input connection
2 or 3 according to model
Cable clamp
External PSU input
5
Cabinet equipotential terminal
for grounding to machine
Display and Keypad
This chapter explains how to interpret the display and use the keypad.
Understanding The Display
Axis 1
950.355
Axis 2
100.250
Axis 3
156.255
T0 0 l
01
Message
Display
Power LED
Understanding The Keypad
Axis Selection Key
Digifind / Reference
Switches between Zero
and Axis Preset modes
Numeric Keys
Switches between Absolute
and Incremental modes
Enter Key
Switches between Inch and
mm display
Clear Numeric Entry
Centre Find
Information selection (scrolls through
options on Message display)
Undo Key
Function Menu Key
Sleep Key
Function Navigation Keys
6
Setting Up The Unit
Navigating Complete Setup
How to enter setup
Until display shows
setup
Language
Eng gb
Note: Other languages may be available
setup
type
setup
Encoder
nn26-lt
cesky
espanol
nederlan
russian
Microsyn LT (10µm)
Spherosyn LT
---i
7
setup
code?
afr.
deutsch
italiano
portugue
S26-lt
setup
dir
setup
plane
Eng us
dansk
francais
pol
turkce
nnill
lathe
0.005
setup
err comp
Unit then
displays
generic
setup
res
setup
measure
funcs
Setup
0.01
0.02
0.05
I---
rad
dia
select
none
linear
segments
(----)
(----)
(----)
(----)
(----)
(----)
Only applicable
to 3 axes units
Setting Up The Unit
Navigating Complete Setup (continued)
setup
funcs
set func
tools
on
off
set func
PCD
on
off
setup
beep
on
off
setup
sleep
0
user defined, use numeric keypad to
enter value (value is in whole minutes)
(Default is inactive)
setup
reset
reset
as
To exit setup
generic
nnill
lathe
8
Setting Up The Unit
Language Setup
This setting enables the user to choose the language that is required to be displayed in the DP500 display.
There are 14 language settings:
Eng gb English UK (Default)
Eng us
francais
deutsch
italiano
dansk
portugue
espanol
turkce
English US
French
German
Italian
Press the axis select key
Danish
Portuguese
Spanish
Turkish
next to the ‘X’ axis to cycle through options
russian
cesky
afr.
nederlan
pol
Russian
Czech
Afrikaans
Hollandic
Polish
Note: Other languages may be available
Type Setup
This setting enables the user to choose the machine type that the DP500 operates in.
There are 3 settings:
Generic
nnill
lathe
Press the axis select key
next to the ‘X’ axis to cycle through options
Note: When set to lathe the x axis changes to diameter measurement
Note: When set to lathe or mill some functions are automatically turned off
Encoder Type Setup
The encoder settings must match the actual encoder in use, or the DP500 will not measure
correctly.
Newall encoders that work with DP500:
Spherosyn LT
Microsyn LT (10µm)
Press the axis select key
s26-LT
Nnm26-LT
next to the ‘X’, ‘Y’ or ‘Z’ axis to cycle through options
Encoder Resolution Setup
The resolution settings available for each axis depend on the inch/mm setting.
µm
5
10
20
50
Display
mm
in
0.005
0.0002
0.01
0.0005
0.02
0.001
0.05
0.002
Press the axis select key
9
Spherosyn™ LT
Microsyn™ LT (10µm)
next to the ‘X’, ‘Y’ or ‘Z’ axis to cycle through options
Setting Up The Unit
Direction of Travel Setup
You use the direction setting to match the DP500 to the actual direction of travel of any axis.
There are two settings for each axis
Press the axis select key
---i
and
i---
next to the ‘X’, ‘Y’ or ‘Z’ axis to cycle through options
Example
---i
If the current setting is
the setting to
i---
and the travel is positive from right to left, changing
will reverse the direction to measure positive from left to right.
Radius / Diameter (measure Setup)
The radius/diameter function allows the operator to display actual (radius) or twice-actual (diameter)
measurements for each axis.
This function is generally used in turning applications, such as the cross travel on a lathe where you
want to display the diameter reading rather than the radius.
There are two settings for each axis:
Radius
rad
Diameter
dia
Press the axis select key
next to the ‘X’, ‘Y’ or ‘Z’ axis to cycle through options
10
Setting Up The Unit
Error Compensation
Your digital readout (DRO) system helps you to improve productivity. It decreases the number of
scrapped parts, as you no longer have to be concerned about making mistakes related to counting the
revolutions on the dials. Your DRO system also helps to eliminate some errors related to ballscrew backlash.
Your DRO system will operate to its published accuracy, provided all components are in
working order and properly installed. Field calibration is not necessary.
Accuracy problems with machined parts may be caused by machine error, DRO system error, or a combination of both. The first step in determining the source of error is to check the DRO system. You do
this by comparing the movement of the Newall reader head to the position reading shown on the display.
You need a high accuracy standard, such as a laser
interferometer. You can use a dial indicator to check short distances, but a laser
provides the best results. If you have to use a dial indicator, be sure it is the highest available accuracy.
To check the accuracy of the DRO system:
1. Place the target of the laser or the needle of the dial indicator directly on the Newall reader head. It is
absolutely critical that you take the readings directly from the Newall reader head. If you have to use a
dial indicator, be sure that the needle of the indicator is perpendicular to the reader head and not
angled. If you take readings anywhere else on the machine, machine errors may distort the results.
2. When the reader head moves, the movement registers on the laser / indicator and DRO
display.
3. Set the laser / dial indicator and DRO position displays to 0.
4. Make a series of movements and compare the position readings between the laser / dial indicator and
the DRO display. If the readings match within the accuracy specified, then you know that the DRO system is operating properly. If this is the case, you can proceed to the next step: evaluating the machine
errors. If the readings do not match, you must repair the DRO system before proceeding with error compensation.
To evaluate machine errors:
1. Put the laser target / dial indicator on the part of the machine where the machining is done.
2. Make a series of movements and compare the position readings between the laser / dial indicator and
the DRO display. The difference between the laser / dial indicator reading and the reading on the DRO
display is your machine error.
3. Plot the machine error along the entire axis of travel to determine the nature of the error. If it is a linear error, you can use linear error compensation. If the error is not linear, you should use segmented
error compensation.
11
Setting Up The Unit
Types of Machine Error
There are many types of machine error, including pitch, roll, yaw, flatness, straightness, and Abbé error.
The diagrams below demonstrate these errors.
Abbé error
Way errors
Yaw
Axis
Typical Yaw
Deviation
C2
C1
C1
Straightness
C2
B
B1
Roll Axis
Encoder
A
A1
End Effector
Travel
Pitch
Axis
B1
B2
greater than
Linear
encoder
less than
encoder A2
Encoder
A1
End Effector
Linear
encoder
Flatness
Typical Pitch
Deviation
Shown with encoder on concave side
of bearing path
Shown with encoder on convex side of
bearing path
Linear Error Compensation
In this mode, you can apply a single constant correction factor for each axis to all displayed measurements. You calculate the correction factor, and specify it in parts per million (ppm). In this mode a single
constant correction factor for each axis is applied to all displayed measurements.
Error
Travel
As you follow the procedure you must ensure that you either use a stepped standard, and approach
each edge from the same direction; or if you must approach each edge from opposite directions, then
subtract the width of the tool or measuring probe from the value displayed on the DP500.
Tool or
Probe
Tool or
Probe
measured distance =
standard distance
standard distance
(Fig 1)
measured distance
12
Setting Up The Unit
Linear Error Compensation Setup
This setting allows you to setup compensation factors for linear errors. There are two methods of entering compensation values Teach mode and Program mode.
Teach Mode
Teach mode is an easier way of calculating linear errors by using the DP500 to automatically calculate
the error, by comparing the actual measurement and the physical movement.
The procedure to do this is shown below.
Error comp select screen is displayed
Press the axis select key
next to the ‘X’, ‘Y’ or ‘Z’ axis which requires linear compensation
Press the
key to Navigate to Linear.
Press
Press the
key to Navigate to Teach.
Press
Display Shows
ax1 tch
at zero?
ax1 tch
at End?
Move tool / probe to start position (see fig 1) Press
Move tool / probe to end position (see fig 1)
Press
Display Shows
ax1 tch
movemnt?
Enter the actual measurement using
numerical keypad
Press
Display Shows
ax1 tch
accept?
Press
Display Shows
to accept, or
to decline
If accepted, goes back to error comp select screen
Program Mode
First you must determine the correction factor required.To do this you use the following equation. (In the
following example the standard distance is 500.000mm and the measured distance is 500.200mm).
Values can be entered in Inches or millimetres.
Correction factor = error / actual x 1,000,000
Correction factor = (500 - 500.200) / 500.000 x 1,000,000
Correction factor = -400
Error comp select screen is displayed
Press the axis select key
next to the ‘X’, ‘Y’ or ‘Z’ axis which requires linear compensation
Press the
key to Navigate to Linear.
Press the
key to Navigate to Program. Press
Display Shows
Press
ax1 prog
ppm
Enter -400 from the example above using the numeric keypad
Goes back to error comp select screen
13
Press
Setting Up The Unit
Segmented Error Compensation
The scale travel is broken down into as many as 200 user-defined segments, each with their own
correction factor, measured against a laser interferometer. The following parameters need to be identified:
Starting point - zero
5
1
Error
4
2
6
0
Travel
3
Correction points
Reference point
Each Correction Point is measured with respect to the Starting Point - zero - which should be set at the
negative end of travel, the DRO must be counting positive when moving away from the starting point.
The Reference Point can be set anywhere along the scale, and does not need to coincide with either
the absolute datum or any of the correction points. However, it may be convenient to make the absolute
datum and the reference point the same.
Always approach the Starting Point, Correction Points and Reference Point from the same direction. If
you do not, then the size of the tool or probe will render the measurement inaccurate. Digifind should
not be used if segmented compensation is active, datums set in normal DRO mode will not affect
segmented error compensation.
Segmented Error Compensation Setup
Procedure for setting segmented error compensation
Error comp select screen is displayed
Press the axis select key
select
next to the ‘X’, ‘Y’ or ‘Z’ axis which requires segmented compensation
Press the
key to Navigate to segments. Press
Press the
key to Navigate to Teach or Program Press
Teach Mode: Enter new segments
Teach Mode
Display Shows
Display Shows
Display Shows
ax1 tch
set ref
ax1 tch
set zero
ax1 tch
goto 1
setup
err comp
Program Mode: Edit previously entered segments
Move machine to reference point Press
Move to zero Press
Move to first position
Press
Display Shows
ax1 tch
movemnt?
Display Shows
ax1 tch
accept?
The difference between
the DRO and laser will Press
be displayed
Display Shows
ax1 tch
contnue?
Press
Enter the actual movement* using numerical keypad Press
to move to next point, or
to accept, or
to decline
to finish
Goes back to error comp select screen
* Actual movement = total accumulated movement of all segments completed, as shown on laser interferometer
14
Setting Up The Unit
Program Mode
Display Shows
ax* edit
seg 001
The existing compensation value(s) for each segment are displayed in each axis. The displayed value is
the difference between the laser interferometer and the DRO registered movement over the segment
length.
To Edit:
Enter number using numerical keypad, press
Press
To navigate to other segments use
Press
to accept
, or enter segment number and then press
to finish
Using Segmented Error Compensation
Note. When using Segmented error, each time you turn on the DP500 you need to move to the
machine reference point. The DP500 will prompt you for this on power up, see below.
reset
segments
reset?
Note. Reset will only appear on an axis if
segmented error has been implemented
reset
reset
Move each axis to the reference point and then press
next to the axis in question
Once all axes have been reset to reference the DP500 will go into normal operating mode
Plane Setup
This setting enables the user to choose the plane in which certain functions will operate. The plane
consists of two axes that require to be set for certain functions to operate correctly.
There are three possible settings:
(----)
setup
plane
(----)
Press
To scroll through options
(----)
(----)
(----)
(----)
Note: Only applicable to a 3 axes unit
15
(----)
(----)
Setting Up The Unit
Functions Setup
This setting enables the user to choose the functions that are required to be used with the DP500.
Functions that are switched off will not show in the function menu or message display.
Function On
on
off
Function Off
Press the axis select key
Press the
next to the ‘X’ axis to cycle through options
key to Navigate through functions
the list of functions can be found below
set func
tools
Tool Offsets
set func
pcd
Pitch Circle Diameter / Bolt Hole Circle
press
to exit
Beep Setup
This setting enables the user to have the option of an audible tone on pressing any of the keys on the
DP500.
There are two settings:
Key Beep on
on
Key Beep off
off
Press the axis select key
next to the ‘X’ axis to cycle through options
Sleep Setup
This setting enables the user to define an automatic sleep mode after a period of time. The user either
leaves the default setting at 0 which deactivates the sleep mode, or inputs a value (in whole minutes) for
when the sleep mode is initiated after no operation of the DP500.
To exit sleep mode, simply move an axis or press any key.
There are two settings:
Sleep Mode deactivated
Sleep Mode Active
0
(Default)
15
Enter the required value via the numeric keypad, Press
to accept the value.
Note: The number in the display is the value in whole minutes before the DP500 will enter sleep mode.
The
key can be used to manually enter/exit sleep
16
Setting Up The Unit
Reset Setup
This setting enables the user to reset the DP500 unit back to factory defaults.
There are three factory default settings:
Default as Lathe / Mill
generic
Default as Mill
nnill
lathe
Default as Lathe
Press the axis select key
Press
to accept the option.
no
Press the axis select key
Press
next to the ‘X’ axis to cycle through options
reset
sure?
next to the ‘X’ axis to cycle between yes and no.
to accept.
Please note: When the DP500 is defaulted as a lathe the X axis default setting is DIA and therefore the
X axis will measure double.
OEM Defaults: The DP500 may have OEM default settings specific to a machine. In this case the
DP500 will only display one reset option. This reset will default all parameters to match the machine it
has been provided with.
17
Standard Functions
This chapter details the standard functions of the DP500.
Absolute / Incremental
Press
to toggle between absolute and incremental mode
Absolute (abs) mode has
been selected
The DP500 has a dedicated key to switch the positional
displays between absolute (abs) and incremental (inc)
measurements. The current display mode is indicated by
a red LED either above or below the key as shown right.
Incremental (inc) mode has
been selected
Using Incremental Mode
In Incremental mode the DRO displays the position
relative to the last position. This is also known as
point-to-point use. In this mode you can set the value
for each axis, or zero it to create an Incremental
datum. This does not effect the machine’s Absolute
datum that you configure in Absolute mode.
70
30
40
50
Using Absolute Mode
In Absolute mode the DRO displays the positions of all
the axes with respect to a fixed datum. The datum is
set by entering an axis position when in Absolute
mode.
30
100
140
190
Example of Absolute and Incremental use
Move to first position in
ABS (Hole A)
Switch to incremental mode
and zero the display
150.000
100.000
0.000
0.000
Y
C
50
Move to second position in
ABS (Hole B)
300
B
A
(0,0)
Make an incremental move
to Hole C
0.000
50.000
Switch to absolute mode
100
30.000
30.000
200
0.000
0.000
30
Set absolute zero at lower
left corner of the part
X
30
150
150.000
150.000
Inch and mm
Press
to toggle between Inch and mm mode
The DP500 has a dedicated key to switch the
positional displays between imperial (inch) and metric
(mm) measurements. The current display mode is
indicated by a red LED either above or below the key
as shown right.
Imperial (Inch) mode has
been selected
Metric (mm) mode has
been selected
18
Standard Functions
Zero and Preset an axis
Press
to toggle between ‘set’ and ‘zero’ mode
The DP500 has a dedicated key to switch the
operation of the axis selection key between zero mode
and set mode. The currently selected mode is
indicated by an LED either above or below the key as
shown right.
Zero mode has been
selected
Set mode has been
selected
Using Set Mode
With set mode selected, this enables the select axis
keys to prompt a numeric entry into the desired axis.
Once the correct value has been selected, it can be
set into the axis by pressing the enter key. This can be
seen in the example on the right.
0.000
Press the axis select key relevant to the axis
0
Input the required numeric value
-145.230
Zeroing an Axis in Set Mode
With set mode selected, it is possible to zero the axis
conveniently by double pressing the relevant select
axis key. This can make use of the DP500 zeroing and
set modes much quicker and easier. This is shown in
the example on the right.
-145.230
0.000
Using Zero Mode
With zero mode selected, this enables the select axis
keys to zero each axis independently. This can be
seen in the example on the right.
Press the axis select key relevant to the axis
0.000
Undo Function
The DP500 stores the last 10 positions/numeric inputs, which can be accessed using the
undo
feature
Example 1 - non movement
Display shows
-145.230
input a value
95.520
You have inputted an incorrect figure and want to get back to the dimension shown before
Press
Display now shows
-145.230
Example 2 - movement
input a value
input a value
5.000
10.000
move to that point, display now shows
move to that point, display now shows
0.000
0.000
Press
once, display now shows
-10.000
this is the position of your second point
Press
again, display now shows
-15.000
this is the position of your starting point
19
Standard Functions
Half Function / Centre Find
Press
to initiate the half function.
The DP500 has a dedicated key to half the value in
any axis. This is done by initiating the half mode and
selecting the required axis. This can be seen in the
example on the right.
100.000
Press the axis select key relevant to the axis
50.000
Digifind / Reference Function
The DP500 comes equipped with Digifind, a feature unique to Newall digital readout
products. Digifind eliminates the risk of losing your position and datum Set-Up.With Digifind, precise SetUp of a workpiece is carried out only one time.
When the DP500 is powered on, it displays the position at power off, compensated for any movement of
a Spherosyn LT transducer up to 0.2500" (6mm) and a Microsyn LT encoder up to 0.1000" (2.5mm) in
either direction since the unit was last used. If the machine has moved beyond 0.2500" (6mm) Spherosyn LT [0.1000" (2.5mm) - Microsyn LT], Digifind allows a quick means to find the datum if lost.
A mark must be made on both a stationary part and moving part of the machine.The marks must be
aligned and will serve as the machine "home" position.
The mark must be indelible, and it must allow the operator to move the machine to within a 0.2500" (6
mm) - Spherosyn LT [0.1000" (2.5mm) - Microsyn LT ] band around the mark at any time. Alternatively,
you can use a convenient reference point on the workpiece
Setting the reference
Until message display shows
,
Message display shows
set ref
sel axis
digifind
set ref
of axis required
The reference point is now set
Finding the reference
If datum is lost at anytime it is possible to “Find” the datum again. Position the machine to within the
6mm (0.2500”) band for Spherosyn LT and 2.5mm (0.1000”) band for Microsyn LT. “Find” the reference.
Until message display shows
,
Message display shows
find ref
sel axis
digifind
find ref
of axis required
The position to the absolute zero for that axis is now displayed
Finding zero
As a fail safe, Digifind can ‘find’ the last datum or absolute zero set.
Position the machine to within the 6mm (0.2500”) band for Spherosyn LT and 2.5mm (0.1000”) band for
Microsyn LT. “Find” the reference.
,
Until message display shows
Message display shows
find 0
sel axis
digifind
find 0
of axis required
The original datum is reset
Note: Display must be in ABS mode for digifind actions
20
Mill Functions
This chapter details the Mill functions of the DP500. The mill functions use the plane setting from setup.
PCD / Bolt Hole Circle
The DP500 calculates positions for a series of equally spaced holes around the circumference of a
circle. The message display prompts the user for various parameters it needs to do the calculations.
Once the DP500 completes the calculations, the axis displays show the distance to each hole. The
operator works to Zero for each hole location. See example below.
How to navigate to PCD function.
funcs
pcd
Until message display shows
,
Example
Message display shows
125.250
99.700
PCd
centre
Enter centre co-ordinates
(See using set mode P19)
PCd
diameter
Enter the diameter value
(See using set mode P19)
150.000
PCd
holes
Enter the number of holes
(See using set mode P19)
5
PCd
angle
Enter the start angle value
(See using set mode P19)
18
Note: The PCD will be calculated from the 3 0‘clock position, anti-clockwise. Enter the angle
as a negative value if it is given as clockwise from 3 o’clock.
Note: At this point you can use the
menus.
keys to navigate back and forth through the above
Y axis
PCd
go
-196.580
-122.880
(-196.580, -122.880)
Starting hole
18º
starting
angle
PCd go
hole 01
Note: The numbers appear as negative
values because the operator works to
zero.
Circle centre
150mm
diameter
99.7mm
Datum
125.25mm
Navigate through the sequence of holes by using
The maximum number of holes is 999
21
X axis
keys, or enter hole number then press
Lathe Functions
This chapter details the Lathe functions of the DP500.
Tool Offsets
The Tool Offset function allows the operator to enter and store offsets for a range of tools.This enables
the operator to change tools without resetting absolute zero or datum. Using tool
offsets ensures that diameter and length measurements will remain consistent after tool changes.This
speeds up tool changes and increases productivity as it eliminates the need for the operator to stop and
manually measure the diameter.
The number of Tool Offsets available is 50. This large number allows tools to be grouped where more
than one set is used. For convenience, it is highly recommended that tools are physically marked with
their corresponding tool number.
There are two ways to set tool offsets, teach mode and program mode.
How to navigate to the tool offset function.
,
Until message display shows
funcs
set tool
Teach Mode
Display will show
tools
teach
Display will now show
select
select
teach
tool 01
Select the
Note:
axis needed
teach
capture
In this example the X
axis has been selected
to select
different tools
Display will show
0.000
Take a skim cut if X axis is selected, or take a face cut if Z axis is selected
Display will show
0.000
teach
value
Note: at this point you can move
the tool away from the part
Measure the part with an accurate gauge and enter this value using the numeric keypad.
Repeat the above process for all the tools required.
to exit tool set mode
22
Lathe Functions
Program Mode
Display will show
tools
program
tools
teach
Display will now show
0.000
0.000
set tool
tool 01
Note:
keys, or enter hole
number then press
Take a skim cut if X axis is selected, or take a face cut if Z axis is selected
Note: Tool must not be moved off the part after taking the cut.
User needs to enter the difference between measured diameter and readout value
Repeat the above process for all the tools required.
to exit tool set mode
Using Tool Offsets
Until message display shows
feed 00
tool 01
The message window displays which tool is in use
feed 00
tool 01
To scroll through different tools, or enter tool number on numerical keypad
at any time.
23
to select
different tools
Lathe Functions
Multiple Tool Datums
The Multiple Tool Datum function offers several advantages when compared to the standard
Tool Offset function.
- Multiple Datums - Each tool has its own independent datum (tool datum)
- Quick Tool Edits - Changes can be made on the fly, with live position display
Application
Several tools are required for work on a particular piece. For example there might be a
roughing tool, a finishing tool, a thread cutting tool, ID boring tool, etc. A separate datum can
be set for each tool. Changing one tool does not affect the other tools.
Using Multiple Tool Datums
Until message display shows
feed 00
tool 01
Until set mode is selected
to change tools. Current tool # is displayed in the message window
Setting Tool Datum
of axis required
to select
datum
recall
wil be displayed
tool datm Enter desired numerical position value
recall
Repeat as necessary for other tools
24
Trouble Shooting Guide
Symptom
The display is blank
Solution
•
•
•
•
•
The DP500 maybe in sleep mode. press any key to exit sleep mode
Check that the power supply is correctly connected to a working mains outlet
Check that the power supply cables are not damaged
Check that the power supply voltage is 15 - 24Vdc ±10%
Check the power supply indicator is illuminated on the front of the DP500.
Either the supply voltage is too low, or the power supply or mains supply has an intermittent fault.
The display works, but
resets from time to time with• Check that the power supply voltage is 15 - 24Vdc ±10%.
out any keys being pressed.
• Check that all the connections are secure.
The display works, but gives
erratic readings,
the last digit jitters or the
measurements jump to
new figures unexpectedly.
The unit does not respond to
any key presses.
There may be a poor earth (ground) connection. Both the DP500, and the machine on which it is
installed, must have proper earth (ground) connections.
There may be a problem with the encoder.
Disconnect the DP500 from its power supply, wait 15 seconds and then reconnect.
This indicates that the unit is not receiving a proper signal from the encoder.
‘NO Sig’ / ‘SIG FAIL’ or ‘1.x’
appears in the display.
Readings are incorrect.
• Check that the encoder connections are secure.
• Check that there is no damage to the connectors or to the encoder.
• Switch the DP500 off and back on again.
• Swap the encoder to another axis to confirm whether the encoder or the DP500 is at fault.
• Check the Encoder Type to ensure it is correct.
• Check the Radius / Diameter setting. The Diameter setting causes the axis to read double.
• Check the Error Compensation factors.
• If using the Segmented Error Compensation, verify the datum position.
• Swap the encoder to another axis to confirm whether the encoder or the DP500 is at fault.
• Check that there is no damage to the encoder or its cable.
• Check that the encoder is fixed firmly and aligned correctly, as described in the Spherosyn / Microsyn
Installation manual.
• Check that there is no binding on the scale. With the scale brackets slightly loosened, you
t should be able to slide the scale back and forth with minimal resistance.
• If you have a Spherosyn LT scale, check that the scale is not bent, by removing it and rolling it
on a flat surface.
This indicates that the encoder has travelled further than the maximum allowed travel
2.1 appears in the display.
• This type of error can only be cleared by cycling the power to the DP500.
• The sleep button to reset the DP500 will not clear this type of error.
If the solutions suggested above do not solve your problem, contact Newall for further instruction.
To swap encoders to trace a fault:
1. Check that the two axes are set to the correct encoder types.
2. Disconnect the DP500 power supply.
3. Disconnect the encoder from the malfunctioning axis and move to a working axis.
4. Reconnect the DP500 power supply and turn on.
If the fault stays with the same encoder, then the encoder is at fault. If the fault does not follow with the encoder the
DP500 is at fault.
Providing you have not moved the machine more than 6.3mm (0.25”) for a Spherosyn LT Encoder or 2.5mm (0.1”) for a
Microsyn LT Encoder, switching the power off and back on again does not lose the datum position.
25
Newall Measurement Systems Ltd.
Technology Gateway, Cornwall Road
South Wigston, Leicester LE18 4XH United Kingdom
Tel: +44 (0) 116 264 2730 • Fax: +44 (0) 116 264 2731
E-mail: [email protected] • Web: www.newall.co.uk
Newall Electronics Inc.
1803 O’Brien Road
Columbus, Ohio 43228 USA
Tel: +1 614 771 0213 • Fax: +1 614 771 0219
E-mail: [email protected] • Web: www.newall.com
Custom Sensors & Technologies
11F Chang Feng International Tower
89 East Yunling Road
Shanghai, 200062 China
Tel: +86 21 8025 7166 • Fax: +86 21 6107 1771
E-mail: [email protected] • Web: www.newall.cn
023-82130-UK/0


