1
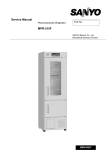
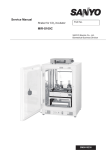
Service Manual FILE No. Versatile Environmental Test Chamber MLR-351 MLR-351H Contents 㩷 㩷 㩷 㩷 㩷 㩷 㩷 㩷 㩷 㩷 㩷 㩷 㩷 㩷 㩷 㩷 㩷 㩷 㩷 㩷 㩷 㩷 㩷 㩷 㩷 㩷 㩷 㩷 㩷 㩷 㩷 㩷 㩷 㩷 㩷 㩷 㩷 㩷 㩷 㩷 㩷 㩷 㩷 Page Features ------------------------------------------------------- 1 Specifications ------------------------------------------------------- 2 Dimensions ------------------------------------------------------- 5 Welding points ------------------------------------------------------- 7 Cooling unit parts -------------------------------------------------- 9 Refrigeration Circuit -------------------------------------------------- 10 Airflow in chamber -------------------------------------------------- 12 ----------------------------------------------- 13 ------------------------------------------------------- 14 Components on PCB Electrical parts Specifications of sensor -------------------------------------------- Structure of high frequency vibration unit Maintenance for humidifier 15 ---------------------- 16 --------------------------------------- 17 Wiring diagram ------------------------------------------------------- 21 Circuit diagram ---------------------------------------------------- 22 Control specifications ----------------------------------------------- Instructions for calibration 23 --------------------------------------- 29 Parts layout -------------------------------------------------------- 37 Test data -------------------------------------------------------- 39 ------------------------------------------------ 43 Instruction manual Effective models This service manual is effective for the following models. 㩷 Model MLR-351 Model code 823 291 52 823 291 54 Voltage and Frequency 220V 50Hz 230V/240V 50Hz MLR-351H 823 292 51 823 292 52 823 292 53 823 292 54 115V 220V 220V 230V/240V 60Hz 50Hz 60Hz 50Hz Features 䂓㩷 Easy and graphical operation - Liquid crystal display (LCD) and Pop-up menu function on the control panel. 䂓㩷 High accuracy in temperature control - Realized with micro processor PID control and cooling capacity control 䂓㩷 Running data of last 14days can be automatically recorded (Intervals; 6min). - An operator can easily check data with graphical display in LCD. 䂓㩷 Real time clock and programmed running function 䂓㩷 Creating maximum step numbers are 12steps. - 12 steps x 10 patterns can be stored. 䂓㩷 Easy calibration - Temperature and humidity cab be calibrated through the control panel. 䂓㩷 Option - Interface board (MTR-480) - Mounting plate for recorder (MLR-S144) 1 㩷 Specifications 㩷 㩷 <Structural specifications> Item Model MLR-351 MLR-351H Versatile Environmental Test Chamber External dimensions W760 × D700 × H1835 (mm) Internal dimensions W520 × D490 × H1135 (mm) Effective capacity 294 L Exterior Painted steel Interior Stainless steel, left and right side paired glass window (370x1110 mm) Door Painted steel, front, left and right side Inner door Paired glass Insulation Rigid polyurethane foamed-in place 4pcs, hard steel wire on polyester coating, W465 x D450 mm (inner dimensions) Shelf 1pc (bottom), hard steel wire on polyester coating with stainless cover W355 x D395 mm (inner dimensions) Maximum load: 25kg/shelf Access port Inner diameter;40mm, top left side Heating/cooling method Forced air circulation Caster 4pcs. Compressor 1pc, Hermetic rotary type, output: 325W Evaporator Fin and tube type Condenser Fin and tube type Refrigerant R-404A Lighting Fluorescent lamp: 40W x 15pcs (FL40SSW/37) Grow starter: 15pcs (FG-4P) Heater Defrosting 340 W Automatic defrost (3patterns), manual defrost Natural evaporation of drain water Power supply Weight Accessories Local voltage 220 Kg 230 Kg 5 shelves, 1 stainless cover 5 shelves, 1 stainless cover, 1 water supply tank, 1 supply hose Option Mounting plate for recorder (MLR-S144), Interface board (MTR-480) 㩷 2 <Control specifications> Item MLR-351 Temperature controller Humidity control MLR-351H PID control Supersonic wave humidifier, PID control Temperature illuminance Temperature, illuminance and humidity (temperature control has first priority) Program running 12steps x 10programs settable Max. 99hrs and 59min settable. Endless running with ‘99:99’ set Max. 98times repeatable, endless repeating with ‘99’ Automatically start after power failure Updates 14days with 6min interval (Note: Data would not be recorded in power failure) Graphic display for day by day Data logging Older data would be eliminated when log data is fully stored Log data can be sent by interface board MTR-480 (option) RS232C enables CSV data to transmit to hyper terminal Start date of programmed running can be set. Real time clock Back-up for clock function with battery (CR2032) 0~100mV Remote analog output for Temperature: 0~50℃ (Dissolution: 0.25℃) recorder Illuminance: 0~5 Humidity: 0~100%RH Automatic In chamber temp. variation exceeds 2.5℃(1.0∼10.0℃ changeable); set Current values of top screen flashes with intermittent buzzer with temp. (high) 15min. (changeable) delay. Heater or compressor would be OFF. Automatic In chamber temp. variation exceeds 2.5℃(-1.0∼-10.0℃ changeable); set temp. Current values of top screen flashes with intermittent buzzer with (low) 15min. (changeable) delay. Heater or compressor would be OFF. Individual security circuit Alarm High limit In chamber temperature exceeds high limit temperature (15℃∼55℃ temp. changeable), continuous buzzer sounds and heater, receptacle, fan motor and fluorescent lamp would be OFF. Individual security circuit Low limit In chamber temperature exceeds high limit temperature (-10℃∼-25℃ temp. changeable), continuous buzzer sounds and compressor would be OFF. Thermal When chamber temperature exceeds 70℃, fusing, heater and fan fuse motor would be OFF. 㩷 3 <Performance specifications> Item MLR-351 MLR-351H Temperature control 10℃~50℃ (light ON) 10℃~50℃ (light ON) range 0℃~50℃ (light OFF) 5℃~50℃ (light OFF) Usable ambient 5~35℃, less than 80% RH temperature Temperature ±2.5℃ (light ON), ±1.0℃ (light OFF) distribution (Set temperature 25℃, AT 20℃, no load) Temperature ±0.3℃ (Set temperature 25℃, AT 20℃, no load) fluctuation 0~20000Lx(Photosynthetically active photon flux: 150µmol-2S-1) Brightness control 6steps changeable (0,1,2,3,4,5) Humidity control -------- 60~90% RH (LS:0, SV:15~45℃) range Rated voltage 55~85% RH (LS:5, SV: 15~45℃) 110VAC Rated frequency 115VAC 220VAC 230VAC 60Hz 240VAC 110VAC 50Hz 115VAC 220VAC 230VAC 60Hz 240VAC 60Hz Power consumption(W) 1390 1500 1390 1310 1410 1390 1420 1540 1420 1340 1450 1560 Total max. current 14.1A 14.9A 9.3A 8.9A 9.6A 10.4A 14.4A 15.2A 9.5A 9.1A 9.8A 10.6A Max. heat emission(kJ/h) 5005 5400 5005 4715 5075 5005 5110 5545 5110 4825 5220 5615 4 Dimensions < MLR-351H> 5 < MLR-351 > 6 Welding points <MLR-351H> Frame Pipe Note) The welding points that are marked with can be fixed in the field HO HI Condenser Evaporator EA FB2 C1 C2 C3 C5 C4 C6 EO FB1 C7 C8 C10 C9 C11 C12 C13 C14 C15 C16 C17 EI EC 㩷 Evaporator for de-humidity FB3 HEO C18 EB HEI Evaporating pipe CO Condenser C1 Compressor DD CB DY FI JI SB DZ FO DI Dryer DO 7 CC SD DB SA CA Solenoid valve for de-humidity DA DR DX SY SX BI VO SZ VI SC Solenoid valve BO BC SE Welding points <MLR-351> Frame pipe Note) The welding points that are marked with can be fixed in the field HO Condenser C1 C2 HI FB2 C3 C5 C4 C6 EO C7 C8 C10 C9 C11 C12 C13 C14 C15 C16 C17 Evaporator EA FB1 EI C18 Condenser Evaporating pipe CO C1 Compressor CC DA Solenoid valve SD DB FO DD FI JI SA CA DI CB Dryer DO 8 SB VO VI SC SE Cooling unit parts MLR-351/351(H) Components Specifications 115V,60Hz Compressor Condenser Model Part code Rated power supply Refrigerant oil Cooling method Starting relay Overload relay Starting capacitor Running capacitor Evaporating pipe Evaporating condenser Frame pipe Evaporator Type Accumulator Evaporator for de-humidity Capillary tube Resistance value Dimensions Refrigerant Type Charged q’ty Dryer Condensing fan Condensing fan motor Cooling fan Cooling fan motor Thermostat, sensor Heater Type Charged q’ty Dimensions Type Dimensions Type Type Type DEF heater Drain pan heater 220V,60Hz 230V,50Hz C-2S320M2D C-2S320M5D 220V,50Hz C-2S320M5D C-2S320M5D 807 323 62 115V,60Hz 807 325 65 220V,50Hz 807 325 65 220V,60Hz 807 325 65 230V,50Hz Ze-NIUS32SA Charged q’ty:280cc Air cooling by fan AMVL-180A P24KU AMVL-300A P95KU AMVL-300A P95KU AMVL-300A P95KU 100MF,160VAC 30MF,300VAC 30MF,300VAC 30MF,300VAC 20MF,220VAC 4MF,400VAC 4MF,400VAC 4MF,400VAC W240×P25×7column(ij4.76×t0.7mm) Fin and tube W280×P25×8.5column(ij9.52×t0.6mm) ij4.0×t0.5mm Fin and tube W380×2lines×12column ij35×L210mm Tube: W360×1line×4column 57PSI L 1500mm, Outer dimensions:ij2.4mm Inner dimensions: ij1.2mm R-404A 278g Oil additive: n-pentane 19cc(11.6g) XH-9 10g ij160, Blades:4pcs Material:ABSGF FU2-A051BMP1 FU2-A051BMP5 ij160, Blades:4pcs Material:ABSGF FU2-A051BMP1 FU2-A051BMP5 Thermistor: 103AT-1 for temp.control Thermistor: 103AT-1 for defrost control 318W 20W 9 Refrigeration Circuit 10 11 Airflow in chamber 12 Components on PCB Humidity sensor (MLR-351H only) 13 Electrical Parts MLR-351/MLR-351H Compressor (H) Starting relay Overload relay Starting capacitor Running capacitor Fl. Lamp capacitor Condensing fan motor Cooling fan motor Circulation fan motor Overheat relay Fan motor relay Fl. Lamp relay Main heater Drain pan heater Dehumidifier defrost heater (351H only) Humidifier (351H only) Ballast Fluorescent lamp Glow starter Switching power supply Thermal fuse Temperature sensor Defrost sensor Limit sensor Dehumidifier def. sensor (351H only) Humidity sensor (351H only) Door switch Breaker switch Noise filter Solenoid valve Solenoid valve (351H only) Valve coil (351H only) Type Code Rated voltage (50/60Hz) Winding resistance C-S(Aux) C-R(Main) Type Pick up voltage Drop out voltage Type Action to the temp. (No current) OFF ON Action to the current (AT25℃) Operation time Non-Action to the temp. (80㷄䋩 Non-Action Action Rating Rating Rating Type Rating Type Rating Type Rating Type Rating Type Rating Type Rating Rating Rating Rating Type Type Rating Type Rating Type Type Rated output Rating Type Rating Type Rating Type Rating Type Rating Type Type Rating Type Rating Type Rating Type Type Type Rating AC115V,60Hz AC220V,50Hz AC220V,60Hz AC230V/240V,50Hz C-2S320M2D 807 323 62 C-2S320M5D 807 323 65 C-2S320M5D 807 323 65 C-2S320M5D 807 323 65 5.432㱅 1.824㱅 AMVL-180A 108~128VAC 30~75VAC P24KU 24.28ȍ 7.832ȍ AMVL-300A 185~217VAC 60~120VAC P95KU 24.28ȍ 7.832ȍ AMVL-300A 215~247VAC 69~132VAC P95KU 24.28ȍ 7.832ȍ AMVL-300A 185~217VAC 60~120VAC P95KU 150+/-10C 85+/-10C 24.0A 6~15sec 150+/-10C 85+/-10C 9.5A 6~15sec 150+/-10C 85+/-10C 9.5A 6~15sec 150+/-10C 85+/-10C 9.5A 6~15sec 6.1A 8.0A 100MF, 160VAC 20MF, 220VAC 75MF, 120VAC FU2-A051BMP1 115VAC FU2-A051BMP1 115VAC WE2B4-958 115VAC G4F-11123T 20A, 12VDC G2R-1A-T 12V, 10A, 250W JC1AF-TM-DC12V-F 12V, 15A, 250W 115V, 22.4W 115V, 22.4W 2.5A 3.4A 30MF, 300VAC 4MF, 400VAC 75MF, 120VAC FU2-A051BMP5 220-240VAC FU2-A051BMP5 220-240VAC WE52B5-959 250VAC G4F-11123T 20A, 12VDC G2R-1A-T 12V, 10A, 250W JC1AF-TM-DC12V-F 12V, 15A, 250W 230V, 22.8W 230V, 22.8W 2.5A 3.4A 30MF, 300VAC 4MF, 400VAC 75MF, 120VAC FU2-A051BMP5 220-240VAC FU2-A051BMP5 220-240VAC WE52B5-959 250VAC G4F-11123T 20A, 12VDC G2R-1A-T 12V, 10A, 250W JC1AF-TM-DC12V-F 12V, 15A, 250W 230V, 22.8W 230V, 22.8W 2.5A 3.4A 30MF, 300VAC 4MF, 400VAC 75MF, 120VAC FU2-A051BMP5 220-240VAC FU2-A051BMP5 220-240VAC WE52B5-959 250VAC G4F-11123T 20A, 12VDC G2R-1A-T 12V, 10A, 250W JC1AF-TM-DC12V-F 12V, 15A, 250W 230V, 22.8W 230V, 22.8W 115V, 47W WM-FN400HG FLB-407115-A 40W, 115V FL40SSW/37 200V, 40W FG-4P ZWS30-12/J 30W, 12V 250V, 7A, 70C 103AT-1 10k㱅, 25C 103AT-1 10k㱅, 25C 103AT-1 10k㱅, 25C 103AT-1 10k㱅, 25C HMP50UAC1A1X SDKNA20700 5V, 5MA IR11A2E251R 250VAC, 25A MC1230 250VAC, 30A DKV322DF20H5 NEAV120V DKVM0Z604E0 12VDC 230V, 47W WM-FN400HG FLB-421722/23-C 40W, 220/230V FL40SSW/37 200V, 40W FG-4P ZWS30-12/J 30W, 12V 250V, 7A, 70C 103AT-1 10k㱅, 25C 103AT-1 10k㱅, 25C 103AT-1 10k㱅, 25C 103AT-1 10k㱅, 25C HMP50UAC1A1X SDKNA20700 5V, 5MA IR11A2E251R 250VAC, 25A MC1230 250VAC, 30A DKV322DF20H5 NEAV220V DKVM0Z604E0 12VDC 230V, 47W WM-FN400HG FLB-421722/23-C 40W, 220/230V FL40SSW/37 200V, 40W FG-4P ZWS30-12/J 30W, 12V 250V, 7A, 70C 103AT-1 10k㱅, 25C 103AT-1 10k㱅, 25C 103AT-1 10k㱅, 25C 103AT-1 10k㱅, 25C HMP50UAC1A1X SDKNA20700 5V, 5MA IR11A2E251R 250VAC, 25A MC1230 250VAC, 30A DKV322DF20H5 NEAV220V DKVM0Z604E0 12VDC 230V, 47W WM-FN400HG FLB-421722/23-C 40W, 220/230V FL40SSW/37 200V, 40W FG-4P ZWS30-12/J 30W, 12V 250V, 7A, 70C 103AT-1 10k㱅, 25C 103AT-1 10k㱅, 25C 103AT-1 10k㱅, 25C 103AT-1 10k㱅, 25C HMP50UAC1A1X SDKNA20700 5V, 5MA IR11A2E251R 250VAC, 25A MC1230 250VAC, 30A DKV322DF20H5 NEAV220V DKVM0Z604E0 12VDC 14 Specifications of sensor 㩷 䂓㩷 Relationship between temperatures and resistance values for thermistor (103AT-1) 㩷 Temperature (℃) Resistance value (kȍ ) Temperature (℃) Resistance value (kȍ ) Temperature (℃) Resistance value (kȍ ) 0 27.28 28 8.94 56 3.43 1 26.13 29 8.64 57 3.32 2 25.03 30 8.31 58 3.22 3 23.99 31 8.02 59 3.12 4 22.99 32 7.73 60 3.02 5 22.05 33 7.46 61 2.93 6 21.15 34 7.19 62 2.84 7 20.29 35 6.94 63 2.75 8 19.48 36 6.70 64 2.67 9 18.70 37 6.47 65 2.59 10 17.96 38 6.25 66 2.51 11 17.24 39 6.03 67 2.44 12 16.55 40 5.83 68 2.37 13 15.90 41 5.63 69 2.30 14 15.28 42 5.44 70 2.23 15 14.68 43 5.26 71 2.16 16 14.12 44 5.08 72 2.10 17 13.57 45 4.91 73 2.04 18 13.06 46 4.75 74 1.98 19 12.56 47 4.59 75 1.92 20 12.09 48 4.44 76 1.87 21 11.63 49 4.30 77 1.82 22 11.20 50 4.16 78 1.77 23 10.78 51 4.02 79 1.72 24 10.38 52 3.90 80 1.67 25 10.00 53 3.77 81 1.62 26 9.63 54 3.65 82 1.58 27 9.28 55 3.54 83 1.53 15 Structure of high frequency vibration unit 16 Maintenance for humidifier 1.Prior to performing maintenance (1) Turn off main power switch and close water feed service valve before maintenance operation. (2) High frequency vibration unit should be delicate, so do not make some scratch upon it with driver. (3) Do not feed power with high frequency vibration unit disconnected. (4) Do not perform Mega Ω test and High Voltage test because electric components would be caused trouble. (5) Do not use except for genuine components. (6) Use appropriate sized equipments. Too much or poor tightness would be caused trouble. 2.Maintenance and equipments Items Maintenance period, description Clean-up water feed 1~2days later from start strainer Then case by case Clean-up water tank Every 1000 hours or 6 months Equipments 125mm Adjustable wrench,2pcs Soft brush, cloth (More often for contaminated water) Remove cover and clean-up water tank Inspect electric Remove cover and take water tank out components to inspect electrical components. Change high Every 5000 hours operating 125mm Adjustable wrench,2pcs frequency vibration Philips screwdriver, 1pc unit Cutter prier, 1pc 5.5mm Box driver, 1pc Note) Serial number of the humidifier (WM-FN400HG) Lot No. Serial number label put on the side. (Ex.)0502 N Alphabetic letter Feb.05 production lot 17 3.Normal maintenance (a)Clean-up strainer 1) Arrange equipments. 2) Turn off main power switch and close water feed service valve. 3) Disconnect cupper tube and make sure to secure strainer with 2pcs. of adjustable wrench. 4) Remove cover from strainer and make sure to secure valve joint with 2pcs. of adjustable wrench. Cover of strainer 5) Loosen and remove strainer with a slotted screwdriver 6) Clean-up inside of strainer and wash with water. Strainer 7) Follow the procedure 1)~6) on reverse order to reassemble strainer. Orifice φ4mm Strainer 18 (b)Clean-up water tank Power cord 1) Arrange equipments. 2) Turn off main power switch and close water feed service valve. 3) Disconnect cupper tube from strainer. 4) Remove power cable wire from transformer terminal. Fixed screw 5) Disconnect mist tube from humidifier. 6) Loosen and remove 2 fixed screws to take humidifier out. 7) Upside down the humidifier to pour water out then remove water tank cover. 8) Clean-up inside water tank with soft brush or cloth. Note) Do not make any scratches on high frequency vibration unit. 9) If you find any damage on high frequency vibration unit replace with new one. (See procedure (d) Replace high frequency vibration unit) (c)Inspect electric components 1) Follow (b) clean-up water tank, 1)~7) to remove the cover from water tank. 2) Take tank off from the case to inspect electric components. Inspection items are; ・ No water leaks, no moisture, no rust. ・ No water leaks on valve joint. ・ No deformation, no corrosion, no discoloration with each relays. ・ No abnormalities with electric components. 19 Outlet for mist tube (d) Replace high frequency vibration unit 1) Follow (b) Clean-up water tank, 1)~7) to remove Lead wire (orange) cover from water tank. High frequency vibration unit 2) Cut the tie band. 3) Disconnect high frequency vibration unit lead wires (yellow and orange wires) from PCB. 4) Loosen and remove 2 screws that fixed high frequency vibration unit to take high frequency vibration unit out. 5) Replace with new one and secure with 2 screws then connect high frequency vibration unit lead wires with PCB. Fixed screw Lead wire (yellow) Note) * Grommet for high frequency vibration unit should be aligned correctly. * Evenly tighten both of fixed screws but do not tighten them too much. 【For your reference】 Service part code for high frequency vibration unit ⇒ 624 188 3259 20 Wiring Diagram 21 Circuit Diagram 22 Control specifications 1. Temperature control Settable temperature range : Usable setting time PV display range Setting method : : : Controller 2. : Humidity control Settable humidity range : Display range Setting method : : Controller : 0.0℃~52.0℃ Ex) If you would set 52.1℃~99.8℃, setting temperature would be 52.0℃. 00:00~99:59 (Input ’99:99’ to set usable setting time ‘limitless’) Ex) If you set at 99:60~99:98, usable setting time would be 00:00. -20.0℃~99.9℃ (Display shows ‘over’ if PV is out of range) In Top screen, press MENU button on the control panel to proceed to temperature setting mode using with Shift key (upward, downward, rightward, leftward). Set desired value with Character Input key. PID control 50%~90% (If you set at 0%, humidifier cannot be controlled) Ex) If you set at 1%~49%, humidifier would be 50% controlled. If you set at 91%~99%, humidifier would be 90% controlled. 0%~118% Press MENU button on the control panel to proceed to humidity setting mode using with Shift key (upward, downward, rightward, leftward). Set desired value with Character Input key. PI control 3. Overheat limit temperature and overcool limit temperature Overheat limit temp. 15℃~55℃ changeable. setting range : Overcool limit temp. -10℃~25℃ changeable. setting range : Setting method : In top screen, press MENU button to proceed to ‘Std-by’. Turn high limit temperature alarm volume (HIGH LIMIT) to set desired high limit temperature alarm. Turn low limit temperature alarm volume (LOW LIMIT) to set desired low limit temperature alarm. Note) You don’t have to press ENTER key. 4. Alarms, safety functions (1) Error code Only 1 error code is displayed if several errors occurred simultaneously. Error code is displayed on the above of internal temperature display. Error # E01 Indication Temp Sensor Open E02 Temp Sensor Short Meaning: Operation: Meaning: Operation: 23 Temp sensor is opened. Heater, compressor, fluorescent lamp, fan motor turn off. Temp sensor is shorted. Heater, compressor, fluorescent lamp, fan motor turn off. E03 RH sensor level is low E04 RH sensor level is over E05 Def. sensor Open E06 Def. sensor Short E07 Def. S sensor Open E08 Def. S sensor short Meaning: Operation: Meaning: Operation: Meaning: Operation: Meaning: Operation: Meaning: Operation: Meaning: Operation: RH sensor is shorted. Humidifier turns off. RH sensor is opened. Humidifier turns off. Def sensor is opened Main heater turns off. Def sensor is shorted Main heater turns off Dehumidifier def sensor is opened Dehumidifier defrost heater turns off Dehumidifier def sensor is shorted Dehumidifier defrost heater turns off (2) Sensor error E01: Temperature sensor abnormality (Open) In case voltage in temp. sensor is more than 4900mV (lower than -50℃), it diagnoses as temp. sensor is opened with E01 displayed. E02: Temperature sensor abnormality (Short) In case voltage in temp. sensor is less than 900mV (higher than 70℃), it diagnoses as temp. sensor is shorted with E02 displayed. E03: Humidity (RH) sensor abnormality (Low) In case voltage in RH sensor is less than 200mV (lower than 5%RH), it (MLR-351H diagnoses as “Low” with E03 displayed. only) E04: Humidity (RH) sensor abnormality (High) (MLR-351H In case voltage in RH sensor is more than 4400mV (higher than 105%RH), it only) diagnoses as “Over” with E04 displayed. E05: Defrost sensor abnormality (Open) In case voltage in defrost sensor is more than 4900mV (lower than -50℃), it diagnoses as defrost sensor is opened with E05 displayed. E06: Defrost sensor abnormality (Short) In case voltage in defrost sensor is less than 900mV (higher than 70℃), it diagnoses as defrost sensor is short with E06 displayed. E07: Defrost S. sensor abnormality (Open) (MLR-351H In case voltage in defrost S. sensor is more than 4900mV (lower than -50℃), only) it diagnoses as defrost S. sensor is opened with E07 displayed. E08: Defrost S. sensor abnormality (Short) (MLR-351H In case voltage in defrost S. sensor is less than 900mV (higher than 70℃), it only) diagnoses as defrost S. sensor is short with E08 displayed. 24 (3) Temperature alarm Situation: In case PV is out of current SV±temperature alarm SV Action: zTemperature display blinks and buzzer beeps intermittently with 15minutes delay. zWhen PV comes back in the range, temperature display stops blinking and buzzer stops beeping. zPress BUZZER key to stop buzzer beeping, but buzzer would beep again after alarm delay time is passed. zDuring defrosting, temperature alarm beeps if PV goes to 20℃ or higher, temperature alarm buzzer beeps. Buzzer does not beep if humidity is out of the range. zAlarm range is returned as usual when displayed temperature is reached to alarm SV after SV was changed. Alarm SV: SV±1.0℃~±10.0℃ changeable. Initial set: 2.5℃ Alarm delay time: 1min.~99min. changeable. Initial set: 30min Note) If you set at 0min, alarm does not retrieve. (4) Humidity alarm Situation: Action: Alarm SV: Alarm delay time: In case display humidity is out of current SV±humidity alarm SV zHumidity display blinks. zAlarm range is returned as usual when displayed humidity is reached to SV after SV was changed. SV±3%~±15% changeable. Initial set: 10% 1min.~99min. changeable. Initial set: 30min Note) If you set at 0min, alarm does not retrieve. (5)High limit temperature/low limit temperature alarm Situation: In case temperature in limit sensor is out of SV Action: zBuzzer beeps continuously without delay and remote contact output turns on. zHeater is forcibly turned off during overheating. zCompressor is forcibly turned off during overcooling. (6) Door alarm Situation: Action: The door is open during more than 2minuites Buzzer beeps intermittently and “Door” is flash. Shut the door or press BUZZER key to stop buzzer beeping. (7) Remote alarm Remote alarm contact: In normal condition → C-N.O. ‘OPEN’ → C-N.C. ‘CLOSE’ In alarm condition → C-N.O. ‘CLOSE’ → C-N.C. ‘OPEN’ 25 <Alarm & safety functions> Alarm & safety 1 Temperature alarm 2 Humidity alarm 3 Temperature safety 4 High limit temp. alarm 5 Low limit temp. alarm 6 Thermal fuse 7 Temp. sensor abnormality Situation Chamber temp. exceeds SV 㫧 2.5 㷄 .( 㫧 1.0~10.0 㷄 changeable) Chamber temp. exceeds 20㷄 during defrosting Chamber humidity exceeds SV 㫧 10%RH. ( 㫧 3~10%RH changeable) More than SV 㫧 2.5 㷄 in high limit. Less than SV-3.0㷄 in low limit. Chamber temp. exceeds overheat limit temp. (15~55㷄 changeable) Humidity sensor abnormality (MLR-351H only) PV flashes Input voltage is lower than suitability of –5㷄 Input voltage is lower than suitability of 5%RH Input voltage is higher than suitability of 120%RH Buzzer Intermittent tone with 15min. delay Remote alarm contact Turns on with 15min. delay Safety operation Heater turns off. Compressor turns off. PV flashes Heater turns off. Compressor turns off. Chamber temp. exceeds overcool limit temp. (-10~25㷄 changeable) Chamber temp. exceeds 76㷄 Input voltage is higher than suitability of 70㷄 8 Indication ‘Error 1: Temp. sensor is opened’ is indicated ‘Error 2: Temp. sensor is shorted’ is indicated ‘Error 3: RH sensor level is low’ is indicated ‘Error 4: RH sensor level is over’ is indicated Continuous tone Turns on Continuous tone Turns on Intermittent tone Turns on Heater, fluorescent lamp, fan motor turns off. Compressor turns off. Fusing Heater, fan motor turns off. Heater, fluorescent lamp, fan motor, compressor turns off. Humidity control turns off. Intermittent tone Turns on 9 Fuse for outlet Current in outlet is over than 3A Outlet turns off 10 Auto erase Disappear of MENU screen 11 Running program back-up In top screen or run screen, there is no key operation for more than 1minute During power failure 12 Clock function back-up During power failure 13 Buzzer delay 14 Door alarm During temperature alarm: 30min. (Ring back:1~99min. changeable) Door opens for 2 min. MENU Nonvolatile memory resumes running after power recovery Continuous running with battery (CR2032) ‘Door’ flashes 26 Intermittent tone 5. Compressor ON/OFF control 1) ON point: With compressor delay timer is “0” and PV is continuously higher than SV-0.3㷄 (ON point), compressor is forcibly turned on. 2) Compressor delay timer: zCompressor would not turn on for 2min. since compressor was turned off. zCompressor delay timer initially set at “120” (2min.) when compressor turns on. zCompressor delay timer set at “120” (2min.) when the power is supplied. 3) OFF point: When PV goes lower than SV-3.0㷄 (OFF point), compressor is forcibly turned off. In case SV is higher than 45.0㷄 and Light Step (LS) is 0, 1, 2, 3: zWhen PV-SV is equal or lower than -0.8㷄, compressor is forcibly turned off. zWhen PV-SV is equal or higher than 1.5㷄, compressor is forcibly turned on. Note) Compressor starts running with 2min. delay since the power was supplied. 6 Defrost control in evaporator When unit starts defrosting, compressor is forcibly turned off and ratio of heater output is 100%. Unit automatically finishes defrosting and retrieves normal operation or programmed operation when temperature in DEF sensor is over than 10.0㷄. Unit automatically finishes defrosting if it continues for 30min. or more. 7. Control in evaporator for de-humidity When setting RH is lower than 75%RH, evaporator for de-humidity is forcibly turned on. When setting RH is higher than 75%RH, evaporator for de-humidity is forcibly turned off. In condition that SV is lower than 40.0㷄, setting RH is 75%RH~85%RH and Light Step (LS) is 0, 1, 2, 3: zWhen displayed RH setting RH is equal or higher than -4%, evaporator for de-humidity is forcibly turned off. zWhen displayed RH setting RH is equal or lower than 4%, evaporator for de-humidity is forcibly turned on. In condition that SV is higher than 30.0㷄, setting RH is lower than 75%RH and Light Step (LS) is 0, 1, 2, 3: zWhen displayed RH is equal or lower than setting RH +15%, evaporator for de-humidity is forcibly turned off. zWhen displayed RH is equal or higher than setting RH +18%, evaporator for de-humidity is forcibly turned on. 8 Defrost control in evaporator for de-humidity In evaporator for de-humidity turns on, automatic defrosting starts at both AM3:00 and PM 3:00. Once defrost begins, DEF relay turns on (heater side) from off (valve side). When temperature in de-humidity DEF sensor is over than 15.0㷄, defrosting finishes automatically with DEF relay turned off (valve side). 27 9 Auto MENU erase zIn condition that MENU window is displayed in Top Screen, MENU window is automatically disappeared if there is no key operation for 1min. zIn condition that MENU window is not displayed in Top Screen, display is automatically renewal once in 1hour if there is no key operation. 10 Brightness (Light Step) control Settable Light Step(LS): 0 LS ~ 5 LS Display range : 0 LS ~ 5 LS Setting procedures : Press MENU key to enter Light Step setting mode and press shift key ( ) to set desirable Light Step with numerous key. Light Step 5: Light Step 4: Light Step 3: Light Step 2: Light Step 1: Light Step 0: 11 Turn port of setting light step (LS) on. All 15 fluorescent lamps are lit. 3 lamps (right, center, left) for each center, left side and right side doors are lit. (9 lamps are totally lit) 1 lamp (center) for each center, left side and right side doors are lit. (3 lamps are totally lit) 1 lamp (center) for both left side and right side doors are lit. (2 lamps are totally lit) 1 lamp (center) for center door is lit. (1 lamp is lit) All 15 fluorescent lamps are gone off. Analog output Temperature analog output: 0㷄~50㷄 in 0~100mV (2mV/㷄) Light Step analog output: 0LS~5LS in 0~100mV (20mV/LS) RH analog output: 0%RH~100%RH in 0~100mV (1mV/%RH) 28 Instructions for calibration 1. Data initialization 2. Setting of date, time 3. Zero calibration (1) Temperature zero calibration (2) RH zero calibration 4. Span calibration (1) Temperature span calibration (2) RH span calibration 㩷 5. Analog output calibration (1) Temperature analog output calibration (2) Light step analog output calibration (3) RH analog output calibration 29 1. Data initialization Process Display, operation MENU 1 Turn power on 2 Top Screen Tools 3 4 Select Tools Input “384”* in display of Password Svc OK 5 Select “Calibration 2” in display of Select tools Svc OK 6 7 8 9 Input “925” in display of Calibration 2 Select “Delete All User Data” in display of Select Tools Svc Display of Confirmation Automatically reverts to Top Screen OK OK OK * Password to use Select Tools Svc is “384” Note) First perform temperature calibration and RH calibration to set initial (default) values. 0 1 2㩷 Display of Top Screen 0 2 1 1 1 2 1 3 1 4 St a nd- b y 1 T e mp 2 3 o 3 0 . 0 1 5 1 6 1 7 1 8 1 9 2 0 2 1 2 2 2 3 To p Sc r e e n C Li ght 2 4 2 5 2 6 2 7 5 2 9 3 0 3 LS 3 1 3 2 3 3 RH 3 4 3 5 3 3 6 7 3 8 3 9 4 0 M ENU 8 5 % Ru n 85% Edi t T ool s 2 0 0 5 / 0 7 / 2 2 6 4 Display of Password 3 8 3 9 Se r v i c e For T ool s 0 5 0 6 0 7 0 8 0 9 1 0 P a s s wo r d 1 3 1 4 1 5 5 Re s e r v e d 1 7 1 8 1 9 2 0 2 1 2 2 2 3 2 4 2 5 0 4 0 5 2 7 2 8 2 9 3 0 3 1 3 2 3 3 3 4 3 5 3 6 3 7 3 8 3 9 4 0 M ENU Sv c Ca n c e l Se t t i n g Us e r Da t a 5 Display of Select tools Svc 0 3 2 6 M L R- 3 5 1H Se t t i ng De l e t e 0 6 0 7 0 8 1 Se l e c t 3 Se nd 0 9 1 0 1 1 1 2 1 3 1 4 1 5 Tool s Al l 1 6 Ca l i b r a t i o n 1 Ca l i b r a t i o n 2 5 Re s e r v e d Al l 1 7 1 8 2 0 2 1 2 2 2 3 2 4 2 5 2 6 2 7 2 8 2 9 3 0 3 1 3 2 3 3 Ve r . X. XXA t o 3 4 3 5 3 6 3 7 3 8 3 9 4 0 M ENU PC OK Ca n c e l Us e r F l a s h 䋯W r i t e 1 9 Sv c Da t a 4 6 1 6 OK De l e t e 6 1 2 T i me Al a r m 0 2 1 1 Tool s 4 Ca n c e l 4 5 0 4 Log 0 1 OK 3 0 3 3 4 0 M ENU 2 3 Display of Select Tools Se l e c t 6 3 7 P a s s wo r d 1 0 2 De f a u l t M. De f 1 2 : 5 7 : 3 1 0 1 1 Da t e St d- by 30.0℃ 3LS 4 2 8 da t a Pr ogr a m Password = 384 6 Display of Calibration 2 0 1 0 2 0 5 0 6 0 7 0 8 0 9 1 0 1 1 1 2 1 3 1 4 1 5 1 6 1 7 1 1 8 9 2 0 1 Ca l i b r a t i o n 3 An a l o g T e mp An a l o g Li ght 5 0 0 An a l o g RH 5 0 0 4 C o mp 5 㩷 EV 0 1 0 2 2 1 2 2 2 3 0 4 0 5 0 7 Mode 0 8 0 9 1 0 1 1 1 3 2 7 2 8 2 9 3 0 ( 0 . Au t o y ou ( 5 0 0 . Au t o 9 2 5 ( 1 02 . HS 1 4 1 5 1 6 1 7 1 8 1 9 2 0 2 1 2 2 2 3 2 4 2 5 2 6 2 7 2 8 2 9 Al l Us e r s ur e 3 4 3 5 3 6 3 7 3 3 8 9 0 1 4 0 3 1 3 2 3 3 3 4 3 5 3 6 3 7 t o d e l e t e ? N a me s a nd 0 2 0 3 0 4 0 5 0 6 0 7 0 8 Se l e c t 3 Se nd 3 9 4 0 OK Ca n c e l P r o g r am s 6 30 1 0 1 1 1 2 1 3 1 4 1 5 Tool s Ca l i b r a t i o n 1 Ca l i b r a t i o n 2 5 Re s e r v e d Al l F l a s h 䋯W r i t e 1 6 1 7 1 8 Sv c Da t a 4 6 3 8 0 9 Al l De l e t e 1 0 3 . TM ) 3 0 7 Display of Select Tools Svc㩷 1 0 - 4 8 0 ) M ENU 4 5 3 3 1 . ON ) 5 0 0 C on f i r ma t i o n Ar e 3 2 Ca n c e l 2 3 3 1 OK 0 1 2 2 6 M ENU Co n t r o l 0 6 2 5 5 0 0 8 Display of Confirmation 0 3 2 4 2 Fun c t i on 6 1 0 0 3 4 t o Us e r 1 9 2 0 2 1 2 2 2 3 2 4 2 5 2 6 2 7 2 8 Ve r . X. XXA PC 2 9 3 0 3 1 3 2 3 3 3 4 3 5 3 6 3 7 3 8 M ENU OK Ca n c e l da t a Pr ogr a m 3 9 4 0 2. Setting of date, time Process Display, operation MENU 1 Top Screen Tools 2 Select Date Time in display of Select Tools OK 3 Input present date in display of Date Time (Ex) Aug. 24, 2005 Input as “050824” then press Enter key or Ļ key Input present time in display of Date Time (Ex) 10:05;00 a.m. Input as “100500” then press Enter key or Ļ key OK Press OK in Menu window to set above values. Press Cancel in Menu window to cancel setting values 4 0 1 0 2 Reverts to Top Screen 1 Display of Top Screen 1 1 1 2 1 3 St a nd- b y 1 T e mp 2 3 3 0 . 0 o 1 4 1 5 1 6 1 7 1 8 1 9 2 0 2 1 2 2 2 3 To p Sc r e e n C Li ght 2 4 2 5 2 6 2 7 5 2 9 3 0 3 LS 3 1 3 2 RH 3 3 3 4 3 5 3 3 6 7 3 8 3 9 M ENU 8 5 % Ru n 2 0 0 5 / 0 7 / 2 2 0 1 3 Display of Date Time 0 2 0 0 3 4 0 5 0 6 Da t e 1 0 7 0 8 0 9 1 0 1 1 1 2 1 3 1 4 1 5 1 6 1 7 1 8 1 9 2 0 85% Edi t 2 2 2 3 2 4 2 5 2 6 2 7 T i me 2 8 2 9 3 0 3 1 3 2 3 3 3 4 3 5 3 6 3 3 8 9 M ENU 3 OK 4 Da t e 0 5 / 0 8 / 2 4 ( Y Y / MM / D D ) T i me 1 0 : 0 5 : 0 0 ( h h 䋺 mm䋺 s s ) Ca n c e l 5 㩷 Log I nt e r v a l 6 mi n ( 2 - 3 0 ) De f T i me r 2 ( 1 - 3 ) 2 Display of Select Tools 0 3 0 4 0 5 0 0 6 7 0 8 1 Se l e c t 3 Log 0 9 31 4 0 1 0 1 1 1 2 1 3 1 4 1 5 Tool s 1 6 1 7 1 8 5 Re s e r v e d De l e t e 2 0 2 1 2 2 2 3 2 4 2 5 2 6 2 7 2 8 2 9 3 0 3 1 3 2 3 3 3 4 3 5 3 6 3 7 3 8 M ENU OK T i me Al a r m 1 9 M L R- 3 5 1H 㩷 㩷 㩷 㩷 4 6 3 7 0 2 Sv c Se t t i ng De f a u l t M. De f 1 2 : 5 7 : 3 1 2 1 0 1 Da t e T ool s 6 6 4 0 St d- by 30.0℃ 3LS 4 2 8 Se t t i n g Us e r Da t a Ca n c e l 3 9 4 0 3. Zero calibration (1) Temperature Zero calibration Process Display, operation MENU 0 Place temperature sensor at center of chamber. Set Light Step in “LS0” Set internal temperature at usable temperature (Ex.25℃) and leave until temperature is stabled. 1 Display of Top Screen Tools 2 Display of Select Tools Svc 3 4 Input “384” in display of Password Select Calibration 1 in display of Select Tools Svc OK OK 5 Input displayed value of temperature sensor (Ex.26.5℃) in column of OK Temp Zero. Reverts to Select Tools Svc 6 (2) RH Zero calibration Process Display, operation 0 Place RH sensor at center of chamber. Set Light Step in “LS0”. Set internal temperature at usable temperature (Ex. 25℃) and internal RH at usable RH (Ex. 55%RH) then leave until temperature and RH are stabled. 1 Display of Top Screen Tools 2 Display of Select Tools Svc 3 4 Input “384” in display of Password Select Calibration 1 in display of Select Tools Svc OK OK 5 Input displayed value of RH sensor (Ex.58%RH) in column of RH Zero. OK 6 Reverts to Select Tools Svc Ex) Temp. Zero calibration 0 1 0 2 0 0 3 4 0 5 0 6 0 0 7 8 0 9 1 0 1 1 1 2 1 3 1 4 1 5 1 6 1 7 1 8 1 9 2 0 1 Ca l i b r a t i o n 3 T e mp Z e r o 2 6 . 5 RH Z e r o 0 2 1 2 2 2 2 3 4 2 5 2 6 2 7 2 8 2 9 o C 3 0 3 1 3 2 3 3 1 3 4 3 5 3 6 3 7 3 8 3 9 4 0 M ENU 2 5 . 0 OK 5 5% Ca n c e l 4 5 㩷 CO2 Z e r o De f 6 Ma i n 0 / Sub 1 6 . 5 Ex) RH Zero calibration 0 1 0 2 0 0 3 4 0 5 0 6 0 0 7 8 0 9 1 0 1 1 1 2 1 3 1 4 1 5 1 6 1 7 1 8 1 9 2 0 1 Ca l i b r a t i o n 3 T e mp Z e r o 0 . 0 RH Z e r o 5 8 2 1 2 2 2 2 3 4 2 5 2 6 2 7 o C 2 8 2 9 o C / 3 0 3 1 1 3 2 - 1 8 . 0 o C 3 3 3 8 3 9 3 4 3 5 3 6 3 7 M ENU 2 5 . 0 OK 5 5% Ca n c e l 4 5 㩷 6 MENU CO2 De f Z e r o Ma i n 0 / Sub 1 6 . 5 o C / - 1 8 . 0 32 o C 4 0 4. Span calibration Note) You do not have to perform this calibration as usual . (1) Temperature span calibration Process Display, operation MENU 0 Place temperature sensor at center of chamber. Set Light Step in “LS0”. Set internal temperature at higher value (Ex. 45℃, desirable range 40℃ ~50℃) and leave until temperature is stabled. 1 Display of Top Screen Tools 2 Display of Select Tools Svc 3 4 5 6 Input “384” in display of Password Select Calibration 2 in display of Select Tools Svc In display of Calibration 2, input “105” in column of Function Select Calibration 1 in display of Select Tools Svc. Column of Temp Span is displayed. Input displayed value of temperature sensor (Ex.46.5℃) in column of Temp Span Reverts to display of Select Tools Svc OK OK OK OK 7 8 OK (2) RH span calibration Process Display, operation MENU 0 Place RH sensor at center of chamber. Set Light Step in “LS0”. Set internal temperature at usable value (Ex.25℃) and internal RH at higher value (Ex. 85%RH, desirable range 80%RH~90%RH) and leave until temperature and RH are stabled. 1 Display of Top Screen Tools 2 Display of Select Tools Svc 3 4 5 6 Input “384 “ in display of Password Select Calibration 2 in display of Select Tools Svc In display of Calibration 2, input “105” in column of Function Select Calibration 1 in display of Select Tools Svc. Column of RH Span is displayed. Compare displayed value of RH sensor (RHs) with displayed value in column of RH Span (RHm). Add 75 to the value in column of RH Span to reduce 10% of internal RH. (Ex.) In case displayed value of RH sensor (RHs) is 90%, displayed value in column of RH Span (RHm) is 80% and calibration value in column of RH Span is 560, input “635” (560+75) to calibrate RH span. Reverts to Select Tools Svc OK OK OK OK 7 8 33 OK 1 Display of Top Screen 0 1 0 2 1 1 1 2 1 3 1 4 To p Sc r e e n o C Li ght St a nd- b y 1 T e mp 2 3 4 5 . 0 1 5 1 6 1 7 1 8 45.0℃ 4 5 1 9 2 0 2 1 2 2 2 3 2 4 2 5 2 6 2 7 2 8 2 9 3 0 3 1 0 LS 3 2 RH 3 3 3 4 3 5 3 6 3 7 3 8 3 9 0 1 4 0 M ENU 8 5 % Ru n 2 Display of Select Tools 0 3 2 0 0 5 / 0 7 / 2 2 85% Ed i t 3 Display of Password 3 8 3 9 For Se r v i c e T ool s Ca n c e l 4 P a s s wo r d 5 0 9 1 0 1 1 Log 4 Al a r m 5 Re s e r v e d 1 3 1 4 1 5 1 6 1 7 1 8 1 9 2 0 2 1 2 2 2 3 2 4 2 5 0 3 0 4 0 5 2 6 2 7 2 8 2 9 3 0 3 1 3 2 3 3 M L R- 3 5 1H 3 4 3 5 3 6 3 7 3 8 3 9 4 0 M ENU OK T i me Sv c Se t t i ng Ca n c e l Se t t i n g Us e r Da t a 4 Display of Select Tools Svc 0 2 0 6 0 7 0 8 1 Se l e c t 3 Se nd 0 9 1 0 1 1 1 2 1 3 1 4 1 5 1 6 Tool s Al l 1 Ca l i b r a t i o n 2 5 Re s e r v e d Al l 1 8 2 0 2 1 2 2 2 3 2 4 2 5 2 6 2 7 2 8 2 9 3 0 3 1 3 2 3 3 Ve r . X. XXA t o 3 4 3 5 3 6 3 7 3 8 3 9 4 0 M ENU PC OK Ca n c e l Us e r F l a s h 䋯W r i t e 1 9 Sv c Ca l i b r a t i o n De l e t e 1 7 Da t a 4 6 6 1 2 Tool s De l e t e 0 1 OK 3 0 8 Se l e c t 4 0 M ENU 2 0 7 3 6 3 7 P a s s wo r d 1 0 6 De f a u l t M. De f 1 2 : 5 7 : 3 1 0 5 1 To ol s 6 0 4 Da t e St d- by 0LS 0 2 da t a Pr ogr a m Password = 384 0 1 5 Display of Calibration 2 0 2 0 0 3 4 0 5 0 6 0 7 0 8 0 9 1 0 1 1 1 2 1 3 1 4 1 5 1 6 1 7 1 1 8 9 2 0 1 Ca l i b r a t i o n 3 An a l o g T e mp 5 0 0 An a l o g Li ght 5 0 0 4 An a l o g RH 5 0 0 5 C o mp M ode 0 㩷 EV 0 1 0 2 Co n t r o l 0 4 0 5 0 6 0 7 0 8 0 9 1 0 1 1 1 2 1 3 1 4 1 5 1 6 1 7 1 8 1 9 2 0 RH Ze r o 0 T e mp Spa n 4 6 . 5 RH Spa n 5 6 0 CO2 Z e r o Ma i n 2 8 2 9 3 0 3 1 3 2 3 3 3 4 3 5 3 6 3 7 3 3 8 9 ( 0 . Au t o 1 . ON) 2 1 2 2 2 3 2 4 2 5 2 6 2 7 2 8 2 9 o C 3 0 3 1 3 2 3 3 3 4 3 5 3 6 3 7 3 8 3 9 4 0 OK 8 0 % Ca n c e l 0 / Sub 1 6 . 5 o C / - 1 8 . 0 o 0 0 3 4 0 5 0 6 0 7 0 8 C 34 0 9 1 0 1 1 1 2 1 3 1 4 1 5 1 6 1 7 1 8 1 9 2 0 2 1 2 2 2 3 2 4 2 5 2 6 6 Display of Select Tools Svc Se l e c t 3 Se nd Tool s Ca l i b r a t i o n 1 4 Ca l i b r a t i o n 2 5 Re s e r v e d 6 F l a s h 䋯W r i t e Al l De l e t e M ENU 4 5 . 0 0 2 1 0 - 4 8 0 ) 1 0 3 . TM ) 1 0 . 0 0 1 4 0 Ca n c e l ( 1 02 . HS Ze r o De f 2 7 ( 5 0 0 . Au t o Ca l i b r a t i o n 6 2 6 5 0 0 T e mp 㩷 2 5 OK 7 Display of Calibration 1 0 3 2 4 1 0 5 3 5 2 3 M ENU 1 4 2 2 2 Fun c t i on 6 2 1 Sv c Da t a Al l t o Us e r 2 7 2 8 Ve r . X. XXA PC 3 2 0 9 3 1 3 2 3 3 3 4 3 5 3 6 3 7 3 3 8 9 M ENU OK Ca n c e l da t a Pr ogr a m 4 0 5. Analog output calibration (1) Temperature analog output calibration Process Display, operation 0 (Ex)Set Light Step at “LS0”, temperature at 37℃ and RH at 55%. Leave until temperature and RH are stabled. 1 Display of Top Screen MENU Tools 2 Display of Select Tools Svc 3 4 Input “384” in display of Password Select Calibration 2 in display of Select Tools Svc OK OK 5 Add 10 to the value in column of Analog Temp to increase 2mV of OK analog output. Analog output range = 0℃~50℃ in 0~100mV(2mv/℃) (Ex) In internal temperature is 37℃, Analog Temp is 503 and analog output voltage is 72mV, input “513” in column of Analog Temp to get analog output voltage to 74mV. Reverts to display of Select Tools Svc 6 (2) Light Step analog output calibration Process Display, operation 0 (Ex) Set Light Step in “LS5” MENU 1 Display of Top Screen Tools 2 Display of Select Tools Svc 3 4 Input “384 “ in display of Password Select Calibration 2 in display of Select Tools Svc OK OK 5 Add 10 to the value in column of Analog Light to increase 2mV of OK analog output. Analog output range = 0LS-5LS in 0~100mV (20mv/LS) (Ex) In Light Step is LS5, Analog Light is 498 and analog output voltage is 98mV, input “508” in column of Analog Light to get analog output voltage to 100mV Reverts to display of Select Tools Svc 6 35 (3) RH analog output calibration Process Display, operation 0 (Ex)Set Light Step at “LS0”, temperature at 37℃ and RH at 55%. Leave until temperature and RH are stabled. 1 Display of Top Screen Display of Select Tools Svc 3 4 Input “384 “ in display of Password Select Calibration 2 in display of Select Tools Svc OK OK 5 Add 10 to the value in column of Analog RH to increase 2mV of OK analog output. Analog output range = 0%RH~100%RH in 0~100mV(1mv/%RH) (Ex) In RH is 55%RH, Analog RH is 495 and analog output voltage is 53mV, input “505” in column of Analog RH to get analog output voltage to 55mV Reverts to display of Select Tools Svc (Ex) Temp. Analog output calibration 0 2 0 0 3 4 0 5 0 6 0 7 0 8 0 9 1 0 1 1 1 2 1 3 1 4 1 5 1 6 1 7 1 1 8 9 2 0 1 Ca l i b r a t i o n 3 An a l o g T e mp An a l o g Li ght 5 0 0 An a l o g RH 5 0 0 4 C o mp 5 㩷 EV 0 1 2 1 2 2 2 3 2 4 2 5 2 6 2 7 M ode ( 0 . Au t o 3 3 3 4 3 5 ( 1 02 . HS 0 0 3 4 0 5 0 6 0 7 0 8 0 9 1 0 1 1 1 2 1 3 1 4 1 5 1 6 1 7 1 1 8 9 2 0 5 1 3 An a l o g Li ght 5 0 8 An a l o g RH 5 0 0 4 C o mp 5 㩷 EV 2 1 2 2 2 3 2 4 2 5 2 6 2 7 0 0 3 4 0 6 M ode 0 7 0 8 0 9 1 0 0 1 2 1 Ca l i b r a t i o n 3 An a l o g T e mp An a l o g An a l o g C o mp EV 3 0 ( 0 . Au t o 5 0 0 1 3 2 9 3 1 3 2 3 3 1 4 1 5 3 4 3 5 3 6 3 7 3 3 8 9 1 6 1 7 1 1 8 9 2 0 1 . ON) ( 5 0 0 . Au t o ( 1 02 . HS 2 1 2 2 2 3 2 4 2 5 2 6 2 7 2 8 2 9 0 - 4 8 0 ) 1 0 3 . TM ) 3 0 3 1 2 3 2 3 3 3 4 3 5 3 6 3 7 3 3 8 9 M ENU 5 1 3 OK Li ght 5 0 8 Ca n c e l RH 5 0 5 M ode Co n t r o l Fun c t i on 4 0 Ca n c e l 0 1 1 2 8 M ENU Co n t r o l 0 5 4 0 OK (Ex) RH Analog output calibration 0 2 3 3 8 9 0 - 4 8 0 ) 2 Fun c t i on 6 3 7 1 0 3 . TM ) (Ex) Light Step Analog output calibration 0 2 3 6 1 . ON) ( 5 0 0 . Au t o 0 T e mp 6 3 2 Ca n c e l 5 0 0 An a l o g 㩷 3 1 OK 0 Co n t r o l 3 5 3 0 M ENU 1 4 2 9 5 1 3 Ca l i b r a t i o n 0 1 2 8 2 Fun c t i on 6 Tools 2 6 0 1 MENU 0 5 0 0 0 ( 0 . Au t o 1 . ON) ( 5 0 0 . Au t o ( 1 02 . HS 0 - 4 8 0 ) 1 0 3 . TM ) 36 4 0 Parts layout Ballast for fluorescent light Fan Humidity sensor Temp.sensor Limit sensor Power transformer PCB Thermal fuse Door switch Control panel Evaporator for de-humidity <MLR-351H> Fan Temp.sensor Limit sensor Thermal fuse Power switch with circuit breaker Note) The above picture shows as MLR-351H. <MLR-351> 37 Remote record terminal <Upper-side> Frequency switch for fluorescent light (50Hz) <Upper-rear> <Lower-front> Remote alarm terminal Circulation fan motor Frequency switch for fluorescent light (60Hz) Filter Humidifier (WM-FN400HG) ※MLR-351H only Solenoid valve <Lower-side> <Lower-rear> Ballast for fluorescent light Compressor Tray drain 38 Solenoid valve for de-humidity ※MLR-351H only Test data 1. Pull-down, pull-up performance 2. Chamber arrival temperature 3. Pressure performance 4. Power consumption performance 5. Illuminance performance 6. Temperature variation * The following data are reference only, it does not assure product’s performance. 39 Pull-down, pull-up performance AT:20oC, Power supply: AC100V, 50Hz Chamber temp. (C) 㪍㪇 15 fluorescent lamps turn on Fluorescent lamps turn off ེౝ᷷ᐲ (㷄 ) 㪌㪇 㪋㪇 㪊㪇 㪉㪇 㪈㪇 㪇 㪇 㪈 㪉 ᾲ⽶⩄⸵ኈ㊂ ⸵ኈ㊂ 2. ེౝᾲ⽶⩄ 㪊 㪋 ᤨ㑆䋨㪿㫆㫌㫉㫊㪀 ౝᾲ⽶⩄⸵ኈ ⩄⸵ኈ㊂ ེౝᾲ⽶ 㔚Ḯ㩷㪘㪚㪈㪇㪇㪭㩷㪌㪇㪟㫑 Permissible heat loading dose(W) 㪋㪌㪇 Arrival temp +5㷄 ེౝ㆐᷷ᐲ䋫㪌㷄 (Fl. Lamp goes off) 䋨ⰯశἮ䇭ᶖἮ䋩 㪋㪇㪇 ⸵ኈᾲ⽶⩄㊂㩿㪮㪀 㪊㪌㪇 㪊㪇㪇 㪉㪌㪇 ེౝ㆐᷷ᐲ䋫㪈㪇㷄 Arrival temp +10㷄 䋨ⰯశἮ㪈㪌ᧄὐἮ䋩 (15 Fl. Lamps are lit) 㪉㪇㪇 㪈㪌㪇 㪈㪇㪇 㪌㪇 㪇 㪌 㪈㪇 㪈㪌 㪉㪇 AT ࿐᷷ᐲ㩿㷄㪀 40 㪉㪌 㪊㪇 㪊㪌 㪧㫉㪼㫊㫊㫌㫉㪼㩷㩿㪤㪧㪸㪀 ജ․ᕈ 㪧㫉㪼㫊㫊㫌㫉㪼㩷㫇㪼㫉㪽㫆㫉㫄㪸㫅㪺㪼 㪌㪇㪟㫑㩷㪈㪇㪇㪭 㪍㪇㪟㫑㩷㪈㪇㪇㪭 㪤㪠㪥 㪊 㪟㪦㪬㪩 㪧㪛 㪧㪪 㪧㪛 㪧㪪 㪇㪅㪇㪇 㪧㫌㫃㫃㪄㪻㫆㫎㫅㩷㫎㫀㫋㪿㩷㪸㫃㫃㩷㪈㪌㩷㪽㫃㫌㫆㫉㪼㫊㪺㪼㫅㫋㩷㫃㫀㪾㪿㫋㫊㩷㫋㫌㫉㫅㩷㫆㫅 㪇㪅㪇㪇 㪈㪅㪌㪈 㪈㪅㪌㪈 㪈㪅㪌㪈 㪈㪅㪌㪈 㪊㪅㪉㪌 㪇㪅㪇㪍 㪉 㪇㪅㪌㪉 㪉㪅㪇㪏 㪍㪇㪟㫑㩷㪧㪻 㪇㪅㪋㪊 㪎㪅㪌㪇 㪇㪅㪈㪊 㪉㪅㪊㪊 㪇㪅㪌㪏 㪉㪅㪊㪏 㪇㪅㪌㪉 㪉㪅㪌 㪈㪌㪅㪇㪇 㪇㪅㪉㪍 㪉㪅㪌㪉 㪇㪅㪍㪊 㪉㪅㪍㪉 㪇㪅㪌㪎 㪉㪉㪅㪌㪇 㪇㪅㪊㪏 㪉㪅㪌㪎 㪇㪅㪍㪉 㪉㪅㪍㪋 㪇㪅㪌㪈 㪊㪇㪅㪇㪇 㪇㪅㪌㪈 㪌㪇㪟㫑㩷㪧㪻 㪉㪅㪌㪌 㪇㪅㪍 㪉㪅㪍㪊 㪇㪅㪌 㪋㪌㪅㪇㪇 㪇㪅㪎㪍 㪉㪅㪋㪏 㪇㪅㪌㪎 㪉㪅㪌㪋 㪇㪅㪌㪉 㪉 㪍㪇㪅㪇㪇 㪈㪅㪇㪇 㪉㪅㪋㪉 㪇㪅㪌㪊 㪉㪅㪋㪎 㪇㪅㪋㪐 㪐㪇㪅㪇㪇 㪈㪅㪌㪇 㪉㪅㪊㪌 㪇㪅㪌㪈 㪉㪅㪊㪐 㪇㪅㪋㪍 㪈㪉㪇㪅㪇㪇 㪉㪅㪇㪇 㪉㪅㪊㪌 㪇㪅㪌㪈 㪉㪅㪊㪎 㪇㪅㪋㪌 㪈㪅㪌 㪈㪌㪇㪅㪇㪇 㪉㪅㪌㪇 㪉㪅㪊㪉 㪇㪅㪌 㪉㪅㪊㪉 㪇㪅㪋㪋 㪈㪏㪇㪅㪇㪇 㪊㪅㪇㪇 㪉㪅㪊㪉 㪇㪅㪌 㪉㪅㪊㪋 㪇㪅㪋㪊 㪉㪈㪇㪅㪇㪇 㪊㪅㪌㪇 㪉㪅㪊㪈 㪇㪅㪌 㪉㪅㪊㪈 㪇㪅㪋㪊 㪈 㪚㫆㫅㪻㫀㫋㫀㫆㫅㪑 䊶㪧㫆㫎㪼㫉㩷㫊㫌㫇㫇㫃㫐㪑㩷㪈㪇㪇㪭㩷㪌㪇㪟㫑㪆㪍㪇㪟㫑 䊶㪩㪫䋺㪊㪌㷄 䊶㪪㪭䋺㪂㪌㪇㷄㸢㪇㷄 㪌㪇㪟㫑㩷㪧㫊 㪇㪅㪌 㪍㪇㪟㫑㩷㪧㫊 㪇 㪇㪅㪇 㪇㪅㪌 㪈㪅㪇 㪈㪅㪌 㪉㪅㪇 㪫㫀㫄㪼㩷㫊㪺㪸㫃㪼㩷㩿㪿㫆㫌㫉㪀 㪉㪅㪌 㪊㪅㪇 㪊㪅㪌 㪧㫆㫎㪼㫉㩷㪺㫆㫅㫊㫌㫄㫇㫋㫀㫆㫅㩷㫇㪼㫉㪽㫆㫉㫄㪸㫅㪺㪼 㔚ᵹ䇮ജ․ᕈ 㪈㪋㪇㪇 㪌㪇㪟㫑㩷㪈㪇㪇㪭 㪉㪉 㪍㪇㪟㫑㩷㪈㪇㪇㪭 㪧㫌㫃㫃㪄㪻㫆㫎㫅㩷㫎㫀㫋㪿㩷㪸㫃㫃㩷㪈㪌㩷㪽㫃㫌㫆㫉㪼㫊㪺㪼㫅㫋㩷㫃㫀㪾㪿㫋㫊㩷㫋㫌㫉㫅㩷㫆㫅 㪟㪦㪬㪩 㔚ᵹ୯ ജ୯ 㔚ᵹ୯ ജ୯ 㪧㫆㫎㪼㫉㩷㪺㫆㫅㫊㫌㫄㫇㫋㫀㫆㫅㩿㪮㪀 㪇 㪊㪅㪉㪌 㪈㪊㪇㪇 㪎㪅㪌 㪈㪌 㪉㪉㪅㪌 㪊㪇 㪈㪉㪇㪇 㪋㪌 㪍㪇 㪐㪇 㪈㪉㪇 㪈㪈㪇㪇 㪈㪌㪇 㪈㪏㪇 㪉㪈㪇 㪇㪅㪇㪇 㪇㪅㪇㪌 㪇㪅㪈㪊 㪇㪅㪉㪌 㪇㪅㪊㪏 㪇㪅㪌㪇 㪇㪅㪎㪌 㪈㪅㪇㪇 㪈㪅㪌㪇 㪉㪅㪇㪇 㪉㪅㪌㪇 㪊㪅㪇㪇 㪊㪅㪌㪇 㪇 㪇 㪇 㪇 㪚㫆㫅㪻㫀㫋㫀㫆㫅㪑 㪈㪋㪅㪉 㪈㪈㪍㪇 㪈㪊㪅㪉 㪈㪈㪎㪇 䊶㪧㫆㫎㪼㫉㩷㫊㫌㫇㫇㫃㫐㩷㪈㪇㪇㪭 㪈㪋㪅㪏 㪈㪉㪇㪇 㪈㪊㪅㪎 㪈㪉㪈㪇 㪌㪇㪟㫑㪆㪍㪇㪟㫑 㪈㪌㪅㪉 㪧㫆㫎㪼㫉㩷㪺㫆㫅㫊㫌㫄㫇㫋㫀㫆㫅㩷㪽㫆㫉㩷㪍㪇㪟㫑㩿㪮㪀 㪈㪉㪌㪇 㪈㪋 㪈㪉㪌㪇 䊶㪩㪫䋺㪊㪌㷄 㪈㪌㪅㪊 㪈㪉㪍㪇 㪈㪋㪅㪈 㪈㪉㪌㪌 㪈㪌㪅㪉 㪈㪉㪍㪇 㪈㪋㪅㪈 㪈㪉㪍㪇 㪈㪌 㪈㪉㪋㪇 㪈㪋㪅㪇㪌 㪈㪉㪍㪇 㪧㫆㫎㪼㫉㩷㪺㫆㫅㫊㫌㫄㫇㫋㫀㫆㫅㩷㪽㫆㫉㩷㪌㪇㪟㫑㩿㪮㪀 㪈㪋㪅㪏 㪈㪉㪊㪇 㪈㪊㪅㪐 㪈㪉㪌㪇 㪈㪋㪅㪎 㪈㪉㪉㪇 㪈㪊㪅㪏 㪈㪉㪋㪇 㪈㪋㪅㪍 㪈㪉㪉㪇 㪈㪊㪅㪎 㪈㪉㪊㪇 㪈㪋㪅㪍 㪈㪉㪉㪇 㪈㪊㪅㪎 㪈㪉㪊㪇 㪚㫌㫉㫉㪼㫅㫋㩷㪽㫆㫉㩷㪌㪇㪟㫑㩿㪘㪀 㪈㪋㪅㪍 㪈㪉㪉㪇 㪈㪊㪅㪎 㪈㪉㪊㪇 㪈㪋㪅㪍 㪈㪉㪉㪇 㪈㪊㪅㪎 㪈㪉㪊㪇 㪉㪇 㪈㪏 㪈㪍 㪈㪇㪇㪇 㪈㪋 㪚㫌㫉㫉㪼㫅㫋㩷㪽㫆㫉㩷㪍㪇㪟㫑㩿㪘㪀 㪐㪇㪇 㪇㪅㪇 㪈㪉 㪇㪅㪌 㪈㪅㪇 㪈㪅㪌 㪉㪅㪇 㪫㫀㫄㪼㩷㫊㪺㪸㫃㪼㩷㩿㪿㫆㫌㫉㪀 41 㪉㪅㪌 㪊㪅㪇 㪊㪅㪌 㪚㫌㫉㫉㪼㫅㫋㩷㩿㪘㪀 㪤㪠㪥 ■ Illuminance performance conditions External temperature: 20°C Internal temperature: 25°C New fluorescent lamps (FL40SS-W/37) Measuring point: center ■ Temperature variation 42