1
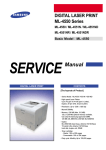
Service Manual
701P47822
Phaser 3600
®
Laser Printer
Service Manual
701P47882
Phaser® 3600 Printer
Warning
The following servicing instructions are for use by qualified service personnel
only. To avoid personal injury, do not perform any servicing other than that
contained in the operating instructions, unless you are qualified to do so.
First Printing: September 2008
Prepared By:
Xerox Corporation
XOG Worldwide Product Training and Information
26600 SW Parkway
Wilsonville, OR 97070
Unpublished rights reserved under the copyright laws of the United States. Contents of this publication may not be reproduced in any form
without permission of Xerox Corporation.
Copyright protection claimed includes all forms and matters of copyrightable materials and information now allowed by statutory or judicial law
or hereinafter granted, including without limitation, material generated from the software programs which are displayed on the screen such as
styles, templates, icons, screen displays, looks, etc.
Xerox technical training materials and service manuals are intended for use by authorized Xerox service technicians and service partners only
and are not for resale. These materials may not be distributed, copied, or otherwise reproduced without prior written consent from Xerox
Corporation.
XEROX®, CentreWare®, Phaser®, PrintingScout®, and Walk-Up® are trademarks of Xerox Corporation in the United States and/or other
countries.
Adobe® and PostScript® are trademarks of Adobe Systems Incorporated in the United States and/or other countries.
Apple®, Bonjour®, ColorSync®, EtherTalk®, Macintosh®, and Mac OS® are trademarks of Apple Computer, Inc. in the United States and/or
other countries.
PCL® is a trademark of Hewlett-Packard Corporation in the United States and/or other countries.
Microsoft®, Windows®, Windows Server®, and Windows Vista® are trademarks of Microsoft Corporation in the United States and/or other
countries.
Novell®, NetWare®, and IPX/SPX™ are trademarks of Novell, Incorporated in the United States and/or other countries.
SunSM, Sun Microsystems™, and Solaris™ are trademarks of Sun Microsystems, Incorporated in the United States and/or other countries.
UNIX® is a registered trademark in the US and other countries, licensed exclusively through X/Open Company Limited.
As an ENERGY STAR® partner, Xerox Corporation has determined that this product meets the ENERGY STAR guidelines for energy efficiency.
The ENERGY STAR name and logo are registered U.S. marks.
Service Terms
Manual Terms
Various terms are used throughout this manual to either provide additional
information on a specific topic or to warn of possible danger present during a
procedure or action. Be aware of all symbols and terms when they are used,
and always read Note, Caution, and Warning statements.
Note
A note indicates an operating or maintenance procedure, practice or
condition that is necessary to efficiently accomplish a task.
A note can provide additional information related to a specific subject or
add a comment on the results achieved through a previous action.
Caution
A caution indicates an operating or maintenance procedure, practice or
condition that, if not strictly observed, results in damage to, or destruction of,
equipment.
Warning
A warning indicates an operating or maintenance procedure, practice or
condition that, if not strictly observed, results in injury or loss of life.
Product Terms
Caution: A personal injury hazard exists that may not be apparent. For
example, a panel may cover the hazardous area.
Danger: A personal injury hazard exists in the area where you see the sign.
Phaser 3600 Printer Service Manual
iii
Symbols Marked on the Product
Warning. Danger invisible laser radiation when open. Avoid
direct exposure to beam.
Hot surface on or in the printer. Use caution to avoid personal
injury.
Warning. Use caution to avoid personal injury.
Use caution (or draws attention to a particular component).
Refer to the manual(s) for information.
Do not touch the OPC Drum.
Do not expose the item to sunlight.
Do not tilt the Print Cartridge.
0°C
32°F
35°C Do not expose item to extreme temperature.
95°F
Recycle the item.
iv
Phaser 3600 Printer Service Manual
Power Safety Precautions
Power Source
For 115 VAC printers, do not apply more than 127 volts RMS between the
supply conductors or between either supply conductor and ground. For 230
VAC printers, do not apply more than 254 volts RMS between the supply
conductors or between either supply conductor and ground. Use only the
specified power cord and connector. This manual assumes that the reader is
a qualified service technician.
Plug the three-wire power cord (with grounding prong) into a grounded AC
outlet only. If necessary, contact a licensed electrician to install a properly
grounded outlet. If the product loses its ground connection, contact with
conductive parts may cause an electrical shock. A protective ground
connection by way of the grounding conductor in the power cord is essential
for safe operation.
Disconnecting Power
Warning
Turning the power Off using the power switch does not completely deenergize the printer. You must also disconnect the power cord from the
printer’s Alternating Current (AC) inlet. Disconnect the power cord by pulling
the plug, not the cord.
Disconnect the power cord in the following cases:
Phaser 3600 Printer Service Manual
■
if the power cord or plug is frayed or otherwise damaged,
■
if any liquid or foreign material is spilled into the product,
■
if the printer is exposed to any excess moisture,
■
if the printer is dropped or damaged,
■
if you suspect that the product needs servicing or repair,
■
whenever you clean the product.
v
Electrostatic Discharge Precautions
Some semiconductor components, and the respective sub-assemblies that
contain them, are vulnerable to damage by Electrostatic Discharge (ESD).
These components include Integrated Circuits (ICs), Large-Scale Integrated
circuits (LSIs), field-effect transistors, and other semiconductor chip
components. The following techniques will reduce the occurrence of
component damage caused by static electricity.
Be sure the power is Off to the chassis or circuit board, and observe all other
safety precautions.
vi
■
Immediately before handling any semiconductor components assemblies,
drain the electrostatic charge from your body. This can be accomplished
by touching an earth ground source or by wearing a wrist strap device
connected to an earth ground source. Wearing a wrist strap will also
prevent accumulation of additional bodily static charges. Be sure to
remove the wrist strap before applying power to the unit under test to
avoid potential shock.
■
After removing a static sensitive assembly from its anti-static bag, place it
on a grounded conductive surface. If the anti-static bag is conductive, you
may ground the bag and use it as a conductive surface.
■
Do not use freon-propelled chemicals. These can generate electrical
charges sufficient to damage some devices.
■
Do not remove a replacement component or electrical sub-assembly from
its protective package until you are ready to install it.
■
Immediately before removing the protective material from the leads of a
replacement device, touch the protective material to the chassis or circuit
assembly into which the device will be installed.
■
Minimize body motions when handling unpacked replacement devices.
Motion such as your clothes brushing together, or lifting a foot from a
carpeted floor can generate enough static electricity to damage an
electro-statically sensitive device.
■
Handle IC’s and Erasable Programmable Read-Only Memories
(EPROM’s) carefully to avoid bending pins.
■
Pay attention to the direction of parts when mounting or inserting them on
Printed Circuit Boards (PCB’s).
Phaser 3600 Printer Service Manual
Service Safety Summary
General Guidelines and Safety precautions:
For qualified service personnel only: Refer also to the preceding “Power Safety
Precautions” on page v.
Avoid servicing alone: Do not perform internal service or adjustment of this
product unless another person capable of rendering first aid or resuscitation is
present.
Use care when servicing with power: Dangerous voltages may exist at several
points in this product. To avoid personal injury, do not touch exposed
connections and components while power is On. Disconnect power before
removing the power supply shield or replacing components.
Do not wear jewelry: Remove jewelry prior to servicing. Rings, necklaces, and
other metallic objects could come into contact with dangerous voltages and
currents.
Warning Labels
Read and obey all posted warning labels. Throughout the printer, warning
labels are displayed on potentially dangerous components. As you service the
printer, check to make certain that all warning labels remain in place.
Safety Interlocks
Make sure all covers are in place and all Interlock Switches are functioning
correctly after you have completed a printer service call. If you bypass an
Interlock Switch during a service call, use extreme caution when working on
or around the printer.
Class 1 Laser Product
The Phaser 3600 is certified to comply with Laser Product Performance
Standards set by the U.S. Department of Health and Human Services as a
Class 1 Laser Product. This means that this product does not emit hazardous
laser radiation; which is possible only because the laser beam is totally
enclosed during all modes of customer operation. When servicing the printer
or laser unit, follow the procedures specified in this manual and there will be
no hazards from the laser.
Phaser 3600 Printer Service Manual
vii
Servicing Electrical Components
Before starting any service procedure, switch the printer power Off and
unplug the power cord from the wall outlet. If you must service the printer with
power applied, be aware of the potential for electrical shock.
Warning
Do not touch any electrical component unless you are instructed to do so by a
service procedure.
Servicing Mechanical Components
When servicing mechanical components within the printer, manually rotate
the Drive Assemblies, Rollers, and Gears.
Warning
Do not try to manually rotate or manually stop the drive assemblies while any
printer motor is running.
Servicing Fuser Components
Warning
This printer uses heat to fuse the toner image to paper. The Fuser is VERY
HOT. Turn the printer power Off and wait at least 5 minutes for the Fuser to
cool before attempting to service the Fuser or adjacent components.
viii
Phaser 3600 Printer Service Manual
Regulatory Information
Xerox has tested this product to electromagnetic emission and immunity
standards. These standards are designed to mitigate interference caused or
received by this product in a typical office environment.
United States (FCC Regulations)
This equipment has been tested and found to comply with the limits for a
Class B digital device, pursuant to Part 15 of the Federal Communications
Commission (FCC) Rules. These limits are designed to provide reasonable
protection against harmful interference in a residential installation. This
equipment generates, uses, and can radiate radio frequency energy. If it is not
installed and used in accordance with these instructions, it may cause harmful
interference to radio communications. However, there is no guarantee that
interference will not occur in a particular installation. If this equipment does
cause harmful interference to radio or television reception, which can be
determined by turning the equipment Off and On, the user is encouraged to
try to correct the interference by one or more of the following measures:
■
Reorient or relocate the receiver (device being interfered with).
■
Increase the separation between the printer and the receiver.
■
Connect the equipment into an outlet on a circuit different from that which
the receiver is connected.
■
Consult the dealer or an experienced radio/television technician for help.
Any changes or modifications not expressly approved by Xerox could void the
user's authority to operate the equipment. To ensure compliance with Part 15
of the FCC rules, use shielded interface cables.
Canada (Regulations)
This Class B digital apparatus complies with Canadian ICES-003.
Cet appareil numérique de la classe B est conforme à la norme NMB-003 du
Canada.
Phaser 3600 Printer Service Manual
ix
European Union
The CE mark applied to this product symbolizes Xerox’s
declaration of conformity with the following applicable
Directives of the European Union as of the dates indicated:
December 12, 2006: Council Directive 2006/95/EC as amended. Approximation of
the laws of the member states related to low voltage equipment.
December 15, 2004: Council Directive 2004/108/EC as amended. Approximation of
the laws of the member states related to electromagnetic compability.
This product, if used properly in accordance with the user's instructions, is
neither dangerous for the consumer nor for the environment.
To ensure compliance with European Union regulations, use shielded
interface cables.
A full declaration of conformity, defining the relevant directives and referenced
standards, can be obtained from your Xerox Limited representative.
x
Phaser 3600 Printer Service Manual
Manual Organization
The Phaser 3600 Printer Service Manual is the primary document used for
repairing, maintaining, and troubleshooting the printer. Use this manual as
your primary resource for understanding the operational characteristics of the
printer and all available options. This manual describes specifications, theory,
and the diagnosis and repair of problems occurring in the print engine and
attached options. Also included are detailed replacement procedures, parts
lists, and wiring diagrams.
The Phaser 3600 Printer Service Manual contains these chapters:
Introductory, Safety, and Regulatory Information: This section contains important
safety information and regulatory requirements.
Chapter 1 - General Information: This chapter contains an overview of the
printer’s operation, configuration, specifications, and consumables.
Chapter 2 - Theory of Operation: This chapter contains detailed functional
information on the printer components.
Chapter 3 - Error Messages: This chapter provides detailed troubleshooting
procedures for error messages generated by resident diagnostics.
Chapter 4 - General Troubleshooting: This chapter contains general information
on troubleshooting the printer. In addition, this chapter includes
troubleshooting methods for situations where error indicators are not
available.
Chapter 5 - Print-Quality Troubleshooting: This chapter focuses on techniques to
correct image quality problems associated with the printer output.
Chapter 6- Cleaning and Maintenance: This chapter provides periodic cleaning
procedures for the printer.
Chapter 7- Service Parts Disassembly: This chapter contains removal
procedures for spare parts listed in the Parts List. A replacement procedure is
included when necessary.
Chapter 8- Parts List: This chapter contains exploded views of the print engine
and optional Field Replaceable Units (FRUs), as well as part numbers for
orderable parts.
Chapter 9- Plug/Jack and Wiring Diagrams: This chapter contains the plug/jack
locations and the wiring diagrams for the printer.
Reference: This section provides a list of acronyms and abbreviations
Phaser 3600 Printer Service Manual
xi
xii
Phaser 3600 Printer Service Manual
Table Of Contents
Table Of Contents
Service Terms . . . . . . . . . . . . . . . . . . . . . . . . . . . . . . . . . . . . . . . . . . . . . . . . . . . . . . . . . . . . . . . . . . . . . . . . . . . . . . . . iii
Symbols Marked on the Product . . . . . . . . . . . . . . . . . . . . . . . . . . . . . . . . . . . . . . . . . . . . . . . . . . . . . . . . . . . . . . . . . . iv
Power Safety Precautions . . . . . . . . . . . . . . . . . . . . . . . . . . . . . . . . . . . . . . . . . . . . . . . . . . . . . . . . . . . . . . . . . . . . . . . . v
Electrostatic Discharge Precautions. . . . . . . . . . . . . . . . . . . . . . . . . . . . . . . . . . . . . . . . . . . . . . . . . . . . . . . . . . . . . . . . vi
Service Safety Summary . . . . . . . . . . . . . . . . . . . . . . . . . . . . . . . . . . . . . . . . . . . . . . . . . . . . . . . . . . . . . . . . . . . . . . . . vii
Regulatory Information . . . . . . . . . . . . . . . . . . . . . . . . . . . . . . . . . . . . . . . . . . . . . . . . . . . . . . . . . . . . . . . . . . . . . . . . . ix
Manual Organization . . . . . . . . . . . . . . . . . . . . . . . . . . . . . . . . . . . . . . . . . . . . . . . . . . . . . . . . . . . . . . . . . . . . . . . . . . . xi
1 General Information
Printer Configurations . . . . . . . . . . . . . . . . . . . . . . . . . . . . . . . . . . . . . . . . . . . . . . . . . . . . . . . . . . . . . . . . . . . . . . . . . 1-2
Printer Options and Supplies. . . . . . . . . . . . . . . . . . . . . . . . . . . . . . . . . . . . . . . . . . . . . . . . . . . . . . . . . . . . . 1-2
Consumable and Service Part Life Expectancy. . . . . . . . . . . . . . . . . . . . . . . . . . . . . . . . . . . . . . . . . . . . . . . . . . . . . . . 1-3
Parts of the Printer. . . . . . . . . . . . . . . . . . . . . . . . . . . . . . . . . . . . . . . . . . . . . . . . . . . . . . . . . . . . . . . . . . . . . . . . . . . . 1-4
Front View . . . . . . . . . . . . . . . . . . . . . . . . . . . . . . . . . . . . . . . . . . . . . . . . . . . . . . . . . . . . . . . . . . . . . . . . . . . 1-4
Rear View . . . . . . . . . . . . . . . . . . . . . . . . . . . . . . . . . . . . . . . . . . . . . . . . . . . . . . . . . . . . . . . . . . . . . . . . . . . 1-4
Control Panel . . . . . . . . . . . . . . . . . . . . . . . . . . . . . . . . . . . . . . . . . . . . . . . . . . . . . . . . . . . . . . . . . . . . . . . . . . . . . . . . 1-5
Menu Map . . . . . . . . . . . . . . . . . . . . . . . . . . . . . . . . . . . . . . . . . . . . . . . . . . . . . . . . . . . . . . . . . . . . . . . . . . . 1-5
Error and Warning Messages . . . . . . . . . . . . . . . . . . . . . . . . . . . . . . . . . . . . . . . . . . . . . . . . . . . . . . . . . . . . 1-5
Printer Specifications. . . . . . . . . . . . . . . . . . . . . . . . . . . . . . . . . . . . . . . . . . . . . . . . . . . . . . . . . . . . . . . . . . . . . . . . . . 1-6
Printer Location and Clearance . . . . . . . . . . . . . . . . . . . . . . . . . . . . . . . . . . . . . . . . . . . . . . . . . . . . . . . . . . . 1-6
Printer Physical Specifications . . . . . . . . . . . . . . . . . . . . . . . . . . . . . . . . . . . . . . . . . . . . . . . . . . . . . . . . . . . 1-7
Functional Specifications. . . . . . . . . . . . . . . . . . . . . . . . . . . . . . . . . . . . . . . . . . . . . . . . . . . . . . . . . . . . . . . . 1-7
Electrical Specifications. . . . . . . . . . . . . . . . . . . . . . . . . . . . . . . . . . . . . . . . . . . . . . . . . . . . . . . . . . . . . . . . . 1-9
Environmental Specification . . . . . . . . . . . . . . . . . . . . . . . . . . . . . . . . . . . . . . . . . . . . . . . . . . . . . . . . . . . . . 1-9
Media and Tray Specifications . . . . . . . . . . . . . . . . . . . . . . . . . . . . . . . . . . . . . . . . . . . . . . . . . . . . . . . . . . . . . . . . . . 1-10
2 Theory of Operation
Phaser 3600 Operational Overview . . . . . . . . . . . . . . . . . . . . . . . . . . . . . . . . . . . . . . . . . . . . . . . . . . . . . . . . . . . . . . . 2-2
Summary of the Printing Process . . . . . . . . . . . . . . . . . . . . . . . . . . . . . . . . . . . . . . . . . . . . . . . . . . . . . . . . . 2-2
Print Cartridge and Print Modes . . . . . . . . . . . . . . . . . . . . . . . . . . . . . . . . . . . . . . . . . . . . . . . . . . . . . . . . . . 2-3
Printer Paper Path . . . . . . . . . . . . . . . . . . . . . . . . . . . . . . . . . . . . . . . . . . . . . . . . . . . . . . . . . . . . . . . . . . . . . . . . . . . . 2-4
Paper Path Components . . . . . . . . . . . . . . . . . . . . . . . . . . . . . . . . . . . . . . . . . . . . . . . . . . . . . . . . . . . . . . . . 2-4
Duplex Paper Path . . . . . . . . . . . . . . . . . . . . . . . . . . . . . . . . . . . . . . . . . . . . . . . . . . . . . . . . . . . . . . . . . . . . . 2-5
Print Engine Assemblies . . . . . . . . . . . . . . . . . . . . . . . . . . . . . . . . . . . . . . . . . . . . . . . . . . . . . . . . . . . . . . . . . . . . . . . 2-6
Image Processing Assembly and Main Board . . . . . . . . . . . . . . . . . . . . . . . . . . . . . . . . . . . . . . . . . . . . . . . . 2-6
Laser Scan Unit (LSU) . . . . . . . . . . . . . . . . . . . . . . . . . . . . . . . . . . . . . . . . . . . . . . . . . . . . . . . . . . . . . . . . . . 2-7
Motor Drive Assemblies . . . . . . . . . . . . . . . . . . . . . . . . . . . . . . . . . . . . . . . . . . . . . . . . . . . . . . . . . . . . . . . . 2-7
Feed Assembly Process and Components . . . . . . . . . . . . . . . . . . . . . . . . . . . . . . . . . . . . . . . . . . . . . . . . . . . 2-7
Transfer Roller Assembly . . . . . . . . . . . . . . . . . . . . . . . . . . . . . . . . . . . . . . . . . . . . . . . . . . . . . . . . . . . . . . . 2-8
Fuser Assembly . . . . . . . . . . . . . . . . . . . . . . . . . . . . . . . . . . . . . . . . . . . . . . . . . . . . . . . . . . . . . . . . . . . . . . . 2-8
Duplex and Tray Assemblies . . . . . . . . . . . . . . . . . . . . . . . . . . . . . . . . . . . . . . . . . . . . . . . . . . . . . . . . . . . . . . . . . . . . 2-9
Duplex Assembly. . . . . . . . . . . . . . . . . . . . . . . . . . . . . . . . . . . . . . . . . . . . . . . . . . . . . . . . . . . . . . . . . . . . . . 2-9
Tray 2 and Optional Tray 3 Assemblies . . . . . . . . . . . . . . . . . . . . . . . . . . . . . . . . . . . . . . . . . . . . . . . . . . . . . 2-9
Printer Controls . . . . . . . . . . . . . . . . . . . . . . . . . . . . . . . . . . . . . . . . . . . . . . . . . . . . . . . . . . . . . . . . . . . . . . . . . . . . . 2-10
Paper Size Control . . . . . . . . . . . . . . . . . . . . . . . . . . . . . . . . . . . . . . . . . . . . . . . . . . . . . . . . . . . . . . . . . . . . 2-10
Automatic Paper Pick Control . . . . . . . . . . . . . . . . . . . . . . . . . . . . . . . . . . . . . . . . . . . . . . . . . . . . . . . . . . . 2-10
Laser Scan Unit (LSU) Control . . . . . . . . . . . . . . . . . . . . . . . . . . . . . . . . . . . . . . . . . . . . . . . . . . . . . . . . . . 2-11
Laser Light Intensity Control . . . . . . . . . . . . . . . . . . . . . . . . . . . . . . . . . . . . . . . . . . . . . . . . . . . . . . . . . . . . 2-11
Toner Control . . . . . . . . . . . . . . . . . . . . . . . . . . . . . . . . . . . . . . . . . . . . . . . . . . . . . . . . . . . . . . . . . . . . . . . 2-11
Fuser Temperature Control . . . . . . . . . . . . . . . . . . . . . . . . . . . . . . . . . . . . . . . . . . . . . . . . . . . . . . . . . . . . . 2-12
Phaser 3600 Color Laser Printer Service Manual
1
Sensor Functions . . . . . . . . . . . . . . . . . . . . . . . . . . . . . . . . . . . . . . . . . . . . . . . . . . . . . . . . . . . . . . . . . . . . . . . . . . . . 2-13
Sensor Types. . . . . . . . . . . . . . . . . . . . . . . . . . . . . . . . . . . . . . . . . . . . . . . . . . . . . . . . . . . . . . . . . . . . . . . . 2-13
Sensors in the Paper Path . . . . . . . . . . . . . . . . . . . . . . . . . . . . . . . . . . . . . . . . . . . . . . . . . . . . . . . . . . . . . . 2-15
Power Supplies . . . . . . . . . . . . . . . . . . . . . . . . . . . . . . . . . . . . . . . . . . . . . . . . . . . . . . . . . . . . . . . . . . . . . . . . . . . . . 2-17
High Voltage Power Supply (HVPS) . . . . . . . . . . . . . . . . . . . . . . . . . . . . . . . . . . . . . . . . . . . . . . . . . . . . . . 2-17
Switching Mode Power Supply (SMPS) . . . . . . . . . . . . . . . . . . . . . . . . . . . . . . . . . . . . . . . . . . . . . . . . . . . 2-18
3 Error Messages
Troubleshooting Overview . . . . . . . . . . . . . . . . . . . . . . . . . . . . . . . . . . . . . . . . . . . . . . . . . . . . . . . . . . . . . . . . . . . . . . 3-2
Using the Troubleshooting Procedures . . . . . . . . . . . . . . . . . . . . . . . . . . . . . . . . . . . . . . . . . . . . . . . . . . . . . 3-2
Service Diagnostics . . . . . . . . . . . . . . . . . . . . . . . . . . . . . . . . . . . . . . . . . . . . . . . . . . . . . . . . . . . . . . . . . . . . . . . . . . . 3-3
Service Diagnostics Menu Map . . . . . . . . . . . . . . . . . . . . . . . . . . . . . . . . . . . . . . . . . . . . . . . . . . . . . . . . . . . . . . . . . . 3-3
Entering Service Diagnostics . . . . . . . . . . . . . . . . . . . . . . . . . . . . . . . . . . . . . . . . . . . . . . . . . . . . . . . . . . . . . 3-3
Service Diagnostic Control Panel Button Descriptions . . . . . . . . . . . . . . . . . . . . . . . . . . . . . . . . . . . . . . . . . 3-4
Diagnostic Test Menu Map . . . . . . . . . . . . . . . . . . . . . . . . . . . . . . . . . . . . . . . . . . . . . . . . . . . . . . . . . . . . . . 3-5
Troubleshooting Error Messages . . . . . . . . . . . . . . . . . . . . . . . . . . . . . . . . . . . . . . . . . . . . . . . . . . . . . . . . . . . . . . . . 3-11
Jam At Tray [1] [2] [3] (Jam 0). . . . . . . . . . . . . . . . . . . . . . . . . . . . . . . . . . . . . . . . . . . . . . . . . . . . . . . . . . 3-13
Jam At Top (Jam 1). . . . . . . . . . . . . . . . . . . . . . . . . . . . . . . . . . . . . . . . . . . . . . . . . . . . . . . . . . . . . . . . . . . 3-14
Jam At Exit (Jam 2) . . . . . . . . . . . . . . . . . . . . . . . . . . . . . . . . . . . . . . . . . . . . . . . . . . . . . . . . . . . . . . . . . . . 3-15
Jam At Rear (Duplex Jam 1) . . . . . . . . . . . . . . . . . . . . . . . . . . . . . . . . . . . . . . . . . . . . . . . . . . . . . . . . . . . . 3-16
Jam At Duplex (Duplex Jam 2) . . . . . . . . . . . . . . . . . . . . . . . . . . . . . . . . . . . . . . . . . . . . . . . . . . . . . . . . . . 3-17
Check Cartridge, Invalid Print Cartridge, Non-Xerox Cartridge, Replace Print Cartridge . . . . . . . . . . . . . . . 3-18
Close Fuser Door . . . . . . . . . . . . . . . . . . . . . . . . . . . . . . . . . . . . . . . . . . . . . . . . . . . . . . . . . . . . . . . . . . . . . 3-19
Close Top Cover . . . . . . . . . . . . . . . . . . . . . . . . . . . . . . . . . . . . . . . . . . . . . . . . . . . . . . . . . . . . . . . . . . . . . 3-19
Fuser Failure, Engine Fuser Low Heat Error, or Engine Fuser Over Heat Error. . . . . . . . . . . . . . . . . . . . . . . 3-20
Laser Failure . . . . . . . . . . . . . . . . . . . . . . . . . . . . . . . . . . . . . . . . . . . . . . . . . . . . . . . . . . . . . . . . . . . . . . . . 3-21
Output Tray is Full . . . . . . . . . . . . . . . . . . . . . . . . . . . . . . . . . . . . . . . . . . . . . . . . . . . . . . . . . . . . . . . . . . . . 3-22
4 General Troubleshooting
Servicing Instructions . . . . . . . . . . . . . . . . . . . . . . . . . . . . . . . . . . . . . . . . . . . . . . . . . . . . . . . . . . . . . . . . . . . . . . . . . 4-2
Preventive Maintenance Procedure . . . . . . . . . . . . . . . . . . . . . . . . . . . . . . . . . . . . . . . . . . . . . . . . . . . . . . . . . . . . . . . 4-3
Recommended Tools. . . . . . . . . . . . . . . . . . . . . . . . . . . . . . . . . . . . . . . . . . . . . . . . . . . . . . . . . . . . . . . . . . . 4-3
Control Panel Troubleshooting . . . . . . . . . . . . . . . . . . . . . . . . . . . . . . . . . . . . . . . . . . . . . . . . . . . . . . . . . . . . . . . . . . 4-4
No Control Panel Display after Power Is Turned ON . . . . . . . . . . . . . . . . . . . . . . . . . . . . . . . . . . . . . . . . . . . 4-4
Control Panel LED is On, Control Panel Display Is Blank . . . . . . . . . . . . . . . . . . . . . . . . . . . . . . . . . . . . . . . . 4-4
Power Supply Troubleshooting . . . . . . . . . . . . . . . . . . . . . . . . . . . . . . . . . . . . . . . . . . . . . . . . . . . . . . . . . . . . . . . . . . 4-5
Taking Voltage Measurements. . . . . . . . . . . . . . . . . . . . . . . . . . . . . . . . . . . . . . . . . . . . . . . . . . . . . . . . . . . . 4-5
5 Print-Quality Troubleshooting
Print-Quality Problems Overview . . . . . . . . . . . . . . . . . . . . . . . . . . . . . . . . . . . . . . . . . . . . . . . . . . . . . . . . . . . . . . . . . 5-2
Repeating Defects . . . . . . . . . . . . . . . . . . . . . . . . . . . . . . . . . . . . . . . . . . . . . . . . . . . . . . . . . . . . . . . . . . . . . . . . . . . . 5-3
Repeating Defects Measurement Table . . . . . . . . . . . . . . . . . . . . . . . . . . . . . . . . . . . . . . . . . . . . . . . . . . . . . 5-4
Control Panel (Internal) Test Print . . . . . . . . . . . . . . . . . . . . . . . . . . . . . . . . . . . . . . . . . . . . . . . . . . . . . . . . . . . . . . . . 5-4
2
Phaser 3600 Printer Service Manual
Table Of Contents
Image-Quality Troubleshooting . . . . . . . . . . . . . . . . . . . . . . . . . . . . . . . . . . . . . . . . . . . . . . . . . . . . . . . . . . . . . . . . . . 5-9
Blank Print (No Print) . . . . . . . . . . . . . . . . . . . . . . . . . . . . . . . . . . . . . . . . . . . . . . . . . . . . . . . . . . . . . . . . . . 5-9
Light or Undertone Print . . . . . . . . . . . . . . . . . . . . . . . . . . . . . . . . . . . . . . . . . . . . . . . . . . . . . . . . . . . . . . . 5-11
Black Print . . . . . . . . . . . . . . . . . . . . . . . . . . . . . . . . . . . . . . . . . . . . . . . . . . . . . . . . . . . . . . . . . . . . . . . . . . 5-13
Background Contamination . . . . . . . . . . . . . . . . . . . . . . . . . . . . . . . . . . . . . . . . . . . . . . . . . . . . . . . . . . . . . 5-15
Residual Image or Ghosting . . . . . . . . . . . . . . . . . . . . . . . . . . . . . . . . . . . . . . . . . . . . . . . . . . . . . . . . . . . . 5-16
Faded or Missing Image . . . . . . . . . . . . . . . . . . . . . . . . . . . . . . . . . . . . . . . . . . . . . . . . . . . . . . . . . . . . . . . 5-18
Random Spots. . . . . . . . . . . . . . . . . . . . . . . . . . . . . . . . . . . . . . . . . . . . . . . . . . . . . . . . . . . . . . . . . . . . . . . 5-20
Repeating Bands, Lines, Marks, or Spots . . . . . . . . . . . . . . . . . . . . . . . . . . . . . . . . . . . . . . . . . . . . . . . . . . 5-22
Unfused Image . . . . . . . . . . . . . . . . . . . . . . . . . . . . . . . . . . . . . . . . . . . . . . . . . . . . . . . . . . . . . . . . . . . . . . 5-24
Skew . . . . . . . . . . . . . . . . . . . . . . . . . . . . . . . . . . . . . . . . . . . . . . . . . . . . . . . . . . . . . . . . . . . . . . . . . . . . . . 5-25
Horizontal Band, Voids, or Streaks . . . . . . . . . . . . . . . . . . . . . . . . . . . . . . . . . . . . . . . . . . . . . . . . . . . . . . . 5-27
6 Cleaning and Maintenance
Service Maintenance Procedure. . . . . . . . . . . . . . . . . . . . . . . . . . . . . . . . . . . . . . . . . . . . . . . . . . . . . . . . . . . . . . . . . . 6-2
Recommended Tools. . . . . . . . . . . . . . . . . . . . . . . . . . . . . . . . . . . . . . . . . . . . . . . . . . . . . . . . . . . . . . . . . . . 6-2
General Cleaning . . . . . . . . . . . . . . . . . . . . . . . . . . . . . . . . . . . . . . . . . . . . . . . . . . . . . . . . . . . . . . . . . . . . . . . . . . . . . 6-2
Cleaning the Laser Scan Unit. . . . . . . . . . . . . . . . . . . . . . . . . . . . . . . . . . . . . . . . . . . . . . . . . . . . . . . . . . . . . 6-3
Cleaning the Print Cartridge. . . . . . . . . . . . . . . . . . . . . . . . . . . . . . . . . . . . . . . . . . . . . . . . . . . . . . . . . . . . . . 6-3
Control Panel Maintenance . . . . . . . . . . . . . . . . . . . . . . . . . . . . . . . . . . . . . . . . . . . . . . . . . . . . . . . . . . . . . . . . . . . . . 6-4
Cleaning the Drum. . . . . . . . . . . . . . . . . . . . . . . . . . . . . . . . . . . . . . . . . . . . . . . . . . . . . . . . . . . . . . . . . . . . . 6-4
Cleaning the Fuser . . . . . . . . . . . . . . . . . . . . . . . . . . . . . . . . . . . . . . . . . . . . . . . . . . . . . . . . . . . . . . . . . . . . . 6-4
7 Service Parts Disassembly
Service Overview . . . . . . . . . . . . . . . . . . . . . . . . . . . . . . . . . . . . . . . . . . . . . . . . . . . . . . . . . . . . . . . . . . . . . . . . . . . . . 7-2
General Notes on Disassembly . . . . . . . . . . . . . . . . . . . . . . . . . . . . . . . . . . . . . . . . . . . . . . . . . . . . . . . . . . . . . . . . . . 7-2
Preparation . . . . . . . . . . . . . . . . . . . . . . . . . . . . . . . . . . . . . . . . . . . . . . . . . . . . . . . . . . . . . . . . . . . . . . . . . . 7-2
Fastener Types . . . . . . . . . . . . . . . . . . . . . . . . . . . . . . . . . . . . . . . . . . . . . . . . . . . . . . . . . . . . . . . . . . . . . . . 7-4
Notations in the Disassembly Text. . . . . . . . . . . . . . . . . . . . . . . . . . . . . . . . . . . . . . . . . . . . . . . . . . . . . . . . . 7-5
Standard Orientation of the Printer . . . . . . . . . . . . . . . . . . . . . . . . . . . . . . . . . . . . . . . . . . . . . . . . . . . . . . . . 7-5
Covers and Control Panel. . . . . . . . . . . . . . . . . . . . . . . . . . . . . . . . . . . . . . . . . . . . . . . . . . . . . . . . . . . . . . . . . . . . . . . 7-6
Right Cover (PL 1.2.3). . . . . . . . . . . . . . . . . . . . . . . . . . . . . . . . . . . . . . . . . . . . . . . . . . . . . . . . . . . . . . . . . . 7-6
Left Cover (PL 1.2.2) . . . . . . . . . . . . . . . . . . . . . . . . . . . . . . . . . . . . . . . . . . . . . . . . . . . . . . . . . . . . . . . . . . . 7-7
Rear Cover (PL 1.2.6) . . . . . . . . . . . . . . . . . . . . . . . . . . . . . . . . . . . . . . . . . . . . . . . . . . . . . . . . . . . . . . . . . . 7-8
Rear Cover Fan (PL1.2.6.10) . . . . . . . . . . . . . . . . . . . . . . . . . . . . . . . . . . . . . . . . . . . . . . . . . . . . . . . . . . . . . 7-9
Top Cover (PL 1.2.1) . . . . . . . . . . . . . . . . . . . . . . . . . . . . . . . . . . . . . . . . . . . . . . . . . . . . . . . . . . . . . . . . . . 7-10
Access Door (PL 1.2.1.1) . . . . . . . . . . . . . . . . . . . . . . . . . . . . . . . . . . . . . . . . . . . . . . . . . . . . . . . . . . . . . . 7-12
Control Panel (PL 1.2.9) . . . . . . . . . . . . . . . . . . . . . . . . . . . . . . . . . . . . . . . . . . . . . . . . . . . . . . . . . . . . . . . 7-13
Tray 1 (MPT) Assembly . . . . . . . . . . . . . . . . . . . . . . . . . . . . . . . . . . . . . . . . . . . . . . . . . . . . . . . . . . . . . . . . . . . . . . . 7-14
Inner Cover (PL 1.2.5) . . . . . . . . . . . . . . . . . . . . . . . . . . . . . . . . . . . . . . . . . . . . . . . . . . . . . . . . . . . . . . . . . 7-16
Tray 1 (MPT) Knock-Up Plate Only (PL 1.1.3). . . . . . . . . . . . . . . . . . . . . . . . . . . . . . . . . . . . . . . . . . . . . . . 7-17
Tray 1 (MPT) Pick-Up Rack (PL 1.3.2) . . . . . . . . . . . . . . . . . . . . . . . . . . . . . . . . . . . . . . . . . . . . . . . . . . . . 7-18
Retard Assembly (PL 1.3.49) . . . . . . . . . . . . . . . . . . . . . . . . . . . . . . . . . . . . . . . . . . . . . . . . . . . . . . . . . . . 7-19
Tray 1 (MPT) Separator Pad Assembly (PL 1.3.4). . . . . . . . . . . . . . . . . . . . . . . . . . . . . . . . . . . . . . . . . . . . 7-20
Tray 1 (MPT) Feed Sensor (PL1.3.97). . . . . . . . . . . . . . . . . . . . . . . . . . . . . . . . . . . . . . . . . . . . . . . . . . . . . 7-21
Paper Tray Empty Sensor (PL1.3.95) . . . . . . . . . . . . . . . . . . . . . . . . . . . . . . . . . . . . . . . . . . . . . . . . . . . . . 7-22
Paper Tray Empty Actuator (PL1.3.58) . . . . . . . . . . . . . . . . . . . . . . . . . . . . . . . . . . . . . . . . . . . . . . . . . . . . 7-23
Sub Toner Low Sensor Board (PL1.3.47) . . . . . . . . . . . . . . . . . . . . . . . . . . . . . . . . . . . . . . . . . . . . . . . . . . 7-24
Pick Roller and Shaft (PL 1.3.2.5) . . . . . . . . . . . . . . . . . . . . . . . . . . . . . . . . . . . . . . . . . . . . . . . . . . . . . . . . 7-25
Tray 1 (MPT) Pick Roller Only (PL 1.3.2.4) . . . . . . . . . . . . . . . . . . . . . . . . . . . . . . . . . . . . . . . . . . . . . . . . . 7-28
Tray 1 (MPT) Solenoid (PL 1.1.26) . . . . . . . . . . . . . . . . . . . . . . . . . . . . . . . . . . . . . . . . . . . . . . . . . . . . . . . 7-29
Phaser 3600 Color Laser Printer Service Manual
3
Tray 2 Pick-Up Assembly and Rollers . . . . . . . . . . . . . . . . . . . . . . . . . . . . . . . . . . . . . . . . . . . . . . . . . . . . . . . . . . . . 7-30
Pick-Up Gear and Bearing (PL 1.1.21). . . . . . . . . . . . . . . . . . . . . . . . . . . . . . . . . . . . . . . . . . . . . . . . . . . . . 7-34
Tray 2 Feed Roller (PL1.3.59.5). . . . . . . . . . . . . . . . . . . . . . . . . . . . . . . . . . . . . . . . . . . . . . . . . . . . . . . . . . 7-35
Tray 2 Pick Roller (PL1.3.59.2) . . . . . . . . . . . . . . . . . . . . . . . . . . . . . . . . . . . . . . . . . . . . . . . . . . . . . . . . . . 7-35
Tray 2 (PL2.1.0) and Optional Tray 3 (PL2.2.0) Replacement . . . . . . . . . . . . . . . . . . . . . . . . . . . . . . . . . . . . . . . . . . 7-36
Duplex Unit (PL2.3.0) . . . . . . . . . . . . . . . . . . . . . . . . . . . . . . . . . . . . . . . . . . . . . . . . . . . . . . . . . . . . . . . . . . . . . . . . 7-37
Main Drive and Registration Assemblies . . . . . . . . . . . . . . . . . . . . . . . . . . . . . . . . . . . . . . . . . . . . . . . . . . . . . . . . . . 7-38
Main Drive Assembly (PL 1.1.18) . . . . . . . . . . . . . . . . . . . . . . . . . . . . . . . . . . . . . . . . . . . . . . . . . . . . . . . . 7-38
Main Board (PL 1.1.19) . . . . . . . . . . . . . . . . . . . . . . . . . . . . . . . . . . . . . . . . . . . . . . . . . . . . . . . . . . . . . . . . 7-39
Main Solenoid (PL 1.1.25). . . . . . . . . . . . . . . . . . . . . . . . . . . . . . . . . . . . . . . . . . . . . . . . . . . . . . . . . . . . . . 7-40
Registration Assembly (PL 1.1.12) . . . . . . . . . . . . . . . . . . . . . . . . . . . . . . . . . . . . . . . . . . . . . . . . . . . . . . . 7-41
Transfer Roller (PL 1.1.7) . . . . . . . . . . . . . . . . . . . . . . . . . . . . . . . . . . . . . . . . . . . . . . . . . . . . . . . . . . . . . . 7-43
Exit Roller (PL 1.3.6) . . . . . . . . . . . . . . . . . . . . . . . . . . . . . . . . . . . . . . . . . . . . . . . . . . . . . . . . . . . . . . . . . . 7-44
Exit Gear (PL 1.3.9) . . . . . . . . . . . . . . . . . . . . . . . . . . . . . . . . . . . . . . . . . . . . . . . . . . . . . . . . . . . . . . . . . . . 7-44
Outbin Full Actuator (PL 1.3.8) . . . . . . . . . . . . . . . . . . . . . . . . . . . . . . . . . . . . . . . . . . . . . . . . . . . . . . . . . . 7-45
Outbin Full Sensor (PL1.3.21) . . . . . . . . . . . . . . . . . . . . . . . . . . . . . . . . . . . . . . . . . . . . . . . . . . . . . . . . . . . 7-46
Duplex Roller (PL 1.3.11) . . . . . . . . . . . . . . . . . . . . . . . . . . . . . . . . . . . . . . . . . . . . . . . . . . . . . . . . . . . . . . 7-47
Exit Solenoid (PL 1.1.16). . . . . . . . . . . . . . . . . . . . . . . . . . . . . . . . . . . . . . . . . . . . . . . . . . . . . . . . . . . . . . . 7-48
Frame Assembly . . . . . . . . . . . . . . . . . . . . . . . . . . . . . . . . . . . . . . . . . . . . . . . . . . . . . . . . . . . . . . . . . . . . . . . . . . . . 7-49
Feed Idle Unit (PL 1.3.50) . . . . . . . . . . . . . . . . . . . . . . . . . . . . . . . . . . . . . . . . . . . . . . . . . . . . . . . . . . . . . . 7-49
Pre-transfer Lamp (PTL) Board (PL 1.3.71) . . . . . . . . . . . . . . . . . . . . . . . . . . . . . . . . . . . . . . . . . . . . . . . . 7-50
Developer Drive Assembly (PL 1.1.17) . . . . . . . . . . . . . . . . . . . . . . . . . . . . . . . . . . . . . . . . . . . . . . . . . . . . 7-51
Joint Board (PL 1.3.61) . . . . . . . . . . . . . . . . . . . . . . . . . . . . . . . . . . . . . . . . . . . . . . . . . . . . . . . . . . . . . . . . 7-52
Paper Size Sensor (PL 1.3.14). . . . . . . . . . . . . . . . . . . . . . . . . . . . . . . . . . . . . . . . . . . . . . . . . . . . . . . . . . . 7-53
Fuser Assembly (1.3.80) . . . . . . . . . . . . . . . . . . . . . . . . . . . . . . . . . . . . . . . . . . . . . . . . . . . . . . . . . . . . . . . . . . . . . . 7-54
Fuser Interlock Switch (PL 1.3.77) . . . . . . . . . . . . . . . . . . . . . . . . . . . . . . . . . . . . . . . . . . . . . . . . . . . . . . . 7-55
Fuser Exit Sensor (PL 1.3.76) . . . . . . . . . . . . . . . . . . . . . . . . . . . . . . . . . . . . . . . . . . . . . . . . . . . . . . . . . . . 7-56
Fuser Thermostat (PL 1.4.3) . . . . . . . . . . . . . . . . . . . . . . . . . . . . . . . . . . . . . . . . . . . . . . . . . . . . . . . . . . . . 7-57
Fuser Thermistor (PL 1.4.40) . . . . . . . . . . . . . . . . . . . . . . . . . . . . . . . . . . . . . . . . . . . . . . . . . . . . . . . . . . . 7-58
Heat Roller (PL 1.4.53) and Bushing (PL 1.4.44) . . . . . . . . . . . . . . . . . . . . . . . . . . . . . . . . . . . . . . . . . . . . 7-60
Dual-lamp (PL 1.4.56) . . . . . . . . . . . . . . . . . . . . . . . . . . . . . . . . . . . . . . . . . . . . . . . . . . . . . . . . . . . . . . . . . 7-66
Pressure Roller (PL 1.4.66) and Bushing (PL 1.4.50) . . . . . . . . . . . . . . . . . . . . . . . . . . . . . . . . . . . . . . . . . 7-67
Laser Scan Unit (PL 1.1.15). . . . . . . . . . . . . . . . . . . . . . . . . . . . . . . . . . . . . . . . . . . . . . . . . . . . . . . . . . . . . . . . . . . . 7-70
LSU Lower Cover (PL 1.3.48) . . . . . . . . . . . . . . . . . . . . . . . . . . . . . . . . . . . . . . . . . . . . . . . . . . . . . . . . . . . 7-72
Left Side Cooling Supply Fan and Duct (PL 1.1.31). . . . . . . . . . . . . . . . . . . . . . . . . . . . . . . . . . . . . . . . . . . 7-73
Cover Open Board and Sensor (PL 1.3.47) . . . . . . . . . . . . . . . . . . . . . . . . . . . . . . . . . . . . . . . . . . . . . . . . . 7-74
Power Supplies . . . . . . . . . . . . . . . . . . . . . . . . . . . . . . . . . . . . . . . . . . . . . . . . . . . . . . . . . . . . . . . . . . . . . . . . . . . . . 7-75
High Voltage Power Supply (HVPS) (PL 1.1.29.1) . . . . . . . . . . . . . . . . . . . . . . . . . . . . . . . . . . . . . . . . . . . 7-75
Switched Mode Power Supply (PL 1.1.29.2) . . . . . . . . . . . . . . . . . . . . . . . . . . . . . . . . . . . . . . . . . . . . . . . . 7-76
8 Parts List
Serial Number Format . . . . . . . . . . . . . . . . . . . . . . . . . . . . . . . . . . . . . . . . . . . . . . . . . . . . . . . . . . . . . . . . . . . . . . . . . 8-2
Serial Number Label Location . . . . . . . . . . . . . . . . . . . . . . . . . . . . . . . . . . . . . . . . . . . . . . . . . . . . . . . . . . . . . . . . . . . 8-3
Using the Parts List . . . . . . . . . . . . . . . . . . . . . . . . . . . . . . . . . . . . . . . . . . . . . . . . . . . . . . . . . . . . . . . . . . . . . . . . . . . 8-4
PL 1.1 Main Assembly . . . . . . . . . . . . . . . . . . . . . . . . . . . . . . . . . . . . . . . . . . . . . . . . . . . . . . . . . . . . . . . . . . . . . . . . . 8-6
PL 1.2 Cover Assembly . . . . . . . . . . . . . . . . . . . . . . . . . . . . . . . . . . . . . . . . . . . . . . . . . . . . . . . . . . . . . . . . . . . . . . . 8-10
PL 1.3 Frame Assembly (1 of 2) . . . . . . . . . . . . . . . . . . . . . . . . . . . . . . . . . . . . . . . . . . . . . . . . . . . . . . . . . . . . . . . . 8-12
PL 1.3 Frame Assembly (2 of 2) . . . . . . . . . . . . . . . . . . . . . . . . . . . . . . . . . . . . . . . . . . . . . . . . . . . . . . . . . . . . . . . . 8-13
PL 1.4 Fuser Assembly . . . . . . . . . . . . . . . . . . . . . . . . . . . . . . . . . . . . . . . . . . . . . . . . . . . . . . . . . . . . . . . . . . . . . . . 8-20
PL 2.1 Tray 2 Cassette . . . . . . . . . . . . . . . . . . . . . . . . . . . . . . . . . . . . . . . . . . . . . . . . . . . . . . . . . . . . . . . . . . . . . . . . 8-24
PL 2.2 Tray 3 Cassette . . . . . . . . . . . . . . . . . . . . . . . . . . . . . . . . . . . . . . . . . . . . . . . . . . . . . . . . . . . . . . . . . . . . . . . . 8-26
PL 2.3 Duplex Assembly . . . . . . . . . . . . . . . . . . . . . . . . . . . . . . . . . . . . . . . . . . . . . . . . . . . . . . . . . . . . . . . . . . . . . . 8-30
4
Phaser 3600 Printer Service Manual
Table Of Contents
9 Plug/Jack and Wiring Diagrams
Plug/Jack Diagrams and Designators . . . . . . . . . . . . . . . . . . . . . . . . . . . . . . . . . . . . . . . . . . . . . . . . . . . . . . . . . . . . . 9-2
Plug/Jack and Connector Locators and Maps . . . . . . . . . . . . . . . . . . . . . . . . . . . . . . . . . . . . . . . . . . . . . . . . . . . . . . . 9-3
Printer Plug/Jack/Connector Designators . . . . . . . . . . . . . . . . . . . . . . . . . . . . . . . . . . . . . . . . . . . . . . . . . . . 9-3
Map 1- LSU and Fuser. . . . . . . . . . . . . . . . . . . . . . . . . . . . . . . . . . . . . . . . . . . . . . . . . . . . . . . . . . . . . . . . . . 9-4
Map 2- Main Board . . . . . . . . . . . . . . . . . . . . . . . . . . . . . . . . . . . . . . . . . . . . . . . . . . . . . . . . . . . . . . . . . . . . 9-5
Map 3- SMPS Board . . . . . . . . . . . . . . . . . . . . . . . . . . . . . . . . . . . . . . . . . . . . . . . . . . . . . . . . . . . . . . . . . . . 9-6
Map 4 - HVPS Board . . . . . . . . . . . . . . . . . . . . . . . . . . . . . . . . . . . . . . . . . . . . . . . . . . . . . . . . . . . . . . . . . . . 9-7
Wiring Diagrams . . . . . . . . . . . . . . . . . . . . . . . . . . . . . . . . . . . . . . . . . . . . . . . . . . . . . . . . . . . . . . . . . . . . . . . . . . . . . 9-8
Notations Used in the Wiring Diagrams. . . . . . . . . . . . . . . . . . . . . . . . . . . . . . . . . . . . . . . . . . . . . . . . . . . . . 9-8
General Wiring Diagram . . . . . . . . . . . . . . . . . . . . . . . . . . . . . . . . . . . . . . . . . . . . . . . . . . . . . . . . . . . . . . . 9-12
HVPS/SMPS to Main Board Wiring Diagram . . . . . . . . . . . . . . . . . . . . . . . . . . . . . . . . . . . . . . . . . . . . . . . . 9-13
Sensor to Main Board Wiring Diagram . . . . . . . . . . . . . . . . . . . . . . . . . . . . . . . . . . . . . . . . . . . . . . . . . . . . 9-14
Main Drive/Joint Board and Optional Tray Wiring Diagram . . . . . . . . . . . . . . . . . . . . . . . . . . . . . . . . . . . . . 9-15
LSU and Main Motor to Main Board Wiring Diagram . . . . . . . . . . . . . . . . . . . . . . . . . . . . . . . . . . . . . . . . . 9-16
Controller Unit and Duplex Board to Main Board Wiring Diagram . . . . . . . . . . . . . . . . . . . . . . . . . . . . . . . . 9-17
A Reference
Acronyms and Abbreviations . . . . . . . . . . . . . . . . . . . . . . . . . . . . . . . . . . . . . . . . . . . . . . . . . . . . . . . . . . . . . . . . . . . . A-2
Index
Phaser 3600 Color Laser Printer Service Manual
5
6
Phaser 3600 Printer Service Manual
General Information
In this chapter...
■
Printer Configurations
■
Consumable and Service Part Life Expectancy
■
Parts of the Printer
■
Control Panel
■
Printer Specifications
■
Media and Tray Specifications
Chapter
1
General Information
Printer Configurations
Print Features and Configurations
Printer Configurations
Features
3600_B
3600V_B
3600_N
3600V_N
Maximum Print Speed
Letter
40 ppm
40 ppm
40 ppm
40 ppm
Memory (Optional)
Up to 512 MB Optional if
the original DIMM is
replaced with 256MB RAM
DIMM and the second slot
has a 256MB RAM DIMM
64 MB
64 MB
128 MB
128 MB
PostScript and PCL Fonts
Yes
Yes
Yes
Default Resolution
Maximum Resolution
600 x 600 dpi 600 x 600 dpi
1200 x 1200 1200 x 1200
dpi
dpi
500-Sheet Feeder (Tray 3)
Optional
Optional
Optional
Optional
Network Interface
Not Optional
Not Optional
Standard
Standard
Automatic 2-Sided Printing Optional
(Separate Duplex Unit)
Optional
Optional
Standard
USB, Parallel Interface
Yes
Yes
Yes
Yes
Printer Options and Supplies
Options and Supplies
Printer Option
Item
Part Number
Memory
64 MB additional RAM memory
128 MB additional RAM memory
256 MB additional RAM memory
097S03759
097S03760
097S03761
Optional Units
Duplex Unit
500-Sheet Feeder
097S03387
097S03385
Cartridges
Standard-Capacity Print Cartridge
(7,000 pages)
High-Capacity Print Cartridge (14,000
pages)
Extra High-Capacity Print Cartridge
(20,000 pages)
Metered/Pagepack Print cartridge
(20,000 pages)
106R01370
Xerox lubricant Plastislip grease
043E00550
Gear Lubricant
1-2
106R01371
106R01372
106R01369
Phaser 3600 Printer Service Manual
General Information
Consumable and Service Part Life Expectancy
Consumable (toner/print cartridge) usage is tracked by the CRUM and
monitored by the Main Board in order to display the near end-of-life and endof-life messages. Life ratings are based on 5% coverage and an average 4
page job length.
Consumables
Print Life
Print Cartridge
Standard Capacity 7,000 pages
High Capacity 14,000 pages
Extra High Capacity 20,000 pages
Metered/Pagepack 20,000 pages
Service Parts
Fuser Assembly
150,000 pages
Transfer Roller
150,000 pages
Feed Roller Kit
150,000 pages
Retard Roller
150,000 pages
Separator Pad
150,000 pages
Note
The service parts are not tracked with an NVRAM counter and there is no
replace or low warnings associated with these service parts.
Phaser 3600 Printer Service Manual
1-3
General Information
Parts of the Printer
Front View
Output Tray
Print Cartridge
Control Panel
Paper Output Support
Control Board
Cover
Tray 1 (MPT)
Tray 1 (MPT) Release
Tray 2
On/Off Switch
Paper Gauge
s3600-001
Rear View
Rear Door
Network Port
(optional for 3500B)
Duplex Unit
(optional)
USB Port
IEEE 1284 Parallel Port
Tray 3 Optional
Cable Connector
1-4
Power Cord Receptacle
s3600-112
Phaser 3600 Printer Service Manual
General Information
Control Panel
The Control Panel has three components:
■
Multi-colored Light Emitting Diode (LED) light
■
Alphanumeric display
■
Six-button cluster
Control Panel Buttons
Button
Function
Return
Returns to the prior higher level menu structure, if
available.
CANCEL
Terminates the current action.
MENU
Cycles through all of the top level menu items.
UP
Scrolls up one menu item within a menu list. If you
continually press this control, the menu items will ‘wrap’.
DOWN
Scrolls up one menu item within a menu list. If you
continually press this control, the menu items will ‘wrap’.
OK
Executes the highlighted menu item.
Menu Map
The Menu Map is a visual representation of the Control Panel settings and
information pages. All Menu Map settings are documented in the User Guide.
Error and Warning Messages
When there is a problem with the printer, the Control Panel LED (3) blinks red
for an error and a warning. An error or warning message is displayed in the
Alphanumeric Display (5).
Phaser 3600 Printer Service Manual
1-5
General Information
Printer Specifications
Printer Location and Clearance
Place the printer in a dust-free area where the temperature range is 50
degrees F to 89 degrees F (10 degrees C to 32 degrees C) and the relative
humidity range is between 20% to 80%.
■
Place the printer in an area where there is adequate space for ventilation,
operation, and servicing. See the clearance graphic below.
■
Do not block or cover the slots and openings on the printer. The printer
can overheat without adequate ventilation.
■
For altitudes under 2,050 meters (6,726 feet), use the Low Altitude
setting. For altitudes over 2,050 meters (6,726 feet), use the High Altitude
setting.
■
Do not place the printer near a heat source.
■
Do not place the printer in direct sunlight.
■
Do not place the printer in line with the cold air flow from an air
conditioning system.
■
Place the printer on a level, solid surface with adequate strength for the
weight of the printer.
1255.6 mm
(49.2 in.)
596 mm
(24.6 in.)
100 mm
(4 in.)
320 mm
(12.6 in.)
100 mm
(4 in.)
482.6 mm
(18.8 in.)
s3600-003
1-6
Phaser 3600 Printer Service Manual
General Information
Printer Physical Specifications
Physical Dimensions and Weight
Packaging
Dimension
(W*D*H)
Net Dimension
(W*D*H)
Item
Specification
Packing Dimension w/o
option tray
518*566*568mm
(20.4"*22.3"*22.4")
Net Dimension w/o Option
Tray
396*453*353mm
(15.6"*17.8"*13.9")
Net Dimension with Option 396*453*501mm
Tray
(15.6"*17.8"*19.7")
Toner Dimension
(W*D*H)
Toner
314 x 225 x 116 mm
Toner Packing
368 x 286 x 169 mm
Weight
SET with 10K toner
cartridge
17.30kg (38.14lb)
SET w/o toner cartridge
15.46kg (34.06lb)
Consumable toner
cartridge
10K : 1.85kg (4.08lbs) 20K :
2.06kg (4.54 lbs)
Set + Consumables
19.15 kg (42.2lb) with 10K toner
cart.
Packing Weight
22.46kg (49.50lb)
Functional Specifications
Print Operability
Phaser 3600 Printer Service Manual
Characteristic
Specification
Printing process
Non-Impact Electrophotography
Color medium
Monochrome
Resolution / Addressability
True 600 x 600 dpi
Addressable 1200 x 1200 dpi
Operating Modes
Standby Mode: Print engine capable of making
prints in less than 9 seconds.
Sleep/ Low Power/ Power Saver Mode: 31
seconds from completion of a print.
Continuous Operating Printing
Speed (ppm = pages per
minute)
Letter:
Up to 40 ppm
A4:
Up to 38 ppm
First Print-Out
(in seconds)
10 seconds or less
Warm-Up Time
Power-on Boot: 40 seconds or less
1-7
General Information
Print Quality
Property
Characteristic
Specification
Resolution
Normal
Up to 1200 x 1200 dpi effective output
Line Width @ 600dpi
Line Width @ 1200dpi
Dot Diameter @ 600dpi
Dot Diameter @ 1200dpi
RET
Yes
Halftone (Gray Scale)
256 levels
Blackness
>1.20
Homogeneity of Halftone at five points on page must be 0.1
Printable Area
Non-Printable Area
Toner Fixing
Magnification
Printing Skew
Halftone
20 % = 0.17 50 % = 0.49 80 % = 0.91
Letter
208 x 271 mm
A4
200 x 289 mm
Envelope
10mm(0.4") from edge(Top/Bottom/Left/Right)
Other Media
4mm(0.16") from edge(Top/Bottom/Left/Right)
Black (100% Solid)
80%
Halftone
70%
Horizontal (applied to
177.8mm length)
< 1.0 mm (0.04 ) ( 0.5 % )
Vertical (applied to
241.3mm length)
< 3.0 mm (0.12 ) ( 1.2 % )
Tray 1 (MPT)
< 1.5 mm (0.06 ) Simplex & Horizontal
< 2.0 mm (0.08 ) Duplex & Horizontal
< 2.0 mm (0.08 ) Simplex & Vertical
< 2.5 mm (0.10 ) Duplex & Vertical
Tray 2
< 1.5 mm (0.06 ) Simplex & Horizontal
< 2.0 mm (0.08 ) Duplex & Horizontal
< 2.0 mm (0.08 ) Simplex & Vertical
< 2.5 mm (0.10 ) Duplex & Vertical
Optional Tray 3
< 2.0 mm (0.08 ) Simplex & Horizontal
< 2.5 mm (0.1 ) Duplex & Horizontal
< 2.5 mm (0.10 ) Simplex & Vertical
< 3.0 mm (0.12 ) Duplex & Vertical
1-8
Phaser 3600 Printer Service Manual
General Information
Electrical Specifications
Power Rating and Line Voltages
Characteristic
Specification
Primary line voltages
110 - 127 V Printer - (100 - 135 V) 13 amp circuit
220 - 240 V Printer - (180 - 264 V) 7-8 amp circuit
Primary line voltage
frequency range
100 - 135 V Printer - 50/60 Hz + 3 Hz
220 - 240 V Printer - 50/60 Hz + 3 Hz
Power consumption
Printing: 550 Watts (average)
Sleep: under 10 Watts
Environmental Specification
Operating Environment
Characteristic
Specification
Optimal Temperature
10 - 30 degrees C (50-60 degrees F)
Optimal Humidity
20% - 80% Relative Humidity
Altitude
Operating
Low Altitude Setting
High Altitude Setting
Transportation
0 - 2,500 meters (8,200 ft.)
0 - 2,050 meters (6,726 ft.)
2,050 - 2,500 meters (6,726 - 8,200 ft.)
0 - 6,092 meters (20,000 ft.)
Acoustic Noise
Idle
Printing
35.0db or less
49.0db or less
Acoustic Characteristic
Printing
Measurement
Phaser 3600 Printer Service Manual
Mode
Specification
Simplex from Tray1
Less than 56.0 dBA
Simplex from MP
Less than 56.0 dBA
Simplex from SCF
Less than 59.0 dBA
Duplex from Tray1
Less than 59.0 dBA
Standby
Less than 35.0 dBA
Warm up
Less than 50.0 dBA
Maximum
Less than 60.0 dBA
1-9
General Information
Media and Tray Specifications
Media Tray Capacity
Property
Media
Specification
Input Size Max
Custom Paper (W*H)
216 x 356 mm (8.5" x 14")
Min Custom Paper
(W*H)
76 x 127 mm (3.0" x 5.0") (>105g)
Standard
500-sheet Cassette Tray/100-sheet Multi
Purpose Tray @75g
Maximum
1 to 100 sheets
Face-Down Capacity
250 sheets
Face-Up Capacity
100 sheets
Output Full sensing
Yes (Paper Outbin Full Sensor)
Output path change
Face Up/Down controlled manually by
opening rear cover
Plain Paper Capacity
100 sheets
Envelope Capacity
10 sheets
Card Stork Capacity
10 sheets
Labels Capacity
25 sheets
Transparencies
Capacity
50 sheets
Media sizes
A4/A5/A6/Letter/Legal/Oficio/Folio/
Executive/ISO B5/JIS B5/3"x5"/Monarch/
No.10/DL/C5/C6
Media type
Transparencies/Envelopes/Labels/Card
stock
Media weight
16~43lb (60 to 163g
Sensing
Paper Empty Sensor
Capacity
500 sheets
Media sizes
A4/A5/Letter/Legal/Executive/Folio/
Oficio/ISO B5/JIS B5
Media types
Plain paper
Media weight
16~28lb (60 to 105g)
Sensing
Paper Empty Sensor and Paper Size
Sensor
Input Capacity
Output Capacity
Multi-Purpose
Tray
Standard
Cassette Tray
1-10
Phaser 3600 Printer Service Manual
General Information
Media Tray Capacity
Optional Cassette Capacity
Tray
Media sizes
Duplex
500 sheets@75g
A4/A5/Letter/Legal/Executive/Folio/
Oficio/ISO B5/JIS B5
Media types
Plain paper
Media weight
16~28lb (60 to 105g/)
Sensing
Paper Empty Sensor
Supporting
Optional
Media sizes
A4/Letter/Legal/Folio/Oficio
Media types
Plain paper
Media weight
20~24lb (75 to 90g )
Media Input Size/Weight
Source
Media Types
Media Sizes
Media Weights
Tray 1
Paper, Envelope,
Paper Labels,
Transparency.
A4, Letter, Legal, Folio,
16 lb. ~ 28 lb.
Executive, ISO and JISB5, A5 (60 ~ 176 gsm)
Tray 2
Paper, Cardstock
Min: 76 mm x 127
mm
(3 in. x 5 in.)
Max: Legal
16 lb. ~ 43 lb.
A4, Letter, Legal, Folio,
Executive, ISO and JISB5, A5, (60 ~ 105 gsm)
A6, Statement Monarch, COM 65# Cover
10, C5, DL, 3” x 5”
Tray 3
Paper
16 lb. ~ 28 lb.
A4, Letter, Legal, Folio,
Executive, ISO and JISB5, A5 (60 ~ 105 gsm)
Duplex
Paper
A4, Letter, Legal, Folio
20 lb. ~ 24 lb.
(75 ~ 90 gsm)
Media Print Speed
Property
Mode
Specification
Speed
Simplex
Up to 38 ppm in A4
(40 ppm in Letter)
Duplex
26 ipm in A4 (27
ipm in Letter)
(Letter A4 Folio
Oficio Legal)
First-Page Output Time
(FPOT)
Warm Up Time
Phaser 3600 Printer Service Manual
from standby
Less than 9 sec
from sleep/power save mode
Less than 40 sec
from cold status
Less than 49 sec
from sleep/power save mode
Less than 31 sec
from cold status
Less than 40 sec
1-11
General Information
Media Print Speed
Toner save setting unit
Duplex Print
1-12
SWS
Support
PSU
Support (30%)
LUI(Local UI)
Support(UI2.0)
Simplex
Support
Manual Duplex
N/A
Duplex
Optional
Phaser 3600 Printer Service Manual
Theory of Operation
In this chapter...
■
Phaser 3600 Operational Overview
■
Printer Paper Path
■
Printer Controls
■
Sensor Functions
■
Printer Controls
Chapter
2
Theory of Operation
Phaser 3600 Operational Overview
Summary of the Printing Process
The Phaser 3600 Laser Printer is a desktop monochrome laser printer,
applying the principals of an electrophotographic system to place a
monochrome image onto the print media. The system contains a drum and
developing unit which places the toner image onto print media producing
monochrome prints through the transfer unit.
The printing process is composed of the following:
Charging: The charge roller is negatively charged at approximately -1400
VDC by the high voltage power supply (HVPS). The charge roller is kept in
contact with the drum surface to provide a uniform negative charge of
approximately -800 VDC on the drum surface as it rotates at a constant
speed.
Exposure: The Laser Scan Unit (LSU) emits laser beams in response to
image data from the Main board. The laser beams are directed onto the drum
surface through a system of mirrors and lenses. A rotating polygonal mirror
causes the laser beams to scan the drum surface from end to end (axially) as
it rotates. The beams are turned on to print a pixel and off when no printing is
required. The negative charge on the drum surface is reduced to
approximately -250 VDC at each point where the energized laser beam
strikes, to form an invisible electrostatic latent image on the drum surface.
Development: Negatively charged toner particles from the toner hopper are
applied to the supply roller and are then applied to the developer roller in a
even layer controlled by the metering blade. The developer roller turns against
the drum and the toner particles are attracted to the relatively positive latent
image. The toner forms a visible image on the drum surface.
Pre-Clean: The pre-transfer Lamp exposes the developed surface of the
drum lowering the surface potential and thereby providing enhanced transfer
efficiency.
Transfer: The finished toner image on the drum is transferred onto the print
media using the voltage supplied by the Transfer Roller. The conductive
Transfer Roller receives a high positive voltage (approximately +1000 VDC)
from the HVPS that puts it at a higher potential than the drum. Since the
Transfer Roller is located behind the print media, the toner image is attracted
to the high potential and deposits on the surface of the print media.
Fixing: The finished toner image is impermanent and easily smeared. To fix
the image, the print media goes through the Fuser where it passes between a
pressure roller and the Heat Roller. The toner is fused onto the print media by
the combination of heat and pressure.
The Heat Roller is heated by a heat element. The roller surface temperature is
detected by a Thermistor. The information is fed back to the heater control to
maintain a surface temperature of 185º C during printing and 145º C during
standby. If the thermostats detect a Fuser overheat condition, it disconnects
AC power to the Fuser.
Cleaning: After the image is transferred to the print media, a cleaning blade
inside the cartridge removes any remaining toner particles from the drum.
2-2
Phaser 3600 Printer Service Manual
Theory of Operation
Print Cartridge and Print Modes
Print Cartridge
The Print Cartridge receives image data in the form of pulsed laser light from
the Laser Scan Unit (LSU) and creates the image via the xerographic
process. The Print Cartridge contains the following components:
■
Charge Roller
■
Drum
■
Developer Roller (D/R)
■
Supply Roller (S/R)
■
Metering Blade
■
Cleaning Blade
Cleaning Roller LSU
0.20 mW
-400 ~ -500±20V Doctor Blade
-1.5 ~ -1.30KV
V0: -680V
VL: -620V
-500 ~
-600±20V
Charging Roller
Cleaning Blade
OPC Drum
Developing
Roller
Supply Roller
PTL
Max. +4.2kV
Zener Diode
-100V
Transfer Roller
s3600-004
Print Modes
The Phaser 3600 Laser Printer provides two print modes:
1. Draft mode: Uses a combination of reduced toner output and the lowest
resolution (300 x 300 dpi) to extend print cartridge life.
2. Enhanced mode: Used for printing on plain paper with an addressable
resolution of 1200 x 1200 dpi.
Phaser 3600 Printer Service Manual
2-3
Theory of Operation
Printer Paper Path
Paper Path Components
The diagram below shows the paper path and identifies the major
components of the printer. The simplex paper path is shown in red and the
duplex path is shown in light red.
Imaging Drum (OPC)
Registration Sensor
Idler
Exit Roller
Heat Roller
Exit/Duplex Roller
Tray 1 Pick Roller
Idler
Tray 1
No Paper
Sensor
Feed 2 Idler
Feed 2 Roller
Fuser Exit Roller
Fuser Exit Sensor
Pressure Roller
Registration Roller
Transfer
Roller
Retard Roller
Feed 1 Roller
Duplex
Rollers
Duplex Sensor
Tray 2
Pick Roller
Retard Roller
Tray 3 No Paper Sensor
Tray 3 Feed Roller
Tray 3 Pick Roller
Tray 2 No Paper Sensor
s3600-085
Media that meets printer specifications can be fed from Tray1 (MPT) and Tray
2, or the Optional Tray 3. If you use thick paper with a weight of more than 105
gsm (60 lbs), you must insert the paper into Tray 1 (MPT) and select the paper
type. Paper will exit the printer to the face down top tray. A door at the rear of
the printer provides access for jam clearance.
All major components of the printer are explained in greater detail under
Printer Controls on page 2-10.
2-4
Phaser 3600 Printer Service Manual
Theory of Operation
Duplex Paper Path
When 2-sided printing is selected, side two is printed first, the image being
printed is the first image. After the first image prints, the paper is reversed and
is fed through the duplexer and back up to the feed roller with side one
positioned for printing with the second image.
Paper Feed Sequence
When the Main Board is ready to feed paper, it energizes the paper feed
solenoid. The solenoid armature releases the clutch and the Pick-Up Roller
makes one revolution. This drives the paper to the Feed Roller and the Retard
Roller. The Feed Roller and Retard Roller drive the paper to the Registration
Assembly, which in turn drives the paper towards the transfer area. Before
arriving at the transfer area, the paper actuates the Feed Sensor.
Paper Transport
The Registration Assembly continues to drive the paper into the transfer area,
where the image is transferred from the drum to the paper.
After the image transfers, the paper continues to the Fuser Assembly for the
fusing the process. In the Fuser Assembly, the Heat Roller is heated by a heat
element and the paper passes in between the Heat Roller and the pressure
roller, where toner melts onto the paper to form a permanent image. The
temperature of the heat roller is monitored by a Thermistor that sends signals
to the Main Board.
The Fuser Assembly drives the paper into the Exit Rollers, which drive the
paper into the output tray. When printing the first side of a duplex print job, the
drive direction is reversed when the Exit Sensor is actuated. Paper is then
directed into the Duplex Unit for printing on the second side.
Paper Feed Drive
The drive for all rollers is provided by the Main Drive Motor and a series of
drive gears. The Main Motor is used for paper feed, fusing, and the duplex/exit
roller reversal for 2-sided printing. When the main motor turns, all the paper
path components also turn except the Pick-Up Roller. The Pick-Up Roller
assembly moves the paper along the path with the Feed Solenoid. There is a
separate Developer Motor for the Print Cartridge.
Phaser 3600 Printer Service Manual
2-5
Theory of Operation
Print Engine Assemblies
The print engine assemblies include the following:
■
Image Processing and the Main Board
■
Laser Scan Unit
■
Main Drive Assembly
■
Feed assembly Process and Components
■
Transfer Roller Assembly
■
Fuser Assembly
Image Processing Assembly and Main Board
The Main Board receives image data from the host computer, converts it to a
bitmap image, and then transfers the image to the Laser Scan Unit (LSU).
The Main Board combines the Image Processor and Engine Control
functions. It contains a 32 bit RISC processor and comes with a standard
memory capacity of 64 Mbytes of RAM and 4 Mbytes of flash memory. The
board provides one expansion slot that allows available memory to be
expanded up to 512 Mbytes with two 256Mbyte RAM DIMM.
Control Panel (CN16)
Toner Sensor Board (CN6)
Cover Open (CN26)
Duplex Solenoid (CN11)
Laser Unit (CN9)
Developer
Thermistor (CN8)
Rear Fan (CN4)
Motor (CN20)
PTL (CN21)
LVPS (CN19)
Ethernet (CN1)
Power (CN22)
USB (CN2)
Duplex (CN17)
Main Motor
(CN18)
Exit Sensor
(CN23)
Joint Board
(CN24)
Optional
3rd Tray
(CN25)
RAM DIMM 1 (CN14)
RAM DIMM 0 (CN12)
2-6
Parallel Port
(CN3)
s3600-077
Phaser 3600 Printer Service Manual
Theory of Operation
Laser Scan Unit (LSU)
The Laser Scan Unit (LSU) is the core element of the image production
process. The LSU receives video data from the controller on the Main Board
and converts the data to an electrostatic latent image on the OPC (Organic
Photo Conductor) drum. The laser beam exposes the OPC drum under
direction of the controller. The controller also turns the drum synchronously
with a polygon mirror within the LSU. The OPC drum also turns in relation to
the speed of the paper feed process. An /HSYNC signal is created when the
laser beam from LSU reaches the end of a polygon mirror, and the signal is
sent to the controller.
The controller detects the /HSYNC signal to adjust the vertical line of the
image on paper. That is, after the controller detects the /HSYNC signal, the
image data is sent to the LSU to adjust the left margin of the media.
Motor Drive Assemblies
The Motor Drive Assemblies include the Main Motor and the Developing
Motor. Under control of the Main Board, the Main Motor Drive is a power
delivery unit. Through a series of gears, it supplies the power to the paper
feed components, the fusing unit, and the distributing unit. For the duplex
process, the Main Motor energizes a solenoid to change paper direction.
By gearing, the main motor drives the rollers such as Feed Roller, developing
roller, fuser roller, and Exit Roller. In addition, a step motor controls the
acceleration of the drive gearing.
The Developing motor also drives gears that, in turn, drive components used
in the image development process.
Feed Assembly Process and Components
The Feed assembly process and components consists of:
1. Separation process
Separates the paper from the friction pad mounted to the center of the
cassette and applies a Retard Roller which uses a spring clutch. A
separate Feed Roller then uses an electronic clutch to control driving
power.
2. Center Loading Process
A center loading method applies 'friction pad separation’, which means
that a software process first detects paper (even though there is a paper
sensor). After the initial detection, the Paper Size Sensor determines
paper size (see “Paper Size Sensor” on page 2-16).
Both the side guide and the rear guide can be adjusted for various types
of papers from A5 to legal size paper. The process also includes a paper
arranging function and a display function displays the amount of paper
remaining. In the front side of the tray, there is a paper level indicator.
3. Paper Pick-up Process
Functions include a paper pickup function, paper feeding function, and the
removal of electronic static.
Phaser 3600 Printer Service Manual
2-7
Theory of Operation
4. Miscellaneous Paper Functions
A paper arrangement function uses a stopper roller and a weight without
an electric actuator. It also includes an additional paper separating
function, a driving control function, and a multi feeding prevention
function. The Feed Roller transfers paper along the paper path and is also
part of jam detection.
Transfer Roller Assembly
The transfer subsystem consists of the Pre-transfer Lamp (PTL) and the
Transfer Roller. The PTL exposes the drum surface after the latent image has
been developed to lower surface potential of the drum. This provides
enhanced transfer efficiency.
The Transfer Roller provides a high positive potential on the back of the print
media. This potential attracts the negatively charged toner image from the
drum and deposits it on the surface of the print media.
The transfer voltage is controlled by PWM (Pulse Width Modulation). When
the paper enters the Transfer Roller, the resistance value of the Transfer
Roller will change due to the surrounding temperature of the printer. If the
temperature changes, a new voltage level is created through an AD converter.
Fuser Assembly
The Fuser Assembly contains the entire Fuser Subsystem and is a field
replaceable unit. The Fuser Assembly contains the following components:
2-8
■
Heat Element and Heat Roller:Two quartz lamps operate as the heating
elements, which generate the heat inside the Heat Roller. The Heat Roller
melts the toner so it adheres to the paper.
■
Pressure Roller: Provides pressure on the opposite side of the print
media so the Heat Roller can embed the melted toner in the media.
■
Thermistor: Monitors the surface temperature of the Heat Roller. This
information is used to control the heat lamp and thus keep the Heat Roller
at the correct temperature.
■
Thermostat: Prevents overheat damage when unexpected system faults
occur.
Phaser 3600 Printer Service Manual
Theory of Operation
Duplex and Tray Assemblies
Duplex Assembly
The Optional Duplex Assembly automatically prints on both sides of a sheet of
paper. With the Duplex Assembly, the printer can print A4-sized paper up to
26 inches per minute (IPM) and letter-sized paper up to 27 IPM. The duplexer
also supports the Oficio and Folio paper sizes.
The components of the Duplex unit include a paper transfer function, paper
guide function, jam removing function, paper sensing function, and main
board supporting function.
You can remove a jam at the front of the assembly by merely opening up the
cassette and paper guide. To remove a jam in a rear part of the assembly,
merely open the rear cover.
Tray 2 and Optional Tray 3 Assemblies
You can increase the paper handling capacity of the printer by installing Tray 2
or an optional Tray 3. Each tray holds 500 sheets of paper (Cassette is same
size as the Tray1 (MPT). Each tray includes a separate driving mechanism
with the following features:
Phaser 3600 Printer Service Manual
■
Feeding Method : Cassette Type
■
Feeding Standard : Center Loading
■
Feeding Capacity : Cassette 500 Sheets(75g/ , 20lb Paper Standard)
■
Paper Detecting Sensor : Photo Sensor
■
Paper Size Sensor : Yes
2-9
Theory of Operation
Printer Controls
Paper Size Control
The paper size selection for Tray 2 and Tray 3 is set by moving the paper
guide in the tray. This in turn sets the plastic “fingers” on the side of the paper
tray to a specific postion.The position of the “fingers” activates the correct
combination of the three paper size switches, located in each paper tray slot,
for the selected paper size. Additionally, the back of the tray must be pulled
down in order to select the two largest sizes; US Folio and Legal. Not all sizes
can be used in both trays. See “Media and Tray Specifications” on page 10 for
a complete listing of the media types for each tray. Additional media types can
be used in Tray 1 (MPT). After inserting the media in Tray 1, use the Control
Panel controls to select the media type.
Paper Size Switch
Paper Size
SW1
SW2
SW3
LEGAL 14"
ON
ON
OFF
US FOLIO (LEGAL 13”)
OFF
OFF
OFF
A4
OFF
ON
ON
LETTER
ON
OFF
OFF
EXECUTIVE
OFF
ON
OFF
B5
ON
OFF
OFF
B5, JIS-B5
OFF
OFF
ON
A5
ON
ON
ON
No Tray
OFF
OFF
OFF
Automatic Paper Pick Control
The default paper pick selection at power ON is Tray 2, Auto-Select ON is also
default. If the default tray is empty, the printer will automatically switch to any
other tray that contains paper unless Auto-Select is set to OFF.
2-10
Phaser 3600 Printer Service Manual
Theory of Operation
Laser Scan Unit (LSU) Control
The Laser Scan Unit receives the bit-mapped image data from the Main
Board and uses that information to turn the laser beam on and off as required
to correctly expose the drum. Image data transfer from the Main Board is
controlled by a synchronization signal from the LSU so the vertical scanning
line is synchronized with the printed page. The LSU contains the following
components:
■
Laser Diodes: Generates the laser beams.
■
Rotating Polygon Mirror: Scans the laser beam across the drum, axially.
■
Beam Detector: Synchronizes the left margin.
■
Optical Lens System: Focuses the laser beam onto the surface of the
drum.
■
Mirrors: Reflect the laser beam onto the surface of the drum.
Laser Light Intensity Control
Image data is transmitted to the laser diode in the Laser Scan Unit as digital
signals. The laser diode converts the image data from digital signals to optical
signals; data expressed by blinking laser beams. The Laser Scan Unit
monitors the output to determine if variations in the light intensity from the
laser beam, variations in the optical system (such as mirrors and lenses), or
variations in drum sensitivity are preventing the system from obtaining a
proper electrostatic image and, if necessary, adjusts the light intensity to
attain a stable electrostatic image.
Error
Description
Error Message
Polygon Motor
Error
The polygon motor speed cannot
obtain a steady state.
Laser Failure
Hsync Error
The polygon motor speed is steady,
Laser Failure
but the Hsync signal is not generated.
Toner Control
Print Cartridge installation and Toner Level are detected by the Print Cartridge
Interconnect Board and the associated signals are supplied to the Main
Board. The CRUM not only detects cartridge presence, it also determines
whether it is a genuine Xerox cartridge. When the toner remaining falls to
15%, the printer displays a low toner message on the Control Panel display.
Phaser 3600 Printer Service Manual
2-11
Theory of Operation
Fuser Temperature Control
During Fuser temperature control the printer’s target temperature is set. The
Heat Roller surface temperature is controlled to match the target temperature
by turning the heat element ON/OFF. The Heat Roller surface temperature is
detected by a Thermistor. If the Thermistor shows that the temperature is
higher than the target, the heat element is turned OFF. If the detection result
is low, the heater lamp is turned ON. The fuser control circuit keeps the Fuser
temperature at 185º C during printing and at 145º C during standby.
2-12
■
When the power voltage for the printer is too high or too low, the Fuser is
stopped to protect the Fuser.
■
When the AC voltage is not applied to the Fuser control circuit, the fuser
will not work and a Fuser Low Heat Error will occur.
■
When the temperature of the Fuser is too high, an “Engine Overheat”
error occurs if the cooling operation is insufficient
Error
Description
Error Message
Open Heat Error
When warming up, the Fuser has been
lower than 60 degrees C for over 35
seconds.
Fuser Failure
Low Heat Error
Stand-by:
Engine Low Heat Error
■ Lower than 130 degrees C for over
10 seconds.
■ Printing:
■ Up to 2 consecutive pages: Lower
than 155 degrees C for over 7 seconds.
■ From 3 consecutive pages: Lower
than 25 degrees C than the fixed fusing
temperature over 7 seconds.
Over Heat Error
Temperature is higher than 230 degrees Engine Over Heat
C over 10 seconds.
Error
Phaser 3600 Printer Service Manual
Theory of Operation
Sensor Functions
Sensor Types
The types of sensors used vary with function. In general, there are three types
in use:
Photo Sensors
Two types of photo sensors are used, photo-reflective and photo-receptive.
Photo-reflective sensors use light reflected back from an object to detect its
presence. Photo-receptive sensors use an actuator or the object itself to block
the light path to detect an object or condition.
Photo-reflective sensors have the light emitter and light receiver aligned on a
single surface. Output of the photo-receptor is High (> +4.5 V) when light is
being reflected back and Low (< +.3 V) when it isn’t.
Photo-receptive sensors consist of a LED in one arm of a U-shaped holder,
and a photo-transistor in the other arm. When the sensing area is vacant,
nothing is between the arms of the sensor, light falls on the photo-receptor
sending the signal High. If the light is interrupted, the photo-transistor goes
Low.
Actuator
s3600-133
Phaser 3600 Printer Service Manual
2-13
Theory of Operation
Microswitches
Microswitches are used primarily as paper size sensors and cover interlocks.
They are in a normally open state, and close when actuated. A bank of
microswitches is used to detect paper size in the universal trays.
Microswitches also employ hooks or catches for retention in the bracket or
frame.
Actuator
Button
Contact
Blade
s3600-134
Thermistors
Thermistors have a known value of resistance whose value varies with
temperature. Used primarily in the Fuser for temperature sensing.
2-14
Phaser 3600 Printer Service Manual
Theory of Operation
Sensors in the Paper Path
The following illustration shows the general physical location of the specified
sensor. Not all the sensors in the illustration have replaceable part numbers.
The text topics following the illustration describe those sensors that have
associated part numbers.
Sub Toner Low Board
and Sensor
Fuser Interlock Switch
Output Tray Full Sensor
Fuser Exit Sensor
Cover Open
Interlock Switch
Paper Size Sensor
Duplex Sensor
Paper Tray
Empty Sensor
Tray 1(MPT)
Feed Sensor
Tray 2 Paper
Empty Sensor
Tray 3 Paper
Empty Sensor
Tray 1(MPT)
Paper Empty
Sensor
Tray 2 Feed
Sensor
Tray 3 Feed
Sensor
s3600-086
Paper Tray Empty Sensor
Media supply is monitored by the Paper Tray Empty Sensor. When any paper
tray runs out of paper, the sensor will send a signal to the Main Board, the
control panel LED will blink red, and the message will display on the control
panel identifying which tray “No Paper in Tray {2|3}” is empty.
Tray 1 (MPT) Paper Empty Sensor
The Tray 1 (MPT) paper empty sensors monitors paper from Tray 1. If Tray 1 is
selected and no paper is available, a message appears on the control panel. If
there is no paper in Tray 2 or Tray 3 and the printer is in auto-select mode, the
printer will look for paper in all the trays and report “No Paper in Tray 1”.
Tray 1 (MPT) Feed Sensor
The Tray 1 (MPT) Feed Sensor has two purposes. First, it monitors paper
movement. If the paper takes too long getting to the sensor, or it stays at the
sensor location too long, the Main Board will shut down the machine, the
control panel LED will blink red, and a “Jam” error message will display on the
control panel.
Phaser 3600 Printer Service Manual
2-15
Theory of Operation
Secondly, the signal generated by the sensor tells the Main Board that the
paper is almost at the transfer area and it is time to start the xerographic
process. It is important that the leading edge of the paper enters the transfer
area at the same time as the leading edge of the developed image on the
drum.
Paper Size Sensor
The Paper Size Sensor detects the presence of paper and monitors a paper
size plate consisting of three sensitive metal tabs in the paper path.
Depending on the size of the paper, one or more of these tabs will send a
signal to the Main Board with the information needed to determine the paper
size. For information regarding the paper size combinations, see “Paper Size
Control” on page 2-10.
Outbin Tray Full Sensor
The Outbin Tray Full Sensor detects when the output bin is full and can no
longer accept more paper from the exit section of the paper path. When the
Main Board detects this sensor, it sends an “Output Bin Full” message to the
control panel.
Fuser Exit Sensor
The Fuser Exit Sensor monitors paper exit and detects the “Jam at Exit” error
if the paper takes too long getting to the sensor, or it stays at the sensor too
long. At this point the Main Board will shut down the printer, the Control Panel
LED will blink red, and a “Jam at Exit” error message will display on the
Control Panel. The signal from the Fuser Exit Sensor is also used to control
paper feed to the Duplex Unit for duplex print jobs.
Cover Open Interlock Switch
The Cover Open Interlock Switch detects whether the top cover is open or
closed. When the top cover is open the “Close Top Cover” message displays
on the Control Panel.
Duplex Sensor
The Duplex Unit slides into the rear of the printer above Tray 2. The Main
Board senses the presence of the Duplex Unit and paper in the Duplex unit
through the Duplex connector. As paper leaves the Fuser Assembly and is
picked up by the Exit Rollers, the drive direction is reversed to send the paper
into the Duplex Unit. As the paper leaves the Duplex Unit, it activates the
Duplex Sensor within the unit. This activates the Feed Roller to position the
paper for printing on the second side of the paper.
2-16
Phaser 3600 Printer Service Manual
Theory of Operation
Power Supplies
High Voltage Power Supply (HVPS)
The HVPS section generates and supplies the following voltages:
■
Transfer Voltage
■
Charge Voltage
■
Bias Voltage
■
Supply Voltage
The Bias, Supply, and Charge voltages are used by the Print Cartridge.
The power distribution section receives AC voltage and creates the required
DC outputs (3.3 VDC, 5 VDC, and 24 VDC) to power the printer components.
It also supplies AC voltage to the Fuser Assembly.
CON02
CON01
CON03
CON06
CON05
Phaser 3600 Printer Service Manual
CON04
s3600-078
2-17
Theory of Operation
Switching Mode Power Supply (SMPS)
The SMPS is mounted on the bottom of the printer and is the main power
source of the entire system. It converts the AC input line into two main output
channels: 3.3. volts DC and 24 Volts DC. The SMPS then provides these
output channels to various components throughout the system in a switching
mode as instructed by the Main Board.
The SMPS also drives the AC heater unit, which supplies controlled current
levels to the Fuser assembly as an independent module.
FUSER
MHV
OPC
THV
CN1
DEVE
SUPPLY
CN2
CN4
CN3
s3600-079
2-18
Phaser 3600 Printer Service Manual
Error Messages
In this chapter...
■
Troubleshooting Overview
■
Service Diagnostics
■
Service Diagnostics Menu Map
■
Troubleshooting Error Messages
Chapter
3
Error Messages
Troubleshooting Overview
This section covers troubleshooting procedures for the Phaser 3600 Laser
Printer. When an error first occurs, record the error message and code and
then cycle power to the printer to see if the error recurs.
To troubleshoot image-quality problems, see “Image-Quality Troubleshooting”
on page 5-9.
Using the Troubleshooting Procedures
1. Each Step in a Troubleshooting Procedure instructs you to perform a
certain action or procedure. The steps are to be followed sequentially until
the problem is fixed or resolved.
2. The Actions and Questions box contains additional information and/or
additional procedures you must follow to isolate the problem.
3. When a procedure instructs you to test a component using service
diagnostics, see the “Service Diagnostics Menu Map” on page 3-3 for the
detailed steps and functions for testing parts of the printer.
4. The action is followed by a question. If your response to the question is
“Yes”, then follow the instructions for a “Yes” reply. If your response to the
question is “No”, then follow the instructions for a “No” reply.
5. Troubleshooting Procedures may ask you to take voltage readings or test
for continuity at certain test points within the printer. For detailed
diagrams, see “Plug/Jack and Connector Locators and Maps” on
page 9-3 for complete information on test point locations and signal
names.
6. Troubleshooting Procedures often ask you to replace a printer
component, see “Service Parts Disassembly” on page 7-1 for detailed
steps in removing and replacing all major components of the printer. The
“Parts List” on page 8-1 details the location, quantity, and part number for
all spared printer components.
3-2
Phaser 3600 Printer Service Manual
Error Messages
Service Diagnostics
The printer has built-in diagnostics to aid in troubleshooting problems. The
Service Diagnostics Menu provides a means to test sensors, motors,
switches, clutches, fans and solenoids. Diagnostics also contain built-in test
prints, cleaning procedures, printer status and some NVRAM access.
Service diagnostics are to be executed through the control panel by a certified
service technician only.
Service Diagnostics Menu Map
Entering Service Diagnostics
1
2
s3600-113
1. Turn the printer power OFF.
2. While holding down the ‘OK’ button (1), turn the printer back ON (2).
Note
Refer to the “Diagnostic Test Menu Map” on page 3-5 to see the
description of all component tests.
Phaser 3600 Printer Service Manual
3-3
Error Messages
Service Diagnostic Control Panel Button Descriptions
5
1
2
1. Cancel Button
2. Return Button
3. On-line/Data/Error LED
4. Menu Button
5. Status/Error Messages
and Menus
6. Up Arrow Button
7. OK Button
8. Down Arrow Button
6
3
7
4
8
s3600-002
The alphanumeric display provides status messages and control panel
menus.
Diagnostic Control Panel Buttons
3-4
Button
Function
BACK
Returns to the prior higher level menu structure, if
available.
Stops the actively running test.
CANCEL
Terminates the current test.
MENU
Cycles through all of the top level menu items.
UP
Scrolls up one menu item within a menu list. This control
does not ‘wrap’.
Used to increment values in tests requiring user input.
DOWN
Scrolls up one menu item within a menu list. This control
does not ‘wrap’.
Used to increment values in tests requiring user input.
OK
Enters the highlighted menu. Executes the current test
item.
Used to select the value entered by the user.
Phaser 3600 Printer Service Manual
Error Messages
Diagnostic Test Menu Map
Note
For definitions of Acronyms and Abbreviations listed in the Diagnostic
Menu Map below, refer to the Appendix (page A-2).
Diagnostic Menu Map Options
Main Menu
Sub Menu
Cover Status Top Cover
(Test 0)
Phaser 3600 Printer Service Manual
Description/Function
Control Panel
Display
If the cover is opened, "Open"
message will be displayed and if
not, "Closed" displayed.
Top Cover
[Closed]/[Open]
Tray 1
If the Tray is opened, "Open"
Cassette
message will be displayed and if
*(T1 thru T3 not, "Closed" displayed
refer to Tray
1 thru Tray3
respectfully.
T4 is not
supported
Tray 1 Cassette
Tray 2
Cassette
If the Tray is opened, "Open"
message will be displayed and if
not, "Closed" displayed
Tray 2 Cassette
Tray 3
Cassette
If the Tray is opened, "Open"
message will be displayed and if
not, "Closed" displayed
Tray 3 Cassette
Fuser Door
If the Door is opened, "Open"
message will be displayed and if
not, "Closed" displayed.
Fuser Door
[Closed] [Open]
3-5
Error Messages
Diagnostic Menu Map Options
3-6
Main Menu
Sub Menu
Description/Function
Control Panel
Display
Sensor
Status
(Test 1)
Registration
Sensor
The first value lists normal display
before touching the sensor, and the
second value lists normal display
after touching the sensor.
Registration
Sensor
[Without Paper]
[With Paper]
T1Feed
Sensor
The first value lists normal display
before touching the sensor, and the
second value lists normal display
after touching the sensor.
T1 Feed Sensor
[Without Paper]
[With Paper]
T2 Feed
Sensor
The first value lists normal display
before touching the sensor, and the
second value lists normal display
after touching the sensor.
T2 Feed Sensor
[Without Paper]
[With Paper]
T3 Feed
Sensor
The first value lists normal display
before touching the sensor, and the
second value lists normal display
after touching the sensor.
T3 Feed Sensor
[Without Paper]
[With Paper]
T4 Feed
Sensor
The first value lists normal display
before touching the sensor, and the
second value lists normal display
after touching the sensor.
T4 Feed Sensor
[Without Paper]
[With Paper]
Exit Sensor
The first value lists normal display
before touching the sensor, and the
second value lists normal display
after touching the sensor.
Exit Sensor
[Without Paper]
[With Paper]
DJam 1
Sensor
The first value lists normal display
before touching the sensor, and the
second value lists normal display
after touching the sensor.
DJam1 Sensor
[Without Paper]
[With Paper]
Phaser 3600 Printer Service Manual
Error Messages
Diagnostic Menu Map Options
Main Menu
Phaser 3600 Printer Service Manual
Sub Menu
Description/Function
Control Panel
Display
Sensor
Outbin
Status (cont) Sensor
The first value lists normal display
before touching the sensor, and the
second value lists normal display
after touching the sensor.
Outbin Sensor
[Normal] [Full]
Bypass
Empty
The first value lists normal display
before touching the sensor, and the
second value lists normal display
after touching the sensor.
Bypass Empty
[Empty][Present]
T1 Paper
Empty
The first value lists normal display
before touching the sensor, and the
second value lists normal display
after touching the sensor.
T1 Paper Empty
[Empty][Present]
T2 Paper
Empty
The first value lists normal display
before touching the sensor, and the
second value lists normal display
after touching the sensor.
T2 Paper Empty
[Empty][Present]
T3 Paper
Empty
The first value lists normal display
before touching the sensor, and the
second value lists normal display
after touching the sensor.
T3 Paper Empty
[Empty][Present]
T4 Paper
Empty
The first value lists normal display
before touching the sensor, and the
second value lists normal display
after touching the sensor.
T4 Paper Empty
[Empty][Present]
T1 PSize0
Sensor
The first value lists normal display
before touching the sensor, and the
second value lists normal display
after touching the sensor.
T1 Psize0 Sen
[Low] [High]
T1 PSize1
Sensor
The first value lists normal display
before touching the sensor, and the
second value lists normal display
after touching the sensor.
T1 Psize1 Sen
[Low] [High]
T1 PSize2
Sensor
The first value lists normal display
before touching the sensor, and the
second value lists normal display
after touching the sensor.
T1 Psize2 Sen
[Low] [High]
T2 PSize0
Sensor
The first value lists normal display
before touching the sensor, and the
second value lists normal display
after touching the sensor.
T2 Psize0 Sen
[Low] [High]
T2 PSize1
Sensor
The first value lists normal display
before touching the sensor, and the
second value lists normal display
after touching the sensor.
T2 Psize1 Sen
[Low] [High]
3-7
Error Messages
Diagnostic Menu Map Options
Main Menu
Description/Function
Control Panel
Display
Sensor
T2 PSize2
Status (cont) Sensor
The first value lists normal display
before touching the sensor, and the
second value lists normal display
after touching the sensor.
T2 Psize2 Sen
[Low] [High]
T3 PSize0
Sensor
The first value lists normal display
before touching the sensor, and the
second value lists normal display
after touching the sensor.
T3 Psize0 Sen
[Low] [High]
T3 PSize1
Sensor
The first value lists normal display
before touching the sensor, and the
second value lists normal display
after touching the sensor.
T3 Psize1 Sen
[Low] [High]
T3 PSize2
Sensor
The first value lists normal display
before touching the sensor, and the
second value lists normal display
after touching the sensor.
T3 Psize2 Sen
[Low] [High]
T4 PSize0
Sensor
The first value lists normal display
before touching the sensor, and the
second value lists normal display
after touching the sensor.
T4 Psize0 Sen
[Low] [High]
T4 PSize1
Sensor
The first value lists normal display
before touching the sensor, and the
second value lists normal display
after touching the sensor.
T4 Psize1 Sen
[Low] [High]
T4 PSize2
Sensor
The first value lists normal display
before touching the sensor, and the
second value lists normal display
after touching the sensor.
T4 Psize2 Sen
[Low] [High]
DPX Detect
Sensor
The first value lists normal display
before touching the sensor, and the
second value lists normal display
after touching the sensor.
DPX Detect Sen
[Low] [High]
Main Mtr
Fwd
The motor will run on the forward
direction or stop.
Main Mtr Fwd
[On] [Off]
Main Mtr
Slow
The motor will run on the forward
direction in half speed mode.
Main Mtr Slow
[On] [Off]
Motors
(Test 2)
3-8
Sub Menu
Dev Mtr Nor The motor will run on the forward
direction in normal speed.
Dev Mtr Nor
[On] [Off]
Dev Mtr
Slow
The motor will run on the forward
direction in half speed.
Dev Mtr Slow
[On] [Off]
Duplex Mtr
Fwd
The motor will run on the forward
direction.
Duplex Mtr Fwd
[On] [Off]
T2 Feed
Motor
The motor will run on the forward
direction or stop.
T2 Feed Motor
[On] [Off]
Phaser 3600 Printer Service Manual
Error Messages
Diagnostic Menu Map Options
Main Menu
Sub Menu
Description/Function
Control Panel
Display
Motors
(Cont.)
T3 Feed
Motor
The motor will run on the forward
direction or stop.
T3 Feed Motor
[On] [Off]
T4 Feed
Motor
The motor will run on the forward
direction or stop.
T4 Feed Motor
[On] [Off]
Fuser Fan
The fan will run or stop.
Fuser Fan
[On] [Off]
Fuser Fan
Rdy
Check whether the fan is in the
locked state.
Fuser Fan Rdy
[Ready]
[Not Ready]
SMPS Fan
The fan will run or stop.
SMPS Fan
[On] [Off]
SMPS Fan
Rdy
Check whether the fan is in the
locked state.
SMPS Fan Rdy
[Ready]
[Not Ready]
Duplex Fan
The fan will run or stop.
Duplex Fan
[On] [Off]
T1 P-up
Clutch
The clutch will run or stop.
T1 P-up Clutch
[On] [Off]
T2 P-up
Clutch
The clutch will run or stop.
T2 P-up Clutch
[On] [Off]
T3 P-up
Clutch
The clutch will run or stop.
T3 P-up Clutch
[On] [Off]
T4 P-up
Clutch
The clutch will run or stop.
T4 P-up Clutch
[On] [Off]
Bypass
Clutch
The clutch will run or stop.
Bypass Clutch
[On] [Off]
Duplex Sol.
The solenoid will run or stop.
Duplex Sol.
[On] [Off]
Fuser Bias
The bias will have the previously
saved value.
Fuser Bias
[On] [Off]
Temp
Control
The fuser unit will control the power
for fixing and displaying the current
temperature on the panel. The target
temperature is 160 degrees.
Temp Control
[On] [Off] [xxx]
Fuser Temp
The Control Panel displays a digital Fuser Temp
equivalent [xxx] of the analog value. [xxx]
Inner Temp
The Control Panel displays a digital Inner Temp
equivalent [xxx] of the analog value. [xxx]
Fans
(Test 3)
Clutches/
Solenoids
(Test 4)
Fuser Ctrl
(Test 5)
Phaser 3600 Printer Service Manual
3-9
Error Messages
Diagnostic Menu Map Options
Main Menu
Sub Menu
Description/Function
Control Panel
Display
LSU Ctrl
(Test 6)
LD Power1
The display shows the previously
saved value.
LD Power1
[On] [Off]
LD Power2
The display shows the previously
saved value.
LD Power2
[On] [Off]
Laser Motor
The motor will run or stop.
Laser Motor
[On] [Off]
Dev Control
(Test 7)
Laser Ready When the LSU is ready to print
(laser diode ON with a stable motor
speed), the message, “Normal”
displays.
Laser Ready
[Normal] [Fault]
THV Plus
Bias
The panel displays the previously
saved bias value.
THV Plus Bias
[On] [Off]
THV Minus
Bias
The panel displays the previously
saved bias value.
THV Minus Bias
[On] [Off]
DEV Bias
The panel displays the previously
saved bias value.
DEV Bias
[On] [Off]
DEV AC Bias The panel displays the previously
saved bias value.
DEV AC Bias
[On] [Off]
DEV Vpp
Bias
The panel displays the previously
saved bias value.
DEV Vpp Bias
[On] [Off]
MHV Bias
The panel displays the previously
saved bias value.
MHV Bias
[On] [Off]
PTL
The Pre-transfer Lamp will be
either on or off.
PTL
[On] [Off]
Erase Lamp
The lamp will be either on or off.
Erase Lamp
[On] [Off]
TR Cur Read The Control Panel displays a digital TR Cur Read
equivalent [xxx] of the analog value. [xxx]
CR Cur
Read
Test Print
(Test 8)
Pattern Print The printer prints a pattern test page
into Tray (MPT).
Print
[On] [Off]
T2 Version
Displays Tray 2 version
2.00
T3 Version
Displays Tray 3 version
1.00
T4 Version
N/A
N/A
DPX Version
3-10
The Control Panel displays a digital CR Cur Read
equivalent [xxx] of the analog value. [xxx]
1.03
Phaser 3600 Printer Service Manual
Error Messages
Troubleshooting Error Messages
The following list summarizes the Phaser 3600 error messages:
Jam At Tray [1|2|3] (JAM 0)
The leading edge of the paper doesn’t pass the Feed Sensor, or the sensor
does not turn ON.
■
After paper pick, paper is not fed.
■
After paper pick, paper enters the printer but does not reach the Feed
Sensor in the specified time.
■
After paper pick, the feed sensor turns ON and tries to pick again but the
paper does not reach the Feed Sensor in the specified time.
Jam At Top (JAM 1)
The paper jams between the Feed Sensor and the Exit Sensor. The Jams
occur when:
■
The leading edge of the paper passes the Feed Sensor but the trailing
edge does not pass through the Feed Sensor in the specified time. (The
Feed Sensor cannot be OFF).
■
The leading edge of the paper passes the Feed Sensor, but the paper
cannot reach the Exit Sensor in the specified time. (The Exit Sensor
cannot be ON).
Jam At Exit (JAM 2)
The trailing edge of the paper passes the Feed Sensor, but the paper does
not pass the Exit Sensor in the specified time.
Jam at Rear (Duplex JAM 1)
The trailing edge of the paper passes the Exit Sensor, but does not reach the
Duplex Sensor in the specified amount of time.
Jam at Duplex (Duplex JAM 2)
The leading edge of the paper passes the Duplex Sensor, but the leading
edge of the paper does not reach the Feed Sensor in the specified time.
Phaser 3600 Printer Service Manual
3-11
Error Messages
Check Cartridge, Invalid Print Cartridge, Non-Xerox Cartridge
This message appears when:
■
A print cartridge is not detected.
■
A non-Xerox print cartridge is installed.
■
The Toner Sensor Board is malfunctioning.
Close Top Cover.
This message appears when the:
■
Top cover is damaged
■
Sensor or actuator is damaged.
Fuser Failure, Engine Fuser Low Heat Error, Engine Overheat Error
Fuser is damaged or malfunctioning.
Laser Failure
The Laser Scan Unit is malfunctioning or damaged.
Outbin Tray is Full
The Outbin Tray Full Sensor or actuator is malfunctioning or damaged.
3-12
Phaser 3600 Printer Service Manual
Error Messages
Jam At Tray [1] [2] [3] (Jam 0)
Troubleshooting Reference Table
Applicable Parts
■
■
■
■
■
Tray 1 Assembly, PL1.2.35
Tray 1 Solenoid, PL1.1.26
Registration Assembly, PL1.1.12
Pick Roller, PL1.3.2.5
Main Board, PL1.1.19
Wiring and Plug/Jack Map References
■ “Sensor to Main Board Wiring Diagram”
on page 9-14
■ “Map 2- Main Board” on page 9-5
Troubleshooting Procedure Table
Phaser 3600 Printer Service Manual
Step
Actions and Questions
Yes
No
1.
Check the side guides for the
inoperative tray for damage or
improper seating.
Are guides damaged or loose?
Replace the Tray
(page 7-14).
Go to Step 2.
2.
Check the surface of the Pick
Roller for dirt or damage.
Are the rollers dirty or damaged?
Clean rollers with a Go to Step 3.
soft cloth very
slightly dampened
with water or
replace
(page 7-25) if
damaged.
3.
Do the Registration Rollers turn
freely?
Go to Step 4.
4.
Is the Feed Sensor Actuator
damaged or binding?
Go to Step 5.
Repair or replace
the actuator and/or
sensor
(page 7-21).
5.
Use service diagnostics to check Replace the Main
the operation of the tray solenoid. Board (page 7-39).
Do the tray solenoids operate
correctly?
Replace
Registration
Assembly
(page 7-41).
Replace the
inoperative
solenoid
(page 7-29).
3-13
Error Messages
Jam At Top (Jam 1)
Troubleshooting Reference Table
Applicable Parts
■
■
■
Registration Assembly, PL1.1.12
Paper Exit Sensor, PL1.3.76
Switched Mode Power Supply
Wiring and Plug/Jack Map References
■ “Main Drive/Joint Board and Optional
Tray Wiring Diagram” on page 9-15
■ “Map 3- SMPS Board” on page 9-6
Troubleshooting Procedure Table
3-14
Step
Actions and Questions
Yes
No
1.
Clean the paper path of any
obstructions, dirt or debris.
Did this correct the problem
Complete.
Go to Step 2.
2.
Use service diagnostics to test
the operation of the Registration
Assembly.
Does the Registration Assembly
operate correctly?
Go to Step 3.
Replace the
Registration
Assembly
(page 7-41).
3.
Use service diagnostics to test
the Exit Sensor.
Does the sensor operate
correctly?
Go to Step 4.
Replace the Exit
Sensor page 7-56
4.
Replace the Fuser Assembly
(page 7-54) and retest.
Did this correct the problem?
Complete.
Replace the SMPS
(page 7-76).
Phaser 3600 Printer Service Manual
Error Messages
Jam At Exit (Jam 2)
Troubleshooting Reference Table
Applicable Parts
Wiring and Plug/Jack Map References
Exit Roller, PL1.3.6
Paper Exit Sensor, PL1.3.76
■ Fuser Assembly, PL1.4.1
■ Switched Mode Power Supply,
PL1.1.29.2
■ Main Board, PL1.1.19
“Map 3- SMPS Board” on page 9-6
“Main Drive/Joint Board and Optional
Tray Wiring Diagram” on page 9-15
■
■
Step
Phaser 3600 Printer Service Manual
■
■
Action and Questions
Yes
No
Is the Paper Exit Sensor or the
actuator damaged or binding?
Repair or replace
the actuator and/or
Paper Exit Sensor
(page 7-56).
Go to Step 2.
2.
Inspect the Exit Roller.
Use service diagnostics to test the
main drive to exit.
Is the exit roller damaged or
binding?
Replace the Exit
Roller (page 7-44).
Go to Step 3.
3.
Visually inspect the Fuser.
Is there paper wrapped around the
Fuser rollers?
Remove
obstruction and
clean Fuser rollers.
Go to Step 4.
4.
Is the Fuser Assembly operational.
Do the Fuser gears rotates when
the Main motor is on?
Go to Step 5.
Replace the Fuser
Assembly
(page 7-54).
5.
Use the embedded diagnostics to
check the Exit Roller.
Are the rollers operational?
Replace Main
Board (page 7-39).
Replace the SMPS
(page 7-76).
3-15
Error Messages
Jam At Rear (Duplex Jam 1)
Troubleshooting Reference Table
Applicable Parts
■
■
■
■
■
3-16
Transfer Roller, PL1.1.7
Duplex Exit Sensor, PL2.3.15
Duplex Roller, PL2.3.4
Duplex Unit, PL2.3.0
Main Board, PL1.1.19
Wiring and Plug/Jack Map References
■ “Main Drive/Joint Board and Optional
Tray Wiring Diagram” on page 9-15
Step
Actions and Questions
Yes
No
1.
Does paper jam after reversal
but before reaching the Duplex
Sensor?
Go to Step 2.
Go to Step 3.
2.
Replace Transfer Roller Shaft
Assembly (page 7-43).
Does problem recur?
Replace Duplex Unit Complete
(page 7-37).
4.
Inspect the Duplex Unit. Is any
paper wrapped around the
Duplex Rollers?
Remove obstruction Go to Step 5.
and clean rollers.
5.
Are the rollers damaged or
binding?
Replace the Duplex
Roller (page 7-47).
Go to Step 7.
6.
Is there damage to the duplex
assembly.
Replace the Duplex
Unit (page 7-37).
Replace Main Board
(page 7-39).
Phaser 3600 Printer Service Manual
Error Messages
Jam At Duplex (Duplex Jam 2)
Troubleshooting Reference Table
Applicable Parts
■
■
■
■
■
Transfer Roller, PL1.1.7
Duplex Exit Sensor, PL2.3.15
Duplex Roller, PL2.3.4
Main Board, PL1.1.19
HVPS Board, PL1.1.29.1
Wiring and Plug/Jack Map References
■ “Sensor to Main Board Wiring Diagram”
on page 9-14
■ “Main Drive/Joint Board and Optional
Tray Wiring Diagram” on page 9-15
■ “Map 4 - HVPS Board” on page 9-7
Troubleshooting Procedure Table
Phaser 3600 Printer Service Manual
Step
Actions and Questions
Yes
No
1.
Does the paper jam after reversal
but before reaching the Duplex
Exit Sensor?
Replace the
Transport Roller
(page 7-43).
Go to Step 2.
2.
Use service diagnostics to test the
Duplex Exit Sensor.
Does the sensor operate
correctly?
Go to Step 3.
Replace the
Duplex Unit
(page 7-37).
3.
Inspect the Exit and Duplex
Rollers for any signs of damage
or binding.
Replace the Duplex
Roller (page 7-47).
Go to Step 4.
4.
Replace the Duplex Unit.
Does the problem still occur?
Replace the Main
Board (page 7-39).
Replace the HVPS
Power Supply
Board
(page 7-75).
3-17
Error Messages
Check Cartridge, Invalid Print Cartridge, Non-Xerox Cartridge, Replace Print
Cartridge
Troubleshooting Reference Table
Applicable Parts
■
■
■
3-18
Print Cartridge, PL1.1.34
Toner Sensor Board, PL1.3.47.2
Main Board, PL1.1.19
Wiring and Plug/Jack Map References
“Map 2- Main Board” on page 9-5
“Main Drive/Joint Board and Optional
Tray Wiring Diagram” on page 9-15
■
■
Step Action and Questions
Yes
No
1.
Open the top cover and ensure
that the Print Cartridge is properly
seated.
Does the error clear after
reseating the cartridge?
Complete
Go to Step 2.
2.
Check the Print Cartridge for
damage.
Does the cartridge contain toner
and appear to be operating
properly?
Go to Step 3.
Replace Print
Cartridge.
3.
Reseat all harness connections to
the Toner Sensor (CRUM) Board.
Does the error clear?
Complete
Go to Step 4.
4.
Check continuity between the
Toner Sensor (CRUM) Board and
CN7 on the Main Board.
Replace the Toner
Sensor Board
(page 7-24).
Replace the Main
Board (page 7-39).
Phaser 3600 Printer Service Manual
Error Messages
Close Fuser Door
Troubleshooting Reference Table
Applicable Parts
Wiring and Plug/Jack Map References
Fuser Assembly, PL1.4.1
Main Board, PL1.1.19
■ Switched Mode Power Supply
(SMPS), PL1.1.29.2
■ “LSU and Main Motor to Main Board
Wiring Diagram” on page 9-16
■ “Map 2- Main Board” on page 9-5
■ “Map 3- SMPS Board” on page 9-6
■
■
Step Action and Questions
Yes
No
1.
Visually inspect the fuser door
close tab for damage.
Is the tab broken?
Replace the Fuser
(page 7-54) then
go to Step 3.
Go to Step 2.
2.
Is the sensor and actuator on the
Fuser operating correctly.
Replace the Main
Board
(page 7-39).
Replace the Fuser
(page 7-54) then
go to Step 3.
3
Is the Printer operational?
Complete
Replace the SMPS
(page 7-76).
Close Top Cover
Troubleshooting Reference Table
Applicable Parts
■
■
Top Cover, PL1.4.1
Main Board, PL1.1.19
Wiring and Plug/Jack Map References
■
“Map 2- Main Board” on page 9-5
Troubleshooting Procedure Table
Phaser 3600 Printer Service Manual
Step
Action and Questions
Yes
No
1.
Visually inspect the top cover and the
top cover actuator.
Is the Top Cover or actuator
damaged?
Go to Step 2.
Replace the Top
Cover (page 7-10).
2.
Use diagnostics to test the Cover
Open Board.
Does the Cover Open board function
properly?
Replace the Main
Board
(page 7-39).
Replace the
Cover Open
Board
(page 7-74).
3-19
Error Messages
Fuser Failure, Engine Fuser Low Heat Error, or Engine Fuser Over Heat Error
Troubleshooting Reference Table
Applicable Parts
Wiring and Plug/Jack Map References
Fuser Assembly, PL1.4.1
Switched Mode Power Supply,
PL1.1.29.2
■ Main Board, PL1.1.19
“Map 3- SMPS Board” on page 9-6
“Main Drive/Joint Board and Optional
Tray Wiring Diagram” on page 9-15
■
■
■
■
Troubleshooting Procedure Table
3-20
Step Action and Questions
Yes
No
1.
Does the error report Fuser
Failure?
Go to Step 2.
Go to Step 3.
2.
Check the thermistor.
Is the circuit open?
Replace the Fuser
(page 7-54).
Replace the Main
Board
(page 7-39).
3.
Check the line voltages across the
thermostats.
Are they open?
Replace the Fuser
(page 7-54).
Go to Step 4.
4.
Is the Fuser getting power?
Replace the Fuser
(page 7-54).
Replace the SMPS
(page 7-76).
Replace the Main
Board
(page 7-39).
Phaser 3600 Printer Service Manual
Error Messages
Laser Failure
Troubleshooting Reference Table
Applicable Parts
■
■
Phaser 3600 Printer Service Manual
Laser Scan Unit, PL1.1.15
Main Board, PL1.1.19
Wiring and Plug/Jack Map References
“Map 1- LSU and Fuser” on page 9-4
“Main Drive/Joint Board and Optional
Tray Wiring Diagram” on page 9-15
■
■
Step
Actions and Questions
Yes
No
1.
Reseat the connections to the laser
and visually inspect the Laser Scan
Unit for damage.
Did this correct the problem?
Complete
Go to Step 2.
2.
Use diagnostics to check the laser Replace the Laser
Scan Unit
motor function.
Is the Laser Scan Unit Operational? (page 7-70).
Replace the Main
Board
(page 7-39).
3-21
Error Messages
Output Tray is Full
Troubleshooting Reference Table
Applicable Parts
■
■
■
3-22
Main Board, PL1.1.19
Tray Full Actuator, PL1.3.8
Tray Full Sensor, PL1.3.95
Wiring and Plug/Jack Map References
■ “Sensor to Main Board Wiring Diagram”
on page 9-14
■ “Main Drive/Joint Board and Optional
Tray Wiring Diagram” on page 9-15
Step
Actions and Questions
Yes
No
1.
Check the Tray Full Sensor and
actuator for obvious damage.
Is the actuator damaged?
Replace the
actuator
(page 7-45).
Go to Step 2.
2.
Use diagnostics to test the Tray Full
Sensor.
Does the sensor operate correctly?
Replace the Main
Board
(page 7-39).
Replace the Tray
Full Sensor
(page 7-23).
Phaser 3600 Printer Service Manual
General Troubleshooting
In this chapter...
■
Servicing Instructions
■
Preventive Maintenance Procedure
■
Control Panel Troubleshooting
■
Power Supply Troubleshooting
Chapter
4
General Troubleshooting
Servicing Instructions
The service flowchart is an overview of the path a service technician should
take, using this manual, to service the print engine and options.
Step 1: Identify the Problem
1. Verify the problem reported and check for any error codes and write them down.
2. Print normal customer prints and service test prints and look for any of the following:
a. any image quality problems in the test prints.
b. any mechanical or electrical abnormalities present.
c. any unusual noise or smell coming from the printer.
3. View the fault and jam histories and look at the total print count for the printer.
4. Verify the AC input power supply is within proper specifications by measuring the voltage at the
electric outlet while the printer is running.
Step 2: Inspect and Clean the Printer
1. Switch OFF printer power and disconnect the AC power cord from the wall outlet.
2. Verify the power cord is free from damage or short circuit and is connected properly.
3. Remove the Print Cartridge and protect it from light, then inspect the printer interior and remove any
foreign matter, obstructions, or loose toner.
4. Inspect the interior of the printer for damaged wires, loose connections, toner leakage, and damaged
or obviously worn parts.
5. Do not use solvents or chemical cleaners to clean the printer interior.
6. Do not use any type of oil or lubricant on printer parts.
7. Use only an approved toner vacuum.
8. Clean all rubber rollers with a lint-free cloth, dampened slightly with cold water.
9. Replace any service items that have reached their 150,000 end-of-life.
Step 3: Find the Cause of the Problem
1. Use the Repair Analysis Procedures to find the cause of the problem.
2. Use Diagnostics to check printer and optional components.
3. Use the Wiring Diagrams to locate test points.
4. Take voltage readings at various test points as instructed in the appropriate troubleshooting
procedure.
Step 4: Correct the Problem
1. Use the Parts List to locate a part number.
2. Use the Repair and Adjustments Procedures to replace the part.
Step 5: Final Checkout
1. Test the printer to be sure you have corrected the initial problem and there are no additional problems
present.
4-2
Phaser 3600 Printer Service Manual
General Troubleshooting
Preventive Maintenance Procedure
Perform the following procedures whenever you check, service, or repair a
printer. Cleaning the printer, as outlined in the following steps, assures proper
operation of the printer and reduces the probability of having to service the
printer in the future.
The frequency of use and the type of paper a customer prints on determines
how critical and how often cleaning the machine is necessary. Record the
number of sheets printed.
Recommended Tools
Phaser 3600 Printer Service Manual
■
Toner vacuum cleaner
■
Clean water
■
Clean, dry, lint-free cloth
■
Black light protective bag
4-3
General Troubleshooting
Control Panel Troubleshooting
The following procedures cover Control Panel and Start-up problems with the
printer when no specific error code or Control Panel message is displayed.
No Control Panel Display after Power Is Turned ON
1. Verify that power cord is securely plugged into both the printer and the
grounded, three prong AC outlet with the appropriate power available.
2. Ensure that all covers are securely closed.
3. Verify the Top Cover, Print Cartridge, and Fuser interlocks are functional.
4. Verify voltages at the Main Board. See “Taking Voltage Measurements” on
page 4-5.
5. Replace the Power Supply Board.
6. Replace the Main Board.
7. Replace the Control Panel.
Control Panel LED is On, Control Panel Display Is Blank
1. Remove and reseat the Control Panel wiring to the Main Board.
2. Replace the Control Panel.
3. Replace the Main Board.
4-4
Phaser 3600 Printer Service Manual
General Troubleshooting
Power Supply Troubleshooting
1. Check the voltage at the AC wall outlet, there should be approximately
110 VAC (or 220 VAC if the printer is a 220 V model) at the AC wall outlet?
2. Check the power cord for defects, damage, or a loose connection.
3. Check the AC switch harness for continuity.
4. Verify the Power Supply is operating correctly.
Taking Voltage Measurements
To locate connectors or test points, refer to “Printer Plug/Jack/Connector
Designators” on page 9-3 for more information.
Unless otherwise specified, the following voltage tolerances are used within
this section.
Phaser 3600 Printer Service Manual
Stated
Measured
+3.3 VDC
+3.135 to +3.465 VDC
+5.0 VDC
+4.75 to +5.25 VDC
+24.0 VDC
+21.6 to +26.4 VDC
0.0 VDC
Less than +0.5 VDC
4-5
General Troubleshooting
4-6
Phaser 3600 Printer Service Manual
Print-Quality
Troubleshooting
In this chapter...
■
Print-Quality Problems Overview
■
Repeating Defects
■
Control Panel (Internal) Test Print
■
Image-Quality Troubleshooting
Chapter
5
Print-Quality Troubleshooting
Print-Quality Problems Overview
Image-quality defects can be attributed to printer components, consumables,
media, internal software, external software applications, and environmental
conditions. To successfully troubleshoot image-quality problems, as many
variables as possible must be eliminated.
The following guidelines should be used before troubleshooting an imagequality problem:
■
Use an unopened ream of approved media for evaluating image-quality
problems
See the approved media list, “Media and Tray Specifications” on page 1-10,
for media that has been tested and approved for use with the Phaser 3600
Laser Printer.
5-2
■
Print a test page to see if the image-quality problem still exists. See Test 8
in the “Diagnostic Test Menu Map” on page 3-5.
■
When analyzing a image-quality defect, first determine if the defect is
repeating or random. Repeating defects can often be associated with a
particular component.
■
Inspect the surfaces of all rollers in the paper path for obvious defects.
Phaser 3600 Printer Service Manual
Print-Quality Troubleshooting
Repeating Defects
Some image-quality problems can be associated with specific assemblies, the
most common problems and the associated assemblies are listed below. Also,
see the specific image-quality troubleshooting procedure for more
information.
Print Cartridge
■
Streaks
■
Fine Lines
■
Banding in Process Direction
■
Uneven Density
■
Voids
■
Repeating Defects
Transfer Roller
■
Toner on the back side of the printed page (simplex mode)
■
Light Prints
■
Repeating Defects
■
Spots on Image
■
Hot or Cold Offsetting
■
Repeating Defects
■
Voids
Fuser
Phaser 3600 Printer Service Manual
5-3
Print-Quality Troubleshooting
Repeating Defects Measurement Table
Repeating Defects
Assembly
Component
Distance between
Defects
Typical Defect
Print Cartridge
Developer Roller
50 mm (1.97 in.)
Horizontal image band
Drum
94 mm (3.70 in.)
White spots on black
image or black spots
on white
Drum Charge
Rollers
38 mm (1.50 in.)
Black spots
Supply Roller
42 mm (1.65 in.)
Light or dark
horizontal image
bands
Transfer Roller
Transfer Roller
56 mm (2.20 in.)
Image ghost
Fuser Assembly
Heat Roller
126 mm (4.96 in.)
Black spots and image
ghost
Pressure Roller
126 mm (4.96 in.)
Black spots on back
Control Panel (Internal) Test Print
A test print is available to aid in determining the quality of output from the
printer and to assist in troubleshooting image-quality problem (see Test 8 in
the “Diagnostic Test Menu Map” on page 3-5). Each area of the test print is
used for a image-quality parameter. The following pages explain each of the
areas and the image-quality parameters. Follow these guidelines when
generating the test print:
■
Use supported paper from a fresh, unopened ream
■
Print five copies of the test print.
■
Discard the first two prints and retain the remaining prints for imagequality analysis.
Deletions
Inspect the test print for the presence of deletions or unprinted spots. If these
are found, see “Repeating Bands, Lines, Marks, or Spots” on page 5-22.
5-4
Phaser 3600 Printer Service Manual
Print-Quality Troubleshooting
Fusing
Rub the image three times at the indicated points with a soft cloth or tissue.
The toner should not lift off of the surface of the print. If the image smears or
toner lifts off the image onto the cloth, see “Unfused Image” on page 5-24.
s3600-080
Resolution
Observe the three resolution check points on several test prints.
■
Ensure that the 2 pixel horizontal, vertical, and diagonal lines are clear
and continuous. The diagonal lines might appear to be narrower than the
others.
■
Characters in the text paragraphs should be uniform and equal in density.
■
The halftone patches should be uniform in appearance.
If the image does not meet the criteria, see “Light or Undertone Print” on
page 5-11 or “Background Contamination” on page 5-15.
Phaser 3600 Printer Service Manual
5-5
Print-Quality Troubleshooting
1
2
3
Registration and Skew
Fold the paper from two consecutive test prints in half (first side edge to side
edge and then top edge to bottom edge). Observe the fold lines with reference
to the crosshairs of the printed target. The fold line should be aligned
perpendicular to the target crosshairs and should be within ±2.0 mm of the
target crosshairs (each line on the target is 1.0 mm). If the image does not
meet the criteria, see “Skew” on page 5-25.
5-6
Phaser 3600 Printer Service Manual
Print-Quality Troubleshooting
s3600-083
s3600-082
Phaser 3600 Printer Service Manual
5-7
Print-Quality Troubleshooting
Skips or Smears
Check the test print in the indicated areas for loss, stretching, or distortion of
the image in bands across the process direction that make the image seem
distorted, blurred, or compressed. If these faults are observed, see
“Horizontal Band, Voids, or Streaks” on page 5-27.
s3600-084
5-8
Phaser 3600 Printer Service Manual
Print-Quality Troubleshooting
Image-Quality Troubleshooting
The following table provides examples and descriptions, possible causes, and
the solutions for troubleshooting various image or printing defects that may be
observed in the Phaser 3600 Laser Printer.
Blank Print (No Print)
The entire image area is blank.
Initial Actions
■
Check the paper transfer path.
■
Ensure the transfer path is free of debris.
Troubleshooting Reference Table
Applicable Parts
■
■
■
■
■
■
Example Print
Transfer Roller, PL1.1.7
Registration Assembly, PL1.1.12
Laser Scan Unit, PL1.1.15
Print Cartridge, PL1.1.34
HVPS, PL1.1.29
Main Board, PL1.1.19
Blank Print
Troubleshooting Procedure Table
Step
Phaser 3600 Printer Service Manual
Actions and Questions
Yes
No
1
Print a Demo page.
Is the entire area still blank?
Go to step 3.
Go to step 2.
2
Check the paper condition.
Is the paper dry, a recommended type,
and loaded in the correct position?
Go to step 3.
Replace the
paper.
3
Check the Print Cartridge for damages. Replace the
Is the Print Cartridge damaged?
Print Cartridge.
Go to step 4.
5-9
Print-Quality Troubleshooting
Troubleshooting Procedure Table (continued)
Actions and Questions
Yes
No
4
Check the Registration Assembly.
Is there any damage to the
Registration Assembly?
Replace the
Registration
Assembly
(page 7-41).
Go to step 5.
5
Complete.
Check the Transfer Roller for correct
installation.
Reseat the Transfer Roller (page 7-43).
Does the image quality improve?
6
Check the laser beam path.
Is there any debris between the Laser
Scan Unit and Transfer Roller?
Remove any
debris.
Go to step 7.
7
Check the wiring harness connector
between the Laser Scan Unit and the
Main Board.
Are the connectors securely
connected?
Go to step 8.
Reconnect the
connectors,
then go to step
8.
8
Check the Main Board for correct
installation. Reseat the Main Board
(page 7-39).
Does the image quality improve?
Complete.
Go to step 9.
9
Check the HVPS for correct
installation. Reseat the HVPS Board
(page 7-75).
Does the image quality improve?
Complete.
Go to step 10.
10
Replace the Laser Scan Unit
(page 7-70).
Does the image quality improve?
Complete.
Replace the
Main Board
(page 7-39).
Step
5-10
Go to step 6.
Phaser 3600 Printer Service Manual
Print-Quality Troubleshooting
Light or Undertone Print
The image density is too light in all colors.
Initial Actions
■
Check the paper path for any debris.
■
Check the Control Panel settings for proper print settings.
Troubleshooting Reference Table
Applicable Parts
■
■
■
■
■
Example Print
Transfer Roller, PL1.1.7
Laser Scan Unit, PL1.1.15
Print Cartridge, PL1.1.34
HVPS, PL1.1.29
Main Board, PL1.1.19
Light or Undertone Print
Troubleshooting Procedure Table
Step
Phaser 3600 Printer Service Manual
Actions and Questions
Yes
No
1
Print a demo page.
Does the error still occur when
printing?
Go to step 3.
Go to step 2.
2
Print a customer application page.
Does the error still occur?
Go to step 3.
Complete.
3
Check the paper condition.
Is the paper dry, recommended type,
and loaded in the correct position?
Go to step 4.
Replace the
paper.
4
Check the Print Cartridge for damages. Replace the
Is the Print Cartridge damaged?
Print Cartridge.
Go to step 5.
5
Check the Transfer Roller for correct
installation. Reseat the Transfer Roller
(page 7-43).
Does the image quality improve?
Complete.
Go to step 6.
6
Replace the Main Board (page 7-39).
Does the image quality improve?
Complete.
Go to Step 7.
5-11
Print-Quality Troubleshooting
Troubleshooting Procedure Table (continued)
Actions and Questions
Yes
No
7
Check the laser beam path.
Is there any debris between the Laser
Scan Unit and Transfer Roller?
Remove the
debris, then go
to step 5.
Go to step 8.
8
Replace the Laser Scan Unit
(page 7-70).
Does the image quality improve?
Complete.
Go to step 9.
9
Check the HVPS for correct
installation. Reseat the HVPS Board.
Does the image quality improve?
Complete.
Replace the
HVPS Board
(page 7-39).
Step
5-12
Phaser 3600 Printer Service Manual
Print-Quality Troubleshooting
Black Print
The entire image is black.
Initial Actions
■
Check the paper transfer path.
■
Ensure there is no debris on the transfer path.
Troubleshooting Reference Table
Applicable Parts
■
■
■
■
■
Example Print
Transfer Roller, PL1.1.7
Laser Scan Unit, PL1.1.15
Print Cartridge, PL1.1.34
HVPS, PL1.1.29
Main Board, PL1.1.19
Black Print
Troubleshooting Procedure Table
Step
Phaser 3600 Printer Service Manual
Actions and Questions
Yes
No
1
Print a demo page.
Does the error still occur when
printing?
Go to step 3.
Go to step 2.
2
Print a customer application page.
Does the error still occur?
Go to step 3.
Complete.
3
Check the paper condition.
Is the paper dry, recommended type,
and loaded in the correct position?
Go to step 4.
Replace the
paper.
4
Check the Print Cartridge for damages. Replace the
Is the Print Cartridge damaged?
Print Cartridge.
Go to step 5.
5
Check the Transfer Roller for correct
installation. Reseat the Transfer Roller
(page 7-43).
Does the image quality improve?
Go to step 6.
Complete.
5-13
Print-Quality Troubleshooting
Troubleshooting Procedure Table (continued)
Actions and Questions
Yes
No
6
Check the wiring and connectors
between the Laser Scan Unit and the
Main Board.
Are the connectors securely
connected?
Go to step 7.
Reconnect the
connectors,
then go to step
7.
7
Replace the Laser Scan Unit
(page 7-70).
Does the image quality improve?
Complete.
Go to step 8.
8
Check the Main Board for correct
installation. Reseat the Main Board
(page 7-39).
Does the image quality improve?
Complete.
Go to step 9.
9
Check the HVPS for correct
installation. Reseat the HVPS Board
(page 7-75).
Does the image quality improve?
Complete.
Go to step 10.
10
Replace the Print Cartridge.
Does the image quality improve?
Complete.
Replace the
Main Board
(page 7-39).
Step
5-14
Phaser 3600 Printer Service Manual
Print-Quality Troubleshooting
Background Contamination
There is toner contamination on all or most of the page. The contamination
appears as a very light gray dusting.
Initial Actions
■
Check the paper transfer path.
■
Ensure there are no debris on the transfer path.
■
Clean the Pre-transfer Lamp (PTL).
Troubleshooting Reference Table
Applicable Parts
■
■
■
■
Example Print
Transfer Roller, PL1.1.7
Registration Assembly, PL1.1.12
Print Cartridge, PL1.1.34
HVPS, PL1.1.29
Background Contamination
Troubleshooting Procedure Table
Step
Phaser 3600 Printer Service Manual
Actions and Questions
Yes
No
1
Print a demo page.
Does the error still occur when
printing?
Go to step 3.
Go to step 2.
2
Print a customer application page.
Does the error still occur?
Go to step 3.
Complete.
3
Is the original document normal?
Go to step 4.
Replace the
original
document.
4
Check the Print Cartridge for damages. Replace the
Is the Print Cartridge damaged?
Print Cartridge.
Go to step 5.
5-15
Print-Quality Troubleshooting
Troubleshooting Procedure Table (continued)
Actions and Questions
Yes
No
5
Check the Transfer Roller.
Are there any damages to the Transfer
Roller?
Replace the
Transfer Roller
(page 7-43).
Go to step 6.
6
Check the Registration Assembly.
Is there any damage to the
Registration Assembly?
Replace the
Registration
Assembly
(page 7-41).
Go to step 7.
7
Check the HVPS for correct
installation. Reseat the HVPS
(page 7-75).
Does the image quality improve?
Complete.
Replace the
Printer
Cartridge.
Step
Residual Image or Ghosting
There are faint, ghostly images appearing on the page. The images may be
either from a previous page or from the page currently being printed.
Initial Actions
5-16
■
Check the paper transfer path.
■
Ensure there are no debris on the transfer path.
Phaser 3600 Printer Service Manual
Print-Quality Troubleshooting
■
Verify the paper is within the printer specifications (refer to page 1-10).
Troubleshooting Reference Table
Applicable Parts
■
■
■
■
■
Transfer Roller, PL1.1.7
Registration Assembly, PL1.1.12
Print Cartridge, PL1.1.34
Fuser, PL1.4.1
Main Board, PL1.1.19
Example Print
.
Residual Image/Ghosting
Warning
Ensure to wait for the Fuser to cool down before starting the procedure.
Troubleshooting Procedure Table
Step
Phaser 3600 Printer Service Manual
Actions and Questions
Yes
No
1
Check the printing usage.
Did the user print the same image at a
large volume?
Go to step 2.
Go to step 3.
2
Check the Transfer Roller.
Are there any damages to the Transfer
Roller surface?
Replace the
Transfer Roller
(page 7-43).
Go to step 3.
3
Check the Registration Assembly.
Is there any damage to the
Registration Assembly?
Replace the
Registration
Assembly
(page 7-41).
Go to step 4.
4
Check the Print Cartridge for correct
Complete.
installation. Reseat the Print Cartridge.
Does the image quality improve?
Go to step 5.
5
Replace the Print Cartridge.
Does the image quality improve?
Complete.
Go to step 6.
6
Replace the Fuser (page 7-54).
Does the image quality improve?
Complete.
Replace the
Main Board
(page 7-39)
5-17
Print-Quality Troubleshooting
Faded or Missing Image
Areas of the image are extremely light or missing in limited areas on the
paper.
Initial Actions
■
Check the paper transfer path.
■
Ensure there are no debris on the transfer path.
Troubleshooting Reference Table
Applicable Parts
■
■
■
Transfer Roller, PL1.1.7
Registration Assembly, PL1.1.12
Print Cartridge, PL1.1.34
Example Print
.
Color Uneven or Wrong (Process Direction)
Troubleshooting Procedure Table
Step
5-18
Actions and Questions
Yes
No
1
Print a demo page.
Does the error still occur when
printing?
Go to step 3.
Go to step 2.
2
Print a customer application page.
Does the error still occur?
Go to step 3.
Complete.
3
Is the original document normal?
Go to step 4.
Replace the
original
document.
4
Check the paper condition.
Is the paper dry, recommended type,
and loaded in the correct position?
Go to step 5.
Replace the
paper.
5
Check the Print Cartridge for damages. Replace the
Is the Print Cartridge damaged?
Print Cartridge.
Go to step 6.
Phaser 3600 Printer Service Manual
Print-Quality Troubleshooting
Troubleshooting Procedure Table (continued)
Actions and Questions
Yes
No
6
Check the Registration Assembly.
Is there any damage to the
Registration Assembly?
Replace the
Registration
Assembly
(page 7-41).
Go to step 7.
7
Check the Transfer Roller for correct
installation. Reseat the Transfer Roller
(page 7-43).
Does the image quality improve?
Complete.
Replace the
Transfer Unit
(page 7-43).
Step
Phaser 3600 Printer Service Manual
5-19
Print-Quality Troubleshooting
Random Spots
Spots of toner are randomly scattered across the page.
Initial Actions
■
Check the paper transfer path.
■
Ensure there are no debris on the transfer path.
Troubleshooting Reference Table
Applicable Parts
■
■
■
Example Print
Transfer Roller, PL1.1.7
Print Cartridge, PL1.1.34
Fuser, PL1.4.1
Random Spots
Warning
Ensure to wait for the Fuser to cool down before starting the procedure.
Troubleshooting Procedure Table
Step
5-20
Actions and Questions
Yes
No
1
Print a demo page.
Does the error still occur when
printing?
Go to step 3.
Go to step 2.
2
Print a customer application page.
Does the error still occur?
Go to step 3.
Complete.
3
Check for any debris on the document
glass and the CVT window.
Are there any debris?
Remove the
debris.
Go to step 4.
4
Check for spot’s regular intervals.
Are there any spots on the page?
Go to step 5.
Complete.
Phaser 3600 Printer Service Manual
Print-Quality Troubleshooting
Troubleshooting Procedure Table (continued)
Step
Phaser 3600 Printer Service Manual
Actions and Questions
Yes
No
5
Check the Print Cartridge for damages. Replace the
Is the Print Cartridge damaged?
Print Cartridge.
Go to step 6.
6
Check the Transfer Roller for correct
installation. Reseat the Transfer Roller
(page 7-43).
Does the image quality improve?
Complete.
Go to step 7.
7
Check the Fuser for correct
installation. Reseat the Fuser.
Does the image quality improve?
Complete.
Replace the
Fuser
(page 7-54).
5-21
Print-Quality Troubleshooting
Repeating Bands, Lines, Marks, or Spots
Recurring lines, marks, or spots appear on the page.
Initial Actions
■
Check the paper transfer path.
■
Ensure there are no debris on the transfer path.
Troubleshooting Reference Table
Applicable Parts
■
■
■
■
Example Print
Registration Assembly, PL1.1.12
Transfer Roller, PL1.1.7
Laser Scan Unit, PL1.1.15
Print Cartridge, PL1.1.34
Repeating Defects
Warning
Ensure to wait for the Fuser to cool down before starting the procedure.
Troubleshooting Procedure Table
Step
5-22
Actions and Questions
Yes
No
1
Print a demo page.
Does the error still occur when
printing?
Go to step 3.
Go to step 2.
2
Print a customer application page.
Does the error still occur?
Go to step 3.
Complete.
3
Check the document path.
Is there any debris on the document
path?
Remove the
debris.
Go to step 4.
4
Check for band or spot’s regular
intervals.
Are there any bands or spots on the
page?
Refer to
Repeating
defects info on
page page 5-3.
Go to step 5.
5
Check the Print Cartridge for damages. Replace the
Is the Print Cartridge damaged?
Print Cartridge.
Go to step 6.
Phaser 3600 Printer Service Manual
Print-Quality Troubleshooting
Troubleshooting Procedure Table (continued)
Step
Phaser 3600 Printer Service Manual
Actions and Questions
Yes
No
6
Check the paper condition.
Is the paper dry, recommended type,
and loaded in the correct position?
Go to step 7.
Replace the
paper.
7
Check the Transfer Roller.
Are there any damages on the roller
surface?
Replace the
Transfer Roller
(page 7-43).
Go to step 8.
8
Check the Registration Assembly for
correct installation. Reseat the
assembly (page 7-41).
Does the image quality improve?
Complete.
Go to step 9.
9
Check for debris in the laser beam
path between the Laser Scan Unit and
the Registration Assembly.
Is there any debris?
Remove the
debris.
Go to step 10.
10
Does the image quality improve?
Complete.
Replace the
Laser Scan Unit
(page 7-70).
5-23
Print-Quality Troubleshooting
Unfused Image
The toner image is not completely fused to the paper. The image easily rubs
off.
Initial Actions
■
Check the paper transfer path.
■
Ensure there are no debris on the transfer path.
Troubleshooting Reference Table
Applicable Parts
■
■
Example Print
Print Cartridge, PL1.1.34
Fuser Assembly, PL1.4.1
Unfused Image
Warning
Ensure to wait for the Fuser to cool down before starting the procedure.
Troubleshooting Procedure Table
Step
5-24
Actions and Questions
Yes
No
1
Print a demo page.
Does the error still occur when
printing?
Go to step 2.
Complete.
2
Verify the media type selection.
Go to step 3.
Select the
correct media.
3
Check the paper condition.
Is the paper dry, recommended type,
and loaded in the correct position?
Go to step 4.
Replace the
paper.
4
Check the Print Cartridge for damages. Go to step 5.
Is the Print Cartridge damaged?
Replace the
Print Cartridge.
Phaser 3600 Printer Service Manual
Print-Quality Troubleshooting
Troubleshooting Procedure Table (continued)
Step
5
Actions and Questions
Yes
No
Check the Fuser for correct
installation. Reseat the Fuser
(page 7-54).
Does the image quality improve?
Complete.
Replace the
Fuser
(page 7-54).
Skew
The printed image is not parallel with both sides of the paper.
Initial Actions
■
Check the paper transfer path.
■
Ensure there are no debris on the transfer path.
Troubleshooting Reference Table
Applicable Notes
■
■
■
■
■
■
Example Print
Retard Assembly, PL1.3.49
Tray 1 (MPT) Assembly, PL1.2.35
Separator Pad Assembly, PL1.3.4
Feed2 Idle Unit, PL1.3.50
Registration Assembly, PL1.1.12
Duplex Unit, PL2.3.0
Skew 2
Troubleshooting Procedure Table
Step
Phaser 3600 Printer Service Manual
Action and Questions
Yes
No
1
Print a demo page.
Does the error still occur when
printing?
Go to step 3.
Go to step 2.
2
Print a customer application page.
Does the error still occur?
Go to step 3.
Complete.
3
Check the paper condition.
Is the paper dry, recommended type,
and loaded in the correct position?
Go to step 4.
Replace the
paper.
5-25
Print-Quality Troubleshooting
Troubleshooting Procedure Table (continued)
Step
5-26
Action and Questions
Yes
No
4
Check the Print Cartridge for correct
Go to step 5.
installation. Reseat the Print Cartridge.
Does the error still occur?
Complete.
5
Check the Separator Pad Assembly.
Is there damage or debris on the
Separator Pad?
Remove the
Go to step 6.
debris or replace
the Separator
Pad Assembly
(page 7-20).
6
Check for a skewed tray.
Is the skewed paper fed from Tray 1
(MPT)?
reseat the paper Go to step 7.
and go to step 7.
7
Check the Tray 1 (MPT) Side Guides.
Reset the Paper Guides.
Does the error still occur?
Go to step 8.
Complete.
8
Replace the Tray 1 (MPT) Feed Roller
(page 7-14).
Does the error still occur?
Go to step 9.
Complete.
9
Check the Registration Assembly and
Transfer Roller for correct installation.
Reseat the Transfer Roller (page 7-43).
Does the error still occur?
Replace the
Registration
assembly
(page 7-41),
then go to step
10.
Complete.
10
Check the skewed mode through the
Duplex Unit.
Is the skewed paper fed the from the
Duplex?
Go to step 11.
Go to step 12.
11
Check the Duplex Unit for correct
installation. Reseat the Duplex Roller
(page 7-47).
Does the error still occur?
Go to step 12.
Complete.
12
Check additional paper trays for
correct installation. Reseat the trays.
Does the error still occur?
Go to step 13.
Complete.
13
Replace the Tray 2 Feed Roller
(page 7-30).
Does the error still occur?
Replace the
Retard
Assembly
(page 7-19).
Complete.
Phaser 3600 Printer Service Manual
Print-Quality Troubleshooting
Horizontal Band, Voids, or Streaks
Areas of the image are extremely light or missing entirely. The missing areas
form wide bands covering a wide area horizontally and perpendicular to the
paper feed direction.
Initial Actions
■
Check the paper transfer path.
■
Ensure there are no debris on the transfer path.
Troubleshooting Reference Table
Applicable Parts
■
■
■
■
Example Print
Registration Assembly, PL1.1.12
Transfer Roller, PL1.1.7
Laser Scan Unit, PL1.1.15
Print Cartridge, PL1.1.34
Horizontal Band, Void, or Streaks
Troubleshooting Procedure Table
Step
Phaser 3600 Printer Service Manual
Actions and Questions
Yes
No
1
Print a demo page.
Does the error still occur when
printing?
Go to step 3.
Go to step 2.
2
Print a customer application page.
Does the error still occur?
Go to step 3.
Complete.
3
Check the document path.
Are there any debris on the paper
path?
Remove the
debris.
Go to step 4.
4
Check for band’s regular intervals
Are there any bands on the page?
Refer to
page 5-4.
Go to step 5.
5
Check the Print Cartridge for damage.
Is the Print Cartridge damaged?
Replace the
Print Cartridge.
Go to step 6.
6
Check the paper condition.
Is the paper dry, recommended type,
and loaded in the correct position?
Go to step 7.
Replace the
paper.
5-27
Print-Quality Troubleshooting
Troubleshooting Procedure Table (continued)
Step
5-28
Actions and Questions
Yes
No
7
Check the Registration Assembly.
Is there any damage to the
Registration Assembly?
Replace the
Registration
Assembly
(page 7-41).
Go to step 8.
8
Check the Transfer Roller for correct
installation. Reseat the Transfer Roller
(page 7-43).
Does the image quality improve?
Complete.
Go to step 9.
9
Check for debris in the laser beam
path between the Laser Scan Unit and
the Registration Assembly.
Is there any debris?
Remove the
debris.
Go to step 10.
10
Does the image quality improve?
Complete.
Replace the
Laser Scan Unit
(page 7-70).
Phaser 3600 Printer Service Manual
Cleaning and Maintenance
In this chapter...
■
Service Maintenance Procedure
■
General Cleaning
Chapter
6
Cleaning and Maintenance
Service Maintenance Procedure
Perform the following procedures whenever you check, service, or repair a
printer. Cleaning the printer, as outlined in the following steps, assures proper
operation of the printer and reduces the probability of having to service the
printer in the future.
The frequency of use, Average Monthly Print Volume (AMPV), type of media
printed on, and operating environment are factors in determining how critical
cleaning the machine is and how often it is necessary. Record the number of
sheets printed.
Recommended Tools
■
Toner vacuum cleaner
■
Clean water
■
Clean, dry, lint-free cloth
■
Black light-protective bag
General Cleaning
Perform the following general cleaning steps as indicated by the printer’s
operating environment.
Caution
Never apply alcohol or other chemicals to any parts of the printer. Never use a
damp cloth to clean up toner. If you remove the Print Cartridges, place them in
a light-protective bag or otherwise protect them as exposure to light can
quickly degrade performance and result in early failure.
1. Record number of sheets printed.
2. Print several sheets of paper to check for problems or defects.
3. Turn the printer power Off and disconnect the power cord.
4. Remove the Transfer Unit, Fuser, Print Cartridges, Duplex Unit (if
installed), and Side Covers before cleaning.
5. Remove the Rear Cover and clean the Rear Cover Fan to remove excess
dust.
6. Remove the Top Cover and clean the Main Fan to remove excess dust.
7. Ensure that all cover vents are clean and free of obstructions.
8. Remove any debris or foreign objects from the Fuser, Transfer Unit, Print
Cartridges, Duplex Unit, and inside of the printer.
9. Remove and clean the paper trays.
10. Clean all rubber rollers with a lint-free cloth slightly dampened with cold
water.
6-2
Phaser 3600 Printer Service Manual
Cleaning and Maintenance
Cleaning the Laser Scan Unit
1. Remove the Right Cover (page 7-6).
2. Remove the Left Cover (page 7-7).
3. Remove the Top Cover (page 7-10).
4. Remove the cover-frame exit cover to expose the Laser Scan Unit
window.
5. Use a dry lint-free cloth to wipe any dust off of the window.
s3600-091
Cleaning the Print Cartridge
Caution
Do not expose the Print Cartridge to light for more than 5 minutes. Cover the
Print Cartridge to avoid damage.
1. Open the Top Cover.
2. Remove the Print Cartridge.
3. Use a dry lint-free cloth to wipe any dust and/or spilled toner from the
Print Cartridge area. Remove any paper debris from the area.
Phaser 3600 Printer Service Manual
6-3
Cleaning and Maintenance
Control Panel Maintenance
Cleaning the Drum
To clean the Drum from the Control Panel:
1. Turn on the printer and wait for the “Ready’ display on the Control Panel.
2. Press Menu > System Setup > Maintenance > Clean Drum.
3. Select Print Yes.
Note
A test page will print notifying you that the Clean Drum cycle has
successfully completed.
Cleaning the Fuser
To clean the Fuser from the Control Panel:
1. Turn on the printer and wait for the “Ready’ display on the Control Panel.
2. Press Menu > System Setup > Maintenance > Clean Fuser.
3. Select Print Yes.
Note
A test page will print notifying you that the Clean Fuser cycle has
successfully completed.
6-4
Phaser 3600 Printer Service Manual
Service Parts Disassembly
In this chapter...
■
Service Overview
■
General Notes on Disassembly
■
Covers and Control Panel
■
Tray 1 (MPT) Assembly
■
Tray 2 (PL2.1.0) and Optional Tray 3 (PL2.2.0) Replacement
■
Duplex Unit (PL2.3.0)
■
Main Drive and Registration Assemblies
■
Frame Assembly
■
Fuser Assembly (1.3.80)
■
Laser Scan Unit (PL 1.1.15)
■
Power Supplies
Chapter
7
Service Parts Disassembly
Service Overview
This section contains the removal and replacement procedures for selected
parts of the printer according to the Service Parts List. Not all Replacement
Procedures are included in this Service Manual. In most cases, to reinstall a
part, simply reverse the Removal Procedure shown. In some instances, the
Replacement Procedure is included, because it may contain special steps.
For specific assemblies and parts, see ”Parts List” on page 8-1.
General Notes on Disassembly
Preparation
Before you begin any Removal and Replacement Procedure:
1. Switch OFF the printer power and disconnect the power cord from the
wall outlet.
2. Remove the Print Cartridge and protect it from exposure to light by
covering it with a light proof bag or by placing it in a light-tight container.
3. Disconnect all computer interface cables from the printer.
4. Wear an electrostatic discharge wrist strap to help prevent damage to the
sensitive electronics of the printer circuit boards.
Warning
Remove the Fuser Assembly or wait at least 5 minutes after you have
switched OFF printer power for the Fuser to cool before you work on or
around the Fuser.
7-2
Phaser 3600 Printer Service Manual
Service Parts Disassembly
5. Tray 2 can interfere with the removal of many printer parts. Remove Tray 2
before further disassembly.
Note
Part names that appear in the disassembly procedures may not exactly
match the names that appear in the Parts List. For example, a part called
the Registration Transport Assembly may appear on the Parts List as
Assembly, Transport Regi.
Caution
Many parts are secured by plastic tabs. DO NOT over flex or force these
parts. Do not over torque the screws threaded into plastic parts.
Always use the correct type and size screw. Using the wrong screw can
damage tapped holes. Do not use excessive force to either remove or install
either a screw or a printer part.
A spring hook is required for removal and replacement of the various springs
in the printer. Springs can be damaged using pliers or other tools for this task.
Warning
Unplug the AC power cord from the wall outlet before removing any printer
part.
Phaser 3600 Printer Service Manual
7-3
Service Parts Disassembly
Fastener Types
The following table lists the primary types of Posi-Drive screws used to
assemble the printer. The procedures provide dimensional specifications for
screws being removed.
Posi-Drive Screw Types used in the Printer
Type
Application
Shape
Selftapping,
plastic
Characteristics
Coarse
Plastic
Parts etc.
Selftapping,
plastic, with
flange
Coarse
Plastic
Parts etc.
1. Silver colored.
2. Screw thread is coarse
compared to metal screw.
3. Screw tip is thin.
1. Black colored.
2. Screw thread is coarse
compared to metal screw.
3. Screw has a flange.
4. Screw tip is thin.
1. Silver colored.
2. Diameter is uniform.
Sheet Metal,
silver
Parts etc.
Sheet
Metal
1. Silver colored.
2. Screw has a flange.
3. Diameter is uniform.
Sheet Metal,
with flange
Parts etc.
Sheet
Metal
Caution
Use care when installing self-tapping screws in plastic. To properly start the
screw in plastic, turn the screw counter-clockwise in the hole until you feel the
screw engage the threads, then tighten as usual. Failure to properly align or
over tighten the screw can result in damage to previously tapped threads.
Always use the correct type and size screw. Using the wrong screw can
damage tapped holes. Do not use excessive force to remove or install
either a screw or a printer part.
Note
Unless specifically noted in the text, all screws listed in the disassembly
chapter for the Phaser 3600 are 10mm self tapping screws.
7-4
Phaser 3600 Printer Service Manual
Service Parts Disassembly
Notations in the Disassembly Text
■
The notation “(item X)” points to a numbered callout in the illustration
corresponding to the disassembly procedure being performed.
■
The notation “PLX.X.X” indicates that this component is listed in the Parts
List.
■
Bold arrows in an illustration show direction of movement when removing
or replacing a component.
Standard Orientation of the Printer
When needed, the orientation of the printer is called out in the procedure for
locating printer parts. Refer to the printer orientation graphic for locating the
right, left, front and back sides of the printer.
Left
Rear
Front
Phaser 3600 Printer Service Manual
Right
s3600-008
7-5
Service Parts Disassembly
Covers and Control Panel
Right Cover (PL 1.2.3)
1. Turn OFF the Printer Power Switch and unplug the power cord.
2. Remove the Duplex Unit (page 7-37).
3. Remove the 2 rear screws securing the Right Cover to the rear of the
printer.
s3600-027
4. Remove the right side access cover.
5. To remove from the printer, slide the Right Cover towards the rear of the
printer to release the 3 tabs on the top of the cover and 3 hooks on the
bottom of the cover.
Replacement Note
When reinstalling the cover, insert the 3 bottom hooks first, then slide
the cover from the rear to the front. Make sure the cover is securely
behind the 3 tabs.
7-6
Phaser 3600 Printer Service Manual
Service Parts Disassembly
Left Cover (PL 1.2.2)
1. Disconnect the power cord.
2. Remove the Duplex Unit (page 7-37).
3. Open the Rear Cover for access to the top rear screw.
4. Remove the 2 rear screws of the cover.
5. Slide the left cover towards the rear of the printer to release the 3 tabs on
the top and 3 bottom hooks securing it to the printer.
s3600-028
Replacement Note
Before reinstalling the cover, remove the duplex unit.
When reinstalling the cover, insert the 3 bottom hooks first, then slide
the cover from the rear to the front. Make sure the cover is securely
behind the 3 tabs.
Phaser 3600 Printer Service Manual
7-7
Service Parts Disassembly
Rear Cover (PL 1.2.6)
1. Open the Rear Cover.
2. Release the Restraining Strap (tie stopper).
s3600-040
3. While facing the Rear Cover, lift up on the right hinge pin, slide the Rear
Cover to the right to free the left hinge pin, then remove the Rear Cover
from the printer.
7-8
Phaser 3600 Printer Service Manual
Service Parts Disassembly
Rear Cover Fan (PL1.2.6.10)
1. Remove the Rear Cover (page 7-8).
2. Use a flatblade screwdriver to flex one side of the paper guide, then lift
and remove to expose the fan.
s3600-108
3. Disconnect the interim connector (P/J4) from the three-wire harness to
the fan.
4. Flex two hooks on one side of the fan to release and remove.
P/J4
P/J3
Hooks
Hooks
s3600-109
Phaser 3600 Printer Service Manual
7-9
Service Parts Disassembly
Top Cover (PL 1.2.1)
Note
Since the top cover is being redesigned, the following instructions will
change.
1. Open the Top Cover for access.
2. Remove the Print Cartridge and protect it from light exposure.
3. Remove the Right Cover (page 7-6).
4. Remove the Left Cover (page 7-7).
5. Remove the 2 screws located on the front of the Top Cover.
6. On the rear, right side of the printer, remove 1 screw securing the Top
Cover.
s3600-031
7. Release 3 tabs, one on the left, one on the right, and one on the rear of
the Top Cover.
Replacement Note
You may need to open the Rear Cover slightly before reinstalling the
Top Cover.
7-10
Phaser 3600 Printer Service Manual
Service Parts Disassembly
s3600-010
8. Disconnect the Control Panel wiring harness (CN17) from the Main
Board.
Replacement Note
Note the position of the wiring harness and ferrite coil for reassembly.
Phaser 3600 Printer Service Manual
7-11
Service Parts Disassembly
Access Door (PL 1.2.1.1)
Note
Since the top cover is being redesigned, the following instructions will
change.
1. Remove the Right Cover (page 7-6).
2. Remove the Left Cover (page 7-7).
3. Remove the Top Cover (page 7-10).
4. Remove the 2 screws and stoppers from the Access Door.
5. Remove the Access Door from the Top Cover by flexing the 2 tabs.
s3600-104
7-12
Phaser 3600 Printer Service Manual
Service Parts Disassembly
Control Panel (PL 1.2.9)
1. Remove the Top Cover (page 7-10).
2. Remove the 6 screws securing the LCD and control panel and remove
from the top cover.
Note
DO NOT remove the 3 screws securing the plastic portion of the LCD
display.
LCD Panel
Key Panel
s3600-074
Phaser 3600 Printer Service Manual
7-13
Service Parts Disassembly
Tray 1 (MPT) Assembly
Caution
Tray 1 and the Knock-Up Plate contain unsecured plastic parts that fall off and
are easy to lose.
Also, be careful in step 6 to not exert too much pressure, or you can break the
plastic tracks.
1. Remove the Right Cover (page 7-6).
2. Remove the Left Cover (page 7-7).
3. Remove the Top Cover (page 7-10).
4. Open Tray 1.
5. Unhook only the bottom of the 2 springs connecting the Knock-Up Plate
to the Pick-Up Rack.
Note
DO NOT unhook the top portion of the springs from the Pick-Up Rack.
s3600-032
6. To disengage the Knock-Up Plate from the Tray 1 (MPT) Assembly, flex
the left and right tray links from the indented portion of the tracks.
7-14
Phaser 3600 Printer Service Manual
Service Parts Disassembly
Tray Link
s3600-033
7. Facing Tray 1, slide the tray to the left to release the 4 pivot points
securing the Tray, then remove the Tray 1 Assembly from the printer.
Replacement Note
Follow these steps to ensure correct replacement of the tray:
To attach the Tray 1 (MPT) assembly to the Knock-Up Plate:
1. Attach the left and right plastic tray links to the top portion of the KnockUp plate.
2. Attach the bottom portion of the Knock-Up Plate to the plastic mounting
links on the chassis.
3. Slide the assembly onto the four pivot points.
4. Insert the top portion of the secured tray links through the Knock-Up Plate
indentations on the track.
Phaser 3600 Printer Service Manual
7-15
Service Parts Disassembly
Inner Cover (PL 1.2.5)
1. Remove the Top Cover (page 7-10).
2. Remove the Tray 1 (MPT) Assembly (page 7-14).
3. Open or remove Tray 2 for better access.
4. Remove 2 screws securing the Inner Cover to the printer frame.
5. Remove the Inner Cover.
s3600-034
7-16
Phaser 3600 Printer Service Manual
Service Parts Disassembly
Tray 1 (MPT) Knock-Up Plate Only (PL 1.1.3)
1. Follow the first three steps for removing the Tray 1 (MPT) Assembly
(page 7-14).
2. Rotate the tray links down slightly until they come free from the printer.
Note
The tray links are marked “L” for the left and “R” for the right.
3. To free the Knock-Up Plate, carefully spread the slotted hinge piece to
release the post, then remove the Knock-Up Plate.
Note
Tray 1 and the Knock-up Plate contain unsecured plastic parts that fall
off and are easy to lose.
Knock Up Plate Assembly
Tray Link
Phaser 3600 Printer Service Manual
s3600-035
7-17
Service Parts Disassembly
Tray 1 (MPT) Pick-Up Rack (PL 1.3.2)
1. Remove the Right Cover (page 7-6).
2. Remove the Left Cover (page 7-7).
3. Remove the Top Cover (page 7-10).
4. Remove the Tray 1 (MPT) Assembly (page 7-14).
5. Remove the Inner Cover (page 7-16).
6. Remove 2 screws securing the Pick-Up Rack and remove the rack.
Caution
Do not remove or lose the springs.
s3600-036
Replacement Note
When reinstalling, be sure to secure the Pick-up Rack in the “boss” on
each side of the rack.
7-18
Phaser 3600 Printer Service Manual
Service Parts Disassembly
Retard Assembly (PL 1.3.49)
1. Remove Tray 1(MPT) Assembly (page 7-14).
2. Remove the Inner Cover (page 7-16).
3. Remove the Tray 1 Pick-Up rack (page 7-18).
4. Squeeze the lock as shown below and slide the Retard Assembly off of
the Retard Roller.
Retard Assembly
s3600-037
Replacement Note
When reassembling, insert the Retard Roller over the left end of the
retard shaft until the roller snaps in place.
s3600-009
Phaser 3600 Printer Service Manual
7-19
Service Parts Disassembly
Tray 1 (MPT) Separator Pad Assembly (PL 1.3.4)
1. Remove the Tray 1 (MPT) Assembly (page 7-14).
2. Remove the Retard Assembly (page 7-19).
3. Loosen the wire harness from the plastic wire holder and disconnect the
connector (CN1) from the Separator Pad Assembly. Do not use a
needlenose set of pliers to loosen the connector.
4. Remove the 3 screws shown below and then remove the Separator Pad
Assembly from the printer.
Caution
Be careful not to break the MP actuator flag. Also, do not lose the spring
located underneath the Friction Pad of the separator.
Friction Pad
MP Actuator
s3600-039
Replacement Note
Before installing the three screws, be sure to snug the spring between
the friction pad and the plastic base.
7-20
Phaser 3600 Printer Service Manual
Service Parts Disassembly
Tray 1 (MPT) Feed Sensor (PL1.3.97)
Caution
When removing the plastic cover in the step 5, lift the edge nearest the sensor
first then the other end, being careful not to bend the actuator.
1. Remove the Tray 1 (MPT) Assembly (page 7-14).
2. Remove the 6 screws from the HVPS board to expose the connectors.
3. Disconnect CN3 from the HVPS board.
4. Unlace the 3-wire harness of CN3 from the HVPS.
5. Remove the plastic cover covering the sensor.
6. Gently push the plastic hook away from the sensor board to remove the
board and sensor.
Hook
s3600-111
Phaser 3600 Printer Service Manual
7-21
Service Parts Disassembly
Paper Tray Empty Sensor (PL1.3.95)
The Paper Tray Empty Sensor is soldered in the High Voltage Power Supply
(HVPS). If the sensor is defective, follow the instructions to replace the power
supply board (page 7-75).
s3600-094
7-22
Phaser 3600 Printer Service Manual
Service Parts Disassembly
Paper Tray Empty Actuator (PL1.3.58)
The Paper Tray Actuator passes through the Paper Tray Empty Sensor, which
is soldered in the Switched Mode Power Supply (SMPS).
1. Remove the Tray 1 (MPT) Assembly (page 7-14).
2. Locate the Paper Tray Empty Actuator on the opposite side of the SMPS
board and chassis.
3. Depress the elongated portion of the actuator slightly to release, then
remove the actuator from the chassis slot.
s3600-088
Phaser 3600 Printer Service Manual
7-23
Service Parts Disassembly
Sub Toner Low Sensor Board (PL1.3.47)
1. Remove the Right Cover (page 7-6).
2. Remove the Left Cover (page 7-7).
3. Remove the Top Cover (page 7-10).
4. Remove the Laser Scan Unit (page 7-70).
5. Remove the LSU Lower Cover (page 7-72).
6. Disconnect all connectors running to the Toner Sensor Board.
7. Remove 2 screws securing the Toner Sensor Board to the LSU cover.
8. Release the 2 locking tabs to remove the board.
Springs
s3600-069
7-24
Phaser 3600 Printer Service Manual
Service Parts Disassembly
Pick Roller and Shaft (PL 1.3.2.5)
1. Remove the Right Cover (page 7-6).
2. Remove the Left Cover (page 7-7).
3. Remove the Top Cover (page 7-10).
4. Remove the Tray 1 (MPT) Assembly (page 7-14).
5. Remove the Inner Cover (page 7-16).
6. Remove the Main Drive Assembly (page 7-38).
7. Remove the locking bearing on the front of the shaft by rotating it in the
direction of the arrows shown below.
s3600-095
Phaser 3600 Printer Service Manual
7-25
Service Parts Disassembly
8. Remove 1 screw, on the right end of the shaft, securing the bracket,
remove the bracket with the bearing.
Bracket
Bearing
Gear Assembly
s3600-041
9. Remove the right side gear from the shaft.
7-26
Phaser 3600 Printer Service Manual
Service Parts Disassembly
10. Lift the latch on the idle cam and slide the shaft to the right through the
cam to free it from the printer.
1
2
Idle-Cam
s3600-042
Phaser 3600 Printer Service Manual
7-27
Service Parts Disassembly
Tray 1 (MPT) Pick Roller Only (PL 1.3.2.4)
Note
If you are only removing the Pick Roller, and not the shaft, it may be
necessary to rotate the shaft, release the solenoid, and then rotate the
shaft gear clockwise to position the roller properly.
Caution
Do not break the pick shaft by trying to force the Pick Roller off.
1. Slide the idle gears outward. Release the locking tab on the Pick Roller
Assembly and slide the roller to the right.
Idle
7-28
s3600-043
Phaser 3600 Printer Service Manual
Service Parts Disassembly
Tray 1 (MPT) Solenoid (PL 1.1.26)
1. Remove the Right Cover (page 7-6).
2. Disconnect the connector (CN11) from the Joint Board to the Tray 1
Solenoid.
3. Remove 1 screw securing the Tray 1 Solenoid.
s3600-044
Phaser 3600 Printer Service Manual
7-29
Service Parts Disassembly
Tray 2 Pick-Up Assembly and Rollers
Note
It is not necessary to remove the entire assembly in order to remove the
Pick Rollers. Also, do not replace the feeder assembly unless drive
components need to be replaced. If replacing just the rollers, the Feed
Assembly does not need to be removed
1. Remove the Right Cover (page 7-6).
2. Remove the Left Cover (page 7-7).
3. Remove the Top Cover (page 7-10).
4. Remove the Tray 1 (MPT) Assembly (page 7-14).
5. Remove the Inner Cover (page 7-16).
6. Remove the Main Drive Assembly (page 7-38).
7. Remove Tray 2 and Tray 3 (if installed)
8. Turn the printer onto its left side.
2
1
s3600-045
9. Before you can slide the Pick-Up Camshaft in the next step, you must first
release the white locking mechanism from the white plastic bearing, then
lift free from the shaft.
10. Remove the Pick-Up Roller by lifting the black tab to slide it off the shaft.
7-30
Phaser 3600 Printer Service Manual
Service Parts Disassembly
Bearing
Feed2 Gear
s3500-046
11. Remove the black locking tab to free and remove the purple gear on the
Retard Shaft.
12. Press the plastic release tab on the Retard Roller to remove the roller.
13. Remove 4 screws securing the Pick-Up Assembly and maneuver the pick
assembly out of the printer.
14. Remove the Front Bottom Cross Bar secured by 2 screws and the ground
strap.
Phaser 3600 Printer Service Manual
7-31
Service Parts Disassembly
s3600-047
Replacement Note
When you are replacing the Cross Bar, place the ground strap
between the bar and the printer before you insert the screw.
Note
Remove a small support metal bracket and screw separately from the
main feeder assembly while removing the 4 securing screws. Also,
remove a rubber spacing block held in place by the metal support
bracket.
7-32
Phaser 3600 Printer Service Manual
Service Parts Disassembly
s3600-088
15. Release the plastic tab on the actuator that is mounted on the metal plate.
Once the screw is out just lift it free from the boss.
16. Remove the 4 screws securing the pick assembly and maneuver the pick
assembly out of the printer.
s3600-048
Phaser 3600 Printer Service Manual
7-33
Service Parts Disassembly
Pick-Up Gear and Bearing (PL 1.1.21)
1. Perform all steps for removing the Tray 2 Pick-Up Assembly and Rollers
(page 7-30).
2. Remove the pick up gear.
3. Remove the locking bearing.
Bearing
Pick Up Gear
s3600-049
7-34
Phaser 3600 Printer Service Manual
Service Parts Disassembly
Tray 2 Feed Roller (PL1.3.59.5)
1. Perform all steps for removing the Tray 2 Pick-Up Assembly and Rollers
(page 7-30).
2. From underneath the chassis, depress the latch downward, then slide the
Feed Roller off of the shaft.
Latch
s3600-105
Tray 2 Pick Roller (PL1.3.59.2)
Note
Since the Pick Roller is accessible directly underneath the chassis, there
is no need to remove any assemblies.
1. From underneath the chassis, depress the latch downward, then slide the
Pick Roller off of the shaft.
Latch
s3600-106
Phaser 3600 Printer Service Manual
7-35
Service Parts Disassembly
Tray 2 (PL2.1.0) and Optional Tray 3 (PL2.2.0) Replacement
Note
If the printer includes the Optional Tray 3, It will be the bottom tray with a
handle. It is identical in appearance to Tray 2 located directly above.
Note
No reconfiguration parameters are required when replacing the Optional
Tray 3.
1. Remove the defective tray.
2. Remove the new tray from its plastic packaging and reinsert in the same
slot.
s3600-107
7-36
Phaser 3600 Printer Service Manual
Service Parts Disassembly
Duplex Unit (PL2.3.0)
Note
No reconfiguration parameters are required when replacing the Duplex
Unit.
1. Remove the defective Duplex Unit.
2. Remove the new Duplex Unit from its plastic packaging and reinsert in the
same slot.
s3600-089
Phaser 3600 Printer Service Manual
7-37
Service Parts Disassembly
Main Drive and Registration Assemblies
Main Drive Assembly (PL 1.1.18)
Caution
When removing screw #3 in step 3, make sure you do not bend or break the
wire connected to the varistor. Also, screw #4 has a grounding strap that must
be replaced during reassembly.
1. Remove the Right Cover (page 7-6).
2. Disconnect the CN1 cable on the Main Drive assembly. The other end is
attached to the Main Board at CN19 DC Motor.
3. Remove all 6 screws in order. The screw numbers are labeled on the
main assembly plate.
4. Remove the Main Drive Assembly.
Caution
Be careful not to reposition the gears.
1
3
6
5
2
4
s3600-050
7-38
Phaser 3600 Printer Service Manual
Service Parts Disassembly
Replacement Procedure
When reassembling:
1. Line up the metal shaft of the main drive assembly to the correct hole.
2. If necessary, lubricate the gears with Xerox Plastislip grease lubricant
(PN-043E00550).
3. Install screws in order on the etched plate when replacing the Main Drive.
Caution
Be careful not to bend the Varistor on screw #3.
Main Board (PL 1.1.19)
1. Remove the Right Cover (page 7-6).
2. Disconnect all connectors from the Main Board.
3. Remove the 6 screws (4 on the Main Board and 2 on the outside chassis
to the parallel connector) securing the Main Board to the printer.
4. Position the retainers on the parallel port connector straight out from the
connector for removal.
5. Move the board toward the front of the printer so the connectors clear the
bracket and remove the Main Board to the right.
s3600-051
Phaser 3600 Printer Service Manual
7-39
Service Parts Disassembly
Main Solenoid (PL 1.1.25)
1. Remove the Right Cover (page 7-6).
2. Disconnect the connector (CN10) from the Joint Board to the Main
Solenoid.
3. Remove 1 screw securing the Main Solenoid and remove from the
chassis.
s3600-052
7-40
Phaser 3600 Printer Service Manual
Service Parts Disassembly
Registration Assembly (PL 1.1.12)
1. Remove the Right Cover (page 7-6).
2. Remove the Left Cover (page 7-7).
3. Remove the Top Cover (page 7-10).
4. Locate the Gear Cap on the right side of the Registration Assembly.
5. Lift up on the tab to release and remove the Gear Cap from the assembly.
Gear Cap
s3600-053
6. Remove the 4 screws securing the Registration Assembly to the printer.
7. Remove the Registration Assembly from the printer.
Phaser 3600 Printer Service Manual
7-41
Service Parts Disassembly
s3600-054
7-42
Phaser 3600 Printer Service Manual
Service Parts Disassembly
Transfer Roller (PL 1.1.7)
Caution
Do not touch the surface of the Transfer Roller.
1. Open the Top Cover (page 7-10).
2. Remove the Print Cartridge and protect it from exposure to light.
3. Locate the cap on the left side of the Transfer Roller.
4. Use small needlenose pliers to depress one end of the cap and remove
from the roller.
5. Pull the tab of the bearing clips on both ends of the Transfer Roller toward
you to release roller tension.
6. Slide the roller slightly to the right so the end of the shaft clears the lip on
the printer case and lift the Transfer Roller and the Bearing Clips from the
printer.
Caution
Be careful not to drop the separate springs, copper contact, and plastic parts
into the chassis.
Holder
Transfer Roller
s3600-055
Phaser 3600 Printer Service Manual
7-43
Service Parts Disassembly
Exit Roller (PL 1.3.6)
1. Remove the Right Cover (page 7-6).
2. Remove the Left Cover (page 7-7).
3. Remove the Top Cover (page 7-10).
4. Remove the locking bearings from both ends of the shaft.
Caution
When you remove the Exit Rollers, do not lose the springs.
Exit Roller
Rack-Exit Roller
Bearing
s3600-057
Exit Gear (PL 1.3.9)
1. Remove the bearing in order to remove the Exit Gear.
Bearing
Exit Gear
7-44
s3600-058
Phaser 3600 Printer Service Manual
Service Parts Disassembly
Outbin Full Actuator (PL 1.3.8)
1. Remove the Right Cover (page 7-6).
2. Remove the Left Cover (page 7-7).
3. Remove the Top Cover (page 7-10).
4. To remove the Actuator, carefully separate the two plastic tabs on the
actuator and lift free from the Exit Roller indentation.
s3600-059
Phaser 3600 Printer Service Manual
7-45
Service Parts Disassembly
Outbin Full Sensor (PL1.3.21)
1. Remove the Right Cover (page 7-6).
2. Remove the Left Cover (page 7-7).
3. Remove the Top Cover (page 7-10).
4. Disconnect the 3-wire harness connector (CN3) from the Toner Sensor
Board.
5. Pinch two black mounting tabs from underneath the sensors to release
and remove the sensor.
s3600-090
7-46
Phaser 3600 Printer Service Manual
Service Parts Disassembly
Duplex Roller (PL 1.3.11)
1. Remove the Right Cover (page 7-6).
2. Remove the Left Cover (page 7-7).
3. Remove the Top Cover (page 7-10).
4. Using a small flatblade screwdriver, spread apart the bearings on both
side of the duplex roller and remove from the printer.
Holder
s3600-060
Phaser 3600 Printer Service Manual
7-47
Service Parts Disassembly
Exit Solenoid (PL 1.1.16)
1. Remove the Right Cover (page 7-6).
2. Remove the Left Cover (page 7-7).
3. Remove the Top Cover (page 7-10).
4. Disconnect connector CN10 from the Main Board.
5. Remove 3 screws securing the solenoid to the printer.
6. Remove the solenoid assembly.
Note
There is a resistor attached by the upper right hand screw. When
reassembling the printer, ensure the resistor is in place.
s3600-056
7-48
Phaser 3600 Printer Service Manual
Service Parts Disassembly
Frame Assembly
Feed Idle Unit (PL 1.3.50)
1. Remove the Tray 1 (MPT) Assembly (page 7-14).
2. Remove the Retard Assembly (page 7-19).
3. Remove the Tray 1 Separator (Holder) Pad Assembly (page 7-20).
4. Remove 4 screws, 2 for each of the Feed Idle Units.
5. Remove each Feed Idle Unit.
s3600-061
Phaser 3600 Printer Service Manual
7-49
Service Parts Disassembly
Pre-transfer Lamp (PTL) Board (PL 1.3.71)
1. Remove the Right Cover (page 7-6).
2. Remove the Left Cover (page 7-7).
3. Remove the Top Cover (page 7-10).
4. Remove the Registration Assembly (page 7-41).
5. Disconnect the wiring harness (CN22) from the Main Board.
6. Remove 1 screw and take out the PTL board.
PTL Upper
Terminal
PTL PBA
PTL PBA
s3600-062
7-50
Phaser 3600 Printer Service Manual
Service Parts Disassembly
Developer Drive Assembly (PL 1.1.17)
1. Remove the Right Cover (page 7-6).
2. Disconnect the Developer Drive Assembly from the connector (CN21) on
the Main Board.
3. Remove 4 screws securing the assembly to the printer.
s3600-063
Replacement Note
Reassemble the 4 screws in order of the numbers etched in the metal
plates of the Developer Drive Assembly.
Phaser 3600 Printer Service Manual
7-51
Service Parts Disassembly
Joint Board (PL 1.3.61)
1. Remove the Right Cover (page 7-6).
2. Disconnect all connectors to the Joint Board.
3. Remove 1 screw securing the Joint Board to the chassis and remove.
s3600-064
Replacement Note
Be sure to insert the board in the securing slot before re-installing the
board. Secure with the single screw.
7-52
Phaser 3600 Printer Service Manual
Service Parts Disassembly
Paper Size Sensor (PL 1.3.14)
Note
If Tray 2 or the optional Tray 3 Feeder is installed, they must be removed
before performing this procedure.
1. Remove the Print Cartridge.
2. Remove the Left Cover (page 7-7).
3. Disconnect connector (PSIZE) from the Paper Size Sensor.
4. Gently turn the printer upside down.
Note
The Paper Size Sensor can be removed and replaced without
removing the rear crossbar. However, to provide improved access,
remove the crossbar screw above the Paper Size Sensor and loosen
the screw on the other side so you can swing the crossbar out of the
way.
5. From the bottom of the printer, remove 2 screws (6mm) holding the Paper
Size Sensor assembly to the chassis and lift free from the printer.
6. To remove the sensor board from the Paper Size Sensor assembly,
remove two screws that secure the Paper Size Sensor to the assembly.
s3600-075
Replacement Note
Do not lose the copper mounting shield that connects the assembly to
the chassis.
Phaser 3600 Printer Service Manual
7-53
Service Parts Disassembly
Fuser Assembly (1.3.80)
Warning
Be sure you turn off the Printer and let the Fuser cool for 5 minutes
1. Remove the Rear Cover (page 7-8).
2. Pull the locking lever and take out the Fuser Assembly.
Note
Press the two green tabs towards the center of the machine to pull out the
Fuser.
Thermistor
Connector
s3600-065
Replacement Note
When you replace the Fuser, run the Clean Fuser cycle from the
Control Panel (page 6-4).
7-54
Phaser 3600 Printer Service Manual
Service Parts Disassembly
Fuser Interlock Switch (PL 1.3.77)
Warning
Be sure you turn off the Printer and let the Fuser cool for 5 minutes
1. Remove the Left Cover (page 7-7).
2. Remove the Rear Cover (page 7-8).
3. Follow the instructions for removing the SMPS Power Supply (page 7-76).
4. Disconnect the connector from CON5 of the SMPS Power Supply.
5. From the bottom of the printer, remove the screws holding the sensor to
the chassis.
6. Remove the Fuser Interlock Switch and wire harness.
s3600-102
Phaser 3600 Printer Service Manual
7-55
Service Parts Disassembly
Fuser Exit Sensor (PL 1.3.76)
Warning
Be sure you turn off the Printer and let the Fuser cool for 5 minutes
1. Remove the Left Cover (page 7-7).
2. Remove the Rear Cover (page 7-8).
3. Pull the locking lever and take out the Fuser Assembly.
Note
Press the two green tabs towards the center of the machine to pull out
the Fuser.
4. From the left side of the printer, disconnect CN24 from the Main Board.
5. Free the CN24 harness and carefully pull into the interior of the printer.
6. Follow the instructions for removing the SMPS Power Supply (page 7-76).
7. From the bottom of the printer, remove a single screw holding the sensor
to the chassis.
8. Remove the Fuser Exit Sensor and wire harness.
s3600-103
7-56
Phaser 3600 Printer Service Manual
Service Parts Disassembly
Fuser Thermostat (PL 1.4.3)
Warning
Be sure you turn off the Printer and let the Fuser cool for 5 minutes
1. Remove the Fuser Assembly from the Printer (page 7-54).
2. Remove two screws (6mm) securing the Thermostat to the Fuser
assembly.
3. Slide one wire connector off each end of the Thermostat tabs.
s3600-115
4. Pull the Thermostat free from the Fuser Assembly.
Replacement Note
Be sure to insert the Thermostat with the Foil side near the edge of
the Assembly.
Phaser 3600 Printer Service Manual
7-57
Service Parts Disassembly
Fuser Thermistor (PL 1.4.40)
Warning
Be sure you turn off the Printer and let the Fuser cool for 5 minutes
1. Remove the Fuser Assembly from the Printer (page 7-54).
2. Remove two screws from the Fuser assembly (see inset below).
s3600-114
7-58
Phaser 3600 Printer Service Manual
Service Parts Disassembly
3. Unfold the Fuser Assembly to expose the Heat Roller and the Pressure
Roller.
s3600-124
4. Disconnect the 4-wire Thermistor plug from the Fuser Connector.
5. Remove one screw holding each of the two Thermistors and remove both
thermistors with plug wiring harness from the Fuser Assembly.
s3600-132
Phaser 3600 Printer Service Manual
7-59
Service Parts Disassembly
Heat Roller (PL 1.4.53) and Bushing (PL 1.4.44)
Warning
Be sure you turn off the Printer and let the Fuser cool for 5 minutes
1. Remove the Fuser Assembly from the Printer (page 7-54).
2. Remove two screws from the Fuser assembly (see inset below).
s3600-114
7-60
Phaser 3600 Printer Service Manual
Service Parts Disassembly
3. Unfold the Fuser Assembly to expose the Heat Roller and the Pressure
Roller.
s3600-124
4. Facing the Fuser Connector, disconnect the single wire connector from
the right tab of the Thermistor.
s3600-116
Phaser 3600 Printer Service Manual
7-61
Service Parts Disassembly
5. Remove two screws (8mm) securing the Fuser connector to the Fuser
Assembly.
s3600-119
6. Disconnect the center Thermistor plug from the Fuser Connector.
s3600-117
7-62
Phaser 3600 Printer Service Manual
Service Parts Disassembly
7. Loosen (but do not remove) two screws (6mm) securing the Heat Roller
retaining plates on each side of the Heat Roller.
L
s3600-118
R
s3600-127
Phaser 3600 Printer Service Manual
7-63
Service Parts Disassembly
8. Pull the retaining plates away from roller and lift the roller free from the
assembly.
Note
Make sure you do not lose any of the Heat Roller claws.
s3600-125
9. Remove the bushing (and rubber sleeve) from the left side of the roller.
s3600-121
7-64
Phaser 3600 Printer Service Manual
Service Parts Disassembly
10. .From the right side of the roller, remove the spring retaining clip securing
the gear to the roller.
s3600-122
Caution
Be careful not to break the Dual-lamp when removing the roller.
Caution
Be sure to seat the Heat Roller claws over the Heat Roller before securing the
Heat Roller to the assembly.
s3600-126
Phaser 3600 Printer Service Manual
7-65
Service Parts Disassembly
Dual-lamp (PL 1.4.56)
Warning
Be sure you turn off the Printer and let the Fuser cool for 5 minutes
1. Remove the Fuser Assembly from the Printer (page 7-54).
2. Remove the Heat Roller and Bushing (page 7-60).
3. Slide the Dual-lamp free from the Heat Roller.
s3600-120
Caution
Do not touch the lamps when re-installing. Fingerprints can cause the lamps
to burn out prematurely.
7-66
Phaser 3600 Printer Service Manual
Service Parts Disassembly
Pressure Roller (PL 1.4.66) and Bushing (PL 1.4.50)
Warning
Be sure you turn off the Printer and let the Fuser cool for 5 minutes
1. Remove the Fuser Assembly from the Printer (page 7-54).
2. Remove two screws from the Fuser assembly (see inset below).
s3600-114
Phaser 3600 Printer Service Manual
7-67
Service Parts Disassembly
3. Unfold the Fuser Assembly to expose the Heat Roller and the Pressure
Roller.
s3600-124
4. Facing the Fuser Connector, disconnect the single wire connector from
the right tab of the Thermistor.
5. Remove two screws (8mm) securing the Fuser connector to the Fuser
Assembly.
6. Remove one screw from each end of the Pressure Roller.
s3600-128
7-68
Phaser 3600 Printer Service Manual
Service Parts Disassembly
7. Slide the retaining plate and bushing off of each end of the Pressure
Roller.
8. Lift the Pressure Roller free from the assembly.
s3600-130
Replacement Note
Slide the retaining plates with bushings onto the Roller and seat into
the plastic retainers before securing the two end screws.
Phaser 3600 Printer Service Manual
7-69
Service Parts Disassembly
Laser Scan Unit (PL 1.1.15)
1. Remove the Right Cover (page 7-6).
2. Remove the Left Cover (page 7-7).
3. Remove the Top Cover (page 7-10).
4. Remove the cover-frame exit cover.
s3600-091
5. Disconnect the LSU cable connector from CN10 on the Main Board.
6. Remove the 3 screws (8mm) securing the LSU to the chassis and remove
the LSU from the printer.
7-70
Phaser 3600 Printer Service Manual
Service Parts Disassembly
s3600-066
Replacement Note
The screws are numbered and need to be replaced and tightened in
the correct order.
Phaser 3600 Printer Service Manual
7-71
Service Parts Disassembly
LSU Lower Cover (PL 1.3.48)
1. Remove 1 screw securing the fan duct.
2. Remove the fan and duct to access the screws in the next step.
3. Remove 3 screws (12mm) securing the LSU Cover.
4. Disconnect all the connectors running to the LSU Cover.
5. Lift the cover free from the chassis.
s3600-067
7-72
Phaser 3600 Printer Service Manual
Service Parts Disassembly
Left Side Cooling Supply Fan and Duct (PL 1.1.31)
1. Remove the Right Cover (page 7-6).
2. Remove the Left Cover (page 7-7).
3. Remove the Top Cover (page 7-10).
4. Remove the Laser Scan Unit (page 7-70).
5. Remove the LSU Lower Cover (page 7-72).
6. Remove a single screw and lift the fan duct covering the Toner Sensor
Board.
7. Disconnect the fan connector to the Toner Sensor Board.
8. Remove 1 screw to remove the fan from the printer.
Stopper
s3600-068
Phaser 3600 Printer Service Manual
7-73
Service Parts Disassembly
Cover Open Board and Sensor (PL 1.3.47)
1. Remove the Right Cover (page 7-6).
2. Remove the Left Cover (page 7-7).
3. Remove the Top Cover (page 7-10).
4. Remove the Laser Scan Unit (page 7-70).
5. Remove the LSU Lower Cover (page 7-72).
6. Remove 1 screw securing the cover open housing harness cover.
7. Release the latching tab and remove the cover open housing harness
cover.
8. Disconnect the connector (CN13) from the Main Board.
9. Using a small flatblade screwdriver, release the 4 tabs to remove the
Cover Open Board.
Cover Open Board
Harness Cover
Cover Open
s3600-070
7-74
Phaser 3600 Printer Service Manual
Service Parts Disassembly
Power Supplies
High Voltage Power Supply (HVPS) (PL 1.1.29.1)
Note
Do not lose the three board-retaining springs when removing the HVPS.
1. Remove the Left Cover (page 7-7).
2. Remove the Rear Cover (page 7-8).
s3600-092
3. Remove 6 screws from the HVPS.
4. Disconnect all connectors from the HVPS.
5. Remove the HVPS from the printer.
Replacement Note
After reinstalling the SMPS board, make sure the actuator from the
chassis can move freely into the Paper Tray Empty Sensor.
Phaser 3600 Printer Service Manual
7-75
Service Parts Disassembly
Switched Mode Power Supply (PL 1.1.29.2)
1. Remove the Print Cartridge.
2. Remove Tray 2 and Tray 3 (if installed).
3. Remove the Right Cover (page 7-6).
4. Remove the Rear Cover (page 7-8).
5. Remove the Registration Assembly (page 7-41).
6. Turn the printer upside down so that you are viewing the bottom of the
chassis.
7. Remove the rear Cross Bar secured by 2 screws.
8. Remove the Tray 2 No Paper Actuator for better access.
9. Remove the left and right Duplex Unit Guides.
2
1
s3600-072
10. Remove 5 screws from the SMPS Power Supply Board.
11. Remove one grounding screw from the rear of the power supply.
12. Remove the SMPS Power Supply Board from the printer.
Caution
Since the fuser wire is hardwired to the SMPS Power Supply Board,
disconnect the wire from the fuser side.
7-76
Phaser 3600 Printer Service Manual
Service Parts Disassembly
s3600-073
Phaser 3600 Printer Service Manual
7-77
Service Parts Disassembly
7-78
Phaser 3600 Printer Service Manual
Parts List
In this chapter...
■
Serial Number Format
■
Using the Parts List
■
PL 1.1 Main Assembly
■
PL 1.2 Cover Assembly
■
PL 1.3 Frame Assembly (1 of 2)
■
PL 1.3 Frame Assembly (2 of 2)
■
PL 1.4 Fuser Assembly
■
PL 2.1 Tray 2 Cassette
■
PL 2.2 Tray 3 Cassette
■
PL 2.3 Duplex Assembly
Chapter
8
Parts List
Serial Number Format
Changes to Xerox products are made to accommodate improved components
as they become available. It is important when ordering parts to include the
following information:
■
Component's part number
■
Product type or model number
■
Serial Number of the printer
The serial number is found on a label located on the frame of the printer. Front
Cover must be opened to locate the Serial Number.
The nine-digit serial number has the following format:
■ PPPRSSSSS
■ PPP = Three digit alphanumeric product code
■ R = Single digit numeric revision digit, 0~9. To be rolled when a major product
change occurs and initiated with a change request.
Product Code
Product
MLB
3600_B, 110 V Engine
MKA
3600V_B, 220 V Engine
MHB
3600_N, 110 V Engine
MHX
3600V_N, 220 V Engine
Mass Production Units (MP Build)
PPP1SSSSS
SSSSS = Five digit numeric serial number based on the following table:
Product
Starting Serial Number
Ending Serial Number
3600_B, 110 V Engine
804501
836500
3600V_B, 220 V Engine
836501
843500
3600_N, 110 V Engine
843501
908500
3600V_N, 220 V Engine
908501
995500
Example
MLB1804599: Xerox Serial Number
MLB: Product Code for the Phaser 3600, configuration B, 110V printer
1 = Revision Level
804599 = Serial Number for 3600_B
Serial Number Format
8-2
Phaser 3600 Printer Service Manual
Parts List
Serial Number Label Location
The location of the Serial Number Label appears to the right of Tray 1 (MPT)
output bin.
Phaser™ 3600_N
Xerox Corporation
Manufactured: JUNE 2008
Serial No.: MHB843514
s3600-110
Phaser 3600 Printer Service Manual
8-3
Parts List
Using the Parts List
1. No.: The callout number from the exploded part diagram.
2. Part Number: The material part number used to order specific parts.
3. Qty: This number represents the parts per printer, not the number of
parts supplied in the actual part order.
4. Name/Description: Details the name of the part to be ordered and the
number of parts supplied per order.
5. Parts identified throughout this manual are referenced PL #.#.#; For
example, PL 3.1.10 means the part is item 10 of Parts List 3.1.
6. A black triangle preceding a number followed by a parenthetical statement
in an illustrated parts list means the item is a parent assembly, made up of
the individual parts called out in parentheses.
7. The notation “with X~Y” following a part name indicates an assembly that
is made up of components X through Y. For example, “1 (with 2~4)”
means part 1 consists of part 2, part 3, and part 4.
8. An asterisk (*) following a part name indicates the page contains a note
about this part.
9. The notation (NS) next to a part indicates that particular part is not
spared, but contained in a kit or major assembly.
The notation “J1<>J2 and P2” is attached to a wire harness. It indicates that
connector Jack 1 is attached to one end of the wire harness and connector J2
is attached to the other end that is plugged into P2.
Only parts showing part numbers are available for support. Parts not
showing part numbers are available on the parent assembly.
8-4
Identifier
Meaning
C
C-ring
E
E-ring
KL
K-clip
S
Screw
Phaser 3600 Printer Service Manual
Parts List
Phaser 3600 Printer Service Manual
8-5
Parts List
PL 1.1 Main Assembly
0
2
37
10
8
8-1
8-2
8-3
8-4
12 14
7
3
9-1
9-2
9-3
15
13
3-4
9
3-5
3-3
31
32
38
16
39
3-2
3-1
3-6
34
41
17
35
1
19
24 18
20-120-3
25
26
29
27
21
20-2
21-3
21-2
21-1
5
20
4-2
22
23
6
4
4-1
28
30
36
30
s3600-011
8-6
Phaser 3600 Printer Service Manual
Parts List
PL 1.1 Main Assembly Parts List Table
ID No.
Name/Description
Part Number
1
ELA UNIT FRAME BASE
2
ELA HOU BASE HOUSING
3
MEA UNIT KNOCK UP MP (Tray 1 Knock-Up Plate) 050N00475
3.1
PLATE M KNOCK UP MP
3.2
MPR PAD KNOCK UP MP
3.3
PMO SIDE GUIDE MP R
3.4
PMO SIDE GUIDE MP L
3.5
GEAR PINION
3.6
SHAFT REINFORCEMENT
4
MEA UNIT COVER MP XRX (Transfer Roller)
4.1
COVER M MP XRX
4.2
TRAY M EXTND MP
5
TRAY M LINK MP L
012N00521
6
TRAY M LINK MP R
012N00522
7
ROLLER TRANSFER
022N02353
8
ELA UNIT HOLDER TR R
030N00560
8.1
PMO BUSHING TR
8.2
SPRING ETC TR R HAWK
8.3
PMO TRANSFER HOLDER
8.4
IPR PLATE TR
9
ELA UNIT HOLDER TR L
9.1
PMO BUSHING TR
9.2
SPRING ETC TR R HAWK
9.3
PMO TRANSFER HOLDER
10
PMO CAP TR
021N02248
12
ELA UNIT REGI (Registration Assembly)
146N00131
13
GEAR REGI Z25
007N01360
14
CAP M GEAR
007N01599
15
UNIT LSU (Laser Scan Unit)
122N00276
16
ELA UNIT EXIT SOLENOID
121N01100
17
ELA UNIT DEVE MOTOR
127N07389
18
ELA UNIT MAIN MOTOR
127N07571
19
PBA MAIN (Base)
PBA MAIN (Network)
140N63317
140N63333
20
MEA UNIT GEAR PICK UP
007N01598
20.1
GEAR M PICK UP CAM
20.2
GEAR M PICK UP
20.3
SPRINT ETC CAM MP
21
MEA UNIT GEAR P/UP MP CARDINAL (Feed Unit
2)
002N02410
019E63480
11
Phaser 3600 Printer Service Manual
007N01600
8-7
Parts List
PL 1.1 Main Assembly Parts List Table (continued)
8-8
ID No.
Name/Description
21.1
GEAR MP HOLDER CAM
21.2
GEAR MP PICK UP
21.3
SPRING ETC CAM MP
22
BEARING PICK UP
23
BRACKET P SHAFT MP
25
SOLENOID MAIN
121N01167
26
SOLENOID MP (Tray 1 (MPT) Pick Solenoid)
121N01102
27
RING E
28
SHIELD P SMPS
29
SMPS V1- 110V
SMPS V2- 220V
30
BAR P CROSS BOTTOM (Front Bottom Cross Bar)
31
FAN DC (Left Side Cooling Fan)
32
STOPPER M FAN80
34
ELA UNIT DEVE (Print Cartridge)
7K Toner Cartridge
14K Toner Cartridge
106R01370
106R01371
35
ELA UNIT CASSETTE (Tray 2)
109R00756
36
ELA UNIT SCF (Optional Tray 3)
097N01673
37
ELA UNIT DUPLEX
097N01679
38
BRACKET P DUMMY CTRL
39
HVPS
39.1
BRACKET NIC
39.2
PBA SUB (NIC BOARD)
40
STOPPER M NETWORK
41
40MM FAN
Part Number
105N02144
105N02146
127N07569
105N02145
127N07568
Phaser 3600 Printer Service Manual
Parts List
Phaser 3600 Printer Service Manual
8-9
Parts List
PL 1.2 Cover Assembly
1-1
1-8
1-5
0
1-13
1-11
1-12
1-10
1-4
1-3 1-4
1-5
1
1-9
1-2
7
1-X
2
6-9
6-10
6-1
6
8
6-3
6-2
6-6
6-7
4
6-8
6-5
6-4
3
5
s3600-012
8-10
Phaser 3600 Printer Service Manual
Parts List
PL 1.2 Cover Assembly Parts List Table
Phaser 3600 Printer Service Manual
ID No.
Name/Description
Part Number
1 (1-X)
AS UNIT COVER TOP
002N02411
1-1
COVER M TOP
002N02730
1-2
COVER M OPEN XRX
002N02729
1-3
PMO STACKER RX
002N02418
1-4
LEVER M STACKING 38
036N00030
1-5
STOPPER M HINGE OPEN
1-6
COVER M OP PANEL XRX
1-7
SHEET OVERLAY BUTTON
1-8
MEC BRUSH ANTISTATIC
1-9
PBA SUB PANEL B’D
1-10
KEY M BUTTON XRX
1-11
KEY M CANCEL
1-12
CAP M LED XRX
1-13
WINDOW M LCD
2
COVER M LEFT
002N02413
3
COVER M RIGHT
002N02414
4
COVER M CONTROL BOX
002N02419
5
COVER M FRONT INNER
002N02415
6
MEA UNIT COVER REAR
002N02416
6.1
COVER M REAR
6.2
PMO STACKER REAR
6.3
ICT BRKT REAR COVER
6.4
GUIDE M EXIT
6.5
PMO STRIPE
6.7
PEX ROLLER F/UP(2)
6.8
SPRING ETC SEPARATION
6.9
LABEL(P) JAM REMOVAL
6.10
FAN
127N07569
7
CO VER M FRAME EXIT
002N02417
8
COVER M DUMMY DUP (FILLER PANEL)
002N02420
140N63320
001N00462
8-11
8-12
4
4-1
4-2
14
15
20
4-5
4-6
2
2-2
18
14-3
16
4-7 4-8
4-3 4-4
14-2
14-1
17 18
0
1
2-4-3
2-4-2
42
45
17
19
2-4-1
41
39
2-4
2-1
40
22
43
21
2-5
43
2-2
8
44
6
39
5-4
12
35
33
5-3
5-2
5-1
10
34
5
3
32 31
37
36
9
29
25
23
43
3-5
13
3-1
28
3-4
26
24
27
11
12
3-7
3-2
3-3
3-7
3-7
38
30
11-2
11-1
3-6
11-2
s3600-013
Parts List
PL 1.3 Frame Assembly (1 of 2)
Phaser 3600 Printer Service Manual
Parts List
PL 1.3 Frame Assembly (2 of 2)
0
48-2
48-7
48-9
48-4
48-6
48
48-8
48-1
48-5
99
81
48-3
98
87 84
85
89
88
91
47
90
92
47-2
47-3
47-4
83
82
78
80
83 79
77
100
76
86
47-5
93
94
47-1
71
70
72
96
49
49-5
95
97
49-3
49-2
49-4
49-8
49-7
49-760-4 60-4
49-9
49-10
49-11
49
50
50-4
50-3
49-1
49-9
49-10
49-13
49-12
69
51
53
58
59
59-2-1
59-7
59-5-2 59-5-1
59-4
59-2-2
59-2-3
59-3
59-2
Phaser 3600 Printer Service Manual
65
50-6 50-9
50-6
50-5
50-150-7
50-2
61
54
59-9
59-6
59-10
59-5
66
41 50
59-8
59-1
63
60-6 60-6-3
60-1
52
60
55 56
57
67
64
62
59-11
73
68
60-4
60-5
60-2
60-6-1
60-6-2
60-3
s3600-014
8-13
Parts List
PL 1.3 Frame Assembly Parts List Table
Item No.
Description
Part Number
1
FRAME M BASE
2
MEA UNIT PICK UP MP (Tray 1 Pick-Up Rack)
2-1
SHAFT M PICK UP MP
2-2
PMO IDLE PICK UP MP
2-4
ELA UNIT ROLLER P/UP MP
2-4-1
HOLDER M PICKUP MP
2-4-2
HOUSING M PICK UP MP
2-4-3
RUBBER PICK UP MP
2-5
CAM M SHAFT
3
MEA UNIT GEAR IDLE
3-1
BRACKET P GEAR IDLE
3-2
GEAR FUSER IDLE 3
3-3
GEAR M FUSER IDLE 2
3-4
GEAR M FUSER DRV IN
3-5
CLUTH M HUB
3-6
GEAR RDCN FUSER OUT
3-7
RING-E
4
ELA HOU BASE HOLDER (Separator Pad Assembly)
4-1
FRAME M HOLDER PAD
4-2
HOLDER M PAD
4-3
RPR FRICTION PAD MP
4-4
SPRING ETC PAD
4-5
PMO ACTUATOR EMPTY MP
4-6
SPRING ETC EMPTY
4-7
PHOTO INTERRUPTER
4-8
CBF HARNESS MP EMPTY
5
MEA RACK EXIT ROLLER
5-1
PMO HOLDER EXIT ROLL
5-2
PMO ROLLER FD F
5-3
PMO ROLLER FD R
5-4
SPRING EXIT ROLL FD
6
ROLLER EXIT F/DOWN
006N01264
8
PMO ACTUATOR OUT FULL (Outbin Full Actuator)
120N00479
9
GEAR M EXIT Z17
007N01364
130N01536
022N02182
007N01362
022N02173
022N02081
7
8-14
Phaser 3600 Printer Service Manual
Parts List
PL 1.3 Frame Assembly Parts List Table (continued)
Item No.
Description
Part Number
10
HOLDER BUSHING EXIT (F/DOWN)
013E25770
11
MEA UNIT ROLL EXIT DUPLEX (Duplex Roller)
006N01265
11-1
SHAFT M EXIT DUPLEX
11-2
RMO RUBBER EXIT DUP
12
BUSH M EXIT D7
013N13839
13
GEAR M EXIT DUP Z21
007N01363
14
ELA HOU CST SENSOR (Paper Size Sensor)
130N01461
14-1
PBA SUB CASSETTE
14-2
IPR PLATE SENSOR
14-3
IPR BRACKET SENSOR
15
CBF HARNESS PSIZE
16
GUIDE P REGI UPPER
17
SPRING ETC LEVER
18
HOLDER M BUSHING TX
19
GUIDE PLATE PAPER
20
IPR P GROUND PLATE PAPER
21
PHOTO INTERRUPTER (Outbin Full Sensor)
23
CBF HARNESS THERM
24
PMO HOUSING TERMINAL
25
IPR TERMINAL FU
26
CBF HARNESS FUSER
27
CAP M HOUS TERM
28
SHIELD P CTRL
29
GROUND P MOTOR DEVE
30
GROUND P GUIDE TR
31
GROUND P REGI ROLLER
32
GROUND P PICK UP MP
33
GROUND P SCF MAIN
34
GROUND P MOTOR MAIN
35
GROUND P GUIDE DUP
36
CAP M GUIDE HARNESS
37
PMO DUMMY DEVE
38
ELA HOU VARISTOR
39
FOOT ML80
40
PMO REMOVE LOCK CST
Phaser 3600 Printer Service Manual
130N01274
8-15
Parts List
PL 1.3 Frame Assembly Parts List Table (continued)
Item No.
Description
41
SHAFT M GEAR RETARD
42
SHAFT M COUPLING RETARD
43
PMO BEARING SHAFT
44
GEAR REGI Z25
Part Number
013N13841
45
8-16
47
MEA UNIT FRAME LSU LOW (Sub-toner Low Sensor)
001N00500
47-1
FRAME M LSU LOWER (LSU Lower Cover)
47-2
PBA TONER SENSOR
47-3
TERMINAL P DEVE
47-4
PBA SUB COVER OPEN
130N01399
47-5
CAP M COVER OPEN
002N02729
48
ELA UNIT FEED 3X5
022N02174
48-1
HOLDER M SAW
48-2
GUIDE P TRANSFER FRONT
48-3
PLATE P SAW
48-4
SHAFT M ROLLER BELT
48-5
ROLLER M IDLE BELT
48-6
IEX SHAFT IDLE, F/UP
48-7
RUBBER BELT FEED
48-8
GUIDE M SHAFT BELT
49
ELA UNIT ROLLER IDLE
49-1
FRAME M RETARD
49-2
HOLDER M RETARD
49-3
SPRING ETC PAD
49-4
BUSH M RETARD 2
49-5
HOUSING M RETARD
49-6
SHAFT RETARD
49-7
RING-E
49-8
PMO HUB OUT RETARD
49-9
SPRING TS
49-10
PMO HUB IN RETARD
49-11
RUBBER RETARD
50
ELA UNIT FEED2 IDLE (Feed 2 Idle Unit)
50-1
HOLDER IDLE FEED2
50-2
CAP M IDLE FEED2
022N02349
022N02176
Phaser 3600 Printer Service Manual
Parts List
PL 1.3 Frame Assembly Parts List Table (continued)
Item No.
Description
50-3
SPRING ETC PAD
50-4
BUSH M RETARD
50-5
SHAFT IDLE FEED2
50-6
RING-E
50-7
ROLLER M IDLE FEED2
50-9
SHAFT HUB IN
51
STOPPER M KNOCK UP MP L
52
STOPPER M KNOCK UP MP R
53
RAIL M LEFT DUPLEX
032N00441
54
RAIL M RIGHT DUPLEX
032N00442
55
PMO BEARING SHAFT
013N13841
56
GEAR REGI E25
57
BEARING PICK UP
58
PMO ACTUATOR EMPTY (Paper Tray Empty Actuator)
120N00519
59
ELA UNIT PICK UP
022N02183
59-1
SHAFT PICK UP
59-2
MEA UNIT P/UP HOUSING (Pick Roller)
59-2-1
PMO M IDLE PICK UP
59-2-3
RUBBER PICK UP
59-3
PMO M CAM PICKUP
59-4
SHAFT FEED 1
59-5
AS FEED 1 ROLL ASSY
59-5-1
HOUSING M FEED1
59-5-2
RUBBER FEED1
59-6
GROUND P PICK UP MAIN
59-7
BEARING PICK UP
59-8
PMO BUSHING FEED
59-9
GUIDE P FRONT DUP PICKUP
59-10
GUIDE M SUPPORT PICKUP
60
ELA UNIT FEED2
60-1
FRAME M PICK UP
60-2
PMO BUSHING FEED
60-3
SHAFT M FEED2
60-4
BEARING PICK UP
60-5
RUBBER ROLLER FEED2
Phaser 3600 Printer Service Manual
Part Number
022N02177
022N02187
022N02178
8-17
Parts List
PL 1.3 Frame Assembly Parts List Table (continued)
Item No.
Description
Part Number
61
PBA SUB JOINT (Joint Card)
140N63022
62
CBF HARNESS TRAY OUT
63
CAP M POWER
64
CBF HARNESS INLET
65
SHAFT M BELT GEAR
66
PMO BEARING SHAFT
67
GEAR M EXIT Z17
68
CAP M DEVE MOTOR
69
CBF HARNESS DUPLEX
71
CAP M WIRE PTL LOWER
021N02249
72
TERMINAL P PTL
116N00243
73
CBF HARNESS PTL
152N11756
74
8-18
76
PBA SUB EXIT SENSOR (Fuser Exit Sensor)
130N01400
77
PBA FUSER SW (Fuser Interlock Switch)
130N01401
78
GUIDE M FRONT
79
TERMINAL P GUIDE FRONT
80
ELA UNIT FUSER 110V
ELA UNIT FUSER 220V
81
PMO GUIDE DEVE L
82
PMO GUIDE DEVE R
83
SPRING ETC GUIDE DEVE
84
TERMINAL P TR KESTREL
86
TERMINAL SPRING TR
87
PBA MAIN ZENER
88
CBF HARNESS EARTH
89
GROUND P ZENER
90
GROUND P FUSER
91
TERMINAL P HV CARDINAL
92
MEA UNIT TERMINAL TR
93
CBF HARNESS HVPS
94
IPR P GROUND OPC
95
PBA SUB EMPTY SENSOR (Paper Tray Empty Sensor)
96
CBF HARNESS SENSOR
97
PBA SUB FEED SENSOR (Tray 1 FeedSensor)
98
CAP M HV
126N00293
126N00294
140N63023
140N63024
Phaser 3600 Printer Service Manual
Parts List
Phaser 3600 Printer Service Manual
8-19
Parts List
PL 1.4 Fuser Assembly
2
5
3
4
4
6
1
7
10
8
34
2
60
36
24
28
35
27
48
26
8
28
33
32
31
37
38
29
40
58
47
62
45
15
13
28
17
27
41
14
2
25
26
27
18
19
53
63
52
20
21
24
42
54
61
12
16
28
39
45
51
8
2
27
57
46
50
7
28
33
32
31
55
56
49
9
29
44
11
30
43
46
64
22
44
23
45
2
47
48
49
65
50
52
51
66
59
s3600-015
8-20
Phaser 3600 Printer Service Manual
Parts List
PL 1.4 Fuser Assembly Parts List Table
Phaser 3600 Printer Service Manual
Item No.
Description
Part Number
1
ELA UNIT FUSER (110V)
ELA UNIT FUSER (220V)
126N00293
126N00294
2
SCREW-TAPTITE
3
THERMOSTAT
4
SCREW-TAPTITE
5
HARNESS-FUSER
6
COVER-FUSER UP LAMP
7
PMO BUSHING TX
8
HOLDER -IDLE ROLLER
9
SPRING ETC ACTUATOR
10
PMO ROLLER UPPER DP
11
PMO ACTUATOR EXIT
12
GEAR-EXIT
13
HOLDER REAR LEVER
14
LABEL HOLD-REOPEN
15
ROLLER EXIT F_UP
16
PLATE ACTUATOR COVER
17
HOLDER-LEVEL R
18
GEAR IDLE
19
CAP ACTUATOR
20
GREASE-BEARING
21
RING E
22
GEAR-FUSER 2 LAMP
23
BRACKET LAMP-RIGHT
24
BEARING BALL
25
BRACKET FUSER-LAMP
26
RING CS
28
SPRING ETC-SEPARATION
29
GUIDE-CLAW POLY
30
COVER SLIDE SENSOR
31
TEX-SHAFT IDLE F/UP
32
PEX ROLLERF/UP
33
SPRING-TS
34
HOLDER-LEVER L
35
GROUND FUSER BRUSH
130N01537
8-21
Parts List
PL 1.4 Fuser Assembly Parts List Table (continued)
8-22
Item No.
Description
36
LEVER AUTO RELEASE L
37
TUBE SMALL
38
TUBE MIDDLE
39
RING E
40
THERMISTOR
41
TUBE LARGE
42
SPRING ETC LOCK
43
LEVER AUTO RELEASE R
44
BUSHING-HEAT_ROLLER
48
BEARING BALL
49
CAP FUSER LOCK
50
BUSHING PRESSURE_ROLLER
52
HOLDER PR SHAFT
53
HEAT ROLLER
54
BRACKET DRAWER
55
MEC-BRUSH ANTISTATIC
56
LAMP-DUAL 266 (110V)
LAMP-DUAL 266 (220V)
57
GROUND HR LAMP
58
SPRING CS
59
COVER FUSER LO LAMP
60
BRACKET LAMP-LEFT
61
CAP ACTUATOR
63
SPRING ETC GUIDE
64
FELT CLEAN TONER
65
GUIDE REAR LAMP
66
PRESSURE ROLLER
Part Number
130N01462
013N13883
013N13884
022N02351
122N00277
122N00278
022N02352
Phaser 3600 Printer Service Manual
Parts List
Phaser 3600 Printer Service Manual
8-23
Parts List
PL 2.1 Tray 2 Cassette
0
7
8
9
17
6
20-3
20-2
10
13
14
11
20
20-4
27
20-1
12
21
19
16
15
25
26
18
4
2
1
3
5
s3600-016
8-24
Phaser 3600 Printer Service Manual
Parts List
PL 2.1 Tray 2 Assembly Parts List Table
Phaser 3600 Printer Service Manual
Item No.
Description
Part Number
0
ELA UNIT CASSETTE
109R00756
1
FRAME M CASSETTE
2
GUIDE M HANDLE
3
INDICATOR EMPTY
4
PLATE P KNOCK UP
5
SPRING PLAT K/UP
6
GEAR PINION
7
CAP M GUIDE SIDE L
8
GUIDE P SIDE L
9
GUIDE M SIDE LOCK
10
GUIDE P SIDE R
11
GUIDE M REAR
12
GUIDE P REAR PAPER
13
SPRING ETC GUIDE PAPER
14
GUIDE M LOCK
15
GUIDE M REAR
16
GUIDE M EXTENTION
17
BRACKET P EXTENTION
18
GUIDE M PAPER
19
HOLDER M PAD HOUSING
20
MEA UNIT HOLDER PAD
20-1
HOLDER M PAD
20-2
SHEET HOLDER PAD R2
20-3
RPR FRICTION PAD
20-4
IPR PLATE PAD
21
SPRING EXIT ROLL FD
25
PMO LOCKER PLATE
26
SPRING LOCKER PLATE
27
GUIDE M PAPER SIZE
019N00947
8-25
36
37
8-26
38-2
34-2
38
34
38-1
34-3
34-1
22
34-1
3
16
35
16
25 16
26
27
28
35
42
35
43
21
20
30
14
11-1
10
18
14
15 16 13
32
14
17
31 16
20
29
41
4
19
33
5
11
11-5
11-3
11-4
12
1
11-2
0
7
40
2
6
8 9
s3600-017
Parts List
PL 2.2 Tray 3 Cassette
Phaser 3600 Printer Service Manual
Parts List
PL 2.2 Tray 3 Cassette Parts List Table
Item No.
Description
Part Number
0
ELA UNIT SCF (Tray 3, 500-sheet feeder)
050N00543
1
FRAME M SCF
2
COVER M RIGHT SCF
3
COVER M LEFT SCF
4
COVER M DUMMY SCF
5
PBA SCF
6
CBF HARNESS OPE
8
BUSH CABLE
9
CBF HARNESS SCF INTERFACE
10
SOLENOID MAIN
11
ELA UNIT MOTOR SCF
11-1
BRACKET P SCF MOTOR
11-2
MOTOR STEP 7.5 DEG
11-3
GEAR M SCF RDCN RETARD
11-4
GEAR M SCF RDCN FEED
11-5
GEAR M SCF RDCN PICK UP
12
CBF HARNESS OPE
13
IPR GROUND SPRING FEED
14
PMO BEARING SHAFT
15
MEP CLUTCH FEED SCF
16
RING E
17
SHAFT M COUPLING RETARD S
18
SHAFT M GEAR RETARD
19
GEAR REGI Z25
20
BAR P CROSS BOTTOM
21
PMO REMOVE LOCK CST
22
ELA UNIT IDLE SCF
140N63300
152N11714
127N07570
022N02350
23
24
Phaser 3600 Printer Service Manual
25
SHAFT PICK UP SCF
27
PBA SCF COVER OPEN
28
ELA HOU CST SENSOR
29
PHOTO INTERRUPTER
30
PMO ACTUATOR EMPTY, SCF
120N00520
31
GEAR SCF PICK UP CAM
007N01366
140N63025
8-27
Parts List
PL 2.2 Tray 3 Cassette Parts List Table (continued)
8-28
Item No.
Description
32
FOOT ML80
33
IPR GROUND TOP
34
MEA UNIT PICK UP HOU
34-1
PMO M IDLE PICK UP
34-2
RUBBER PICK UP
34-3
HOUSING M PICK UP
35
PMO BUSHING FEED
36
PMO M DUMMY SHAFT
37
SPRING ES
38
HOUSING M FEED1
39
RUBBER FEED1
40
CBF HARNESS MOTOR
41
CBF HARNESS SCF EMPTY
42
CBF HARNESS SCF CASSETTE
43
CBF HARNESS SCF P SIZE
Part Number
Phaser 3600 Printer Service Manual
Parts List
Phaser 3600 Printer Service Manual
8-29
Parts List
PL 2.3 Duplex Assembly
3
0
25
26 26
24
2
4
33 27
32 30
28 29
28
16
8
34
10
30
31
9
7
6
11
1
17
13
12
18
19 20 21
22
5
14
15
23
s3600-018
8-30
Phaser 3600 Printer Service Manual
Parts List
PL 2.3 Duplex Assembly Parts List Table
Phaser 3600 Printer Service Manual
Item No.
Description
Part Number
0
ELA UNIT DUPLEX
022N02412
1
FRAME M DUPLEX
2
GUIDE M UPPER DUP
3
COVER M REAR DUP
4
MEA ETC ALIGN DUP
4-1
GUIDE M ALIGN DUP
4-2
SHAFT IDLE ROLL DUP
4-3
ROLLER M IDLE DUP
4-4
PCT SLIP WASHER
4-5
SPRING ETC DUP
4-6
PULLEY M 18 DUMMY DUP
4-7
PULLEY 18 DUP
4-8
BUSH M FEED DUP
4-9
BELT TIMMING
4-10
ROLLER FEED DUP
4-11
RING C
5
CAP M CONNECTOR DUP
6
DUCT M FAN DUP
7
FAN DC HAWK
8
PBA SUB DPX SCF
9
CABLE CLAMP
10
IPR TERMINAL GND DUP
11
LOCKER M DUP
12
SHEET FRAME DUP
13
SPRING TS
14
PMO ACTUATOR FEED DUP
15
PBA SUB MP SEN (Duplex Exit sensor)
16
CBF HARNESS POWER GND
17
MOTOR STEP
18
BRACKET P MOTOR DUP
19
PULLEY M 30 DUP
20
BELT TIMING GEAR
21
PULLEY M 30 DUMMY DUP
22
RING E
23
CBF HARNESS D JOINT
8-31
Parts List
8-32
Phaser 3600 Printer Service Manual
Plug/Jack and Wiring
Diagrams
In this chapter...
■
Plug/Jack Diagrams and Designators
Chapter
9
Plug/Jack and Wiring Diagrams
Plug/Jack Diagrams and Designators
This chapter contains the Plug/Jack or Connector Designators, Locators, and
wiring diagrams for the print engine and all options.
The diagrams following the Plug/Jack table show the P/J (Plug/Jack) and CN
(connector) locations on boards in the printer, Optional 550-Sheet Feeder,
Duplex Unit, Fax, Copier, and Scanner. Use these illustrations to locate
connectors called out in the Troubleshooting procedures presented in
Sections 3, 4, and 5.
The Plug/Jack and CN locators consist of the P/J Designator Table and the
Locator Diagrams.
■
The P/J column lists the Plug/Jack or CN numbers in numerical order.
■
The Map column provides the map number of the specific areas (i.e.,
Electrical, Laser Scan Unit...etc.)
■
The Coordinates column lists the diagram coordinates for the location of
the connector.
■
The Remarks column provides a brief description of each connection.
1. Locate the P/J connector designator in the first column of the table.
2. With this information, go to the map listed in the second column.
3. Use the coordinates to locate the connection indicated on the map with its
P/J designation number.
9-2
Phaser 3600Printer Service Manual
Plug/Jack and Wiring Diagrams
Plug/Jack and Connector Locators and Maps
Printer Plug/Jack/Connector Designators
Print Engine Plug/Jack Designator Table
Phaser 3600Printer Service Manual
Map P/J
Coordinates Remarks
1
P/J1
H-143
Connects the Laser Scan Unit to CN10 of the Main Board.
2
CN3
J-139
Connects the Ethernet to the Main Board.
2
CN4
I-134
Connects the USB to the Main Board.
2
CN6
H-134
Connects the Serial port to the Main Board.
2
P/J9
F-134
Connects Main Board to the Thermistor.
2
P/J11
E-134
Connects the main board to the Duplex Solenoid
2
P/J12
D-134
Connects the Main Board to the 1st RAM DIMM.
2
P/J14
F-142
Connects the Main Board to the 2nd RAM DIMM.
2
P/J16
C-134
Connects the Main Board to the Control Panel
2
P/J17
C-138
Connects the Main Board to the Duplex Board.
2
P/J18
C-139
Connects the Main Board to the Main Motor.
2
P/J19
C-136
Connects the Main Board to CON4 of the SMPS Board.
2
P/J20
B-135
Connects the Main Board to the Developer Motor.
2
P/J21
B-136
Connects the Main Board to the PTL Board.
2
P/J22
B-137
Connects the Main Board to CON3 of the SMPS Board.
2
P/J23
B-139
Connects the Main Board to P/J5 of the Exit Sensor.
2
P/J24
B-140
Connects the Main Board to CN12 of the Joint Board.
2
P/J25
B-141
Connects the Main Board to he Optional Tray 3.
2
P/J26
D-134
Connects the Main Board to the Rear Fan.
3
P/J1
A-140
Connects the SMPS Board to the AC inlet.
3
P/J2
A-141
Connects the SMPS Board to the Fuser.
3
P/J3
D-141
Connects the SMPS Board to CN23 of the Main Board.
3
P/J4
J-141
Connects the SMPS Board to CN20 of the Main Board.
3
P/J5
H-141
Connects the SMPS Board to the Jam Cover Switch.
3
P/J6
J-140
Connects the SMPS Board to CN1 of the HVPS Board.
4
P/J1
J-134
Connects the HVPS Board to CON6 of the SMPS Board.
4
P/J2
K-136
Connects the HVPS Board to CN2 of the Toner Sensor
Board.
4
P/J3
J-139
Connects the HVPS Board to the Feed Sensor.
4
MP/J2
J-140
Connects the HVPS Board to the Tray Empty Sensor.
9-3
Plug/Jack and Wiring Diagrams
Map 1- LSU and Fuser
A
B
C
D
E
F
G
H
I
J
K
L
131
132
133
134
135
136
137
138
139
140
141
142
143
144
145
s3600-101
9-4
Phaser 3600Printer Service Manual
Plug/Jack and Wiring Diagrams
Map 2- Main Board
B
A
C
D
E
F
G
H
I
J
K
L
131
132
CN26
133
CN16
134
CN20
135
CN21
136
137
138
CN11
CN19
CN9
CN8
CN6
CN4
CN1
CN22
CN2
CN17
CN18
139
140
CN3
CN23
CN24
141
CN25
142
143
CN14
CN12
144
145
s3600-096
Phaser 3600Printer Service Manual
9-5
Plug/Jack and Wiring Diagrams
Map 3- SMPS Board
A
B
C
D
E
F
G
H
I
J
K
L
131
132
133
134
135
136
137
138
139
140
141
142
143
CON02
CON01
CON03
CON06
CON05
CON04
144
145
s3600-097
9-6
Phaser 3600Printer Service Manual
Plug/Jack and Wiring Diagrams
Map 4 - HVPS Board
B
A
C
D
E
F
G
H
I
J
K
L
131
132
133
FUSER
134
135
136
MHV OPC
THV
CN1
DEVE
SUPPLY
CN2
137
138
139
CN4
CN3
140
141
142
143
144
145
s3600-098
Phaser 3600Printer Service Manual
9-7
Plug/Jack and Wiring Diagrams
Wiring Diagrams
Notations Used in the Wiring Diagrams
The following table lists the symbols used in the wiring diagrams.
Description
Symbol
Denotes a Plug.
Plug
Denotes a Jack.
Jack
Denotes Pin yy and Jack yy of the connector Pxx
and Jxx.
P/Jxx
YY
Plug and Jack
Denotes a Jumper Point (JPxxx/xxx). Each end of
the Jumper connection has a numeric
designation.
JPxxx
Jumper
Denotes the parts.
PL X.Y.Z implies the item “Z” of plate (PL) “X.Y”
in Parts List.
Fuser
PL X.Y.Z
Subassembly 1
Denotes functional parts attached with functional
parts name.
Heater
Subassembly 2
9-8
Phaser 3600Printer Service Manual
Plug/Jack and Wiring Diagrams
Description
Symbol
Denotes the control and its outline in the Board.
Control
Subassembly 3
Denotes a connection between parts with
harness or wires, attached with signal name/
contents.
DEVE_A
Connection Wire
CLUTCH ON(L)+24V
Denotes the function, and logic value of the
signal to operate the function (Low: L, High: H).
The given voltage is for signal in high status.
The arrow indicates the direction of signal.
Function Logic 1
EXIT SENSED(L)+3.3VDC
Function Logic 2
Denotes the function, and logic value of the
signal when the function is operated (Low: L,
High: H).
The given voltage is for signal in high status.
The arrow indicates the direction of signal.
Denotes a connection between wires.
Connection of Wires
Denotes a Clutch or Solenoid.
Solenoid/Clutch
Denotes a Motor.
M
Motor
Phaser 3600Printer Service Manual
9-9
Plug/Jack and Wiring Diagrams
Description
Symbol
Denotes a Photo Sensor.
Optic Sensor
Denotes an LED.
LED
Denotes a Safety Interlock Switch.
Safety Interlock Switch
Denotes an On-Off Switch (single-pole, singlethrow switch).
On Off Switch
Denotes an On-Off Switch (Temperature normally close).
Temperature Switch
Denotes an NPN Photo-transistor.
NPN Phototransistor
Represents an interconnection between parts
using wiring harness or wire.
Interconnection
Represents an interconnection which differs
according to the specifications.
Interconnection, Differing
9-10
Phaser 3600Printer Service Manual
Plug/Jack and Wiring Diagrams
Symbol
Description
Represents an interconnection between parts
using a conductive part such as a Plate Spring.
Interconnection, Conductive Part
+5 VDC
+3.3 VDC
Phaser 3600Printer Service Manual
Denotes DC voltage.
SG
Denotes signal ground.
AG
Denotes analog ground.
RTN
Denotes return.
9-11
Plug/Jack and Wiring Diagrams
General Wiring Diagram
Main Board
Ethernet
CN1
USB
CN2
Parallel Port
CN3
Thermistor
Laser
Unit
TH1
CN2
RAM
DIMM
CN12
RAM
DIMM
CN14
Main
Solenoid
MP
Solenoid
Tray 1 (MPT)
Paper Empty
Sensor
9-12
CN10
CN11
CN13
Tray 1 Feed
Sensor
CN2
CN1
Paper Full
Sensor
Paper Size
Sensor
CN4
PSIZE
CN1
P/J2
SMPS (LVPS)
Fan
CN5
P/J1
Main Fan
CN7
Erase Lamp
CN1
CN18
CN1
CN20
CN16
CNT1
Control
Panel
CN17
DUP1
Duplex
Board
AC Inlet
CON1
CN19
Temp2
Cover Open
CN1
CON4
FSR1
Fuser
CN21
P/J5
SMPS
(LVPS)
CN23
Joint
Board
CN12
CON5
Jam Cover
Microswitch
CON6
CN24
CN22
CON3
CN25
CN7
CN4
P/J3
CN14
CN1
CN4
PFULL
CN26
PTL 1
Exit
Sensor
Tray Empty
Sensor
Registration
Sensor
CN3
CON2
PTL 2
CN3
CN9
CN1
CN11
Developer
Motor
CN6
CN8
Duplex
Solenoid
Main
Motor
CN6
Toner
Sensor
Board
HVPS
Optional
3rd Tray Board
P/J4
Rear Fan
s3600-019
Phaser 3600Printer Service Manual
Plug/Jack and Wiring Diagrams
HVPS/SMPS to Main Board Wiring Diagram
Main Board
CON4
CN19
10
11
12
13
14
+24VDC
+3.3VDC
CN22
1
2
3
4
5
6
7
8
9
10
11
12
13
14
15
16
17
18
19
20
21
22
23
24
25
26
27
28
LVPS (SMPS)
14
13
12
11
10
9
8
7
6
5
4
3
2
1
1
2
3
4
5
6
7
8
9
DEV_AC_PWM
+24VDC
DEV_AC_Vpp
+24VDC
DEV_AC_CON
+24VDC
DEV_VDC_PWM
+24VDC
FUSER_BIAS_PWM
+3.3VDC
MHV_PWM
+3.3VDC
MHV_READ
+3.3VDC
THV_PWM
VCC
THV_READ
VCC
nTHV_EN
GND
FUSER_COVER
GND
GND
GND
FUSER_ON
GND
GND
GND
CON1
CON2
+24VAC
CON5
CON3
+24VAC
NC
CON6
28
27
26
25
24
23
22
21
20
19
18
17
16
15
14
13
12
11
10
FSR1
HOT
NEUTRAL
1
2
3
1
2
3
AC Inlet
HOT
NEUTRAL
1
2
Fuser
Jam Cover
Microswitch
+24VAC
CN1
HVPS
16
15
14
13
12
11
10
9
8
7
6
5
4
3
2
1
1
2
3
4
5
6
7
8
9
10
11
12
13
14
15
16
9
8
7
6
5
4
3
2
1
s3600-024
HVPS
+3.3VDC
+3.3VDC
CN3
1
2
3
CN4
1
2
3
GND
P_FEED
CN?
+3.3VDC
P_MARGIN
GND
+3.3VDC
3
2
1
Registration
Sensor
3
2
1
Tray 1 Feed
Sensor
CN?
Tray
Empty
Sensor
s3600-025
Phaser 3600Printer Service Manual
9-13
Plug/Jack and Wiring Diagrams
Sensor to Main Board Wiring Diagram
Main Board
+24VDC
CN6
1
2
3
4
5
6
7
8
9
10
11
12
13
14
15
16
17
18
19
20
+24VDC
P_SIZE3
FAN_SMPS
P_SIZE2
FAN_MAIN
P_SIZE1
THERM_IN
TEMP_2
FUSER_ON
OUTBIN_FULL
CART_CLK
P_REGI
CART_DPUT/DIN
P_EMPTY
CN6
20
19
18
17
16
15
14
13
12
11
10
9
8
7
6
5
4
3
2
1
Toner Sensor
Board
+3.3VDC
+24VDC
CN2
6
5
4
3
2
1
CN3
1
2
3
+3.3VDC
SIGNAL
GND
PFULL Paper Full Sensor
3
2
1
CN4
1
2
3
4
GND
P_SIZE1
P_SIZE2
P_SIZE3
PSIZE Paper Size Sensor
4
3
2
1
CN1
1
2
+24VDC
+24VDC
SIGNAL
3
CN5
1
2
+24VDC
SIGNAL
3
+24VDC
CN26
1
2
3
4
5
6
7
8
9
+24VDC
+24VDC
+24VDC
+24VDC
HVPS
CN2
1
2
3
4
5
6
CN1
9
8
7
6
5
4
3
2
1
P/J2
SMPS Fan
3
2
1
P/J1
Main Fan
3
2
1
Temp2 Cover
Open
s3600-022
9-14
Phaser 3600Printer Service Manual
Plug/Jack and Wiring Diagrams
Main Drive/Joint Board and Optional Tray Wiring Diagram
Main Board
CN20
1
2
3
4
5
6
7
+5VDC
+24VDC
+3.3VDC
+24VDC
+3.3VDC
CN23
1
2
3
CN24
1
2
3
4
5
6
7
8
9
CN25
1
2
3
4
5
6
7
8
9
10
11
12
13
14
15
16
17
18
P/J5
3
2
1
+3.3VDC
EXIT_SENS
GND
Joint Board
+24VDC
MAIN_CLUTCH
MP_CLUTCH
REGI_CLUTCH
MP_EMPTY
+3.3VDC
CASSETTE_DETECT
GND
TEMP_1
+24VDC
+3.3VDC
SCF_EMPTY
SCF_RXD
SCF_DETECT
SCF_TXD
GND
GND
GND
GND
GND
CN12
9
8
7
6
5
4
3
2
1
M
PTL2
PTL1
+5VDC
PTL_ON
1
2
+3.3VDC
7
6
5
4
3
2
1
NC
CN21
Developer Motor
CN1
nDEV_MOT_READY
DRV_MOT_CLK
nDEV_MOT_ON
DEV_MOT_DIR
CN10
+24VDC
1
2
+24VDC
1
2
+3.3VDC
CN11
CN13
1
2
3
Exit
Sensor
CONTROL
Main
Solenoid
+24VDC
CONTROL
MP
Solenoid
+24VDC
+3.3VDC
SIGNAL
GND
CN1
3
2
1
Tray 1 (MPT)
Paper Empty
Sensor
CN7
18
17
16
15
14
13
12
11
10
Optional
Tray 3 Board
9
8
7
6
5
4
3
2
1
s3600-021
Phaser 3600Printer Service Manual
9-15
Plug/Jack and Wiring Diagrams
LSU and Main Motor to Main Board Wiring Diagram
Main Board
CN8
Thermistor1
Thermistor2
1
2
CN9
GND
LSU_5V
LD_POWER2
1
2
3
4
5
6
7
8
9
10
+24VDC
+24VDC
+24VDC
3
2
CN11
18
17
16
15
14
13
12
11
10
9
8
7
6
5
4
3
2
1
PDX_SOL
+24VDC
1
2
CN18
+24VDC
+24VDC
GND
GND
GND
VCC
nMAIN_MOT_ON
MAIN_MOT_READY
MAIN_MOT_CLK
NC
Thermistor
Laser Unit
CN1
LD_POWER1
VDO1_minus
VDO1_plus
VDO1_minus
VDO1_plus
nLD_EN1
nSH1
nSH2
nSH2
nHSYNC_minus
LSU_CLK
nREADY
LSU_MOT_ON
GND
+24VDC
11
12
13
14
15
16
17
18
1
2
3
4
5
6
7
8
9
10
TH1
Duplex Solenoid
CN1
Main Motor
10
9
8
7
6
5
4
3
2
1
M
s3600-020
9-16
Phaser 3600Printer Service Manual
Plug/Jack and Wiring Diagrams
Controller Unit and Duplex Board to Main Board Wiring Diagram
Main Board
CN4
1
2
3
+24VDC
+24VDC
SIGNAL
P/J3
P/J4
3
2
1
1
2
3
CN16
1
2
3
4
5
6
Rear Fan
CNT1
+3.3VDC
PANEL_TXD
PANEL_RXD
nRSTOUT
GND
Control Panel
6
5
4
3
2
1
+3.3VDC
+24VDC
CN17
1
2
3
4
5
6
7
8
9
+24VDC
+3.3VDC
+3.3VDC
DUPLEX_RXD
DUPLEX_DETECT
MDUPLEX_RXD
GND
GND
GND
DUP1
Duplex Board
9
8
7
6
5
4
3
2
1
s3600-023
Phaser 3600Printer Service Manual
9-17
Plug/Jack and Wiring Diagrams
9-18
Phaser 3600Printer Service Manual
Reference
Contents...
■
Acronyms and Abbreviations
Reference
Reference
Acronyms and Abbreviations
Acronym
Ref-2
Description
3TM
Three Tray Module
A3
Paper size 297 millimeters (11.69 inches) x 420
millimeters (16.54 inches).
A4
Paper size 210 millimeters (8.27 inches) x 297
millimeters (11.69 inches).
A5
Paper size 148 millimeters (5.82 inches) x 210
millimeters (2.10 inches).
AC
Alternating Current is type of current available at power
source for the printer.
AMPV
Average Monthly Print Volume
APC
Auto Power Control
ASIC
Application Specific Integrated Circuit
ASSY
Assembly
ATM
Adobe Type Manager
BCR
Bias Charge Roller
BLDC
Brush-Less Direct Current
BOOTP
Boot Parameter Protocol
BSD
Block Schematic Diagram
BTM
Bottom
BTR
Bias Transfer Roller
CAM
Cam Shaft
CCD
Charged Coupled Device (Photoelectric Converter)
CD
Circuit Diagram
CD
Compact Disc
CLT
Clutch
CN
Connector
CON
Connector
CRU
Customer Replaceable Unit
CRUM
Customer Replaceable Unit Meter/Memory
CST
Cassette
CUPS
Common Unix Printing System
dB
Decibel
DC
Direct Current is type of power for printer components.
Machine converts AC power from power source to DC
power.
Phaser 3600 Printer Service Manual
Reference
Acronym
Phaser 3600 Printer Service Manual
Description
DCU
Diagnostic Control Unit
DDR2 DIMM
Double Data Rate Dual In-Line Memory Module
DEVE
Developer
DHCP
Dynamic Host Configuration Protocol
DIMM
Dual In-line Memory Module
DPI
Dot Per Inch
DRV
Drive
DUP
Duplex
Duplex
2-sided printing
EC
European Community
ECM
Error Correction Mode
EEA
European Economic Area
EEC
European Economic Community
EEPROM
Electrically Erasable Programmable Read-Only Memory
EOM
End of Message
ESA
Electric Static Attachment
ESD
Electrostatic Discharge. A transfer of charge between
bodies at different electrostactic potential.
FCC
Federal Communications Commission
FDR
Feeder
FE
Field Engineer
FPOT
First Print Output Time
FR/FRNT
Front
FRU
Field Replaceable Unit
F/W
Firmware
GB
Giga Byte
GDI
Graphics Device Interface
GND
Ground
HARN
Harness
HCF
High-Capacity Feeder
HDD
Hard Disk Drive
HOU
Housing
HUM
Humidity
HVPS
High-Voltage Power Supply
Hz
Hertz (cycles per second)
IC
Integrated Circuit
IDT
Intermediate Drum Transfer
Ref-3
Reference
Acronym
Ref-4
Description
IEC
International Electrotechnical Commission
I/F
Interface
IP
Image Processor
IPM
Image Per Minute
IPP
Internet Printing Protocol
IQ
Image Quality
KB
Kilo Byte
LAN
Local Area Network
LCD
Liquid Crystal Display
LD
Laser Diode
LED
Light Emitting Diode
LEF
Long-Edge Feed
LSU
Laser Scan Unit
LTR
Letter Size Paper (8.5 x 11 inches)
LVPS
Low-Voltage Power Supply
MAC
Media Access Control
MB
Mega Byte
MHz
Mega Hertz
MM
Millimeters
MOT
Motor
MPT
Multi-Purpose Tray
NCS
Non-Contact Sensor
NCU
Network Control Unit
NPP
No Paper
NVM
Non-Volatile Memory
NVRAM
Non-Volatile Random Access Memory
OHP
Overhead Paper (Transparency)
OPC
Organic Photo Conductor
OPT
Optional
OS
Operating System
PBA
Printed Board Assembly
PC
Personal Computer
PCB
Printed Circuit Board
PCL
Printer Command Language
PDL
Page Description Language
P/J
Plug Jack (electrical connections)
Phaser 3600 Printer Service Manual
Reference
Acronym
Phaser 3600 Printer Service Manual
Description
PJL
Printer Job Language
PL
Parts List
PPD
PostScript Printer Description
PPM
Pages Per Minute
PPR
Partial Page Request
PPS
Pages
PPS
Pulses Per Second
PS
PostScript
PTL
Pre-transfer Lamp
PV
Print Volume Management
PWB
Printed Wiring Board
PWBA
Printed Wiring Board Assembly
PWM
Pulse Width Modulation
RAM
Random Access Memory
RH
Relative Humidity
RLS
Release
ROM
Read-Only Memory
ROS
Raster Output Scanner - Laser Scan Unit
SEF
Short-Edge Feed
SMPS
Switching Mode Power Supply
SNR
Sensor
SOL
Solenoid
SOS
Start of Scan
SPOOL
Simultaneous Peripheral Operations Online
STS
Soft Touch Sensor
SYNC
Synchronous or Synchronization
TDC
Toner Density Control
THV
Transfer High Voltage
TNR
Toner
TRNS
Transport
UI
User Interface
USB
Universal Serial Bus
Ref-5
Reference
Ref-6
Phaser 3600 Printer Service Manual
Index
B
Duplex Assembly, 2-9
disassembly, 7-37
Duplex paper path, 2-5
Duplex Roller, disassembly, 7-47
Duplex Unit Sensor, 2-16
parts list, 8-31
view of parts, 8-30
Duplex board to Main Board Wiring Diagram, 9-17
black print defects, 5-13
blank print defects, 5-9
E
A
Access Door, disassembly, 7-12
acronyms and abbreviations, A-2
C
Center Loading Process, 2-7
charge roller, 2-2
cleaning, 2-2
Laser Scan Unit, 6-3
printer, 6-2
Cleaning blade, 2-3
Clutches/Solenoid tests, 3-9
Consumables, 1-3
contamination defects, 5-15
Control, 7-6
Control Panel
components, 1-5
disassembly, 7-13
LED, 1-5
menu map, 1-5
messages, 1-5
Controller Unit to Main Board Wiring Diagram, 9-17
Cooling Supply Fan, disassembly, 7-73
coordinates column for designators, 9-2
Cover Assembly
Cover Open Board and Sensor, 2-16
Cover Open Sensor, disassembly, 7-74
Cover status, 3-5
parts list, 8-11
view of parts, 8-10
D
Developer Drive, disassembly, 7-51
Developing Motor, 2-7
Device control tests, 3-10
Diagnostic Menu Map, 3-5
Disassembly
general notes, 7-2
notation, 7-5
Drum, 2-3
Phaser 3600 Printer Service Manual
ENERGY STAR, 1-ii
error message list, 3-11
Exit Assembly
Exit Gear, disassembly, 7-44
Exit Roller, disassembly, 7-44
Exit rollers, 2-5
Exit Solenoid, disassembly, 7-48
F
faded image defects, 5-18
Fan tests, 3-9
fastener types
Posi-Drive screw types, 7-4
precautions, 7-4
Feed Assembly
Feed Roller, 2-5
Feed Sensor, 2-5
Idle Unit, disassembly, 7-49
process, 2-7
Frame Assembly
parts list, 8-13
view of parts, 8-12
Functional specifications, 1-7
Fuser Assembly, 2-5, 2-8
defects, 5-3
disassembly, 7-54
Exit Sensor theory, 2-16
Fuser control tests, 3-9
Fuser Exit Sensor, disassembly, 7-56
Fuser Interlock Switch, disassembly, 7-55
parts list, 8-21
view of parts, 8-20
G
general wiring diagram, 9-12
ghosting defects, 5-16
I–1
H
High Voltage Power Supply, disassembly, 7-75
horizontal image defects, 5-27
HVPS
board locator map, 9-7
theory, 2-17
to Main Board Wiring Diagram, 9-13
I
image-quality defects, 5-2
Inner Cover, disassembly, 7-16
input capacity, tray, 1-10
J
Joint Board, disassembly, 7-52
K
Knock-Up Plate, disassembly, 7-17
L
Laser Scan Unit (LSU)
disassembly, 7-70
Laser exposure, 2-2
LSU Control tests, 3-10
LSU Lower Cover, disassembly, 7-72
Pre-transfer lamp, 2-2
theory, 2-7
Left Cover, disassembly, 7-7
light or undertone defects, 5-11
Locator Maps
Map 1- LSU and Fuser, 9-4
Map 2 - Main Board, 9-5
Map 3 - SMPS Board, 9-6
Map 4 - HVPS Board, 9-7
LSU and Fuser locator map, 9-4
LSU and Main Motor to Main Board Wiring Diagram, 9-16
M
Main Assembly
parts list, 8-7
view of parts, 8-6
Main Board
disassembly, 7-39
theory, 2-6
I–2
Main Drive
disassembly, 7-38
Solenoid, disassembly, 7-40
theory, 2-5
to Joint Board and Optional Tray Wiring Diagram, 9-15
maintenance
preventive, 6-2
tools, 6-2
map column, 9-2
Menu map, 3-3
Microswitches, 2-14
Motor Drive Assemblies, 2-7
Motor tests, 3-8
O
OPC drum, 2-7
optional trays, 2-9
Outbin Full Assembly
Actuator, disassembly, 7-45
Outbin Full Sensor, disassembly, 7-46
theory, 2-16
output capacity, tray, 1-10
P
P/J designators, 9-2
Paper feed sequence, 2-5
paper path, 2-4
paper path sensors, 2-15
Paper Size Sensor, 2-16
Paper Size Sensor, disassembly, 7-53
Paper Tray Assembly
Paper Pick-up Process, 2-7
Paper Tray Empty Actuator, disassembly, 7-23
Paper Tray Empty Sensor, 2-15
Paper Tray Empty Sensor, disassembly, 7-22
Parts list, using, 8-4
Photo sensors, 2-13
Physical Specifications, 1-7
Pick-Up Assembly
Pick Roller and Shaft, disassembly, 7-25
Pick Roller, disassembly, 7-28
Pick-Up Gear, disassembly, 7-34
Pick-Up Rack, disassembly, 7-18
Pick-Up Roller, 2-5
Plug Jack Designation
diagrams, 9-2
locator table, 9-3
notation, 8-4
Pre-transfer Lamp
disassembly, 7-50
theory, 2-2
preventive maintenance procedure, 4-3
Print cartridge
defects, 5-3
theory, 2-3
print modes, 2-3
Phaser 3600 Printer Service Manual
Printer, 1-4
location and clearance, 1-6
options and supplies, 1-2
orientation, 7-5
parts, 1-4
Physical specifications, 1-7
Print quality table, 1-8
Print resolution, 1-8
printer configurations, 1-2
specifications, 1-5
printer
serial number, 8-2
Printing process, 2-2
Process Control
fuser temperature, 2-12
laser scan, 2-11
light intensity, 2-11
paper pick, 2-10
paper size, 2-10
toner, 2-11
product symbols, 1-iv
pulse width modulation, 2-8
R
RAM DIMM, 2-6
random spo defects, 5-20
Rear Cover, disassembly, 7-8
Registration Assembly, disassembly, 7-41
Regulatory Information, 1-ix
repeating image defects, 5-22
Retard Assembly
disassembly, 7-19
theory, 2-5
Right Cover, disassembly, 7-6
S
Safety precautions
disconnecting power, 1-v
electrostatic discharge, 1-vi
general guidelines, 1-vii
power safety, 1-v
servicing compponents, 1-viii
Sensors
Sensor status, 3-6
to Main Board Wiring Diagram, 9-14
types, 2-13
Separation process, 2-7
Separator Pad Assembly, disassembly, 7-20
serial number location, 8-2
Service Diagnostic Front Panel Key Descriptions, 1-5, 3-4
service diagnostics menu, 3-3
service diagnostics, control panel, 3-3
service diagnostics, entering, 3-3
Phaser 3600 Printer Service Manual
service flowchart, 4-2
service procedures, 6-2
Service Terms
manual terminology, 1-iii
product terminology, 1-iii
skew defects, 5-25
SMPS
board locator map, 9-6
theory, 2-18
to Main Board Wiring Diagram, 9-13
Specifications
environmental, 1-9
media and tray, 1-10
Sub Toner Low Sensor Board, disassembly, 7-24
Switched Mode Power Supply, disassembly, 7-76
switching mode, 2-18
T
Test print
deletions, 5-4
fusing, 5-5
registration and skew, 5-6
resolution, 5-5
skips or smears, 5-8
Thermistor, 2-2, 2-5, 2-8, 2-14
toner development, 2-2
Tools, recommended, 4-3
Top Cover, disassembly, 7-10
Transfer Roller
defects, 5-3
disassembly, 7-43
theory, 2-2, 2-8
transfer subsystem, 2-8
Tray 1 (MPT)
disassembly, 7-14
Feed Sensor, 2-15
Feed Sensor, disassembly, 7-21
Paper Empty Sensor, 2-15
replacement, 7-15
Solenoid, disassembly, 7-29
Tray 2
assembly, parts list, 8-25
Cassette, view of parts, 8-24
Feed Roller, disassembly, 7-35
Pick Roller, disassembly, 7-35
Pick-Up Assembly, disassembly, 7-30
Tray 3
disassembly, 7-36
Tray 3 Cassette
parts list, 8-27
view of parts, 8-26
Troubleshooting
Control Panel, 4-4
image defects, 5-9
Power supplies, 4-5
print-quality, 5-2
I–3
U
unfused image defects, 5-24
V
voltage measurements, 4-5
W
Wiring diagrams
Controller Unit and Duplex Board to Main Board, 9-17
HVPS/SMPS to Main Board, 9-13
LSU and Main Motor to Main Board, 9-16
Main Drive/Joint Board and Optional Tray, 9-15
notation, 9-8
Sensor to Main Board, 9-14
4
Phaser 3600 Printer Service Manual
701P47822