1
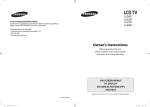
LCD-Monitor SERVICE LCD Monitor Model 2220WM Manual Fashion Feature - WXGA Display (1680 x1050) -Response Time: 5ms -Connectivity: Analog (15P D-sub) -Power Consumption: 22’’W (52W) -DPMS: under 1W (240Vac) -This Service Manual is a property of Samsung Electronics Co., Ltd. Any unauthorized use of Manual can be punished under applicable International and/or domestic law Samsung Electronics Co.,Ltd. 416, Maetan-3Dong, Yeongtong-Gu, Suwon City, Gyeonggi-Do, Korea, 443-742 Printed in Korea P/N : URL : http://itself.sec.samsung.co.kr/ 1 1. 2. Contents Precautions ……………………………………………………………………………………………………………………………………………… 4 1-1 Safety Precautions …………………………………………………………………………..……………………………………………… 4 1-2 Servicing Precautions ……………………………………………………………………………………………………………………... 5 1-3 Static Electricity Precautions ………………………………………………………………………………………………………………. 5 1-4 Installation Precautions …..………………………………………………………………………………………………………………… 6 Product specifications ………………………………………………………………………………………………….…………………………… 2-1 Fashion Feature ………………………………………………………………………………………………………………………… 2-2 2220WM Specifications 3. Alignments and Adjustments …………………………………………………………………………………………….………………………. 7 8 ………………………………………………………………………………………………………………………. 8 3-2 Automatic Color Adjustment …. ……………………………………………………………………………………………………………. 8 3-3 DDC EDID Data Input 8 .…………………………………………………………………………………………………………………….. 3-4 EDID table .. …………………………………………………………………………………………………………………………… 9 3-5 How to execute DDC ….. …………………………………………………………………………………………………………………… 13 3-6 How to execute MCU Code …………………………………………………………………………………………………………………. 15 Troubleshooting ………………………………………………………………………………………………………………………………….. 16 4-1 Common Acknowledge …………………………………………………………………………………………………………………… 16 4-2 No Picture (VGA Mode) ……………………………………………………………………………………………………………… 17 4-3 No Picture (DVI Mode) …………………………………………………………………………………………………………. 4-4 No Power ……………………………………………………………………………………………………………… ……………... 5. Exploded View and Parts List 19 20 …………………………………………………………………………………………………………………………… 20 …………………………………………………………………………………………………………………………………… 22 ……………………………………………………………………………………………………………………………… ……… 24 5-2 Parts List Block Diagram 18 ……………………………………………………………………………………………………………………. 5-1 Exploded View 6. 7 ………………………………………………………………………………………………………………………. 3-1 Required Equipment 4. 7 6-1 Power Tree ………………………………………………………………………………………………………………………………… 6-2 Main Board Part …………………………………………………………………………………………………………………………….. 6-3 IP Board Part (SMPS Part) 6-4 IP Board Part (Inverter Part) 24 24 ………………………………………………………………………………………………………………… 25 ………………………………………………………………………………………………………………. 25 7. Wiring Diagram ………………………………………………………………………………………………………………………………………………. 34 8. 27 Schematic Diagrams …………………………………………………………………………………………………………………………………….. 8-1 DC- DC …………………………………………………………………………………………………………………………………….. 27 ………………………………………………………………………………………………………………………………………. 27 8-3 TSUMU58WHJ ……………………………………………………………………………………………………………………………… 28 8-2 Input 8-4 Power ………………………………………………………………………………………………………………………………………… 28 8-5 Inverter …………………………………………………………………………………………………………………………………… 29 8-6 Keypad …………………………………………………………………………………………………………………………………… 29 8-7 Audio …………………………………………………………………………………………………………………………………… 8-8 Ear Phone 30 …………………………………………………………………………………………………………………………………… 30 9. Operating instructions and installation …………………………………………………………………………………………………………………… 31 9-1 front ……………………………………………………………………………………………………………………………………………. 31 9-2 Rear …………………………………………………………………………………………………………………………………………… 32 2 9-3 Connecting the monitor ……………………………………………………………………………………………………………………… 33 9-4 Monitor Assembly …………………………………………………………………………………………………………………………….. 34 9-5 Attaching a Base …………………………………………………………………………………………………………………………….. 35 10. Disassembly and Reassembly …………………………………………………………………………………………………………………………… 36 10-1 Disassembly …………………………………………………………………………………………………………………………………… 36 10-2 Assembly Block ……………………………………………………………………………………………………………………………….. 39 11. PCB Diagram ……………………………………………………………………………………………………………………………………………… 40 11-1 Mian Board................................................................................................................................................................................................... 40 12-2 Power Board.................................................................................................................................................................................................. 41 12. Circuit Descriptions ...................................................................................................................................................................................................... 42 12-1 Overall Block Structture ............................................................................................................................................................................. 42 12-2 IP Board Part (Power) Schematic Diagrams ........................................................................................................................................... 44 12-3 IP Board (Inverter) Schematic Diagrams …………………………………………………………………………………………………… 45 13. Reference Information …………………………………………………………………………………………………………………………………… 46 13-1 Technical Terms ……………………………………………………………………………………………………………………………… 46 13-2 Pin Assignments ……………………………………………………………………………………………………………………………… 48 13-3 Timing Chart ………………………………………………………………………………………………………………………………….. 49 3 1 Precautions Follow these safety, servicing and ESD precautions to prevent damage and to protect against potential hazards such as electrical shock. 1-1 1-1-1 Safety Precautions Warnings 1. For continued safety, do not attempt to modify the circuit board. 2. Disconnect the AC power and DC power jack before servicing. 1-1-2 Servicing the LCD Monitor 1. When servicing the LCD Monitor, Disconnect the AC line cord from the AC outlet. 2. It is essential that service technicians have an accurate voltage meter available at all times. Check the calibration of this meter periodically. 1-1-3 Fire and Shock Hazard Before returning the monitor to the user, perform the following safety checks: Figure 1-1. Leakage Current Test Circuit 4. 1. Inspect each lead dress to make certain that the leads are not pinched or that hardware is not lodged between the chassis and other metal parts in the monitor. 2. Inspect all protective devices such as nonmetallic control knobs, insulating materials, cabinet backs, adjustment and compartment covers or shields, isolation resistor- capacitor networks, mechanical insulators, etc. 3. Leakage Current Hot Check (Figure 1-1): WARNING : Do not use an isolation With the unit completely reassembled, plug the AC line cord directly into a 120V AC outlet. With the unit’s AC switch first in the ON position and then OFF, measure the current between a known earth ground (metal water pipe, conduit, etc.) and all exposed metal parts, including: metal cabinets, screw heads and control shafts. The current measured should not exceed 0.5 milliamp. Reverse the power-plug prongs in the AC outlet and repeat the test. 1-1-4 transformer during this test. Use a leakage current tester or a metering system that complies with American National Standards Institute (ANSI C101.1, Leakage Current for Appliances), and Underwriters Laboratories (UL Publication UL1410, 59.7). Product Safety Notices Some electrical and mechanical parts have special safety- related characteristics which are often not evident from visual inspection. The protection they give may not be obtained by replacing them with components rated for higher voltage, wattage, etc. Parts that have special safety characteristics are identified by on schematics and parts lists. A substitute replacement that does not have the same safety characteristics as the recommended replacement part might create shock, fire and/or other hazards. Product safety is under review continuously and new instructions are issued whenever appropriate. 4 1-2 Servicing Precautions WARNING: An electrolytic capacitor installed with the wrong polarity might explode. Caution: Before servicing units covered by this service manual, read and follow the Safety Precautions section of this manual. Note: If unforeseen circumstances create conflict between the following servicing precautions and any of the safety precautions, always follow the safety precautions. 1-2-1 General Servicing Precautions 1. Always unplug the unit’s AC power cord from the AC power source and disconnect the DC Power Jack before attempting to: (a) remove or reinstall any component or assembly, (b) disconnect PCB plugs or connectors, (c) connect a test component in parallel with an electrolytic capacitor. 2. Some components are raised above the printed circuit board for safety. An insulation tube or tape is sometimes used. The internal wiring is sometimes clamped to prevent contact with thermally hot components. Reinstall all such elements to their original position. 4. Check the insulation between the blades of the AC plug and accessible conductive parts (examples: metal panels, input terminals and earphone jacks). 5. Insulation Checking Procedure: Disconnect the power cord from the AC source and turn the power switch ON. Connect an insulation resistance meter (500 V) to the blades of the AC plug. The insulation resistance between each blade of the AC plug and accessible conductive parts (see above) should be greater than 1 mega-ohm. 6. 3. After servicing, always check that the screws, components and wiring have been correctly reinstalled. Make sure that the area around the serviced part has not been damaged. Always connect a test instrument’s ground lead to the instrument chassis ground before connecting the positive lead; always remove the instrument’s ground lead last. 1-3 Static Electricity Precautions Some semiconductor (solid state) devices can be easily damaged by static electricity. Such components are commonly called Electrostatically Sensitive Devices (ESD). Examples of typical ESD are integrated circuits and some field-effect transistors. The following techniques will reduce the incidence of component damage caused by static electricity. 1. Immediately before handling any semiconductor components or assemblies, drain the electrostatic charge from your body by touching a known earth ground. Alternatively, wear a discharging wrist-strap device. To avoid a shock hazard, be sure to remove the wrist strap before applying power to the monitor. 2. After removing an ESD-equipped assembly, place it on a conductive surface such as aluminum foil to prevent accumulation of an electrostatic charge. 3. Do not use freon-propelled chemicals. These can generate electrical charges sufficient to damage ESDs. 4. Use only a grounded-tip soldering iron to solder or desolder ESDs. 5. Use only an anti-static solder removal device. Some solder removal devices not classified as “anti-static” can generate electrical charges sufficient to damage ESDs. 6. Do not remove a replacement ESD from its protective package until you are ready to install it. Most replacement ESDs are packaged with leads that are electrically shorted together by conductive foam, aluminum foil or other conductive materials. 7. Immediately before removing the protective material from the leads of a replacement ESD, touch the protective material to the chassis or circuit assembly into which the device will be installed. Caution: Be sure no power is applied to the chassis or circuit and observe all other safety precautions. 8. Minimize body motions when handling unpackaged replacement ESDs. Motions such as brushing clothes together, or lifting your foot from a carpeted floor can generate enough static electricity to damage an ESD. 5 1-4 Installation Precautions 1. For safety reasons, more than two people are required for carrying the product. 2. Keep the power cord away from any heat emitting devices, as a melted covering may cause fire or electric shock. 3. Do not place the product in areas with poor ventilation such as a bookshelf or closet. The increased internal temperature may cause fire. 4. Bend the external antenna cable when connecting it to the product. This is a measure to protect it from being exposed to moisture. Otherwise, it may cause a fire or electric shock. 5. Make sure to turn the power off and unplug the power cord from the outlet before repositioning the product. Also check the antenna cable or the external connectors if they are fully unplugged. Damage to the cord may cause fire or electric shock. 6. Keep the antenna far away from any highvoltage cables and install it firmly. Contact with the high- voltage cable or the antenna over may cause fire or electric shock. 7. When installing the product, leave enough space (10cm) between the product and the wall for ventilation purposes. A rise in temperature within the product may cause fire. 6 2 Product Specifications 2-1 Fashion Feature - WXGA Display (1680 x 1050) - Black Color Variation 2-2 Specifications Features Specifications Maximum resolution 1680(H)*1050(V) Back light system 4 CCFL (top & bottom edge side) Actual Resolution display WSXGA+(1680x1050) Pixel pitch 0.282(H) x 0.282(V) Display area 473.76 ( H ) x 296.1 ( V ) , 22” diagonal Contrast ratio 700׃1(Min.) 1000׃1 (typ.) (INL: MT220WW01 v.0&INL: MT220WW01 V2 & CMO: M220Z1-L03) Response time (Tr +Tf ) 5ms (typ.) 10ms(Max) 5ms (typ.) 8ms(Max) Viewing angle 85°(L)/ 85°(R), 80°(U)/80°(D) typ. CR≧10 (INL V0 & V2 panel) 85°(L)/ 85°(R), 80°(U)/80°(D) typ. CR≧10 (CMO) Input interface Analog(D-sub 15 pin) & DVI-D Power management Compatible with Energy Star Plug & Play VESA DDC 2B University AC supply OSD language power (INL V0 & V2 panel) (CMO panel) 100V – 240V AC, 50Hz – 60Hz,0.8—1.6A English,German,Spanish,French,Italian,Swedish,Russian,Portuguese,Turkish 7 3 Alignments and Adjustments This section of the service manual explains how to use the DDC Manager JIG. This function is needed for AD board change and program memory (U105) change. 3-1 Required Equipment The following equipment is necessary for adjusting the monitor: - Computer with Windows 95, Windows 98, Windows 2000, Windows XP, or Windows NT. 3-2 Automatic Color Adjustment To input video, use 16 gray or any pattern using black and white. 1. Select English for OSD language. 2. Press the (Enter/Source) key for 5 seconds. 3-3 DDC EDID Data Input 1. Input DDC EDID data when replacing AD PCB. 2. Receive/Download the proper DDC file for the model from HQ quality control department. Install the below jig (Figure 1) and enter the data. PC Parallel Cable Figure 1. 8 3-4 EDID table VGA 0 1 2 3 4 5 6 7 8 9 A B C D E F 0 00 FF FF FF FF FF FF 00 4C 2D 1F 03 XX XX XX XX 1 XX XX 01 03 6C 2F 1E 78 2A DC 51 A3 59 48 9E 24 2 11 50 54 BF EF 80 B3 00 81 80 81 40 71 4F 01 01 3 01 01 01 01 01 01 21 39 90 30 62 1A 27 40 68 B0 4 36 00 DA 28 11 00 00 1C 00 00 00 FD 00 38 4B 1E 5 51 0F 00 0A 20 20 20 20 20 20 00 00 00 FC 00 53 6 79 6E 63 4D 61 73 74 65 72 0A 20 20 00 00 00 FF 7 00 48 31 41 4B 35 30 30 30 30 30 0A 20 20 00 XX Byte(Hex) Field Name and Comments Description EDID 00~07h Head Information 00,FF,FF,FF,FF,FF,FF,00 08~09h ID Manufacturer Name SAM 0A~0Bh Product ID Code 031F 1F,03 0C~0Fh Last 5 Digits of Serial Number 0 XXXXXXXXXX 10h Week of Manufacture 1 XX 11h Year of Manufacture 2007 XX 12h EDID Version Number 1 01 13h EDID Revision Number 3 03 4C,2D Analog Signal Level 0.700, 0.000 (0.700Vp-p) No Blank -to-black Setup 14h Video Input Definition Separate Syncs. Supported 6C Composite Sync. Supported No Sync. on Green Supported No Serration Required 15h Max Horizontal Image Size 47 16h Max Vertical Image Size 30 17h Display Gamma 2F 2.2 78 No Standby No Suspend 18h Power Management and Supported Feature(s) Active Off/Very Low Power RGB Color Display 2A No sRGB Color Space Preferred Timing Mode No Default GTF Supported 19~22h Chroma Info R (x, y) 0.640, 0.349 G (x, y) 0.284, 0.617 B (x, y) 0.142, 0.067 W (x, y) 23h Established Timing I 0.313, 0.329 720 x 400 @ 70Hz 720 x 400 @ 88Hz (N/A) 640 x 480 @ 60Hz 9 DC,51,A3,59,48,9E,24,11,50 ,54 BF 640 x 480 @ 67Hz 640 x 480 @ 72Hz 640 x 480 @ 75Hz 800 x 600 @ 56Hz 800 x 600 @ 60Hz 800 x 600 @ 72Hz 800 x 600 @ 75Hz 832 x 624 @ 75Hz 24h 1024 x 768 @ 87Hz(I) (N/A) Established Timing II EF 1024 x 768 @ 60Hz 1024 x 768 @ 70Hz 1024 x 768 @ 75Hz 1280 x 1024 @ 75Hz 1152 x 870 @ 75Hz 800 x 600 @ 85Hz (N/A) 1024 x 768 @ 85Hz (N/A) 25h Manufacturers Reserved Timings 1280 x 1024 @ 60Hz (N/A) 80 1280 x 1024 @ 85Hz (N/A) 1600 x 1024 @ 60Hz (N/A) 1600 x 1200 @ 75Hz (N/A) 1600 x 1200 @ 85Hz (N/A) 26~35h Standard Timing Identification 36~47h Detailed Timing / Descriptor Block 1 5A~6Bh Detailed Timing / Descriptor Block 2 1680 x 1050 @ 60Hz 16: 10 B3,00 1280 x 1024 @ 60Hz 1280 x 960 @ 60Hz 5: 4 4: 3 81,80 1152 x 864 @ 75Hz 4: 3 71,4F No Application No Application 01,01 01 No Application 01 No Application 01 1680x1050 @ 60Hz 21,39,90,30,62,1A,27,40,68, B0, 36,00,DA,28,11,00,00,1C 146.25 MHz 00,00,00,FC,00,53,79,6E,63, 4D,61,73,74,65,72,0A,20,20 Monitor Name: SyncMaster Min. Vertical Frequency: 56 Hz 48~59h Detailed Timing / Descriptor Block 3 6C~7Dh Detailed Timing / Descriptor Block 4 81,40 00,00 Max. Vertical Frequency: 75 Hz 00,FD Min. Horizontal Frequency: 30 00,38 KHz Max. Horizontal Frequency: 81 4B,1E KHz 51,0F,00,0A,20,20, 20,20, Max. Pixel Clock: 150 MHz 20,20, Monitor Serial Number: H1AK500000 00,00,00,ff,00,48,31,41,4B,3 5,30,30,30,30,30,0A,20,20 7Eh Extension flag 00 7Fh Checksum XX DVI 0 0 1 2 3 4 5 6 7 8 9 A B C D E F 00 FF FF FF FF FF FF 00 4C 2D 20 03 XX XX XX XX 10 1 XX XX 01 03 80 2F 1E 78 2A DC 51 A3 59 48 9E 24 2 11 50 54 BF EF 80 B3 00 81 80 81 40 71 4F 01 01 3 01 01 01 01 01 01 21 39 90 30 62 1A 27 40 68 B0 4 36 00 DA 28 11 00 00 1C 00 00 00 FD 00 38 4B 1E 5 51 0F 00 0A 20 20 20 20 20 20 00 00 00 FC 00 53 6 79 6E 63 4D 61 73 74 65 72 0A 20 20 00 00 00 FF 7 00 48 31 41 4B 35 30 30 30 30 30 0A 20 20 00 XX Byte(Hex) Field Name and Comments Description EDID 00~07h Head Information 08~09h ID Manufacturer Name SAM 00,FF,FF,FF,FF,FF,FF,00 0A~0Bh Product ID Code 0320 20,03 0C~0Fh Last 5 Digits of Serial Number 0 XXXXXXXXXX 10h Week of Manufacture 1 XX 11h Year of Manufacture 2007 XX 12h EDID Version Number 1 01 13h EDID Revision Number 3 03 4C,2D Analog Signal Level 0.700, 0.000 (0.700Vp-p) No Blank -to-black Setup 14h Video Input Definition Separate Syncs. Supported 80 Composite Sync. Supported No Sync. on Green Supported No Serration Required 15h Max Horizontal Image Size 47 16h Max Vertical Image Size 30 17h Display Gamma 2F 2.2 78 No Standby No Suspend 18h Power Management and Supported Feature(s) Active Off/Very Low Power RGB Color Display 2A No sRGB Color Space Preferred Timing Mode No Default GTF Supported 19~22h Chroma Info R (x, y) 0.640, 0.349 G (x, y) 0.284, 0.617 B (x, y) 0.142, 0.067 W (x, y) DC,51,A3,59,48,9E,24,11,50 ,54 0.313, 0.329 720 x 400 @ 70Hz 720 x 400 @ 88Hz (N/A) 640 x 480 @ 60Hz 23h Established Timing I 640 x 480 @ 67Hz 640 x 480 @ 72Hz BF 640 x 480 @ 75Hz 800 x 600 @ 56Hz 800 x 600 @ 60Hz 24h Established Timing II 800 x 600 @ 72Hz 800 x 600 @ 75Hz 11 EF 832 x 624 @ 75Hz 1024 x 768 @ 87Hz(I) (N/A) 1024 x 768 @ 60Hz 1024 x 768 @ 70Hz 1024 x 768 @ 75Hz 1280 x 1024 @ 75Hz 1152 x 870 @ 75Hz 800 x 600 @ 85Hz (N/A) 1024 x 768 @ 85Hz (N/A) 25h Manufacturers Reserved Timings 1280 x 1024 @ 60Hz (N/A) 1280 x 1024 @ 85Hz (N/A) 80 1600 x 1024 @ 60Hz (N/A) 1600 x 1200 @ 75Hz (N/A) 1600 x 1200 @ 85Hz (N/A) 26~35h Standard Timing Identification 36~47h Detailed Timing / Descriptor Block 1 5A~6Bh Detailed Timing / Descriptor Block 2 1680 x 1050 @ 60Hz 16: 10 B3,00 1280 x 1024 @ 60Hz 1280 x 960 @ 60Hz 5: 4 4: 3 81,80 1152 x 864 @ 75Hz 4: 3 71,4F No Application No Application 01,01 01 No Application 01 No Application 01 1680x1050 @ 60Hz 21,39,90,30,62,1A,27,40,68, B0, 36,00,DA,28,11,00,00,1C 146.25 MHz Monitor Name: SyncMaster Min. Vertical Frequency: 56 Hz 48~59h Detailed Timing / Descriptor Block 3 6C~7Dh Detailed Timing / Descriptor Block 4 81,40 00,00,00,FC,00,53,79,6E,63, 4D,61,73,74,65,72,0A,20,20 00,00 Max. Vertical Frequency: 75 Hz 00,FD Min. Horizontal Frequency: 30 00,38 KHz Max. Horizontal Frequency: 81 4B,1E KHz 51,0F,00,0A,20,20, 20,20, Max. Pixel Clock: 150 MHz 20,20, Monitor Serial Number: H1AK500000 00,00,00,ff,00,48,31,41,4B,3 5,30,30,30,30,30,0A,20,20 7Eh Extension flag 00 7Fh Checksum XX Remark: Notes1: Get SerialNumber(10----14Digit) from BarCode and transfer it to HEX Notes2: Week(1---53), Notes3: Year , HEX(Year-1990) , Notes4: Get Barcode(5----14Digit)﹐and save as ASCII 12 3-5 How to execute DDC 1. Install Analog DVI EDID Tool Program 2. Click the Analog DVI EDID Tool icon. 3. Then Select the model which you want to write EDID. 4. Select VGA EDID or DVI EDID: Click `Setting' --`Config File' to enable the `Setting' Window Then choose a port for EDID writing or read in this Window. 13 5. Write EDID: Select “File”- “Auto Write” to enable EDID Writing. It will auto write when you enter a S/N which i Successful EDID written when it shows‘PASS’ Logo 14 3-6 How to execute MCU Code 1. Set the options. -. Manufacture : MSTAR -. Device Type : TSUM16_ROM128K_ext_flash -. Communication Port : DSUB15 (Analog) -. External Memory: PM25LV010E 5. If Program and Verify is OK, turn off the hard power and than turn on again. 15 4 Troubleshooting 4-1 Common Acknowledge If you change the interface board, be sure that the U104 and U105 these two components also changed to the new I/F board because there was program inside. If not, please re-write EDID or upload firmware into Flash memory via VGA Cable. If you adjust clock and phase, please do it at the condition of Windows shut down pattern. If you confirm the R.G.B. color is normal or not, please do it under 16-grey scalar pattern. This LCM is analog interface. So if the entire screen is an abnormal color that means the problem happen in the analog circuit part, if only some scale appears abnormal color that stand the problem happen in the digital circuit part. If you check the H/V position, please use the crosshatch pattern. This LCM support more than 30 timing modes, if the input timing mode is out of specification, the picture may appears abnormally. If brightness uneven, repairs Inverter circuit or change a new panel. If you find the vertical line or horizontal line lost on the screen, please change panel. 16 4-2 No Picture (VGA Mode) 17 4-3 No Picture (DVI Mode) 18 4-4 No Power 19 5. Exploded View & Part List 5. Exploded View & Part List M0563 7140500110 M0564 M0562 7911513005 7911514006 M0215 M0561 7140300119 5-1. LS22WJWKBJUXAA Exploded View 5-1 5. Exploded View & Part List 5-1-1. LS22WJWKBJUXAA Parts List Location No. Code No. Description & Specification Q’ty SA/SNA 7140300119 BN82-00278A A/S ASSY-COVER FRONT;714030011900R 1 S.A 7140500110 BN82-00275A A/S ASSY-COVER REAR;714050011000R 1 S.A 7911513005 BN81-01270A A/S-PCBA I/F;791151300510R,-,-,-,-,-,- 1 S.A 7911514006 BN81-01275A A/S-PCBA P/I;791151400610R,-,-,-,-,-,- 1 S.A M0215 BN07-00427A LCD-PANEL;M220Z1-L03 1 S.A M0561 BN81-01095A A/S-PCBA,KEYPAD BOARD;LE1969,KEY FUNCTIO 1 S.A M0562 BN81-01096A A/S-PCBA EARPHONE;790240400000R,-,-,-,-, 1 S.A M0563 BN82-00273A A/S ASSY-ARM;714000003500R 1 S.A M0564 BN82-00254A A/S ASSY-BASE;714020003500R 1 S.A 5-2 Remark 5. Exploded View & Part List 5-2. LS22WJWKBJUXAA Parts List Level Location No. Code No. Description & Specification LS22WJWKBJUXAA BRIGHTNESS 300CD/M2 CONTRAST RATIO 1000: Q’ty SA/SNA Remark 0.1 M0215 BN07-00427A LCD-PANEL;M220Z1-L03 1 S.A 0.1 M0560 BN81-00549A A/S-PWR CORD;BLK 6FT UL/CSA,10A/ 125V,453 1 S.A 0.1 M0561 BN81-01095A A/S-PCBA,KEYPAD BOARD;LE1969,KEY FUNCTIO 1 S.A 0.1 M0562 BN81-01096A A/S-PCBA EARPHONE;790240400000R,-,-,,-, 1 S.A 0.1 4530303001 BN81-01254A A/S-CABLE AUDIO;453030300120R,-,-,-,-,-, 1 S.A 0.1 4530303001 BN81-01256A A/S-CABLE DVI-D;453030300161R,-,-,-,-,-, 1 S.A 0.1 4530101003 BN81-01257A A/S-CABLE D-SUB;453010100380R,-,-,-,-,-, 1 S.A 0.1 5060200170 BN81-01259A A/S-CARTON;506020017000R,-,-,-,-,-,- 1 S.N.A 0.1 5060600069 BN81-01262A A/S-CUSHION;506060006900R,-,-,-,-,-,- 1 S.N.A 0.1 5060600069 BN81-01263A A/S-CUSHION;506060006910R,-,-,-,-,-,- 1 S.N.A 0.1 4303008012 BN81-01264A A/S-HRN;430300801280R,-,-,-,-,-,- 1 S.A 0.1 4303006003 BN81-01266A A/S-HRN;430300600310R,-,-,-,-,-,- 1 S.A 0.1 4303030013 BN81-01267A A/S-HRN;430303001310R,-,-,-,-,-,- 1 S.A 0.1 7030000090 BN81-01269A A/S-KIT ACCESSORY;703000009000R,-,-,-,-, 1 S.A 0.1 7911513005 BN81-01270A A/S-PCBA I/F;791151300510R,-,-,-,-,-,- 1 S.A 0.1 7911514006 BN81-01275A A/S-PCBA P/I;791151400610R,-,-,-,-,-,- 1 S.A 0.1 M0564 BN82-00254A A/S ASSY-BASE;714020003500R 1 S.A 0.1 M0563 BN82-00273A A/S ASSY-ARM;714000003500R 1 S.A 0.1 7140500110 BN82-00275A A/S ASSY-COVER REAR;714050011000R 1 S.A 0.1 7140300119 BN82-00278A A/S ASSY-COVER FRONT;714030011900R 1 S.A 5-3 6 Block Diagram 6-1 Power Tree 6-2 Main Board Part TSUM16AWK-LF-1 (PC)ANALOG R G B HSYNC Display Processing Engine Single Interface Engine Response Time Enhancement LVDS Panel Interface SDRAM OSD Clock Generator MCU Function Key 14.318MH z 3.3V Regulator IP Board 1.8V Regulator 5V Regulator 24 1MB Flash 24C04 EEPROM P A N E L 6-3 IP Board Part (power Part) 6-4 IP Board Part (Inverter Part) 25 7 Wiring Diagram 26 8 Schematic Diagram 8- 1 8- 2 DC-DC Input 27 8- 3 8- 4 TSUMU58WHJ Power 28 8- 5 Inverter 8- 6 Keypad 29 8- 7 Audio 8- 8 Ear Phone 30 9 Operating Instructions and Installation 9-1 Front 3. Volume button When OSD is not on the screen, push the button 1. Menu button Opens the OSD menu. Also use to exit the OSD menu or return to the previous menu. 2&3. Adjust buttons Adjust items in the menu. 2. MagicBright button MagicBright is a new feature providing optimum viewing environment depending on the contents of the image you are watching. Currently four different modes are available: Custom, Text, Internet, Game , Sport and Movie. Each mode has its own preconfigured brightness value. You can easily select one of four settings by simply pressing MagicBright control buttons. 4. Enter button Activates a highlighted menu item. 5. Auto button Use this button for auto adjustment. 6. Power button / Power indicator Use this button for turn the monitor on and off. /This light glows green during nomal operation, and blinks green once as the monitor saves your adjustments.. 31 9-2 Rear 4 1 3 2 1. Power port Connect the power cord for your monitor to the power port on the back of the monitor. 2. D-sub 15-pin port Connect the signal cable to the 15-pin, D-sub connector on the back of your monitor. 3. Audio port Connect the audio cord for your monitor to the audio port on the back of the monitor 4. Kensington Lock The Kensington lock is a device used to physically fix the system when using it in a public place. (The locking device has to be purchased separately. ) To get the information on using the Kensington Lock, contact an aurhorized dealer 32 9-3 Connecting the Monitor 33 9-4 Monitor Assembly 34 9-5 Attaching a Base - This monitor accepts a 100mm x 100mm VESA-compliant mounting interface pad. A. Monitor B. Mounting Interface Pad 1. Turn off your monitor and unplug its power cord. 2. Lay the LCD monitor face-down on a flat surface with a cushion beneath it to protect the screen. 3. Remove four screws and then remove the stand from the LCD monitor. 4. Align the mounting interface Pad with the holes in the rear cover mounting pad and secure it with four screws that came with the arm-type base, wall mount hanger or other base. 35 10 Disassembly and Reassembly 10-1 Disassembly Block LE 2294 LCD Monitor ASSY BASE*1 BASE*1 RUBBER FOOT*4 SCREW,MINUS,M4*8,Zn* 1 SCREW M4*10, *3 STAND_BACK*1 HINGE *1 SCREW M4*10 *3 STAND_FRONT*1 BACK COVER*1 BKT-VESA *4 SHIELDING*1 TAPE,ACE,(PC=10x4 LCP 22 MT220WW01-V0G1 (INNOLUX)& LCP 22 N220Z1-L01(A)(CMO)& LCP 22 MT220WW01-V2- ASSY STAND*1 ASSY BACK COVER*1 CHASSIS *1 MYLAR TRANSPARENT*2 Power Board *1 SCREW M3*6, *4 SCREW M4*6, *1 ASSY CHASSIS PCBA I/F BOARD *1 CABLE 30 PIN FFC SCEW M3*6, *1 BOLT, #440x11.8,W/CUT,DSUB/DVI,Ni ASSY PANEL*1 Speaker*2 Key PAD PCBA*1 Earphone PCBA*1 BEZEL,FRONTLE2294 BUTTON,LE2294, ASSY BEZEL*1 Note: The disassembly direction please following direction of arrowhead 36 1.unscrew the manual scerw and remove the base 2.unscrew the stand screws and remove the stand 3.Lift the back cover and use jig remove the lamp shielding 4.Disconnect lamp wire and earphone wire 37 5.Tear the adhesive tape and disconnect keypad wire 6.Disconnect the speaker and LVDS wire 7.Remove chassis assembly and lift up the panel 38 10-2 Reassembly Block COVER,FRONT BUTTON,LE1970,ROHS LENS,LE1970 ROHS KeyPAD PCBA*1 CHASSIS *1 MYLAR TRANSPARENT*2 MYLAR BLACK*2 ASSY BEZEL*1 LCP 22 MT220WW01-V0G1 (INNOLUX)& LCP 22 N220Z1-L01(A)(CMO)& LCP 22 MT220WW01-V2G1 (INNOLUX) SHIELDING*1 TAPE,ACE,(PC=10x45mm) *1 ASSY PANEL*1 ASSY CHASSIS Power Board *1 SCREW M3*6, *4 SCREW M4*6, *1 PCBA I/F BOARD *1 CABLE 30 PIN FFC SCEW M3*6, *1 BOLT, #440x11.8,W/CUT,DSUB/DVI,Ni BEZEL&PANEL&A SSY CHASSIS Speaker*2 BACK COVER*1 BKT-VESA *4 STAND_BACK*1 HINGE *1 SCREW M4*10 *3 STAND_FRONT*1 ASSY BACK COVER*1 SCREW M4*10, *3 ASSY STAND*1 LE 2294 LCD Monitor BASE*1 RUBBER FOOT*4 SCREW,MINUS,M4*8,Zn*1 ASSY BASE*1 39 11 PCB Diagram 11-1 Main Board 11-1-1 Main Board Top Layer 11-1-2 Main Board Bottom Layer 40 11–2 Power Board 11-2-1 Power Board TOP Layer 11-2-2 Power Board BOTTOM Layer 41 12 Circuit Descriptions 12-1 Overall Block Structure 12-1-1 Power Tree 1. When the AD board is in DPMS state: 1.1 The IP has been designed so that it operates with a power consumption of less than 0.8W of. 1.2 The Scaler consumes power up to 37mA 1.3 The power to the panel is switched off 2. When the AD board is operating normally: 2.1 The maximum power consumption of the panel lamps is described below (It may vary depending on the panel manufacturer) INL: 4*(7.0mA*680Vrms)=4* 4.76W=19W CMO: 4*(7.0mA*775Vrms)=4* 5.43W=21.7W 2.2 The power consumption of the Panel Control board is as follows: 5V*700mA=3.50W 2.3 The power consumption of the Scaler is as follows: 3.3V*274mA + 1.8V*145mA = 1.24W 42 12-1-2 Main board Parts TSUM16AWK-LF-1 (PC)ANALOG R G B HSYNC Display Processing Engine Single Interface Engine Response Time Enhancement LVDS Panel Interface SDRAM OSD Clock Generator MCU Function Key 14.318MH z 3.3V Regulator IP Board 1MB Flash 24C04 EEPROM 1.8V Regulator 5V Regulator 1. Inverter: A conversion device that converts DC rated voltage/current to high ones necessary for the panel lamp. 2. DC/DC(Regulator): General term for DC to DC converting devices. The IP board receives 5V and outputs 1.8 or 3.3V that is supplied to the scaler (TSUM16AWK-LF-1). 3. Power MosFET: The IP board receives 5V and outputs a lower voltage in DPMS mode and supplies the whole 5V for the panel operating board in normal conditions. In that case, the switching of Power MosFET is controlled by Micom. 4. Scaler: Receives the analog R,G,B signals and convert them to proper reso- lutions using up- or downscaling that are transferred to the panel in the LDVS formats. 5. Crystal(Oscillator): Use one 14.318MHz oscillator externally to supply power to both MCU and Scaler at the same time. 6. Scaler & EEPROM: I2C is a two-way serial bus of two lines that supports communications across the integrated circuits as well as between FLASH and EEPROM. In particular, MCU(TSUM16AWK-LF-1) and use the SDR direct bus for mutual communications, which is an effective, speedy system because it allows 4 additional address/data lines com- pared to the old serial systems. 7. Function Key: A certain keystroke generates a certain electrical potential, which is transferred into ADC input port of the MCU and then con- verted to a digital value by the A/D converter of the chip. The digital value (data) is a clue to which key is entered. 43 P A N E L 12-2 IP Board Part(Power) Schematic Diagrams Power Switching Mode Power Supply 1.1 AC Current Input Circuit P801 is a connector for connecting AC Power. F801 is a fuse to protect all the circuit. AC input voltage is from 90v to 264V. R801 and R802 joined between two inputting main circuit to prevent man from shock. L801 is used to clear up low frequency wave. C801 and C802 are used to discharge the waves that L801 produced. High frequency waves are damped by C801 and C802. D801 is a rectifier which composed of 4 build-in diodes, it inverts AC to DC. 1.2 High Voltage to Low Voltage Control Circuit C804 is used to smooth the wave from rectifier. IC802 is a highly integrated PWM controller. When rectified DC high voltage is applied to the HV pin during start-up, the MOSFET Q804 is initially off, and the Vcc pin capacitor is charged. When the Vcc pin voltage reaches approximately 10V, the control circuitry is activated and the soft-start begins. The soft-start circuit gradually increases the duty cycle of the MOSFET from zero to the maximum value over approximately 4ms. If no external feedback/supply current is fed into the FB pin by the end of the soft-start, the current Setpoint will be above the fault level, FAULT flag is raised, if the FAULT duration exceeds 80ms, the output controller disable Resistor R808, R809, R810, R811 are for line over voltage shutdown(OVP) When PWM is turned off, the main current flow will be consumed through R804 and D802, This will prevent MOSFET Q804 from being damaged under large current impulse and voltage spike. D803 and C807 to provide internal Auxiliary voltage to Vcc pin during normal operation. Otherwise, error amplifier and feedback current input the FB pin for duty cycle control. 1.3 DC_5V and DC_14V Output Circuit For DC 5V, D805 is used to rectify the inducted current. R828 and C814 are used to store energy when current is reversed. The parts including C818, C822, C820,L803 are used to smooth the current waves. For DC 14V, D803 is used to rectify the inducted current. R827 and C813 are used to store energy when current is reversed. The parts including C815, C817 and L802 are used to smooth the current waves. 3.1.4 Feedback 44 Pin R of IC803 is supplied 2.5-v stable voltage. It connects to 5V and 14V output through R822, R823 and R824. R822, R823 and R824 are output sampling resistor. When the sampling voltage more than 2.5V or less than 2.5V, current of FB IC802 will change, this can change the voltage from T801. 12-3 IP Board Part(Inverter Part) Inverter Circuit 1. R503, ZD501, R502, Q501 components convert +14V voltage into +5.0V voltage, and the voltage supply to IC501. The extra PWM pulse signal (BRIGHTNESS signal) input to control IC through R512, R514, C510, The LCT pin is set to a DC voltage of 0.7V by using a resistor divider(R507, R516), change the duty of PWM pulse, will regulate the lamp current. The ON/OFF voltage connect to pin10 of IC501 through D501, R501, A voltage of 2V to pin10 of IC501 enables the IC and activates the striking timer. The SSTCMP pin of IC501 performs the soft function, the C511 set the time of SST. The operation frequency determined by external capacitor C512, C521 and resistor R508 connected at CT pin of IC501. C515 connect the TIMER pin of IC501, the capacitor to set striking time and shunt down delay time. DRV!, DRV2 output for power MOSFET U501, U502. 2. OZ9938 provides two drive signals for U501, U502, and they work in push pull topology driving, two transformers are connected in parallel with each transformer driving two lamps in series. Turning each NChannel MOSFET “on/off” complementarily, produces an alternating current through the transformer primary and secondary. The “on” duration of the switches determines the amount of energy delivered to the CCFLs. R504, C504, R505, C505, R532, C529, R530, C522 are snubber networks, they suppress Voltage transient spike in drain of power MOSFET. 3. R506, R510, C509, C513, C514, R525, R531, C528, C525, and C527 are connected between high voltage output connector and ground, the divided AC voltage is inverted DC voltage through D502, D503, D508, and D509. The sense voltage feed back to VSEN (pin 6 of IC501) for an over voltage/over current condition during normal operation. R528, R533 are current sense resistor, current sense signal feed back to Isense (pin 5 of IC501) for lamp “ON” detection. 45 13 Reference Information 13-1 Technical Terms -TFT-LCD -FINE The "Fine" adjustment is used to adjust visibility by controlling phase difference. Thin film Transistor Liquid Crystal Display -ADC(Analog to Digital Converter) This is a circuit that converts from analog signal to digital signals. -COARSE This adjustment adjusts the display by tuning Video clock and PLL clock. -PLL(Phase Locked Loop) During progressing ADC, Device makes clock synchronizing HSYNC with Video clock -L.V.D.S.(Low Voltage Differential Signaling) A kind of transmission method for Digital. It can be used from Main PBA to Panel. -Inverter Device that supplies Power to LCD panel lamp. This device generates about 1,500~2,000V. -DDC(Display data channel) It is a communication method between a Host Computer and related equipment. It enables Plug and Play between PC and AC Adapter Device that converts AC(90V~240V) to DC(+12V or 14V) Monitor. -EDID Extended Display Identification Data PC can recognize monitor information, such as Product data, Product name, Display mode, Serial number, Signal source, etc. Data is recognized via DDC Line linking PC and Monitor. -SMPS(Switching Mode Power Supply) Switching Mode Power supply. This design technology is used to step up/down the input power by switching on/off -FRC(Frame Rate Controller) Technology that changes the number of frames displayed on screen per second. TFT-LCD panel requires 60 frames per second. This technology is needed to convert input image to 60 frames per second regardless input frame quantity. -Dot Pitch The image on a monitor is composed of red, green and blue dots. The closer the dots, the higher the resolution. The distance between two dots of the same color is called the 'Dot Pitch'. Unit: mm -Image Scaler Technology that convert various input resolution to other resolution.(ex. 640* 480 to 1024*768) -Auto Configuration(Auto adjustment) This is an algorithm to adjust monitor to optimum condition by pushing one key. -OSD(On Screen Display) Customers can easily control the screen settings using the OSD. 46 -Vertical Frequency The screen must be redrawn several times per second in order to create and display an image for the user. The frequency of this repetition per second is called Vertical Frequency or Refresh Rate. Unit: Hz Example: If the same light repeats itself 60 times per second, this is regarded as 60 Hz. -Horizontal Frequency The time to scan one line connecting the right edge to the left edge of the screen horizontally is called Horizontal Cycle. The inverse number of the Horizontal Cycle is called Horizontal Frequency. Unit: kHz -Interlace and Non-Interlace Methods Showing the horizontal lines of the screen from the top to the bottom in order is called the Non-Interlace method while showing odd lines and then even lines in turn is called the Interlace method. The NonInterlace method is used for the majority of monitors to ensure a clear image. The Interlace method is the same as that used in TVs. -Plug & Play This is a function that provides the best quality screen for the user by allowing the computer and the monitor to exchange information automatically. This monitor follows the international standard VESA DDC for the Plug & Play function. -Resolution The number of horizontal and vertical dots used to compose the screen image is called 'resolution'. This number shows the accuracy of the display. High resolution is good for performing multiple tasks as more image information can be shown on the screen. Example: If the resolution is 1680 x 1050 , this means the screen is composed of 1680 horizontal dots (horizontal resolution) and 1050 vertical lines (vertical resolution). 47 13-2 Pin Assignments VGA Sync Type Pin No. 15-Pin D-Sub Signal Cable Connector Separate Sync-on-green 1 Red Red 2 Green Green + H/V Sync 3 Blue NC DDC Return(GND) GND-R GND-G GND-B NC Cable Detect NC Bi-Dr Data (SDA) H-Sync V-Sync DDC Clock(SCL) Blue NC DDC Return(GND) GND-R GND-G GND-B NC Cable Detect NC Bi-Dr Data (SDA) Not Used Not Used DDC Clock(SCL) 4 5 6 7 8 9 10 11 12 13 14 15 DVI-D Pin 1 2 3 4 5 6 7 Symbol RX2RX2+ GND RX4RX4+ SCL SDA Pin 9 10 11 12 13 14 15 Symbol RX1Rx1+ GND RX3RX3+ +5V Power GND 48 Pin 17 18 19 20 21 22 23 Symbol RX0RX0+ GND RX5RX5+ GND RXC+ 13-3 Timing Chart This section of the service manual describes the timing that the computer industry recognizes as standard for computer- generated video signals. Through D-SUB connectors, this unit can support FH= 30~81 KHz, Fv=56~75Hz and WXGA+ display modes as below: Table 1. Timing Chart NO. 1 2 3 4 5 6 7 8 9 10 11 12 13 14 15 16 17 18 19 20 21 22 23 24 25 26 27 28 29 30 31 32 33 34 35 36 37 38 39 40 41 42 Name 640X350-70 640X400-60VESA 640X400-70IBM VGA50-CVT VGA60VESA VGA67 VGA72VESA VGA75VESA 720X400-70IBM 720X480-60GTF 720x576-50 SVA56 SVGA60VESA SVGA72VESA SVGA75VESA 832X624-75MAC XGA50-CVT XGA60VESA XGA70VESA XGA72-GTF XGA75VESA 1152X864-75VESA 1152X870-75MAC 1152x900-67GTF 1280X720-50CVT 1280X720-60CVT 1280X768-50CVT 1280X768-60 1280X768-75 VESA 1280X960-50CVT 1280X960-60VESA 1280x960-75 SXGA50CVT SXGA60VESA SXGA75VESA 1360X768-60 1400X1050-50CVT 1400X1050-60 1440X900-60 1440X900-75 UXGA60VESA 1680X1050-60 dot_clk out_hs out_vs htotal (MHz) 25.175 800 + 25.175 800 25.175 800 19.750 800 25.175 800 30.240 864 31.500 832 31.500 840 28.322 900 + 26.719 896 + 27.000 864 36.000 1,024 + + 40.000 1,056 + + 50.000 1,040 + + 49.500 1,056 + + 57.283 1,152 52.000 1,312 + 65.000 1,344 75.000 1,328 78.434 1,360 78.750 1,312 + + 108.000 1,600 + + 100.000 1,456 96.223 1,536 60.500 1,632 + 74.500 1,664 + 65.250 1,648 + 79.500 1,664 + 102.250 1,696 + 83.000 1,680 + 108.000 1,800 + + 130.000 1,728 + 88.500 1,680 + 108.000 1,688 + + 135.000 1,688 + + 85.500 1,792 + + 100.000 1,848 + 121.750 1,864 + 106.500 1,904 + 136.750 1,936 + 162.000 2,160 + + 146.250 2,240 + h_disp h_bp h_sync vtotal v_disp v_bp v_sync 640 640 640 640 640 640 640 640 720 720 720 800 800 800 800 832 1,024 1,024 1,024 1,024 1,024 1,152 1,152 1,152 1,280 1,280 1,280 1,280 1,280 1,280 1,280 1,280 1,280 1,280 1,280 1,360 1,400 1,400 1,440 1,440 1,600 1,680 49 48 48 48 80 40 96 128 120 54 88 60 128 88 64 160 224 144 160 144 168 176 256 144 192 176 192 184 192 208 200 312 224 200 248 248 256 224 232 232 248 304 280 96 96 96 64 96 64 40 64 108 72 64 72 128 120 80 64 104 136 136 112 96 128 128 120 128 128 128 128 128 128 112 136 128 112 144 112 144 144 152 152 192 176 449 525 449 497 525 525 520 500 449 497 625 625 628 666 625 667 793 806 806 801 800 900 915 935 744 748 793 798 805 991 1,000 1,005 1,057 1,066 1,066 795 1,083 1,089 934 942 1,250 1,089 350 400 400 480 480 480 480 480 400 480 576 600 600 600 600 624 768 768 768 768 768 864 870 900 720 720 768 768 768 960 960 960 1024 1024 1024 768 1050 1050 900 900 1200 1050 60 73 33 10 25 39 28 16 35 13 39 22 23 23 21 39 18 29 29 29 28 32 39 31 16 20 15 20 27 24 36 38 23 38 38 18 26 32 25 33 46 30 2 2 2 4 2 3 3 3 2 3 5 2 4 6 3 3 4 6 6 3 3 3 3 3 5 5 7 7 7 4 3 4 7 3 3 6 4 4 6 6 3 6 h_freq (kHz) 31.469 31.469 31.469 24.688 31.469 35.000 37.861 37.500 31.469 29.820 31.250 35.156 37.879 48.077 46.875 49.725 39.634 48.363 56.476 57.672 60.023 67.500 68.681 62.645 37.071 44.772 39.593 47.776 60.289 49.405 60.000 75.231 52.679 63.981 79.976 47.712 54.113 65.317 55.935 70.635 75.000 65.290 v_freq (Hz) 70.086 59.940 70.086 49.673 59.940 66.667 72.809 75.000 70.087 60.001 50.000 56.25 60.317 72.188 75.000 74.550 49.980 60.004 70.069 72.000 75.029 75.000 75.062 67.000 49.827 59.855 49.929 59.870 74.893 49.853 60.000 74.857 49.838 60.020 75.025 60.015 49.965 59.978 59.887 74.984 60.000 59.954 50