1
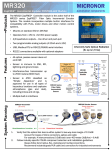
MR320 Series ZapFREE® Fiber Optic Incremental Encoder System Installation Guide Doc No: MR320-INSTALL Rev A2: 10-31-2011 MICRONOR INC. 750 Mitchell Road Newbury Park, CA 91320 USA PH: (805) 499 - 0114 FX: (805) 499 – 6585 [email protected] www.micronor.com For Support in Europe: MICRONOR AG. Pumpwerkstrasse 32 CH-8105 Regensdorf Switzerland PH: +41-44-843-4020 FX: +41-44-843-4039 [email protected] www.micronor.com Notice of Proprietary Rights The design concepts and engineering details embodied in this manual, which are the property of MICRONOR INC., are to be maintained in strict confidence; no element or detail of this manual is to be spuriously used, nor disclosed, without the express written permission of MICRONOR INC. All rights are reserved. No part of this publication may be reproduced, stored in a retrieval system, or transmitted in any form or by any means, electronic, mechanical, photocopying, recording, or otherwise, without prior written permission from MICRONOR INC. © COPYRIGHT 2004-2011, MICRONOR INC. NEWBURY PARK, CALIFORNIA UNITED STATES OF AMERICA MICRONOR INC MR320 ZapFREE® Fiber Optic Encoder System Installation Guide This Setup Guide is intended to guide you through the installation and initial setup. A comprehensive User Manual is supplied on the Zappy™ CDROM (supplied with the MR320 module) or can be downloaded via this link: http://www.micronor.com/products/files/MR320/ZAPPY.zip A complete fiber optic encoder system consists of: • • • • Sensor (MR322, MR324, MR326 or MR328) Controller Module (MR320) Additional Duplex LC optical assemblies, if required (MR320-D06CXX or user supplied cabling.) Additional Duplex LC Mating Adapters, if required to interconnect link cables (MR320C or user supplied) IMPORTANT SYSTEM NOTES Always keep Optical Connectors Clean! Two-way optical loss cannot exceed 12.5 dB Each connector must meet Duplex LC-UPC performance with multimode return loss > 24dB What optical signals do you need? If you require only the direct A+B quadrature outputs, then this Quick Setup Guide is all you should need. If you plan to use the Multiplier, Divider, Position Counter, Analog Outputs or Serial Interface, then you to need to install the ZAPPY™ software and reference the detailed MR310/MR320 User Manual. These files are included on the Resource CD supplied with the MR320 module or can be downloaded via a single ZIP file at: http://www.micronor.com/products/files/MR320/ZAPPY.zip Quick Connections: Step 1 Step 2 Step 3 Step 4 Connect optical link between Sensor and Module For A+B push-pull quadrature outputs, connect to App and Bpp terminals. For A+B line driver outputs, connect to A+/A-/B+/B- terminals Connect +24VDC to +Vs and 0V to GND terminals. For first time installation, it is necessary to “calibrate” the encoder system. While rotating the Encoder shaft, use the Wago tool to depress the RESET button on the Module. If the A and B LED lights blink ON/OFF, then system is "calibrated" and functioning properly. Page 2 of 13 MICRONOR INC MR320 ZapFREE® Fiber Optic Encoder System Installation Guide MR320 Electrical Connections: 1 2 3 4 5 6 7 8 9 10 11 12 J1 - Terminal A+ Line Driver (5V) A- Line Driver (5V) GND B+ Line Driver (5V) B- Line Driver (5V) GND App +24V push-pull Bpp +24V push-pull GND (power) +Vs power(+15V to +32V) Counter RESET (+24V) Shield 1 2 3 4 5 6 7 8 9 10 J2 - Terminal Divider A+ (5V) Divider A+ +24V push-pull GND Divider B+ (5V) Divider B+ +24V push-pull GND GND -10V to +10V Out (analog) GND 4-20mA Out (analog) +5V (2) 10mA max J3 RS422/485 Serial I/O GND +5V Output (10mA max) TX+ TXRCV+ RCV- 1 2 3 4 5 6 A Line Driver (5V Out) MAX4031 GND (3) B+ (4) B- (5) B GND (1) GND (6) 24V Driver 7272 TX+ (3) TX- (4) A+ (1) A- (2) A+ (7) B+ (8) RCV+ (5) RCV- (6) GND (9) J3 IMPORTANT NOTES: RS422/485 Serial Interface 9600 Baud, 1 Start, 1 Stop, No Parity +24V Supply (10) 100 ohm Line Driver outputs are short circuit protected. The 24V push-pull digital outputs are short circuit protected. Avoid any long-term short circuits on outputs. (Max 5 min) Analog output polarity (direction) may be inverted by changing the Direction parameter using the ZAPPY™ Setup Program. The analog voltage output delivers up to 10mA current and is short circuit protected. The current loop output provides 0-24mA Chassis (12) J1 Encoder DIRECT Outputs Power Supply +15V to +30V A Line Driver (5V Out) A+ (1) GND (3) B B+ (4) GND (6) 24V Driver 7272 A+ (7) B+ (8) GND (9) ±10V (8) 4..20mA (10) GND (6,9) J2 Encoder DIVIDED Outputs Analog Outputs Page 3 of 13 MICRONOR INC MR320 ZapFREE® Fiber Optic Encoder System Installation Guide Sensor-Module Optical Connection The optical connection between the Encoder and Sensor must be made using 62.5/125µm multimode optical fiber. This is the same fiber used in local area networks (LANs). The cable ends must be terminated with high quality Duplex LC and meet these optical performance requirements: Insertion loss <0.5dB, Return loss >24dB, and meets TELCORDIA GR-326-CORE endface geometry specifications. Sensor-Module Initialization: The first time after initial installation, the MR320 module must be initialized as follows: The encoder must be rotating at the same time that the RESET button on the MR320 module is being depressed. This initialization calibrates the combination of the sensor, optical link and MR320 control unit. It needs to be executed only once after initial installation – or any time the optical system (loss) is changed. The RESET button initiates a gain calibration of the optical input amplifier. This procedure may be executed as many times as required. However, once this initial calibration has been performed, the unit will retain calibration as long as the system arrangement is unchanged – i.e. no change in optical loss. Fiber Optic Connector Cleaning: IMPORTANT INFORMATION ABOUT FIBER OPTIC CONNECTORS Fiber Optic connectors must be kept clean from dust and other contaminants. Always keep unmated connectors covered with an appropriate dust cap. Do not touch the connector ends. Micronor supplies the MR321C cleaning kit with every system order. Before mating - clean BOTH connector ends as shown below. Page 4 of 13 MICRONOR INC MR320 ZapFREE® Fiber Optic Encoder System Installation Guide MR320 Error Messages – Blink Codes In normal operation, the PWR LED is continuously On. Approximately every 50 seconds the PWR LED blinks indicating execution of the internal Auto Calibration cycle, which is normal. This Auto Cal cycle only executes when the encoder is moving. The PWR LED starts blinking when a change or error in operation occurs. The number of blinks corresponds to an error code as shown below. Consult Section 7.5 of MR320 User Guide for additional information. Blinks Description – Cause – Remedy 1 2 3 4 5 EEPROM Error: Power down unit and re-initialize. If error persists, contact Factory. 2.5V Reference Voltage is out of tolerance: Contact Factory Internal +5V Power Supply Voltage is out of tolerance: Contact Factory Internal +12V Power Supply is out of tolerance: Contact Factory The optical encoder cannot be calibrated properly Possible reasons: Too much or too little optical power High insertion loss in the data link NOTE: Five blinks indicate that the input optical AMPLIFIER is either at the minimum (3) or maximum GAIN (20) setting. If you install ZAPPY software and use the Diagnostics Mode, then allowable GAIN range is 3-20. When the amplifier is at its maximum GAIN setting (20), the reason is most likely: • High loss within the optical link – usually a connector problem. Install ZAPPY and run DIAGNOSTICS Mode. Consult User Guide for additional information. • Defective encoder • Defective module When the amplifier is at its minimum GAIN setting (3), the reason is most likely: • Power is too high • Defective module Contact Micronor factory or distributor for additional troubleshooting assistance. Page 5 of 13 MICRONOR INC MR320 ZapFREE® Fiber Optic Encoder System Installation Guide How To Install ZAPPY Software What is ZAPPY Software? ZAPPY software is run on a PC and allows user to set the operating parameters of various functions (analog outputs, position counter, etc.), run Diagnostics to verify proper operation as well as to certify the fiber optic connections. Consult Section 5.9 of the MR3XX User Guide for detailed instructions but a summary follows here. What do I need to install ZAPPY Software? You will need the following: • ZAPPY Installation CDROM • An IBM-compatible PC running Windows XP • One of the following cable adapters: o If PC has available serial port, use MR232-1 RS422-to-RS232 Adapter Cable o If PC has available USB port, use MR232-2 RS422-to-USB Adapter Cable How do I install ZAPPY Software? 1. 2. 3. 4. If using MR232-2 USB Adapter cable, first install USB software per supplied instructions. Run SETUP.EXE on ZAPPY CDROM and install ZAPPY. Connect the MR320 to either serial or USB port. Turn on power to MR320 module. Run ZAPPY software. If using MR232-2 USB Adapter cable or port other than COM1, be sure proper COM port number is entered at ZAPPY Start-Up Screen per example below. NOTE: Version 3.5.1 of ZAPPY will find the MR320 automatically. Page 6 of 13 MICRONOR INC MR320 ZapFREE® Fiber Optic Encoder System Installation Guide How To Test The Optical Link using ZAPPY How can I verify if the Encoder/Module is properly connected and the optical connections meet requirements? 1. Click on [Diagnostics]. If the encoder is not rotating, you will get the following warning screen: 2. While rotating the shaft (RPM-Too Slow!!! warning will go away), click on [Analyze Receiver Settings]. All measured parameters should fall within range of allowed values shown in brackets [...] . Page 7 of 13 MICRONOR INC MR320 ZapFREE® Fiber Optic Encoder System Installation Guide How can I monitor Encoder operation? 1. Click on [Operate] to view RPM and Position Counter value. 2. Run encoder and verify proper operation. 2. Click on [Diagnostics] to view internal signal status. Page 8 of 13 MICRONOR INC MR320 ZapFREE® Fiber Optic Encoder System Installation Guide How To Use ZAPPY Software How do I change operating parameters stored in the MR320? 1. 2. 3. 4. First, click on the [Upload to PC] button view current settings. Change settings as required. Consult MR320 Technical Manual for detailed information. Click on [Save To MR320] to store all changes in the MR320’s nonvolatile memory. Operate the encoder and verify that the changes are functioning as expected. Explanation of MR320 System Parameters NOTE: System parameters are set by the factory and should not be altered by the user. The only exception is the RS422 address and the encoder resolution. Parameter Description Comments Device Name MR320 Fixed. This is the model name. Firmware Version Version number of firmware Fixed Serial Number Serial number of unit Fixed Address RS422 bus address This address may be changed by user when more than one unit resides on the same bus. Common address is 0. Unit always listens and responds to calls on address 0. Resolution This number must match the For example, MR324 encoder has resolution of 1024ppr number of slits of the encoder (pulses-or slits-per revolution). Therefore, the number entered here should be 1024. Cal Interval Defines internal time span for Cal Interval value represents multiples of ~3 seconds. A automatic calibration check. typical value is 82 (~4 minutes). If the value is 0, no automatic calibration will be performed. Duty Cycle Adjust This value is for adjustment of the Typically it should be left between 50 to 70. An oscilloscope quadrature signal duty cycle. is required to adjust the setting. Page 9 of 13 MICRONOR INC MR320 ZapFREE® Fiber Optic Encoder System Installation Guide Explanation of MR320 Operating Parameters NOTE: Operating parameters are used to define internal modes of operation and their variables. Parameter Description Comments Divider Divides quadrature outputs with Accepts values 2-8192. separate output via DIVIDE A+B line driver outputs Voltage Mode Defines output mode (Speed or If Voltage output not to be used, then set Voltage Scale=0. Position) and function of Voltage Otherwise see following sections describing detailed Speed analog output or Position setup of analog outputs for detailed information. Voltage Scale Determines Full Scale value if used If Voltage output not used, then set Voltage Scale=0. for Speed or Position Otherwise see following sections describing Speed or Position setup of analog outputs for detailed information. Voltage Filter Determines time constant of low If no filter function required, then set Voltage Filter=0. pass filter Otherwise see following sections describing Speed or Position setup for analog outputs for detailed information. Current Mode Defines output mode (Speed or If Current output not to be used, then set Voltage Scale=0. Position) and function of Current Otherwise see following sections describing Speed or analog output Position setup of analog outputs for detailed information. Current Scale Determines Full Scale value if used If no filter function required, then set Voltage Filter=0. for Speed or Position Otherwise see following sections describing Speed or Position setup for analog outputs for detailed information. Current Filter Determines time constant of low If no filter function required, then set Current Filter=0. pass filter Otherwise see following sections describing Speed or Position setup for analog outputs for detailed information. Position Reset Programs response of RESET input If value=0, Internal Position Counter resets on rising edge of Mode which resets Internal Position hardware RESET input. If value=1, enables a debounce Counter to value either 0 or value period for use of an external pushbutton wired to RESET of Hardware Reset Point input. For detailed information, see following section describing Position setup for analog outputs. Quadrature Can increase resolution by clocking Set value=0 for standard count mode and value=1 to double Multiplier Internal Counter on the ½ resolution. For detailed information, see following section quadrature cycle describing Position setup for analog outputs. Direction Determines direction of encoder Direction=0 for normal CW direction. Otherwise, Direction =1 to set reverse direction (CCW). Hardware Reset Internal Position Counter resets to For detailed information, see following section describing Point this value when hardware RESET Position setup for analog outputs. input is activated Reset On Count Internal Position Counter is Value=0 deactivates this mode. For detailed information, see automatically reset to 0 whenever following section describing Position setup for analog absolute value matches this value outputs. How do I setup the parameters for operating the Analog Outputs? The two analog outputs can be independently configured as a Speed (RPM) or an absolute Position indicator. Any Full Scale value >0 will activate the output. The Mode defines which Function the output performs. Each analog output is followed by a programmable low pass Filter. Consult following summary or MR3XX User Guide for details. Page 10 of 13 MICRONOR INC MR320 ZapFREE® Fiber Optic Encoder System Installation Guide How Do I Program The Voltage and/or Current Analog Output for Speed (RPM)? Encoder Direction (Register 2B) accepts values of 0=CW (default) and 1=CCW Output Function (Voltage register 23 and Current register 26, see table below for output descriptions) Full Scale value (Voltage register 24 and Current register 27) o 0 turns the Voltage analog output OFF – regardless of selected Output mode o Accept full scale value of 10-10,000 (RPM) Filter values (Voltage register 25 and Current register 28) o Value 0 corresponds to no filtering o 1-256 correspond to the 3dB filter point per equation provided in the Technical Reference Voltage SPEED Mode (Register 23) 0 1 Current SPEED Mode (Register 26) 0 1 2 Page 11 of 13 MICRONOR INC MR320 ZapFREE® Fiber Optic Encoder System Installation Guide How Do I Program The Voltage and/or Current Analog Output for POSITION? Encoder Direction (Register 2B) accepts values of 0=CW (default) and 1=CCW Output Function ( Voltage register 23 and Current register 26, see table below for output functions) Full Scale value (Voltage register 24 and Current register 27) o 0 turns the Current Voltage analog output OFF – regardless of selected Mode o Accepts full scale value of 1-8,388,607 counts Filter values (Voltage register 25 and Current register 26) o 0 corresponds to no filtering o 1-256 correspond to the 3dB filter point per equation provided in the Technical Reference o Default value is 32 (corresponding to 10Hz) Counter Reset mode (Register 29) o 0 = Counter is reset on first rising edge of RESET input o 1 = Allows debounce period of 60ms Counter Multiplier mode (Register 2A) o 0 = Normal counting (every cycle is one count) o 1 = Allows ½ quadrature cycle to increment/decrement internal Counter – effectively doubling the position resolution. Hardware Reset Value (Register 2C) o Internal Counter resets to this value when RESET input is activated o Accepts input value of 0-8,388,607 o Sometimes this function is also called “homing” o Analog output value will be determined by Mode selected. Here is an example: Reset On Count/Homing mode (Register 2D) o Internal Position Counter is automatically reset to 0 whenever its absolute value matches this preprogrammed value o 0 = mode deactivated o Accepts input value of 1-8,388,607 for active mode o Here is an example: Page 12 of 13 MICRONOR INC MR320 ZapFREE® Fiber Optic Encoder System Installation Guide Voltage POSITION Mode (Register 23) 2 Current POSITION Mode (Register 26) 3 4 5 6 Page 13 of 13