1
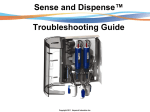
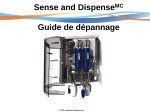
™
OnCommand Troubleshooting Guide
© 2012 Hayward Industries
Table of Contents
Safety Precautions
Overview
Software Troubleshooting
Local Display
Relays
Heaters
Temperature Sensors
Additional Error Codes
Chlorinator Off Error Codes
Page 1
Pages 2-5
Page 6
Pages 7-8
Pages 9-10
Page 11
Pages 12-13
Pages 14-15
Pages 16- 22
Safety Precautions
Warning
!
High Voltage Electrocution Hazard
Hazardous voltage can shock, burn, cause serious injury
and or death. To reduce the risk of electrocution and or
electric shock hazards:
• Only qualified technicians should remove the panel
• Replace damaged wiring immediately
• Insure panel is properly grounded and bonded
Page 1
Overview
When the “check system” light is illuminated, the first step should always be to
determine what error code is listed under the Default Menu by pressing the right
arrow key until the error code(s) are displayed.
However, additional detailed error codes may also be available under the
Diagnostic Menu, so be sure to check this menu as well.
Throughout this guide, we will list the error codes as they are shown in the Default
Menu.
Page 2
Overview
To remove the left side display panel
Remove the two screws and open the door to access the wire harness connecting the display
panel to the integrated control board. Next, disconnect the harness from the display board
and remove the door from the hinges.
To remove the right side panel
Remove the two screws and open the door. Next, slide the door towards the right to remove.
Page 3
Overview
Left Side - Display Panel Removed
24 VDC voltage to
relays
3 Amp fuse for
valves
Wireless Base Station
(antenna) connection
Air temperature sensor
connection
Pool/ Spa water
temperature sensor
connection
Solar temperature
sensor connection
Low voltage Heater
relay connection
Local Display
connection
Variable Speed
Pump & External
Chlorinator
connection
Incoming Voltage
Valve Actuator
connections
Page 4
Overview
Right Side - Panel Removed
Filter Pump Relay
Lights Relay
Auxiliary 1 Relay
Auxiliary 2 Relay
120 or 240 VAC
Incoming Power
Ground Bus Bar
Note: Remove screws (2) holding relay cover in place to access
low voltage coil of relays.
Page 5
Software Troubleshooting
One of the most important parts of troubleshooting a control system is knowing what the
system can do and why it is doing something. Below are some examples of how the system
operates in different situations. These are the most common, but you should thoroughly
familiarize yourself with the installation and owner's manual to better understand the
OnCommand's operating rules.
1.
If the Filter Pump is configured as a two-speed pump, the system will prevent the Low
Speed Relay from activating at the same time as the filter pump relay. The auxiliary
button that was programmed to function as “filter low speed” will now become inactive.
The high and low speed are now toggled by pressing the filter button, first time=high,
second time=low, third time=off.
2.
Any auxiliary relay that is “Interlocked” will not activate unless the system is in Pool Mode
and the Filter Pump Relay has been activated for at least three (3) minutes.
3.
Certain features or devices have to be configured in the system so that the OnCommand
knows they exist, otherwise, they will not operate. Example: If a heater is not “enabled”, a
call for heat will not be generated, thus the heater relay will not close.
4.
If an Aqua Rite or other external chlorinator is not wired to OnCommand, the option for
chlorinator configuration will not be present in the Configuration Menu.
Page 6
Local Display Blank/No Lights
Step A
Verify 115-120 or 220-240 Volts AC incoming voltage
on white and black wires located on the right side.
Blank local display
Step B
Unplug bus strip for remote
display as well as the wireless
antenna (base station)
connector. Shut the system
down and power back up. If the
display returns, plug each
connector back in one at a time
and see if it affects the display.
Repair or replace any device or
device wiring that affects the
display. If not, go to Step C.
If no voltage is measured, check connection from
breaker and that breaker is turned on. Also verify
line in voltage to panel from main branch. Correct
if necessary and go to Step B.
Page 7
Local Display Blank/No Lights
Measure for 9-10 Volts
DC across pins 1 and 3
(red and yellow wires).
Unplug local display harness.
Step C
Step D
1
2
3
4
No voltage, replace PCB,
voltage OK replace local
display.
Page 8
Relay Not Working
Step E
Step F
Verify the relay button is on and the
relay LED is lit on the local display.
Check for 18-24 VDC at the relay
coil. If present, go to next page.
If no voltage is present, check the coil wire connections. If OK, replace the Main PCB.
Page 9
Relay Not Working
Turn off circuit breaker supplying line voltage to relay and remove the Line and Load wiring.
Next, make sure relay is ON and check for continuity between terminals 2 & 4 and 6 & 8.
2 4
6 8
If continuity exists, the relay is
working and the issue is in the
wiring of, or the equipment itself.
If no continuity exists,
replace the relay.
Page 10
Heater Not Working
Note: Heater must be configured for remote control operation according to the manufacturer’s
instructions.
Verify the temperature set point is at
Verify Heater is enabled in the
least 1º higher than the current water
Configuration Menu.
temperature and the Heater LED is ON.
Step G
Step H
Remove the remote control communication wiring that connect OnCommand
with the heater and measure continuity between terminals 7&8.
Step I
If continuity exists, the control is working and the problem is in the wiring of, or the heater itself.
Otherwise, replace the main PCB.
Page 11
Troubleshooting Temperature Sensors
Place the control in Service mode. Then remove the terminal strip from PCB and measure
resistance across terminals of the Pool/Spa, Air, or Solar sensor.
Match the measured resistance value with the
temperature chart on Page 13.
If the measured value is 0.00,
replace the sensor.
If the measured value is open or infinity, check the sensor wiring for
damage. If OK, replace the sensor.
Page 12
Temperature vs. Resistance Chart
Page 13
Additional “Check System” Errors
Note: If Variable Speed Pump is not being used, change Filter Pump type in the Configuration Menu
to remove these error codes.
Below is a list of additional “Check System” error codes which relate to the OnCommand’s operation
with Hayward’s TriStar Energy Solution™ Variable Speed Pump & Control:
•Pool Bridge Comm
•Pool VSC Comm
•Pool VSC Err:xx
•Spa Bridge Comm
•Spa VSC Comm
•Spa VSC Err: xx
Please refer to the pump service manual for detailed troubleshooting.
Page 14
Additional “Check System” Errors
Below is a list of additional “Check System” error codes which relate to the OnCommand’s operation
of an externally mounted Aqua Rite:
•Chlorinator Off Test Salt Level
•Chlorinator Off High Salt / Amps
•Chlorinator Off Freeze Protect
•Chlorinator Off PCB Error
•Chlorinator Off Solar Turn on Delay
•Ext. Chlorinator Comm. Error
•Chlorinator Off Low Volts
Troubleshooting for each error code is shown on the following pages.
Page 15
Check System Light On
Chlorinator Off - Test Salt Level Message
Before operation, the Aqua Rite must be configured for the chlorinator cell that will be used. “t-15” is the factory default. If the
incorrect cell is chosen the salt level, amperage, and voltage will not be correct and the system will turn the chlorinator off.
Slide the Main Switch to
the “Auto” position.
Step J
Push the diagnostic button until “t-15,
t-9, t-5 or t-3” appears on the display.
Step K
To switch Cell Type, cycle Main Switch from
AUTO
Super Chlorinate
AUTO.
Step L
Maximum Current (Amps) before shutdown
T-Cell 3: 5.50
T Cell 9: 10.00
T-Cell 5: 6.75
T Cell 15: 10.00
Page 16
Check System Light On
Chlorinator Off - High Salt/Amps Error Message
Step M
Step N
Step O
Step P
Test the salt level in the pool using a suitable tester. Be sure the tester has been
calibrated and is clean. Pool water will have to be removed and fresh water added
to reduce the last level to the 3200 PPM level if found to be higher.
Check to make sure system is configured for correct model cell. (Page 16)
Has system been switched over to Spa and now gives this fault? High water
temperatures, such as in Spa, combined with salt levels in the higher ranges and
smaller bodies of water can possibly cause this fault. Verify this by switching back
to pool for 10 minutes without a fault or by setting the chlorinator to off (zero
percent) in spa mode and then running in spa without a fault. If a nuisance,
the salt level will have to be reduced to the lower ranges.
Remove and clean cell per the Goldline cleaning instructions. Be sure to ‘reset’ the
average salt by following the instructions in the Aqua Rite Installation Manual.
Replace cell if message is still displayed after cleaning.
Page 17
Check System Light On
Chlorinator Off – Freeze Protect
OnCommand will turn the chlorinator off when the air temperature drops below the air
temperature set-point (42-33°F). This is normal operation. If the ambient air temperature is
above the set-point, check to make sure the air temperature sensor is plugged in and not
defective (Page 12).
Check System Light On
Chlorinator Off – PCB Error
PCB error message indicates an internal fault with the PCB of the AquaRite.
Replacement of the AquaRite PCB is the solution.
Page 18
Check System Light On
Chlorinator Off – Solar Turn on Delay
OnCommand has turned the chlorinator off while the actuators turn the valves for solar heat. This is
normal operation. After three minutes, the chlorinator will continue to operate. If solar heat is not an
option, make sure to disable Solar in the Configuration Menu of the OnCommand.
Check System Light On
Ext. Chlorinator Comm. Error
Make sure the external AquaRite is powered up. Next, verify communication wiring connections
from chlorinator to OnCommand PCB. The wire connections should be identical from the
OnCommand to the AquaRite (1 to 1, 2 to 2, 3 to 3, 4 to 4). The AquaRite “remotely controlled”
LED should be illuminated if properly connected.
If error code is still displayed, verify the continuity (ohms) of each wire. If open, replace the
communication wiring.
OnCommand
AquaRite
Page 19
Check System Light On
Chlorinator Off - Low Volts
Verify 220-240 VAC or 115-125 VAC
at input terminal TB1.
Step Q
Verify 20-24 VAC between yellow wires
1
2
3
4
1
2
3
4
If voltage is good, go to step Q.
If no voltage, check to see that breaker
and/or time clock are not off.
Check input jumpers for correct position.
220-240 VAC: jumpers on 2 & 3 (factory default)
115-125 VAC: jumpers on 1 & 2 and 3 & 4
If no voltage go to step R.
If voltage is good go to step S.
Page 20
Check System Light On
Chlorinator Off - Low Volts
Shut off power to the control box. Disconnect the
blue, white, gray and violet wires from the main board
and measure the following:
Step R
Test for continuity of
20 amp slow blow fuse
Step S
Insert probes and measure resistance between the
Blue & White wires and the Violet & Gray wires.
The readings should be 2.0- 2.9 Ohms.
Replace fuse if blown. If fuse OK, go to step T.
If the readings of either of the two measurements are not
2.0 – 2.9 Ohms, the transformer is faulty and should be replaced.
If measurements are OK, go to step S.
Page 21
Check System Light On
Chlorinator Off - Low Volts
Verify 18-33 VDC between
black & red wires on main board
Step T
Step U
If no/low voltage replace rectifiers.
If voltage OK, go to step U.
Visually inspect main PCB board for any damaged or
burnt components. If damaged or burned, replace the
main PCB.
Page 22