1
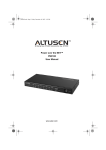
Korenix JetPort 5208/5216 Rackmount Serial Device Server User’s Manual First Edition, Feb. 2009 www.korenix.com v Korenix JetPort 5208/5216 Rackmount Serial Device Server User’s Manual Copyright Notice Copyright ¤ 2009 Korenix Technology Co., Ltd. All rights reserved. Reproduction in any form or by any means without permission is prohibited. vi Contents Regulatory Information . . . . . . . . . . . . . . . . . . . . . . . . . . . . . . . . . . . . . . . . ii RoHS . . . . . . . . . . . . . . . . . . . . . . . . . . . . . . . . . . . . . . . . . . . . . . . . . . . . . ii User Notice . . . . . . . . . . . . . . . . . . . . . . . . . . . . . . . . . . . . . . . . . . . . . . . . . iii Safety Instructions . . . . . . . . . . . . . . . . . . . . . . . . . . . . . . . . . . . . . . . . . . .iv General . . . . . . . . . . . . . . . . . . . . . . . . . . . . . . . . . . . . . . . . . . . . . . . . .iv Rack Mounting . . . . . . . . . . . . . . . . . . . . . . . . . . . . . . . . . . . . . . . . . . .vi Package Contents . . . . . . . . . . . . . . . . . . . . . . . . . . . . . . . . . . . . . . . . . . vii About This Manual . . . . . . . . . . . . . . . . . . . . . . . . . . . . . . . . . . . . . . . . . . .xi Overview . . . . . . . . . . . . . . . . . . . . . . . . . . . . . . . . . . . . . . . . . . . . . . . .xi KORENIX Information . . . . . . . . . . . . . . . . . . . . . . . . . . . . . . . . . . . . . . . xiii Technical Support . . . . . . . . . . . . . . . . . . . . . . . . . . . . . . . . . . . . . . . . xiii Getting Help . . . . . . . . . . . . . . . . . . . . . . . . . . . . . . . . . . . . . . . . . . . . xiii Product Information . . . . . . . . . . . . . . . . . . . . . . . . . . . . . . . . . . . . . . . xiv Chapter 1. Introduction Overview . . . . . . . . . . . . . . . . . . . . . . . . . . . . . . . . . . . . . . . . . . . . . . . . . . . 1 Requirements . . . . . . . . . . . . . . . . . . . . . . . . . . . . . . . . . . . . . . . . . . . . . . . 2 Features . . . . . . . . . . . . . . . . . . . . . . . . . . . . . . . . . . . . . . . . . . . . . . . . . . . 3 JETPORT 5208 / JETPORT 5216 Front Panel . . . . . . . . . . . . . . . . . . . . . . . . . . . . . . . . . . 5 JETPORT 5208 / JETPORT 5216 Rear Panel . . . . . . . . . . . . . . . . . . . . . . . . . . . . . . . . . . 6 Chapter 2. Hardware Setup Before you Begin . . . . . . . . . . . . . . . . . . . . . . . . . . . . . . . . . . . . . . . . . . . . 7 Stacking and Mounting . . . . . . . . . . . . . . . . . . . . . . . . . . . . . . . . . . . . . . . . 7 Stacking . . . . . . . . . . . . . . . . . . . . . . . . . . . . . . . . . . . . . . . . . . . . . . . . 7 Rack Mounting . . . . . . . . . . . . . . . . . . . . . . . . . . . . . . . . . . . . . . . . . . . 8 PC Installation. . . . . . . . . . . . . . . . . . . . . . . . . . . . . . . . . . . . . . . . . . . . . . . 9 Sun Fire V100 Server Installation . . . . . . . . . . . . . . . . . . . . . . . . . . . . . . . 11 Chapter 3. Browser Login Logging In . . . . . . . . . . . . . . . . . . . . . . . . . . . . . . . . . . . . . . . . . . . . . . . . . 13 The JETPORT 5208 / JETPORT 5216 Main Screen . . . . . . . . . . . . . . . . . . . . . . . . . . . . 14 Chapter 4. Administration Working Environment Configuration . . . . . . . . . . . . . . . . . . . . . . . . . . . . . 15 General . . . . . . . . . . . . . . . . . . . . . . . . . . . . . . . . . . . . . . . . . . . . . . . . 15 Administrator: . . . . . . . . . . . . . . . . . . . . . . . . . . . . . . . . . . . . . . . . 16 Connection Control:. . . . . . . . . . . . . . . . . . . . . . . . . . . . . . . . . . . . 16 Network . . . . . . . . . . . . . . . . . . . . . . . . . . . . . . . . . . . . . . . . . . . . . . . . 17 Service Ports: . . . . . . . . . . . . . . . . . . . . . . . . . . . . . . . . . . . . . . . . 17 vii IP Address: . . . . . . . . . . . . . . . . . . . . . . . . . . . . . . . . . . . . . . . . . . 17 ANMS . . . . . . . . . . . . . . . . . . . . . . . . . . . . . . . . . . . . . . . . . . . . . . . . . 19 CC Management Settings:. . . . . . . . . . . . . . . . . . . . . . . . . . . . . . . 19 RADIUS Settings: . . . . . . . . . . . . . . . . . . . . . . . . . . . . . . . . . . . . . 19 SNMP Settings: . . . . . . . . . . . . . . . . . . . . . . . . . . . . . . . . . . . . . . . 21 OOBC . . . . . . . . . . . . . . . . . . . . . . . . . . . . . . . . . . . . . . . . . . . . . . . . . 22 Date / Time . . . . . . . . . . . . . . . . . . . . . . . . . . . . . . . . . . . . . . . . . . . . . 23 Firmware . . . . . . . . . . . . . . . . . . . . . . . . . . . . . . . . . . . . . . . . . . . . . . . 24 Preparation: . . . . . . . . . . . . . . . . . . . . . . . . . . . . . . . . . . . . . . . . . . 24 Starting the Upgrade:. . . . . . . . . . . . . . . . . . . . . . . . . . . . . . . . . . . 24 Logout . . . . . . . . . . . . . . . . . . . . . . . . . . . . . . . . . . . . . . . . . . . . . . . . . 25 Device Management Configuration . . . . . . . . . . . . . . . . . . . . . . . . . . . . . . 26 Port Config . . . . . . . . . . . . . . . . . . . . . . . . . . . . . . . . . . . . . . . . . . . . . 26 Property Settings: . . . . . . . . . . . . . . . . . . . . . . . . . . . . . . . . . . . . . 27 Alert Settings: . . . . . . . . . . . . . . . . . . . . . . . . . . . . . . . . . . . . . . . . 30 User Management . . . . . . . . . . . . . . . . . . . . . . . . . . . . . . . . . . . . . . . . 31 Deleting an Account. . . . . . . . . . . . . . . . . . . . . . . . . . . . . . . . . . . . 32 Adding an Account: . . . . . . . . . . . . . . . . . . . . . . . . . . . . . . . . . . . . 32 Editing an Account: . . . . . . . . . . . . . . . . . . . . . . . . . . . . . . . . . . . . 33 Direct Access . . . . . . . . . . . . . . . . . . . . . . . . . . . . . . . . . . . . . . . . . . . 34 Session Info. . . . . . . . . . . . . . . . . . . . . . . . . . . . . . . . . . . . . . . . . . . . . 35 Sys Info . . . . . . . . . . . . . . . . . . . . . . . . . . . . . . . . . . . . . . . . . . . . . . . . 36 Log . . . . . . . . . . . . . . . . . . . . . . . . . . . . . . . . . . . . . . . . . . . . . . . . . . . 37 Chapter 5. Browser Operation Overview . . . . . . . . . . . . . . . . . . . . . . . . . . . . . . . . . . . . . . . . . . . . . . . . . . 39 Telnet . . . . . . . . . . . . . . . . . . . . . . . . . . . . . . . . . . . . . . . . . . . . . . . . . . . . 41 Port Configuration . . . . . . . . . . . . . . . . . . . . . . . . . . . . . . . . . . . . . . . . . . . 45 User Manager . . . . . . . . . . . . . . . . . . . . . . . . . . . . . . . . . . . . . . . . . . . . . . 45 Chapter 6. Out of Band Operation Overview . . . . . . . . . . . . . . . . . . . . . . . . . . . . . . . . . . . . . . . . . . . . . . . . . . 47 HyperTerminal. . . . . . . . . . . . . . . . . . . . . . . . . . . . . . . . . . . . . . . . . . . . . . 47 Direct HyperTerminal Connection . . . . . . . . . . . . . . . . . . . . . . . . . . . . 47 Logging In: . . . . . . . . . . . . . . . . . . . . . . . . . . . . . . . . . . . . . . . . . . . 51 Indirect HyperTerminal Connection . . . . . . . . . . . . . . . . . . . . . . . . . . . 52 Final Check: . . . . . . . . . . . . . . . . . . . . . . . . . . . . . . . . . . . . . . . . . . 53 Logging In . . . . . . . . . . . . . . . . . . . . . . . . . . . . . . . . . . . . . . . . . . . . . . 54 PPP (Dial In) Connection . . . . . . . . . . . . . . . . . . . . . . . . . . . . . . . . . . . . . 55 Direct PPP Connection . . . . . . . . . . . . . . . . . . . . . . . . . . . . . . . . . . . . 55 Finishing Up: . . . . . . . . . . . . . . . . . . . . . . . . . . . . . . . . . . . . . . . . . 58 Logging In: . . . . . . . . . . . . . . . . . . . . . . . . . . . . . . . . . . . . . . . . . . . 58 Indirect PPP Connection . . . . . . . . . . . . . . . . . . . . . . . . . . . . . . . . . . . 59 Setup: . . . . . . . . . . . . . . . . . . . . . . . . . . . . . . . . . . . . . . . . . . . . . . 59 ix Final Check: . . . . . . . . . . . . . . . . . . . . . . . . . . . . . . . . . . . . . . . . . 60 Logging In:. . . . . . . . . . . . . . . . . . . . . . . . . . . . . . . . . . . . . . . . . . . 60 Telnet . . . . . . . . . . . . . . . . . . . . . . . . . . . . . . . . . . . . . . . . . . . . . . . . . . . . 61 Logging In . . . . . . . . . . . . . . . . . . . . . . . . . . . . . . . . . . . . . . . . . . . . . . 61 SSH . . . . . . . . . . . . . . . . . . . . . . . . . . . . . . . . . . . . . . . . . . . . . . . . . . . . . 62 Terminal Session (Linux): . . . . . . . . . . . . . . . . . . . . . . . . . . . . . . . . . . 62 Third Party Utility (Windows): . . . . . . . . . . . . . . . . . . . . . . . . . . . . . . . 63 Chapter 7. Real Port Management Overview . . . . . . . . . . . . . . . . . . . . . . . . . . . . . . . . . . . . . . . . . . . . . . . . . . 65 Driver Installation . . . . . . . . . . . . . . . . . . . . . . . . . . . . . . . . . . . . . . . . . . . 65 Real Port Management . . . . . . . . . . . . . . . . . . . . . . . . . . . . . . . . . . . . . 66 Dialog Box Layout . . . . . . . . . . . . . . . . . . . . . . . . . . . . . . . . . . . . . . . . 66 Menu and Toolbar . . . . . . . . . . . . . . . . . . . . . . . . . . . . . . . . . . . . . 67 Target Information . . . . . . . . . . . . . . . . . . . . . . . . . . . . . . . . . . . . . 67 Target List . . . . . . . . . . . . . . . . . . . . . . . . . . . . . . . . . . . . . . . . . . . 68 Port List . . . . . . . . . . . . . . . . . . . . . . . . . . . . . . . . . . . . . . . . . . . . . 69 Mapped COM Ports. . . . . . . . . . . . . . . . . . . . . . . . . . . . . . . . . . . . 70 Port Mapping and Unmapping . . . . . . . . . . . . . . . . . . . . . . . . . . . . . . 71 Port Mapping . . . . . . . . . . . . . . . . . . . . . . . . . . . . . . . . . . . . . . . . . 71 Port Unmapping . . . . . . . . . . . . . . . . . . . . . . . . . . . . . . . . . . . . . . 72 Appendix Specifications . . . . . . . . . . . . . . . . . . . . . . . . . . . . . . . . . . . . . . . . . . . . . . 73 Administrator Login Failure . . . . . . . . . . . . . . . . . . . . . . . . . . . . . . . . . . . . 74 IP Address Determination . . . . . . . . . . . . . . . . . . . . . . . . . . . . . . . . . . . . . 75 Method 1: . . . . . . . . . . . . . . . . . . . . . . . . . . . . . . . . . . . . . . . . . . . 75 Method 2: . . . . . . . . . . . . . . . . . . . . . . . . . . . . . . . . . . . . . . . . . . . 76 Method 3: . . . . . . . . . . . . . . . . . . . . . . . . . . . . . . . . . . . . . . . . . . . 77 RJ-45 to Serial Adapters. . . . . . . . . . . . . . . . . . . . . . . . . . . . . . . . . . . . . . 78 Troubleshooting . . . . . . . . . . . . . . . . . . . . . . . . . . . . . . . . . . . . . . . . . . . . 82 Battery Replacement . . . . . . . . . . . . . . . . . . . . . . . . . . . . . . . . . . . . . . . . 82 Limited Warranty. . . . . . . . . . . . . . . . . . . . . . . . . . . . . . . . . . . . . . . . . . . . 82 x Overview Chapter 1, Introduction, introduces you to the JETPORT 5208 / JETPORT 5216 System. Its purpose, features and benefits are presented, and its front and back panel components are described. Chapter 2, Hardware Setup, provides step-by-step instructions for setting up your installation. Chapter 3, Browser Login, explains how to log into the JETPORT 5208 / JETPORT 5216 from your browser. Chapter 4, Administration, explains the administrative procedures that are employed to configure the JETPORT 5208 / JETPORT 5216’s working environment. Chapter 5, Browser Operation, details concepts and procedures involved in the browser operation of your JETPORT 5208 / JETPORT 5216 installation. Chapter 6, Out of Band Operation, describes how to set up the various serial port methods that can be used to access the JETPORT 5208 / JETPORT 5216 when the network is unavailable. Chapter 7, Real Port Management, shows how to install the Real COM port driver and to set up and manage the Real COM ports. An Appendix, at the end of the manual provides technical and troubleshooting information. 1 Chapter 1 Introduction Overview The JETPORT 5208 / JETPORT 5216 Serial over the net is a control unit that provides both In-Band and Out-of-Band remote serial access to up to 8 (JETPORT 5208) or 16 (JETPORT 5216) servers or other serial IT devices (hubs, routers, power management devices, etc.), via a Telnet or SSH TCP/IP connection. Up to 8 (JETPORT 5208) or 16 (JETPORT 5216) Users can log in at the same time from any computer connected to the Internet, whether down the hall, or half way around the world. Each is able to control a separate port so that eight attached devices can be accessed at the same time. Remote TCP/IP JETPORT 5208 The JETPORT 5208 / JETPORT 5216 can work in tandem with other remote management products. Management system to provide convenient, reliable, and effective, remote data center device management. Installation is fast and easy: plugging cables into their appropriate ports is all that is entailed. A choice of browser based GUI, Telnet (SSH), and VT console terminal sessions make configuration and operation smooth and convenient. 2 Chapter 1. Introduction The JETPORT 5208 / JETPORT 5216's firmware is upgradeable over the Net, so you can stay current with the latest improvements simply by downloading updates from our website. With its advanced features and ease of operation, the JETPORT 5208 / JETPORT 5216 is the most convenient, most reliable, and most cost effective way to centrally manage your remote, serially connected, IT products. Requirements ̝ ʳʳʳ Sun's Java 2 JRE 1.4.2 or higher must be installed on your computer. Java is available for free download from the Sun Java website: http://java.sun.com ̝ ʳʳʳ The devices that connect to the JETPORT 5208 / JETPORT 5216 must support the RS-232 protocol or RS-232 terminal operations ̝ ʳʳʳ Real COM port driver (Real COM port) support requires Windows 2000 or higher. 3 JetPort 5208 / JetPort 5216 User’s Manual Features JetPort 5216 16 ports RS-232 over 10/100M Ethernet Real COM Driver for Windows 2000/XP/2003/Vista, Linux Versatile Serial Services: Real Com, TCP server. Multi-level secure user authentication and authorization by SSH / Telnet or Console Auto IP Discovery, and Virtual Port Mapping Utility User Access by Port Dial-in Modem and direct Access by PPP/Hyper Terminal Choice of configuration methods: Web console, console terminal. SNMP MIB II, RS-232 MIB for network management, SNMP Trap Event Notification by Syslog, E-mail, and SNMP trap Standard 19-inch rack mount 1U size JetPort 5208 4 8 ports RS-232 over 10/100M Ethernet Real COM Driver for Windows 2000/XP/2003/Vista, Linux Versatile Serial Services: Real Com, TCP server. Multi-level secure user authentication and authorization by SSH / Telnet or Console Auto IP Discovery, and Virtual Port Mapping Utility User Access by Port Dial-in Modem and direct Access by PPP/Hyper Terminal Choice of configuration methods: Web console, console terminal. SNMP MIB II, RS-232 MIB for network management, SNMP Trap Event Notification by Syslog, E-mail, and SNMP trap Standard 19-inch rack mount 1U size Chapter 1. Introduction JETPORT 5208 / JETPORT 5216 Front Panel No. Component 1 2 3 4 5 1 2 3 4 5 Description 1 Port LEDs A Port LED lights to indicate the device attached to its corresponding port is online. The LED flashes when data is being transmitted through its corresponding port. 2 Reset Switch Pressing and holding this switch in for less than three seconds performs a system reset. Pressing and holding this switch in for more than three seconds returns its settings to their default status. 3 10/100 Mbps Data LED The LED lights ORANGE to indicate a 10 Mbps data transmission speed. It lights GREEN to indicate a 100 Mbps data transmission speed. 4 Link LED Flashes GREEN to indicate that a Client program is accessing the device. 5 Power LED Lights when the JETPORT 5208 is powered up and ready to operate. 5 JetPort 5208 / JetPort 5216 User’s Manual JETPORT 5208 / JETPORT 5216 Rear Panel 1 2 3 1 2 3 No. 6 Component 4 4 Description 1 Power Socket The power cable from the AC source plugs in here. 2 Power Switch This is a standard rocker switch that powers the JETPORT 5208/ JETPORT 5216 on and off. 3 LAN Port The Ethernet cable that connects the JETPORT 5208 / JETPORT 5216 to the Internet plugs in here. 4 Serial Ports The RJ45 to Serial Cable Chapter 2 Hardware Setup Before you Begin 1. Make sure that power to all the devices you will be connecting up have been turned off. Stacking and Mounting The JETPORT 5208 / JETPORT 5216 can be placed on the desktop or it can be rack mounted, as described in the sections that follow. Stacking To place the JETPORT 5208 / JETPORT 5216 on the desktop stick the selfadhesive footpads that came with your package to the unit's bottom panel at the four corners. 7 JetPort 5208 / JetPort 5216 User’s Manual Rack Mounting The JETPORT 5208 / JETPORT 5216 can be mounted in a 1U system rack. The mounting brackets can screw into either the front or the back of the unit so that it can attach to the front or the back of the rack. To rack mount the unit: 1. Remove the screws at the front or the rear, as shown in the diagram below. Phillips head hex M3 x 6 Phillips head hex M3 x 6 2. Screw the mounting brackets into the sides of the unit at the front or the rear, as shown in the diagram below. Phillips head hex M3 x 8 Phillips head hex M3 x 8 3. Slide the unit into the front or rear of the rack and secure it to the rack. 8 Chapter 2. Hardware Setup PC Installation Refer to the Installation Diagram on p.10 (the numbers in the diagram correspond to the numbers of the steps), as you do the following: 1. For each server or serial device, plug an RJ45 to Serial cable into its serial port. 2. Plug the RJ-45 connector of the cable above to connect any available port on the JETPORT 5208 / JETPORT 5216's rear panel to the adapter. 3. If you choose to install a serial modem for OOB operation (see Chapter 6), use standard Ethernet cable to connect any available port on the JETPORT 5208 / JETPORT 5216's rear panel to a DTE to DCE serial Cable then plug the cable into the modem's serial port. Note: This step is optional. 4. Plug a Ethernet cable to connects the JETPORT 5208 / JETPORT 5216 to the network or the Internet into its LAN port. 5. Use the AC power cord provided with this package to connect the JETPORT 5208/ JETPORT 5216's Power Socket to an AC power source. After you connect all the cables, you can turn on the JETPORT 5208 / JETPORT 5216. 9 JetPort 5208 / JetPort 5216 User’s Manual PC Installation Diagram: (DB9-M, DTE - DCE) (DB9, DCE) Modem 3 5 4 2 1 (DB9-F, DTE - DTE) (DB9, DTE) 1 Chapter 2. Hardware Setup Sun Fire V100 Server Installation For each Sun Fire V100 server you wish to install, refer to the Installation Diagram on p. 12 (the numbers in the diagram correspond to the numbers of the steps), as you do the following: 1. Use standard Ethernet cable to connect any available port on the JETPORT 5208 / JETPORT 5216's rear panel. 2. Use standard Ethernet cable to connect the V100's LAN port. Note: If you choose to install a serial modem for OOB operation (see Chapter 6), refer to step 3 of the PC installation procedure. 4. Plug the cable that connects the JETPORT 5208 / JETPORT 5216 to the network or the Internet into its LAN port. 5. Use the AC power cord provided with this package to connect the JETPORT 5208/ JETPORT 5216's Power Socket to an AC power source. After you connect all the cables, you can turn on the JETPORT 5208 / JETPORT 5216. 1 JetPort 5208 / JetPort 5216 User’s Manual Sun Fire V100 Server Installation Diagram SunFire V100 Server 2 1 5 1 4 3 Chapter 3 Browser Login Logging In JETPORT 5208 / JETPORT 5216 operation is Internet browser based. To begin: 1. Open your browser and specify the IP address of the JETPORT 5208 / JETPORT 5216 you want to access in the browser's URL location bar. Note: 1. Default IP: 192.168.10.2 2. If you are the administrator, and are logging in for the first time, the various ways to determine the JETPORT 5208 / JETPORT 5216's IP address are described in the Appendix on p. 75. 2. A Security Alert dialog box appears. Accept the certificate. 3. A login dialog box, like the one below, appears: 4. Provide a valid Username and Password (set up by the administrator), then Click Login to continue. Note: If you are the administrator, and are logging in for the first time, use the default Username: admin; and the default Password: admin. For security purposes, we strongly recommend you remove these and give yourself a unique Username and Password. 1 JetPort 5208 / JetPort 5216 User’s Manual The JETPORT 5208 / JETPORT 5216 Main Screen After you have successfully logged in, the Main Screen appears: ̝ ʳʳʳ Except for the Logout icon, the icons arranged horizontally across the top are only enabled for the administrator. Administrative functions are explained in Chapter 4. Note: Be sure to click the Logout icon when you end your session. ̝ ʳʳʳ The bar along the left side is used to configure and control access to each of the JETPORT 5208 / JETPORT 5216's COM ports. The functions of each of the buttons is described in Chapter 5. ̝ ʳʳʳ Unless you need to perform administrative functions, you can skip to Chapter 5 now. 1 Chapter 4 Administration Working Environment Configuration The icon bar at the top of the main screen is used by the administrator to configure the JETPORT 5208 / JETPORT 5216's working environment. An explanation of each of the configuration functions is given in the sections that follow. General When you click the General icon, the following dialog box appears: 1 JetPort 5208/JetPort 5216 User’s Manual The dialog box is divided into three main panels, as described below: System Information: The System Information section allows you to provide a name and description for the JETPORT 5208 / JETPORT 5216 Station. Providing a Station Name and Station Description is optional, but makes it convenient to differentiate the Stations in large, multistation installations. Administrator: This section sets the administrator's login name and password. ̝ ʳʳʳ The default administrator name is: admin ̝ ʳʳʳ The default password is: admin For security purposes, we strongly recommend that you change the default values to something unique. The Comments field is optional. It provides administrators with a place to enter personal comments. Connection Control: Session Timeout sets a timeout value. If there is no input from the logged in operator for the amount of time set with this function, the operator is automatically logged out and the session is terminated. Valid settings are from 0 ~ 255 minutes. A setting of 0 (zero) disables this function. The default is 3 minutes. 1 Chapter 4. Administration Network Network Configuration allows you to set up the network parameters for the JETPORT 5208 / JETPORT 5216: Service Ports: Lets you select the service ports that the JETPORT 5208 / JETPORT 5216 listens for incoming data on. Unless you have a specific reason for changing them, we recommend you leave the default settings as they are. IP Address: The default is for a fixed IP address. To give the JETPORT 5208 / JETPORT 5216 a fixed IP address, fill in the Primary IP to Alternate DNS Server fields with values appropriate to the network you are on. Default IP address is 192.168.10.2 1 JetPort 5208/JetPort 5216 User’s Manual To have the Station obtain its IP address automatically from a DHCP server: 1. Put a check in the Obtain an IP address automatically [DHCP] checkbox. 2. Enable the Enable report from the following SMTP server checkbox, and key in the IP address of your SMTP server. 3. If your server requires authentication, put a check in the My server requires authentication checkbox. 4. Key in the appropriate account information in the Account Name, Password, and From fields. 5. Key in the email address of where you want the report of the DHCP address sent to in the To field. 6. When all of your configuration settings have been made, click Update to save the information and have the JETPORT 5208 / JETPORT 5216's DHCP generated IP address emailed to you. Note: If the JETPORT 5208 / JETPORT 5216 is on a network that uses DHCP to assign network addresses, and you don't know what the address is, there are several methods you can use to ascertain it.. 1 Chapter 4. Administration ANMS The Authentication Network Management Service dialog box allows you to set up login authorization management from external sources. It is divided into three main panels, as described below: RADIUS Settings: If you want to allow authorization for the JETPORT 5208 / JETPORT 5216 through a RADIUS server, do the following: 1. Check Enable RADIUS. 2. Fill in the IP addresses and Service Ports for the Primary and Alternate RADIUS servers. 3. Key the Shared Secret character string that you want to use for authentication between the JETPORT 5208 / JETPORT 5216 and the RADIUS Server. 1 JetPort 5208/JetPort 5216 User’s Manual 4. Set the time in seconds that the JETPORT 5208 / JETPORT 5216 waits for a RADIUS server reply before it times out in the Timeout field. 5. Set the number of RADIUS retries allowed in the Retries field. 6. Click Save to save the information. 7. On the RADIUS server, set the access rights for each user according to the attribute information in the table, below: Attribute Meaning U (User) The user has the authority to access and configure some ports. This attribute must be specified for all users who access the system. T (True) The user has the authority to access and configure the ports that are specified with it. F (False) The user cannot configure any ports. A (All) The user has the authority to access and configure all ports. Example: U,T,2,3,5,6,12,16 The user can access and configure ports 2, 3, 5, 6, 12, and 16. Note: 1. The characters are not case sensitive. Upper or lower case work equally well. 2. Characters are comma delimited. 3. An invalid character in the string will prohibit access to the JETPORT 5208 / JETPORT 5216 for the user. 2 Chapter 4. Administration SNMP Settings: If you want to use SNMP to help with your installation management: 1. Check Enable SNMP Agent. 2. Once SNMP Agent has been enabled, the SNMP Trap checkbox becomes active. If you want to enable SNMP trapping, click to put a check in the checkbox. 3. Key in passwords for the Community Name fields. We recommend replacing the defaults (public, private) with an alphanumeric string of at least 8 characters. 4. Key in the IP addresses of the computers that will automatically be notified of SNMP trap events in the SNMP Manager fields. 5. When you have finished making all your entries, click Save, to save them. Note: MIB definitions for the JETPORT 5208 / JETPORT 5216 are provided on the CD that came with this package. 2 JetPort 5208/JetPort 5216 User’s Manual OOBC OOBC (Out of Band Configuration), provides the ability to access the JETPORT 5208 / JETPORT 5216 via a serial connection. This can either be a direct serial connection from a local computer, or a dial in connection via modem. When you click the OOBC icon, the following dialog box appears: 1. Select which port will be used for the Console Port. The Console Port is the one that you connect the terminal or modem to for OOB communication. The default is Port 1 (COM1), but you can use any of the ports as long as you specify which one it is, here. 2. Specify the JETPORT 5208 / JETPORT 5216's IP address in the ServerIP field. 3. Specify the IP address of the device that will connect to the JETPORT 5208 / JETPORT 5216 in the ClientIP field. 4. Click Update to save the information. The various ways to access the JETPORT 5208 / JETPORT 5216 with an OOB connection, are described in Chapter 6. 2 Chapter 4. Administration Date / Time The Date / Time function allows you to set the JETPORT 5208 / JETPORT 5216's date and time. When you click the Date / Time icon, the following dialog box appears: The date and time that the JETPORT 5208 / JETPORT 5216 is currently set to appear in the upper section. The large lower section offers three methods to set new date and time parameters: ̝ ʳʳʳ Synchronizing the date and time with your computer's date and time ̝ ʳʳʳ Setting the date and time manually ̝ ʳʳʳ Synchronizing the date and time with the date and time of an NTP server on the internet Note: 1. If you enable Synchronize with computer time, the Date and Time fields are filled with the date and time settings of your computer. 2. If you enable Set Manually, key in the Date and Time in the corresponding fields. 3. If you enable Synchronize with NTP server, select the time zone that corresponds to the JETPORT 5208 / JETPORT 5216's location from the list box in the Time Zone panel. If you are behind a firewall, you must enable a port for the NTP server. ̝ ʳʳʳ Click Save to save your changes. 2 JetPort 5208/JetPort 5216 User’s Manual Firmware The Firmware Upgrade function provides a smooth, automated process for upgrading the JETPORT 5208 / JETPORT 5216's firmware. New firmware upgrade packages are posted on our web site as they become available. Check the site regularly to find the latest packages. Preparation: 1. From your computer, go to our Internet support site and choose the model name that relates to your product (JETPORT 5208 / JETPORT 5216) to get a list of available Firmware Upgrade Packages. 2. Choose the Firmware Upgrade Package you want to install (usually the most recent), and download it to your computer. Starting the Upgrade: 1. From the computer that you downloaded the upgrade file to, log into the JETPORT 5208 / JETPORT 5216. 2. Click the Firmware icon. A dialog box similar to the one below appears: 2 Chapter 4. Administration 3. Click the Browse button; navigate to the upgrade file on your computer, and select it. 4. Click Upgrade to perform the upgrade. Note: 1. If you enable Check Firmware Version, the upgrade function compares the station's firmware level with that of the upgrade files. If it finds that the JETPORT 5208 / JETPORT 5216's current version is equal to, or higher than, the upgrade version, it won't overwrite the JETPORT 5208 / JETPORT 5216's version. 2. If you do not enable Check Firmware Version, the Utility installs the upgrade files without checking whether they are a higher level, or not. Logout Click the Logout icon to end your JETPORT 5208 / JETPORT 5216 session. 2 JetPort 5208/JetPort 5216 User’s Manual Device Management Configuration The buttons in the bar along the left side of the JETPORT 5208 / JETPORT 5216 web page are used to manage and access the devices connected to the JETPORT 5208 / JETPORT 5216's COM ports. This section discusses the functions available to administrators and, in the case of port configuration, users with configuration permission. The functions available to ordinary users are discussed in Chapter 5, Browser Operation. Port Config The administrator and users with port configuration permission, can set up the operating parameters for each of the JETPORT 5208 / JETPORT 5216's ports by clicking the Port Config button to bring up the Port Configuration dialog box: 2 Chapter 4. Administration Property Settings: To set up the serial communications parameters for a port, select it, then click the Property Settings button at the bottom of the page: The meanings of the settings are given in the following table: Setting Meaning Port ID Each port on the JETPORT 5208 / JETPORT 5216 has a port ID number (COM1 - COM8 for the JETPORT 5208, or COM1 - COM16 for the JETPORT 5216). The Port ID field displays the number of the port that is being configured. Port Name You can give a port an appropriate name by editing the Port Name field. Serial Parameters The serial parameter fields allow you to set up the port so that the JETPORT 5208 / JETPORT 5216 can communicate with the device connected to it. Choose the parameters so that they match the ones for the connected device. (Data Bits - Out CRLF Translation) Suspend Character The Suspend character is used to bring up the Suspend Menu in Telnet sessions. (Continues on next page.) 2 JetPort 5208/JetPort 5216 User’s Manual (Continued from previous page.) Setting Operating Mode Meaning The choices are: Console Management: In this mode, users establish a Telnet or SSH session under the JETPORT 5208 / JETPORT 5216 to manage a server or serial device connected to the port. Users can log in using the browser Telnet function, a direct Telnet session, SSH or PuTTY. This mode can also be used for Out-of-Band operation via the JETPORT 5208 / JETPORT 5216’s Console Port. See Out of Band Operation, Chapter 6. Raw TCP Mode: This mode is used with socket programming to directly control the device’s data transmission without the need for serial port control or serial modem signal control. Only data is transmitted (using IP as the protocol). Note: When you use the IP address you must also specify the port number. For example: 192.168.0.200 5003. For security purposes, access to the port can be limited to specific IP addresses. See Direct Access Real COM Port: Used with a Real COM port driver on the local machine (See Real Port Management, Chapter 7 for Real port management details.) The device connected to this port appears as if it were a device directly connected to a COM port on the local computer. Data transmission between the device and the local computer takes place over the Real COM port to the JETPORT 5208 / JETPORT 5216. This mode is useful with serial devices such POS terminals, Bar Code Readers, Serial printers, etc. As with Raw TCP Mode, access to the port can be limited to specific IP addresses with the Direct Access function. (Continues on next page.) 2 Chapter 4. Administration (Continued from previous page.) Setting Timeout Meaning If there is no input on this port for the amount of time set with this function, the port is released for use by another user. Note: This field doesn’t appear when this dialog box is accessed from the Console port. Authorized Operators The Authorized Operators field indicates the users that are authorized to operate the port. The information in this field is for viewing purposes only. It can't be changed on this page. ̝ ʳʳʳ When you have finished making your settings choices, click Update to save them. ̝ ʳʳʳ To abandon the settings choices without saving them, simply leave the page. 2 JetPort 5208/JetPort 5216 User’s Manual Alert Settings: The Port Alert Settings dialog box provides a way for you to be informed via email about problems that may occur on the devices connected to the JETPORT 5208 / JETPORT 5216's ports. When a device has a problem - such as a critical error that requires a reboot - debug messages can be sent through its COM port. When the JETPORT 5208 / JETPORT 5216 receives such a message, it can send an email to inform the user specified here of the problem. You can have up to 10 types of alert emailed to you when a device generates them. To configure a port to provide alert notification, select it in the Select column, then click the Alert Settings button. A dialog box, similar to the one below, appears: 3 Chapter 4. Administration 1. Use the Alert String fields to specify the alerts you want to receive. 2. Enable the Enable report to the following address checkbox, and key in the IP address of your SMTP server. 3. If your server requires authentication, put a check in the My server requires authentication checkbox. 4. Key in the appropriate account information in the Account Name, Password, and From fields. 5. Key in the email address of where you want the report sent to in the To field. 6. When all of your configuration settings have been made, click Update to save the information. After setting up this page, whenever one of the specified alerts is generated, you will be informed by email of its occurrence. User Management Clicking the User Manager button brings up the User Management dialog box. If this is the first time you are accessing this function, and no user accounts have been created yet, the following screen displays: Click New to begin setting up user accounts. See p. 32 for adding, editing, and deleting user accounts. 3 JetPort 5208/JetPort 5216 User’s Manual If user accounts have been set up, the User Manager dialog box appears: This dialog box allows the administrator to add, delete, and edit user accounts. Up to 15 user accounts can be established. Operators must provide the Usernames and Passwords established here, in order to log in. Deleting an Account To delete a user account, select it and click Delete. Adding an Account: To add a user, click Add. A dialog box similar to the one below appears: 3 Chapter 4. Administration 1. Key in the user’s Username and Password (up to 16 characters for each). 2. Reenter the password to confirm that it is correct. 3. Key in any Comments you wish to make concerning the user. (optional) 4. If you want the user to have Port Configuration permission, put a check in the Port Config Permission checkbox. Otherwise, leave it blank. Note: 1. Port Configuration is where the Port Numbers and Names that appear in this dialog are set. See Port Config, for port configuration information. 2. The term “Yes” in the Shared column means that other users have access permission to the port. 5. If there are any ports that you do not want the user to access, remove the check from the Enable checkbox. 6. Click Add to save your changes. Editing an Account: 1. To Edit a user account click Edit. A dialog box similar to the one below appears: 3 JetPort 5208/JetPort 5216 User’s Manual 2. Make your changes in the appropriate fields and checkboxes. 3. To save your changes, click Update. 4. To exit without saving any changes, click Back. Direct Access For security purposes, Direct Access can limit the users attempting to log in to ports that have been specified as RAW TCP Port. 3 Chapter 4. Administration If no IP addresses are specified on this page, anyone can open a TCPIP Telnet session to a RAW TCP port by specifying the IP address and port number of the port – without having to specify a Username and Password. Once specific IP addresses are entered here, however, only users logging in to the JETPORT 5208 / JETPORT 5216 from one of those IP addresses can have access to the RAW TCP ports without having to specify a Username and Password. Note: The port must be designated as a RAW TCP Port under the Port Config settings. See Operating Mode. Session Info Clicking the Session Info button brings up the Active Sessions display: This display lets the administrator see at a glance all the users currently logged into the JETPORT 5208 / JETPORT 5216, and provides information about each of their sessions. It also gives the administrator the option of forcing a user logout by selecting the user and clicking End Session. 3 JetPort 5208/JetPort 5216 User’s Manual Sys Info The System Information dialog box provides information about all aspects of the JETPORT 5208 / JETPORT 5216's configuration: 3 Chapter 4. Administration Log Clicking the Log button brings up the Event Log dialog box: The JETPORT 5208 / JETPORT 5216 maintains a log file of the events that take place on it. This dialog box allows you to select the range of events you wish to view: ̝ ʳʳʳ Choose Today then click OK to see a listing of only today's events. ̝ ʳʳʳ Choose All then click OK to see a listing of events for the entire log file. ̝ ʳʳʳ Choose Selected; key in the desired range of dates in the From and To fields; then click OK to see a listing of events for a specific time period. Note: The maximum number of events contained in the log file is 512. Once that amount is reached, the oldest events are discarded as new ones are recorded. (Continues on next page.) 3 JetPort 5208/JetPort 5216 User’s Manual Once you make a choice and click OK an Event Log List, similar to the one below, appears: When you have finished viewing the event list: ̝ ʳʳʳ If you want to return to the Event Log dialog box, click Back. ̝ ʳʳʳ If you want to erase the contents of the entire log file, click Clear All. ̝ ʳʳʳ To exit, select a different function from the button bar. 3 Chapter 5 Browser Operation Overview Once you have logged in and the Main Screen appears (see The JETPORT 5208 / JETPORT 5216 Main Screen).The bar along the left side is used to configure and control access to each of the JETPORT 5208 / JETPORT 5216's COM ports. The functions of each of the buttons is described in the following table: Button Authorization Function All Clicking this button brings up the Serial Port Status screen. This is the same screen that displays after a log in. Users can see the status of each of the devices attached to the JETPORT 5208 / JETPORT 5216's COM ports. All Clicking this button brings up the Telnet page. This page allows the administrator and all users to open telnet sessions to connect to the devices attached to the JETPORT 5208 / JETPORT 5216's COM ports. See p. 41 for details. Administrator and Permitted Users This page allows the administrator and users with configuration permission, to set up the COM port parameters for each of the JETPORT 5208 / JETPORT 5216's COM ports All This button has two effects depending on whether the administrator or an ordinary user clicks it: ̝ ʳ The administrator can use this function to Create, Edit, and Delete user profiles ̝ ʳ Ordinary users can only use this function to change their passwords and personal information Note: Operators who have logged in via a RADIUS server can view User Manager information, but cannot make any changes to that information. (Continues on next page.) 39 JetPort 5208/JetPort 5216 User’s Manual (Continued from previous page.) Button Authorization Function Administrator Only For security purposes, Direct Access can limit the users attempting to log in to ports that have been specified as RAW TCP Ports and Real COM Ports. Administrator Only This page allows the administrator to see information about all the users who are currently logged into the JETPORT 5208 / JETPORT 5216 ( 35) This page shows information about the JETPORT 5208 / JETPORT 5216's configuration ( 36) Clicking this button brings up the Event Log dialog box which allows the administrator to view all of the events that took place on the JETPORT 5208 / JETPORT 5216 (see p. 37 for details). Administrator Only Administrator Only Note: 1. Buttons are only active for the functions that the user is authorized to perform. 2. Administrator functions (including Port Config) are discussed in Chapter 4. 3. The Telnet, and User Manager operations are discussed in the sections that follow. 40 Chapter 5. Browser Operation Telnet After viewing the status of the devices attached to the JETPORT 5208 / JETPORT 5216's ports, if you want to access any of them, click the Telnet button. A screen similar to the one below appears: 1. Select the port you would like to access. Note: You must have permission in order to access a port. 2. If you want to view the port history, click the View History button. A screen showing the Telnet activity that took place on the device connected to the port appears. Click the browser's Back button to return to the Telnet page. 41 JetPort 5208/JetPort 5216 User’s Manual 3. To access the device connected to the port, click Connect. The JETPORT 5208 / JETPORT 5216 opens a Telnet session and a screen similar to the one below appears: 4. If you are connected to a computer and want to go to a terminal session or command line to operate it, Press [Enter]. When you have finished with the session, log out, then bring up the Main Menu. Note: Be sure to log out before bringing up the Main Menu, otherwise, another user can access the device without having to log in. 5. If you are connected to another device, enter the command that brings it up. 42 Chapter 5. Browser Operation 6. To display the Suspend Menu, Press [Ctrl+x]. Where x represents the Suspend Character set by the Administrator (see the Property Settings dialog box under Port Configuration, p. 27). The screen will prompt you as to the correct character. In this example, it is [Ctrl+D] (see the prompt on the previous screenshot). The following screen appears: 7. Press 1 to issue a Send Break command to the attached device. This is used to put a Sun system in OK Mode. 8. Press Q to bring up the Main Menu: 43 JetPort 5208/JetPort 5216 User’s Manual The Main Menu is the text based equivalent of the browser configuration and control functions. The descriptions and explanations for the Browser Operations apply to the submenu functions presented here, as well. Note: 1. As with the browser version, access to many of these submenus are restricted to the administrator or users with configuration permission. If you select a submenu that you are not authorized for, nothing will happen. 2. Some of the submenus do not have an Exit choice. In these cases, you can return to the previous menu without making any changes by pressing Enter twice. 3. You can bring up the Main Menu at any time during your session. When you have finished with your session, bring up the Main Menu and press Q to log out. 44 Chapter 5. Browser Operation Port Configuration Since only the administrator and users with port configuration permission can access this function, it is discussed in the Administration chapter. User Manager For users, clicking the User Manager button brings up a screen that shows their username, port configuration permission status, and the ports they are authorized to control: Clicking Edit brings up a dialog box that allows users to change their password and Comments information : ̝ ʳʳʳ To save any changes, click Update. ̝ ʳʳʳ To exit without saving any changes, click Back. 45 JetPort 5208/JetPort 5216 User’s Manual This Page Intentionally Left Blank 46 Chapter 6 Out of Band Operation Overview In case the network goes down, or the JETPORT 5208 / JETPORT 5216 cannot be accessed with the usual browser based method for some other reason, the JETPORT 5208 / JETPORT 5216 can be reached via several additional Out of Band (OOB) methods. These include HyperTerminal, PPP, Telnet, and SSH. Each of these is described in the sections that follow. HyperTerminal HyperTerminal is a program included with Windows. It can be used to establish either a direct terminal connection, or an indirect (phone in) terminal connection. Both configurations are discussed below. Direct HyperTerminal Connection Setup: To set up a direct HyperTerminal connection, do the following: 1. Use Ethernet to serial cable to connect one of the JETPORT 5208 / JETPORT 5216's serial ports to a COM port on a PC. Note: 1. In the examples that follow we use COM1. If you use a different COM port, change the settings accordingly. 2. Be sure that the port you specify as the Console Port in the OOBC dialog box matches the port that you are connecting the PC to. Change the setting, if necessary. 2. On your PC, run the HyperTerminal program: Start Programs Accessories Communications HyperTerminal Hypertrm.exe 47 JetPort 5208/5216 User’s Manual The following dialog box appears: 3. Key a name to describe the connection in the Name field (we chose Com1Test); select an icon to represent the connection; then click OK. A dialog box similar to the one below comes up: 48 Chapter 6. Out of Band Operation 4. For the Connect using: field, select Direct to COM1 (assuming you are using COM1 on your PC), then click OK. A Port Setting dialog box similar to the one below comes up: 5. For OOBC connections, the JETPORT 5208 / JETPORT 5216's serial port settings and the computer's COM port settings must be the same. Change the settings in your dialog box (if necessary), so that they match the JETPORT 5208 / JETPORT 5216's Console Port settings (see Port Config for details), then click OK. Note: The JETPORT 5208 / JETPORT 5216's default settings are 9600 bps; 8 Data bits; No Parity; No Stop bits, but you can change these to something more suitable to your installation as long as they both much. 49 JetPort 5208/5216 User’s Manual 6. When the HyperTerminal screen appears, open the File menu and select: Properties Settings. The following dialog box displays: 7. Change the settings (if necessary), so that they match the settings shown in the dialog box, then click ASCII Setup... The ASCII Setup dialog box comes up: : 50 Chapter 6. Out of Band Operation 8. Change the settings (if necessary), so that they match the settings shown in the dialog box, then click OK. 9. Close the HyperTerminal Window. When Windows asks if you want to disconnect, click Yes. When Windows asks if you want to save the session, click Yes. This completes the HyperTerminal setup. For Windows NT, 2000, XP and Windows Server 2003 systems, a HyperTerminal icon that connects you to the JETPORT 5208 / JETPORT 5216 is created on the desktop. For Windows 98 and ME, you must access HyperTerminal from the Windows Start Menu. Logging In: 1. Double click the HyperTerminal icon on your desktop. 2. In the VT100 terminal window, key in: [Ctrl + D] A login prompt appears. 3. Key in your Username and Password to bring up the JETPORT 5208 / JETPORT 5216's main menu. 51 JetPort 5208/5216 User’s Manual Indirect HyperTerminal Connection This method uses HyperTerminal to phone into the JETPORT 5208 / JETPORT 5216 from a remote location. Setup: 1. Set up your hardware configuration to match the diagram, below : JETPORT 5208 / JETPORT 5216 Ethernet to Serial Modem Cable Serial Cable Phone Line Remote Operator Modem Modem ̝ ʳʳʳ On the remote computer side, use a standard 9 pin serial modem cable (pin 2 to pin 2; pin 3 to pin 3) to connect the computer to the modem. ̝ ʳʳʳ On the JETPORT 5208 / JETPORT 5216 side, use Cat 5 cable and an Note: Be sure that the port you specify as the Console Port in the OOBC dialog box (see p. 22) matches the port that you connect the modem to. Change the setting, if necessary. 2. Create a HyperTerminal connection. a) Start with Step 2 of the Direct HyperTerminal Setup section (p. 47). b) For Connect using: in Step 4, select the type of modem connected to your computer from the list. If your modem doesn't appear in the list, select Standard 28800bps Modem. c) Follow Steps 5-9 to complete the setup and create the connection icon. 52 Chapter 6. Out of Band Operation This completes the HyperTerminal setup. For Windows NT, 2000, XP and Windows Server 2003 systems, a HyperTerminal icon that connects you to the JETPORT 5208 / JETPORT 5216 is created on the desktop. For Windows 98 and ME, you must access HyperTerminal from the Windows Start Menu. Final Check: To make sure that the modem and COM port are correctly installed: 1. Open the Control Panel: My Computer Control Panel 2. Open the Make New Connection folder. If all went well, you should see an entry with the name you assigned for this connection. 3. Open the Device Manager: My Computer Control Panel System Device Manager Your Modem and Ports entries should look similar to the image below . 53 JetPort 5208/5216 User’s Manual Logging In 1. Double click the HyperTerminal icon on your desktop. 2. In the VT100 terminal window, key in: atdt [modem telephone number] [Enter] The terminal responds with: CONNECT115200 3. Wait at least 60 seconds, then key in: [Ctrl+D] 4. Key in your Username and Password to bring up the JETPORT 5208 / JETPORT 5216's Main Menu. 54 Chapter 6. Out of Band Operation PPP (Dial In) Connection This type of connection works directly through the COM port. Direct PPP Connection Setup: To set up a direct PPP connection, do the following: 1. Use Ethernet to Serial cable to connect one of the JETPORT 5208 / JETPORT 5216's serial ports to a COM port on a PC (refer back to the PC Installation section, if necessary). Note: 1. In the examples that follow we use COM1. If you use a different COM port, change the settings accordingly. 2. On your PC, run the Make New Connection setup program: Start Programs Accessories Communications Make New Connection The following dialog box appears: 3. Key a descriptive name for the connection in the top text box; select Standard 28800 bps Modem for the device; then click Configure. 55 JetPort 5208/5216 User’s Manual 4. In the Modem Properties dialog box that comes up change the dialog box settings (if necessary), so that the COM port is correct, then click OK. 5. Click the Connection tab to see the connection setup page: 6. Change your settings (if necessary), so that they match the settings shown in the figure above then click Advanced. 56 Chapter 6. Out of Band Operation 7. In the Advanced Connection Settings dialog box enable Use flow control; select Hardware (RTS/CTS); then click OK to return to the Connection page. 8. Click OK (at the bottom of the Connection page; then click Next. The following dialog box appears: 9. Key in anything you like for these fields, then click Next. 10. Click Finish. A new icon that you can use to connect to the JETPORT 5208 / JETPORT 5216 is created in the Dial-up Network folder. This completes the Direct Dial In setup. 57 JetPort 5208/5216 User’s Manual Finishing Up: The JETPORT 5208 / JETPORT 5216's serial port settings and the computer's COM port settings must be the same. Change the JETPORT 5208 / JETPORT 5216's settings for the port you are connecting the computer to (see Port Config,), so that they match the ones you just set in the dialog boxes (as shown in the table below): Parameter Value Bit per second: 115200 Data bits: 8 Parity: None Stop bits: 1 Flow control: Hardware (RTS/CTS) Logging In: 1. Double click the icon you created in the Dial-up Network folder. 2. Key in your Username and Password, then click Connect. 3. Use Telnet, SSH, or your browser to access the JETPORT 5208 / JETPORT 5216 the same way as if you were accessing it over the net. 58 Chapter 6. Out of Band Operation Indirect PPP Connection This method uses a modem connection to phone into the JETPORT 5208 / JETPORT 5216 from a remote location. Setup: 1. Set up your hardware configuration to match the diagram, below: JETPORT 5208 / JETPORT 5216 Ethernet to Serial Modem Cable Serial cable Phone Line Remote Operator Modem Modem ̝ ʳʳʳ On the remote computer side, use a standard 9 pin serial modem cable (pin 2 to pin 2; pin 3 to pin 3) to connect the computer to the modem. ̝ ʳʳʳ On the JETPORT 5208 / JETPORT 5216 side, use Cat 5 cable and an Optional: RJ-45 to Serial Cable Note: Be sure that the port you specify as the Console Port in the OOBC dialog box matches the port that you connect the modem to. Change the setting, if necessary. 2. Set up your connection configuration as specified in Steps 2 - 8 of the Direct Dial In Connection, section. 3. For Step 9, key in the JETPORT 5208 / JETPORT 5216's modem telephone number in the fields provided, then click Next. 4. Click Finish. A new icon that you can use to connect to the JETPORT 5208 / JETPORT 5216 is created in the Dial-up Network folder. This completes the Indirect Dial In setup. 59 JetPort 5208/5216 User’s Manual Final Check: To make sure that the modem and COM port are correctly installed, follow the procedures described under Final Check on p. 53. Logging In: 1. Double click the icon you created in the Dial-up Network folder. 2. Key in your Username and Password; click Connect and wait for the Authentication procedure to complete (be patient, it may take a few moments). 3. Use Telnet, SSH, or your browser to access the JETPORT 5208 / JETPORT 5216 the same way as if you were accessing it over the net. 60 Chapter 6. Out of Band Operation Telnet Logging In 1. On your computer, open a terminal (command line) session. 2. At the prompt, key in the JETPORT 5208 / JETPORT 5216's IP Address in the following way: telnet [IP Address] Note: The default telnet port is 23. If that port is already being used, up to 16 additional users can log in by adding a port number (from 5000 to 5015) to the login command. For example: telnet [IP Address]5001 3. Press Enter. The following screen appears: 4. At the login prompt, provide your Username and Password. Note: If you cannot see the login prompt click Terminal/Preferences on the telnet session's menu bar, then select VT-100/ANSI. Once a Telnet connection to the device is established, the JETPORT 5208 / JETPORT 5216 Main Menu comes up. See p. 41 for Telnet operation. 61 JetPort 5208/5216 User’s Manual SSH Terminal Session (Linux): 1. Open a terminal (command line) on your computer. 2. At the prompt, key in your JETPORT 5208 / JETPORT 5216 Username and the JETPORT 5208 / JETPORT 5216's IP Address in the following way: SSH [username@IP Address] Note: The default SSH port is 22. If that port is already being used, up to 16 additional users can log in by adding a port number (from 5100 to 5115) to the login command. For example: SSH [username@IP Address] -P 5101 3. Press Enter 4. When you are prompted for a password, use your JETPORT 5208 / JETPORT 5216 password. Once an SSH connection to the device is established, the JETPORT 5208 / JETPORT 5216 Main Menu comes up: This menu is the same as the main menu that appears with Telnet sessions (see p. 41 for Telnet operation). 62 Chapter 6. Out of Band Operation Third Party Utility (Windows): SSH sessions can be implemented under Windows with the use of third party utility software, such as PuTTY, a free implementation of Telnet and SSH for the Win32 and Unix platforms. To make an SSH connection with PuTTY, do the following: 1. In the Host Name box, enter the Internet host name of the server you want to connect to. Note: The default SSH port is 22. If that port is already being used, select an alternate port - from 5100 to 5115. This allows up to 16 additional users to log in at the same time. 2. Select SSH from the Protocol buttons. 3. Click Open (at the bottom of the dialog box) 4. After you have connected, provide your JETPORT 5208 / JETPORT 5216 username and password at the login prompts. Note: If you make a mistake keying in the username, the SSH protocol doesn't allow you to try again. You must close PuTTY and start over. Once an SSH connection to the device is established, the JETPORT 5208 / JETPORT 5216 Main Menu comes up. This menu is the same as the main menu that appears with Telnet sessions (see p. 41 for Telnet operation). 63 JetPort 5208/5216 User’s Manual This Page Intentionally Left Blank 64 Chapter 7 Real Port Management Overview The JETPORT 5208 / JETPORT 5216 offers Real COM Port support. Devices connected to this type of Real port appear as if they were directly connected to a COM port on the local computer. Data transmission between the device and the local computer takes place over the Real COM port to the JETPORT 5208 / JETPORT 5216. This mode is useful with serial devices such POS terminals, Bar Code Readers, Serial printers, etc. In addition, this mode can be used with other Korenix management products. Driver Installation In order to utilize Real COM port management, the Korenix Real COM port driver must be installed. To install the driver, do the following: 1. On the software CD that came with your JETPORT 5208 / JETPORT 5216 package, locate the file: Real_Port_vxxx.exe Note: The vxxx specified above stands for the driver’s version number. The file on the CD will show an actual version number. 2. Double click the filename to start the installation. The Setup screen appears: Click Next to move on. 65 JetPort 5208/5216 User’s Manual 3. Click Yes to accept the License Agreement. 4. Continue through the setup screens to complete the driver installation. Real Port Management The Real Port Management Utility provides a convenient interface to COM port mapping. When you run the Real Serial Port Manager program (Start Real Port Management Utility Real Serial Port Manager), the following dialog box appears: Dialog Box Layout The Real Port Management Utility dialog box is laid out as follows: ̝ ʳʳʳ The menu and button bars allow the automatic enumeration and listing of devices and ports. ̝ ʳʳʳ Below the menu and button bars, there is an area to input information in order to manually list target devices if the device doesn’t appear using the automatic enumeration method. ̝ ʳʳʳ All target devices that were found by enumeration or manually entered are listed in the left side panel. ̝ ʳʳʳ All ports that were found for a selected target device are enumerated in the central panel. ̝ ʳʳʳ The right side panel displays the Real COM port mappings that you have made. 66 Chapter 7. Virtual Port Management Menu and Toolbar The Real Port Management Utility menu and toolbar have the same captions and functions. Users can either click the menu items or buttons to invoke the desired function, as shown in the table, below: Item Action Enum Targets This function searches and lists all SN01xx devices on the LAN. The results are shown in the Target List panel (see Target List for details). Be aware that all devices listed in the Target List will be deleted when the delete function is invoked. Be sure to remove any devices from the list that you don’t want to delete before invoking the delete function. Enum Ports This function lists the existing ports for the target device currently selected in the Target List. The results are shown in the Port List panel. Map After selecting a port from the Port List panel, selecting this function maps the device’s COM port to a Real COM port on the user’s computer. Unmap After selecting a port from the Mapped Ports list, selecting this function removes the mapping between the computer and the device’s COM port. Target Information The Target Information fields allow a user to install (map) ports on an offline target device, as follows: Field Action Target IP Address Input the IP address of the target that you want to map COM ports to. Base Socket Port The base socket port of the target device. Target Name The name of the target. If it is different from the target’s real name, it will be replaced by the real one. Note that the name is not related to the mapping or unmapping process. Only the IP address, socket port and target type are relevant. Target Type The type of target to be mapped. Only SN01xx series devices are valid. Add Target Creates an entry in the Target List based on the above information. Delete Target Remove the currently selected target from the Target List. 67 JetPort 5208/5216 User’s Manual Target List The left side panel displays all the devices that were found with the Enumeration function, as well as any devices that were manually added with the Target Information fields. Note: Double clicking an item in the list invokes the same function as selecting Enum Ports–which displays the numbers and working modes of the selected target’s ports in the Port List column. ̝ ʳʳʳ If a device was automatically listed as a result of the Enumeration procedure, the icon to its left is drawn with green dots and lines to show that the target is on line and is ready to be mapped. ̝ ʳʳʳ If a device was added to the list manually and is off line, the icon to its left is drawn with black dots and lines. Double clicking a manually added item can get some information and display it in the Port List, but the working mode information is not accurate and we must assume that all the device’s ports are in Real Port mode. See Operating Mode for details about port modes. ̝ ʳʳʳ If the target is off line or is on line but does not respond within 2 seconds of asking to enumerate its ports, the working mode information is not accurate and we must assume that all the device’s ports are in Real Port mode. See Operating Mode for details about port modes. 68 Chapter 7. Virtual Port Management Port List This list displays the port information of the selected target (only one target can be selected at a time). ̝ ʳʳʳ The left column lists the target’s port numbers, the second column shows the COM port it is mapped to (if any), the third column shows its working mode, and the right column shows its status. Note: The working mode refers to the setting for the port that was specified when the port was configured. See Port Config for details. ̝ ʳʳʳ Double clicking a port in the Port List brings up a Port Mapping dialog box that lets users select the number of COM ports they wish to map (i.e., Real COM ports they wish to install). Only ports designated as Real Port ports can be mapped. See Port Mapping for mapping details. Note: The Port Mapping dialog box can also be invoked either by clicking MapTo… on the toolbar or selecting MapTo… from the menu. 69 JetPort 5208/5216 User’s Manual Mapped COM Ports This panel displays the mapped COM ports, showing the device and port that each mapped one is derived from. The list is generated as soon as the application starts, and is dynamically updated whenever the mapped COM port configuration changes as a result of installations and removals. 70 Chapter 7. Virtual Port Management Port Mapping and Unmapping Port Mapping To map a Real COM port: 1. Double click your Target item in the Port List to brings up the Port Mapping dialog box: 2. Drop down the list of available COM ports and select the COM port you wish to map the Target port to. 3. Click OK to complete the operation. Note: 1. If a range of ports was selected, and Map consecutively is enabled, the COM ports are mapped to the Target ports in sequence based on the port numbers. 2. Only Real Mode ports are mapped. Other ports in the range are passed over. 71 JetPort 5208/5216 User’s Manual Port Unmapping To unmap Real COM ports: 1. Either click Unmap… on the button bar or select Unmap… from the menu to bring up the Port Unmapping dialog box: 2. Drop down the list of mapped COM ports and select the COM port you wish to unmap. 3. Click OK to complete the operation. Note: For a consecutive unmapping, the COM ports are unmapped in sequence based on the mapped COM port number. 72 Appendix Appendix Specifications 73 JetPort 5208/5216 User’s Manual 74 Appendix Administrator Login Failure If you are unable to perform an Administrator login (because the Username and Password information has become corrupted, or you have forgotten it, for example), you can clear the login information with the following procedure: 1. Power off the JETPORT 5208 / JETPORT 5216 and remove its housing. 2. Short the jumper labeled J6. 3. Power on the switch. 4. When the Link and 10/100Mbps LEDs flash, power off the switch. 5. Remove the jumper cap from J6. 6. Close the housing and start the JETPORT 5208 / JETPORT 5216 back up. After you start back up, you can use the default Username and Password to log in. 75 JetPort 5208/5216 User’s Manual IP Address Determination If you are an administrator logging in for the first time, you need to access the JETPORT 5208 / JETPORT 5216 in order to give it an IP address that users can connect to. There are three methods to choose from. In each case, your computer must be on the same network segment as the JETPORT 5208 / JETPORT 5216.After you have connected and logged in you can give the JETPORT 5208 / JETPORT 5216 its fixed network address. Method 1: For computers running Windows, an IP address can be assigned with the IP Installer utility: 1. Unzip the contents of IPInstaller.zip (found on the Software CD that came with your JETPORT 5208 / JETPORT 5216 package) to a directory on your hard drive. 2. Go to the directory that you unzipped the IPInstaller program to and run IPInstaller.exe. A dialog box similar to the one below appears : 3. Select the JETPORT 5208 / JETPORT 5216 in the Device List. Note: 1. If the list is empty, or your device doesn't appear, click Enumerate to refresh the Device List. 2. If there is more than one device in the list, use the MAC address to pick the one you want. The JETPORT 5208 / JETPORT 5216's MAC address is located on its bottom panel. 76 Appendix 4. Select either Obtain an IP address automatically (DHCP), or Specify an IP address. If you chose the latter, fill the IP Address, Subnet Mask, and Gateway fields with the information appropriate to your network. 5. Click Set IP. 6. After the IP address shows up in the Device List, click Exit to end the program. Method 2: 1. Set your computer's IP address to 192.168.10.XXX Where XXX represents any number or numbers except 10. (192.168.0.10 is the default address of the JETPORT 5208 / JETPORT 5216.) 2. Specify the switch's default IP address (192.168.10.2) in your browser, and you will be able to connect. 3. Assign a fixed IP address for the JETPORT 5208 / JETPORT 5216 that is suitable for the network segment that it resides on. 4. After you log out, be sure to reset your computer's IP address to its original value. 77 JetPort 5208/5216 User’s Manual Method 3: A fixed IP address can also be assigned with the ARP command as follows: 1. Turn off the power to the JETPORT 5208 / JETPORT 5216. 2. Enter the following command: arp -s <ip address> <JETPORT 5208 / JETPORT 5216's MAC address> Where the IP address that you assign is one suitable for the network segment that the JETPORT 5208 / JETPORT 5216 resides on. Note: The JETPORT 5208 / JETPORT 5216's MAC address can be found on its bottom panel. 3. Turn the power to the JETPORT 5208 / JETPORT 5216 back on. 4. In your browser, go to the IP address you just assigned and log in with your Username and Password. Note: You must log in within 30 seconds after entering the arp command. Therefore, it would be advisable to have your browser all set up to go to the IP address beforehand. 5. Once you have logged in, go to Network, to set up the permanent IP environment. 78 Appendix Pin Assignmetns RJ45-F to DB9-F JETPORT 5208 / JETPORT 5216 (RJ45) RTS DTE to DTE Pins (8) Computer (DB9) 1 <————————> 8 DTR 2 <————————> 6&1 TXD 3 <————————> 2 CTS 4 <————————> 7 GND 5 <————————> 5 RXD 6 <————————> 3 DSR 7&8 <————————> 4 9 NC not used RJ45-F to DB9-M DTE to DCE Modem/Device (DB9) JETPORT 5208 / JETPORT 5216 Pins (8) (RJ45) RTS 1 <————————> 7 DTR 2 <————————> 4 TXD 3 <————————> 3 CTS 4 <————————> 8 GND 5 <————————> 5 RXD 6 <————————> 2 DCD 7 <————————> 1 DSR 8 <————————> 6 9 NC not used 79 JetPort 5208/5216 User’s Manual RJ45-F to DB25-F JETPORT 5208 / JETPORT 5216 (RJ45) RTS DTE to DTE Pins (8) Computer (DB25) 1 <————————> 5 DTR 2 <————————> 6&8 TXD 3 <————————> 3 CTS 4 <————————> 4 GND 5 <————————> 7 RXD 6 <————————> 2 DSR 7&8 <————————> 20 Other pins not used RJ45-F to DB25-M JETPORT 5208 / JETPORT 5216 (RJ45) DTE to DCE Modem/Device (DB25) Pins (8) RTS 1 <————————> 4 DTR 2 <————————> 20 TXD 3 <————————> 2 CTS 4 <————————> 5 GND 5 <————————> 7 RXD 6 <————————> 3 DCD 7 <————————> 8 DSR 8 <————————> 6 Other pins not used 80 Appendix RJ45-F to DB9-M JETPORT 5208 / JETPORT 5216 (RJ45) RTS DTE to DTE Pins (8) Computer (DB9) 1 <————————> 8 DTR 2 <————————> 6&1 TXD 3 <————————> 2 CTS 4 <————————> 7 GND 5 <————————> 5 RXD 6 <————————> 3 DSR 7&8 <————————> 4 9 NC not used RJ45-F to DB9-F JETPORT 5208 / JETPORT 5216 (RJ45) DTE to DCE Modem/Device (DB9) Pins (8) RTS 1 <————————> 7 DTR 2 <————————> 4 TXD 3 <————————> 3 CTS 4 <————————> 8 GND 5 <————————> 5 RXD 6 <————————> 2 DCD 7 <————————> 1 DSR 8 <————————> 6 9 NC not used 81 JetPort 5208/5216 User’s Manual RJ45-F to DB25-M JETPORT 5208 / JETPORT 5216 (RJ45) RTS DTE to DTE Pins (8) Computer (DB25) 1 <————————> 5 DTR 2 <————————> 6&8 TXD 3 <————————> 3 CTS 4 <————————> 4 GND 5 <————————> 7 RXD 6 <————————> 2 DSR 7&8 <————————> 20 Other pins not used RJ45-F to DB25-F JETPORT 5208 / JETPORT 5216 (RJ45) DTE to DCE Modem/Device (DB25) Pins (8) RTS 1 <————————> 4 DTR 2 <————————> 20 TXD 3 <————————> 2 CTS 4 <————————> 5 GND 5 <————————> 7 RXD 6 <————————> 3 DCD 7 <————————> 8 DSR 8 <————————> 6 Other pins not used 82 Appendix Appendix A Revision History Version Description Date V1.0 The first released version. Feb. 2009 83 JetPort 5208/5216 User’s Manual 84