1
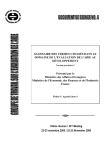
User Manual
for Cascade v1.1
Zhiqiang Zhang
Institute of Software, Chinese Academy of Science
Email: [email protected]
2
Contents
1 Introduction
5
2 Installing Cascade
7
3 Getting Started
3.1 Writing the Parameter Specifications
3.2 Writing the Covering Strength . . .
3.3 Writing the Constraints . . . . . . .
3.4 Generating the Covering Array . . .
3.5 Statement Parsing Order in Cascade
.
.
.
.
.
.
.
.
.
.
.
.
.
.
.
.
.
.
.
.
.
.
.
.
.
.
.
.
.
.
.
.
.
.
.
.
.
.
.
.
.
.
.
.
.
4 Advanced Features
4.1 Notations . . . . . . . . . . . . . . . . . . . . . . . .
4.2 Writing Complex Constraints . . . . . . . . . . . . .
4.3 Variable Strength . . . . . . . . . . . . . . . . . . . .
4.3.1 Seeding . . . . . . . . . . . . . . . . . . . . .
4.4 Auxiliary Parameters . . . . . . . . . . . . . . . . . .
4.5 Auto Parameters (Not Supported Before v1.0) . . .
4.6 Parameter Invalidation Constraints . . . . . . . . . .
4.7 Setting Precision for Floating-point Relations (Not
Before v1.0) . . . . . . . . . . . . . . . . . . . . . . .
.
.
.
.
.
.
.
.
.
.
.
.
.
.
.
.
.
.
.
.
.
.
.
.
.
.
.
.
.
.
.
.
.
.
.
. . . . . . .
. . . . . . .
. . . . . . .
. . . . . . .
. . . . . . .
. . . . . . .
. . . . . . .
Supported
. . . . . . .
9
9
10
10
11
11
13
13
13
15
16
16
17
18
21
5 Trouble Shooting
23
5.1 Waiting too long on “[2]translating constraints into intermediate
form” . . . . . . . . . . . . . . . . . . . . . . . . . . . . . . . . . 23
6 A Complete Example
25
3
4
CONTENTS
Chapter 1
Introduction
Cascade is a test generation tool for combinatorial testing (CT). CT is used
to test software systems with multiple configurable parameters. The advantage
of CT is that it can detect failures triggered by the interaction of parameter
combinations, while the number of test cases is very small. In CT, the SUT is
modeled as a parameterized black-box, which has several parameters, acting as
the input for the SUT. Each parameter has several possible values.
An investigations by Kuhn et al. [Kuhn and Michael(2002)] discovered that
for some systems the failures are usually caused by the combination effect of
a small number of parameters, and about 90% of the failures are caused the
the interaction of no more than 3 parameters. Thus if we have tested all small
parameter combinations, most defects could be detected. In CT, we generate
covering arrays as the test suite, which covers all combinations of any t parameters, where t is a given covering strength. So the array is able to detect
interaction faults caused by no more than t parameters.
Cascade is used to generate combinatorial test sets, i.e. covering arrays. The
intention to develop Cascade is to help testers generate combinatorial test suite
more easily, and to provide support for many advanced features, such as variable
strength, constraints and seeds. The tool has a very user-friendly command line
interface. It takes a file describing the SUT model as input, and produces a test
suite satisfying the requirement.
5
6
CHAPTER 1. INTRODUCTION
Chapter 2
Installing Cascade
Installing Cascade is very simple. You just need to unpack the software package
into any directory you like. Currently, we provide Cascade in Windows, Linux
and OS X. Note that the executable clasp w (or clasp w.exe in Windows) is
a underlying optimization solver, which should always be in the same directory
with cascade (or cascade.exe in Windows).
7
8
CHAPTER 2. INSTALLING CASCADE
Chapter 3
Getting Started
For using Cascade, you should provide an input file (we call it the model file),
specifying the parameters, their values, the desired covering strength and other
requirements the test suite should meet. The model file language of Cascade is
in a C-like style, which is very convenient for learning, using and understanding.
Let us give a simple example to show how to use Cascade. Suppose we are
testing a browser application (such as a browser game) to see if it works normally
on systems with different configurations. Suppose the following parameters and
their corresponding values are identified:
3.1
Writing the Parameter Specifications
The model file consists of several sections. To write the parameter specifications into the model file, you should write them in [PARAMETERS] sections. A
[PARAMETERS] section begins consists of a header “[PARAMETERS]” and several parameter specification statements. Each parameter specification statement has a type specifier, a parameter list, and a list of possible values. The
type specifier could be int(integer), double(floating-point number), string and
bool(Boolean value).
The format is as follows:
<type> <param_list>: <val_list>;
<param list> consists of a list of parameters separated by commas, and
<val list> consists of a list of values separated by commas (must be consistent
with the type). The parameter names should conform to the naming rules for
C variable names, and the values should be specified in C style.
OS
Table 3.1: Parameters of a Browser Application
Browser
Flash Player Version
Proxy
Windows
Linux
Mac OS X
Internet Explorer
Firefox
Safari
Google Chrome
9
10
11
9
No Proxy
HTTP
SOCKS4
SOCKS5
10
CHAPTER 3. GETTING STARTED
A consecutive list of parameters labeled with numbers can be represented in
short form: <prefix>{i-j}. For example v1,v2,...,v8,v10 could be written
as v{1-8},v10.
For int parameters, the values could be specified in the following short
forms:
int <param_list>: [<start>:<end>];
int <param_list>: [<start>:<step>:<end>];
In the first case, the value domain of the parameter is {start, start + 1, start +
2, . . . , end }, and in the second case the value domain of the parameter is {start,
start − end
cstep}.
start + step, start + 2step, . . . , start + b
step
For bool parameters, the value can only be true or false. Thus the parameter statements can only be as follows:
bool <param_list>;
bool <param_list>: true, valse;
For this example SUT model, the [PARAMETERS] section is as follows:
[PARAMETERS]
string OS: "Windows", "Linux", "Mac OS X";
string Browser: "Internet Explorer", "Firefox", "Safari",
"Google Chrome";
string Flash_player_version: "9", "10", "11";
string Proxy: "No Proxy", "HTTP", "SOCKS4", "SOCKS5";
3.2
Writing the Covering Strength
Now for generating a covering array, the covering strength should be specified.
Suppose we set the covering strength as 2, then the generated covering array
will cover all combinations between any 2 parameters. In Cascade the covering
strength is specified in the [STRENGTHS] section:
[STRENGTHS]
default: <strength>;
Here, the default means the set of all parameters. This covering requirement requires all <strength>-way combinations to be covered. Later we will
discuss variable strengths which allows specifying covering requirement on a
partial set of parameters.
We call the combinations required to be covered by the covering strength
target combinations.
3.3
Writing the Constraints
In real SUT models, the parameters are sometimes not independent, and must
conform to some constraints. For the example above, the Internet Explorer
browser can only be installed on Windows, and the Safari browser can only be
installed on Mac OS X. (Note that Internet Explorer for Mac, Internet Explorer
3.4. GENERATING THE COVERING ARRAY
11
for Linux and Safari for Windows have been discontinued, so we do not consider
these cases.) If a test case violate such constraints, it will be invalid and cannot
be executed. Thus if a target combination is covered by invalidate test cases
only, it will not be tested, resulting in a coverage hole.
So we should let Cascade know the constraints, and avoid unsatisfiable assignments when generating test cases. Constraints are specified in [CONSTRAINTS]
sections in the model file. The constraints are written in a C-like style, and we
added a lot of operators to help users to help convenient use. More details about
the constraint can be found in Section 4.2.
For the example above, the constraints could be written as the following:
[CONSTRAINTS]
Browser=="Internet Explorer" -> OS=="Windows";
Browser=="Safari" -> OS=="Mac OS X";
3.4
Generating the Covering Array
Now to generate the covering array, you just need to call Cascade using command line using the model file as an argument as follows:
<path_to_cascade>/cascade <model_file> (for Linux and OS X)
<path_to_cascade>\cascade.exe <model_file> (for Windows)
By default, Cascade outputs the generated covering array to the standard
output. You can also export the covering array to an output file:
-o <output_file>
By default, Cascade prints the covering array in text format. It can also export the covering array in other formats (currently txt and csv are supported):
--oformat <txt|csv> (the default option is txt)
You can also specify an -r option to let Cascade generate covering arrays
using a random seed. However the result may still not be deterministic if you
do not use this option because of the underlying algorithm. Using -r can make
Cascade behave more randomly.
3.5
Statement Parsing Order in Cascade
You can write in one single model file multiple [PARAMETERS] sections, [STRENGTHS]
sections, [CONSTRAINTS] sections and [SEEDS] sections which we will introduce
later. Note that Cascade parses the model file in an incremental way. Thus all
the symbols referred to by some statement must be defined in previous statements.
If some statements specify an universal covering strength, it is only specified
upon all parameters which are already defined in previous sections.
12
CHAPTER 3. GETTING STARTED
Chapter 4
Advanced Features
4.1
Notations
Here we provide some notations which you should understand before learning
how to use advanced features of Cascade.
• <param>: some parameter name;
• <val>: some parameter value;
• <param list>: a list of parameter names (may contain short-form names);
• <exp>: an numeric expression, a Boolean expression or a string;
• <cond>: a Boolean expression.
4.2
Writing Complex Constraints
Cascade provides a very friendly and powerful interface for writing constraints.
It supports four expression types which operators can operate on
• Integers (int type);
• Float numbers (double type);
• Boolean values (bool type);
• Strings (string type).
The top-level expression of each constraint statement must be a Boolean expression.
The terminal symbols in Cascade are listed as follows:
• true, false: Boolean constants, of bool type;
• <integer value>: integer constants, of int type;
• <floating point value>: floating-point constants, of double type;
• <param>: parameter, of its corresponding type;
• #(<param>): expression of bool type, which is true if and only if <param>
is invalid (see Section 4.6).
13
14
Table 4.1: Operators in Cascade
Description
Unary Plus
Unary Minus
Logical Not
Multiplication
Division
Modulo
Addition
Subtraction
Less than
Less than or equal to
Greater than
Greater than or equal to
Equal to
Not equal to
Imply
Logical Equivalent
Logical AND
Logical OR
Logical XOR
Operand Types
int, double
int, double
bool
int, double
int, double
int
int, double
int, double
int, double
int, double
int, double
int, double
int, double, bool
int, double, bool
bool
bool
bool
bool
bool
Resulting Type
same with the operand
same with the operand
bool
same with operands
same with operands
int
same with operands
same with operands
bool
bool
bool
bool
bool
bool
bool
bool
bool
bool
bool
Precedence
Assoc.
1
Right-to-Left
2
Left-to-right
3
Left-to-right
4
Left-to-right
5
Left-to-right
6
Left-to-right
7
Left-to-right
CHAPTER 4. ADVANCED FEATURES
OP
+
!
*
/
%
+
<
<=
>
>=
==
!=
->
<->
&&
||
^^
4.3. VARIABLE STRENGTH
15
bool
int
double
Figure 4.1: Legal Explicit Casts
The operators supported by Cascade are listed in Table 4.1. Expressions
can be bracketed in parenthesis to override the default operator precedence.
Expressions can be casted into a different type. Similar to the C language,
the cast may be explicit or implicit.
Explicit type casting is specified by adding a type specifier before expression
enclosed by parentheses: <type>(<exp>). Figure 4.1 shows the legal explicit
casts. Casting from bool types into numeric types will yield 1. This is quite
useful when expression constraints like “no more than 2 parameters can be
greater than 0”, which can be written as follows:
int(p1>0)+int(p2>0)+int(p3>0)+int(p4>0) <= 2;
Implicit type casting works when some operators is used on two numeric
expressions of different types. These operators are: +,-,*,/,<,<=,>,>=,==,!=.
If both the operands are of int or double type, then Cascade will take their
values directly. If one operand is of int type and the other is of double type,
Cascade will cast the value of the int operand into a double value, and operate
on the two double values. The resulting expression type of +,-,*,/ is int if
both operands are of int type. Otherwise, the type will be double.
Note that Cascade processes double values by using the exact values stored
in the memory. Thus special concerns should be taken on relation operators
on double expressions. For example, suppose we have two double expressions
<exp 1> and <exp 2>, then constraint <exp 1>==<exp 2> is true if and only
if the resulting values of <exp 1> and <exp 2> in the memory are exactly the
same.
4.3
Variable Strength
The covering strength we described in Section 3.2 specifies a universal strength
on all input parameters. Sometimes, some parameters may interact more often
with each other than with other parameters, so we want the covering strength
of these parameters be larger to find more possible bugs. However, specifying a
universal higher strength may make the resulting test suite size increase a lot.
Thus specifying a higher strength on only a part of the parameters may relieve
the test suite size increase. Variable strength [Cohen et al.(2003b)] allows the
user to specify different covering strengths on different sets of parameters. In
Cascade, a variable covering strength is specified in the [STRENGTHS] section as
follows:
<param_list>: <strength>;
16
4.3.1
CHAPTER 4. ADVANCED FEATURES
Seeding
Sometimes you may want to explicitly specify some important parameter combinations that must be covered by the test suite, such as parameter settings of a
newly-deployed software system. Seeding [Cohen et al.(1997)] allows you to do
this. In Cascade, we also support the user to specify a predicate (in the form of
a constraint) as a seed. This kind of seeds is covered only when a valid test case
satisfies this predicate. Seeds are specified in the [SEEDS] section as follows:
[SEEDS]
// use "==" before v1.0
<param_1>:<val_1>, <param_2>:<val_2>, ..., <param_n>:<val_n>;
<cond>; // Not supported before v1.0
The first seed is in combination form (unknown parameters will be discarded),
and the second seed is in constraint form.
Besides, there is a special kind of seeds – starter seeds – which is supported
by Cascade (not supported before v1.0). These seeds are mainly used for using
an existing covering array to generate a newer covering array. Sometimes the
SUT model may change, so the test suite should be regenerated to be consistent
with the new model. However the resulting new test suite may differ a lot with
the old one. If we can minimize the differences between the new and the old
test suite, the effort to re-execute the new test suite may be reduced. This is
the reason why starter seeds useful. In Cascade, a starter seed can be specified
by adding an attribute keyword starter before the seed.
Suppose there are n starter seeds specified in the model file. For the first
test case, Cascade will try to cover the first seed. If the test case covers the first
starter seed, Cascade will continue with the second one, and so on. If at some
point, the test case cannot cover a starter seed, Cascade abandons the seed and
continue with the next one. After all starter seeds are covered or abandoned,
Cascade will work in the normal way for the remaining test cases.
4.4
Auxiliary Parameters
Auxiliary parameters are very useful to simplify the constraints without changing the semantics. An auxiliary parameter is almost the same with normal
parameters, however they will not appear in the test cases, and will not be
included in any coverage requirement by default (however you can still explicitly specify coverage requirements related to auxiliary parameters in covering
strengths and seeds, but the keyword default will not include them). Parameters can be specified as auxiliary by adding an attribute keyword aux before
the type (use aux in versions before v1.0).
A good example of using auxiliary parameters is to simplify Boolean expressions which frequently appear in constraints (of course other types are permitted). Sometimes a Boolean sub-expression <cond> may frequently appear in
constraints. Repetitively writing all the instances will be error prone and will
make the model file hard to maintenance. Instead you may define an auxiliary parameter <aux param> of bool type, and write constraint “<aux param>
== <cond>;”. Then you can use <aux param> to substitute all occurrences of
<cond>.
4.5. AUTO PARAMETERS (NOT SUPPORTED BEFORE V1.0)
4.5
17
Auto Parameters (Not Supported Before v1.0)
Auto parameters are an advanced version of auxiliary parameters. An auto
parameter does not have a value domain as normal parameters or auxiliary
parameters, instead it uses an expression to indicate what value should it take.
You can specify auto parameters in the [PARAMETERS] section in the following way:
__auto__ <type> <param_list>: <exp>;
Note that the resulting type of <exp> must be consistent with type. Auto
parameters are internally translated into the corresponding expressions in the
embedding expressions or constraints.
Besides, auto parameters can also be specified in the switch style:
__auto__ <type> <param>: {<cond_1>:<exp_1>,
<cond_2>:<exp_2>,
...,
<cond_n>:<exp_n>};
Here <cond 1>, <cond 2>, ..., <cond n> is a list of conditions, and <exp 1>,
<exp 2>, ..., <exp n> is a list of corresponding expressions. For a given parameter assignment, Cascade tries to match the conditions one by one (in sequential order). If some condition is met, say <cond i>, the auto parameter
takes the value of <exp i>. We strongly suggest you to set the last condition
as default (or constant true equally), or else the conditions may not cover all
cases, and Cascade cannot determine the value of the auto parameter, so it will
fail to generate a covering array.
Please note that auto parameters should NEVER be included in any coverage
requirement (strength or seed in combination form), since they do not have value
domains.
The advantage of auto parameters compared with auxiliary parameters is
that you need not to specify value domains for auto parameters. Thus it will be
more easier to use when substituting complex expressions of types other than
bool.
For simplifying frequently-appeared expressions in constraints, you can just
specify the following auto parameter, and use it to substitute all occurrences of
<exp>:
__auto__ <type> <auto_param>: <exp>;
Here we give an example for auto parameters. Suppose we are testing a 4-bit
adder, which takes two 4-bit integers as input, and outputs a 4-bit integer as
the sum of the two integers and an carry bit. Here we set a covering strengths
on all 8 input parameters, and we want Cascade output corresponding outputs
for examination. The model file is as follows:
[PARAMETERS]
// a1, b1 and s1 are the most significant bits
int a{1-4},b{1-4},s{1-4},c: [0,1];
__auto__ int c4: (a4+b4)/2;
__auto__ int c3: (a3+b3+c4)/2;
18
CHAPTER 4. ADVANCED FEATURES
__auto__ int c2: (a2+b2+c3)/2;
__auto__ int c1: (a1+b1+c2)/2;
[CONSTRAINTS]
s4 == (a4+b4)%2;
s3 == (a3+b3+c4)%2;
s2 == (a2+b2+c3)%2;
s1 == (a1+b1+c2)%2;
c == c1;
[STRENGTHS]
a{1-4},b{1-4}: 2;
The generated test suite is as follows:
a1
a2
a3
a4
b1
b2
b3
b4
s1
s2
s3
s4
c
----------------------------------------------------------------1
0
1
0
1
1
1
0
1
0
0
0
1
1
1
0
1
0
0
0
1
1
1
1
0
0
0
0
1
1
0
0
0
0
0
0
1
1
0
0
1
0
0
1
1
1
1
0
0
1
1
1
0
0
0
1
1
1
0
1
1
1
1
0
0
1
1
0
0
0
0
1
0
1
1
1
0
0
1
1
1
1
1
0
1
1
1
0
1
0
1
0
1
1
0
0
1
0
0
1
0
1
0
0
4.6
Parameter Invalidation Constraints
Parameter invalidation constraints [Chen et al.(2010)] are a special type of constraint, which are common in real SUT models. A parameter invalidation constraint describes that if some condition is met, some parameter will lose effect
and take an invalid value. The semantics of parameter invalidation constraints
are non-trivial. In Cascade, the semantics are defined as follows:
a) If some condition invalidating parameter p is met, then p is invalid;
b) If no condition invalidating parameter p is met, then p must take a valid
value;
c) If p is invalid, some constraints may not be evaluated as true or false, since
p has no actual value. In this case, the constraint must be capable to
evaluate, or else the constraint is not satisfied.
For this kind of constraints, you can add an additional value representing the
parameter is invalid. However you need to consider all the 3 descriptions above,
which will make the constraint very complex and hard to understand. Thus we
provide a more convenient way to write parameter invalidation constraints.
A parameter invalidation constraint should be written in the [CONSTRAINTS]
section only in the following way:
<cond> ## (<param_list>);
4.6. PARAMETER INVALIDATION CONSTRAINTS
19
This constraint means if <cond> is met, all parameters in <param list> will be
invalid. In the generated covering array, invalid parameter values are represented
by #. You can also use Boolean expression #(p) in other expressions, which is
true if and only if p is invalidated.
The processing for parameter invalidation constraints is postponed until the
parsing process meet the end-of-file (EOF). We collect all the conditions invalidating each parameter, and transform these constraints in the following way:
• For each parameter p, suppose the set of all conditions invalidating p is
Φ(p);
• If Φ(p) = ∅, then parameter invalidation constraints for p is translated as
follows:
false <-> #(p);
• If Φ(p) 6= ∅, suppose Φ(p) = {c1 , c2 , . . . , cn }, then parameter invalidation
constraints for p is translated as follows:
c1 || c2 || ... || cn <-> #(p);
Please be aware that only parameter invalidation constraints (in the form of
“<cond> ## (<param list>);”) are collected. Normal constraints containing
expression #(p) will not be collected. Please do not write any normal constraint which implies conditions invalidating some parameter, unless you fully
understand the semantics. Otherwise Cascade may not work as you thought.
For example suppose there is only one condition v1 == 1 invalidating parameter p. You should use “v1==1 ##(p)”. However if you use “v1==1 <-> #(p)”
instead, then no conditions invalidating p is collected. So Cascade generates
constraint “false <-> #(p)”. The constraint you write and the automatically
generated constraint will make v1 never take the value of 1.
For other normal constraints, as described in c), we need to determine
whether they can be evaluated. Inevaluable expressions have no actual values.
In Cascade, the top-level constraints in the [CONSTRAINTS] section must be
evaluable and be true. For a given assignment of parameters, we use a bottomup way to determine whether an expression is evaluable. Table 4.2 displays the
rules to determine whether an expression is evaluable, and the corresponding
value if it is evaluable. Here E(e) it true if and only if expression e is evaluable.
20
<auto param>
Table 4.2: Rules for Determining the Evaluability of Expressions
Description
E(e)
Value
Unary Plus
Unary Minus
E(a)
Standard value
Logical Not
Multiplication
Division
Modulo
Addition
Substraction
Less than
E(a) ∧ E(b)
Standard value
Less than or equal to
Greater than
Greater than or equal to
Equal to
Not equal to
Imply
¬E(a) ∨ ¬a ∨ E(b)
¬E(a) ∨ ¬a ∨ b
Logical Equivalent
E(a) ∧ E(b)
Standard value
Logical AND
E(a) ∧ E(b)
Standard value
Logical OR
(E(a) ∧ E(b)) ∨ (E(a) ∧ a) ∨ (E(b) ∧ b)
(E(a) ∧ a) ∨ (E(b) ∧ b)
Logical XOR
E(a) ∧ E(b)
Standard value
Constant value
>
Standard value
Parameter
> iff. the parameter is valid
Standard value
Invalidation predicate
>
> iff. the parameter is invalidated
> iff. the parameter is not invalidated and
the parameter assignment is captured
Auto parameter
Standard value
by some of its condition
CHAPTER 4. ADVANCED FEATURES
Expression
+a
-a
!a
a*b
a/b
a%b
a+b
a-b
a<b
a<=b
a>b
a>=b
a==b
a!=b
a->b
a<->b,a==b
a&&b
a||b
a^^b,a!=b
true, false, <value>
<param>
#(<param>)
4.7. SETTING PRECISION FOR FLOATING-POINT RELATIONS (NOT SUPPORTED BEFORE V1.0)21
Let us give an example of using parameter invalidation constraints. Suppose
we are testing an payment web page of an online store. The customer may pay
by using the account balance, by using a credit card or by paying cash when
receiving the package. Here is a example model file (suppose we are only testing
valid inputs):
[PARAMETERS]
string payment_method: "balance", "credit card", "cash";
double account_balance: 0.0, 50.0, 100.0, 200.0;
double total_price: 50.0, 100.0, 200.0;
string credit_card_number: "8888888888888888", "5555555555555555";
[STRENGTHS]
default:2;
[CONSTRAINTS]
payment_method == "balance" -> (account_balance > total_price);
payment_method == "balance" ##(credit_card_number);
payment_method == "cash" ##(credit_card_number);
4.7
Setting Precision for Floating-point Relations (Not Supported Before v1.0)
Floating-point expressions (of type double) are internally process as doubleprecision floating point numbers in the memory. However you may find the
relations for double expressions is not handy to use. Cascade allows you
to provide a comparison precision of floating-point relations by appending a
“[<precision>]” after the relational operator, where [<precision>] is a positive floating-point number including zero. Note that the resulting operator and
the appendix is considered as one token, and no spaces are allowed between
them. Detailed description of each floating-point relation with a given precision
is shown in Table 4.3. For example “1.0 ==[1e-6] 1.0+1e-7” is true since
|1.0 − (1.0 + 10−7 )| = 10−7 ≤ 10−6 .
You can also specify a global precision in a [OPTIONS] section:
[OPTIONS]
default_precision: <precision>;
This will make all succeeding floating-point relations having a precision of
<precision>. The default setting is 0.0 if not set. Note that the precision
will NOT be used when comparing int and string expressions.
22
CHAPTER 4. ADVANCED FEATURES
Table 4.3: Floating-point Relations with Precision
Relation
Description
a == b
|a − b| ≤ precision
a != b
|a − b| > precision
a < b
a − b < −precision
a <= b
a − b ≤ precision
a > b
a − b > precision
a >= b
a − b ≥ −precision
Chapter 5
Trouble Shooting
5.1
Waiting too long on “[2]translating constraints
into intermediate form”
Cascade internally translates constraints into forbidden combinations for further processing. As a preparation step, Cascade finds all related parameters
of each constraint, and enumerate all possible combinations of these parameters to determine which combinations violates constraints. These combinations
are called forbidden combinations, and Cascade will avoid these combinations
when generating test cases. The problem of this processing is that the number
of enumeration is exponential to the number of related parameters. Thus if a
constraint relates to too many parameters, the time for computing forbidden
combinations may be very long. To alleviate this problem, you can use auxiliary
parameters to store the intermediate result of part of the expression. Using auto parameter will not help since Cascade internally expands the corresponding
expression in constraints.
23
24
CHAPTER 5. TROUBLE SHOOTING
Chapter 6
A Complete Example
Table 6.1 is specification of a online PC retailing system. The user wants to
buy a customized PC. He chooses preferred components, and submit the order
to the website. The website should determine whether the selected components
are compatible, check whether the order satisfies some promotion conditions,
and finally give a total price. The next step, which is not considered in this
model, is to let the user confirm the order, and proceed to the payment process.
We can see the model has 6 parameters: CPU, motherboard (MB), hard disk
(HD), Memory (Mem), Graphics Card and shipping cost, each having 2 to 4
possible values. The constraints between parameters are informally described
as follows:
• Each components has a price;
• CPU and memory standards must be compatible with the motherboard;
• If the motherboard has an integrated graphics card, the user do not need to
buy a dedicated graphics card if he has no demand for high performance;
• If the total price is higher than or equal to $300, or the user has chosen
some items on promotion, the shipping will be free.
Table 6.1: Online PC Retailing System Example
CPU
CPU1
CPU2
CPU3
CPU4
MB
MB1
MB2
MB3
MB4
HD
500GB
1TB
Mem
2GB DDR2
4GB DDR2
4GB DDR3
8GB DDR3
Graphics
NONE
Graphics1
Graphics2
Shipping
$0.00
$15.00
The complete model file for this system is as shown in Figure 6.1.
25
26
CHAPTER 6. A COMPLETE EXAMPLE
[PARAMETERS]
string CPU: "CPU1", "CPU2", "CPU3", "CPU4";
string MB: "MB1", "MB2", "MB3", "MB4";
string Mem: "2GB DDR2", "4GB DDR2", "4GB DDR3", "8GB DDR3";
string HD: "500GB", "1TB";
string Graphics: "NONE", "Graphics1", "Graphics2";
double Shipping: 0.00, 15.00;
__auto__ double CPUPrice:
{ CPU=="CPU1": 42.00, CPU=="CPU2": 65.00,
CPU=="CPU3": 34.00, CPU=="CPU4":49.00 };
__auto__ double MBPrice:
{ MB=="MB1": 120.00, MB=="MB2": 150.00,
MB=="MB3": 113.00, MB=="MB4": 128.00 };
__auto__ double MemPrice:
{ Mem=="2GB DDR2": 20.00, Mem=="4GB DDR2": 41.00,
Mem=="4GB DDR3": 22.00, Mem=="8GB DDR3": 50.00 };
__auto__ double HDPrice:
{ HD=="500GB": 30.00, HD=="1TB": 62.00 };
__auto__ double GraphicsPrice:
{ Graphics=="NONE": 0.00, Graphics=="Graphics1": 127.00,
Graphics=="Graphics2": 54.00 };
__aux__ string CPUSocket: "LGA 775", "AM3";
__aux__ string DDRVersion: "DDR2", "DDR3";
__auto__ double total_price: CPUPrice + MBPrice + MemPrice
+ HDPrice + GraphicsPrice;
__auto__ bool HighPrice: total_price>=300.00;
[STRENGTHS]
default: 2;
CPU,MB,Mem: 3; // higher strength on critical components
[CONSTRAINTS]
// compatibility constraints
(CPU == "CPU1" || CPU == "CPU2") -> CPUSocket == "LGA 775";
(CPU == "CPU3" || CPU == "CPU4") -> CPUSocket == "AM3";
(Mem == "2GB DDR2" || Mem == "4GB DDR2") -> DDRVersion == "DDR2";
(Mem == "4GB DDR3" || Mem == "8GB DDR3") -> DDRVersion == "DDR3";
MB == "MB1" -> (CPUSocket == "LGA 775" && DDRVersion == "DDR2");
MB == "MB2" -> (CPUSocket == "LGA 775" && DDRVersion == "DDR3");
MB == "MB3" -> (CPUSocket == "AM3" && DDRVersion == "DDR2");
MB == "MB4" -> (CPUSocket == "AM3" && DDRVersion == "DDR3")
(MB == "MB2" || MB == "MB3") -> Graphics != "NONE";
// shipping cost
(HighPrice || CPU == "CPU2" || MB == "MB2") <-> Shipping == 0.00;
Figure 6.1: Model File for PC Retailing System
Bibliography
[Chen et al.(2010)] Chen, B., Yan, J., and Zhang, J. (2010). “Combinatorial
testing with shielding parameters”. Proc. of the 17th Asia Pacific Software
Engineering Conference (APSEC’10), 280–289.
[Cohen et al.(2003b)] Cohen, M. B., Gibbons, P. B., Mugridge, W. B., Colbourn, C. J., and Collofello, J. S. (2003b). “A variable strength interaction
testing of components”. Proc. of the 27th Annual International Computer
Software and Applications Conference (COMPSAC’03), 413–418.
[Cohen et al.(1997)] Cohen, D. M., Dalal, S. R., Fredman, M. L., and Patton,
G. C. (1997). “The AETG system: An approach to testing based on combinatorial design”. IEEE Transactions on Software Engineering, 23(7): 437–444.
[Kuhn and Michael(2002)] Kuhn, D. R., and Michael J. R. (2002). “An investigation of the applicability of design of experiments to software testing”. Proc.
of the 27th Annual NASA Goddard/IEEE, Software Engineering Workshop.
27