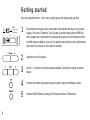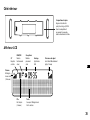
1
Owner’s manual
Bedienungsanleitung
Manuel de l’utilisateur
Manuale dell’utente
Safety instructions
Keep the radio away from heat sources.
Do not use the radio near water.
Avoid objects or liquids getting into the radio.
Do not remove screws from or open the
radio casing.
Sicherheitshinweise
Halten Sie das Radio fern von Heizquellen.
Benutzen Sie das Radio nicht in der Nähe
von Wasser.
Verhindern Sie, dass Gegenstände oder
Flüssigkeiten in das Radio gelangen.
Entfernen Sie keine Schrauben vom Gehäuse
und öffnen Sie dieses nicht.
Consignes de sécurité
Tenir la radio éloignée de toute source de chaleur.
Ne pas utiliser la radio à proximité d’un point d’eau.
Éviter que des objets ou des liquides ne
pénètrent à l’intérieur de la radio.
Ne pas ouvrir le boîtier de la radio ou en enlever les vis.
Istruzioni di sicurezza
Tenere la radio lontana da fonti di calore.
Non utilizzare la radio vicino all’acqua.
Evitare che oggetti o liquidi penetrino nella radio.
Non rimuovere le viti né aprire l’involucro
della radio.
Warranty information
Garantie-Informationen
Garantie
Informazioni sulla garanzia
Imagination Technologies Ltd. warrants to the end user
that this product will be free from defects in materials
and workmanship in the course of normal use for a period
of two years from the date of purchase. This guarantee
covers breakdowns due to manufacturing or design
faults; it does not apply in cases such as accidental
damage, however caused, wear and tear, negligence,
adjustment, modification or repair not authorised by
us. Please return your warranty card or visit www.pure.
com/register to register your product with us. Should
you have a problem with your unit please contact your
supplier or contact PURE Support at the address shown
on the rear of this manual.
Imag inat ion Te c hnolog ie s L t d. g ar an t ier t dem
Endbenutzer, dass dieses Produkt für die Dauer von
zwei Jahren ab Kaufdatum bei normalem Gebrauch
frei von Schäden an Material oder Verarbeitung
ist. Diese Garantie umfasst Ausfälle aufgrund von
Herstellungs- und Konstruktionsfehlern; sie gilt nicht für
Unfallschäden, wie auch immer verursacht, Verschleiß,
Fahrlässigkeit und Veränderung oder Reparatur durch
von uns nicht autorisierte Personen. Senden Sie Ihre
Garantiekarte ein oder registrieren Sie Ihr Produkt
bei uns unter www.pure.com/register. Sollten Sie mit
Ihrem Gerät ein Problem haben, wenden Sie sich an
Ihren Verkäufer oder den PURE Support. Die Adresse
finden Sie auf der Rückseite dieser Bedienungsanleitung.
Imagination Technologies Ltd. garantit à l’utilisateur que
le présent produit est exempt de défauts en termes de
matériaux et de main-d’œuvre, dans le cadre d’une utilisation
normale, pour une période de deux ans à compter de la date
d’achat. La présente garantie couvre les pannes dues à un
défaut de conception ou de fabrication ; elle ne prend pas
en compte les dommages accidentels, quelle que soit leur
cause, l’usure normale du produit, ainsi que tous dommages
dus à la négligence, à la modification, au réglage ou à la
réparation effectué(e) sur l’appareil sans notre autorisation.
Veuillez renvoyer votre carte de garantie ou visiter le site
www.pure.com/register pour enregistrer votre produit auprès
de nos services. En cas de problème avec votre appareil,
veuillez contacter votre fournisseur ou le centre d’assistance
PURE, à l’adresse indiquée au dos du présent manuel.
Imagination Technologies Ltd. garantisce all’utente
finale che il presente prodotto è esente da difetti di
materiale e fabbricazione in condizioni normali di
utilizzo per un periodo di due anni a partire dalla data
di acquisto. La presente garanzia copre i danni dovuti
a difetti di fabbricazione o progettazione; non si applica
in casi quali danni accidentali, in qualsiasi modo
siano stati provocati, usura, negligenza, regolazione,
modifica o riparazione non autorizzate. Restituire
la scheda della garanzia oppure visitare il sito www.
pure.com/register per registrare il prodotto. In caso
di problemi relativi all’unità, contattare il proprio
fornitore oppure contattare il Supporto tecnico PURE
all’indirizzo indicato sul retro del presente manuale.
Copyright
Copyright
Copyright
Copyright
Copyright 2005 by Imagination Technologies Limited.
All rights reserved. No part of this publication may be
copied or distributed, transmitted, transcribed, stored
in a retrieval system, or translated into any human
or computer language, in any form or by any means,
electronic, mechanical, magnetic, manual or otherwise,
or disclosed to third parties without the express written
permission of Imagination Technologies Limited.
Copyright 2005 by Imagination Technologies Limited.
Alle Rechte vorbehalten. Kein Teil dieser Publikation
darf ohne ausdrückliche und schriftliche Zustimmung
von Imagination Technologies Limited in irgendeiner
Form (elektronisch, mechanisch, magnetisch, manuell
oder auf andere Weise) kopiert, verteilt, übermittelt,
überschrieben, in einem Suchsystem gespeicher t,
in eine andere natürliche oder Computersprache
übersetzt oder Dritten zugänglich gemacht werden.
Copyright 2005 Imagination Technologies Limited.
Tous droits réservés. Aucune partie de la présente
publication ne doit être copiée ou diffusée, transmise,
retranscrite, stockée dans un système de récupération
de données ou traduite, que ce soit dans une langue
humaine ou dans un langage informatique, sous
quelque forme et par quelque moyen que ce soit,
électronique, mécanique, magnétique, manuel ou autre,
ou encore diffusée auprès de tiers sans autorisation
écrite expresse de Imagination Technologies Limited.
Copyright 2005 by Imagination Technologies Limited.
Tutti i diritti riservati. Nessuna parte della presente
pubblicazione può essere copiata o distribuita,
trasmessa, trascritta, memorizzata in un sistema di
archiviazione, o tradotta in un formato normalmente
comprensibile, in qualsiasi forma o con qualsiasi
mezzo, elettronico, meccanico, magnetico, manuale
o altro, o divulgata a terze parti senza il permesso
s c r i t t o d i I m a g i na t i o n Te c h n o l o g i e s L i m i t e d.
Disclaimer
Ausschlusshinweis
Avis de non-responsabilité
Dichiarazione di non responsabilità
I m a g i n a t i o n Te c h n o l o g i e s L i m i t e d m a k e s n o
representation or warranties with respect to the content
of this document and specifically disclaims any implied
warranties of merchantability or fitness for any particular
purpose. Further, Imagination Technologies Limited
reserves the right to revise this publication and to make
changes in it from time to time without obligation of
Imagination Technologies Limited to notify any person
or organization of such revisions or changes.
Imagination Technologies Limited gewähr t keine
Garantien für den Inhalt dieses Dokument s und
lehnt insbesondere implizier te Garantien für die
allgemeine Gebrauchstauglichkeit bzw. die Eignung für
spezielle Zwecke ab. Weiterhin behält sich Imagination
Technologies Limited das Recht vor, diese Publikation
von Zeit zu Zeit zu überarbeiten und zu ändern, ohne dass
daraus eine Verpflichtung für Imagination Technologies
Limited entsteht, irgendeine Person oder Organisation
von solchen Änderungen in Kenntnis zu set zen.
Imag inat ion Technolog ie s L imited r efuse toute
représentation ou garantie vis-à-vis du contenu
du présent document et refuse spécif iquement
toute garantie implicite de valeur marchande ou
d’adéquation à un usage spécif ique. En outre,
Imagination Technologies Limited se réserve le droit
de réviser la présente publication et d’y apporter
des modifications, quand elle le souhaite, sans
obligation de sa part de notifier toute personne ou
organisation desdites révisions ou modifications.
Imagination Technologies Limited non si assume alcuna
responsabilità rispetto al contenuto del presente
documento, in particolare non riconosce nessuna garanzia
implicita di commerciabilità o idoneità per uno scopo
specifico. Inoltre, Imagination Technologies Limited si
riserva il diritto di revisionare la presente pubblicazione
e di apportarvi modifiche periodiche senza alcun
obbligo di notifica a qualsiasi persona o organizzazione.
Trademarks
Warenzeichen
Marques commerciales
Marchi
Élan, the Élan logo, PURE, the PURE logo, PURE Digital,
the PURE Digital logo, Imagination Technologies, and
the Imagination Technologies logo are trademarks or
registered trademarks of Imagination Technologies
Limited. All other product names are trademarks of their
respective companies. Version 1 September 2005.
Élan, das Élan Logo, PURE, das PURE Logo, PURE Digital,
das PURE Digital Logo, Imagination Technologies und das
Imagination Technologies Logo sind Warenzeichen oder
eingetragene Warenzeichen von Imagination Technologies
Limited. Alle anderen Produktnamen sind Warenzeichen
ihrer jeweiligen Besitzer. Version 01. September 2005
Élan, le logo Élan, PURE, le logo PURE, PURE Digital,
le logo PURE Digital, Imagination Technologies et
le logo Imagination Technologies sont des marques
commerciales ou des marques déposées de Imagination
Technologies Limited. Tous les autres noms de produits
sont des marques commerciales de leurs détenteurs
respectifs. Version 1
er s ept embr e 2005.
Élan, il logo Élan, PURE, il logo PURE, PURE Digital,
il logo PURE Digital, Imagination Technologies e il
logo Imagination Technologies sono marchi o marchi
registrati di Imagination Technologies Limited. Tutti
gli altri nomi di prodotti sono marchi di proprietà delle
rispettive società. Versione 1 settembre 2005.
Introduction
Thank you for buying the PURE Élan portable stereo DAB and FM radio.
This manual provides guidance on using your radio and what to do if you have
problems. Please take a minute or two to read through this manual to help you get
the most of your radio, read the safety instructions below, and register your product
on our website at www.pure.com or by filling in and returning your warranty card.
Safety instructions
Keep the radio away from heat sources.
Do not use the radio near water.
Avoid objects or liquids getting into the radio.
Do not remove screws from or open the radio casing.
Remove batteries if exhausted or if they will not be used again for a long period.
Use only the supplied 9V power adapter if connecting the radio to the mains.
1
Overview diagrams
Top panel - controls and connectors
Power/Sleep
Volume +/-
Switch power on/off
and Sleep timer
Adjust the
volume
Preset (1-4) and
presets 5 - 8
to access
Quick access to radio presets
Menu
Aerial
Change audio and
general setup options
Adjustable
telescopic aerial
Headphone
-
3.5mm
headphone
socket
(Mutes speakers)
+
Menu
Info
DAB/FM
LCD screen
+/- and Select
Info
Switch between
DAB and FM modes
Backlit LCD screen
Scroll through and select
stations or menu options
Switches between
display modes
Rear panel - connector
9V DC
2
Select
9V DC
power socket
for adapter
Base panel
Battery compartment
Takes 6 size 'C' batteries.
Slide cover to remove.
LCD screen
ST
DAB/FM Sleep timer
Stereo current
station mode
sleep timer
active
Clock
Signal strength
time from
DAB signal
for current DAB station
7 levels, full shown
Volume
volume level
(14 levels,
full shown)
Battery
Text area
battery charge
monitor
(5 levels,
full shown)
16 x 2 character
text display area
3
Getting started
So you’ve unpacked the box - here’s how to quickly get up and running using your Élan.
9V DC
9V DC
power socket
for adapter
1
2
Adjust the volume if required.
3
Use the +/- buttons to see all the stations available. Push select to change to another
station.
4
5
4
Fully extend the telescopic aerial, connect the mains adapter and plug in to your power
supply or fit six size ‘C’ batteries. The LCD lights up and the display shows ‘PURE Elan’
and a progress bar on the bottom line indicates the progress of a DAB autotune to find
the DAB stations available in your area. The stations found will be stored in alphanumeric
order and the first station on the list will be selected.
Push the Info button and repeat to cycle through the optional DAB display modes.
Push the DAB/FM button to change to FM mode and listen to FM stations.
Using DAB
To listen to digital radio stations press the DAB/FM button until you see the DAB icon on screen.
If this is the first time you have switched to DAB, you hear the first station on the list, otherwise
you hear the last station you were listening to.
Changing stations
Change stations using the +/- and Select button or by selecting a numbered preset button.
1. Press the + or - buttons to scroll the list and find the station you want.
The current station is shown at the top of the screen.
2.
1Xtra - BBC
Bringing you hot
Default DAB screen
1Xtra - BBC
Virgin
Changing stations
Press the Select button to change the station.
A station with ‘?’ before its name is currently unavailable either because you have lost
reception or the station is not currently broadcasting. You can use the ‘Trim stn. list ’ option
to remove them from the station list, see page 8.
Using presets
The numbered buttons and enable you to assign up to eight DAB (and eight FM) radio
stations to presets for easy one-touch access. You can also automatically transfer your eight
favourite stations to presets, see Station order on page 7.
You can store a station to a preset while listening to it or when you see the station name at
the bottom of the screen while scrolling through the station list. For presets 1-4 press and
hold down a numbered button to store the station under that number. For presets 5-8 press
and release the button, then hold down a numbered button ( 5 - 8 ).
Virgin Radio
Preset 1 saved
Storing a preset
5
When you save a station as a preset, the station name shows the preset number next to it on
the station list.
To select presets 1-4 press the relevant numbered button. To select presets 5-8 press and
release the button then press the numbered button ( 5 - 8 ).
Changing the information on the screen
Virgin Radio
oday's best musi
Info mode - Scrolling text
Virgin Radio
18:36 27-08-2004
Info mode - Time and date
Virgin Radio
11D 222.06MHz
Info mode - Channel and frequency
6
Press the Info button to change what you see on the bottom line of the screen.
Scrolling text
The default mode, broadcast by most stations.
Program Type
Type of content being broadcast.
Multiplex
Multiplex the current station belongs to. Multiplexes or ensembles are
groups of stations owned and broadcast by a single operator.
Time and date
Time and date updated regularly from the current multiplex. If your radio
has been unplugged there may be a slight delay before the time appears
when you switch on.
Channel
Multiplex channel and frequency.
Mode
Stereo or mono indicator and data rate at which the signal is being
transmitted. This rate is set by the broadcaster to suit the type of material.
Higher rates generally mean higher quality.
Signal quality
Signal quality. As a guide, values from 85 to 100 indicate good reception,
70 to 84 borderline reception and 0 to 69 poor reception.
DAB setup options
Press the Menu button, scroll using the +/- buttons and push Select to choose one of the
following setup options.
LCD backlight
Change whether the screen backlight stays on all the time or remains on only for a short
period after a button is pressed.
Press the +/- buttons to view the options and push Select to choose one:
Timed Off
Backlight will turn on when a button is pressed and turn off again after
no button has been pressed for around five seconds. This setting is
recommended if you are using batteries.
Always On
Backlight will remain on all the time.
Always On
Timed Off
LCD backlight options
Station order
Changes the order of stations on your station list. Use the +/- buttons to scroll through the
following options and push Select to choose one:
Alphanumeric Displays all stations in alphanumeric order.
Fav station
Displays your six most listened to stations at the top of the station list and
the rest below, in alphanumeric order. Your favourite stations are displayed
with a next to their names.
Active station Displays active stations at the top of the station list and inactive ones at
the bottom in alphanumeric order. Inactive stations are those on the station
list but not currently available, marked with a ’?’.
Alphanumeric
Fav station
Station order menu
7
Multiplex
Trim stn. list
→ presets
Autotune...
12
Autotune UK Band III option
Lists stations in groups according to their multiplex. Multiplexes, sometimes
called ensembles, are groups of stations owned and broadcast by a single
operator.
Removes inactive stations from the station list.
Available only when Fav station order (above) has been selected. Transfers
your favourite stations to the eight presets.
Autotune UK
Scans all UK frequencies for DAB stations and adds any new ones to the station list.
Autotune full
Scans the full range of digital frequencies in Band III. This option is for use outside the UK
where other Band III stations may be available.
Manual tune
12B
225.64MHz
Manual tune - channel
12B
BBC DAB
Manual tune - good signal
8
1.
Use the +/- buttons to scroll through different channels and push Select to choose one
(UK stations are in the range 11B to 12D). You see a signal level display.
The empty block indicates the minimum required level for reception and the filled blocks
indicate the current level.
2.
Move your aerial while watching the display and to try to raise the current level to the
empty block or beyond. Once you have a good signal the display will show the multiplex
name and add the stations to the station list.
3.
Push the Menu button to exit the tuning aid or +/- and Select buttons to change station.
225.64MHz
Manual tune - low signal
12B
Shows signal level which you can use to find the best position for your radio and aerial.
Note You can display the signal level at any time by pushing the Select button.
DRC value
DRC (Dynamic Range Control) value makes the quieter sounds in a broadcast easier to hear
at low volume or in a noisy environment. The DRC level of a broadcast is set by the station
and sent with the signal. At the time of writing in the UK only BBC Radio 3 and 4 regularly use
DRC. Check with the broadcasters to find out if they use DRC on their stations. Press the +/buttons to scroll through the following options and push Select to choose one:
DRC 0
DRC is switched off. Any DRC level broadcast will be ignored.
DRC ½
DRC level is set to ½ that sent with the broadcast.
DRC 1
Applies the DRC level as sent with the broadcast.
DRC 0
DRC 1
DRC value
Sw version
Displays the version of the software in your radio. You may be asked to quote this if you
contact Technical Support.
v1.0
Sw version
Software version
9
87.50MHz
Default FM screen
Using FM
To listen to FM radio stations press the DAB/FM button until you see the FM icon on screen.
If this is the first time you have switched to FM, Élan starts at the beginning of the frequency
range, otherwise you hear the last station you were listening to.
Changing stations
Searching... > .
Seek tune - Searching for station
Change stations using the + and - buttons or by selecting a numbered preset button.
Press the + or - button to search up or down the frequency range and find the station you
want. You may see ‘Searching...’ briefly on screen while the search for the next station is in
progress.
You can change the FM tuning method, if preferred, to enable you to manually step up and
down the frequency range see FM Tuning mode on page 11.
98.20MHz
Preset 1 saved
Storing a preset
Using presets
The numbered buttons and enable you to assign up to eight FM radio stations to presets
for easy one-touch access. These eight presets are in addition to any DAB presets you may
have stored and are only accessible while in FM mode.
To store presets 1-4 press and hold down a numbered button to store the station under that
number. To store presets 5-8 press and release the button, then hold down a numbered
button ( 5 - 8 ).
To select presets 1-4 press the relevant numbered button. To select presets 5-8 press and
release the button then press the numbered button ( 5 - 8 ).
10
FM setup options
Press the Menu button, scroll using the +/- buttons and push Select to choose one of the
following setup options.
FM Tuning mode
Changes how you tune from one station to another. The current mode is shown on the top line
of the display.
Press the +/- buttons to view the options and push Select to choose one:
Seek Tune
automatically searches for the next FM station
Manual Tune
lets you manually step through the frequency range in steps of 0.05MHz
Seek Tune
Manual Tune
FM Tuning mode options
FM Stereo mode
Changes between stereo and mono reception - mono may be clearer for stations with weak
signals. The current mode is shown on the top line of the display.
Press the +/- buttons to view the options and push Select to choose one.
Stereo
Mono
FM Stereo options
LCD backlight
This is the same option as appears on the DAB setup menu, see page 7 for details.
Sw version
This is the same option as appears on the DAB setup menu, see page 9 for details.
11
Using the Sleep Timer
You can set a Sleep Timer after which Élan will switch itself into standby mode, ideal if you want to
fall asleep listening to the radio.
Classic FM
Sleep 30
Sleep Timer - setting
Classic FM
stress-free mix
Sleep Timer - set icon
Classic FM
Sleep off
Sleep Timer - switching off
12
Set the sleep timer
Hold down the Sleep button, then press again and repeat to choose between 15, 30, 45, 60
or 90 minutes or select Sleep off to set no sleep time.
Leave your unit for a couple of seconds to return to what you were listening to. You will see
the Sleep Timer icon displayed on screen indicating that the timer is set.
Hold down the Sleep button again to view the time remaining until Élan will switch off or to
change the sleep time.
Cancel the sleep timer
Hold down the Sleep button, you will see the remaining time. Press again and repeat until the
Sleep off option is selected. In a couple of seconds Élan will return to what you were listening
to, with sleep timer cancelled.
Using batteries
To use battery power as an alternative to a mains power supply, slide off the battery
compartment cover on the base and insert six size ‘C’ batteries. The label inside the
compartment illustrates the correct way to insert the batteries.
When using batteries the Battery Charge monitor icon on the screen gives an indication of the
charge remaining in the batteries.
If you use rechargeable batteries (NiMh or NiCd), connecting the unit to the mains will not
recharge the batteries. Use a separate charger such as the BC-CD6 battery charger available
from PURE to recharge your batteries.
JAZZFM
Best Variety Of
Using batteries - fully charged
talkSPORT
- the nation's f
Using batteries - charge low
The battery supply is switched off when your Élan is connected to the mains. To switch to
battery supply remove the power adapter plug from the rear of the unit.
13
Hints and Tips
(<</>>) Secondary services
Secondary services accompany some stations, providing extra information or alternative content and may only be broadcast at certain
times. At the time of writing not many secondary services are available. If a station has secondary services available, the station shows
‘>>’ next to its name in the station list and the secondary service appears next to the station in the list. A secondary service has a ‘<<’
before its name in the station list.
(?) Inactive or unavailable stations
Inactive or unavailable stations are those which appear on the station list but are not currently available because either you are outside
the broadcast area, have lost reception or the station is not currently broadcasting. Unavailable stations have a ‘?’ before their name on
the station list. If you select a station which has this symbol, Élan returns to the last station you were listening to.
I hear a ‘burbling’ sound on some stations
Although DAB is excellent at providing quality audio from very little signal, the quality can suffer if the signal strength is too low. If that
happens, a ‘burbling’ sound can sometimes be heard. To help reduce this, check that your aerial is fully extended and upright. If the
problem persists try moving your radio or repositioning your aerial using manual tuning.
Display says ‘No stations available’
Check that your aerial is fully extended. Use Autotune to search for stations. Use manual tuning to adjust your aerial or radio position.
Clock shows the wrong time
This may happen if the multiplex you are tuned to broadcasts an incorrect time signal, try tuning to a station in another multiplex.
Resetting your radio
Resetting your Élan removes all presets, stored stations and favourite station settings and resets all options to defaults. To reset:
1. Press and hold the Menu button for three seconds. The screen shows ‘Press Select to confirm reset’.
2. Push the Select button to confirm the reset or press no buttons to cancel the reset.
14
Technical Specifications
General
Stereo DAB digital and FM radio with full Band III DAB reception capability, for reception of all UK DAB
broadcasts and full UK FM capability. Fully compliant with ETS 300 401 and capable of decoding all
DAB transmission modes 1-4 up to and including 256 kb/sec.
Speakers
Two full-range 3 inch drive units
Frequency range
DAB – Band III (174-240 MHz), with fast Autotune feature
FM – 87.5-108 MHz
Aerial
Integral telescopic aerial
Input connectors
9V DC power adapter socket (230V adapter supplied)
Output connectors
3.5mm socket for headphones
Controls
Power on/standby & Sleep, DAB/FM selector, volume up/down, preset buttons, tune up/down and
select, menu and display info.
LCD display
Custom, easy to read LCD with 16 x 2 character display plus status icons.
Mains power supply 230V AC to 9V DC external power adapter
Battery power
6 size 'C' batteries. Battery life up to 80 hours FM or 30 hours DAB at normal listening levels.
Ultra low-power standby mode.
Approvals
CE marked. Compliant with the EMC and Low Voltage Directives (89/336/EEC and 73/23/EEC)
Dimensions
280 mm (width) x 168 mm (height) x 80 mm (depth)
15
Einleitung
Vielen Dank, dass Sie sich für einen Stereo-DAB/FM-Radio PURE Élan entschieden
haben.
Diese Anleitung zeigt Ihnen Ihr Radio zu bedienen und was zu tun ist, wenn
Probleme auftreten sollten. Nehmen Sie sich zwei, drei Minuten Zeit um diese
Anleitung zu lesen, damit Sie alle Funktionen Ihres Radios kennen, lesen Sie die
Sicherheitshinweise unten und registrieren Sie Ihr Produkt auf www.pure.com oder
indem Sie die ausgefüllte Garantiekarte an uns senden.
Sicherheitshinweise
Halten Sie den Radio fern von Heizquellen.
Benutzen Sie den Radio nicht in Nähe von Wasser.
Verhindern Sie, dass Gegenstände oder Flüssigkeiten in den Radio gelangen.
Entfernen Sie keine Schrauben vom Gehäuse und öffnen Sie dieses nicht.
Entfernen Sie die Batterien, wenn Sie längere Zeit nicht gebraucht werden oder wenn sie leer sind.
Verwenden Sie für den Netzbetrieb nur den mitgelieferten 9V-Adapter.
17
Bedienelemente und Anschlüsse
Oberseite - Bedienelemente und Anschlüsse
Power/Sleep
Volume +/-
Ein-/Ausschalten
und Sleep Timer
Lautstärkeregelung
Vorwahltasten (1-4) und um die
Vorwahltasten 5 - 8 anzuwählen
Schnellzugriff auf gespeicherte Sender
Menu
Antenne
Ändern von allgemeinen
und Audio-Einstellungen
Einstellbare
Teleskopantenne
Kopfhörer
-
3.5mm
Kopfhöreranschluss
(Lautsprecher wird
stumm geschaltet)
18
+
Menu
Info
DAB/FM
LCD screen
+/- und Select
Info
Umschalten zwischen
DAB und FM (UKW)
Beleuchteter LCD Bildschirm
Durchsehen und Auswahl von
Sendern oder Menu-Optionen
Wechsel zwischen den
verschiedenen Anzeigemod
Rückseite - Anschlüsse
9V DC
Select
9V DC
Anschluss für
Netzadapter
Unterseite
Batterie-Fach
Benötigt 6 Typ 'C' Batterien.
Deckel zum Entfernen schieben.
LCD screen
ST
DAB/FM Sleep timer
Stereo- aktueller
sendung Modus
Sleep Timer
aktiv
Uhr
Signalstärke
DAB-ZeitSignal
für aktuellen DAB-Sender
7 Level
Lautstärke
Anzeige der
Lautstärke
(14 Level)
di
Batterie
Textfelder
Batteriezustand
(5 Level)
16 x 2 Zeichen
Textanzeigefelder
19
Schnellstart
Hier erfahren Sie, wie Sie Ihren Élan schnell zum ‘Laufen’ bringen.
9V DC
20
9V DC
Anschluss für
Netzadapter
1
Ziehen Sie die Teleskopantenne voll aus, schliessen Sie das Gerät am Strom an oder
setzen Sie sechs Typ ‘C’ Batterien ein. Das LCD-Display leuchtet auf und zeigt ‘PURE
Elan’ an, ein Balken auf der unteren Zeile zeigt den Fortschritt des DAB-Autotunings an,
welches die in Ihrem Gebiet empfangbaren DAB-Sender sucht. Die gefundenen Sender
werden in alphanumerischer Reihenfolge gespeichert und der erste Sender auf der Liste
wird wiedergegeben.
2
Regeln Sie bei Bedarf die Lautstärke.
3
Benutzen Sie die +/- Tasten um alle verfügbaren Sender zu sehen. Drücken Sie ‘Select’
um einen anderen Sender auszuwählen.
4
Drücken Sie wiederholt die ‘Info’-Taste um die optionalen DAB-Anzeige-Modi zu
durchlaufen.
5
Drücken Sie die Taste ‘DAB/FM’ um in den FM-Modus zu wechseln und FM-Sender zu
hören.
Verwenden von DAB
Drücken Sie die DAB/FM-Taste bis das DAB-Zeichen angezeigt wird, um einen digitalen RadioSender zu hören. Wenn Sie zum ersten Mal auf DAB gestellt haben, hören Sie den ersten Sender
aus der Liste, ansonsten den, den Sie zuletzt gehört haben.
1Xtra - BBC
Bringing you hot
DAB-Standardanzeige
Senderwechsel
Mit +/- und Select oder durch Drücken einer nummerierten Vorwahltaste können Sie die
Sender wechseln.
1.
2.
Drücken Sie die + oder - Taste um durch die Liste zu scrollen und den gewünschten
Sender zu finden. Der aktuelle Sender wird in der oberen Zeile des Displays angezeigt.
1Xtra - BBC
Virgin
Senderwechsel
Drücken Sie die Select-Taste um den Sender zu wechseln.
Wird vor dem Sendernamen ein ‘?’ angezeigt, ist er Sender zurzeit nicht verfügbar, weil Sie
entweder keinen Empfang haben oder die Station momentan nicht sendet. Mit der Funktion
‘Trim stn. list’ können Sie diesen aus der Senderliste entfernen (siehe Seite 24).
Verwenden der Vorwahltasten
Die Nummerntasten und ermöglichen Ihnen das Zuordnen von bis zu 8 DAB- (und 8 FM-) Sender
zu einer Vorwahltaste für einfachen und schnellen Zugriff. Ihre 8 Favoritensender können Sie
auch automatisch den Vorwahltasten zuordnen lassen (siehe Senderreihenfolge auf Seite 23).
Ein Sender kann einer Vorwahltaste zugeordnet werden, wenn Sie diesen hören oder beim
Durchsehen der Senderliste, wenn sein Name in der unteren Display-Zeile angezeigt wird. Für die
Vorwahltasten 1-4 halten Sie die gewünschte Nummerntaste gedrückt. Für die Vorwahltasten 5-8
drücken Sie kurz die Taste und halten dann die gewünschte Nummerntaste gedrückt ( 5 - 8 ).
Virgin Radio
Preset 1 saved
Belegung einer Vorwahltaste
21
Wenn Sie einen Sender einer Vorwahltaste zugeordnet haben, wird die entsprechende
Nummer in der Senderliste neben dem Sendernamen angezeigt.
Um eine Vorwahltaste 1-4 aufzurufen, drücken sie die entsprechende Nummerntaste. Um eine
Vorwahltaste 5-8 aufzurufen drücken Sie zuerst und dann eine Nummerntaste ( 5 - 8 ).
Ändern der angezeigten Information
Virgin Radio
oday's best musi
Info Modus - laufender Text
Virgin Radio
18:36 27-08-2004
Drücken Sie die Info-Taste um die auf der unteren Zeile angezeigte Information zu ändern.
Laufender text
Standard-Modus, wird von den meisten Stationen gesendet.
Program Type
Art des Inhalts wird angezeigt.
Multiplex
Multiplex zu welchem der aktuelle Sender gehört. Multiplex ist eine
Sendergruppe, die einem Multiplex-Anbieter gehört und von diesem
ausgestrahlt wird.
Info Modus - Zeit und Datum
Virgin Radio
11D 222.06MHz
Info Modus - Kanal und Frequenz
22
Zeit und Datum Regelmässig aktualisiert vom eingestellten Sender. War Ihr Élan vom Netz
getrennt kann es nach dem Einschalten eine kurze Verzögerung geben bis
die Zeit angezeigt wird.
Kanal
Multiplex-Kanal und -Frequenz.
Mode
Stereo- oder Mono-Indikator und Data-Rate mit welcher das Signal
übermittelt wird. Diese Rate wird vom Sender bestimmt, je nach Art der
Übermittlung. Eine höhere Rate bedeutet grundsätzlich eine bessere Qualität.
Signal quality
Werte zwischen 85 und 100 zeigen einen guten Empfang an, zwischen 70
und 84 einen mässigen und zwischen 0 bis 69 einen schlechten Empfang.
DAB-Einstellungen
Drücken Sie die Menu-Taste, scrollen Sie mit +/- und drücken Sie Select um eine der
folgenden Einstellungen auszuwählen.
LCD backlight (LCD-Beleuchtung)
Wählen Sie, ob die Display-Beleuchtung immer eingeschaltet sein soll oder ob sie nach dem
Drücken einer Taste nach kurzer Zeit ausschaltet.
Drücken Sie +/- um die Einstellungen zu sehen und wählen Sie mit Select eine aus:
Timed Off
Die Beleuchtung geht an, wenn eine Taste gedrückt wird und erlöscht nach
ca. fünf Sekunden wieder, wenn keine weitere Taste gedrückt wird. Diese
Einstellung ist bei Batteriebetrieb empfehlenswert.
Always On
Die Beleuchtung bleibt immer eingeschaltet.
Station order (Senderreihenfolge)
Zum Ändern der Reihenfolge der Sender in Ihrer Senderliste. Scrollen Sie mit +/- durch die
folgenden Optionen und drücken Sie Select um eine auszuwählen:
Alphanumeric Zeigt alle Sender in alphanumerischer Reihenfolge an.
Fav station
Zeigt Ihre sechs meistgehörten Sender zuerst an und anschliessend die
restlichen Sender in alphanumerischer Reihenfolge. Ihre Favoriten-Sender
werden mit einem neben ihrem Namen gekennzeichnet.
Active station Zeigt alle aktiven Sender zuerst und die inaktiven am Schluss an - dies
in alphanumerischer Reihenfolge. Inaktive Sender sind in der Senderliste,
zurzeit aber nicht verfügbar und mit einem ‘?’ markiert.
Always On
Timed Off
Optionen LCD-Beleuchtung
Alphanumeric
Fav station
Senderlisten-Menu
23
Multiplex
Trim stn. list
→ presets
Sortiert die Sender in Gruppen, abhängig von ihrem Multiplex. Multiplex ist
eine Sendergruppe, die einem Multiplex-Anbieter gehört und von diesem
ausgestrahlt wird.
Entfernt inaktive Sender von der Senderliste.
Nur verfügbar, wenn ‘Fav station order’ (siehe oben) ausgewählt wurde.
Ordnet Ihre Favoritensender den acht Vorwahltasten zu.
Autotune UK
Autotune...
12
Autotuning Band III option
Scannt alle englischen Frequenzen für DAB-Stationen und fügt neue der Senderliste hinzu.
Autotune full
Scannt den ganzen digitalen Bereich im Band III. Diese Option muss ausserhalb Englands
gewählt werden, wo andere Band III-Stationen verfügbar sein können.
Manual tune
Zeigt das Signallevel an, was dazu verwendet werden kann die beste Position für Radio und Antenne zu finden.
12B
225.64MHz
1.
Manuelles Tuning - Kanal
12B
225.64MHz
Manuelles Tuning - schlechtes Signal
12B
BBC DAB
Manuelles Tuning - gutes Signal
24
Scrollen Sie mit +/- durch die verschiedenen Kanäle und drücken Sie Select um einen auszwählen
(CH-Sender befinden sich auf 12C und 12B). Eine Signallevel-Anzeige erscheint auf dem Display.
Das leere Kästchen markiert den minimal erforderlichen Level für Empfang und die
gefüllten Kästchen zeigen den aktuellen Level an.
2.
Bewegen Sie die Antenne während Sie das Display beobachten und versuchen Sie den
Level bis zum leeren Kästchen oder höher zu bringen. Haben Sie ein gutes Signal, wird
der Multiplex-Name im Display angezeigt und die Sender der Senderliste hinzugefügt.
3. Verlassen Sie ‘Tuning aid’ mit der Menu-Taste oder wechseln Sie den Sender mit +/- und Select.
Hinwies Sie können sich den Signallevel jederzeit mit einem Druck auf Select anzeigen lassen.
DRC value
Der DRC-Wert (Dynamic Range Control) macht leisere Töne einer Sendung bei niedriger
Lautstärke oder lärmiger Umgebung besser wahrnehmbar. Der DRC-Level einer Sendung wird
vom Sender bestimmt und mit dem Signal übertragen. Fragen Sie Ihren Sender an um zu
erfahren, ob dieser DRC verwendet.
DRC 0
DRC 1
DRC-Wert
Drücken Sie +/- um durch die folgenden Optionen zu scrollen und drücken Sie die SelectTaste um eine auszuwählen:
DRC 0
DRC ist ausgeschaltet. Ein allfällig übermittelter DRC-Level wird ignoriert.
DRC ½
Der DRC-Level wird auf ½ des übertragenen Levels reduziert.
DRC 1
Wendet den übertragenen DRC-Level 1:1 an.
Sw version
Zeigt die aktuell installierte Software-Version Ihres Radios an. Halten Sie diese Information
bereit, wenn Sie den technischen Support kontaktieren.
v1.0
Sw version
Software-Version
25
87.50MHz
FM-Standardanzeige
Verwenden von FM (UKW)
Um einen UKW-Sender zu hören, drücken Sie die DAB/FM-Taste bis das FM-Zeichen angezeigt
wird. Wenn Sie zum ersten Mal FM eingestellt haben, beginnt Ihr Élan am Anfang des
Frequenzbandes, ansonsten wird der zuletzt gehörte Sender wiedergegeben.
Senderwechsel
Searching... > .
Seek tune - Sendersuche
Wechseln Sie die Sender mit der + oder - Taste oder durch Drücken einer nummerierten
Vorwahltaste. Drücken Sie die + oder - Taste um das Frequenzband gegen oben oder unten
nach dem gewünschten Sender zu durchsuchen. Während der Suche nach dem nächsten
Sender wird auf dem Display ‘Searching...’ angezeigt.
Sie können auch manuell - schrittweise nach oben oder unten - nach einem Sender suchen
(siehe FM-Tuning-Modus auf Seite 27).
Verwenden der Vorwahltasten
98.20MHz
Preset 1 saved
Belegung einer Vorwahltaste
Die Nummerntasten und ermöglichen Ihnen das Zuordnen von 8 FM-Sendern zu einer
Vorwahltaste für einen einfachen und schnellen Zugriff. Diese acht Speicherplätze sind
zusätzlich zu allfällig gespeicherten DAB-Stationen und nur im FM-Modus zugänglich.
Für die Vorwahltasten 1-4 halten Sie die gewünschte Nummerntaste gedrückt. Für
die Vorwahltasten 5-8 drücken Sie kurz die Taste und halten dann die gewünschte
Nummerntaste gedrückt ( 5 - 8 ).
Um eine Vorwahltaste 1-4 aufzurufen, drücken Sie die entsprechende Nummerntaste. Um eine
Vorwahltaste 5-8 aufzurufen drücken Sie zuerst und dann eine Nummerntaste ( 5 - 8 ).
26
FM-Einstellungen
Drücken Sie die Menu-Taste, scrollen Sie mit +/- und drücken Sie Select um eine der
folgenden Einstellungen auszuwählen.
FM tuning mode (FM Tuning-Modus)
Ändert die Tuning-Art. Der aktuelle Modus wird in der oberen Display-Zeile angezeigt. Drücken
Sie +/- um die Optionen zu sehen und drücken Sie Select um eine auszuwählen:
Seek Tune
sucht automatisch nach dem nächsten FM-Sender
Manual Tune
ermöglicht Ihnen ein manuelles Suchen nach der Frequenz in 0.05 MHzSchritten
Seek Tune
Manual Tune
FM Tuning-Modus-Optionen
FM stereo mode (FM Stereo-Modus)
Wechsel zwischen Stereo- und Mono-Empfang - Mono kann bei Sendern mit schwachem
Signal ein besseres Ergebnis liefern. Der aktuelle Modus wird in der oberen Zeile angezeigt.
Drücken Sie +/- um die Optionen zu sehen und drücken Sie Select um eine auszuwählen.
LCD backlight (LCD-Beleuchtung)
Stereo
Mono
FM Stereo-Optionen
Siehe Seite 23 für Details.
Sw version
Siehe Seite 25 für Details.
27
Verwenden des Sleep Timers
Sie können einen Sleep Timer setzen nach welchem Ihr Élan selbst in den Standby-Modus
wechselt, ideal wenn Sie zu Ihrer Lieblingssendung einschlafen möchten.
Einstellen des Sleep Timers
Classic FM
Sleep 30
Sleep Timer-Einstellung
Classic FM
stress-free mix
Sleep Timer-Anzeige
Halten Sie die Sleep-Taste gedrückt, drücken Sie sie erneut bis Sie die gewünschte Zeit 15, 30,
45, 60 oder 90 Minuten sehen oder wählen Sie ‘Sleep off’ um den Sleep Timer nicht zu aktivieren.
Warten Sie ein paar Sekunden bis das Gerät wieder in den Radiobetrieb zurückkehrt. Eine Sleep
Timer-Anzeige erscheint auf dem Display, die anzeigt, dass der Sleep Timer eingeschaltet ist.
Halten Sie die Sleep-Taste erneut gedrückt um die verbleibende Zeit bis zum Ausschalten des
Élan zu sehen oder diese zu ändern.
Ausschalten des Sleep Timers
Classic FM
Sleep off
Sleep Timer - Ausschalten
28
Halten Sie die Sleep-Taste gedrückt, es wird die verbleibende Zeit angezeigt. Drücken Sie sie
erneut, bis ‘Sleep off’ ausgewählt ist. In wenigen Sekunden kehrt Ihr Élan in den Radiobetrieb
zurück und der Sleep Timer ist ausgeschaltet.
Verwenden von Batterien
Um Ihren Élan mit Batterien zu betreiben müssen Sie den Batteriefachdeckel auf der
Geräteunterseite öffnen und sechs Typ ‘C’-Batterien einsetzen. Die Abbildung im Innern des
Fachs zeigt Ihnen, wie die Batterien korrekt eingesetzt werden müssen.
Im Batteriebetrieb zeigt die Ladezustands-Anzeige an, in welchem Zustand sich die
eingesetzten Batterien befinden.
Wenn Sie wiederaufladbare Batterien verwenden (NiMh or NiCd), werden diese durch das
Anschliessen des Netzadapters nicht aufgeladen. Verwenden Sie ein separates Ladegerät
zum Aufladen Ihrer Batterien.
JAZZFM
Best Variety Of
Batteriebetrieb - Ladezustand voll
talkSPORT
- the nation's f
Batteriebetrieb - Ladezustand niedrig
Sobald Ihr Élan ans Stromnetz angeschlossen wird, wird die Stromzufuhr von den Batterien
unterbrochen. Um zum Batteriebetrieb zurückzukehren ziehen Sie das Netzkabel raus.
29
Tipps und Tricks
(<</>>) Zusatzdienste
Zusatzdienste werden von einigen Sendern übertragen. Sie bieten Zusatzinformationen oder andere Inhalte und werden möglicherweise
nur zu bestimmten Zeiten gesendet. Zusatzdienste werden zur Zeit als diese Anleitung geschrieben wurde, nur von wenigen Sendern
angeboten. Bietet ein Sender Zusatzdienste an, wird ‘>>’ neben dem Namen in der Senderliste angezeigt und der Zusatzdienst erscheint
in der Liste neben dem Sender. Ein Zusatzdienst hat ‘<<’ vor dem Namen in der Senderliste.
(?) Inaktive oder nicht verfügbare Sender
Inaktive oder nicht verfügbare Sender sind Sender, die sich in der Senderliste befinden, aber zur Zeit nicht verfügbar sind. Dies kann darin
begründet sein, dass Sie sich ausserhalb des Empfangsgebiets befinden oder der Sender momentan nicht sendet. Nicht verfügbare Sender
haben in der Senderliste ein ‘?’ vor ihrem Namen. Haben Sie einen solchen Sender gewählt, so kehrt der Élan zum zuletzt gehörten Sender zurück.
Bei einigen Sendern sind Störgeräusche wahrnehmbar
Auch wenn DAB exzellente Audioqualität ermöglicht, kann die Qualität leiden, wenn das Signal zu schwach ist. Ist dies der Fall, können
zweitweise Störungen auftreten. Um diese zu reduzieren, prüfen Sie, ob die Antenne voll ausgezogen und senkrecht ausgerichtet ist. Besteht
das Problem weiterhin, wechseln Sie den Standort Ihres Élan oder richten die Antenne mit Hilfe von ‘Manual tune’ neu aus (siehe Seite 24).
Display-Anzeige ‘No stations available’
Überprüfen Sie ob die Antenne voll ausgezogen ist. Suchen Sie mit Autotune nach neuen Sendern. Richten Sie mit Manual tune Ihr Radio und die Antenne aus.
Die angezeigte Uhrzeit ist falsch
Dies kann vorkommen, wenn der eingestellte Sender ein falsches Zeitsignal aussendet. Versuchen Sie einen anderen Sender zu wählen.
Radio auf Werkseinstellungen zurücksetzen
Das Rücksetzen des Élan löscht alle Einstellungen, Speicherplätze und Favoritensender und setzt sie auf die Standardwerte zurück. Gehen Sie wie folgt vor:
1. Halten Sie die Menu-Taste für ca. 3 Sekunden gedrückt. Im Display wird ‘Press Select to confirm reset’ angezeigt.
2. Drücken Sie Select um zu bestätigen und die Rücksetzung durchzuführen oder warten Sie bis die Anzeige erlöscht um abzubrechen.
30
Technische Daten
Allgemein
Stereo-DAB-Digital- und FM-Radio mit vollem Band III-Empfang, für den Empfang aller Schweizer
DAB-Sender. Zugelassen gemäss ETS 300 401 und fähig, alle DAB-Übertragungsmodi 1-4 bis zu und
einschliesslich 256 KB/sec. zu decodieren.
Lautsprecher
Zwei 3" Antriebseinheiten mit vollem Spektrum.
Frequenzbereich
DAB – Band III (174-240 MHz), mit schnellem Autotuning
FM – 87.5-108 MHz
Antenne
Integrierte Teleskopantenne
Eingänge
9V DC auf 230V AC Netzadapter (im Lieferumfang)
Ausgänge
3.5mm Kopfhöreranschluss
Bedienelemente
Power on/Standby & Sleep, DAB/FM-Wähltaste, Lautstärkeregler, Vorwahltasten, Tune und Select,
Menu und Anzeige-Info.
LCD Display
Leicht ablesbares LCD-Display mit 16 x 2 Zeichen und Statusanzeige.
Netzanschluss
externer Netzadapter 230V AC auf 9V DC
Batteriebetrieb
6 Typ ‘C’ Batterien. Batterielaufzeit: FM bis zu 80 Stunden/DAB bis zu 30 Stunden bei normaler
Lautstärke. Standby-Mode mit sehr tiefem Strombedarf.
Zulassungen
CE-Kennzeichnung. Erfüllt die EMV- und die Niederspannungsrichtlinien (89/336/EEC und 73/23/EEC).
Abmessungen
280 mm (Breite) x 168 mm (Höhe) x 80 mm (Tiefe)
31
Introduction
Nous vous remercions de l’achat de votre radio stéréo DAB/FM PURE Élan.
Dans ce mode d’emploi, vous trouverez toutes les informations sur le fonctionnement
de la radio, et nous expliquons les démarches à suivre lorsque l’appareil ne
fonctionne pas correctement. Avant de mettre l’appareil en marche, prenez le temps
de lire le consignes de sécurité et de vous familiariser avec toutes les fonction de la
radio.
Consignes de sécurité et avis importants
Gardez la radio loin des sources de chaleur.
Ne faites pas fonctionner la radio à proximité de l’eau.
Veillez à ce que ni des liquides, ni quelque objet que ce soit ne pénètrent à l’intérieur de la radio.
N’essayez jamais d’ouvrir le boîtier de la radio, et veillez à ce que les vis restent toujours en place.
Retirez les piles de l’appareil lorsque vous ne l’utilisez pas pendant une période prolongée, ou lorsque les piles se sont
déchargées.
Lorsque vous branchez la radio à la prise de courant, utilisez seulement l’adaptateur-secteur de 9V fourni.
33
Eléments de commande et connexions
Connecteurs et boutons de commande sur le côté supérieur
Power/Sleep
Volume +/-
Mise en marhe/arrêt;
minuterie présommeil
Réglage du
volume
Touches de présélection (1-4)
et pour accéder aux numéros
5
-
8
Accès rapide aux stations radio mémorisées
Menu
Antenne
Modification des réglages de
base et des paramètres audio
Antenne télescopique
orientable
Prise casque
Pour brancher
un casque ou
des écouteurs
avec une fiche
jack de 3.5 mm
(les haut-parleurs
de l’appareil sont
automatiquement
désactivés)
-
+
Menu
Info
DAB/FM
Afficheur LCD
+/- et Select
Info
Commutation entre DAB et FM
Afficheur LCD rétroéclairé
Syntonisation des stations
radio et sélection dans
le menu
Changement entre
les différents modes
de l’affichage
Connecteurs sur le côté arrière
9V DC
34
Select
9V DC
Prise pour
l’adaptateursecteur
Côté inférieur
Compartiment à piles
L’appareil est alimenté
par 6 piles du type C/LR14.
Ouvrir le compartiment
en poussant le couvercle
dans la direction de la flèche.
Afficheur LCD
ST
Réception
en stéréo
DAB/FM
Sleep timer
Mode de
fonctionnement
actuel
Minuterie
présommeil
active
Horloge
Puissance du signal
Signal horaire
DAB
de la station DAB actuellement
réglée (7 niveaux)
Volume
Affichage du
niveau sonore
(14 niveaux)
Pile
Texte
Etat des piles
(5 niveaux)
Cases pour l’affichage du texte
16 x 2 caractères
35
Démarrage rapide
Ce chapitre explique brièvement le fonctionnement de base de la radio PURE Élan.
9V DC
36
9V DC
Prise pour
l’adaptateursecteur
1
Etendez l’antenne télescopique au maximum. Branchez l’appareil à la prise de courant
ou insérez six piles du type C/LR14 dans le compartiment. L’afficheur LCD s’allume
et « PURE Elan » s’affiche. Une barre sur la deuxième ligne de l’afficheur indique la
progression de la syntonisation automatique DAB qui cherche toutes les stations
DAB disponibles dans votre région. Les stations identifiées sont automatiquement
enregistrées en ordre alphanumérique, et l’appareil se règle ensuite sur la première
station de la liste.
2
Réglez le volume sur le niveau désiré.
3
Appuyez sur les touches +/- pour afficher toutes les stations enregistrées. Appuyez sur la
touche « Select » pour choisir une autre station.
4
Appuyez plusieurs fois sur la touche « Info » pour changer entre les différents modes de
l’affichage DAB.
5
Appuyez sur la touche DAB/FM pour écouter une station radio de la bande FM.
Comment utiliser DAB
Appuyer sur la touche DAB/FM jusqu’à ce que l’afficheur indique « DAB » pour écouter une
station radio digitale. Si vous avez choisi le mode DAB pour la première fois, l’appareil se règle
sur la première station DAB enregistrée ; autrement vous entendrez la station DAB que vous avez
écouté la dernière fois.
1Xtra - BBC
Bringing you hot
Affichage DAB standard
Sélectionner autre station
Vous pouvez choisir une autre station radio en appuyant sur les touches +/- et Select, ou en
utilisant les touches de présélection numérique.
1. Appuyez sur la touche + ou – pour parcourir la liste des stations radio. Les noms des
stations radio sont affichés sur la première ligne de l’écran.
2. Appuyez sur la touche Select pour choisir la station désirée.
Si un point d’interrogation ( ?) s’affiche devant le nom de la station radio, la station n’est pas
disponible actuellement soit parce que la réception est perturbée, soit parce que l’émetteur
ne transmet un programme en ce moment. Vous pouvez effacer cette station de la liste avec
la fonction « Trim stn.list » (voir la page 40).
1Xtra - BBC
Virgin
Sélection d’une autre station
Utiliser les touches de présélection
Les touches numériques et permettent d’enregistrer 8 stations DAB (et 8 stations FM)
sous une touche de présélection pour l’accès rapide. L’appareil possède également une
fonction pour l’enregistrement automatique (voir la page 39).
Vous pouvez attribuer un numéro de présélection à une station radio au moment d’écouter
cette station, ou lorsque vous êtes en train de parcourir la liste des stations et lorsque le
nom de la station radio apparaît sur la deuxième ligne de l’afficheur. Appuyez sans lâcher sur
les touches 1-4 pour enregistrer une station radio sous un numéro de 1 à 4.
Virgin Radio
Preset 1 saved
Programmation d’une touche
de présélection
37
Virgin Radio
oday's best musi
Mode Info – défilement de texte
Virgin Radio
18:36 27-08-2004
Mode Info – heure et date
Pour les numéros 5-8, appuyez brièvement sur la touche et appuyez ensuite sans lâcher
sur la touche numérique désirée ( 5 - 8 ).
Si vous avez enregistré une station radio sous un numéro de présélection, le numéro choisi
s’affiche à côté du nom de la station dans la liste des stations radio.
Pour accéder à une station enregistrée sous les numéros 1-4, il suffit d’appuyer sur la touche
numérique correspondante. Pour choisir une des stations 5-8, appuyez d’abord sur et
ensuite sur la touche numérique désirée ( 5 - 8 ).
Changer les informations affichées
Appuyez sur la touche Info pour changer les informations qui sont affichées sur la deuxième
ligne de l’afficheur.
Scrolling text
Program Type
Multiplex
Heure et date
Virgin Radio
11D 222.06MHz
Mode Info – canal et fréquence
Canal
Mode
Signal quality
38
Affichage standard, transmis par la majorité des stations.
Affichage du type du programme.
Affiche le Multiplex auquel appartient la station actuellement réglée.
Multiplex est un groupe de stations radio, qui appartient à et est transmis
par un certain fournisseur Multiplex.
L’affichage de l’heure et de la date est régulièrement mis à jour par la
station radio actuellement réglée. Si la radio était débranchée de la prise
de courant, vous devez peut-être attendre pendant un bref instant jusqu’à
ce que ces informations s’affichent.
Canal et fréquence Multiplex
Indicateur stéréo ou mono, et affichage de la vitesse de transmission du signal. Une
vitesse de transmission plus élevée signifie généralement une meilleure qualité.
Une valeur entre 85 et 100 indique une bonne qualité de réception. Un
chiffre entre 70 et 84 signifie une réception moyenne, et les valeurs 0-69
indiquent une faible qualité de réception.
Réglages DAB
Appuyez sur la touche du menu et ensuite sur +/- et Select pour choisir entre les options
suivantes.
LCD backlight (Options éclairage de l’afficheur)
Vous pouvez déterminer si l’afficheur reste éclairé en permanence, ou si la lumière s’éteint
peu de temps après avoir appuyé sur une touche de la radio.
Appuyez sur les touches +/- pour afficher les différentes options, et appuyer sur Select pour
choisir l’option désirée :
Timed Off
L’éclairage s’allume au moment d’appuyer sur une touche, et s’éteint après
cinq secondes environ si vous n’appuyez sur aucune autre touche de
l’appareil. Nous recommandons de choisir cette option lorsque l’appareil
est alimenté par des piles.
Always On
L’éclairage de l’afficheur est toujours allumé.
Always On
Timed Off
Options éclairage de l’afficheur
Station order (L’ordre des stations)
Cette fonction permet de changer l’ordre des stations radio dans la liste. Appuyez sur les touches
+/- pour afficher les différentes options, et appuyez sur Select pour choisir l’option désirée.
Alphanumeric Affiche toutes les stations radio en ordre alphanumérique.
Fav station
Affiche les six stations radio que vous écoutez le plus souvent, et ensuite
les autres stations en ordre alphanumérique. Les stations préférées sont
indiquées par le symbole qui s’affiche à côté du nom de la station.
Active station Affiche d’abord toutes les stations actives et ensuite les stations inactives,
en ordre alphanumérique. Les stations inactives sont toujours inclus dans
Alphanumeric
Fav station
Menu de la liste des stations radio
39
Multiplex
Trim stn. list
→ presets
Autotune...
12
Option Autotuning UK bande III
la liste, mais elles ne sont pas disponibles en ce moment et indiquées par
un « ? ».
Les stations radio sont divisées en groupes, selon leur type Multiplex.
Multiplex est un groupe de stations radio qui appartient à et est transmis
par un fournisseur Multiplex.
Cette fonction efface les stations inactives de la liste.
Cette fonction est seulement disponible en mode « Fav station ». Elle
attribue vos stations préférées aux huit numéros de présélection.
Autotune UK
Balaye toutes les fréquences anglaises pour les stations DAB, et ajoute des stations radio à la liste.
Autotune full
Balaye toute la gamme digitale de la bande III. Choisissez cette option dans les régions en
dehors de l’Angleterre, où vous pouvez recevoir d’autres stations sur la bande III.
12B
225.64MHz
Syntonisation manuelle – canal
12B
225.64MHz
Syntonisation manuelle – signal faible
12B
BBC DAB
Syntonisation manuelle – signal suffisant
40
Manual tune (Syntonisation manuelle)
Affichage de la puissance du signal. Cette fonction peut vous aider à trouver la meilleure
position pour la radio et l’antenne.
1. Appuyez sur les touches +/- pour parcourir les différents canaux, et appuyez sur Select
pour choisir le canal désiré (les stations radio suisses se trouvent sur 12C et 12B).
L’afficheur indique la puissance du signal reçu. La case vide indique la puissance
minimale qui est nécessaire pour une bonne qualité de réception. Les cases noires
indiquent la puissance du signal actuelle.
2. Orientez l’antenne dans plusieurs directions et observez toujours l’affichage de la
puissance du signal. Essayez d’augmenter la puissance (c.-à-d. le nombre de cases noires)
en tournant la radio et l’antenne. Si vous avez capté un signal suffisamment fort, le nom de
3.
Multiplex apparaît sur l’afficheur et la station est ajouté à la liste des stations radio.
Appuyez sur la touche du menu pour quitter « Tuning aid », ou choisissez une autre
station avec les touches +/- et Select.
Remarque : Vous pouvez afficher la puissance du signal à n’importe quel moment en
appuyant sur Select.
DRC value (Valeur DRC)
La valeur DRC (Dynamic Range Control) rend les sons faibles plus audibles lorsque vous
écoutez une station radio à un moindre niveau sonore ou dans un environnement bruyant.
Le niveau DRC d’une émission est déterminé par le transmetteur, et il est transmis avec le
signal. Renseignez-vous auprès de votre transmetteur pour savoir s’il utilise des valeurs DRC.
DRC 0
DRC 1
Valeur DRC
Appuyez sur les touches +/- pour afficher les différentes options, et appuyez sur Select pour
choisir l’option désirée :
DRC 0
DRC 1/2
DRC 1
DRC est désactivé. L’appareil ne tient pas compte du niveau DRC qui est
éventuellement transmis avec le signal.
Le niveau DRC est réduit à la moitié du niveau transmis.
Utilise le niveau DRC transmis dans le rapport 1:1.
Sw version (Version du logiciel)
Affiche la version actuelle du logiciel qui est installé dans la radio. Tenez ces information à
portée de main lorsque vous contactez le support technique.
v1.0
Sw version
Version du logiciel
41
87.50MHz
Affichage FM standard
Searching... > .
Recherche de stations automatique
Ecoute d’une station FM
Pour écouter une station FM, appuyez sur la touche DAB jusqu’à ce que l’afficheur indique « FM ».
Si vous avez choisi la gamme FM pour la première fois, l’appareil se place automatiquement au
début de la gamme de fréquence. Autrement vous entendrez la station FM que vous avez écouté
en dernier.
Sélection d’une autre station
Vous pouvez choisir une autre station FM en appuyant sur les touches +/- ou sur une
des touches de présélection. Appuyez sur la touche + ou – pour parcourir la gamme de
fréquences en avant ou en arrière. L’indication « Searching… » s’affiche pendant la recherche
d’une station.
Vous pouvez également chercher une station manuellement en balayant la gamme de
fréquences pas à pas en avant ou en arrière (voir la section « Mode de syntonisation FM » sur
la page 43).
98.20MHz
Preset 1 saved
Programmation d’une touche de
présélection
42
Utiliser les touches de présélection
Les touches numériques et permettent d’enregistrer 8 stations FM sous un numéro de
présélection pour l’accès rapide. Ces présélections sont seulement disponibles en mode FM,
et s’ajoutent à celles que vous pouvez utiliser en mode DAB.
Pour choisir un des numéros 1-4, appuyez sans lâcher sur la touche numérique
correspondante. Si vous souhaitez enregistrer une station FM sous un numéro de 5 à 8,
appuyez brièvement sur la touche et appuyez ensuite plus longtemps sur la touche
numérique correspondante ( 5 - 8 ).
Pour écouter une station enregistrée sous un numéro de 1 à 4, il suffit d’appuyer sur la
touche avec le numéro correspondant. Pour choisir une des stations 5-8, appuyez d’abord sur
et ensuite sur une des touches ( 5 - 8 ).
Réglages en mode FM
Appuyez sur la touche du menu et ensuite sur les touches +/- et Select pour choisir entre les
options suivantes :
FM Tuning mode (Mode de syntonisation FM)
Seek Tune
Manual Tune
Mode de syntonisation FM
Cette fonction change le mode de syntonisation sur la gamme FM. Le mode de syntonisation
actuel est affiché sur la première ligne de l’afficheur. Appuyez sur les touches +/- pour
afficher les différentes options, et appuyez sur Select pour choisir l’option désirée :
Seek Tune
Manual Tune
L’appareil cherche automatiquement la prochaine station FM avec une bonne
qualité de réception
Permet de parcourir manuellement la gamme de fréquences à intervalles de 0.05 MHz
FM Stereo mode (Options FM stéréo)
Changement entre la réception monaurale et stéréophonique. Si le signal reçu n’est pas
assez fort, vous pouvez améliorer la qualité du son en passant en mode mono. Le mode de
réception actuel est affiché sur la première ligne de l’afficheur.
Appuyez sur les touches +/- pour afficher les différentes options, et appuyez sur Select pour
choisir l’option désirée.
Stereo
Mono
Options FM stéréo
LCD backlight
Voir la page 39 pour plus de détails.
Sw version (Version du logiciel)
Voir la page 41 pour plus de détails.
43
Minuterie présommeil
Avec cette fonction, vous pouvez programmer une durée de fonctionnement après laquelle la radio
passe en mode stand-by, et ainsi vous endormir en écoutant votre station radio préférée.
Réglage de la minuterie
Classic FM
Sleep 30
Réglage de la minuterie présommeil
Classic FM
stress-free mix
Affichage de la minuterie présommeil
Classic FM
Sleep off
Minuterie présommeil désactivée
44
Maintenez appuyée la touche Sleep, puis réappuyez sur cette touche jusqu’à ce que
l’afficheur indique la durée de fonctionnement désirée (15, 30, 45, 60 ou 90 minutes), ou
choisissez l’option « Sleep off » pour désactiver la minuterie.
Attendez quelques secondes jusqu’à ce que l’appareil retourne au mode de la radio. Le
symbole de l’horloge apparaît sur l’afficheur pour indiquer que la minuterie présommeil est
activée.
Réappuyez sur la touche Sleep et maintenez-la appuyée pour afficher le temps de
fonctionnement restant ou pour changer la durée de fonctionnement.
Désactiver la minuterie
Maintenez appuyée la touche Sleep ; l’afficheur indique la durée de fonctionnement restante.
Réappuyez sur cette touche jusqu’à ce que l’afficheur indique « Sleep off ». Quelques
secondes plus tard, l’appareil retourne au mode de la radio et la minuterie présommeil est
désactivée.
Alimentation à piles
Le compartiment à piles se trouve sur le côté inférieur de la radio. Ouvrez le couvercle et
insérez six piles du type C/LR14/Baby dans le compartiment. Respectez les indications à
l’intérieur du compartiment pour la polarité correcte.
Le symbole de la pile sur l’afficheur vous indique toujours la capacité actuelle des piles.
Si vous utilisez des piles rechargeables, il faut les recharger avec un chargeur de piles
externe. Il n’est pas possible de charger les piles en branchant l’appareil à la prise de courant
avec l’adaptateur-secteur fourni.
JAZZFM
Best Variety Of
Piles entièrement chargées
talkSPORT
- the nation's f
Piles faibles
L’alimentation à piles est coupée lorsque la radio est branchée à la prise de courant. Il faut
débrancher l’appareil de la prise-secteur pour qu’il soit de nouveau alimenté à piles.
45
Conseils et astuces
(<</>>) Services complémentaires
Quelques stations radio transmettent des services complémentaires. Il transmettent des informations ou des programmes supplémentaires,
probablement seulement quelques heures par jour. Lors de la rédaction du présent mode d’emploi, peu de stations radio proposaient des
services complémentaires. Si une station transmet des services complémentaires, l’indication « >> » s’affiche à côté du nom de la station
dans la liste, et le type de service est affiché dans liste à côté du nom de la station. Le service complémentaire est précédé de « << ».
(?) Stations inactives ou inaccessibles
Les stations inactives ou inaccessibles sont les stations radio qui se trouvent sur la liste, mais qui ne sont pas disponibles en ce moment. La raison est
que vous vous trouvez en dehors de la zone de réception, ou que la station ne transmet pas un programme en ce moment. Les stations inactives sont
indiquées par le signe « ? ». Si vous avez choisi une de ces stations, l’appareil retourne automatiquement à la station radio précédemment réglée.
La réception de certaines stations radio est perturbée
Bien que le système DAB permette une qualité audio excellente, la qualité du son se dégrade si le signal reçu est trop faible. Dans ce cas, vous
entendrez des bruits sur certaines stations radio. Pour diminuer les bruits, vérifiez si l’antenne est entièrement étendue et placée en position verticale. Si
le problème persiste, placez la radio dans un autre endroit ou réorientez l’antenne en utilisant la fonction « Manual tune » (voir la page 40).
L’afficheur indique « No stations available »
Vérifiez si l’antenne est entièrement étendue. Démarrez la fonction « Auto tune » pour chercher une autre station radio. Réorientez la
radio et l’antenne avec la fonction « Manual tune ».
L’afficheur n’indique pas l’heure correcte
Ceci arrive lorsque la station radio sélectionnée transmet un faux signal horaire. Essayez de chercher une autre station radio.
Réinitialisation de l’appareil
Si la radio est remise à l’état initial, tous les réglages (y compris les présélections pour vos stations radios préférées) sont effacés. La
réinitialisation est effectuée de la manière suivante :
1. Appuyez sur la touche du menu pendant 3 secondes environ. L’afficheur indique « Press Select to confirm reset ».
2. Appuyez sur la touché Select pour confirmer et remettre l’appareil à l’état initial, ou attendez que l’affichage disparaisse pour
interrompre la réinitialisation et garder les réglages en mémoire.
46
Spécifications techniques
Général
Radio FM/DAB stéréo digitale, avec pleine couverture de la bande III pour les stations DAB suisses.
Certifié ETS 300 401 et capable de décoder tous les modes de transmission DAB 1-4 jusqu’à 256
KO/sec.
Haut-parleur
Deux haut-parleurs full range de 3 »
Gamme de fréquences Bande DAB III (174-240 MHz), avec syntonisation automatique (Autotuning) rapide
FM 87.5 – 108 MHz
Antenne
Antenne télescopique intégrée
Prise d’entrée
Prise pour l’adaptateur-secteur (inclus) : DC 9V / AC 230V
Prise de sortie
Prise casque de 3.5 mm
Eléments de commande Power on/Standby & Sleep, sélecteur DAB/FM, réglage du volume, touches de présélection, Tune et
Select, touche Menu et sélecteur de l’affichage
Afficheur LCD
Afficheur LCD bien lisible, avec 16 x 2 caractères et indication de l’état de fonctionnement
Branchement au secteur Adaptateur-secteur externe (AC 230V / DC 9V)
Alimentation à piles 2 piles du type « C ». Durée des piles : jusqu’à 80 heures en mode FM et jusqu’à 30 heures en mode
DAB (avec un niveau sonore normal). Très faible consommation de courant en mode stand-by.
Conformité
Conformité CE. Conforme aux directives EMV et de basse tension (89/336/EEC et 73/23/EEC)
Dimensions
280 mm (largeur) x 168 mm (hauteur) x 80 mm (profondeur)
47
Introduzione
Tante grazie per aver scelto una radio stereo DAB/FM PURE Élan.
Questa istruzione le mostra come usare la sua radio, qualora dovessero presentarsi
dei problemi. Dedichi due o tre minuti per la lettura di questa guida in modo da
conoscere tutte le funzioni della sua radio. Legga in basso le indicazioni sulla
sicurezza.
Indicazioni sulla sicurezza
Tenga la radio lontana da fonti di calore.
Non utilizzi la radio vicino all’acqua.
Eviti che oggetti o liquidi cadano nella radio.
Non tiri le viti dalla cassa e non l’apra.
Tolga le pile se non sono utilizzate per un lungo periodo o se sono scariche.
Adoperi, per l’alimentazione a rete, solamente l’adattatore 9V fornito.
49
Elementi di comando e prese
Parte superiore – elementi di comando e prese
Power/Sleep
Volume +/-
Accensione/spegnimento
e sleep timer
Regolazione del
volume
Tasti di preselezione (1-4) e per
selezionare i tasti di preselezione
-8
Accesso rapido alle emittenti memorizzate
Cuffia
-
Presa cuffia 3.5mm
(Altoparlanti
passano su mute)
Menu
Antenna
Per cambiare le regolazioni
generali e audio
Antenna telescopica
regolabile
Select
+
Menu
Info
DAB/FM
Schermo LCD
+/- e Select
Info
Commutazione tra
DAB e FM (UKW)
Schermo LCD illuminato
Visione e selezione di emittenti
o di opzioni del menu
Commutazione trai i
vari modi di visualizzazione
Retro - prese
9V DC
50
5
9V DC
Presa per
adattatore rete
Parte inferiore
Scomparto di pile
Sono necessarie 6 pile del tipo 'C'.
Spingere per togliere il coperchio.
Display LCD
ST
DAB/FM
Sleep timer
Orologio
Potenza del segnale
Trasmissione
stereofonica
Modalità
attuale
Sleep timer
attivo
Segnale
orario DAB
Per emittente DAB attuale
7 livelli
Volume
Indicazione
del volume
(14 livelli)
Pile
Caselle di testo
Stato delle pile
(5 livelli)
16 x 2 segni
Caselle visualizzanti testo
51
Avvio rapido
Ecco come può far „camminare“ rapidamente il suo Élan.
9V DC
52
9V DC
Presa per
adattatore rete
1
Allunghi completamente l’antenna telescopica, colleghi l’apparecchio alla corrente o
introduca sei pile del tipo ‘C’. Il display LCD s’illumina indicando ‘PURE Elan’, una barra
sulla linea in basso indica l’avanzamento dell’autotuning DAB che cerca quelle emittenti
DAB ricevibili nel suo apparecchio. Le emittenti trovate vengono memorizzate in ordine
alfanumerico e la prima emittente dell’elenco viene riprodotta.
2
Regoli il volume, se necessario.
3
Utilizzi i tasti +/- per vedere tutti le emittenti disponibili. Prema „select’ per selezionare
un’altra emittente.
4
Prema ripetutamente il tasto ‘info’ per scorrere attraverso tutti i modi di visualizzazione
DAB in opzione.
5
Prema il tasto ‘DAB/FM’ per passare nella modalità FM e per sentire le emittenti FM.
Impiego di DAB
Prema il tasto DAB/FM fino a che non venga visualizzato il simbolo DAB, per ascoltare
un’emittente radiofonica digitale. Se si è sintonizzata su DAB per la prima volta, ascolti la prima
emittente dell’elenco, altrimenti quella che ha ascoltato per ultima.
1Xtra - BBC
Bringing you hot
Indicazione DAB standard
Cambio dell’emittente
Con +/- e select o premendo un tasto di preselezione numerato può cambiare le emittenti.
1.
Prema il tasto + o - per sfogliare l’elenco e trovare l’emittente desiderata.
L’emittente attuale viene indicata nella linea superiore del display.
2. Prema il tasto select per cambiare l’emittente.
Se davanti al nome dell’emittente viene indicato un ‘?’, allora l’emittente non è al momento
disponibile, o perché non c’è connessione o perché la stazione non trasmette. Tramite la
funzione ‘Trim stn. list’ può rimuoverla dall’elenco delle emittenti (vedi pagina 56).
1Xtra - BBC
Virgin
Cambio dell’emittente
Utilizzo dei tasti di preselezione
I tasti numerici e le permettono l’assegnazione di mass. 8 emittenti DAB (e 8 FM) a
un tasto di preselezione per un accesso facile e rapido. Le sue 8 emittenti preferite può
assegnarle automaticamente anche ai tasti di preselezione (vedi l’ordine delle emittenti su
pagina 55).
Un’emittente può essere assegnata a un tasto di preselezione, se lei la sente o, mentre
sfoglia l’elenco delle emittenti, qualora il suo nome fosse indicato sulla linea inferiore del
display. Per i tasti di preselezione da 1 a 4 tenga schiacciato il tasto numerico desiderato.
Per i tasti di preselezione da 5 a 8 prema brevemente il tasto e poi tenga schiacciato il
tasto numerico desiderato ( 5 - 8 ).
Virgin Radio
Preset 1 saved
Stato di occupato di
un tasto di preselezione
53
Dopo che avrà assegnato un’emittente a un tasto di preselezione, il numero corrispondente
sarà indicato nell’elenco delle emittenti, accanto al nome dell’emittente.
Per richiamare un tasto di preselezione da 1 a 4 prema l’apposito tasto numerico. Per
richiamare un tasto di preselezione da 5 a 8 prema prima e poi un tasto numerico ( 5 - 8 ).
Cambiamento dell’informazione indicata
Virgin Radio
oday's best musi
Prema il tasto d’informazione per cambiare l’informazione indicata sulla linea inferiore.
Modalità informativa - testo scorrevole
Testo scorrevole
Virgin Radio
18:36 27-08-2004
Modalità informativa - orario e data
Virgin Radio
11D 222.06MHz
Modalità informativa
- emittente e frequenza
54
Modalità standard, viene trasmesso dalla maggiore parte delle
stazioni.
Tipo di programma Viene indicato il tipo del contenuto.
Multiplex
Multiplex al quale appartiene l’emittente attuale. Multiplex è un gruppo
di emittenti che appartiene a un gestore multiplex che trasmette
questo gruppo.
Orario e data
Vengono regolarmente aggiornati dall’emittente in onda. Se il suo Élan
era staccato dalla rete, all’accensione può verificarsi un breve ritardo
fino al momento in cui sarà indicato l’orario.
Emittente
Emittente e frequenza multiplex.
Modalità
Indicatore stereo o mono e data-rate (velocità di trasferimento dati)
attraverso cui viene trasmesso il segnale. Questo viene regolato
dall’emittente, a seconda del tipo di trasmissione. Un velocità più
elevata significa normalmente una migliore qualità.
Qualità del segnale Valori tra 85 e 100 indicano una buona ricezione, tra 70 e 84 un
valore medio e tra 0 e 69 una pessima ricezione.
Regolazioni DAB
Prema il tasto menu, scorra con +/- e prema select per selezionare una delle seguenti
regolazioni.
LCD backlight (Illuminazione LCD)
Decida se vuol tenere l’illuminazione del display sempre accesa o se venga spenta poco
dopo il premere di un tasto.
Prema +/- per visualizzare le regolazioni e selezionatene una mediante select:
Timed Off
L’illuminazione si accende quando viene premuto un tasto e si rispegne
dopo ca. cinque secondi, se che non viene schiacciato nessun altro tasto.
Questa regolazione è raccomandata nell’alimentazione a pile.
Always On
L’illuminazione resta sempre accesa.
Station order (Ordine delle emittenti)
Per cambiare l’ordine delle emittenti nel suo elenco delle emittenti. Scorra con +/- attraverso
le seguenti opzioni e prema select per selezionarne una:
Alphanumeric
Indica tutti le emittenti in ordine alfanumerico.
Fav station
Indica per primo le sue sei emittenti più ascoltate in ordine alfanumerico
e poi le altre. Le sue emittenti favorite vengono contrassegnate con un
accanto al loro nome.
Active station
Indica per primo tutte le emittenti attive, e quelle inattive alla fine – questo
in ordine alfanumerico. Le emittenti inattive si trovano nel elenco delle
emittenti, ma al momento non disponibili e segnate con un ‘?’.
Always On
Timed Off
Opzioni per l’illuminazione LCD
Alphanumeric
Fav station
Menu elenco delle emittenti
55
Multiplex
Trim stn. list
→ presets
Ordina le emittenti in gruppi, dipendenti dal loro multiplex. Multiplex è un
gruppo di emittenti che appartiene a un gestore multiplex che trasmette
questo gruppo.
Elimina dall’elenco delle emittenti le emittenti inattive.
Solamente disponibile se è stato selezionato ‘Fav station order’ (vedi
sopra). Colloca le sue emittenti favorite negli otto tasti di preselezione.
Autotune UK
Autotune...
12
Autotuning UK opzione banda III
Scannerizza tutte le frequenze inglesi per le stazioni DAB e ne aggiunge delle nuove all’elenco
delle emittenti.
Autotune full
Scannerizza l’intero campo digitale nella banda III. Questa opzione deve essere selezionata al
di fuori dell’Inghilterra dove sono disponibili altre stazioni di banda III.
Manual tune (Tuning manuale)
12B
225.64MHz
Tuning manuale - emittente
12B
225.64MHz
Tuning manuale – pessimo segnale
12B
BBC DAB
Tuning manuale – buon segnale
56
Indica il livello del segnale, serve a trovare la migliore posizione per la radio e l’antenna.
1. Scorra con +/- attraverso le varie emittenti e prema select per selezionarne una. (Le
emittenti svizzere si trovano su 12C e 12B). Un’indicazione del livello del segnale
apparirà sul display. La casella vuota segna il minimo livello necessario per la ricezione
e le caselle piene indicano il livello attuale.
2. Muova l’antenna, mentre osserva il display, e cerchi di portare il livello fino alla casella
vuota o più in alto. Se il segnale è buono, il nome del multiplex appare nel display e le
emittenti vengono aggiunte all’elenco delle emittenti.
3. Abbandoni il ‘tuning aid’ col tasto menu o cambi l’emittente con +/- e select.
Suggerimento Può far visualizzare il livello del segnale in qualsiasi momento premendo su select.
DRC value (Valore DRC)
Il valore DRC (Dynamic Range Control) rende percepibili i suoni più bassi provenienti da una
trasmissione a volume basso o da un ambiente rumoroso. Il livello DRC di una trasmissione
viene stabilito dall’emittente e trasmesso col segnale. Si rivolga alla sua emittente per sapere
se questa utilizza DRC. Prema +/- per scorrere attraverso le seguenti opzioni e prema il tasto
select per selezionarne una:
DRC 0
DRC è spento. Un eventuale livello DRC trasmesso viene ignorato.
DRC ½
Il livello DRC viene ridotto a ½ del livello trasmesso.
DRC 1
Adopera il livello DRC 1:1 trasmesso.
DRC 0
DRC 1
Valore DRC
Sw version (Versione software)
Indica l’attuale versione di software della sua radio. Tenga pronta questa informazione nel
momento in cui contatterà il supporto tecnico.
v1.0
Sw version
Versione software
57
87.50MHz
Indicazione FM standard
Utilizzo di FM (UKW)
Per poter ascoltare un’emittente FM, prema il tasto DAB/FM fino a che non sarà indicato il
simbolo FM.
Se si sarà sintonizzata per la prima volta su FM, il suo Élan partirà dall’inizio della banda di
frequenza, altrimenti sarà riprodotta l’emittente ascoltata per ultima.
Searching... > .
Seek tune – ricerca emittenti
Cambio dell’emittente
Cambi le emittenti col tasto + o -, o premendo un tasto di preselezione numerato.
Prema il tasto + o - per cercare nella banda di frequenza, verso sopra e sotto, l’emittente
desiderata. Durante la ricerca di un’altra emittente, sul display sarà indicato ‘Searching...’.
La ricerca di un’emittente è anche possibile manualmente – gradualmente verso su o giù
- (vedi modalità Tuning FM a pagina 59).
98.20MHz
Preset 1 saved
Stato di occupazione
di un tasto di preselezione
Utilizzo dei tasti di preselezione
I tasti numerici e le permettono di assegnare 8 emittenti FM a un tasto di preselezione
per un accesso facile e rapido. Questi otto posti di memoria sono accessibili
complementarmente a eventuali stazioni DAB memorizzate e solo nella modalità FM.
Per i tasti di preselezione da 1 a 4 tenga schiacciato il tasto numerico desiderato. Per i
tasti di preselezione da 5 a 8 prema brevemente il tasto e tenga poi schiacciato il tasto
numerico desiderato ( 5 - 8 ).
Per richiamare un tasto di preselezione da 1 a 4 prema l’apposito tasto numerico. Per
richiamare un tasto di preselezione da 5 a 8 prema prima e poi un tasto numerico ( 5 -
58
8
).
Regolazioni FM
Prema il tasto menu, scorra con +/- e prema select per selezionare una delle seguenti
regolazioni.
FM Tuning mode (Modalità tuning FM)
Serve a modificare il tipo di tuning. La modalità attuale viene indicata nella linea superiore
del display.
Prema +/- per visualizzare le opzioni e prema select per selezionarne una:
Seek tune
cerca automaticamente la prossima emittente FM
Manual tune le permette una ricerca manuale attraverso la frequenza in passi da 0.05 MHz.
Seek Tune
Manual Tune
Opzioni modalità tuning FM
FM Stereo mode (Modalità FM stereo)
Commutazione tra ricezione stereo e mono - mono può portare a dei migliori risultati nelle
emittenti dai segnali deboli. La modalità attuale viene indicata nella linea superiore.
Prema +/- per visualizzare le opzioni e prema select per selezionarne una.
Stereo
Mono
Opzioni FM stereo
LCD backlight (Illuminazione LCD)
Vedi pagina 55 per dettagli.
Sw version (Versione software)
Vedi pagina 57 per dettagli.
59
Utilizzo del sleep timer
Può attivare un sleep timer con il quale il suo stesso Élan passa nella modalità stand by,
ideale per quando desidera addormentarsi con la sua trasmissione preferita.
Attivazione del sleep timer
Classic FM
Sleep 30
Attivazione del sleep timer
Classic FM
stress-free mix
Indicazione del sleep timer
Tenga schiacciato il tasto sleep, lo premi di nuovo fino a quando non vedrà il tempo
desiderato 15, 30, 45, 60 o 90 minuti o selezioni ‘sleep off’ per non attivare il sleep timer.
Attenda alcuni secondi fino a che l’apparecchio non ritorni nel funzionamento radio.
Un’indicazione sleep timer apparirà quindi sul display e indicherà l’accensione del sleep timer.
Tenga schiacciato nuovamente il tasto sleep per visualizzare o modificare il tempo rimanente
fino allo spegnimento dell’Élan.
Spegnimento del sleep timer
Classic FM
Sleep off
Spegnimento del sleep timer
60
Tenga schiacciato il tasto sleep, quindi sarà indicato il tempo rimanente. Premi di nuovo il
tasto fino alla selezione di ‘Sleep off’. In pochi secondi, il suo Élan ritornerà nel funzionamento
radio e il sleep timer sarà spento.
Utilizzo delle pile
Per alimentare il suo Élan con pile deve aprire lo scomparto pile sul retro dell’apparecchio e
inserire sei pile del tipo ‘C’. L’illustrazione all’interno dello scomparto le mostra come inserire
correttamente le pile.
Nell’alimentazione a pile, l’indicatore dello stato di carica mostra lo stato delle pile inserite.
Quando utilizza pile ricaricabili (NiMh o NiCd), esse non saranno ricaricate attaccando
l’adattatore di rete. Utilizzi un caricabatteria separato per ricaricare le sue pile.
Non appena il suo Élan sarà collegato alla rete elettrica, l’alimentazione a pile sarà interrotta.
Per ritornare all’alimentazione a pile basta che tiriate fuori il cavo di rete.
JAZZFM
Best Variety Of
Alimentazione a pile
– stato di carica pieno
talkSPORT
- the nation's f
Alimentazione a pile
– stato di carica basso
61
Consigli e trucchi
(<</>>) Servizi complementari
I servizi complementari vengono trasmessi da alcune emittenti. Questi offrono ulteriori informazioni o altri contenuti e vengono trasmessi
probabilmente solo a orari precisi. I servizi complementari sono offerti, al momento in cui veniva scritta questa istruzione, solo da poche emittenti.
Qualora un’emittente offrisse dei servizi complementari, sarà indicato ‘>>’ accanto al nome nell’elenco delle emittenti e il servizio complementare
apparirà quindi nell’elenco vicino all’emittente. Un servizio complementare porta il segno ‘<<’ davanti al nome nell’elenco delle emittenti.
(?) Emittenti inattive o non disponibili
Emittenti inattive o non disponibili sono emittenti che si trovano nell’elenco delle emittenti, ma che al momento non sono disponibili. La
ragione di questo può essere che si trovano al di fuori del campo di ricezione o che l’emittente non trasmette nel preciso momento. Le
emittenti non disponibili hanno nell’elenco delle emittenti un ‘?’ davanti al loro nome. Se ha selezionato un’emittente del genere, in quel
caso l’Élan ritorna all’emittente ascoltata per ultima.
In alcune emittenti sono percepibili dei rumori derivati da disturbi
Anche se il DAB permette una qualità audio eccellente, la qualità stessa può risentirne se il segnale è troppo debole. Se ne è il caso,
a volte, possono presentarsi dei disturbi. Per ridurre questi, controlli se l’antenna sia allungata del tutto e disposta verticalmente. Se il
problema persiste, cambi la posizione del suo Élan o orienti l’antenna nuovamente con l’aiuto del ‘manual tune’ (vedi pagina 56).
Indicazione sul display ‘No stations available’
Controlli che l’antenna sia completamente allungata. Cerci mediante l’autotune nuove emittenti. Orienti tramite il manual tune la sua radio e l’antenna.
L’orario indicato è sbagliato
Questo può verificarsi quando l’emittente in onda trasmette un segnale orario sbagliato. Cerchi di selezionare un’altra emittente.
Spostare indietro la radio su regolazioni operative
Lo spostare indietro dell’Élan cancella tutte le regolazioni, gli spazi di memoria e le emittenti favorite e li riposiziona sui valori standard.
Proceda nella seguente maniera:
1. Tenga schiacciato il tasto menu per ca. 3 secondi. Nel display viene indicato ‘Press Select to confirm reset’.
2. Prema select per confermare e per eseguire il riposizionamento, o aspetti che si spenga l’indicazione, per interrompere.
62
Dati tecnici
In generale
Radio FM e stereo DAB digitale con piena banda ricezione III, per la ricezione di tutte le emittenti DAB
svizzere. Ammessa secondo ETS 300 401 e in grado di decodificare tutti i tipi di trasferimenti DAB da
1 a 4, compreso 256 kb/sec.
Altoparlanti
Due unità motrice 3” con gamma piena.
Gamma di frequenza DAB banda III (174-240 MHz), con autotuning rapido FM 87.5-108 MHz
Antenna
Antenna telescopica Integrata
Entrate
Adattatore di rete AC 9V DC su 230V (compreso nella consegna)
Uscite
Presa cuffia 3.5 mm
Elementi di comando Power on/stand by & sleep, tasto di selezione DAB/FM, regolatore del volume, tasti
di preselezione, tune e select, menu e indicazione informativa.
Display LCD
Display LCD facilmente leggibile con 16 x 2 segni e indicazione dello stato.
Presa della corrente Adattatore di rete esterno 230V AC su 9V DC
Alimentazione a pile 6 pile del tipo ‘C’. Autonomia delle pile: FM fino a 80 ore/DAB fino a 30 ore a
volume normale.
Modalità stand by con consumo energetico molto basso.
Ammissioni
Contrassegnazione CE. Risponde alle direttive EMV e a quelle della bassa tensione (89/336/EEC e
73/23/EEC).
Dimensioni
280 mm (larghezza) x 168 mm (altezza) x 80 mm (profondità)
63
www.pure.com
PURE Digital
Imagination Technologies Ltd.
Imagination House
Home Park Estate
Kings Langley
Herts, WD4 8LZ
UK
+44 (0)1923 277477 support
+44 (0)1923 277488 sales
+44 (0)1923 270188
[email protected]
[email protected]
12N12
PURE Digital
Karl-Marx Strasse 6
64589 Stockstadt/Rhein
GERMANY
+49 (0) 6158 878872 sales
+49 (0) 6158 878874
[email protected]
PURE Digital - Vertrieb über:
TELANOR AG
Unterhaltungselektronik
Bachstrasse 42
4654 Lostorf
SCHWEIZ/SWITZERLAND
+41 (0)62 285 95 95 sales
+41 (0)62 285 95 85
[email protected]
www.telanor.ch