1
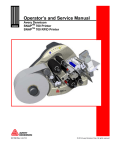
1 User’s Manual—SNAP™ 500 2/1 Printer User’s Manual Supplement TM SNAP 500 Printer Firmware Upgrade Process AVERY DENNISON Supplement Edition 1.0 7 August 2013 2 User’s Manual—SNAP™ 500 2/1 Printer 1.0 Introduction The SNAP 500 printer software otherwise known as firmware can be updated electronically. Software upgrades are distributed as a single file called the upgrade or UPG file. PCMate Platinum will take the UPG file and automatically upgrade the printer. Once the upgrade process is started, no other action is required. There are three methods to upgrade the SNAP 500 printer: 1. The upgrade can be performed by PCMate Platinum. Therefore, you must have a Microsoft PC running PCMate Platinum to upgrade the printer software. See Section 2.1.3 of the SNAP full manual for the minimum requirements to run PCMate Platinum. This takes approximately 15-20 minutes. Please be patient. 2. The upgrade file can be placed in the root directory of a USB flash drive and inserted in one of the USB slots on the back of the printer. When the printer is turned on, it will detect the USB flash drive and upgrade the printer automatically. NOTE: some older operating systems do not support this function. If you try it and it doesn’t work, you must upgrade using method 1. This takes approximately 4-5 minutes. 3. If your printer has the Ethernet Interface Option, and your printer is running firmware version 3.28.16.02 or higher, you can upgrade through the printer’s web server. 2.0 Getting the UPG file 2.1 Selecting the UPG fie The UPG file you need will depend on the motherboard in the SNAP printer being upgraded. This is what the ―new‖ motherboard looks like: If you have this in your printer, you will need firmware 3.31 or higher. 3 User’s Manual—SNAP™ 500 2/1 Printer If you have one of the following motherboards, you will need 3.30.16.15 MachSpeed P4MDPT Chaintech MP4M26A Epox EP-P4MKI-EP Biostar U8668-D Biostar MCP6P M2+ Red color ―P4KDPT‖ printed on board Yellow/gold color Chaintech‖ printed on heatsink next to processor Fourth line of the BIOS reads ―MP4M266A‖ Green color ―EP-P4MKI-EP‖ printed in white on the motherboard near the memory slots. Fourth line of BIOS reads ―10/01/2004 for Apollo P4M266A Chipset‖ Red/purple color ―U8668-D printed on motherboard near memory slots. Fourth line of BIOS reads ―U8668-R35-D‖ Blue in color ―MCP6P M2+‖ printed next to heat sink. Connector block on back of printing missing parallel port connector (25 pin D-shall above serial and video connectors) If you have one of the motherboards not listed, you may be able to use 3.31 or higher. If you have questions, please contact Technical Support. 2.2 Using D2Comm to get the UPG file The easiest way to get the upgrade file is through D2Comm. If you have a D2comm account, contact your D2Comm Coordinator and request that an upgrade be scheduled for your account. Once this is done, log onto D2Comm, select ―In Plant‖, then ―Retrieve Updates‖. The upgrade file will be automatically put on your PC, and the next time you start up PCMate, it will offer to upgrade the printer. 2.3 Getting upgrade file without using D2Comm You may download the upgrade file as follows: 1. Open a web browser and enter www.monarch.averydennison.com in the address bar. 2. On the left, click on ―SUPPORT‖ 3. Then on the left, click, ―Printer Utilities, Firmware & Drivers‖ 4. Next in the middle, click ―Apparel Printers‖ 5. Select the firmware you want from the page. 6. There may be up to 3 upgrade files per release. For example, for version 3.28.16.02, the following upgrade files are available: a. V3_28_16_02.upg – This is the complete upgrade and includes English and all alternate language messages and prompts 4 User’s Manual—SNAP™ 500 2/1 Printer b. V3_28_16_02_OS.upg – This is the upgrade with only the English messages and prompts c. V3_28_16_02_ALT_LANGUAGES.upg – This upgrade contains only the alternate language messages and prompts. This version does NOT contain the printer operating system. 7. Depending on your operating system, you may be able to choose the folder where the file will be placed, or it may be placed in a default download folder. If you are going to upgrade using PCMate Platinum, put the file in the “C:\D2Comm\Control folder.” 3.0 Performing the Upgrade 3.1 Upgrading through PCMate 1. Once you have received the upgrade file through D2Comm, and the file is in the “C:\D2Comm\Control folder,” start PCMate Platinum. The following screen will appear. 2. Click on the Yes button to start the upgrade. Clicking on the No button will take you into PCMate Platinum. Each time you start up PCMate Platinum, this screen will appear until you either perform the upgrade or remove it (see below). 3. When you click on the Yes button, the following screen will appear. If you have more than one printer connected to the PC, they will all show in this window. If you leave the Upgrade Schedule box at Upgrade Now (see below), all the printers will be upgraded, one at a time. 4. In the box under Upgrade Schedule, it will say Upgrade Now. If you click on the box, a drop down list will offer the following choices: User’s Manual—SNAP™ 500 2/1 Printer 5 - Upgrade Now – this will cause the printer to be upgraded when you click on the Start Upgrade button. - Upgrade Later – This choice will skip the upgrade for that printer, but keep the upgrade file. The next time you start PCMate Platinum, the upgrade will be offered again. This allows you to skip the upgrade until later. - Remove Upgrade – If you select this option, the printer will not be upgraded, and the upgrade file will be deleted. 5. To start the upgrade, click on the Start Upgrade button. No further action is required until the upgrade process is complete. The upgrade process can take quite a while. If the process is interrupted, the printer will attempt to revert to the last revision. If it fails, it will revert to a safe version. If this occurs, it will be necessary to redo the upgrade. 6. The following window will appear. The following description of the upgrade process is accurate as of this writing. However, changes may be made to improve the process. It is important to allow the process to finish. 7. During the first part of the upgrade process, PCMate Platinum sends the necessary files to the printer. This screen allows you to monitor the progress of the file transfer. The top progress bar shows the file being sent, while the bottom bar shows the overall progress. 8. Once all the files have been transferred to the printer, the printer must perform its upgrade. The following window will appear. 6 User’s Manual—SNAP™ 500 2/1 Printer 9. The printer will reboot and say, ―Upgrade in progress. Please wait.‖ After a few minutes, the printer will reboot again. It will then say ―Programming MCB. Please wait‖ At this time, the lights on the printer control panel will all come on. 10. After a few minutes, the printer will reboot again. After a few more minutes, the following window will appear on the PC. 11. The Upgrade Status is now ―Upgrade Complete‖. Click on Close to continue to PCMate Platinum. 3.2 Upgrading through USB Flash Drive 1. Place the upgrade file in the root directory of a USB flash drive. 2. Insert the drive in one of the USB slots on the back of the printer. 3. When the printer is turned on, it will detect the USB flash drive and upgrade the printer automatically. 4. This process takes approximately 4-5 minutes. User’s Manual—SNAP™ 500 2/1 Printer 7 Some older operating systems do not support this function. If you try it and it doesn’t work, you must upgrade using method 1 3.3 Upgrading through the Webserver This instruction uses the Filezilla FTP Client Application as an example. Filezilla is an open source FTP client that is available freely from http://filezilla-project.org/ . Other FTP clients operate in a similar manner. This upgrade procedure is only available in printer firmware version 3.28.11.01 and above. If the printer is not at this version or above it must be upgraded through PCMate or a USB drive. Future upgrades can then be done through the Web Server. Accessing the printer though Filezilla or another ftp client allows access to the entire printer file structure. Moving, deleting or otherwise changing any files or folders can result in erroneous operation or disabling of the printer. Use caution. Connecting to the Printer through Filezilla 1. Start the Filezilla application. The following window will appear: Refresh icon 2. Enter the printer’s IP address in the host box, enter the printer’s username (Avery) and password (Dennison) in the corresponding boxes, and click the Quickconnect button. 3. The screen is divided into two sets of panes. The left panes show folders on the computer, and the right panes show folders on the printer. The top pane on each 8 User’s Manual—SNAP™ 500 2/1 Printer side shows the folder, and the bottom pane shows files and subfolders in the highlighted folder. 4. The information in these panes is not live – it is a snapshot of the file structure when the screen was last refreshed. To refresh the screen, select View – Refresh from the menu or click the Refresh icon on the toolbar.Transferring the Upgrade File to the Printer 5. The screen below shows Filezilla ready to transfer the upgrade file to the printer. In the left panes, the folder on the computer that hold the upgrade file has been selected in the upper pane, and the upgrade file is selected in the lower pane. In the right panes, the root directory of the printer is shown. The upgrade file must be placed in the printer’s root directory. Printer’s Root Directory Upgrade File 6. To transfer the file, simply drag it from the bottom left pane to the bottom right pane, or double click the upgrade file. There may be a folder in the root directory of the printer called PAXA. This is a temporary folder used in processing the upgrade file. Ignore this directory and place the upgrade file in the root directory. User’s Manual—SNAP™ 500 2/1 Printer 9 Upgrading the Printer 7. To upgrade the printer, first open a browser window, enter the printer’s IP address in the address bar, and press Enter. The following window will appear. 8. Click the Upgrade Firmware button. The printer will perform the upgrade operation automatically. 9. There is no indication from the browser when the upgrade is complete. To determine if the upgrade is complete, refresh the browser window. When the upgrade is complete, the above window will reappear with the new firmware version shown in the SW Version box. If you refresh the browser window during the upgrade process, you will receive an error message that the connection has timed out or the web page is unavailable. Simply refresh again until the web page appears.