1
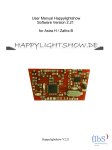
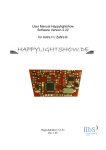
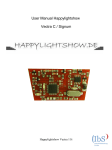
User Manual Happylightshow
Software Version 219
for Astra H / Zafira B
Happylightshow manual
V219 Revision 1.0
1
Overview
1. Introduction..............................................................3
2. Installation
2.1 Astra H ................................................................. 4
2.2 Zafira B .................................................................5
2.3 Functional Test .................................................... 6
3. Setup Parameters................................................... 7
4. Functional Description ............................................10
5. Legal Meaning.........................................................14
Happylightshow manual
V219 Revision 1.0
2
1.Introduction
The HAPPYLIGHTSHOW is a additional electronical
device, that communicates through the on-board
CAN-Bus system.
Therefore additional new functions are possible.
The HAPPYLIGHTSHOW is very easy to install,
because it‘s only being put on the diagnostic link
connector (DLC).
-> No wiring or soldering necessary
Happylightshow manual
V219 Revision 1.0
3
2.1 Einbau Astra H
mounting place:
diagnostic link connector (DLC) underneath the cover of
the handbrake
procedure:
Holt the device a little bit angular and put the two pins on
top inside Pin 1 and 4 of the DLC.
After that, put the single Pin inside Pin 16 of the DLC
(see figure)
Happylightshow manual
V219 Revision 1.0
4
2.2 Einbau Zafira B
Mounting place:
Diagnostic link connector (DLC) behind ashtray
procedure:
Put the black wire into Pin 4 of the DLC,
Then put te red wire into Pin 16,
Finally put in the pink wire into Pin1 of the DLC.
(see figure)
Happylightshow manual
V219 Revision 1.0
5
2.3 functional test
Activate the ignition.
If the installation was sucessful the Leds on the
HAPPYLIGHTSHOW will work like this:
Green Led lights up continuous
Red Led toggels every second
→ Installation sucessful, go on with setup procedure
Happylightshow manual
V219 Revision 1.0
6
3 Setup Parameters
3.1 Activation setup modus
Requirements:
Ignition on, Engine off. Clutch must not be pushed and Lightswitch off
Procedure:
Push Brake, FlashToPass and TurnLight Left at the same time.
Advice:
Best way to do it is: PushBrake and FlashToPass and then add TurnLightLeft.
The odometer is now in the parameter menu.
3.2 Change parameters Adjustment
The value of the digits will be count upwards by pushing the brake pedal.
Changing from digit to digit is made with clutch pedal.
Cars with automatic Transmission have the possibility to change between the digits
by using the parking light switch (on/off.)
3.3 Save Adjustments & Resetting Trip Computer
To save the adjustments you have to push turn switch right once.
Now “333333“ should be shown inside the odometer
The Setup procedure is now finished.
Happylightshow manual
V219 Revision 1.0
7
3.Setup Parameters
3.4 Meaning of the digits
Digit 6:
0 = menulayer 0
1 = menulayer 1
2 = menulayer 2
3 = menulayer 3
Digit 0.1: OPC
0 = OPC Scan off
1 = OPC Scan on
menulayer
Digit 0.2: Coolant temperature / Trip Computer
0 = off
1 = with rear window heater switch*
2 = until Engine reaches 75 °C
3 = with Centrallocking
4 = until Engine reaches 75 °C OR rear window heater*
5 = until Engine reaches 90 °C OR rear window heater*
6 = Trip Computer 1*
7 = Trip Computer 2
8 = till Engine reaches 75°C, then vehicle speed
and warning over 105 °C
and warning over 105 °C
and warning over 105 °C
and warning over 105 °C
and warning over 105 °C
*only with automatic climate control
Digit 0.3: WTTC Function rear
0 = off
1 = Reverse Light + License plate
2 = Taillight + License plate
3 = Reverse Light + Taillight + License plate
4 = Red Taillights without foglamp + License plate (Caravan)
5 = Turn Lights + License plate
Digit 0.4: WTTC Function front
0 = off
1 = Low Beam + Parking light
2 = Low Beam + Parking light + Repeater
3 = Fog lamp + Parking light
4 = Fog lamp + Parking light + Repeater
5 = Parking light
6 = Low Beam + Fog lamp + Parking light + Repeater
7 = Turn Lights
8 = High Beam + Parking light + Fog lamp + Repeater
Happylightshow manual
V219 Revision 1.0
8
3.Setup Parameters
Digit 0.5: (WTTC Function Time)
Number multiplied by 10 seconds (e.g. 3 = 30 seconds)
Digit 1.1 (WTTC Activation)
0 = always when Door locked/unlocked
1 = only when door get locked/unlocked twice
Digit 1.2: (Thief Protection simulation)
0 = Simulation off
1 = Simulation on
Digit 1.3: (daytime running light)
0 = DRL off
1 = DRL with foglights on
2 = DRL with parkinglight on
Digit 1.4: (Speedlock)
0 = Speedlock off
1 = Speedlock 1 on
2 = Speedlock 2 on
Digit 1.5: (Chirp)
0 = Chirpfunction on
1 = Chirpfunction off
Digit 2.1: (hazardlight function)
0 = hazardlightfunction off
1 = hazardlightfunction on
Digit 2.2: (Distance Signal – for internal Navi)
0 = Distance impulses off
1 = Distance impulses on
Happylightshow manual
V219 Revision 1.0
9
4.Functional Description
Lightshow:
Requirements:Ignition on, engine off
Procedure:
Push Brake, FlashToPass and TurnLight Left at the same time.
Advice:
Best way to do it is: PushBrake and FlashToPass and then add TurnLightLeft.
-> highbeam and turnlight telltales begin to flash
To switch between lightsamples push brake pedal, the speedometer
Shows the sample (180km/h = Sample 18)
To switch betwenn the variations use parklightswitch on/off,
The tachometer shows variation (2000 rpm = variation 2)
Variation 1: lights changing clockwise/anticlockwise
Variation 2: lights clockwise
Variation 3: lights anticlockwise
Particel Filter Regeneration Display:
When the vehicle is cleaning the particel filter, you will see the following
message in your odometer. (df = DieselFIlter)
Happylightshow manual
V219 Revision 1.0
10
4.Functional Description
OPC-Scan:
Speedometer and tachometer go to limit and back when activating the
ignition
Speedlock 1:
Car locks automatically if faster than 20km/h
Unlocks manually.
Speedlock 2:
Car locks automatically if faster than 20km/h
Unlocks automatically if the engine is turned off.
Trip Computer 1:
Shows following informations inside the odometer:
Engine Coolant Temperature
(first digit = 0)
Actual Consumption on 100km
(first digit = 1)
Average Consumption on 100km (first digit = 2)
True Speed
(first digit = 3)
To switch between the values press rear window heater double
To reset the average consumption setup the devices once.
Happylightshow manual
V219 Revision 1.0
11
4.Functional Description
Trip Computer 2:
Trip Computer 2 shows the Coolant Temperature until 75°C (first digit = 0)
Then it shows the Actual Consumption on 100km for 10 seconds (first digit
= 1) and then for 2 seconds the Average Consumption (first digit = 2).
To reset the Avereage Consumption setup the devices once
Thief Protection Simulation:
The Led inside the central door lock button flashes, if car is locked
( its looks like a regular system)
WTTC Function:
The driving lights light up, if car gets locked/unlocked.
WTTC Activation:
0 = always if car gets locked/unlocked
1 = only when car gets locked/unlocked twice
Happylightshow manual
V219 Revision 1.0
12
4.Functional Description
Daytime Running Light:
Fog or Parking Lights are activated meanwhile the lightswitch is off, or the
lightsensor recognizes daylight.
Chirp function:
Vehicle honks two times when opening the car and once when closing the
car.
Hazardlight function:
Hazardlight will flash while the hatchback is open
Distance Signal Function:
You have a distance signal for a internal Navigation System.
See installation guide document
Happylightshow manual
V219 Revision 1.0
13
5. Legal meaning
The devices has no general type approval,
thus it is not allowed to use it within the laws of road
traffic.
By noncompliance the user will be responsible for any
loss.
Happylightshow manual
V219 Revision 1.0
14