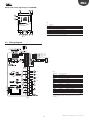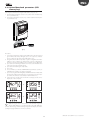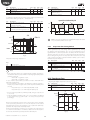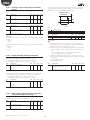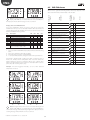
1
UltraCella Electronic control for Cold Rooms User manual NO POWER & SIGNAL CABLES TOGETHER READ CAREFULLY IN THE TEXT! H i g h E f f i c i e n c y S o l u t i o n s ENG WARNING DISPOSAL CAREL developed its products thanks to the several years of experience in the HVAC field, continuous investment in technological innovation of the product, rigorous quality procedures and processes with in-circuit and function tests on 100% of its production, as well as the most innovative production technologies available on the market. CAREL and its branch offices/affiliates do not guarantee, in any case, that all the aspects of the product and the software included in the product will respond to the demands of the final application, even if the product is built according to state-of-the-art techniques. The client (builder, developer or installer of the final equipment) assumes every responsibility and risk relating to the configuration of the product in order to reach the expected results in relation to the specific final installation and/or equipment. CAREL, in this case, through specific agreements, can intervene as consultant for the positive result of the final start-up machine/application, but in no case can it be held responsible for the positive working of the final equipment/apparatus. INFORMATION FOR THE USERS REGARDING THE CORRECT HANDLING OF WASTE ELECTRIC AND ELECTRONIC EQUIPMENT (WEEE) With reference to European Parliament and Council Directive 2002/96/EC issued on 27 January 2003 and the related national implementation legislation, please note that: • WEEE cannot be disposed of as municipal waste, said waste must be collected separately; • the public or private waste collection systems defined by local legislation must be used. Moreover, the equipment can be returned to the distributor at the end of its working life when buying new equipment; • this equipment may contain dangerous substances: improper use or incorrect disposal of such may have negative effects on human health and on the environment; • the symbol (crossed-out wheeley bin) shown on the product or on the packaging and on the instruction sheet indicates that the equipment has been introduced onto the market after 13 August 2005 and that it must be disposed of separately; • in the event of illegal disposal of electrical and electronic waste, the penalties are specified by local waste disposal legislation. The CAREL product is a state-of-the-art product, whose operation is specified in the technical documentation supplied with the product or can be downloaded, even prior to purchase, from the website www.carel.com. Each CAREL product, in relation to its advanced technological level, needs a phase of definition / configuration / programming / commissioning so that it can function at its best for the specific application. The lack of such phase of study, as indicated in the manual, can cause the final product to malfunction of which CAREL cannot be held responsible. Only qualified personnel can install or carry out technical assistance interventions on the product. The final client must use the product only in the manner described in the documentation related to the product itself. Materials warranty: 2 years (from the date of production, excluding consumables). Type-approval: the quality and safety of CAREL S.P.A. products are guaranteed by the design system and ISO 9001 certified production. Without excluding proper compliance with further warnings present in the manual, it is stressed that in any case it is necessary, for each CAREL product: • Not allow the electronic circuits getting wet. Rain, humidity and all types of liquids or condensate contain corrosive mineral substances that can damage the electrical circuits. In any case, the product should be used and stored in environments that respect the temperature and humidity limits specified in the manual; • Not to install the device in a particularly hot environments. Temperatures that are too high can shorten the duration of the electronic devices, damaging them and distorting or melting the parts in plastic. In any case, the product should be used and stored in environments that respect the temperature and humidity limits specified in the manual; • Not to try to open the device in any way different than that indicated in the manual; • Not to drop, hit or shake the device, because the internal circuits and mechanisms could suffer irreparable damage. • Not to use corrosive chemical products, aggressive solvents or detergents to clean the device; • Not to use the product in application environments different than those specified in the technical manual. HACCP: CAUTION The Food Safety programs based on HACCP procedures and on certain national standards, require that the devices used for food preservation are periodically checked to make sure that the measuring errors are within the allowed limits of the application of use. Carel recommends compliance with the indications of European standard “Temperature recorders and thermometers for transport, storage and distribution of chilled, frozen, deep-frozen/ quick-frozen food and ice cream – PERIODIC VERIFICATION “, EN 13486 -2001 (or subsequent updates)or similar standards and prescriptions applicable in the country of use. The manual contains further indications regarding technical feature, proper installation and configuration of the product. All the above reported suggestions are also valid for the control, serial boards, programming keys or however for any other accessory in the CAREL product portfolio. CAREL adopts a continuous development policy. Therefore, CAREL reserves the right to carry out modifications and improvements on any product described in this document without prior notice. The technical data in the manual can undergo modifications without forewarning. NO POWER & SIGNAL CABLES TOGETHER The liability of CAREL in relation to its products is specified in the CAREL general contract conditions, available on the website www.carel.com and/or by specific agreements with customers; specifically, to the extent where allowed by applicable legislation, in no case will CAREL, its employees or subsidiaries be liable for any lost earnings or sales, losses of data and information, costs of replacement goods or services, damage to things or people, downtime or any direct, indirect, incidental, actual, punitive, exemplary, special or consequential damage of any kind whatsoever, whether contractual, extra-contractual or due to negligence, or any other liabilities deriving from the installation, use or impossibility to use the product, even if CAREL or its subsidiaries are warned of the possibility of such damage. READ CAREFULLY IN THE TEXT! WARNING: separate the probe cables and the digital input cables as much as possible from the inductive load and power cables to prevent possible electro-magnetic interference. Never introduce power cables and signal cables (including those of electric control board) into the same cable troughs. 3 UltraCella +0300083EN - rel. 1.3 - 30.06.2014 ENG Content 1. INTRODUCTION 1.1 1.2 18 Display ...........................................................................................................................18 Programming............................................................................................................20 Procedures ..................................................................................................................22 Multifunction menu .............................................................................................24 4. COMMISSIONING 4.1 4.2 4.3 4.4 4.5 4.6 4.7 4.8 4.9 9 Assembly and sizes (mm) ...................................................................................9 Structure ......................................................................................................................10 Wiring diagram ........................................................................................................11 Expansion modules assembly ........................................................................12 Ultra EVD module...................................................................................................14 Ultra Power module..............................................................................................15 Installation ..................................................................................................................16 Connection in supervisoring network ......................................................16 UltraCella Service terminal ...............................................................................16 Upload/download parameters (USB memory key) .........................17 3. USER INTERFACE 3.1 3.2 3.3 3.4 6.1 6.2 6.3 6.4 6.5 6.6 6.7 6.8 6.9 6.10 6.11 6.12 6.13 6.14 6.15 Codes ................................................................................................................................7 Expansion modules .................................................................................................8 2. INSTALLATION 2.1 2.2 2.3 2.4 2.5 2.6 2.7 2.8 2.9 2.10 6. CONTROL 7 First commissioning .............................................................................................28 Parameters to be set for the commissioning........................................28 Single digit display models cod. WB000S* commissioning.........28 Double digit display models cod. WB000D* commissioning.....29 Commissioning with UltraCella Service Terminal ..............................30 Main function commissioning .......................................................................30 Light management ...............................................................................................34 Other configuration parameters ..................................................................34 Ultra EVD module commissioning ..............................................................35 Switching the controller ON and OFF ......................................................37 Virtual probe..............................................................................................................37 Set point.......................................................................................................................37 Pump down ...............................................................................................................37 Autostart in pump down ..................................................................................38 Continuous cycle....................................................................................................39 Door switch control ..............................................................................................39 Defrost...........................................................................................................................39 Evaporator Fans .......................................................................................................41 Condenser fans........................................................................................................42 Duty setting ...............................................................................................................43 Bowl resistance ........................................................................................................43 Defrosting with 2 evaporators .......................................................................43 Second compressor with rotation ...............................................................43 Humidity management......................................................................................45 7. PARAMETERS TABLE 47 8. SIGNALS AND ALARMS 51 8.1 8.2 8.3 8.4 8.5 8.6 8.7 8.8 28 37 Signalling .....................................................................................................................51 Alarms............................................................................................................................51 Reset alarms...............................................................................................................51 HACCP alarms and display ...............................................................................51 EVD EVO alarms .......................................................................................................52 Alarm parameters ..................................................................................................54 HACCP Alarm parameters and monitoring activation .................54 High condenser temperature alarm .........................................................55 9. TECHNICAL SPECIFICATIONS 9.1 56 UltraCella technical characteristics..............................................................56 5. OUTPUTS CONFIGURATION AND PROTECTIONS 36 5.1 5.2 Analogue output ....................................................................................................36 Digital Outputs ........................................................................................................36 5 UltraCella +0300083EN - rel. 1.3 - 30.06.2014 ENG 1. INTRODUCTION Ultracella is a family of products consisting of a control system for the basic functions of a cold room to which can be added further modules for accessory functionalities (e.g. electronic valve, power relays, etc.). The accessory modules allow: • the installation of the electronic expansion valve, using the module with CAREL Evd Evolution driver dedicated to the control of superheat; • compressor control with power relay of up to 3 Hp; • the use of a single-phase circuit breaker switch in addition to the power relay. The user interface ensures ease in use and it consists, depending on the models, of: • wide led display on which can be viewed the operating temperature and the active loads; • a graphic terminal with text strings in multiple languages, which guide the user during commissioning (wizard). It is also equipped with contextual help menus accessible during programming, that provide an accurate description of the alarms. The graphic terminal is also available as a “service tool”, which is useful when the control has the only LED interface. UltraCella has a port for the insertion of a USB memory key to: • load the languages for the graphic terminal during the first commissioning; • parameters upload/download; • other operations reserved for the service centre (e.g. software update); • download log of temperature recorded. UltraCella When mounting the optional modules are matched to the right of the main control system and connected to it with watertight coupling, to ensure the IP degree of protection of the assembly. Fig. 1.a Main characteristics: • 6 relay outputs: compressor, defrost, fan, light, AUX1, AUX2; • assembly on guide DIN or wall; • LED board with bright display with 3 digits, with decimal point and icons that indicate the operating status; • integration of the keys in the front panel (LED board) to ensure a high degree of protection (IP65) and safety during operation and cleaning; • availability of 10 sets of parameters (recipes) preloaded by CAREL but modifiable, corresponding to the same number of parameters configurations, to adapt the control to the specific conservation needs required by the cold room; • navigation on intuitive user interface with contextual backlight keyboard; • defrost can be driven using the keyboard, digital input and supervisor; • various types of defrost managements, on one or two evaporators: natural (with stop compressor), resistance, hot gas; • control of compressors with up to 2 Hp or up to 3 Hp with the accessory power module; • temperature control with virtual adjustment probe; • digital inputs that can be configurated for alarm activation, enabling or activating defrost, door switch, auxiliary output, on / off, etc; • control of 1 compressor with double step or of two compressors, even with rotation; • keyboard safety: operation of the single keys can be disabled to avoid tampering; • light management by door switch or dedicated key; • alarm buzzer; • HACCP function: temperature monitoring and adjustment in case of alarm due to high temperature during operation or after black out; • RS485 network connection for remote monitoring and supervision sytems. 1.1 Codes Codes WB000S**F0 WB000D**F0 Description UltraCella, led display with single row UltraCella, led display with double row Tab. 1.a Fig. 1.b 7 Fig. 1.c UltraCella +0300083EN - rel. 1.3 - 30.06.2014 ENG 1.2 Expansion modules EVD Module (cod. WM00E***00) UltraCella Service Terminal (cod. PGDEWB0FZ0) Expansion module containing the supply transformer and the driver EVD Evo to control the electronic expansion valve. The UltraCella control can be connected to an external terminal, without having to open the unit, for easy commissioning and programming of the control parameters, to be used with the controls having LED display. When connecting the UltraCella Service Terminal the LED interface is temporarily disabled. Codes Description WM00ENSI00 Ultra EVD Module with EVD I/E display WM00ENNI00 Ultra EVD Module “blind” - commissioning through UltraCella Tab. 1.b Fig. 1.g Fig. 1.d Fig. 1.e Power module (cod. WM00P000*N) Expansion module that contains the circuit breaker switch and 3 Hp relay for compressor control. There is also a version without relay, to give way to the installer to insert devices suitable for the application (contactors, safety devices, etc.) Codes Description WM00P0003N Ultra Power Module main switch and 3HP relay WM00P000NN Ultra Power Module main switch Tab. 1.c Fig. 1.f UltraCella +0300083EN - rel. 1.3 - 30.06.2014 8 ENG 2. INSTALLATION 2.1 Assembly and sizes (mm) The control system has holes on the lower and right side, in which the installer can insert the cable glands. 290 87,5 47,5 30 47,5 107,5 N 200 32 100 62 380 Fig. 2.a 62 Fig. 2.b Mounting B: without DIN rail 1 260 A: with DIN rail 2 Ø 4,5 1.a: Fix the DIN rail and insert the controller 156 1.b: Make 4 holes (Ø 4,5 mm) according to the drilling template and insert thr dowels (mm) 1 1 1 2 1 2 1 2 1 1 2 2 1 2 2 1 1 1 2.a: Remove the frames, loosen the screws (1) and open the panel 2.b: Remove the frames 9 UltraCella +0300083EN - rel. 1.3 - 30.06.2014 ENG A A 1 2 1 1 B 2 N 1 2 1 1 B A A 3.a: Mark on the wall the positions of the lower holes, remove the panel and perform the drills (Ø 4.5 mm); insert the plugs. Replace the panel on the DIN guide and fix it fastening the lower screws. 1 2 3.b: Fasten the screws (1) and fix the panel. Loosen the screws (2) and open the panel. 2 connection to option modules N A power supply, compressor fan, actuators 4: Use the holes and mount the cable glands to connect: • on the lower side: supply cables, probes, actuators; • on the right side: cables for the connection of accessory modules; 5: Close the panel fastening the screws (2). probes, digital inputs Caution: separate the power cables (supply, actuators) from the signal cables (probes, digital inputs). Note: use a hole saw to drill the knock-outs (A). 2.2 Structure Models with single digit display cod. WB000S* 3 4 3 2 1 Key 3 8 7 6 5 4 1 Keyboard 2 Display 3 Wall mounting holes 4 Locking screws 5 Connector for UltraCella Service (*) 6 Green LED (*) 7 Red LED (*) 8 USB Port (*) (*) Visible after removing the bottom frame 3 Fig. 2.c UltraCella +0300083EN - rel. 1.3 - 30.06.2014 10 ENG Models with double digit display cod. WB000D* 3 4 3 2 1 Key 3 8 7 6 5 4 1 Keyboard 2 Display 3 Wall mounting holes 4 Locking screws 5 Connector for UltraCella Service (*) 6 Green LED (*) 7 Red LED (*) 8 USB port (*) (*) Visible after removing the bottom frame 3 Fig. 2.d 2.3 Wiring diagram CAREL NTC, PT1000 CAREL NTC, PT1000 CAREL NTC, PT1000 analog output (0 to 10 Vdc) CAREL NTC, analog input 0 to 10 Vdc 0 to 5Vdc CMP B5 analog input (4 to 20 mA) Key B1…B5 DI1 DI2, DI3 Y1 GND 5 VREF +Vdc CMP DEF FAN LIGHT AUX1 AUX2 L, N Fieldbus BMS DEF FAN to connector board LIGHT Analogue inputs 1…5 Door switch Digital inputs 2, 3 0…10 V analogue output Grounding for signals Ratiometric pressure probe power supply Active probe supply (humidity) DO1 (*) Compressor DO2 (*) Defrost DO3 (*) Evaporator fan DO4 (*) Light DO5 (*) Auxiliary output 1 DO6 (*) Auxiliary output 2 Power Supply Fieldbus Serial BMS Serial Tab. 2.a (*) Digital outputs display in the multifunction module (see chap. 3). Fig. 2.e 11 UltraCella +0300083EN - rel. 1.3 - 30.06.2014 ENG 2.4 Expansion modules assembly Dimensions (mm) Layout If more than one expansion modules it is to assemble, use the arrangement of figure to optimize the wiring. 30 87,5 47,5 Power Module 107,5 260 290 UltraCella Control drilling template Ø32 Ø 4,5 47,5 128 EVD Module 1 110 2 103 Fig. 2.f Fig. 2.h 43 33 Overall drilling template (mm) If UltraCella and expansion modules have to be mounted at the same time, use the overall drilling template. UltraCella Expansion Module 214 260 DIN RAIL Ø 4,5 mm 156 24 103 Fig. 2.g Mounting A 1 B 3 2 1 1 1 2 2 2 3 2 1 1: Use a hole saw to drill the panel in correspondence with the predrilled holes (steps A, B). If present, fasten the DIN rail for the module. UltraCella +0300083EN - rel. 1.3 - 30.06.2014 2: Remove the faceplates. Unscrew the screws (3) and open the UltraCella control 12 ENG 1 1 1 A A B A A 2 B 1 N 2 1 1 3: Raise the cover or remove the faceplates and unscrew the screws to remove the panel and open the module. 4: Put the module close to UltraCella control and insert the coupling clamps supplied as standard. 13 UltraCella +0300083EN - rel. 1.3 - 30.06.2014 ENG 2.5 Ultra EVD module Mounting with DIN rail Mounting without DIN rail 5.a Mark the positions of the bottom holes on the wall (A), remove the coupling clamps (B), extract the module (C). Drill the corresponding holes (Ø 4,5 mm) and insert the anchors. Place again the module: mount the coupling clamps (B) and fasten the screws (A). 5.b Mark the positions of the 4 holes (A), remove the coupling clamps (B), extract the module (C). Drill the corresponding holes (Ø 4,5 mm), depending on drilling template and insert the anchors. Place again the module: mount the coupling clamps (B) and fasten the screws (A). B A B A 4 B N 1 3 2 4 NOA 2 COMA 3 G G0 VBAT 1 G G0 VBAT N PRI 230 V NOA B COMA PRI 230 V GND HELP S1 DI1 DI2 S4 C S2 VREF Prg Esc S3 GND S1 DI1 DI2 S4 S2 VREF SEC 24 V C Prg Esc S3 GND HELP SEC 24 V GND Tx/Rx Tx/Rx B A B A A A Fig. 2.j Fig. 2.i Connect electrically the mudule wiring according to the diagram. The EVD EVO driver is connected to UltraCella via Fieldbus serial line (automatic identification). When connected, it is necessary to proceed with the activation of the driver (set the parameter P1=1 in UltraCella) ULTRACELLA CONTROL ULTRA EVD MODULE VL GND GND Rx/Tx+ Rx/TxGND bianco/white R5 EN60730-1 250 V UL 873 EN60730-1 250 V UL 873 R1 - R2 8 (4) A N.O. 8 A res. 2FLA 12 LRA R4 R3 R2 16 15 14 4 NOA 2 13 11 10 9 CMP DEF FAN Prg Esc LIGHT 8 7 EVD Module 5 4 ratiometric pressure transducer 3 2 1 230 V 20 A max NTC Fig. 2.k UltraCella +0300083EN - rel. 1.3 - 30.06.2014 3 17 6 R1 1 COMA 18 12 R3 - R4 10 A res. 5 (3) A 10 A res. 5FLA 18 LRA 2 AT 14 DI1 DI2 EN60730-1 250 V UL 873 25 VA S4 R6 R5 - R6 12 (10) A 12 A res. 2HP 12FLA 72 LRA Door switch S3 UltraCella Control S shield 24 Vac S2 24 Vac (**) DI1 OUT B5 analog input M (4 to 20 mA) +V G G0 VBAT 42 0 to 5 Vdc giallo/yellow HELP Rx/Tx+ Rx/TxGND Rx/Tx+ Rx/TxGND FieldBus BMS verde/green marrone/brown CAREL NTC, PT1000 CAREL NTC, PT1000 CAREL NTC, PT1000 analog output (0 to 10 Vdc) CAREL NTC, analog input 0 to 10 Vdc S1 49 50 51 52 53 54 B3 B2 B1 Y1 B4 B5 GND 5 VREF + Vdc DI1 DI2 DI3 VREF 31 30 29 28 27 26 25 24 23 22 21 20 19 GND 48 47 46 45 44 43 CAREL ExV GND Tx/Rx ENG 2.6 Ultra Power module Mounting with DIN rail Mounting without DIN rail 5.a Mark the positions of the bottom holes (A), remove the coupling clamps (B), extract the module (C). Drill the corresponding holes (Ø 4,5 mm) and insert the anchors. Place again the module: mount the coupling clamps (B) and fasten the screws (A). 5.b Mark on the wall the positions of the 4 holes (A), remove the coupling clamps (B), extract the module (C). Drill the corresponding holes (Ø 4,5 mm), depending on drilling template and insert the anchors Place again the module: mount the coupling clamps (B) and fasten the screws (A). B A A B B C N 2 B 3 6 C N 5 2 3 6 B A 5 A B Fig. 2.l A A Fig. 2.m Connect electrically the mudule wiring according to the diagram. ULTRACELLA CONTROL ULTRA POWER MODULE VL GND GND Rx/Tx+ Rx/TxGND 48 47 46 45 44 43 31 49 50 51 52 53 54 Rx/Tx+ Rx/TxGND Rx/Tx+ Rx/TxGND FieldBus BMS 42 30 29 28 27 26 25 24 23 22 21 20 19 B3 B2 B1 Y1 B4 B5 GND 5 VREF + Vdc DI1 DI2 DI3 CAREL NTC, PT1000 CAREL NTC, PT1000 CAREL NTC, PT1000 analog output (0 to 10 Vdc) CAREL NTC, analog input 0 to 10 Vdc 0 to 5 Vdc 230 V~ L N OUT B5 analog input M (4 to 20 mA) +V (**) DI1 Circuit Breaker Door switch 18 UltraCella Control 24 Vac R6 EN60730-1 250 V UL 873 R5 - R6 12 (10) A 12 A res. 2HP 12FLA 72 LRA R5 17 16 Relay 3Hp (*) 15 14 DEF 6 3 FAN 5 2 13 2 3 12 EN60730-1 250 V UL 873 R3 - R4 10 A res. 5 (3) A 10 A res. 5FLA 18 LRA R4 R3 R2 11 6 9 LIGHT 8 7 EN60730-1 250 V UL 873 R1 - R2 8 (4) A N.O. 8 A res. 2FLA 12 LRA 2 6 R1 5 10 6 5 3 5 4 3 CMP 2 1 230 V 20 A max (*) Note: highlighted wires and 3HP relay supplied with module (cod. WM00P0003N) Fig. 2.n 15 UltraCella +0300083EN - rel. 1.3 - 30.06.2014 ENG 2.7 Installation 2.8 Connection in supervisoring network Proceed as follows for installation, making reference to the wiring diagrams in the previous paragraphs: 1. Connect the supply and probes: the probes can be remote-controlled up to a maximum distance of 10 metres from the controller as long as cables with minimum section of 1 mm2 are used. 2. Program the control: as indicated in chapter“Commissioning”and“User interface”; 3. Connect the actuators: the actuators should only be connected after having programmed the controller. It is recommended to carefully evaluate the maximum capacities of the relays indicated in table “Technical specifications”. 4. Connection to the serial network (if present): all controls are fitted with a serial connector for connection to the supervisory network. Warnings: • properly fix the converter to avoid disconnections; • perform the wiring without power supply; • keep the cables of the converter CVSTDUMOR0 separate from power cables (supply and relay outputs). The RS485 converter allows you to connect to the UltraCella control network to the monitoring network for complete control and monitoring of controls connected. The system provides a maximum of 207 units with a maximum length of 1000 m. For the connection it is requested the accessory standard (RS485-USB converter cod. CAREL CVSTDUMOR0) and a terminating resistor of 120 Ω to be placed on the terminals connected to the last control. Connect RS485 converter to the controls as shown in the figure. For assigning the serial address see the parameter H0. See the instruction sheet of the converter for further information. Warnings: avoid installing UltraCella control system in environments with the following characteristics: • relative humidity over 90% non-condensing; • strong vibrations or knocks; • exposure to continuous jets of water; • exposure to aggressive and polluting atmospheric agents (e.g.: sulphur and ammonia gases, saline mist, smoke) to avoid corrosion and/or oxidation; • high magnetic and/or radio frequency interference (e.g. near transmitting antennas); • exposure of the control system to direct sunlight and atmospheric agents in general. UltraCella 1 USB CVSTDUMOR0 USB-485 Converter The following recommendations must be respected when connecting the controllers: warnings: • incorrect connection of the power supply may seriously damage the control system; • use cable ends that are suitable for the terminals. Loosen every screw and fit the cable end, next tighten the screws and gently pull the cables to check their tightness. If using an automatic screwdriver, adjust the torque to a value less than 0.5 N · m; • separate as much as possible (by at least 3 cm) the probe signal and digital input cables from inductive loads and power cables, to avoid any electromagnetic disturbance. Never lay power cables and probe cables in the same cable conduits (including those for the electrical panels). Do not install the probe cables in the immediate vicinity of power devices (contactors, circuit breakers or other). Reduce the length of the sensor cables as much as possible, and avoid spirals around power devices; • only use IP67 guaranteed probes as end defrost probes; place the probes with the vertical bulb upwards, so as to facilitate drainage of any condensate. Remember that the thermistor temperature probes (NTC) have no polarity, so the order of connection of terminals is not important. TT+ GND TT+ GND to BMS port UltraCella ...n TT+ GND 120 Ω to BMS port Fig. 2.o UltraCella can be connected to both PlantVisor and PlantWatch via BMS port (RS485 Carel protocol) 2.9 UltraCella Service terminal The UltraCella Service Terminal has to be connected via a dedicated connector, that can be accessed after removing the lower frame Using the “UltraCella Service Terminal” you can: • during the first commissioning: insert the first configuration parameters following the guided procedure (wizard); • during normal operation: Caution: in order to ensure the safety of the unit in the event of serious alarms, all the electromechanical safety devices required to guarantee correct operation must be fitted on the unit. 1. display the active loads and the main variables: temperature, humidity; 2. perform the control programming, facilitated by contextual help. HACCP - CAUTION When the temperature measurement is relevant for Food Safety (see HACCP), will be used only temperature probes suggested by Carel. The standards in force may require the compilation and preservation of appropriate documentation, as well as periodic checks on instrumentation and sensors. If in doubt, consult the person in charge of food safety or the manager of the plant. 1 2 Fig. 2.p UltraCella +0300083EN - rel. 1.3 - 30.06.2014 16 ENG 2.10 Upload/download parameters (USB memory key) The USB memory key must be placed in the connector accessible after removing the lower frame. Using the USB memory key you can: 1. download the parameters set (r01...r10): control saves inside the key the 10 parameters set; 2. upload the parameters set (r01...r10): control loads from the key the 10 parameters set); 1 2 USB key Fig. 2.q Procedure: 1. remove the lower frame and insert the USB memory key. The red and green LED beside the key will light up once in sequence to indicate the recognition by the unity of the USB memory key; 2. bring the control to OFF to upload (to copy the configurations from the USB key to the controller); to download (to copy the configurations from the controller to the USB key), the controller can be in ON status; 3. press at the same time Prg and Set for 2 s and access the multifunction menu: the message “HcP” will appear; 4. press “UP” until reaching the entry “USb”; 5. press “Set”; 6. choose whether you want to DOWNLOAD the parameters (= dnL), to UPLOAD them (=uPd) or to exit the page (EXt); 7. press “Set”; the green LED will light up and will remain lit to indicate that the upload / download of parameters occurred; if, for some reason, the procedure should not be successful, the red LED will turn on; 8. extract the key. The LED turns off. The file is “.txt”type, and it can be displayed on the computer. 1 2 1 2 1 2 1 2 Note: the figure refers to the screens on models with single row display, P/Ns WB000S*. In models with two rows, P/Ns WB000D*, as well as the message indicated, during navigation the display shows the scrolling message “USB device” on the second row. 17 UltraCella +0300083EN - rel. 1.3 - 30.06.2014 ENG 3. USER INTERFACE The front panel contains the display and keyboard, made up from 10 or 11 keys (depending on the model), which, pressed individually or together, allow to perform all of the controller programming operations. The accessory UltraCella Service terminal, accessory terminal, allows the commissioning of the control system via a guided procedure (Wizard) and also programming the parameters with a contextual help that explains the various functions. 3.1 Display On the LED display is shown the temperature range from -50 °C (-58 °F) to +150 °C (302 °F). The resolution of the tenth for temperatures in the range -19,9…99,9. In case of alarm the value of the probe is displayed in alternance with the codes of the active alarms. During programming, it displays the codes that identify the parameters and their value. Note: you can select the standard display by properly configuring parameter /t1 (/t1 and /t2 for double digit models). Front panel for single row display models Front panel for double row display models cod. WB000S* cod. WB000D* UltraCella Service Terminal (accessories) H E L P Multifunction menu PRG ESC Fig. 3.a Fig. 3.b M E N U SET HACCP Fig. 3.c Icons table on models with single row display P/Ns WB000S* Icon Function Normal operation ON OFF HACCP function enabled - HACCP alarm saved (HA and/or HF) Door open Door Close Door open and door alarm active Off Waiting for activation Off Waiting for activation Technical support HACCP Door Compressor On Fan Clock On Note Flashing Alarms, for example alarm due to EEprom Serious problem detected. Please contact or probe fault technical service Blinks when the activation of the compressor is delayed by safety times. Blinks when the activation of the compressor is delayed by safety times. On if a scheduled defrost is requested Tab. 3.a UltraCella +0300083EN - rel. 1.3 - 30.06.2014 18 ENG Icons table on models with two rows display P/Ns. WB000D* Icon Function Normal operation ON OFF HACCP function enabled - HACCP alarm saved (HA and/or HF) Door open Door Close Door open and door alarm active Off Waiting for activation Off Waiting for activation Technical support HACCP Door Compressor On Fan Clock On On if a scheduled defrost is requested Temperature visualization in Celsius degrees Temperature visualization in Farenheit degrees Celsius degrees Farenheit degrees humidity Humidity visualization percentage Note Flashing Alarms, for example alarm due to EEprom Serious problem detected. Please contact or probe fault technical service Blinks when the activation of the compressor is delayed by safety times. Blinks when the activation of the compressor is delayed by safety times. . - Tab. 3.b 3.1 Keyboard Key Normal operation Pressing the individual key • Pressed for 2 s, turns the control OFF • Pressed for 2 s, turns the control ON Blink Combined pressure with other keys On/Off ALARM • ESC function, return to higher level • Pressed for 2 s, enters the programming menu • In case of alarm: mutes the audible alarm (buzzer) and deactivates the alarm relay • Pressed for 2 s, reset the manual reset alarms • Turns the light on/off Prg + Set: if pressed at the same time for 2 s, allow access to the multifunction menu Available only in case of alarm • Turns auxiliary output 1 on/off (*) • Turns auxiliary output 2 on/off (*) • Activates/deactivates manual defrost Waiting for activation DEF • Set point setting • Value setting • Value increase/ decrease Prg + Set: if pressed at the same time for 2 s, allow access to the multifunction menu / UP/DOWN Tab. 3.c (*) Set H1/H5=2. If parameters are not set, if AUX1/AUX2 key are pressed, they blink for 5 seconds. 19 UltraCella +0300083EN - rel. 1.3 - 30.06.2014 ENG 3.2 Programming The parameters can be modified using the keyboard. Access to the configuration parameters is protected by a password that prevents unwanted modifications or access by unauthorised persons. With the password you can access and change all the parameters of the control. 1 Note: in the LED display model the keys are illuminated according to the menu where the user is operating, in order to facilitate navigation. 3.2.1 2 1 2 Note: in the parameters or set point modification procedures, the new value is saved every time the Set key is pressed. Category Probes Control Compressor Defrost Alarms Fan Changing the set point In order to change the set point St (default =0°C): 1. the control system displays the standard display visualization; 2. press Set for 2 s: on the display appears the current value of the set point; 3. press UP/DOWN to reach the desired value; 4. press Set to confirm the new set point value. The control returns to standard display visualization. Text Pro CtL CMP dEF ALM FAn Category Configuration HACCP Clock Door and light Recipes Valve Text CnF HcP rtc doL rcP Eud Tab. 3.d Note: if no key is pressed, after about 120 s the control automatically returns to standard display.. 1 2 1 3.2.3 2 Procedure: 1. to modify the parameters, first switch the controller OFF (press ON/ OFF button); 2. press Prg for 2 sec: the second row of the display will show “PASS” (password required); 3. press UP/DOWN to enter the password: 22; 4. press Set; the second row of the display will scroll the name of the first category of parameters: Probes (see the previous table and the parameter table); 5. press Set: the second row of the display will scroll the code and description of the first parameter in the category: /21 – Probe1 meas. stab.; the first row of the display will show the current value of the parameter; 6. press Set: the value on the first row of the display flashes, to indicate that the value can be modified; 7. press UP/DOWN until reaching the desired value; 8. press Set to confirm the new value; the value will stop flashing; 9. press UP/DOWN to scroll the other parameters; 10. repeat steps 6) to 9) to modify other parameters; 11. press Prg to return to the top level of parameter categories, or UP/ DOWN to move the next category: CtL (Control). Then repeat steps from 5) to 9) to access the category and modify other parameters; 12. press Prg once or more than once to exit the parameter setting procedure and return to the standard display. 1 2 1 2 Note: the figure refers to the screens on models with single row display, P/Ns WB000S*. In models with two rows, P/Ns WB000D*, as well as the message indicated, during navigation the display shows the scrolling message “Setpoint” on the second row 3.2.2 Modification of the parameters (for models with single digit display cod. WB000S*) Procedure: 1. to modify the parameters, first switch the controller OFF (press ON/OFF button); 2. press Prg for 2 s: on the display appears the message “PAS” - password request; 3. press UP/DOWN and insert the password: 22. If you press Set, the code of the first parameters category will appear: Probes (see the following table and parameters table); 4. press Set: the first parameter of the category will appear: /21; 5. press UP/DOWN until reaching the parameter to be modified; 6. press Set key to display the parameter value; 7. press UP/DOWN to reach the desired value; 8. press Set to confirm the new value and return to parameter code display; 9. repeat the operations from 5) to 8) to change other parameters; 10. press Prg to return to higher level of the parameters categories and UP/ DOWN to pass to the next category: CtL. Repeat steps from 4) to 8) to access the category and change other parameters; 11. press one or more times Prg to exit the parameters modification procedure and return to standard display visualization. 1 2 UltraCella +0300083EN - rel. 1.3 - 30.06.2014 1 Modification of the parameters (for models with double digit display cod. WB000D*) 2 20 ENG Par. tcE tcT y__ M__ d__ h__ n__ Description Enabling date modification procedure 0/1=No/Yes Date/ time change Action on change 01 or 10 Date/ time: year Date/ time: month Date/ time: day of the month Date/ time: hour Date/ time: minute Def Min Max U.M. 0 0 1 0 0 1 - 0 1 1 0 0 0 1 1 0 0 37 12 31 23 59 - 1 2 1 2 Note: the figure refers to the screens on models with single row display, P/Ns WB000S*. In models with two rows, P/Ns WB000D*, as well as the message indicated, during navigation the display shows with a scrolling message, parametercode and description: “tce - enable data modification”. 3.2.5 Example 2: set the scheduled defrosting periods Procedure: 1. access the parameters modification menu as described in the relative paragraph; 2. enter category “rtc”; 3. press UP and select the parameters “ddi (i = 1…8”) to select the frequency of the ith defrost, based on the indications in the table below; 4. press UP and pass to the defrost hour and minute; 5. press once or more times Prg to save and return to standard visualization. 0 1…7 8 9 10 11 ith defrosting disabled Monday…Sunday From Monday to Friday From Monday to Saturday Saturday and Sunday Daily Note: in the parameters or set point modification procedures, the new value is saved every time the Set key is pressed. Note: if no key is pressed, after about 120 s the control automatically returns to standard display. 3.2.4 1 2 1 2 Note: the figure refers to the screens on models with single row display, P/Ns WB000S*. In models with two rows, P/Ns WB000D*, as well as the message indicated, during navigation the display shows with a scrolling message, parametercode and description: “dd1 - defrost1-day” Example 1: current date/time setting Procedure: 1. access the parameters modification menu as described in the relative paragraph; 2. enter category “rtc”; 3. select parameter “tcE” and set it to 1 to enable the date exchange; 4. press UP 2 times and then set the parameters regarding the year (Y), month (M), day of the month (d), hour (h), minutes (n) (see table below); 5. press UP, select tct parameter and set it from 0 to 1 or from 1 to 0 to perform the data/ time change; 6. select again parameter tcE and set it to 0; 7. press one or more times Prg to save the date/ time and return to standard display. 21 UltraCella +0300083EN - rel. 1.3 - 30.06.2014 ENG 3.3 Procedures 3.3.1 Parameter set selection The control can work with 10 sets of parameters, pre-set in the factory by Carel, but modifiable to suit your requirements, indicated with r01 r10 (recipe 1 ... recipe 10); In order to select the current parameters set (control in OFF): 1. from parameters modification menu, access the category“rcP”and press Set; the message “bni” will appear; 2. press Set and display the active parameters set, for example. r01= recipe 1; 3. press UP/DOWN to select the parameters set to be loaded; you can choose between r01…r10; for example r02 (figure); 4. Press Set to confirm.The control system loads the chosen parameters set and displays “bni”; 5. Press once or more times Prg to return to standard display.. Param Std CAREL /4 /t2 /A2 /A3 /A4 /A5 St rd StH rdH r1 r2 r3 c11 d0 dI dt1 dP1 AL AH Ad A5 A9 F0 F1 F2 F3 F4 H1 H5 HO1 c12 d8d tLi A4 r01 0 12 0 0 0 0 0 2 90 5 -50 60 0 4 0 8 4 30 0 0 120 0 0 0 5 30 1 1 1 1 0 0 0 120 0 1 2 Poultry 1 2 1 2 Note: the figure refers to the screens on models with single row display, P/Ns WB000S*. In models with two rows, P/Ns WB000D*, as well as the message indicated, during navigation the display shows the scrolling message “temp recorder” on the second row “bni - recipe index”. Fish For all other parameters not included in this table, the default values will be used for all configurations, as shown in chap.7 Parameter table. UltraCella +0300083EN - rel. 1.3 - 30.06.2014 2 Recipes (configurations) Vegetables Fruit Summer and Frozen tropical fruit Heater Heater Heater defrost Heater defrost Timed defrost No defrost, Heater defrost defrost defrost with probe, with probe, by stopping evap. fans with probe, with probe, with probe, evap. fans evap. fans compressor, on with evap. fans evap. fans evap. fans controlled by on with evap. fans on compressor on with controlled by controlled by temperature compressor with compressor on, humidity compressor on temperature temperature and off during on and on on and on control and off during and off and off defrost during defrost, during defrost, defrost during during humidity humidity control defrost defrost control r02 r03 r04 r05 r06 r07 r08 0 0 0 0 0 0 0 4 4 4 4 4 11 4 1 1 1 1 0 0 1 0 0 0 0 0 0 0 0 0 0 0 0 0 0 0 0 0 1 1 1 0 -0,5 0 1 4 4 10 -22 2 2 2 2 2 2 2 90 90 90 95 95 85 90 5 5 5 5 5 5 5 -5 -5 -5 0 0 5 -25 10 10 10 10 10 15 -15 0 0 0 0 0 1 0 4 4 4 4 4 4 4 0 0 0 0 2 0 0 12 12 12 24 24 8 15 20 15 10 8 4 4 15 60 60 60 45 30 30 60 4 4 4 4 5 5 10 5 5 10 5 5 5 6 60 60 120 60 60 60 60 0 0 0 0 0 0 0 0 0 0 0 0 0 0 1 1 1 0 0 0 0 -8 0 0 5 5 5 5 30 30 30 15 15 10 30 1 1 1 0 0 0 1 1 1 1 1 1 1 1 0 0 0 0 0 0 0 2 2 2 15 15 15 3 0 0 0 0 0 0 0 0 0 0 0 0 0 0 0 0 0 0 0 0 0 120 120 120 120 120 120 120 0 0 0 0 0 0 0 Red meat 1 22 Restaurant Bakery fresh food Heater defrost Heater with probe, defrost evap. fans with probe, on with evap. fans compressor on controlled by and on during temperature defrost and off during defrost r09 r10 0 0 4 4 1 1 0 0 0 0 0 0 3 -20 2 2 90 90 5 5 0 -25 10 -10 0 0 4 4 0 0 13 15 10 15 90 60 4 10 5 6 60 60 0 0 0 0 0 1 5 -22 30 30 0 1 1 1 0 0 2 3 0 0 0 0 0 0 120 120 0 0 Tab. 3.e ENG 3.3.2 DEACTIVATION MANUAL DEFROST Press DEF: message “Off ” will appear and the control ends the defrost Parameters set to default values In order to set all parameters sets to the factory values (default): 1. from parameters modification menu, access the category“rcP”and press Set; the message “bni” will appear 2. press UP/DOWN and display the message “bnr”; 3. press Set: the message “no” will appear; 4. press UP/DOWN: the message “Std” will appear; 5. press set: the control system brings all parameters sets to default values; 6. press one or more times Prg to return to standard display. 1 Note: in this manner all the modifications are erased and the original factory values are restored to the default ones, indicated in parameters table. 3.3.3 1 2 Note: The Figures refer to the screens on models with single row display, P/Ns WB000S*. In models with two rows, P/Ns WB000D*, the message “Off ” appears on the second row of the display. Defrost In order to activate the defrost by temperature, the defrost probe must detect a temperature lower than the temperature relative to defrost end (par. dt1). The defrost by time is activated setting dI parameter to a value >0. 3.3.4 Description Terminal display during defrost 0 = Temperature alternated with dEF 1 = Last temperature shown before defrost 2 = dEF Def 1 Min 0 Max 2 AUX1/AUX2/Light In order to activate/deactivate the digital outputs AUX1/AUX2 from keyboard set the parameters H1/H5=2. The light output is fixed and cannot be configured. Procedure: 1. press DEF. There can be 3 cases: 2. if the defrost probe detects a temperature greater than the value of the defrost end temperature, the control displays the message “no” and the defrost is not activated; 3. if there are protections in progress, the control waits before entering the defrost. The DEF button blinks and when conditions permit, the control enters the defrost; 4. control comes into defrost, it shows the message “On”. The DEF key is lit and the defrost output is enabled. The display depends on parameter d6. Par. d6 2 ACTIVATION Press keys AUX1/AUX2/Light: message “On” will appear and the control activates the relative output. 1 U.M. - 1 2 2 1 2 DEACTIVATION Press keys AUX1/AUX2/Light: message “Off ” will appear and the control deactivates the relative output. 1 ACTIVATION MANUAL DEFROST 2 1 2 1 2 Note: if output AUX1/2 was not enabled by setting H1/H5 = 2, the relative key blinks to signal that the output is not active. However, the messages “On” and “Off ” will appear 1 2 Note: The Figures refer to the screens on models with single row display, P/Ns WB000S*. In models with two rows, P/Ns WB000D*, the message “On” and “Off ” appear on the second row of the display. Request a manual defrost 1 2 1 2 1 2 3.3.5 On/Off In order to turn off the control from keyboard: • press On/Off for 2 s. The display will alternate Off to the standard display. The key On/Off lights up and any active output relay will be deactivated. 1 2 Case 1 1 2 Case 2 1 2 Case 3 Note: The Figures refer to the screens on models with single row display, P/Ns WB000S*. In models with two rows, P/Ns WB000D*, the message “no” and “On” appear on the second row of the display. 1 2 1 2 Note: The Figures refer to the screens on models with single row display, P/Ns WB000S*. In models with two rows, P/Ns WB000D*, the message “On” and “Off ” appear on the second row of the display. 23 UltraCella +0300083EN - rel. 1.3 - 30.06.2014 ENG In order to turn on the control from keyboard: • press On/Off for 2 s. Par. HA HA1 HA2 Han HF HF1 HF2 HFn Hcr “On” will appear on the display and then control returns to the standard display. The output relay will be re-activated. 1 2 1 2 Description Date/time of last HA alarm Date/time of penultimate HA alarm Date/time of third from last HA alarm Number of HA alarms Date/time of last HF alarm Date/time of penultimate HF alarm Date/time of third from last HF alarm Number of HF alarms HACCP alarms cancelling Action on variation 01 or 10 Def Min Max U.M. 0 0 0 0 0 15 0 0 0 0 0 15 0 0 1 - Each alarm is displayed with scrolling text, which contains the day of week, hour, minute, and the temperature that caused the alarm. This is a list (FIFO) in which are stored only the last 3 alarms. Instead, the alarm counters (HAn, HFn), after reaching 15, they stop. Note: The Figures refer to the screens on models with single row display, P/Ns WB000S*. In models with two rows, P/Ns WB000D*, the message “On” and “Off ” appear on the second row of the display. Example: HA alarm triggered Thursday at 13:17, with detected temperature of 36.8 °C. 3.4 Multifunction menu The multifunction menu allows you to access: • “HcP”: HACCP alarms display, type HA and HF alarms and reset; • “cc”: continuous cycle activation/deactivation; • “rEc”: display maximum and minimum temperature, cancellation and re-start recording; • “I/O”, input/output: displaying the temperature read by the probe and digital input status; • “USB”: USB key; • “InF”: information • “Log”: datalogging function 1 Def 0 Min 0 Max 15 2 1 2 1 2 1 2 Note: the figure refers to the screens on models with single row display, P/Ns WB000S*. In models with two rows, P/Ns WB000D*, as well as the message indicated, during navigation the display shows the scrolling message “HACCP Alarms” on the second row. 2 2 U.M. ora Procedure: 1. press Prg and Set for 2 s; the first menu will appear: HcP; 2. press UP/DOWN to view other entries; 3. press Set to enter: follow the steps described in the following sections for the relative explanations; 4. Press one or more times Prg to return to standard display. 1 1 1 Par. Description cc Continuous cycle duration 2 1 2 Note: the figure refers to the screens on models with single row display, P/Ns WB000S*. In models with two rows, P/Ns WB000D*, as well as the message indicated, during navigation the display shows the scrolling message “Menu” on the second row. 3.4.2 3.4.1 Par. Description cc Continuous cycle duration Continuous cycle For explanation of continuous cycle, see chapter 6. In order to activate the continuous cycle • the control must be on; • the value of the parameter cc must be >0. HACCP alarms display Def 0 Min 0 Max 15 U.M. hour For explanations regarding HACCP alarms, consult chapter “Alarms”. In the multifunction menu you can see the date and time of the last 3 alarms HA and HF. After entering the multifunction menu (see previous par.), select with UP / DOWN the message “HcP”. After entering the multifunction menu (see previous par.), select with UP / DOWN the message “cc”. Procedure: 1. press Set, and then UP / DOWN to display the parameters in the following table: you can see the number of alarms, the relative date and you can also cancel the alarms; 2. press Set to display the alarm date and time; 3. press Prg until you return to standard display. ACTIVATION Procedure: 1. press Set; the message “OFF” will appear (continuous cycle disabled); 2. press UP/DOWN: the message “ON” appears; 3. after about 1 s the control returns to standard display and the compressor icon appears, to show the activation of the function. UltraCella +0300083EN - rel. 1.3 - 30.06.2014 24 ENG 1 2 1 2 1 2 1 2 Note: by pressing UP you will cancel both the maximum and the minimum recorded temperature. 1 2 1 Note: the Figures refer to the screens on models with single row display, P/Ns WB000S*. In models with two rows, P/Ns WB000D*: • MAX --> Max temp recorder (scrolling) • 36,9 --> Max • 13.Y --> year • 11.M --> month • 22.d --> day • 9.H --> hour • 34.m --> minute 2 Note: the figure refers to the screens on models with single row display, P/Ns WB000S*. In models with two rows, P/Ns WB000D*, as well as the message indicated, during navigation the display shows the scrolling message “Continuous cycle” on the second row. DEACTIVATION Follow the same activation steps and set “OFF”. 3.4.4 Note: the activation of the continuous cycle function does not appear on display in standard mode. 3.4.3 Input/output status display After entering the multifunction menu (see previous par.), select with UP / DOWN the message “I/O”. Procedure: 1. Press Set: the message “b1” appears regarding the probe B1; 2. Press Set once again: the value read on probe B1 will appear alternating with the message b1; 3. Press Prg to return to upper level; 4. Press UP/DOWN and repeat steps 1)…3) to display the inputs/outputs indicated in table; 5. Press one or more times Prg to return to standard display Maximum and minimum temperature monitoring The control allows you to continuously record the minimum and maximum temperature measured by the control probe. The monitoring is always active. The values can be reset, as described below. After entering the multifunction menu (see previous par.), select with UP / DOWN the message “rEc”. Text b1 b2 b3 b4 b5 di1 di2 di3 do1 Procedure: 1. press Set; the message “MAX” will appear (maximum registered temperature); in order to see the maximum temperature, registration date and time pass to point 3 or: 2. press UP/DOWN: the message “MIn” appears (minimum temperature registered); 3. press Set: the maximum/minimum recorded temperature will appear along with the date/time of record (y=year, m = month, d = day, h = hour, m = minutes. Press UP to cancel (both temperatures), appears RES and the control exits the menu, or press Prg for more than once and exit the display. Description Analogue input 1 Analogue input 2 Analogue input 3 Analogue input 4 Analogue input 5 Digital input 1 Digital input 1 Digital input 1 Digital output 1 Note: the opened digital inputs/outputs are displayed along with the message “oP” (=open), those closed with “cLo” (=closed). Example 1: probe B1 measures the temperature of -1.0 °C.. 2 1 1 2 2 2 2 1 1 2 2 1 2 Note: the figure refers to the screens on models with single row display, P/Ns WB000S*. In models with two rows, P/Ns WB000D*, as well as the message indicated, during navigation the display shows the scrolling message “Probe1 status” on the second row “. 1 1 2 1 Description Digital output 2 Digital output 3 Digital output 4 Digital output 5 Digital output 6 Analog output 1 EVD suction temp. EVD evaporation temp. Tab. 3.f Example: maximum registered temperature 36.9°C on 22/11/2013 at 9.34. 1 Text do2 do3 do4 do5 do6 Y1 ESu ESA 1 2 25 UltraCella +0300083EN - rel. 1.3 - 30.06.2014 ENG Example 2: digital input 1 is closed. 3.4.6 Information In the information menu you can view the software release. 1 After entering the multifunction menu (see chapter 3.4), select with UP / DOWN the message “InF”. 1 2 2 1 2 Note: the figure refers to the screens on models with single row display, P/Ns WB000S*. In models with two rows, P/Ns WB000D*, as well as the message indicated, during navigation the display shows the scrolling message “Digital input 1 status” on the second row. 3.4.5 1 2 1 2 1 2 Fig. 3.e Procedure: 1. press Set: the message “vEr” appears regarding the software revision; 2. press Set once again: the software revision will appear (e.g. 1.3); 3. press one or more times Prg to return to standard display . USB memory key Preliminary operations: 1. remove the lower frame and insert the USB memory key; 2. set the control to OFF. Note: the figure refers to the screens on models with single row display, P/Ns WB000S*. In models with two rows, P/Ns WB000D*, as well as the message indicated, during navigation the display shows the scrolling message “Application version” on the second row 3.4.7 1 Data logging function 2 UltraCella introduces the data logging function to cold room control, offering the possibility to record the temperature read by probe B4. How to download the file with temperatures recorded by UltraCella: 1. remove the bottom frame and insert the USB flash drive. The red and green LEDs next to the flash drive will come on once in sequence to indicate the that unit has recognised the USB flash drive; 2. press Prg and Set for 2 s; the first menu will be displayed: “HcP” 3. press UP or DOWN until reaching the “LoG” menu item; 4. press SET to confirm the download of the recorded temperatures (log file) to the USB flash drive. The message “LoG” will flash during downloading; at the end, “LoG” will stop flashing to indicate that the download has been completed; if the procedure fails for some reason, USB key Fig. 3.d After entering the multifunction menu (see previous par.), select with UP / DOWN the message “USb”. the alarm icon Procedure: will be shown on the display; 5. remove the flash drive; to exit the “LoG” menu, press PRG and/or SET. Press Set: the following commands will appear by scrolling UP/DOWN: • EXt: press Set to exit; • dnL: press Set, the control saves inside the key the 10 parameters set: r01…r10; • uPd: press Set, the control loads from the key the 10 parameters set: r01…r10; 1 Note • the parameters are saved in a text file type. txt, which can be viewed 2 Note: the figure refers to the screens on models with single row display, P/Ns WB000S*. In models with two rows, P/Ns WB000D*, as well as the message indicated, during navigation the display shows the scrolling message “temp recorder” on the second row. on the computer; • for information regarding the switching of the LEDs, see chapter 2.10.. Note: if the procedure fails for some reason, when exiting the 1 1 2 the error message “LoG” will menu, as well as the alarm icon also be shown on the display. The message error will be cleared after the next correct download or when restarting the controller 2 When probe B4 is suitably configured, the unit starts recording the temperature read by the probe every 5 minutes (sample time) for a maximum period of 4 years. After the fourth year, the controller overwrites the oldest data saved. The temperature log is available as a csv file via USB flash drive, which can be analysed in Excel or other widely-available programs. 1 2 1 2 Note: the figures refer to the screens on models with single row display, P/Ns WB000S*. In models with two rows, P/Ns WB000D*, as well as the message indicated, during navigation the display shows the scrolling message “USB device” on the second row USB key UltraCella +0300083EN - rel. 1.3 - 30.06.2014 26 ENG Fig. 3.f UltraCella can only record the temperature read by probe B4. To activate the data logging function, probe B4 must be configured as the temperature recording probe, setting /A4=3 (analogue input B4 must be configured as a temperature probe: /P4=0 or 1) Par. /A4 Description B4 configuration … 3 = Record probe (Src) Def 0 Min 0 Max 3 U.M. - • Channel recorded: only analogue input B4 • Start logging: as soon as parameter /A4 is set to 3. The instant the setting is confirmed is recorded in the log under event name “Start” • Sample time: 5 minutes (not modifiable by the user) • Logging period: 4 years from recording the first sample (determined by • • • • the event /A4=3). After this period, the controller overwrites the oldest samples saved Data extraction: any USB flash drive available on the market can be used Extracted log file name: Log_UltraCella.csv Other events: as well as the “Start” event, the log also records “Stop” events (probe /A4 no longer configured as recording probe “Src”) and “Boot” (starting or restarting the controller) Log data format: the data is organised in columns: date (yy/mm/ dd hh:mm:ss), type of event, temperature (in °C or °F in relation to parameter /5t) Example: recording started on 2 April 2014 at 17:19:49. The data were extracted by USB flash drive at 18:10 on the same day. TIME 2014/04/02 17:19:49 2014/04/02 17:24:49 2014/04/02 17:29:49 2014/04/02 17:34:49 2014/04/02 17:39:49 2014/04/02 17:44:49 2014/04/02 17:49:49 2014/04/02 17:54:49 2014/04/02 17:59:49 2014/04/02 18:04:49 2014/04/02 18:09:49 EVENT Boot Src_Probe (°C) 0 25,2 25,0 24,6 24,1 21,9 18,8 15,1 12,7 10,1 7,3 Tab. 3.g 27 UltraCella +0300083EN - rel. 1.3 - 30.06.2014 ENG 4. COMMISSIONING 4.1 First commissioning 4.3 Single digit display models cod. WB000S* commissioning After wiring the electrical connections and the power supply (see installation chapter), the operations required for commissioning the UltraCella control system depend on the type of interface used. Refer to some parameters such as: 1. Set-point and differential; 2. Probes and digital inputs configuration; 3. Selection of the type of defrost and fans operation; 4. Cold room light management. UltraCella with single row display Types of interfaces: • board with LED display: parameters configuration is performed using the display and the keyboard based on the procedure described in chap.3 “parameters change”. Alternatively, you can connect the remote graphic terminal “UltraCella Sevice Terminal” and enter the wizard menu for first commissioning (wizard); • USB memory key: put the control on OFF and load the programming parameters from USB memory key (uPd command, UPLOAD, see Chapter 3); • supervisor: in order to facilitate the launch of a large number of controls UltraCella using only the supervisor you can limit the operation of the first commissioning to the serial address setting. The configuration is postponed to a later time using the supervisor. Fig. 4.a After the configuration you can enable the control of the cold room by pressing the ON/OFF key. 1. First switch the controller OFF (press ON/OFF). 4.2 Parameters to be set for the commissioning Par St rd /P /A2 /A3 /P4 /A4 /P5 /A5 A5 A9 d0 dt1 dt2 dP1 dd Fd F3 C12 d8d tLi A4 c1 c2 c3 Description Categ. Set point CtL Differential CtL Type B1 to B3 Pro B2 configuration Pro B3 configuration Pro Type B4 Pro B4 configuration Pro Type B5 Pro B5 configuration Pro Digital input configuration 2 (DI2) ALM Digital input configuration 3 (DI3) ALM Type of defrost dEF End defrost temperature, main dEF evaporator End defrost temperature, auxiliary dEF evaporator Maximum defrost duration dEF Dripping time after defrost (fans dEF off ) Post dripping time (fans off ) Fan Evaporator fan during defrost Fan 0/1=on/off Compressor safety for door switch doL 0 = disable door management Compressor restart time for door doL switch Light on with door open doL Light management doL 0 = door switch + light key 1 = light key Minimum time between CmP compressor starts Minimum compressor off time CmP Minimum compressor on time CmP Def Min Max 0 r1 r2 2.0 0.1 20 0 0 2 0 0 2 0 0 3 0 0 2 0 0 3 0 0 0 0 0 1 0 0 14 0 0 14 0 0 3 4.0 -50.0 200.0 U.M. °C/°F °C/°F - 1 2. Press Prg for 2 sec: the password prompt is displayed (PAS). 1 °C/°F 1 0 250 min 30 min 1 1 0 0 30 1 min - 0 0 5 min 0 0 240 min 120 0 0 0 240 min 1 - 6 0 15 min 3 3 0 0 15 15 min min Tab. 4.a 2 4. Press Set: the first category is displayed: Pro (Probes). 4.0 -50.0 200.0 °C/°F 30 2 2 1 2 6. Press repeatedly UP to reach the parameter /P. 1 2 8. Press UP to modify the value. UltraCella +0300083EN - rel. 1.3 - 30.06.2014 28 1 2 3. Press UP and enter the password: 22. 1 2 5. Press Set: the first parameter is displayed: /21. 1 2 7. Press Set to set the value of the parameter (see settings in the parameter table). 1 2 9. Press Set to confirm and return to the parameter code. The new value has now been saved on the controller. ENG 1 1 2 10. Press UP to move to parameters /A2.../ A5; make any required settings. 1 2 11. Press Prg to return to the parameter categories. 5. Press Set: the second row of the display will scroll the code and description of the first parameter in the category: /21 – Probe1 meas. stab.; the first row of the display will show the current value of the parameter 6. Press UP repeatedly until reaching parameter /P. The second row of the display will scroll the code and description of the parameter: /P – type B1 to B3; the first row of the display will show the current value of the parameter 7. Press Set and UP/DOWN to set the desired value of the parameter. 8. Press Set to confirm. The new value entered is now saved on the controller. 9. Press UP to move to parameters /A2…/A5; make any required settings . 10. Press Prg to return to the categories of parameters. 2 12. Press UP to move to category CtL and follow the previous steps to set St and the following parameters. 4.4 Double digit display models cod. WB000D* commissioning UltraCella with double row display Fig. 4.b 11. Press UP to move to category CtL (the second row scrolls the name of the second category of parameters: Control) and follow the previous steps to set St and the subsequent parameters, as shown in the previous table and in the parameter table. 1. First switch the controller OFF (press ON/OFF). 2. Press Prg for 2 sec: the second row of the display will show “PASS” (password required). 3. Press UP/DOWN to enter the password: 22. 4. Press Set; the second row of the display will scroll the name of the first category of parameters: Probes. 29 UltraCella +0300083EN - rel. 1.3 - 30.06.2014 ENG 4.5 Commissioning with UltraCella Service Terminal H E L P Parameters Modification M E N U Password: 1234 PRG SET ESC + UltraCella with LED display H E L P Multifunction menu PRG M E N U SET HACCP ESC Fig. 4.g UltraCella Service terminal 2. To enter programming mode: Press Prg and enter the password: 1234 H E L P Fig. 4.c If the UltraCella controller has never been configured, as soon as the terminal is connected, the wizard is shown automatically. The Wizard menu can also be accessed to repeat the guided commissioning procedure before the first commissioning. M E N U Parameters Categ. 1/2 1-Probes 2-Control 3-Compressor PRG SET ESC Fig. 4.h 3. Press DOWN until reaching the “Wizard” menu 1 2 H E L P M E N U 10-Door/Light 11-Recipes 12-Wizard PRG Fig. 4.d Parameters Categ. 12/12 SET ESC Remove the bottom faceplate and connect the UltraCella Service Terminal to the controller. Fig. 4.i 4. Confirm by selecting Set. 4.5.1 First start - up H E L P When starting for the first time, once the Service Tool is connected, the wizard is shown automatically. Set “Yes” to change the set point and then answer the questions to set the other parameters. H E L P Param. Cat Wizard M E N U Do you want to modify the main set point? YES PRG PRG 5. Press Up and SET to enter the guided commissioning procedure. 4.6 Main function commissioning 4.6.1 Repeated commissioning procedure Setpoint 0.0 °C PRG Set-point and differential The reference output is the compressor output (CMP). The set point and differential determine the compressor activation and deactivation temperatures. The control probe is the virtual probe Sv. At start-up it corresponds to probe B1. If the temperature inside the cold room is not uniform the control can be set (by placing /4> 0) to regulate on a “virtual” probe obtained from the average of two measurement points (probes B1 and B2). The commissioning procedure can be repeated by accessing the Wizard menu. 03/12/13 17:52:30 SET Fig. 4.j SET Fig. 4.e H E L P M E N U YES ESC ESC 4.5.2 Param.Cat Wizard Do you want to use the Wizard to configure the cold room ? M E N U CMP ON SET OFF OFF ESC rd St Fig. 4.f Fig. 4.k 1.Switch the controller OFF (press DOWN and select the On/Off icon; press Set twice and then UP to switch the controller OFF; press Esc twice to exit) UltraCella +0300083EN - rel. 1.3 - 30.06.2014 Key St Sv rd CMP 30 Set point Virtual probe Differential Compressor Sv ENG 4.6.2 Probes configuration T2 The UltraCella controls have a maximum of 5 analog inputs, of which 3 can be configured as temperature probes (NTC probes, NTC high temperature probes, PT1000), the fourth as temperature probe or input 0 ... 10 V, the fifth can be configured as input 4 ... 20 mA. B5 Type NTC10 kΩ a 25°C, range -50T90°C, NTC extended range, NTC50 kΩ a 25°C, range 0T150°C; PT1000, 1000 Ω a 0°C, range -50T90°C NTC10 kΩ a 25°C, range -50T90°C, NTC extended range, NTC50 kΩ a 25°C, range 0T150°C 0…10 V 4…20 mA Tab. 4.b A Analogue Inputs B1 B2 B3 B4 T1 min Key T1 T2 A min, max Below the parameters with the selection: Par. /P /P4 /P5 4.6.3 Description Type B1 to B3 0 = NTC Standard Range -50T90°C 1 = NTC Enhanced Range 0T150°C 2 = PT1000 Type B4 0 = NTC Standard Range -50T90°C 1 = NTC Enhanced Range 0T150°C 2 = 0 to 10 V Type B5 0 = 4 to 20 mA Def 0 Min 0 Max 2 U.M. - 0 0 2 - 0 0 0 - max Fig. 4.l Temperature measured by the probe Temperature measured by the probe after offset correction Offset value Measurement range HACCP - CAUTION The modification of these parameters, influencing the measurement and display, may not be allowed in some applications or might require special approval because it may affect the operation of HACCP systems. If in doubt, consult the person in charge of food safety or the manager of the plant. 4.6.5 Digital inputs Note: the digital input 1 (DI1) is suited for door switch and is not programmable. If door switch is not used, short-circuit pin 21 (DI1) with a GND pin. Probes function assignment B1, B2, B3, B4, B5 The control, inside the cold room, can use the probes: • outlet; • intake; • defrost, placed in the evaporator, preferably where the ice resides most; • condenser, used to protect the compressor due to high discharge temperature, associated with fowling of the condenser or fan failure. You can link multiple contacts to multifunction digital inputs to activate various functions, such as alarm, enable / start defrost, low pressure, etc.. Caution: in order to ensure the safety of the unit in the event of serious alarms, all the electromechanical safety devices required to guarantee correct operation must be fitted on the unit. Probe B1 is configured as environment probe and its function cannot be changed. Par. /A2 /A3 /A4 /A5 4.6.4 Description Configuration B2 0 Absent 2 Intake probe 1 Defrost probe 1 Configuration B3 0 Absent 2 Cond.probe 1 Defrost probe 2 3 Defr. probe 1 Configuration B4 0 Absent 1 Ambient temperature probe (SA) 2 Humidity probe 3 Recording probe (Src) Configuration B5 0 Absent 1 Humidity probe Def 0 Min 0 Operation of the digital inputs Max U.M. 2 - PARAMETERS A5, A9 0 0 3 - 0 0 3 - 0 0 1 Selection 0 = Not active 1 = Immediate external alarm 2 = Do not select 3 = Enable defrost 4 = Start defrost 5 = Do not select 6= Remote On/Off 7 = Do not select 8 = Low pressure switch 9 = Do not select 10 = Do not select 11 = Do not select 12 = AUX activation 13 = Do not select 14 = Continuous cycle activation - Probes reading correction The values read by the probes can be corrected by adding/removing an offset from the measure with the parameters /c1, ..., /c5. Par. /c1 /c2 /c3 /c4 /c5 Description Offset B1 Offset B2 Offset B3 Offset B4 Offset B5 Def 0 0 0 0 0 Min Max -20.0 20.0 -20.0 20.0 -20.0 20.0 -20.0 20.0 -20.0 20.0 Contacts U.M. - OPEN CLOSE active not enabled not active OFF low pressure status deactivated contact opening (deactivation) not active enabled active ON normal status activated contact closing (activation) Tab. 4.c Below are indicated the parameters used to explain the selections for A5 and A9. 1 = Immediate external alarm Offsets may be required to meet the calibration requirements of HACCP systems. In this case, the offset should be obtained using calibrated instruments and proper records should be kept. The modification of these parameters, influencing the measurement and display, may not be allowed in some applications. If in doubt, consult the person in charge of food safety. Application: external alarm that requires immediate activation (for example, high pressure alarm or compressor thermal overload). The activation of the alarm: 31 UltraCella +0300083EN - rel. 1.3 - 30.06.2014 ENG 1. • shows the message on the display (IA); 5 = Do not select • activates the buzzer, if enabled; • activates the alarm relay, if selected; 6=On/Off remote 2. involves the following actions on the actuators: The digital input can also be programmed as a remote ON/OFF switch. When the control is set to OFF: • the temperature is displayed alternately with the message “OFF”, the internal timer relative to the parameter “dI” is updated. If dI expires when the unit is OFF, a defrost is performed when the unit is switched on again; • the auxiliary relays remain active set as an auxiliary output and light, the other auxiliary outputs are off ; • the buzzer and the alarm relay are off; • the control does not perform the control functions, defrosts, continuous cycle, temperature alarm signalling and all the other functions; • the compressor protection times are respected. • compressor: operates depending on the values assigned to parameter A6 (stop compressor on external alarm). • fans: continue to operate according to the fan parameters (F). Note: • when stopping the compressor, the minimum ON time (c3) is ignored. • if more than 1 input is configured on immediate alarm, the alarm is generated when one of the inputs is opened. 2 = Do not select 3 = Enable defrost At control restart, all functions are reactivated, except: • defrost at start-up; • compressor and fan delay at start-up. Application: Any defrost request arriving when the contact is open will remain pending until the contact closes. Note: The ON/OFF from external digital input has priority over the keypad and the supervisor. A5/ A9 = 3 Contacts Open Closed Close with active defrost Defrost Not enabled Enabled (defrost start is still determined by the control) when the digital input is opened, the defrost is immediately stopped and the unit restarts normal operation (without performing the dripping or postdripping phases). The LED starts flashing to indicate that the defrost request is pending, waiting for the next enabling signal (closing of the contact), when the defrost will be performed completely. Tab. 4.d 7 = Do not select 8 = Low pressure switch By setting “A5/A9”=8 you can manage the low pressure switch. The low pressure alarm “LP” is signalled when the low pressure switch is triggered: • during normal regulation, with active compressor and pump down function is disabled (c7=0) • with pump-down function enabled (c7 >0), if the pump down valve is opened and the compressor is active. Note: this function is useful to prevent defrosts on the units accessible by the public during opening times. The low pressure alarm signal is delayed by the time set for parameter A7. The low pressure alarm ‘LP’ stops the compressor. 4 = Start defrost from external contact Application: this feature is useful in case you need to perform synchronized defrost across multiple units or otherwise manually controlled by an external contact. To perform the defrosts, connect a cyclical, mechanical or electronic timer to the digital input. You can connect multiple units at the same timer and set different values for the parameter d5 (defrost delay from multifunction input) to avoid simultaneous defrosts. 1 2 1 2 9, 10, 11 = Do not select ON Timer 12 = Auxiliary output OFF ON Setting H1/H5 = 2 the corresponding output AUX1/ AUX2 is activated by the key AUX1/ AUX2. Besides, it is possible to use alternatively one digital input DI2 or DI3 (set A5 or A9=12) to drive output AUX2 or AUX3. In this case the key and the digital input have the same priority as regards the switch on. UNIT 1 Defrost OFF ON UNIT 2 Defrost 13 = Do not select OFF UNIT 3 ON 14 = Continuous cycle activation Defrost Activation: passage of the contact from opened to closed; Deactivation: passage of the contact from closed to opened. OFF dP(1) dP(2) dP(3) t d5(2) d5(3) Fig. 4.m Key dP UNIT 1…3 d5 t Maximum defrost duration Unit 1…3 Defrost delay form digital input Time UltraCella +0300083EN - rel. 1.3 - 30.06.2014 32 ENG 4.6.6 Type of defrost Compressor on before door opening UltraCella allows you to manage the following types of defrost, depending on parameter d0: 0. electric heater defrost by temperature; 1. hot gas defrost by temperature; 2. electric heater defrost by time; 3 hot gas defrost by time. open open Door switch Door switch close close ON ON Evaporator fan Evaporator fan OFF OFF ON ON CMP CMP OFF OFF For further explanations please see chap. 6. Par. Description d0 Type of defrost 0 heater by temperature. 1 hot gas by temperature 2 heater by time 3 hot gas by time dt1 End of defrost temperature, main evaporator dP1 Maximum defrost duration Def 0 4.0 30 Min 0 Max 3 U.M. - -50.0 200.0 °C/°F 1 250 ON ON Door alarm Door alarm min 1 2 3 4 OFF Evaporator Fans Fd Description Dripping time after defrost (fans off ) Fan activation time with compressor OFF Evaporator fan during defrost 0/1=on/off Post dripping time (fans off ) 4.6.8 Def 2 30 1 Min 0 0 0 Max 30 60 1 U.M. min - 1 0 30 min t Door_sw Evap_fan CMP Dor alarm d8d Min 0 Max 5 U.M. min 0 0 240 min t d8d Fig. 4.o Time door switch Evaporator fan Compressor Door alarm “dor” Note: to render the time settings operational, the control must restart. Otherwise, the settings will be used only at the next use, when the inner timers are set. 4.6.9 Def 0 4 Key Door opening Description Compressor safety time, door switch 0 = disabled door management Compressor restart time for door switch 3 c12 Fig. 4.n If the door is left open, the signalling control is made via the door switch (digital input 1, already configured). When the door is open, the evaporator fans are turned off if set as fixed speed fans (F0=0, 1), otherwise operate at minimum speed defined by parameter F7 (if F7<50) if set as variable speed fans (F0= 2); the compressor continues to operate for the time c12, then turns off. Once passed the period of time d8d from door opening, compressor and evaporator fans are running again and the error “dor” is displayed. Par. c12 2 d8d During the dripping periods (parameter dd > 0) and post-dripping periods (parameter Fd > 0) the evaporator fans are always off. This is useful to allow the evaporator to return to normal temperature after defrost. There is the possibility to force the start of the evaporator fans during control (parameter F2) and during defrost (parameter F3). See chap. 6 Par. dd F2 F3 1 OFF t c12 4.6.7 Compressor off before door opening Compressor management • c1 determines the minimum time between two consecutive starts of the compressor; • c2 sets the minimum turn off time for the compressor. • c3 sets the minimum running time for the compressor. Par. c1 c2 c3 Description Def Minimum time between two successive 6 starts of the compressor Compressor minimum switch-off time 3 Compressor minimum switch-on time 3 Min 0 Max 15 U.M. min 0 0 15 15 min min c1 c3 Special cases refer figure 4.n and 4.o: • to disable door alarm, set d8d =0. If d8d = 0, c12 is also considered =0; • to keep only phase 2 (figure), in which the compressor is on, and to eliminate phase 3 in which the compressor/ evaporator fan is off, set d8d=c12; • to keep only phase 3 (figure), c12=0; • during phase 3 the compressor may be on if: 1. pump down is activated; 2. hot gas defrost is activated. c2 ON Step1 OFF ON Step2 OFF Power_ON t c0 c11 Fig. 4.p Note: c2 parameter used to ensure the balance of the pressure after the compressor stop and to avoid blocking at the next reboot of those compressors that do not have sufficient starting torque. 33 UltraCella +0300083EN - rel. 1.3 - 30.06.2014 ENG 4.7 Light management 4.8 Other configuration parameters The light can be managed: • from door switch and/or light key; • only from light key. The configuration parameters must be set during the commissioning of the controller and concern: • date/time set; • measurement stability of the analogue probes; • display of the decimal point on control; • serial address for monitoring network connection; • temperature measurement unit (°C / °F); • disabling of keyboard, keys and buzzer; • display view during defrost. Below are indicated the involved parameters. Par. tLi A4 Description Light on with door open Light management Def 120 0 Min 0 0 Max 240 1 U.M. - 0 Door switch + light key 1 Light key Note: if the control is OFF, the light output is controlled only by the light key. If the control is set to ON, the light is controlled by a door switch + light key or just light key according to the setting of the parameter A4. Date/ time set See example 2 in chap.3. 4.7.1 Analogue probes measuring stability It defines the filter coefficient used to stabilize the temperature measurement. Low values assigned to this parameter allow a prompt response of the sensor to temperature variations, but the reading becomes more sensitive to disturbance. High values slow down the response, but guarantee greater immunity to disturbance, that is, a more stable and more precise reading. Door switch + light key If A4=1 the light is on/off only using the light key. The open/closed status of the door is ignored. If A4=0, when the cold room door is opened, the light is always on. When the door is closed, the light can be turned on or off using the light key. Once turned on, the light will automatically turn off after the time set in parameter tLi. Par. /21 /22 /23 /24 /25 LIGHT CONTROL FROM DOOR SWITCH AND LIGHT KEY A4=0 ON Description Stability measuring probe 1 Stability measuring probe 2 Stability measuring probe 3 Stability measuring probe 4 Stability measuring probe 5 Def 4 4 4 4 4 Min 0 0 0 0 0 Max 9 9 9 9 9 U.M. - Light_K Display view On models with single row display, P/Ns WB000S*, it is possible to show a single characteristic, selectable through /t1 parameter. On models with two rows, P/Ns WB000D*, and on the UltraCella Service terminal, it is possible to show two different characteristics, the first selectable through /t1 parameter, and the second through /t2 parameter. OFF OP Door_sw CL Par. Description /t1 Display variable 1 0 None 1 Virtual probe 2 Outlet probe 3 Intake probe 4 Defrost probe 1 5 Defrost probe 2 /t2 Display variable 2 0 None 1 Virtual probe 2 Outlet probe 3 Intake probe 4 Defrost probe 1 5 Defrost probe 2 6 Set point ON Li OFF tLi tLi t Fig. 4.q Key Light_k Li Door_sw tLi t Light key Light Door switch Light turn off delay Time 7 B1 6 7 8 9 10 11 Set point B1 B2 B3 B4 B5 8 9 10 11 12 13 14 B2 B3 B4 B5 rd superheat valve opening % valve opening step 15 Def 1 Min 0 Max 11 U.M. - 6 0 15 - Serial address (parameter H0) H0 assigns an address to check for serial connection to a supervision system and / or remote assistance. Par. H0 UltraCella +0300083EN - rel. 1.3 - 30.06.2014 34 Description Serial Address Def 193 Min 0 Max 207 U.M. - ENG Temperature unit of measure and decimal point display The control allows: • choosing the temperature measuring unit between Celsius (°C) and Fahrenheit (° F) degrees; • to enable/disable the display of the decimal point and buzzer. Par. /5t /6 H4 Description Temperature unit of measure 0/1 = °C for temperature and Bar for pressure sensors / °F for temperature and psi for pressure sensors of EVD (if present) Display decimal point 0/1 = yes/no Buzzer 0/1 = enabled/disabled Def 0 Min 0 Max 1 U.M. - 0 0 1 - 0 0 1 - Disable keypad You can inhibit some functions relating to the use of the keypad, for example, the modification of the parameters and the set point if the unit is accessible to the public Par. H6 Description Terminal keys block configuration 0 = all keys enabled. Def 0 Min 0 Max 255 U.M. - Configuration table FUNCTION Set-point modification Defrost AUX1output Multifunction menu (HACCP) AUX2 output On/Off management Light management par. H6 1 2 4 8 16 32 64 128 Tab. 4.e Example: to disable the activation functions of the outputs AUX1 and AUX2, set H6 = 8+32 = 40. 4.9 Ultra EVD module commissioning If Ultra EVD Module is connected to UltraCella as shown in figure 2.o (on FieldBus RS485 Modbus protocol), it’s possible to make the commissioning of the Module through UltraCella, using both built-in display and/or UltraCella Service if available. Since the driver inside Ultra EVD Module is a standard EVD Evo driver, please see the relevant manual for details (code +0300005EN). The EVD parameters that can be set using UltraCella are listed in chapter 7, EVD parameters category, while EVD alarm are listed in chapter 8.5 of this manual. 35 UltraCella +0300083EN - rel. 1.3 - 30.06.2014 ENG 5. OUTPUTS CONFIGURATION AND PROTECTIONS 5.1 Analogue output 5.2.3 It is available analog output Y1, to drive the evaporator fans designed to be operated with input 0 ... 10 V. See the chapter 6.9. The AUX1 and AUX2 outputs can be associated with different functions, such as alarm, auxiliary output controlled by AUX button, the pump down valve, condenser fan, compressor, second compressor with rotation. For further explanations, please consult chapter 3.2. Par. HO1 Description Configuration output Y1 0 Not active 1 Do not select 2 Variable speed evaporator fans set on Sd probe Def 0 Min 0 Max 2 U.M. - Par. H1 5.2 Digital Outputs Note: for the other protection parameters (c1, c2, c3) see chapter 4. 5.2.1 Delay start for compressor output Par. Description c0 Compressor/ fan start delay at power on Def 0 Min 0 Max 15 U.M. min • c0: from the moment in which the control is powered-up, turning H5 on the compressor and the evaporator fan is delayed by a time (in minutes) equal to the value assigned to this parameter. This delay helps to protect the compressor against repeated starts in the case of frequent power failures. 5.2.2 Par. c11 Safety devices for outputs with different relays Description Second compressor start delay Def 4 Min 0 Max U.M. 250 s • c11 sets the activation delay between the first and the second compressor (or between the first and the second step of the compressor). c1 c3 c2 ON Step1 OFF ON Step2 OFF Power_ON t c0 c11 Fig. 5.a Key Step1 Step2 t Step 1 compressor Step 2 compressor Time UltraCella +0300083EN - rel. 1.3 - 30.06.2014 36 Output operation AUX1/AUX2 Description Configuration of output AUX1 0 = Normally energized alarm 1 = Normally deenergized alarm 2 = Activation by AUX1 key 3 = Bowl resistance activation 4 = Auxiliary evaporator defrost 5 = Pump down valve 6 = Condenser fan 7 = Delayed compressor 8 = Do not select 9 = Do not select 10 = Do not select 11 = Do not select 12 = Do not select 13 = Second compressor step 14 = Second compressor step with rotation 15 = humidity output Configuration of output AUX2 See H1 Def 1 Min 0 Max 15 U.M. - 1 0 15 - ENG 6. CONTROL 6.1 Switching the controller ON and OFF 6.3 Set point The state of ON/OFF can be controlled by more than one source, keyboard, digital input and supervisor. When the controller is off, the display will show the temperature selected for parameter /t1 alternating with the OFF message. The digital input can be used to switch the controller on/ off, setting parameter A5/A9 to “6”. The activation state of ON / OFF from digital input has priority over the one from the supervisor and keyboard. The reference output is the compressor (CMP). The controller can operate in two different modes, that can be selected using parameter r3: • direct with defrost; • direct without defrost; Origin Digital input Keyboard Supervisor Par. St rd r1 r2 r3 Priority Notes 1 Disable On/Off from keypad and supervisor 2 2 Tab. 6.a The control output of the controller is the compressor output. The control probe is the ambient probe B1 (default setting), while the probes B2, B3, B4, B5 may be associated with the functions of defrost probe 1/2, outlet probe, intake probe, condenser probe. If the cold room is very large you should also use a second probe to control the temperature of the room. The controller will activate the compressor based on the requirements of the virtual probe (Sv), obtained from weighed average of the 2 probes (B1, B2). Description Virtual probe composition 0 = probe B1 100 = probe B2 Def 0 Min 0 Max 100 Min r1 0.1 -50 r1 0 Max r2 20 r2 200 1 U.M. °C/°F °C/°F °C/°F °C/°F - CMP OFF rd Sv St Fig. 6.b Key St rd Sv CMP U.M. - Set point Differential Virtual probe Compressor If you have activated the second compressor output (H1, H5 = 13, 14) on AUX output, the activation of the compressor is at St + rd/2 and that of the auxiliary compressor AUX in St + rd, according to the figure below. The /4 parameter is used to determine the virtual probe (Sv) as a weighted average of the control sensor probe B1 and B2, according to the formula: Sv= Def 0 2.0 -50 60 0 ON 6.2 Virtual probe Par. /4 Description Set point Differential Minimum set point Maximum set point Operating mode 0 Direct with defrost 1 Direct without defrost [(B1*(100-/4)+B2*/4] 100 AUX ON OFF ON CMP OFF rd/2 rd rd/2 Sv St Fig. 6.c Key UltraCella St rd Sv CMP AUX Set point Differential Virtual probe Compressor Auxiliary output Fig. 6.a Key B1 B2 Intake probe 1 Intake probe 2 6.4 Pump down The pump down has the aim to completely empty the evaporator of the refrigerant at each stop of the compressor. After this phase, you can safely turn off the compressor, so that the liquid is not present the next time the compressor is started. When the set point is reached, the control closes the pump down valve to stop the flow of refrigerant to the evaporator, and, after a certain time, the compressor. In the application diagram there are the pump down valve and the low pressure switch. When the control requires turning on the compressor, if the safety periods c1 and c2 have passed, the pump down valve is opened and after the time set in parameter c8 the compressor is activated. 37 UltraCella +0300083EN - rel. 1.3 - 30.06.2014 ENG Par. c7 c8 H1 H5 Description Maximum pump down time (PD) 0 = Pump down disabled. Compressor start delay after opening of pump down valve PD Configuration of output AUX1 …5 = pump down valve Configuration of output AUX2 …5 = pump down valve Def 0 Min 0 Max 900 U.M. s 5 0 60 s 1 0 15 - 1 0 15 - Key CMP, FAN PDV Pressure switch Sv c7 Pd t St Compressor, fan pump down valve Pressure switch Virtual probe Pump down maximum time Pump down alarm Time Set point Note: C • if during the pump down there is a new demand for cooling, the pump CMP down procedure terminates, and the pump down valve is opened (the compressor is already on from the previous pump down phase); • in case of “Pd” alarm the auto-start function is disabled. L F P 6.5 Autostart in pump down S T V2 PDV As seen in the previous paragraph, once you reach the set point, the control closes the pump down valve and then the pressure switch changes and signals low pressure. If, due to problems of sealing of the valve, the pressure switch changes again, you can reactivate the compressor with the Auto start function, signalled by the message “Ats”. This message is erased on the next correct pump down cycle E M Fig. 6.d Par. c9 Key CMP C L P F E S V2 PDV Compressor Condenser Liquid receiver Low pressure switch Dehydrator filter Evaporator Liquid indicator Thermostatic expansion valves Pump down valve Description Autostart in pump down 0 whenever pump down valve closes 1 whenever pump down valve closes & every request of low pressure switch without regulation request Def 0 Min 0 Max U.M. 1 - ON CMP, FAN You can select the pump down: • on pressure (pressure switch mandatory): once the pump down valve closes, the compressor continues to operate until reaching the low pressure value (contact opened). At this point the compressor is turned off. If the pressure switch does not change within the time c7, alarm “Pd” triggers, pump down ended due to time-out. The Pd alarm is reset automatically if in the next pump down low pressure is reached within the time c7. • on time (pressure switch optional): after the valve closes, the compressor operates for the time c7. The ‘Pd’ alarm, Pump down ended by time-out, is deactivated. OFF ON VPD OFF ON Pressure switch OFF ON AtS OFF c10 = 0: Pressure pump down Sv Pressure switch changes within c7 Pressure switch changes after c7 St ON CMP, FAN t OFF Fig. 6.g ON Note: low pressure = pressure off/open. PDV OFF Key ON Pressure switch CMP, FAN VPD St Sv OFF ON Compressor, fan Pump down valve Set point Control probe t Time AtS Autostart in pump down Pressure switch Pressure switch Alarm Pd Notes: OFF Sv • at compressor autostart, the safety times c1 and c2, not c3 are respected; St • the message “AtS” is reset automatically on the next correct pump c7 Fig. 6.e UltraCella +0300083EN - rel. 1.3 - 30.06.2014 down cycle. c7 Fig. 6.f 38 ENG 6.6 Continuous cycle Par. d0 To activate the continuous cycle by keyboard see Chapter 3 (parameter value cc> 0). During operation in a continuous cycle, the compressor continues to operate regardless the control, for the time “cc”, to lower the temperature even below the set point. The continuous cycle is stopped after the time “cc” or when reaching the minimum specified temperature, corresponding to the minimum temperature alarm threshold (AL). If, after the end of the continuous cycle, the temperature falls below the minimum temperature threshold, the low temperature alarm signal can be ignored by suitably setting the c6 parameter: the alarm bypass delay time after continuous cycle. Par. cc c6 A5 A9 Description Continuous cycle duration Low temperature alarm delay after continuous cycle Digital input configuration 2 (DI2) … 14 = Continuous cycle activation Digital input configuration 3 (DI3) … 14 = Continuous cycle activation Def 0 2 Min 0 0 Max 15 250 U.M. hour hour 0 0 14 - 0 0 14 - dt1 dt2 dP1 dP2 d6 Description Type of defrost 0 Heater by temperature 1 Hot gas by temperature 2 Heater by time 3 Hot gas by time End defrost temperature, main evaporator End defrost temperature, auxiliary evaporator Maximum defrost duration Maximum defrost duration, auxiliary evaporator Terminal display during defrost 0 = Temperature alternated with dEF 1 = Last temperature shown before defrost 2 = dEF Def 0 Min 0 Max 3 U.M. - 4 -50 200 °C/°F 4 -50 200 °C/°F 30 30 1 1 250 250 min min 1 0 2 - Sd dt1 dt1-1 t 6.7 Door switch control ON d0=0, 1 DEF See chap. 4 OFF t d0=2, 3 ON DEF 6.8 Defrost OFF Introduction These parameters (dd1…dd8) can be used to set up to 8 defrost events linked to the system clock (RTC) Par. dd1…8 hh1…8 nn1…8 Description Defrost 1…8: day 0 Disabled 1…7 Monday…Sunday 8 From Monday to Friday 9 From Monday to Saturday 10 Saturday and Sunday 11 Daily Defrost 1…8: hour Defrost 1…8: minute Def 0 Min 0 Max 11 dP1 Fig. 6.h U.M. - Key t dt1 dP1 Sd d0 DEF 0 0 0 0 23 59 t Time End of defrost temperature Maximum defrost duration Defrost Probe Type of defrost Defrost hour min. UltraCella allows you to manage the following types of defrost, depending on parameter d0: 0. electric heater defrost by temperature (placed near the evaporator); 1. hot gas defrost by temperature. 2. electric heater defrost by time; 3. hot gas defrost by time. 1. electric heater defrost (d0 = 0, 2): operating cycle. The operating cycle refers to default values of the parameters F2 and F3. C CMP Note: Ed1 and Ed2 indicate that the defrost ended due to timeout. L The end of the defrost cycle can be by temperature, and in this case it is necessary to install the defrost probe Sd (to select between B2 and B3) or by time. In the first case the defrost ends if the probe Sd measures a value greater than the value of dt1 or dP1 time has elapsed, in the second case if the defrosting phase exceeds the maximum time dP1. At the end of the defrost the controller can enter in dripping status (present if dd> 0), in which the compressor and the fans are turned off, and subsequently in the state of post-dripping (if present Fd> 0), in which the control resumes with fans off. You can choose the display on the user terminal during defrost, using parameter d6. F S PDV T V2 M B3 E Fig. 6.i 39 UltraCella +0300083EN - rel. 1.3 - 30.06.2014 ENG REFRIG PUMP DOWN DEF (REF) DRIP (dd) ON POST DRIP (Fd) REFRIG REFRIG DEF DRIP (hot gas) ON c8 CMP CMP OFF ON OFF POST DRIP REFRIG c8 ON PDV FAN OFF F0=0 OFF ON F3=1 ON FAN F0=0 OFF V_def F3=1 OFF ON RES t Fig. 6.l OFF Key t CMP Refrig FAN Def V_def Drip E Post drip C B3 V2 L F S t Fig. 6.j Key CMP Refrig PDV Pump down FAN Def RES Drip E Post drip C V2 F t B3 L S Compressor Refrigeration Pump down valve Pump down phase Evaporator fan Defrost Resistance (defrost heater) Drip Evaporator Post drip Condenser Thermostatic expansion valve Dehydrator filter Time Defrost probe Liquid receiver Liquid indicator The defrost is activated, upon priority: • from keyboard, using the defrost key; • from clock, setting the event and the starting mode, with maximum 8 defrosts a day (parameters dd1...dd8); • setting the cyclic range “dI”; • from digital input; • from supervisor. Note: • • in pump-down the fan activation is determined by F0; in defrost the fan activation is determined by F3. The defrost is disabled: • defrost by temperature: when the defrost probe detects a temperature greater than the defrost end temperature dt1; • defrost by time: in the absence of the defrost probe, the defrost ends after the maximum time set by parameter dP1. 2. hot gas defrost (d0 = 1, 3): operating cycle. The operating cycle refers to default values of the parameters F2 and F3. C V_def M 6.8.1 CMP Par. dI L F B3 E Fig. 6.k Note: the defrost output (DEF) is used for command of the hot gas valve V_def. UltraCella +0300083EN - rel. 1.3 - 30.06.2014 Maximum period of time between consecutive defrosts Description Def Maximum interval between consecutive 8 defrosts 0 = defrost not performed Min 0 Max 250 U.M. hour The parameter dI is a security parameter that allows cyclical defrosts every “dI” hours even in the absence of the Real Time Clock (RTC). At the beginning of each defrost cycle, regardless of duration, a count is started. If the dl time is exceeded without performing any defrost, the defrost is automatically activated. The counter remains active even if the controller is off. S T V2 Compressor Refrigeration Evaporator fan Defrost Hot gas valve Drip Evaporator Post drip Condenser Defrost probe Thermostatic expansion valve Liquid receiver Dehydrator filter Liquid indicator Time 40 ENG Example: in case of failure for example at RTC the scheduled defrost by td3 (= dd3, hh3, nn3) is not made, after the safety time dI starts a new defrost. 6.9 Evaporator Fans 6.9.1 dl Fixed speed fans The status of the fans depends on the compressor status. When the compressor is: • on: the fan can also be on (F0=0) or activated based on the evaporator temperature, virtual probe Sv, based on the formula: ON DEF OFF if Sd ≤ (Sv - F1) -Frd --> FAN = ON if Sd ≥ (Sv - F1) --> FAN = OFF t dd1 dd2 dd3 • off: the fan is controlled by a PWM that has duty cycle with a fixed Fig. 6.m period of 60 minutes. Key dI dd1…dd3 DEF t Maximum interval of time between consecutive defrosts Scheduled defrosts Defrost Time duty_cycle = F2 60 Par. Description F0 Evaporator fan management 0 = always on with compressor on 1= activation depends on Sd, Sv F1 Fan activation temperature F2 Fan activation time with CMP off HO1 Output Y1 configuration 0 = not active Note: • if the interval dI expires when the controller is OFF, when it is started again a defrost is performed; • to ensure regular defrosts, the interval between defrosts must be greater than the maximum defrost duration, plus the dripping time and post-dripping time; • if setting dl=0 the defrost is performed only if activated from keyboard or by setting the scheduled defrosts (ddi). Def 0 Min 0 Max 2 U.M. - 5 30 0 -50 0 0 200 60 2 °C/°F min - ON CMP 6.8.2 Par. d3 d4 d5 d8 dpr Other defrost parameters Description Defrost activation delay Defrost at start-up 0/1=No/Yes Defrost delay at start-up High temperature alarm delay after defrost (and door open) Defrost priority over continuos cycle 0/1=No/Yes OFF Def 0 0 Min 0 0 Max 250 1 U.M. min - 0 1 0 0 250 250 min hour 0 0 1 - ON F0=0 Evap. fan PWM mod. Sd Sv-F1 (Sv-F1)-Frd • d3 determines the time that must elapse, when the defrost is activated, ON between the stopping of the compressor (electric heater defrost) or the starting of the compressor (hot gas defrost), and the activation of the defrost relays on the main and auxiliary evaporators. In the hot gas defrost, the delay d3 is useful for ensuring a sufficient amount of hot gas before activation of the hot gas valve; • d4 determines whether to activate or not the defrost at the controller start-up. The defrost at start-up request has priority over the activation of the compressor and the continuous cycle. Force a defrost at controller start-up may be useful in special situations. F0=1 Evap. fan (*) (*) (*) (*)= PWM mod. t Fig. 6.n Key Example: frequent power drops inside the plant. In case of lack of voltage the tool resets the inner clock that calculates the period of time between two defrosts, starting from zero. If, in an extreme case, the frequency of the power failure were greater than the defrost frequency (e.g. a power failure every 8 hours, against a defrost every 10 hours) the controller would never perform a defrost. In a situation of this type, it is preferable to activate defrost on start-up, above all if the defrost is controlled by temperature (probe on the evaporator), therefore avoiding unnecessary defrosts or at least reducing the running times. In the case of systems with a large number of units, if selecting defrosts at start-up, after a power failure all the units will start defrosting, thus causing a voltage overload. This can cause power overload. To overcome this, the parameter d5 can be used. It adds a delay before the defrost, and this delay must obviously be different for each unit. • d5 represents the time that elapses between the start of the controller and the start of the defrost at start-up; • dd is used to force the stop of the compressor and the evaporator fan after a defrost cycle in order to facilitate the evaporator dripping; • d8 indicates the time of exclusion of the high temperature alarm signalling from the end of a defrost; • if dpr = 0, the defrost and the cycle have the same priority; if dpr = 1, if the continuous cycle is in progress and a defrost request intervenes, the continuous cycle ends and the defrost starts. CMP PWM mod. F1 Frd Evap.fan t Sv Sd Compressor PWM modulation Fan activation threshold Fan activation differential Evaporator fan Time Virtual probe Defrost probe The fan can be stopped: • when the compressor is off (parameter F2); • during defrost (parameter F3). 6.9.2 Variable speed fans The installation of variable speed fans may be useful to optimise energy consumption. In this case, the fans are powered by the mains, while the control signal is provided by UltraCella by analogue output Y1 0…10 Vdc. The maximum and minimum fan speed can be set using F6 and F7 parameters (in percentage respect range 0…10V). If using the fan speed controller, F5 represents the temperature below which the fans are activated, with a fix hysteresis of 1°C. 41 UltraCella +0300083EN - rel. 1.3 - 30.06.2014 ENG Par. F5 Description Evaporator fans cut-off temperature (hysteresis 1°C) Maximum fans speed Minimum fans speed F6 F7 Def 15 Min -50 100 0 F7 0 Max U.M. 50 °C/°F Par. F8 100 F6 F10 % % Description Fans peak time 0 = function disabled Evaporator fans forcing time at maximum speed 0 = function disabled Def 0 Min 0 Max 240 U.M. s 0 0 240 min To enable the algorithm, it’s necessary to select variable speed fans mode (F0=2) and set analogue output 0…10 Vdc (HO1=2). Par. F0 Description Evaporator fans management … 2 = variable speed fans Output Y1 0…10 V configuration … 2 = variable speed fans regulated on Sd HO1 Def 0 Min 0 Max 2 U.M. - 0 0 2 - speed fans defined by Sd F6 F7 F8 F8 F10 Sd F5+1 F5 F1 F0 = 2 t 6.9.3 F6 F7 0% Evaporator fans during defrost There is the possibility to force the start of the evaporator fans during control (parameter F2) and during defrost (parameter F3). During the dripping periods (parameter dd > 0) and post-dripping periods (parameter Fd > 0) the evaporator fans are always off. This is useful to allow the evaporator to return to normal temperature after defrosting, thus avoiding forcing hot air on evaporator. dd is used to force the stop of the compressor and the evaporator fan after a defrost cycle in order to facilitate evaporator dripping. t Fig. 6.o Evaporator Fan (analog output) F0= 2 Par. F2 F3 Key Sd F0 F1 Frd t Note: Cyclic time at maximum speed (determined by both F8 and F10) is not allowed when door is open. F1-Frd FAN F8 F10 Evaporator probe Evaporator fans management Fan start temperature Fan activation differential Fd F4 dd Note: Description Fan activation time with CMP off Evaporator fans during defrost 0/1=on/off Post dripping time (fans off ) Humidity output during defrost 0/1 = ON/OFF Dripping time after defrost (fans off ) Def 30 1 Min 0 0 Max 60 1 U.M. min - 1 1 0 0 30 1 min - 2 0 30 min • if two evaporator probes are configured (Sd1 and Sd2), speed fans is calculated in relation to probe which is measuring higher temperature (to limit hot air flow): if Sd1>Sd2 –› regulation on Sd1; if Sd1<Sd2 –› regulation on Sd2. In case of defrost probe failure, speed fans is fixed to maximum value defined by parameter F6. • If F0=2 and HO1=2, speed fan is calculated in according to Figure 6.o. Anyway, if speed fan is higher than 0, “FAN” relay DO3 is ON anyhow (closed): if speed fan (Y1) > 0V –› “FAN” relay ON (DO3 closed) if speed fan (Y1) = 0V –› “FAN” relay OFF (DO3 open) 6.10 Condenser fans The condenser fans are activated based on parameters FC4 and A0, after configuring the digital output AUX or the analog output. Par. FC4 A0 Description Condenser fan deactivation temperature Alarm and fan differential Min -50 2.0 0.1 Max U.M. 200 °C/°F 20 Sc • If F0=0,1 (fixed speed fans by “FAN” relay DO3), analogue output is set FC4+A0 to 0 (Y1=0V) • Inside modulation interval (F1-Frd < Sd < F1), speed fan is modulated in proportional way (e.g. Sd=F1-Frd/2 –› Y1 correspond to (F6+F7)/2 percentage) FC4 t Because of mechanical inertia of motor, some EC fans cannot start with a low speed set by parameter F7. To overcome this, fans can be started with maximum speed set by parameter F7 for a “peak time” defined by parameter F8, irrespectively of Sd temperature. On the other hand, if fans operates for too long time at a reduced speed, ice can form on the blades. To avoid this, at interval of F10 minutes, fans are forced to maximum speed for “peak time” defined by F8 UltraCella +0300083EN - rel. 1.3 - 30.06.2014 Def 40 ON FAN OFF t Fig. 6.p 42 °C/°F ENG Key Sc FAN FC4 t A0 CASE 4: 2 PROBES AND 2 EVAPORATORS Condenser probe Condenser fans Turn off temperature Time Differential C CMP L Note: if an alarm triggers at condenser probe, the output condenser fan is always on. F S 6.11 Duty setting In the event the alarm “rE” (virtual control probe fault), the parameter is used to ensure the operation of the compressor until the fault is resolved. The compressor cannot be activated according to the temperature (due to the faulty probe), it is activated cyclically with a time of operation (ON) equal to the value assigned to c4 and a switch-off time (OFF) fixed at 15 minutes . T V1 E1 ON CMP T V2 B3 E2 OFF c4 Fig. 6.r t 15 Key Fig. 6.q Par. c4 B2 Description Compressor running time in duty setting Def 0 Min 0 Max 100 E1/2 C V1/2 L B2/B3 CMP F S U.M. min Evaporator 1/2 Condenser Thermostatic expansion valve 1/2 Liquid Receiver defrost probe 2, 3 Compressor Filter drier Liquid indicator 6.12 Bowl resistance 6.14 Second compressor with rotation The resistor is used to heat the collection tank after the defrosting phase, to prevent the ice from blocking the passage of water. The resistance is activated for 3 minutes before the programmed defrost or simultaneously with a manual defrost. The resistance is always off after the defrost phase. Par. H1 H5 Description Configuration of output AUX1 … 3 = bowl resistance activation Configuration of output AUX2 … 3 =bowl resistance activation Def 1 Min 0 1 0 Second compressor output with double step control with rotation: the compressors will be turned on as follows: • alternately for single step requests (as in example 3) • the first to be turned on will be the first to be turned off for the 2 steps requests (as in examples 1, 2 and 4) Max U.M. 15 - 15 Par. Description H1/H5 Configuration of output AUX1/AUX2 0 = alarm normally energised … 13 = second compressor step with rotation - Def 1 Min 0 Max 15 U.M. Sv St+rd 6.13 Defrosting with 2 evaporators St+rd/2 St You can configure up to 2 defrost probes and up to 2 evaporator outputs. The control recognizes the configuration based on the following table (probe 1 is the control probe and cannot be configured) t ON CP1 OFF DEFROST PROBES AND EVAPORATORS OUTPUT CONFIGURATION Case 1 2 3 4 Defrost probes B2 B2 B2 and B3 B2 and B3 Evaporator outputs Evap. 1 Evap. 1 and 2 Evap. 1 Evap. 1 and 2 Notes t ON CP2 B2 acts on the evap. 1 B2 acts on the evap. 1 B2 and B3 act on evap. 1 (start and end of defrost based on the minimum value probe) B2 acts on the evap. 1 and B3 act on evap. 2 Tab. 6.b OFF t Fig. 6.s 43 UltraCella +0300083EN - rel. 1.3 - 30.06.2014 ENG ON CP2 D OFF ON D CP1 OFF rd/2 rd/2 Sv St Fig. 6.t Key SV CP1 t CP2 rd St Virtual probe Compressor 1 time Compressor 2 Differential Set point Operation examples: (NOTE: REQ1: Sv > St + rd/2; REQ2: Sv > St + rd) Example 1 Example 3 ON ON REQ1 REQ1 OFF OFF t t ON ON REQ2 REQ2 OFF OFF t t ON ON CP1 CP1 OFF OFF t t ON ON CP2 CP2 OFF OFF t t Fig. 6.u Fig. 6.a Example 2 Example 4 ON ON REQ1 REQ1 OFF OFF t t ON ON REQ2 REQ2 OFF OFF t t ON ON CP1 CP1 OFF OFF t t ON ON CP2 CP2 OFF OFF t t Fig. 6.v Fig. 6.b Key REQ1 REQ2 t CP1 CP2 UltraCella +0300083EN - rel. 1.3 - 30.06.2014 44 request 1 request 2 time compressor 1 compressor 2 ENG 6.15 Humidity management UltraCella can interact with CAREL humidification systems, managing the humidity level in combination with cooling control. The humidity must be read from UltraCella, configuring an analogue input (B4 or B5) as a 0 to 10 V or 4 to 20 mA input for humidity probes. The controller can display the humidity read by the probe and, by suitably configuring one of the auxiliary outputs, AUX1 or AUX2, activate an external CAREL humidifier to adjust the humidity level accordingly. Carel Humidification systems are compatible with UltraCella humiSonic mc multizone humiDisk Fig. 6.w Wiring diagram between UltraCella and humiSonic VL GND GND Rx/Tx+ Rx/TxGND humiSonic 48 47 46 45 44 43 31 49 50 51 52 53 54 Rx/Tx+ Rx/TxGND Rx/Tx+ Rx/TxGND FieldBus BMS 42 30 29 28 27 26 25 24 23 22 21 20 19 B3 B2 B1 Y1 B4 B5 GND 5 VREF + Vdc DI1 DI2 DI3 CAREL NTC, PT1000 CAREL NTC, PT1000 CAREL NTC, PT1000 analog output (0 to 10 Vdc) CAREL NTC, analog input 0 to 10 Vdc 0 to 5 Vdc OUT B5 analog input M (4 to 20 mA) +V (**) DI1 Door switch 18 24 Vac UltraCella Control R6 EN60730-1 250 V UL 873 R5 - R6 12 (10) A 12 A res. 2HP 12FLA 72 LRA R5 17 16 15 14 DEF 13 12 EN60730-1 250 V UL 873 R3 - R4 10 A res. 5 (3) A 10 A res. 5FLA 18 LRA R4 R3 R2 11 FAN (4) (1) RS485 Supervisione Supervision 10 9 LIGHT GND Tx Rx 8 ON/OFF 7 EN60730-1 250 V UL 873 R1 - R2 8 (4) A N.O. 8 A res. 2FLA 12 LRA 6 R1 5 4 3 Connection between UltraCella and humiSonic 2 1 230 V 20 A max Fig. 6.x 45 UltraCella +0300083EN - rel. 1.3 - 30.06.2014 ENG Basic humidity control logic: if the humidity measured is less than the set point StH, the relay activates the externally connected humidifier (REVERSE action, standard ON/OFF with differential). 6.15.1 Analogue input configuration for humidity probes Either analogue input B4 or B5 needs to be configured a humidity probe input. Par. /P4 /P5 Par. /A4 /A5 Description B4 configuration … 2 = 0 to10V B5 configuration … 0 = 4 to 20mA Def 0 Min 0 Max 2 U.M. - 0 0 0 - Description B4 configuration … 2 = humidity probe (Su) B5 configuration … 1 = humidity probe (Su) Def 0 Humidity output AUX1/AUX2 OFF B5 rdH Min 0 Max 3 ON StH U.M. - Fig. 6.y Key 0 0 1 StH rdH B5 - Par. StH rdH Example: Humidity probe with 0 to 10 V output -> connect the probe to input B4 and set • /P4=2 • /A4=2 Humidity set point Humidity differential Probe B5 configured as 4 to 20 mA humidity probe Description Humidity set point Humidity differential Def 90.0 5.0 Min Max U.M. 0.0 100.0 %rH 0.1 20.0 %rH Note: 1. If the temperature inside the cold room is less than 2°C (virtual control temperature Sv) -> humidifier activation (AUX1/AUX2 relay) is always disabled (with a fixed hysteresis of 1°C). 2. Humidity control can be disabled during the defrost (parameter F4): • F4=0 -> humidity control enabled based on humidity set point StH; • F4=1 -> humidity control not enabled: during defrost, the external humidifier will not be activated. 3. Humidifier activation (AUX1/AUX2 relay) is always disabled in the event of an alarm that immediately stops the compressor. Examples: • CHT alarm; • LP alarm (after 3 times); • IA alarm (when A6=0). Humidity probe with 4 to 20 mA output -> connect the probe to input B5 and set • /P5=0 • /A5=1 6.15.2 Display humidity reading on UltraCella On models with single row display, P/Ns WB000S*, the humidity can be displayed instead of the cold room temperature, selecting: • Humidity probe with 0 to 10 V output -> /t1=10 (B4) • Humidity probe with 4 to 20 mA output -> /t1 = 11 (B5) Par. /t1 Description Variable 1 on the display … 10 = B4 11 = B5 Def 1 Min 0 Max 11 U.M. - Par. F4 On models with double row display, P/Ns WB000D*, the humidity can be displayed on the second row as the second process selecting: • Humidity probe with 0 to 10 V output -> /t2=10 (B4) • Humidity probe with 4 to 20 mA output -> /t2 = 11 (B5) Par. /t2 Description Variable 2 on the display (second row) … Def 6 Min 0 Max 12 U.M. - 10 = B4 11 = B5 6.15.3 AUX1 / AUX2 auxiliary output configuration and basic humidity control logic To activate the humidifier connected to UltraCella, configure one of the auxiliary outputs AUX1 or AUX2 for humidity control. Par. H1 H5 Description AUX1 output configuration … 15 = humidity output AUX2 output configuration … 15 = humidity output UltraCella +0300083EN - rel. 1.3 - 30.06.2014 Def 1 Min 0 Max 15 U.M. - 1 0 15 - 46 Description Humidifier relay during defrost 0 = relay enabled in defrost (based on StH) 1 = relay not enabled in defrost Def 1 Min 0 Max 1 U.M. - ENG 7. PARAMETERS TABLE Type of variable: A = analogue, I = integer, D = digital Par. Description Def Min Max UOM Type CAREL SVP R/W page Pro /21 /22 /23 /24 /25 /4 Probe measurement stability probe 1 4 Probe measurement stability probe 2 4 Probe measurement stability probe 3 4 Probe measurement stability probe 4 4 Probe measurement stability probe 5 4 Virtual probe composition 0 0 = probe B1 100= probe B2 /5t Temperature unit of measure 0 0/1 = °C for temperature and Bar for pressure sensors / °F for temperature and psi for pressure sensors of EVD (if present) /6 Display decimal point 0 0/1 = yes/no /t1 Display variable 1 1 0 None 6 Set point 1 Virtual probe (Sv) 7 B1 2 Outlet probe (Sm) 8 B2 3 Intake probe (Sr) 9 B3 4 Defrost probe 1 (Sd1) 10 B4 5 Defrost probe 2 (Sd2) 11 B5 /t2 Display variable 2 (*) 6 0 None. 8 B2 1 Virtual probe (Sv) 9 B3 2 Outlet probe (Sm) 10 B4 3 Intake probe (Sr) 11 B5 4 Defrost probe 1 (Sd1) 12 rd 5 Defrost probe 2 (Sd2) 13 Superheat 6 Set point 14 Valve opening % 7 B1 15 Valve opening step 0 /P Type B1 to B3 0 NTC Standard range -50T90°C 1 NTC extended range 0T150°C 2 PT1000 /A2 B2 configuration 0 0 Absent 1 Defrost probe 1 (Sd1) 2 Intake probe (Sr) /A3 B3 configuration 0 0 Absent 1 Defrost probe 2 (Sd2) 2 Condenser probe (Sc) 3 Defrost probe 1 (Sd1) 0 /P4 Type B4 0 NTC Standard range -50T90°C 1 NTC Extended range 0T150°C 2 0…10 V /A4 B4 configuration 0 0 Absent 1 Ambient temperature probe 2 Humidity probe 3 Recording probe (Src) 0 /P5 Type B5 0 4 … 20 mA /A5 B5 configuration 0 0 Absent 1 Humidity probe /C1 Offset B1 0 /C2 Offset B2 0 /C3 Offset B3 0 /C4 Offset B4 0 /C5 Offset B5 0 St Set point 0 rd Differential 2.0 r1 Minimum set point -50.0 r2 Maximum set point 60.0 0 r3 Operating mode 0 direct with defrost 1 direct without defrost StH Humidity setpoint 90.0 rdH Humidity differential 5.0 (*): can be viewed only on UltraCella Sevice Terminal or on the controller with double row display. 47 0 0 0 0 0 0 9 9 9 9 9 100 - I I I I I I 12 13 14 15 16 17 R/W R/W R/W R/W R/W R/W 34 34 34 34 34 37 0 1 - I 18 R/W 35 0 1 - D 19 R/W 35 0 11 - I 67 R/W 34 46 0 15 - I 68 R/W 34 46 0 2 - I 20 R/W 31 0 2 - I 21 R/W 31 0 3 - I 22 R/W 31 0 2 - I 23 R/W 31 46 0 3 - I 24 R/W 31 46 0 0 - I 25 R/W 0 1 - I 26 R/W 31 46 31 46 -20.0 -20.0 -20.0 -20.0 -20.0 r1 0.1 -50.0 r1 0 20.0 20.0 20.0 20.0 20.0 r2 20 r2 200 1 °C/°F °C/°F °C/°F °C/°F °C/°F °C/°F °C/°F - A A A A A A A A A D 7 8 9 10 11 12 13 14 15 11 R/W R/W R/W R/W R/W R/W R/W R/W R/W R/W 31 31 31 31 31 37 37 37 37 37 0.0 0.1 100.0 20.0 %rH %rH A A 28 29 R/W R/W 46 46 UltraCella +0300083EN - rel. 1.3 - 30.06.2014 ENG Par. Description Def Min Max UOM Type CAREL SVP R/W page CMP c0 c1 Compressors/fan start delay at power on Minimum time between compressor starts 0 6 0 0 15 15 min min I I 31 32 R/W R/W 36 33 c2 c3 c4 cc c6 c7 Minimum compressor off time Minimum compressor on time Compressor running time in duty setting Continuous cycle duration Low temperature alarm delay after continuous cycle Maximum pump down (PD) time 0 = Pump down disabled Compressor start delay after opening of pump down valve Autostart in pump down 0/1 = whenever pump down valve closes/ whenever pump down valve closes & every request of low pressure switch without regulation request Pump down by time/pressure 0/1 = pressure/ time Second compressor start delay Condenser fan deactivation temperature 3 3 0 0 2 0 0 0 0 0 0 0 15 15 100 15 250 900 min min min hour hour s I I I I I I 33 34 35 36 37 38 R/W R/W R/W R/W R/W R/W 33 33 43 39 39 38 5 0 0 0 60 1 s - I D 39 13 R/W R/W 38 38 0 0 1 - D 12 R/W 38 4 40.0 0 -50.0 250 200.0 s °C/°F I A 40 16 R/W R/W 36 42 0 0 3 - I 41 R/W 33 39 c8 c9 c10 c11 FC4 dEF d0 8 0 250 hour I 42 R/W 40 dt1 Type of defrost 0 Heater by temperature 1 Hot gas by temperature 2 Heater by time 3 Hot gas by time Max interval between consecutive defrosts 0 = defrost not performed End defrost temperature, main evaporator 4.0 -50.0 200.0 °C/°F A 17 R/W dt2 dP1 End defrost temperature, auxiliary evaporator Maximum defrost duration 4.0 30 -50.0 1 200.0 250 °C/°F min A I 18 43 R/W R/W dP2 dd d3 dpr Maximum defrost duration, auxiliary evaporator Dripping time after defrost Defrost activation delay Defrost priority over continuous cycle 0/1 = no/yes Defrost at start-up 0/1=no/yes Defrost delay at start-up Terminal display during defrost 0 Temperature alternated with dEF 1 Last temperature shown before defrost 2 dEF High temperature alarm delay after defrost (and door open) 30 2 0 0 1 0 0 0 250 30 250 1 min min min - I I I D 44 45 46 15 R/W R/W R/W R/W 33 39 39 33 39 39 33 41 41 0 0 1 - D 14 R/W 41 0 1 0 0 250 2 min - I I 47 49 R/W R/W 41 39 1 0 250 hour I 48 R/W 41 A0 Alarm and fan differential 2.0 0.1 20.0 °C/°F A 19 R/W A1 Alarm thresholds relative to set point or absolute 0/1=relative/absolute Low temperature alarm threshold If A1=0, AL=0: alarm disabled If A1=1, AL=-50: alarm disabled High temperature alarm threshold High temperature alarm threshold If A1=0, AH=0: alarm disabled If A1=1, AH=200: alarm disabled High/low temperature alarm delay Digital input 2 (DI2) configuration 0 Not active 8 1 Immediate external alarm 9 2 Do not select 10 3 Enable defrost 11 4 Start defrost 12 5 Do not select 13 6 Remote ON/OFF 14 7 Do not select Stop compressor on external alarm Low pressure (LP) alarm delay Digital input 3 (DI3) configuration 0 Not active 8 1 Immediate external alarm 9 2 Do not select 10 3 Enable defrost 11 4 Start defrost 12 5 Do not select 13 6 Remote ON/OFF 14 7 Do not select 0 0 1 - D 16 R/W 43 54 54 0.0 -50.0 200.0 °C/°F A 20 R/W 54 0.0 -50.0 200.0 °C/°F A 21 R/W 54 120 0 0 0 250 14 min - I I 50 51 R/W R/W 54 39 0 1 0 0 0 0 100 250 14 min min - I I I 53 54 52 R/W R/W R/W 54 32 39 dI d4 d5 d6 d8 ALM AL AH Ad A5 A6 A7 A9 UltraCella +0300083EN - rel. 1.3 - 30.06.2014 Low pressure switch Do not select Do not select Do not select Aux1 activation Do not select Continuous cycle activation Low pressure switch Do not select Do not select Do not select Aux2 activation Do not select Continuous cycle activation 48 ENG Par. Ac Acd A10 Description High temperature condenser alarm threshold High temperature condenser alarm delay Low pressure alarm delay, compressor running Def 70.0 0 3 Min 0.0 0 0 Max UOM Type CAREL SVP 200.0 °C/°F A 22 250 min I 56 60 min I 55 R/W page R/W 55 R/W 55 R/W Fan 0 0 2 - D 20 R/W 41 42 F1 Evaporator fan management 0 always on with compressor on 1 activation depends on Sd, Sv 2 variable speed fans Fan activation temperature 5.0 -50.0 200.0 °C/°F A 23 R/W Frd F2 Fan activation differential Fan activation time with compressor off 2.0 30 0.1 0 20.0 60 °C/°F min A I 24 57 R/W R/W F3 Evaporator fan during defrost 0/1=on/off Post dripping time (fans off ) Humidity output during defrost 0/1 = ON/OFF Evaporator fans cut-off temperature (hysteresis 1°C) Maximum fan speed Minimum fan speed Fans peak time 0 = disabled function Evaporator fans forcing time at maximum speed 0 = disabled function 1 0 1 - D 17 R/W 33 41 41 33 41 33 1 1 0 0 30 1 min - I D 60 71 R/W R/W 33 46 15 -50 50 °C/°F A 25 R/W 42 100 0 0 F7 0 0 100 F6 240 % % s I I I 58 59 176 R/W R/W R/W 42 42 42 0 0 240 min I 177 R/W 42 193 0 0 0 207 0 - I - 69 - R/W R/W 34 1 0 15 - I 61 R/W 36 46 0 0 1 - D 21 R/W 35 1 0 15 - I 62 R/W 36 46 0 0 255 - I 70 R/W 35 0 0 2 - I 63 R/W 36 41 42 Enable HACCP 0/1 = No/Yes HACCP alarm delay 0 0 1 - D 22 R/W 54 0 0 250 min I 71 R/W 54 Enable data modification 0/1 = no/ yes Date/ time change Action on variation 01 o 10 Date/ time: year 0 0 0 0 1 1 - D D 24 25 R/W R/W 21 21 0 0 37 - I 98 R/W 21 F0 Fd F4 F5 F6 F7 F8 F10 CnF H0 In H1 H4 H5 H6 HO1 Serial address Type of unit 0 = Normal AUX1 output configuration 0 Normally energized alarm 1 Normally deenergized alarm 2 Activation by AUX1 key or DI2 3 Bowl resistance activation 4 Auxiliary evaporator defrost 5 Pump down valve 6 Condenser fan 7 Delayed compressor Buzzer 0/1 = enabled/ disabled AUX2 output configuration 0 Normally energized alarm 1 Normally deenergized alarm 2 Activation by AUX2 key or DI3 3 Bowl resistance activation 4 Auxiliary evaporator defrost 5 Pump down valve 6 Condenser fan 7 Delayed compressor 8 9 10 11 12 13 14 Do not select Do not select Do not select Do not select Do not select Second compressor step Second compressor step with rotation 15 Humidity output 8 9 10 11 12 13 14 Do not select Do not select Do not select Do not select Do not select Second compressor step Second compressor step with rotation Humidity output 15 Terminal keys block configuration 0 = all keys enabled par. H6 FUNCTION 1 Set point modification 2 Defrost 4 8 AUX1 output 16 Multifunction menu (HACCP) 32 AUX2 output 64 On/Off management 128 Light management Output Y1 configuration 0 Not active 1 Do not select 2 Variable speed evaporator fans set on Sd probe HcP HCE Htd rtc tcE tcT y__ 49 UltraCella +0300083EN - rel. 1.3 - 30.06.2014 ENG Par. M__ d__ h__ n__ tcL ddi hhi nni Description Date/ time: month Date/ time : day of month Date/ time: hour Date/ time: minute Hours/minutes visualization on the second row for models with two rows display 0/1=no/yes Defrost i (i=1…8): day Defrost i (i=1…8): hour Defrost i (i=1…8): minute Def 1 1 0 0 0 Min 1 1 0 0 0 Max 12 31 23 59 1 UOM - Type CAREL SVP I 99 I 100 I 101 I 102 D 72 R/W page R/W 21 R/W 21 R/W 21 R/W 21 R/W 0 0 0 0 0 0 11 23 59 day hour min I I I 103…110 111…118 119…126 R/W R/W R/W 39 39 39 0 0 5 min I 64 R/W 33 0 120 0 0 0 0 240 240 1 min min - I I D 65 66 18 R/W R/W R/W 33 34 34 0 0 1 - 0 9,3 -1 1 2 2 198 10 15 150 2 3 600 600 -50 600 600 50 10 0 0 0 -20 -20 1 0 1 1 -72 0 0 0 -72 0 0 -76 0 0 0 0 0 0 3 200 200 22 24 4 247 324 800 999 800 324 800 999 392 800 999 100 60 100 1 °C/°F °C/°F K sec sec K sec sec °C/°F sec sec % min step - I A A I I I I A A A A A A A A A A A A A D 139 31 30 136 135 137 134 44 36 148 37 45 38 150 64 39 151 146 147 169 103 R/W R/W R/W R/W R/W R/W R/W R/W R/W R/W R/W R/W R/W R/W R/W R/W R/W R/W R/W R/W R/W 0 1 1 1 1 1 1 1 1 1 1 1 1 1 1 1 1 1 1 1 1 0 7 23 59 7 23 59 7 23 59 15 7 23 59 7 23 59 7 23 59 15 1 day hour min day hour min day hour min day hour min day hour min day hour min - I I I I I I I I I I I I I I I I I I I I D 72 73 74 75 76 77 78 79 80 96 81 82 83 86 87 88 91 92 93 97 23 R R R R R R R R R R R R R R R R R R R R R/W doL c12 d8d tLi A4 Compressor safety time for door switch 0 = disable door management Compressor restart time for door switch Light on with door open Light management 0 = door switch + light key - 1 = light key rcP (see charter 3 the procedure for setting parameters to default values) Eud P1 P1t P1M P1n PVt PH PrE P0 P3 P4 P5 P6 P7 P8 P9 PL1 PL2 PL3 cP1 Pdd PSb PMP Enable communication with Evd module 0/1=no/yes S1 probe type Max value of S1 probe Min value of S1 probe Valve type Refrigerant type Main regulation type EVD ModBus address Superheat setpoint Proportional gain Integral time Derivative time LowSH: threshold low superheat Low Superheat protection integral time LowSH: low superheat alarm delay LOP: threshold for low temperature of evaporation Low Superheat protection integral time LOP: low evaporation temperature alarm delay Open valve startup, Percentage Post defrost delay [min], only for single driver Valve position in stand-by Enable manual positioning R/W HACCP alarms (MULTIFUNCTION MENU) HA HA1 HA2 HAn HF HF1 HF2 HFn Hcr Date/time of last HA alarm: day Date/time of last HA alarm: hour Date/time of last HA alarm:minute Date/time of second last HA alarm: day Date/time of second last HA alarm: hour Date/time of second last HA alarm:minute Date/time of third last HA alarm: day Date/time of third last HA alarm: hour Date/time of third last HA alarm:minute Number of HA alarms Date/time of last HF alarm: hour Date/time of last HF alarm: hour Date/time of last HF alarm:minute Date/time of second last HF alarm: day Date/time of second last HF alarm: hour Date/time of second last HF alarm:minute Date/time of third last HF alarm: day Date/time of third last HF alarm: hour Date/time of third last HF alarm: minute Number of HF alarms Reset HACCP alarms (1 = reset) UltraCella +0300083EN - rel. 1.3 - 30.06.2014 50 52 52 52 52 52 52 52 52 52 52 52 52 52 52 52 52 52 52 52 52 52 Tab. 7.a ENG 8. SIGNALS AND ALARMS Example: display after alarms rE and E0. 8.1 Signalling The signals are messages that appear on the display to notify the user regarding the performance of control procedures (such as defrost) or confirmation of controls from keyboard. Code ----- 1 Description It appears at controller start-up Probe not enabled Probes Control Compressor Defrost Alarm Fan Configuration HACCP Clock Recipes EVD Evo cc Ed1 Ed2 On OFF AUX rEc no uPd dnL bni r01…r10 MAX MIN Op cLo EXT Hcr VEr 2 1 2 Note: the figures refer to the screens on models with single row display, P/Ns WB000S*. In models with two rows, P/Ns WB000D*, the display shows the alarm messages on the second row. 8.3 Reset alarms Alarms with automatic reset automatically reset when the cause that generated them, for example, after the replacement of a faulty probe, at the end of the alarm for high temperature, etc. For those with manual reset it is necessary to first remove the cause that generated them, and then press the Alarm button for entire restore. Messages that appear during navigation PAS HA HF rES 1 Note: in order to deactivate the buzzer and the relay alarm press the Alarm key Parameters categories Pro CtL CMP dEF ALM Fan CnF HcP rtc rcP Evd 2 Password HACCP alarm, HA type HACCP alarm, HF type Reset alarms with manual reset Reset HACCP alarms Reset temperature monitoring Continuous cycle Defrost on evaporator 1 ended by time-out Defrost on evaporator 2 ended by time-out Switch ON Switch OFF Auxiliary output switch on request Temperature registration Operation not executed Parameters upload Parameters download Menu parameters set (bn) Recipe 1…10 Maximum temperature read Minimum temperature read Open Closed Exit menu Reset HACCP alarms Software version Example: display and manual restore alarm CHt (condenser high temperature) 1 2 1 2 1 2 1 2 1 2 Note: the figures refer to the screens on models with single row display, P/Ns WB000S*. In models with two rows, P/Ns WB000D*, the display shows the alarm messages on the second row Tab. 8.a 8.4 HACCP alarms and display In order to activate monitoring see par 8.6 (HACCP = Hazard Analysis and Critical Control Point). HACCP can only be activated on the controllers with the RTC option fitted, and allows control of the operating temperature and the recording of any anomalies due to power failures or increases in the operating temperature due to various causes (breakages, severe operating conditions, operator errors, etc…). There are two types of HACCP events: • HA alarms, high temperature during operation; • HF alarms, high temperature after power black out. The alarm causes the blinking of HACCP icon, the display of the relative alarm code on the display, storage of the alarm and activation of the buzzer. 8.2 Alarms There are two types of alarms: • system alarms: e.g. Eeprom alarms, communication (interrupted) alarms, HACCP, high (HI) and low (LO) temperature alarms; • control alarms: e.g. pump down ended by time-out (Pd), low pressure (LP). The alarm for damaged data inside EE/EF memory generates control block. The auxiliary digital outputs AUX1, AUX2 can be configured to signal the alarm status, as normally energised or normally de-energised. See chapter 5. The control indicates the alarms triggered due to faults in the control itself, in the probes or in the network communication. You can also activate an alarm from external contact, immediate type. See chapter 4. On the display the message “IA” appears and at the same time the bell icon blinks and the buzzer activates. If more errors occur, they will appear in sequence on the display. Example: display after HF error and restore of the alarm condition: 1 51 2 1 2 UltraCella +0300083EN - rel. 1.3 - 30.06.2014 ENG 8.5 EVD EVO alarms 2 Note: the figures refer to the screens on models with single row display, P/Ns WB000S*. In models with two rows, P/Ns WB000D*, the display shows the alarm messages on the second row Display and cancel HACCP alarms Access the multifunction menu (see chap. 3) and choose HcP. In the multifunction menu you can see the date and time of the last 3 alarms HA and HF. After entering the multifunction menu (see previous par.), select with UP / DOWN the message “HCP”. Par. HA HA1 HA2 HAn HF HF1 HF2 HFn Hcr Description Date/time of last HA alarm Date/time of second last HA alarm Date/time of third last HA alarm Number of HA alarms Date/time of last HF alarm Date/time of second last HF alarm Date/time of third last HF alarm Number of HF alarms HACCP alarms cancelling Action on variation 01 o 10 Def 0 0 0 0 0 0 0 0 0 Min 0 0 0 Max 15 15 1 U.M. - 1 2 1 2 1 2 1 2 1 2 Note: the figure refers to the screens on models with single row display, P/Ns WB000S*. In models with two rows, P/Ns WB000D*, as well as the message indicated, during navigation the display shows the scrolling message “HACCP Alarms” on the second row. UltraCella +0300083EN - rel. 1.3 - 30.06.2014 ON Automatic LOA LOP protection ON Automatic MOA MOP protection ON Automatic EEA Valve motor fault ON Automatic LSA Threshold and timeout exceeded ON Automatic Hit High condensing temperature protection activated ON Automatic ES1 Probe S1 fault or set point exceeded ON Automatic ES2 Probe S2 fault or set point exceeded ON Automatic ES3 Probe S3 fault or set point exceeded ON Automatic ES4 Probe S4 fault or set point exceeded ON Automatic Battery discharged or faulty or electrical connection interrupted Operating and/or parameter EEPROM error ON Automatic ON Automatic EIC Valve not closed completely ON Automatic EEC Valve closed in emergency ON Automatic EFu FW compatibility error (>=5.0) ON Automatic ECn Configuration error ON Automatic ELE EVD offline ON Automatic Tab. 8.b Example: HA alarm triggered Thursday at 13:17, with detected temperature of 36.8 °C. 2 Low superheat protection EEE Each alarm is displayed with scrolling text, which contains the day of week, hour, minute, and the temperature that caused the alarm. The buffer in which are saved can contain the data of up to 3 alarms. Once full, the new alarm will replace the oldest one. Instead, the alarm counters (HAn, HFn), after reaching 15, they stop. 1 SHA bAt Procedure: 1. Press Set and then UP/DOWN to display the parameters of the following table; 2. Press Set to display the alarm date and time; 3. Press Prg until you return to standard display. 4. To cancel all HACCP alarms, change the value of the parameter Hcr Reset 1 Alarm description 2 Alarm code on display 1 Buzzer Icon flashing on display If an Ultra EVD module, P/N WM00E%, is connected by Fieldbus, UltraCella will be able to signal the following alarms, which only depend on the status of the EVD EVO controller fitted on the module. 52 ENG PD valve Compressor Defrost Evaporator Fans Condenser fans Continuous cycle duty setting (c4) duty setting (c4) - - - - E0 Probe B1 fault ON ON automatic duty setting (c4) duty setting (c4) - - - - E1 Probe B2 fault ON ON automatic - - - - - - E2 Probe B3 fault ON ON automatic - - - - - - E3 Probe B4 fault ON ON automatic - - - - - - E4 Probe B5 fault Cod. display --- NO Buzzer automatic Alarm relay ON ON Display key flashing Virtual control probe fault Icon on the display flashing rE Alarm cause Reset ALARM TABLE ON ON automatic OFF OFF automatic - - - - - - LO Low temperature alarm - ON ON automatic - - - - - - HI High temperature alarm - ON ON automatic - - - - - - IA Immediate alarm from external contact - ON ON automatic - - - - Pd Maximum pump down time alarm - ON ON autom. / manual LP Low pressure alarm - ON ON AtS Autostart in pump down - ON ON autom. / manual CHt High condenser temperature alarm - ON ON dor Door open too long alarm - ON ON Etc Real time clock is broken OFF OFF autom. / manual EE EEprom error, unit parameters OFF OFF EF Eeprom error, operating parameters HA HACCP alarm, HA type HF HACCP alarm, HF type LOG duty setting (A6) duty setting (A6) - - - - - - OFF OFF - - - - - - - - - - manual OFF OFF - - - - automatic - - - - - - - - - - - - automatic OFF OFF NO OFF OFF NO OFF OFF automatic OFF OFF NO OFF OFF NO - OFF OFF manual OFF OFF - - - - - OFF OFF manual OFF OFF - - - - LOG fault OFF ON automatic - - - - - - uPL Parameters upload fault OFF ON automatic - - - - - - dnL Parameters download fault OFF ON automatic - - - - - - SHA Low superheat protection OFF ON automatic OFF OFF - - - - LOA LOP protection OFF ON automatic OFF OFF - - - - MOA MOP protection OFF ON automatic OFF OFF - - - - EEA Valve motor fault OFF ON automatic OFF OFF - - - - LSA Threshold and timeout exceeded OFF ON automatic OFF OFF - - - - Hit High condensing temperature protection activated OFF ON automatic OFF OFF - - - - ES1 Probe S1 fault or set point exceeded OFF ON automatic OFF OFF - - - - ES2 Probe S2 fault or set point exceeded OFF ON automatic OFF OFF - - - - ES3 Probe S3 fault or set point exceeded OFF ON automatic OFF OFF - - - - ES4 Probe S4 fault or set point exceeded OFF ON automatic OFF OFF - - - - bAt Battery discharged or faulty or electrical connection interrupted OFF ON automatic OFF OFF - - - - EEE Operating and/or parameter EEPROM error OFF ON automatic OFF OFF - - - - EIC Valve not closed completely OFF ON automatic OFF OFF - - - - EEC Valve closed in emergency OFF ON automatic OFF OFF - - - - EFu FW compatibility error (>=5.0) OFF ON automatic OFF OFF - - - - ECn Configuration error OFF ON automatic OFF OFF - - - - ELE EVD offline OFF ON automatic OFF OFF - - - - Tab. 8.c 53 UltraCella +0300083EN - rel. 1.3 - 30.06.2014 ENG 8.6 Alarm parameters 8.7 HACCP Alarm parameters and monitoring activation Alarm and activation parameters AL (AH) allows you to determine the activation temperature for low (high) temperature alarm LO (HI). The set value AL (AH) is always compared with the value detected by the control probe. The parameter Ad represents the alarm activation delay in minutes; the low temperature alarm (LO) activates only if the temperature is lower than threshold AL for period of time greater than Ad. The thresholds can be relative or absolute, depending on the value of parameter A1. In the first case (A1=0) the value AL indicates the deviation regarding the set point and the low temperature alarm activation point is: set point - AL. If the set point differs, the activation point will automatically differ. In the second case (A1=1), the value AL indicates the low temperature alarm threshold. An active low temperature alarm is indicated via internal buzzer, with the code LO on display and with the activation of the alarm relay. The same occurs for high temperature alarm (HI), considering AH instead of AL. Par A0 A1 AL AH Ad A6 Description Alarm and fan differential Alarms threshold (AL, AH) relative to set point or absolute 0/1=relative/absolute Low temperature alarm threshold If A1= 0, AL=0: alarm disabled If A1= 1, AL=-50: alarm disabled High temperature alarm threshold If A1= 0, AL=0: alarm disabled If A1= 1, AL=200: alarm disabled Delay time for low temperature and high temperature alarms Stop compressor from external alarm 0 = compressor always off ; 100 = compressor always on; Def 2.0 0 Min 0.1 0 In order to activate HACCP alarm monitoring, set parameter HCE=1. HA alarms The HA alarm is generated if during normal operation it is noted that the temperature read by the control probe exceeds the high temperature threshold for the time Ad + Htd. Therefore compared to the normal high temperature alarm already signalled by the control, HACCP alarm type HA is delayed by a further Htd time specific for HACCP recording. Par. HCE Htd Max UM 20.0 °C/°F 1 - Def 0 Min 0 Max 1 U.M. - 0 0 250 min AH Sv St 0 -50.0 200 °C/°F t ON 0 -50.0 200 ALARM °C/°F OFF 120 0 250 min 0 0 100 min Ad Htc t Fig. 8.b Key Sv St t AH ALARM Ad Htd A1=1 ON Description Enabling HACCP 0/1=No/Yes HACCP alarm delay LO HI A0 A0 ALARM Virtual probe Set point Time High temperature alarm threshold HACCP alarm, HA type Delay time for low temperature and high temperature alarms HACCP alarm delay 0=monitoring disabled OFF AL Sv AH HF alarms The HACCP alarm type HF is generated as a result of a power failure for a long time (> 1 minute), when after mains voltage restore the temperature read by the adjustment probe exceeds the high temperature threshold AH . Fig. 8.a Key LO HI SV Low temperature alarm High temperature alarm Adjustment probe AH Notes: Sv • The alarm LO and HI are alarms with automatic reset. A0 determines St the hysteresis between the value of the activation and deactivation of the alarm; • if you press the Alarm button when the measurement is above a threshold, the buzzer and the alarm relay immediately turn off, and an indication of the alarm code will remain active until the measure falls within the activation threshold. Parameter A6 has similar meaning as parameter c4 (duty setting). If an external alarm occurs, the compressor works for a time equal to the value set for parameter A6, while it remains OFF for a fixed period of 15 minutes. • In case of relative alarms (A1= 0) both AL and AH are considered as absolute values (e.g. AL= -10 is considered as AL= 10) UltraCella +0300083EN - rel. 1.3 - 30.06.2014 ALARM t ON OFF black out Fig. 8.c Key Sv AH ALARM St t 54 Virtual probe High temperature alarm threshold HACCP alarm, HF type Set point Time t ENG 8.8 High condenser temperature alarm You can monitor the temperature of the condenser to signal the high temperature, probably due to situations of clogging. The signalling follows the figure below. Par Ac Acd Description High condenser temperature alarm threshold High condenser temperature alarm delay Def 70 Min 0 0 0 Max UM 200 °C/°F 250 min Ac+10 Sc Ac CHT t ON OFF Acd t Fig. 8.d Key t Acd Sc Ac CHT Time High condenser temperature alarm delay Condenser probe High condenser temperature alarm threshold High condenser temperature alarm 55 UltraCella +0300083EN - rel. 1.3 - 30.06.2014 ENG 9. TECHNICAL SPECIFICATIONS 9.1 UltraCella technical characteristics Power Supply: Insulation ensured by 230V power supply Analog inputs Analog output Note: Probe Type Probe power supply Relay output Connections Container Assembly Display Keyboard Clock with buffer battery Buzzer Clock Serial USB Model 230V: Voltage 230 V~ (+10/-15%), 50/60 Hz; Power 18 VA, 100 mA~ max. Model 24V: Voltage 24 V~ (+10/-15%), 50/60 Hz; Power 18 VA, 1A~ max. Insulation for low voltage: reinforced, 6 mm in air, 8 mm superficial, 3750 V. Insulation for relay outputs: reinforced, 3 mm in air, 4 mm superficial, 1250 V. B1, B2, B3: NTC, PT1000 (+-3%) B4: NTC, 0...10Vdc (+-3%) B5: 0...5Vdc ratiometric (+-3%) , 4...20mA (+-3%) Y1: 0...10 Vdc (10mA max,+-5%) When installing, keep the supply and loads connections away from the cables of the probes, digital inputs, and monitoring device. NTC std. CAREL: 10 kΩ at 25°C, range from -50°C to 90°C; measuring error: 1°C in range from -50°C to +50°C; 3°C in range from +50°C to +90°C NTC HT: 50 kΩ at 25°C, range from 0°C to 150°C; measuring error: 1.5°C in range from 0°C to +115°C; 4°C in range from +115°C to +150°C PT1000 std. CAREL: 1000 Ω at 0°C, range from –50°C to +90°C; measuring error 3°C in range from –50°C to 0°C; 5°C in range from 0°C to +90°C +Vdc 12 V+-30%, 25 mA max; 5VREF: 5V+-2% Applicable ratings based on the relay type Type of Relay EN60730 -1 (250 V ~) UL 873 (250 V ~) 8A (AUX1, AUX2) 8 (4)A on N.O.; 6 (4)A on N.C.; 2 (2)A on N.C. and N.O. (100000 8A resistive 2FLA 12LRA, C300 (30000 cycles) cycles) 16A,(LIGHT, FAN) 10A resistive, 5 (3)A (100000 cycles) 10A resistive, 5FLA 18LRA (30000 cycles) 30A(COMP, DEF) 12 (10)A (100000 cycles) 12A resistive, 2HP, 12FLA 72LRA (30000 cycles) NOTE: The sum of the loads currents COMP, DEF, FAN accessed at the same time should not exceed 20A Insulation for low voltage: reinforced, 6 mm in air, 8 superficial, 3750 V. Insulation between independent relay outputs: reinforced, 3 mm in air, 4 superficial, 1250 V. Section of conductors for analog inputs and outputs, digital inputs, serial: from 0.5 to 2.5mm2 (from 20 to 13 AWG); Section of supply and loads cables: from 1.5 to 2.5 mm2 (from 15 to 13 AWG) Serial connections:use shielded cables Maximum length of the cables: 10 m Plastic: sizes 200 x 100 X 190 mm On wall (with plastic container): using fastening screws for front board LED display: 3 and 4 digits, display from -99 to 999; operating status indicated by LEDs and icons formed on the polycarbonate applied to the plastic 10 keys on keyboard in polycarbonate membrane applied to the plastic Available depending on the model Available on all models. Depending on the model installed. Accuracy: ±100 ppm Battery: “button” type with lithium code CR2430 voltage: 3Vdc (sizes 24x3 mm) 3 types of available serials: pLAN, BMS, Fieldbus PLAN : Driver HW RS485, telephone jack (available only on few models) and screw terminals BMS Driver HW RS485, screw terminals Fieldbus: Driver HW RS485, screw terminals Type: Host (A connector); 5Vdc supply, maximum absorption: 100mA (low power devices) Operating conditions Storage conditions Front protection rating Environmental pollution PTI of the isolating materials Resistance to fire class: Protection against overcharging class Type of action and disconnection Control system manufacture Classification according to protection against electric shock Device intended to be hand-held or built into equipment designed to be hand held Class and structure of the software Control front cleaning Only board: -10T65°C; <90% U.R. non condensing With plastic container: -10T50°C, <90% U.R. non condensing Relay identification, type and maximum resistive current to operating temperature: Relay Associated load Type of Relay Max resistive current applicable R1 (AUX2) 8A 8A R2 (AUX1) 8A 8A R3 (LIGHT) 16A 10A R4 (FAN) 16A 10A R5 (DEF) 30A 12A R6 (COMP) 30A 12A NOTE: The sum of the loads currents COMP, DEF, FAN accessed at the same time should not exceed 20A. -20T70°C, < 90% U.R. non condensing With plastic container: IP65 2, normal situation Printed circuits 250, plastic and insulation materials 175 Category D Category II, without PE terminal Category I, with PE terminal Relay contact 1 B (micro-disconnection) Incorporated, electronic control device Class II by means of appropriate incorporation No Class A Only use neutral detergents and water Tab. 9.a UltraCella +0300083EN - rel. 1.3 - 30.06.2014 56 ENG Notes 57 UltraCella +0300083EN - rel. 1.3 - 30.06.2014 ENG Notes UltraCella +0300083EN - rel. 1.3 - 30.06.2014 58 CAREL INDUSTRIES S.p.A. Via dell’Industria, 11 - 35020 Brugine - Padova (Italy) Tel. (+39) 049.9716611 - Fax (+39) 049.9716600 e-mail: [email protected] - www.carel.com UltraCella +0300083EN - rel. 1.3 - 30.06.2014 Agenzia / Agency: