1
Page 1
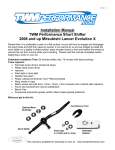
Installation Manual
TWM Performance
Short Shift Kit
2003 Hyundai Tiburon 5 speed
1. Unscrew the shift knob and
remove the boot.
2. Remove the cover which
surrounds the shifter. Pull up on it
and it pops out.
Page 2
3. Remove the screws on either
side of the center console. There
are 3 sets of screws securing the
console. There is one set toward the
front of the console, one set near the
center as shown in the picture on the
left, and one set toward the rear of
the console.
4. Remove the 2 screws at the front
of the console. Once these screws
have been removed The console just
lifts out.
5. Carefully slide an exacto knife
under the clip on the right side of the
assembly to remove it. CAUTION :
Be extremely careful in this step, if
the knife is torqued too hard the
blade could break and become a
dangerous projectile.
Page 3
6. Insert a flat head screw driver
into the gap created by the exacto
knife to pry the clip off.
7. Use a punch to drive out the pin
on the opposite side of the shifter.
Tap lightly with a hammer until the pin
is driven out of the assembly.
8. Remove the clip on the left side of
the assembly.
Page 4
9. Remove the four bolts securing
the assembly to the chassis.
Remove the steel inserts from the
rubber bushings by pushing them out
through the bottom of the bushing.
Push the rubber bushings out
through the bottom of the plastic
assembly. Now insert the aluminum
bushings included with the kit in
place of the rubber ones you just
removed. They will slide in beneath
the plastic assembly, be sure their
smallest diameter is facing up and is
inserted into the hole in the
assembly. Place a bolt and washer
included in the kit through the
assembly and bushing, tighten later.
10. Lift up the assembly and
remove the bottom clip holding
the shifter to the linkage.
11. Pull out the pin and the ‘L’
shaped arm which was held on
by the clip and remove the
shifter.
Page 5
12. Use the cup remover tool included
with the kit to remove both plastic cups
on the original shifter. To do so, place
the cup remover tool on top of the open
jaws of a vice, the jaws should be
approximately 1” apart. Hang the shifter
from the tool as shown, be sure the
shifter is inserted completely into the slot
in the tool. Insert a punch into the center
hole through the plastic cup and tap
firmly with a hammer to separate the
original shifter from cup. Repeat for 2nd
cup.
13. Install the plastic cups which
you removed from the original
shifter onto the TWM shifter.
Grease the cups and pivot balls.
Place the cup on a firm surface
and push the TWM shifter into it
until it pops in.
14. Lightly grease the large pivot
ball before installing the TWM
shifter into the plastic assembly in
place of the stock shifter.
Page 6
15. Re-install the clip on the bottom of
the shifter.
16. Replace the top plastic retaining ring
and rubber grommet.
17. Replace the top part of the assembly,
drive the rear pin back in, and re-insert
the L shaped shift arm.
Page 7
18. Install the clip included in the kit
onto the shaft at the front of the
assembly. Drive the clip on with a
12mm socket to secure it properly
against the plastic assembly. Be sure
the shaft is pushed all the way into the
assembly and the clip is on all the way
so there is no free play.
19. Re-install the clip on the driver’s
side of the L shaped shift arm. Bolt the
assembly back to the chassis using the
4 bolts and washers included with the
kit.
20. Re-install the console, boot, and
shift knob and you’re ready to drive.
Page 8