1
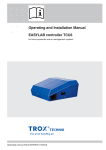
Operating and Installation Manual EASYLAB Control panel BE-LCD-01 for fume cupboard control and room control The art of handling air BE-LCD-01 Operating and Installation Manual / Leaflet no. M375EV8 (01/2015) Contents 1 2 General information __________________ 3 5 Room control ________________________ 14 Symbols used in this manual ____________ 3 Basic functions ______________________ 15 Additional functions __________________ 16 Safety and correct use ________________ 4 Operating mode default setting __________ 16 General information regarding safety ______ 4 Overriding operating mode defaults set by the central BMS____________________ 17 General safety measures ______________ 4 Correct use ________________________ 4 Operating states, alarm messages, fault displays ________________________ 18 Incorrect use ________________________ 4 Residual risks 3 Operation · Room control ______________ 14 Other applicable documentation ________ 3 ______________________ 4 Product description __________________ 5 Product overview and dimensions ________ 5 Mounting __________________________ 21 6 Mounting on an adapter ________________ 22 Functional description and technical data __ 6 4 Transport, storage and packaging ________ 7 5 Operation · Fume cupboard control ______ 7 Fume cupboard control ________________ 7 Basic functions ______________________ 8 Installation and electrical wiring __________ 21 Wall installation using a junction box ______ 22 Installation to a wall or to furniture ________ 23 7 Commissioning ______________________ 24 8 Maintenance ________________________ 24 Additional functions __________________ 9 Operating mode default setting __________ 9 Automatic sash device ________________ 10 Fume cupboard lighting ________________ 10 Overriding operating mode defaults set by the central BMS____________________ 10 Operating states, alarm messages, fault displays ________________________ 11 TROX GmbH Heinrich-Trox-Platz D-47504 Neukirchen-Vluyn Phone +49 (0) 28 45 20 20 Fax +49 (0) 28 45 20 22 65 E-Mail [email protected] www.troxtechnik.com 2 Subject to change / All rights reserved © TROX GmbH BE-LCD-01 Operating and Installation Manual / Leaflet no. M375EV8 (01/2015) 1 General information This operating manual describes the EASYLAB BE-LCD-01 control panel for fume cupboard control and room control. To ensure complete functioning of the control panel it is essential to read this operating and installation manual before starting any work, and to comply with it. The manual must be given to the facilities manager when handing over the system. The facilities manager must include the manual with the system documentation. The manufacturer does not accept any liability for any malfunction or damage resulting from non-compliance with these instructions or noncompliance with relevant statutory regulations. Other applicable documentation In addition to this manual, the following documents apply: • Control Systems catalogue – EASYLAB BE-LCD-01 control panel – EASYLAB TCU3 controller – EASYLAB TAM adapter module • EASYLAB Configuration Software Operating Manual (M375EV1) • Project-specific wiring documents Symbols used in this manual Danger! Designates danger to life and limb due to electrical voltage. Warning! Designates danger to life and limb. Important! Designates danger that can cause minor personal injury or damage to property. BE-LCD-01 Operating and Installation Manual / Leaflet no. M375EV8 (01/2015) 3 2 Safety and correct use General information regarding safety Correct use Only skilled qualified personnel are allowed to perform the described work on the control panel. Only skilled qualified electricians are allowed to work on the electrical system. For all work performed on EASYLAB components, the following regulations and guidelines must be complied with. This applies in particular to the following German country specific regulations or as appropriate in the country where the installation is taking place: • Equipment and Product Safety Laws (GPSG) • Industrial Health and Safety Regulations (BetrSichV) • Accident Prevention Regulations (BGV A1, BGV A3) The BE-LCD-01 control panel is an EASYLAB component intended for the display of values and for performing various functions. If the control panel is connected to a fume cupboard controller, the function display complies with EN 14175; operating functions and special functions can be set by the user. If a room is equipped with EASYLAB controllers, the control panel is intended for monitoring and for operating mode default setting. • Connect the control panel to an EASYLAB TCU3 used for fume cupboard control (equipment function FH-xxx). • Connect the control panel to a EASYLAB TCU3 controller used for extract air control (equipment function RE), supply air control (equipment function RS), or room pressure control (equipment function PC). • Connect the control panel to an EASYLAB TAM adapter module with active room management function (RMF). • Surface mount the control panel onto the side frame of the fume cupboard. • As an alternative, mount the control panel to a wall, with our without junction box. • Observe the technical data for the control panel. General safety measures • Large temperature differences Condensation can damage the electronics beyond repair. If the control panel has been kept in an unheated area, wait at least two hours before switching on the supply voltage for commissioning. • Electrostatic charge Electrostatic charge can damage the electronics. To avoid this, first touch an equipotentially bonded metal surface, e.g. a water pipe, for electrical earthing before you remove the control panel from its protective wrapping. • Fixing the base plate and the adapter Tighten the screws only hand-tight in order to not damage the base plate or the adapter. • Foreign matter and liquids If liquid gets inside the control panel, let the control panel completely dry before commissioning. Remove foreign matter, if any. If the device emits a smell or smoke, have it checked by the manufacturer. 4 Incorrect use Do not use the control panel outdoors, in wet areas, or in potentially explosive atmospheres. Residual risks A failure of the supply voltage is indicated on the control panel only if the EASYLAB controller is equipped with the EM-TRF-USV expansion module and the battery pack has been connected and fully charged. BE-LCD-01 Operating and Installation Manual / Leaflet no. M375EV8 (01/2015) 3 Product description Product overview and dimensions Product overview 40-character display Alarm sounder Sash monitoring warning display Status display (green, yellow, red) with text HIGH and LOW Connection socket for service and commissioning device Acoustic alarm acknowledgement Manual control Selection of operating mode Lighting or other equipment (RMF) Automatic sash device (FH), sun protection, e.g. blinds (RMF) Connection socket for EASYLAB controller (on rear) Dimensions Front view BE-LCD-01 with adapter BE-LCD-01 without adapter 55 111 17 145 ≈60 10 28 15° BE-LCD-01 Operating and Installation Manual / Leaflet no. M375EV8 (01/2015) 5 3 Product description Functional description and technical data Functional description The BE-LCD-01 control panel is used to display and control the most critical aerodynamic functions of a fume cupboard or a room. Users obtain information regarding the condition of the fume cupboard or room and can select among various operating modes. The individual display elements and controls are as follows: • Three-colour status display • Warning display • 40-character display • Alarm sounder • Eight function button fields – Acoustic alarm acknowledgement – Three operating mode buttons – Two buttons for the automatic sash device or sun protection (depending on application) – One button for the fume cupboard lighting – One button for manual control • Service socket The range of functions of the control panel can be adapted to project-specific requirements using the EasyConnect configuration software. The range of functions may vary for different fume cupboards or rooms. The function button fields are used for display and as buttons for operation. The available functions are highlighted (blue). The required function can be selected by pressing the appropriate button. • Selection of the operating mode • Automatic sash device • Control of the fume cupboard lighting The 40-character display shows system messages or, if enabled, current values. The control panel is connected to the EASYLAB controller using a plug-in connection cable. The control panel consists of a front panel with the display elements and controls, the electronics, and the pluggable adapter that provides four different viewing angles. The control panel can be mounted onto the side frame of a fume cupboard (using the adapter) or to a wall or furniture. The control panel is part of the EASYLAB system. The functions described in this manual are only available with the corresponding controllers and possibly additional components. Detailed information on design and areas of application can be found on our website and in the LABCONTROL design manual. Technical data Supply voltage 24 V AC/DC from TCU3 controller or TAM adapter module Connecting cable Approx. 5 m standard network patch cable, SF-UTP, extendable to 40 m Acceptable temperature range for storage: -10°C to +70 °C for operation: 0°C to +50 °C Acceptable humidity for storage and operation <90% non-condensing Protection level 6 IP20 Dimensions 145 × 111 × 23 mm Structural depth Approx. 60 mm when the adapter is used 28 mm when mounted to a wall or to furniture Casing ABS plastic, pearl light grey (RAL 9022); front plastic: anthracite grey (RAL 7016) BE-LCD-01 Operating and Installation Manual / Leaflet no. M375EV8 (01/2015) 4 5 Transport, storage and packaging Operation · Fume cupboard control Delivery check Storage Check delivered items immediately after arrival for transport damage and completeness. In case of any damage or an incomplete shipment, inform the shipping company and your TROX contact person immediately. A complete shipment includes: • BE-LCD-01 control panel with adapter • Connecting cable, approx. 5 m, patch cable, blue • Operating and installation manual If you need to store the control panel temporarily, make sure that the following conditions apply: • Leave the unit in its packaging and do not expose it to the effects of weather. • Store the unit in a dry place and away from direct sunlight. • Temperature: –10°C to +70°C Maximum humidity: 90% (non-condensing) Transport on site Properly dispose of packaging material. • If possible, take the control panel in the transport packaging up to the installation location. • Do not remove the protective wrapping until just before installation. The BE-LCD-01 control panel is used to display and control the most critical aerodynamic functions of a fume cupboard controlled by an EASYLAB TCU3 fume cupboard controller. Packaging The basic functions are available for all fume cupboards. Other functions may be available depending on the configuration and operating state. The range of functions can be configured individually. The control panel has eight function button fields that are visible or not visible according to the configuration. • Available function: • Active function: blue symbol white symbol Fume cupboard control The BE-LCD-01 control panel fulfils the requirements of EN 14175 for fume cupboard operation and status displays. It can be used to control an automatic sash device as well as fume cupboard lighting. It works in combination with the ‘fume cupboard control equipment function of the TCU3 EASYLAB controller and displays regular operating states and values. Fume cupboard control M TCU3 BE-LCD-01 BE-LCD-01 Operating and Installation Manual / Leaflet no. M375EV8 (01/2015) 7 5 Operation · Fume cupboard control Basic functions Three-colour status display Green, yellow, red combined with text LOW and HIGH • Green Normal operation, fume cupboard functionally reliable • Yellow Volume flow rate too high; fume cupboard is functionally reliable, increased energy consumption • Red Volume flow rate too low; fume cupboard not functionally reliable, work at the fume cupboard is not allowed Green Yellow 40-character status display Text display of fume cupboard operating states and faults. Display texts → p. 11 onwards The display of additional information can be configured. • Volume flow rate setpoint and actual values • Face velocity actual value (only for fume cupboard controllers with face velocity transducer FH-VS) • Display text language • Unit of measure for volume flow rate setpoint and actual values The display can be adjusted using the configuration software. Red Acoustic alarm acknowledgement This button is used to acknowledge and reset an acoustic alarm. Warning display for sash opening • Permanent light Maximum operational sash opening has been exceeded. At the same time, an acoustic alarm may sound (depending on the controller configuration). The permanent light is reset by closing the sash. • Blinking light The fume cupboard is affected by diversity control. The volume flow rate has been reduced to prevent the total room extract air from exceeding the set value. Close the sash. 8 BE-LCD-01 Operating and Installation Manual / Leaflet no. M375EV8 (01/2015) 5 Operation · Fume cupboard control Additional functions Depending on the configuration and operating mode default setting additional displays and function buttons may be available. Available function buttons are visible (highlighted in blue or white). Function buttons that are not available are not visible. Examples White symbol The function is active. Pressing the button again deactivates the function. Blue symbol This function is available but not active. Pressing the button activates the function. Non-visible (grey) symbol The function is not available. This depends on the configuration of the controller or on the current operating state. White symbol blinks Increased operation OPEN mode (special operating mode) is active. White symbol blinks after button has been pressed If you press a function button field and the white symbol blinks briefly, the selected function cannot be deactivated at the moment. The current operating mode default setting is of higher priority and cannot be overridden on the fume cupboard. Operating mode default setting In standard mode all function button fields for all available functions are indicated as blue symbols (i.e. not active). Activate the special operating modes using the following buttons: Activate increased operation Pressing this button activates the increased volume flow rate set for the controller (e.g. for emergency operating mode). The symbol colour changes to white. Activate reduced operation Pressing this button activates the reduced volume flow rate set for the controller (e.g. for night setback). The symbol colour changes to white. Shut-off Pressing this key activates shut-off. The symbol colour changes to white. Deactivating special operating modes Pressing the respective button deactivates the special operating mode. To select a new operating mode without first deactivating the previous function just press the corresponding function button. Increased operation can be set for a limited period of time. The increased volume flow will then automatically be deactivated after the set delay. BE-LCD-01 Operating and Installation Manual / Leaflet no. M375EV8 (01/2015) 9 5 Operation · Fume cupboard control Overriding operating mode defaults set by the central BMS Operating mode default settings from the central BMS or from the room control panel can be overridden on the control panel for the fume cupboard controller. Temporary override A centrally set operating mode can be temporarily overridden at any time using the operating mode button on the control panel. The operating mode selected on the control panel remains active until the central BMS sets another operating mode. If the central BMS sets a different default operating mode, it overrides the locally activated operating mode. Manual control for permanent override A centrally set operating mode can be permanently overridden on the control panel. To do so, first activate manual control by pressing the corresponding button to prevent further overrides from the central BMS. Then set any other operating mode on the control panel. This operating mode default setting can be terminated by pressing the manual control button again. The fume cupboard controller then resumes the previous operating mode from the central BMS. Manual operation can be set for a limited period of time. The manual mode will then automatically be deactivated after the set delay and the previous operating mode will be resumed. No override option The central BMS can suppress overrides from the control panel temporarily or permanently. In this case, manual control cannot be used, and the control panel shows only the centrally set operating mode. If a user attempts to change the operating mode on the control panel, the active operating mode will blink briefly. 10 Automatic sash device These buttons are used to control the automatic sash device. The buttons can be used only if an automatic sash device has been configured. Open the sash Close the sash. Fume cupboard lighting This button is used to control the fume cupboard lighting. The button can be used only if this function has been configured. BE-LCD-01 Operating and Installation Manual / Leaflet no. M375EV8 (01/2015) 5 Operation · Fume cupboard control Operating states, alarm messages, fault displays Operating states Code State Actual state, explanation Actions, remedial measures PF UPS, battery operation The connected power supply has failed. The control is maintained by the battery pack. Eliminate the cause of the power failure. SE Service Service (maintenance) for the fume cupboard control is due. Initiate maintenance and have the maintenance interval reset. oo Fume scrubber demand A user has requested the extract air scrubber. The volume flow rate is increased as a consequence. When the set volume flow rate has been reached, extract air scrubbing starts. 00 Fume scrubber active The increased volume flow rate for the extract air scrubber has been achieved. The extract air scrubber is in operation. EF Fire Open Fire Shut-off The sensor system has activated smoke extract. Depending on the controller configuration the damper blade will remain open or will be shut (shut-off). SC Automatic sash device Error message relating to the automatic sash device. S1 Test function The general test function, triggered by the configuration software, is active, e.g. actuator test. ¹ Sash opening > max. The maximum operational sash opening has been exceeded. Close the sash. ² Close fumehood Motion detector – indicates that the sash has to be closed. The sash is open and the motion detector has not detected a person in front of the fume cupboard during the set delay. Close the sash. ² FaceVelocity reduced Motion detector – lower the face velocity to 0.3 m/s. The motion detector has not detected a person in front of the fume cupboard during the set delay. The face velocity has been reduced. ³ Diversity limitation The diversity control in combination with the room management function is active. The volume flow rate of the fume cupboard is reduced based on the total room extract air. ¹ Warning display permanently on ² Acoustic signal Close the sash. ³ Warning display blinks BE-LCD-01 Operating and Installation Manual / Leaflet no. M375EV8 (01/2015) 11 5 Operation · Fume cupboard control Operating states, alarm messages, fault displays Alarm messages Code State Explanation Actions, remedial measures A1 Volume flow rate too high The volume flow rate exceeds the setpoint value. Check the actuator and the controller. A2 Volume flow rate too low The volume flow rate falls short of the setpoint value. Check the pressure. Check the volume flow rate transducer. A3 Face velocity The face velocity falls short of the threshold value. Check if the sash opening is too wide. Check the volume flow rate. Check the pressure. Configuration faults 12 Code Message Explanation Actions, remedial measures C1 Software version Not all controllers have the same software version installed. Have the correct software version installed by the Service department. C2 No. of controllers > 24 More than 24 controllers have been connected to the communcation cable. Reduce the number of controllers. C3 Communication cable termination The communication cable has not been terminated properly. An active terminal resistor is required at each end of the communication cable. Activate the terminal resistors using a switch on the EASYLAB TCU3 main PCB. C4 RMF configuration The room management function has not been activated on any of the controllers. Activate the RMF on a controller. C5 dP controller ≠ 1 Configuration of differential pressure control is incomplete. There is either no differential pressure controller on the communication cable, or the room management function is not active. Include a differential pressure controller. Activate differential pressure control in the room management function. C6 System conflict Not all controllers are of the same system type. Connect either supply air controllers or extract air controllers but not both. BE-LCD-01 Operating and Installation Manual / Leaflet no. M375EV8 (01/2015) 5 Operation · Fume cupboard control Operating states, alarm messages, fault displays Controller faults Code Message Explanation Actions, remedial measures H1 24 V undervoltage The supply voltage is too low. The sensors and actuators are no longer supplied with sufficient power. Check the power supply to the system. H2 AI characteristic Analogue input signal is outside of the characteristic. Check the voltage signal or sensor. Check the characteristic parameters stored in the controller. H3 Supportive flow fan fault The feedback signal from the supportive flow fan is missing. The fan has been switched off, or the cable is no longer connected. The controller automatically raises the volume flow rate to the value that has been set for this case. Check the feedback signal and the supportive flow fan. Control panel faults Code Message Explanation Actions, remedial measures E1 Connection lost Communication between the control panel and the fume cupboard controller has been interrupted. For technical reasons, this text always appears in English. Check the cable connection, the control panel, and the controller. E2 CP-CRC failure Communication between the control panel and the fume cupboard controller is faulty. For technical reasons, this text always appears in English. Check the cable connection, the control panel, and the controller. E3 CP not possible The control panel cannot be used with the controller to which it is connected. The control panel must be connected to a configured fume cupboard controller or to a controller with active room management function. Check the wiring, assignment, and configuration. E4 CP memory A hardware error occurred while accessing the internal memory. If the error occurs again, replace the control panel. BE-LCD-01 Operating and Installation Manual / Leaflet no. M375EV8 (01/2015) 13 5 Operation · Room control The BE-LCD-01 control panel is used to display and control the most critical aerodynamic and safety-related functions of an EASYLAB controlled room. The basic functions are available for all fume cupboards. Other functions may be available depending on the configuration and operating state. The range of functions can be configured individually. The control panel has eight function button fields that are visible or not visible according to the configuration. • Available function: • Active function: blue symbol white symbol Room control For setting operating modes and for monitoring an entire room the control panel is to be connected to a TCU3 supply or extract air controller, or to the TAM adapter module with active room management function. Consolidated faults as well as pressure control states can be displayed. Room control Supply air TAM-RMF Extract air Communication cable BE-LCD-01 14 Fume Fume cupboard 1 cupboard n BE-LCD-01 Operating and Installation Manual / Leaflet no. M375EV8 (01/2015) 5 Operation · Room control Basic functions Three-colour status display Green, yellow, red combined with text LOW and HIGH Green Yellow Red Volume flow rate control - functional display • Green Standard operation, no errors • Yellow Too many sashes are open. The set threshold for the room total extract air has been exceeded; diversity control is active. • Red An error has occurred, or the SHUT-OFF or OPEN operating mode is active. The cause is being displayed. Pressure control - functional display • Green Standard operation, normal room pressure • Yellow The differential pressure is too high. For negative pressure: Room pressure is too low. For positive pressure: Room pressure is too high. • Red An error has occurred, or the differential pressure is too low. For negative pressure: Room pressure is too high. For positive pressure: Room pressure is too low. Acoustic alarm acknowledgement This button is used to acknowledge and reset an acoustic alarm. Warning: Diversity control is active • Blinking display The fume cupboards are affected by diversity control. The volume flow rate has been reduced for some fume cupboards to prevent the total room extract air from exceeding the set value. Close the sash. 40-character status display The display shows certain operating states for the room as well as error codes. If room control is active, room pressure actual and setpoint values are also displayed. Display texts → p. 18 onwards The display of additional information can be configured. • Volume flow rate setpoint and actual values • Total room extract air actual and setpoint values • Display text language • Unit of measure for volume flow rate setpoint and actual values The display can be adjusted using the configuration software. BE-LCD-01 Operating and Installation Manual / Leaflet no. M375EV8 (01/2015) 15 5 Operation · Room control Operating mode default setting Additional functions Depending on the configuration and operating mode default setting additional displays and function buttons may be available. Available function buttons are visible (highlighted in blue or white). Function buttons that are not available are not visible. Examples White symbol The function is active. Pressing the button again deactivates the function. Blue symbol This function is available but not active. Pressing the button activates the function. Non-visible (grey) symbol The function is not available. This depends on the configuration of the controller or on the current operating state. White symbol blinks Increased operation OPEN mode (special operating mode) is active. White symbol - blinks after button has been pressed If you press a function button field and the white symbol blinks briefly, the selected function cannot be deactivated at the moment. The current operating mode default setting is of higher priority and cannot be overridden on the fume cupboard. 16 In standard mode all function button fields for all available functions are indicated as blue symbols (i.e. not active). Activate the special operating modes with the following buttons. Activate increased operation Pressing this button activates the increased volume flow rates set for all controllers in the room (e.g. for emergency operating mode). The symbol colour changes to white. Activate reduced operation Pressing this button activates the reduced volume flow rates set for all controllers in the room (e.g. for night setback). The symbol colour changes to white. Shut-off Pressing this key activates the SHUT-OFF mode for all controllers in the room. The symbol colour changes to white. Deactivating special operating modes Pressing the respective button deactivates the special operating mode. To select a new operating mode without first deactivating the previous function just press the corresponding function button. Increased operation can be set for a limited period. This enables an automatic deactivation of the increased operation after the set delay. Note Whether a defaulted operating mode applies to a controller in a room depends on the configuration of the controller and on whether manual control is active on each fume cupboard. BE-LCD-01 Operating and Installation Manual / Leaflet no. M375EV8 (01/2015) 5 Operation · Room control Overriding operating mode defaults set by the central BMS Operating mode default settings from the central BMS can be overridden on the control panel for the room. Overriding the room operating mode temporarily A centrally set room operating mode can be temporarily overridden at any time using the operating mode button on the control panel. The operating mode selected on the room control panel remains active unless the central BMS sets another operating mode. If the central BMS sets a different default operating mode, that operating mode overrides the locally activated operating mode. The operating mode for all room controllers is always the operating mode that has been set last, either by the central BMS or on the room control panel. Overriding the room operating mode permanently using manual control A centrally set room operating mode can be permanently overridden on the room control panel. To do so, activate manual control by pressing the corresponding button. This prevents further overrides by the central BMS. You can then set any other operating mode using the control panel. To resume the previous operating mode from the central BMS, press the manual mode button again. Manual operation can be set for a limited period. The manual mode will then automatically be deactivated after the set delay, and the previous operating mode will be resumed. No override option for the room operating mode The central BMS can be configured to block the override function on the room control panel temporarily or permanently. In this case, manual control cannot be used, and the control panel shows only the centrally set operating mode. If a user attempts to change the operating mode on the control panel, the active operating mode will blink briefly. Lighting Use this button to switch the room lighting on or off. This function is only available if the room management function has been configured accordingly. This button can also be used for other functions instead of or in addition to switching the lighting on/off, e.g. for switching certain devices on/off. Sun protection (e.g. blinds) Use these buttons to operate the sun protection, e.g. blinds (by others). These buttons are available only if this function has been set for the control panel (configuration of the room management function). Open blinds Close blinds BE-LCD-01 Operating and Installation Manual / Leaflet no. M375EV8 (01/2015) 17 5 Operation · Room control Operating states, alarm messages, fault displays Operating states Code State Actual state, explanation Actions, remedial measures PF UPS, battery operation The connected power supply has failed. The control is maintained by the battery pack. Eliminate the cause of the power failure. S1 Test function The general test function, triggered by the configuration software, is active, e.g. actuator test. ³ Diversity active Too many sashes are open. The set threshold for the room total extract air has been exceeded; diversity control is active. The volume flow rate has been reduced for some fume cupboards. ³ Door switch The door contact is active and affects pressure control. ¹ Warning display permanently on ² Acoustic signal Close some sashes. ³ Warning display blinks Alarm messages 18 Code State Explanation Actions, remedial measures A1 Volume flow rate too high The volume flow rate exceeds the setpoint value. Check the actuator and the controller. A2 Volume flow rate too low The volume flow rate falls short of the setpoint value. Check the pressure. Check the volume flow rate transducer. A4 Σ extract air is too high The set threshold for the room total extract air has been exceeded; diversity control is active. Close some sashes. A5 Differential pressure is too high The differential pressure is too high. For negative pressure: Room pressure is too low. For positive pressure: Room pressure is too high. A6 Differential pressure is too low The differential pressure is too low. For negative pressure: Room pressure is too high. For positive pressure: Room pressure is too low. A7 Σ extract air is too low The total room extract air falls short of the set threshold for the total room extract air. Check the pressure. Check the volume flow rate transducer. BE-LCD-01 Operating and Installation Manual / Leaflet no. M375EV8 (01/2015) 5 Operation · Room control Operating states, alarm messages, fault displays Configuration faults Code Message Explanation Actions, remedial measures C1 Software version Not all controllers have the same software version installed. Have the correct software version installed by the Service department. C2 No. of controllers > 24 More than 24 controllers have been connected to the communcation cable. Reduce the number of controllers. C3 Communication cable termination The communication cable has not been terminated properly. An active terminal resistor is required at each end of the communication cable. Activate the terminal resistors using a switch on the EASYLAB TCU3 main PCB. C4 RMF configuration The room management function has not been activated on any of the controllers. Activate the RMF on a controller. C5 dP controller ≠ 1 Configuration of differential pressure control is incomplete. There is either no differential pressure controller on the communication cable, or the room management function is not active. Include a differential pressure controller. Activate differential pressure control in the room management function. C6 System conflict Not all controllers are of the same system type. Connect either supply air controllers or extract air controllers but not both. Code Message Explanation Actions, remedial measures F1 Category 1 alarm Consolidated alarm, room - Category 1 Either the power supply has failed, or the smoke extract function is active on at least one controller on the communication cable. Check controller. F2 Category 2 alarm Consolidated alarm, room - Category 2 A control error on at least one controller on the communication cable results in a deviation of the volume flow rate or face velocity. Check controller. F3 Category 3 alarm Consolidated alarm, room - Category 3 A hardware error has occurred on at least one controller on the communication cable. Check controller. Consolidated room alarm faults BE-LCD-01 Operating and Installation Manual / Leaflet no. M375EV8 (01/2015) 19 5 Operation · Room control Operating states, alarm messages, fault displays Local controller hardware faults Code State Explanation Actions, remedial measures H1 24 V undervoltage The supply voltage is too low. The sensors and actuators are no longer supplied with sufficient power. Check the power supply to the system. H2 AI characteristic Analogue input signal is outside of the characteristic. Check the voltage signal or sensor. Check the characteristic parameters stored in the controller. Control panel faults 20 Code State Explanation Actions, remedial measures E1 Connection lost Communication between the control panel and the fume cupboard controller has been interrupted. For technical reasons, this text always appears in English. Check the cable connection, the control panel, and the controller. E2 CP-CRC failure Communication between the control panel and the fume cupboard controller is faulty. For technical reasons, this text always appears in English. Check the cable connection, the control panel, and the controller. E3 CP not possible The control panel cannot be used with the controller to which it is connected. The control panel must be connected to a configured fume cupboard controller or to a controller with active room management function. Check the wiring, assignment, and configuration. E4 CP memory A hardware error occurred while accessing the internal memory. If the error occurs again, replace the control panel. BE-LCD-01 Operating and Installation Manual / Leaflet no. M375EV8 (01/2015) 6 Installation and electrical wiring For installation, wiring, and commissioning observe the recognised technical regulations, especially safety and accident prevention regulations. For any wiring work follow the national and local regulations and guidelines for electrical installation. Danger! Important! Danger of electric shock! Do not touch any live components! Electrical equipment carries a dangerous electrical voltage during operation. Danger of injury or of damage to electrical cables Fold or deburr the edges of the side frame cut-outs. • Only skilled qualified electricians are allowed to work on the electrical system. • Switch off the power supply before working on any electrical equipment. Mounting The control panel can be mounted with or without the adapter. Types of installation include: • Using the pluggable adapter which can provide four different viewing angles: from the right, from the left, from top, from bottom • Wall installation using a junction box • Installation to a wall or to furniture Fixing screws • For the pluggable adapter, 4 fixing screws Ø 4 mm. The screws should be selected according to the material of the side frame. Hole template for mounting the control panel onto an adapter 64 Screws should be as short as possible to prevent damage to the cable that runs inside the side frame. • Wall installation using a junction box: Use the screws supplied with the junction box. • Installation to a wall or to furniture: 4 fixing screws Ø 4 to 4.5 mm. The screws should be selected according to the surface for which they are used. Connecting cable If there is a considerable distance between the control panel and the controller, you may want to use a network patch cable type S-FTP with a maximum length of 40 m instead of the supplied 5 m cable. Hole template for mounting the control panel to a wall or to furniture 13.5 20 119 4 × Ø4 mm 12 4 × Ø3 mm 54 15 12.5 54 50 86 84 20 20 30 111 20 27.5 111 55 59 27.5 27 145 BE-LCD-01 Operating and Installation Manual / Leaflet no. M375EV8 (01/2015) 105.5 12.5 145 21 6 Installation and electrical wiring Mounting on an adapter How to proceed 1.Create a cut-out and drill any necessary holes into the side frame or furniture wall. 2.Lay the cable for the connection of the control panel with the controller. Take the control panel end of the cable and pass it carefully from the rear through the side frame. Only the plug must protrude from the side frame cut-out. Attach the first cable fastener in such a way that some spare cable length remains inside or at the end of the side frame. 3.Feed the cable through the adapter from below. Attach the adapter to the side frame or furniture wall using suitable screws. After fixing the screws, check the connecting cable for any damage. To do so, pull the connecting cable about 35 cm out of the side frame and check it. 4.Put the plug of the connecting cable into the socket of the control panel such that it locks into place. → See picture on p. 23 5.Align the control panel including the cable with the adapter and press it onto the fixing points until it locks into place. In the process, carefully push the connecting cable back into the side frame cut-out without kinking it. Wall installation using a junction box How to proceed 1.Install the junction box. 2.Lay the cable for the connection of the control panel with the controller. Take the control panel end of the cable and pull it from the junction box for about 10 cm. 3.Carefully remove the control panel base plate: The release openings are located on the left side of the casing. Fix the base plate to the junction box. 4.Put the plug of the connecting cable into the socket of the control panel such that it locks into place. → See picture on p. 23 5.Align the control panel including the cable with the base plate and press it back onto the base plate until it locks into place. In the process, carefully push the connecting cable back into the junction box without kinking it. 22 Right-hand side frame Left-hand side frame Above the sash Below the sash Connecting cable Adapter Side frame Connecting cable Base plate Junction box BE-LCD-01 Operating and Installation Manual / Leaflet no. M375EV8 (01/2015) 6 Installation and electrical wiring Installation to a wall or to furniture How to proceed 1.Create a cut-out and drill any necessary holes into the wall. 2.Lay the cable for the connection of the control panel with the controller. Take the control panel end of the cable and pull it from the wall for about 10 cm. 3.Carefully remove the control panel base plate: The release openings are located on the left side of the casing. Fix the base plate. 4.Put the plug of the connecting cable into the socket of the control panel such that it locks into place. → See picture to the right. 5.Align the control panel including the cable with the base plate and press it back onto the base plate until it locks into place. In the process, carefully push the connecting cable back into the wall without kinking it. Connecting cable Base plate Wall Connection to the control panel The socket for the connecting cable is on the rear of the control panel. Connection to the controller Connect the control panel cable to either Terminal 1 (X2) or Terminal 2 (X3). The remaining connection is intended for a second control panel. The control panel can only be used when it has been configured on a TCU3 controller or TAM with active room management function. TCU3 or TAM Connecting cable for the control panel BE-LCD-01 Operating and Installation Manual / Leaflet no. M375EV8 (01/2015) 23 7 8 Commissioning Maintenance The functions of the control panel are configurable. The control panel is factory set to allow essential functions for fume cupboard and room control (basic setting). If two control panels are connected, the same configuration applies to both units. The EasyConnect configuration software can be used to change and expand the range of functions. EasyConnect configuration software EasyConnect-CAB (TROX part no. B588NF4) for wire-based configuration, consisting of: • Software licence • USB RS485 adapter • Configuration cable EasyConnect-BC (TROX part no. B588NF5) for wireless configuration, consisting of: • Software licence • Bluetooth adapter module BlueCON Connection socket Connection socket for service and commissioning For configuration, maintenance, and diagnosis, connect a notebook to the connection socket of the control panel using the configuration cable and adapter. Commissioning The EasyConnect configuration software provides a commissioning wizard that guides users in making project-specific adjustments. • Optical alarm, red, either blinking or permanent • Duration of the acoustic alarm • Type of acoustic alarm in case the sash is opened beyond the maximum operational sash opening • Enabling the function button for “Increased Operation” • Enabling the function button for “Reduced operation” • Enabling the function button for shut-off • Enabling the function button for fume cupboard lighting • Enabling the function button for manual control • Enabling the display for face velocity (only for fume cupboard control) Enabling the room control panel when room management control is active Configuring the room control panel Maintenance The EASYLAB control panel is maintenance-free. 24 Use only mild cleaning agents to clean the front plastic. BE-LCD-01 Operating and Installation Manual / Leaflet no. M375EV8 (01/2015)