Download LED NANO BEAM - installation manual V1,1
Transcript
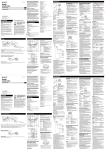
LED NANO BEAM IP68 WATERPROOF LED PROJECTOR Operation Manual Mode d'emploi Gebruiksaanwijzing Bedienungsanleitung Manual de instrucciones Manual do utilizador WWW.BEGLEC.COM Copyright © 2009 by BEGLEC comm.v.a. ‘t Hofveld 2 ~ B1702 Groot-Bijgaarden ~ Belgium Reproduction or publication of the content in any manner, without express permission of the publisher, is prohibited. Version: 1.1 EN FR NL DE ES PT DANGER ~ GEVAAR ~ GEFAHR ~ PELIGRO ~ PERIGO ! WARNING: DANGER! never expose the lens to direct sunlight, even for a short period. This may damage the light effect or even cause fire! ATTENTION: DANGER! n'exposez jamais la lentille directement aux rayons de soleil, même pendant un bref instant. Ceci peut endommager l'intérieur de l'appareil ou même causer un incendie ! OPGELET : GEVAAR ! stel de lens nooit bloot aan direct zonlicht, zelfs gedurende een korte periode. Dit kan het toestel beschadigen en zelfs brand veroorzaken! WARNUNG: GEFAHR! Setzen sie die Linse niemals direkter Sonneneinstrahlung aus, auch nicht für eine kurze Zeit ! Die direkte Sonneneinstrahlung kann das Gerät zerstören oder zum brennen bringen! ADVERTENCIA: ¡PELIGRO! ¡nunca exponga la lente a la luz solar directa, aún durante un período corto! ¡Esto puede dañar el efecto de luz o incluso causar el fuego! AVISO: PERIGO! Nunca exponha as lentes directamente à luz solar, mesmo que por pouco tempo! Isto pode danificar o efeito luminoso ou mesmo provocar um incêndio! EN - DISPOSAL OF THE DEVICE Dispose of the unit and used batteries in an environment friendly manner according to your country regulations. FR - DÉCLASSER L’APPAREIL Débarrassez-vous de l’appareil et des piles usagées de manière écologique, conformément aux dispositions légales de votre pays. NL - VERWIJDEREN VAN HET APPARAAT Verwijder het toestel en de gebruikte batterijen op een milieuvriendelijke manier conform de in uw land geldende voorschriften. DU - ENTSORGUNG DES GERÄTS Entsorgen Sie das Gerät und die Batterien auf umweltfreundliche Art und Weise gemäß den Vorschriften Ihres Landes. ES - DESHACERSE DEL APARATO Reciclar el aparato y pilas usadas de forma ecologica conforme a las disposiciones legales de su pais. PT - COMO DESFAZER-SE DA UNIDADE Tente reciclar a unidade e as pilhas usadas respeitando o ambiente e em conformidade com as normas vigentes no seu país. ENGLISH OPERATION MANUAL FRANCAIS LED NANO BEAM - INSTALLATION MANUAL SAFETY INSTRUCTIONS: To protect the environment, please try to recycle the packing material as much as possible. Install the fixture away from any flammable materials and/or liquids. Maximum save ambient temperature is 50°C. Don’t use this unit at higher ambient temperatures. The housing and the lenses must be replaced if they are visibly damaged. Important: Don’t look directly into the LED light beam at close range and don’t use the projector in the presence of persons suffering from epilepsy. ELECTRICAL INSTALLATION The electrical installation should be carried out by qualified personal only, according to the regulations for electrical and mechanical safety in your country. !!! CAUTION: DO NOT CONNECT DIRECTLY TO 230Vac !!! !!! CAUTION: Ensure the LED power supply is switched off before installation !!! The LED NANO BEAM consumes about 1,7 Watt per unit. This means that you can put a lot of units on one power supply, however the maximum cable length between the LED power supply and the last unit in the chain is about 30m. We strongly suggest using our special LED power supply “LED-PSU 50W/24Vdc” (order code: 4935) for maximum reliability. However a simple 6Vac to 26Vac transformer is also possible. Connections: For outdoor installations: make sure to use waterproof junction boxes! AC-input (ordinary transformer): connect all projectors in parallel to the transformer output. DC-input (example: LED-PSU 50W/24Vdc): connect all projectors in parallel to the PSU output BUT make sure that the positive (red wire) and negative (black wire) poles of the projectors are connected in the right way to the corresponding wires of the PSU see drawing! After checking that the maximum allowed power is not exceeded, you can connect the chain to the LED Manager and switch it on. MECHANICAL INSTALLATION Many possibilities: you can simply drill a hole (ex. in a wooden surface) and press/click the LED projector inside or you can install the projector in concrete floors, using an M40 Cable protection pipe (Diameter = 36mm) to protect the projector. For outdoor installations, make sure to use waterproof junction boxes. SPECIFICATIONS Connections: Operation voltage : Power consumption: Power Cable: Beam Angle: IP rating: Weight: Size: MODE D’EMPLOI LED NANO BEAM – GUIDE D’INSTALLATION INSTRUCTIONS DE SECURITE : Pour protéger l'environnement, veuillez, autant que faire se peut, recycler les emballages de l'appareil. Installez l'appareil à l'écart de matériaux inflammables et/ou liquides. La température maximale ambiante est de 50°C pour garantir un fonctionnement correct. N'utilisez pas cet appareil à des températures ambiantes plus élevées. Le boîtier et les pièces optiques doivent être remplacés s'ils sont visiblement endommagés. Important : Ne regardez pas directement vers le faisceau lumineux des LED à courte distance, et n'utilisez pas le projecteur en présence de personnes atteintes d'épilepsie. INSTALLATION ELECTRIQUE L'installation électrique devrait être effectuée uniquement par du personnel qualifié, suivant les normes de sécurité relatives à l'électricité et à la mécanique dans votre pays. !!! ATTENTION ! NE VOUS CONNECTEZ PAS DIRECTEMENT AU SECTEUR (230V) !!! !!! ATTENTION ! Assurez-vous que le bloc d'alimentation des LED est éteint avant l'installation !!! Le LED NANO WASH consomme environ 1,7 watt par appareil. Cela signifie donc que vous pouvez alimenter une série d'appareils au départ d'un seul bloc d'alimentation. Cependant, la longueur maximale du câble entre le bloc d'alimentation des LED et le dernier appareil de la chaîne doit se situer aux alentours de 30 mètres. Nous recommandons vivement l'utilisation de notre bloc d'alimentation spécifique, le 'LED-PSU 50W/24Vdc' (numéro de référence : 4935) afin de garantir une fiabilité maximale. Cependant, un simple transformateur de 6V CA à 26V CA est aussi une possibilité envisageable. Connexions : Pour des installations en plein air : assurez-vous que le matériel utilisé pour les connexions soit bien étanche ! Entrée CA (transfo ordinaire) : connectez tous les projecteurs en parallèle à la sortie du transfo. Entrée CC (exemple : LED-PSU 50W/24Vdc) : connectez tous les projecteurs en parallèle à la sortie du PSU, MAIS assurez-vous bien que les pôles positifs (fil rouge) et négatifs (fil noir) des projecteurs soient connectés comme il se doit, donc, aux fils correspondants du PSU prière de se reporter à la figure ! Après avoir vérifié que la puissance maximale n'est pas dépassée, vous pouvez raccorder la chaîne au LED Manager et le mettre sous tension. INSTALLATION MECANIQUE Il y a beaucoup de possibilités : vous pouvez simplement aménager un trou (par exemple dans une surface en bois) et presser/cliquer le projecteur à LED à l'intérieur ; ou alors, installer le projecteur dans du béton, en prenant soin d'utiliser de la gaine de protection (d'un diamètre de 36 mm) pour câble M40 afin de protéger le projecteur. Pour les installations en plein air, assurez-vous que le matériel utilisé pour les connexions soit bien étanche. standard 2x0,75mm² cable 9 to 35Vdc (example: LED-PSU 50W/24Vdc) 6 to 26Vac (standard transformer) 1,7 Watt / unit curled 1m 10° IP68 (complete immersion) 0,25 kg see drawing CARACTERISTIQUES Connexions : Tension de service : Consommation : CORDON SECTEUR : Angle de dispersion : IP rating (indice de protection) : Poids : Dimensions : Câble standard de 2 x 0,75 mm² de 9 à 35V CC (exemple : LED-PSU 50W/24Vdc) de 6 à 26V CA (transfo standard) 1,7 Watt par appareil 1 m, de type spirale 10° IP68 (immersion complète) 0,25 kg se reporter à la figure Every information is subject to change without prior notice Every information is subject to change without prior notice JB SYSTEMS® 1/6 LED NANO BEAM JB SYSTEMS® 2/6 LED NANO BEAM NEDERLANDS HANDLEIDING DEUTSCH LED NANO BEAM - INSTALLATIEGIDS VEILIGHEIDSINSTRUCTIES: Bescherm het milieu, probeer zoveel mogelijk het verpakkingsmateriaal te recycleren. Installeer het toestel buiten het bereik van ontvlambare stoffen of vloeistoffen. De maximale omgevingstemperatuur waarbij het toestel mag gebruikt worden bedraagt 50°C. Gebruik het toestel nooit bij hogere temperaturen. De behuizing en de lenzen moeten vervangen worden wanneer deze duidelijk beschadigd zijn. Belangrijk: Kijk nooit rechtstreeks van dichtbij in de LED lichtstraal en gebruik de projector niet in de nabijheid van personen die lijden aan epilepsie. ELECTRISCHE INSTALLATIE De elektrische installatie behoort uitsluitend uitgevoerd te worden door bevoegd personeel, volgens de in uw land geldende regels betreffende elektrische en mechanische veiligheid. !!! OPGELET: NIET RECHTSTREEKS OP HET 230V NET AANSLUITEN !!! !!! OPGELET: Let er op dat de LED voeding uitgeschakeld staat alvorens de toestellen aan te sluiten !!! De LED NANO BEAM verbruikt ongeveer 1,7 Watt per toestel. Dit betekent dat u heel wat toestellen kunt aansluiten op één enkele voeding, de maximum kabellengte daarentegen tussen de LED voeding en het laatste toestel in de ketting mag maximum ongeveer 30m bedragen. Wij bevelen u ten sterkste aan onze speciale LED voeding “LED-PSU 50W/24Vdc” te gebruiken (bestelcode: 4935) voor een optimale betrouwbaarheid. U kunt echter ook een gewone transfo gebruiken van 6Vac tot 26Vac. Aansluitingen: Gebruik steeds waterproof aansluitdozen voor buiten installaties! AC wisselstroom ingang (gewone transfo): sluit alle projectoren in parallel aan op de transformator uitgang. DC gelijkstroom ingang (voorbeeld: LED-PSU 50W/24Vdc): sluit alle projectoren in parallel aan op de PSU uitgang MAAR verzeker u ervan dat de positieve (rode draad) en de negatieve (zwarte draad) polen van de projectoren op de juiste manier verbonden worden met de draden van de PSU zie afbeelding! Nadat u nagekeken heeft of de maximum toegelaten belasting niet is overschreden kunt u de ketting aansluiten op de LED Manager en deze aan zetten. BEDIENUNGSANLEITUNG LED NANO BEAM - MONTAGEANLEITUNG SICHERHEITSHINWEISE: Aus Umweltschutzgründen bitten wir Sie, das Verpackungsmaterial möglichst zu recyceln. Bringen Sie die Befestigung nicht in der Nähe von brennbaren Materialien und/oder Flüssigkeiten an. Die maximale sichere Umgebungstemperatur ist 50°C. Benutzen Sie vorliegendes Gerät nicht bei höheren Umgebungstemperaturen. Das Gehäuse und die Linsen müssen ersetzt werden, wenn sie sichtbare Beschädigungen aufweisen. Wichtig: Schauen Sie auf kurze Entfernung nie direkt in den LED Lichtstrahl und benutzen Sie den Scheinwerfer nicht in Anwesenheit von Personen, die an Epilepsie leiden. ELEKTROINSTALLATION Die Elektroinstallation sollte ausschließlich von qualifizierten Fachkräften und in Übereinstimmung mit den in Ihrem Land geltenden Bestimmungen für elektrische und mechanische Sicherheit ausgeführt werden. !!! VORSICHT: NICHT DIREKT AN 230V WECHSELSTROM ANSCHLIEßEN !!! !!! VORSICHT: Gehen Sie sicher, dass bei der Installation die LED-Stromzufuhr ausgeschaltet ist!!! Der LED NANO WASHER verbraucht ungefähr 1,7 Watt pro Gerät. Dies bedeutet, dass Sie viele Geräte an ein Netzgerät anschließen können, allerdings darf die maximale Kabellänge zwischen dem LED-Netzteil und dem letzten Gerät in der Reihe 30 m nicht übersteigen. Wir empfehlen Ihnen sehr unser spezifisches LED Netzteil “LED-PSU 50W/24Vdc” (Bestellnummer: 4935) für maximale Sicherheit. Ein einfacher 6V WS bis 26V WS Trafo ist allerdings auch möglich. Anschlüsse: Bei Außenmontagen: Achten Sie darauf, wasserdichte Anschlussdosen zu benutzen! WS-Eingang (herkömmlicher Trafo): schalten Sie alle Scheinwerfer mit dem Trafoausgang parallel. GS-Eingang (Beispiel: LED-PSU 50W/24VGS): schalten Sie alle Scheinwerfer mit dem PSU Ausgang parallel ABER stellen Sie sicher, dass der positive (roter Draht) und der negative (schwarzer Draht) Pol der Scheinwerfer korrekt mit den entsprechenden Drähten des PSU verbunden sind siehe Zeichnung! Nachdem Sie überprüft haben, dass die Spannung den maximal zulässigen Wert nicht übersteigt, können Sie die Reihe an den LED-Manager anschließen und ihn anschalten. MECHANISCHE INSTALLATIE Vele mogelijkheden: u kunt gewoon een gat boren (bvb. In een houten oppervlak) en de LED projectoren er in drukken/klikken, of u kunt de projector in een betonnen vloer inbouwen met behulp van een M40 beschermingspijp voor kabels (Diameter = 36mm) zodat de projector beschermd blijft. Gebruik steeds waterproof aansluitdozen voor buiten installaties. MECHANISCHE INSTALLATION Zahlreiche Möglichkeiten: Sie können einfach ein Loch bohren (z. B. in einer Holzkonstruktion) und den LEDScheinwerfer durch Drücken hineinklicken oder Sie können den Scheinwerfer mit Hilfe eines M40 Kabelschutzrohr (Durchmesser = 36mm) zum Schutz des Scheinwerfers in Betonböden einbauen. Achten Sie bei Außenmontagen darauf, wasserdichte Anschlussdosen zu benutzen! EIGENSCHAPPEN Aansluitingen: Werkingsvoltage : SPEZIFIKATIONEN Anschlüsse: Betriebsspannung: Verbruik: Voedingskabel: Stralingshoek: IP bescherming: Gewicht: Afmetingen: standaard kabel 2x0,75mm² 9 tot 35Vdc (bijvoorbeeld: LED-PSU 50W/24Vdc) 6 tot 26Vac (standaard transfo) 1,7 Watt / toestel gekruld 1m 10° IP68 (volledige onderdompeling) 0,25 kg zie afbeelding Leistungsaufnahme: Netzkabel: Abstrahlwinkel: IP Wert: Gewicht: Abmessung: De inlichtingen kunnen zonder voorafgaande verwittiging gewijzigd worden. JB SYSTEMS® 3/6 LED NANO BEAM herkömmliches 2x0,75mm² Kabel 9 bis 35VGS (Beispiel: LED-PSU 50W/24VGS) 6 bis 26VWS (Standardtrafo) 1,7 Watt / Gerät 1m Spiralkabel 10° IP68 (vollständig tauchfähig) 0,25 kg siehe Zeichnung Every information is subject to change without prior notice JB SYSTEMS® 4/6 LED NANO BEAM ESPAÑOL MANUAL DE INSTALACIÓN PORTUGUÊS LED NANO BEAM - MANUAL DE INSTALAÇÃO LED NANO BEAM - MANUAL DE INSTALACIÓN INSTRUCCIONES DE SEGURIDAD: Para proteger el medio ambiente, recicle el material de embalaje en la medida de lo posible. Instale el aparato lejos de cualquier material o líquido inflamable. La máxima temperatura ambiente para un funcionamiento seguro es de 50°C. No utilice la unidad a temperaturas ambiente superiores. La carcasa y la lente deben reemplazarse si presentan daños visibles. Importante: No mire directamente al haz de luz LED y no utilice el proyector en presencia de personas que sufran de epilepsia. INSTALACIÓN ELÉCTRICA La instalación eléctrica sólo debe ser llevada a cabo por personal cualificado, de acuerdo con la regulaciones sobre seguridad eléctrica y mecánica de su país. PRECAUCIÓN: NO CONECTAR DIRECTAMENTE A 230 V de CA PRECAUCIÓN: Asegúrese de que el suministro de alimentación del LED está apagado antes de la instalación El LED NANO WASH consume unos 1,7 vatios por unidad. Esto significa que puede colocar varias unidades en un único suministro de energía, no obstante, la máxima longitud de cable entre el suministro de energía LED y la última unidad en la cadena es de unos 30 m. Le recomendamos encarecidamente que utilice nuestro suministro de energía para LED especial “LED-PSU 50W/24Vdc” (código de pedido: 4935) para la máxima fiabilidad. No obstante, un simple transformador de 6 V de CA a 26 V de CA también es posible. Conexiones: Para instalaciones exteriores: asegúrese de utilizar cajas de unión a prueba de agua Entrada de CA (transformador ordinario): conecte todos los transformadores en paralelo a la salida del transformador. Entrada de CC (ejemplo: LED-PSU 50W/24Vdc): conecte todos los proyectores en paralelo a la salida PSU, pero asegúrese de que los polos positivo (cable rojo) y negativo (cable negro) de los proyectores están conectados correctamente a los cables correspondientes del PSU . Consulte el gráfico. Después de verificar que la energía máxima permitida no se ha excedido, puede conectar la cadena al LED Manager y encenderlo. INSTRUÇÕES DE SEGURANÇA: Para proteger o ambiente, tente reciclar ao máximo o material de acondicionamento. Instale o produto longe de qualquer material inflamável e/ou líquidos A temperatura ambiente segura é no máximo 50ºC. Não use esta unidade em temperaturas ambientes mais altas. A estrutura e as lentes devem ser substituídas se houver danos visíveis. Importante: Não olhe directamente para o feixe de luz LED a curta distância e não use o projector na presença de pessoas que sofrem de epilepsia. INSTALAÇÃO ELÉCTRICA A instalação eléctrica deverá ser efectuada apenas por pessoal qualificado, de acordo com as regulações para segurança eléctrica e mecânica no seu país. !!! ATENÇÃO: NÃO CONECTE DIRECTAMENTE A 230Vac!!! !!! ATENÇÃO: Verifique que a fonte de alimentação LED está desligada antes de instalar!!! O LED NANO BEAM consume cerca de 1,7 Watt por unidade. Isto significa que pode colocar muitas unidades numa fonte de alimentação, contudo o comprimento máximo entre o LED power supply e a última unidade é cerca de 30 mt. Nós sugerimos fortemente que use a nossa fonte de alimentação especial para LEDS “LED-PSU 50W/24Vdc” código: 4935) para máxima fiabilidade. Contudo um simples transformador de 6Vac até 26Vac também é possível. Ligações: Para instalações no exterior: Certifique-se de usar caixas de junção á prova de água! Entrada AC (transformador normal): conecte todos os projectores em paralelo ao transformador de saída. Entrada DC (exemplo: LED-PSU 50W/24Vdc); Conecte todos os projectores em paralelo á saída da PSU MAS certifique-se que o pólo positivo (fio vermelho) e negativo (fio preto) dos projectores são conectados da maneira correcta ao fios correspondentes do PSU ver figura! Depois de verificar que a potência máxima permitida não é excedida, pode conectar a série ao LED Manager e ligá-lo. INSTALAÇÂO MECÂNICA Muitas possibilidades: pode simplesmente fazer um orifício (ex. numa superfície de madeira) e pressione/clique o projector de LED para dentro ou pode instalar o projector em chão de cimento. Usando um tubo de protecção do cabo M40 (Diâmetro=36mm) para proteger o projector. Para instalações no exterior, certifiquese de usar caixas de junção á prova de água. INSTALACIÓN MECÁNICA Varias posibilidades: puede simplemente perforar un agujero (ej. en una superficie de madera) y meter el proyector LED dentro o puede instalar el proyector en suelos de cemento, mediante un tubo de protección para cable M40 (Diámetro = 36 mm) para proteger el proyector. Para aplicaciones exteriores, asegúrese de utilizar cajas de unión a prueba de agua. ESPECIFICAÇÕES Ligações: cabo 2x0,75mm² standard Voltagem de operação:9 a 35Vdc (exemplo: LED-PSU 50W/24Vdc) 6 a 26Vac (transformador standard) Consumo de potência: 1,7 Watt / unidade Cabo de alimentação: 1m (enrolado) Ângulo do feixe: 10° Valor IP: IP68 (imersão completa) Peso: 0,25 kg Tamanho: Ver imagem ESPECIFICACIONES Conexiones: cable estándar 2x0,75mm² Voltaje de operación: 9 a 35 V de CC (ejemplo: LED-PSU 50W/24Vdc) 6 a 26 V de CA (transformador estándar) Consumo de energía: 1,7 vatios / unidad Cable de alimentación: ondulado 1 m Ángulo de haz: 10° Clasificación IP: IP68 (inmersión completa) Peso: 0,25 kg Tamaño: Consulte el gráfico. Toda a informação está sujeita a mudança sem aviso prévio Toda la información está sujeta a cambios sin previo aviso JB SYSTEMS® 5/6 MANUAL DO UTILIZADOR LED NANO BEAM JB SYSTEMS® 6/6 LED NANO BEAM


