Download 89129 user manual
Transcript
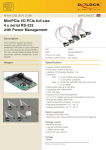
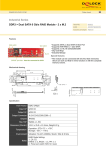
2 x serial, 1x parallel PCI Express card
Product-No: 89129
User m anu al No: 891 29-a
w w w. d e l oc k . c o m
Description
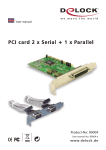
The DeLock PCI Express card expands your PC by two external serial, also one
external parallel Ports. You can connect devices like scanner, printer, mouse etc.
to the card.
Specification
• 2 x Pin header, with rear bracket with two DB9 RS-232 ports
• 1 x parallel DB25 Port
• Data transfer rate: serial up to 230.4 Kbps
parallel up to 1.5 Mbps
• SPP, PS2, EPP, ECP compatible to IEEE 1284
• compatible with 16C550 UART
• FIFO: 16 byte
• PCI Express x1 Standard
• Supports PCI Express 1.0a Specification
• for Windows 2000/XP, 2003
System requirements
• PC with one free PCI Express Slot and one rear slot
• Windows 2000/XP/2003
Package content*
• PCI Express card + rear bracket
• Driver CD
• User manual
*Make sure that the product package contains all items before operation. If any
item is missing or damaged, then please contact your dealer immediately.
Hardware Installation
Note:
Follow the general instructions for installation of the card. If necessary, read the
manual of your computer, or ask a specialist for help.
1.
2.
3.
4.
Turn off your PC, and unplug the power cord.
Open the housing.
Remove the slot holder from the available PCI Express slot and the rear slot
for the 2 serial ports.
Before you can insert the Card into the PCI Express slot, please connect the
2 ports of the serial rear bracket to the PCI Express card.
-1-
5. Insert the card straight and carefully into the free PCI Express slot, until it is
well seated.
6. Use a screw to attach the card to the housing.
7. Fix the rear bracket with a screw also on the housing.
8. Reattach the housing, and connect the power cord to the AC adapter.
9. Switch on your computer.
Note: Should your computer not start, please update the BIOS firmware. For
more information please contact your mainboard manufacturer.
Driver Installation
Windows XP, 2003
1. After installation of the device, and after start of Windows the Hardware
wizard appears.
2. Put the driver CD in the CD ROM drive and click on "next".
3. Choose the option “No, not this time” and click “next”.
4. Choose “Install software automatically” and click “next”.
5. When driver is located, click “Continue installation or Yes”.
6. Click on "next". Click on "finish".
7. Choose “Install software automatically”.
8. Click on "next", click “Continue installation or Yes” and on " finish".
9. Choose “Install software automatically”.
10. Click on "next", click “Continue installation or Yes” and on " finish".
11. Choose “Install software automatically”.
12. Click on "next", click “Continue installation or Yes” and on " finish".
13. Restart your PC.
14. After restart you can start using the device immediately.
Windows 2000
1. After installation of the device, and after start of Windows the Hardware
wizard appears.
2. Put the driver CD in the CD ROM drive and click on "next".
3. Please choose “Search for a suitable device driver” and click on "Next".
4. Select the “CD-ROM” option and click on "next".
5. After the driver is located, click on "next". Click on "finish".
6. Restart your PC.
7. After restart you can start using the device immediately.
-2-
Support Delock
If you have further questions, please contact our customer support
[email protected] / www.delock.com or phone
0700 - DELOCKGE (0700 - 335 625 43).
You can contact our service hotline during the following times:
Mon – Fri: 9:00 – 17:30 pm charge 0,12 € / min*
* A connection fee applies according to fee schedule of Deutsche Telekom AG or
your local telephone provider.
All callers outside of Germany dial please 00493081789324
You can find current product information on our homepage:
www.delock.com
Final clause
Information and data contained in this manual are subject to change without
notice in advance. Errors and misprints excepted.
Copyright
No part of this user manual may be reproduced, or transmitted for any purpose,
regardless in which way or by which means, electronically or mechanically,
without explicit written approval of Delock.
Edition: 05/2006
-3-


