1
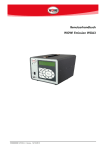
User Manual WOW! Emission WGA3 2120-ENG- / Version- 12/12/2012 Manual WGA3 1 Introduction © Würth Online World GmbH All rights reserved. This document may not be duplicated, either in whole or in part, without the prior consent of Würth Online World GmbH. The manufacturer reserves the right to make technical modifications without notice. The target group is users with previous technical knowledge in the field of automotive test technology. Information on this product is published without regard to any possible patent protection. Trade names are used without guarantee of free applicability. Every care has been taken in drawing up and compiling the texts and illustrations included herein. Nevertheless, errors cannot be completely excluded. The publisher, editor and authors shall not be legally responsible or in any way liable for incorrect information and its consequences. The publisher and editor are grateful for suggestions for improvement and reference to errors. All rights reserved, including those related to photomechanical reproduction and storage in electronic media. Almost all hardware and software designations mentioned in this Manual are simultaneously registered trade marks, or should be regarded as such. Use The WOW! WGA3 is used to measure vehicle exhaust gases and to monitor the exhaust-gas-relevant components in the engine. The main products of the combustion of fuel with air in a spark-ignition engine are carbon dioxide (CO2) and water. Unwanted by-products are carbon monoxide (CO), nitrogen oxides (NOx) and hydrocarbons (HC). Exhaust gas also contains a residual amount of unburned oxygen. Carbon monoxide (CO) is absorbed into the blood instead of oxygen and acts as a toxin. Nitrogen oxide (NO) is also toxic and is primarily responsible for the creation of smog. It is created when the nitrogen in the air reacts with oxygen at high temperatures. NO reacts very quickly with air to create NO2 and other nitrogen oxides. These are referred to as NOx. Hydrocarbons are incompletely combusted fuel. Carbon dioxide (CO2) is a product of the complete combustion of fuel. It has an asphyxiating effect in high concentrations. The aim of exhaust gas measurement is to reduce the toxins and environmental toxins to a minimum and to optimise combustion inside the engine. This is accompanied by an optimisation of combustion and a reduction in fuel consumption. In addition, the Emission exhaust gas testing system allows the vehicle's engine speed and oil temperature to be measured, by means of which the engine's operating state can be recorded. User groups The WOW! WGA3 has been developed for trained specialist personnel in the automotive industry. For your own safety and to avoid damage to the device caused by incorrect handling, it is essential to read through this User Manual carefully before using the device for the first time. Calibration requirement The WGA3 is approved in accordance with MID (Measurement Instrument Directive) on the basis of European Directive 2004/22/EC by the Physikalisch-Technische Bundesanstalt (PTB) (German institute for science and technology for metrology and physical safety engineering). The WOW! WGA3 is subject to the calibration requirement for exhaust gas measuring devices and must in accordance with the legislation be calibrated once a year by the relevant calibration authority. Manufacturer: WOW! Würth Online World GmbH Schliffenstrasse / Falkhof D-74653 Künzelsau Telephone: (+497940) 15-1770 E-mail: [email protected] Fax: Internet: www.wow-portal.com 2120-ENG- (+497940) 15-3299 1 Manual WGA3 Contents 1 Introduction .................................................................................................................................... 1 Use .................................................................................................................................................. 1 User groups ..................................................................................................................................... 1 Calibration requirement ................................................................................................................... 1 Contents .......................................................................................................................................... 2 1.2 Safety instructions ........................................................................................................................ 3 2 Description of Device ....................................................................................................................... 5 2.1 Front view .................................................................................................................................... 5 2.2 Rear view ..................................................................................................................................... 6 2.3 Switching on ................................................................................................................................ 6 3 Menu Structure ................................................................................................................................ 6 3.1 Operating the WGA3 ................................................................................................................... 6 3.2 Measuring mode.......................................................................................................................... 7 3.2.1 Function menu ......................................................................................................................... 7 Settings in the function menu ............................................................................................................ 7 Fuel type ...................................................................................................................................... 8 Zero gas ...................................................................................................................................... 8 Rinse ........................................................................................................................................... 8 Leak test ...................................................................................................................................... 8 Pump on/off ................................................................................................................................ 9 Display negative values ................................................................................................................ 9 3.3 Settings ...................................................................................................................................... 10 Time/Date ..................................................................................................................................... 10 System data ................................................................................................................................... 10 Interfaces ....................................................................................................................................... 10 LCD (Display) ................................................................................................................................. 11 3.4 Version ...................................................................................................................................... 12 Update .......................................................................................................................................... 12 Update of internal flash ............................................................................................................. 12 Update-Check ........................................................................................................................... 13 View Logbooks ............................................................................................................................... 13 3.5 Maintenance menu .................................................................................................................... 13 Test gas calibration ........................................................................................................................ 13 Leak test ........................................................................................................................................ 14 Service ........................................................................................................................................... 14 RPM/TEMP ..................................................................................................................................... 14 4 Maintenance ................................................................................................................................. 15 4.1 General information on maintenance ......................................................................................... 15 4.1.1 Work instructions every 180 days ........................................................................................... 15 4.1.2 Additionally every 360 days ................................................................................................... 16 5 Settings in the WOW! Software ....................................................................................................... 16 6 Replacing the O2 Sensor ............................................................................................................... 17 7 Calibration ................................................................................................................................... 20 7.1 Initial calibration ........................................................................... Fehler! Textmarke nicht definiert. 7.2 Recalibration.............................................................................................................................. 20 8 Technical Data .............................................................................................................................. 21 8.1 Spare parts and accessories ....................................................................................................... 22 9 Fault messages ............................................................................................................................. 22 10 Legal Information .......................................................................................................................... 26 10.1 WEEE SYMBOL INFORMATION .................................................................................................. 26 10.2 Complaints, warranty ................................................................................................................. 26 10.3 Declaration of Conformity .......................................................................................................... 27 International Offices ......................................................................................................................... 1 2120-ENG- 2 Manual WGA3 1.2 Safety instructions This section contains information on protecting devices and vehicle components. System voltages and high voltages The mains system network and electrical systems in motor vehicles are subject to hazardous voltages. Personnel are exposed to the risk of electric shock through contact with parts to which a voltage is applied (e.g. ignition coil) and through flashovers caused by damaged insulation (e.g. rodent bites in ignition cables). This applies to the secondary and primary sides of the ignition system, the wiring harness with plug connections, lighting systems, and the connections/terminals of test devices. SAFETY PRECAUTIONS: Connect the Emission exhaust gas system only to a correctly earthed grounding-type socket-outlet (see also information on the back of the exhaust gas measuring cell). Use only the power supply cord provided. Use only extension leads with earthing contacts, do not use cable drums (self-induction/coil principle). Replace cables which have damaged insulation. Connect the Emission exhaust gas system to the mains system network before connecting to a Vehicle and switch on. Carry out interventions on the electrical systems of vehicles only when the ignition has been turned off. Such interventions include, for example, connecting devices, replacing ignition system parts, removing assemblies (e.g. alternators), connecting assemblies on a test bench, etc. Perform testing and adjusting operations if possible only with the ignition turned off and the engine stopped. Do not touch any live parts when performing testing and adjusting operations with the ignition turned on or while the engine is running. This applies to all the connecting cables of the Emission exhaust gas system and the terminals/connections of assemblies on test benches. Complete test connections only with matching connecting elements (e.g. vehicle-specific adapter leads). Snap test plug connections correctly into place and ensure that the connections are firmly seated. Danger of burning the respiratory organs Exhaust gas measurement involves the use of exhaust gas sampling hoses which, if heated to temperatures in excess of 250 °C or in the event of a fire, release a highly caustic gas (hydrogen fluoride) which can burn the respiratory organs. SAFETY PRECAUTIONS: Seek immediate medical attention if such gases are inhaled! Wear neoprene or PVC gloves when removing combustion residues. Neutralise burning residues with calcium hydroxide solution. This creates non-toxic calcium fluoride, which can then be rinsed off. Danger of burning Acids and alkalis cause serious burns to unprotected skin, hydrogen fluoride together with moisture (water) forms hydrofluoric acid. Condensate which collects in the sampling hose is also acidic. Bear in mind when replacing the oxygen sensor that the sensor contains an alkaline solution. SAFETY PRECAUTIONS: Wash areas of burned skin immediately with water, then seek medical attention! Danger of asphyxiation Vehicle exhaust gases contain carbon monoxide (CO), a gas which is both colourless and odourless. Carbon monoxide, if inhaled, causes an oxygen deficiency in the body. Particular care must be exercised when working in pits, since some exhaust gas constituents are heavier than air and will settle at the bottom of the pit. Caution is also advised when working on vehicles with LPG systems. SAFETY PRECAUTIONS: Always ensure that appropriate ventilation and fume extraction is provided (particularly in pits). Switch on the extractor system in closed rooms. 2120-ENG- 3 Manual WGA3 Danger of injury and crushing Vehicles which have not been secured against rolling expose personnel to, for example, the risk of being crushed against a workbench. Engines which are running and also those which are stopped have rotating and moving parts (e.g. belt drives) which can cause injuries to fingers and arms. Electrically powered fans are particularly subject to the risk of starting up unexpectedly when the engine is stopped and with the ignition turned off. SAFETY PRECAUTIONS: Secure the vehicle against rolling, place automatic transmissions in Park, place manual gearboxes in Neutral, apply the handbrake, block the wheels with chocks. Do not reach into areas with rotating/moving parts while the engine is running. Before working on or in the vicinity of electrically powered fans, allow the engine to cool down and pull the fan motor plug. Do not lay connecting cables from the Emission exhaust gas system in the area of rotating parts. Danger of burning Personnel working on hot engines are exposed to the risk of burning e.g. by exhaust manifolds, exhaust turbochargers, oxygen sensors, etc. These components can reach temperatures of several hundred °C. Depending on the duration of the exhaust gas measurement, the sampling sensor of the exhaust gas measuring cell can also become extremely hot. SAFETY PRECAUTIONS: Wear protective clothing/equipment, e.g. gloves. Allow the engine to cool down (also applicable to independent heating). Do not lay connecting cables of test equipment on or near hot parts. Do not allow the engine to run for longer than is necessary for testing/setting. Noise The noise emission values of the exhaust gas measuring cell are less than 70 dB(A) in the area of the operating personnel's workbays. Measurements on vehicles can give rise, particularly at high engine speeds, to noise levels in excess of 70 dB(A). Prolonged exposure to such high noise levels can lead to hearing damage. SAFETY PRECAUTIONS: The owner must if necessary protect the workbays in the vicinity of the test location against noise. The operator must if necessary use personal sound insulation equipment. 2120-ENG- 4 Manual WGA3 2 Description of Device 2.1 Front view No. Description 1 Display 2 Keypad 3 Exhaust gas inlet 4 Main switch ON/OFF 5 Servicing stamp position 6 Green/blue LED, see also Interfaces 6 5 3 1 2 4 Description of function keys Keys Function Cursor left/right or jump into the decimal positions Cursor up/down or enter numerical values ENTER Confirm ESC Back F1 F2 F3 Function keys are described in the menu F4 2120-ENG- 5 Manual WGA3 2.2 Rear view No. Designation Connection 1 USB-PC PC connection via USB 2 Power – DC12V Power supply 3 Temp Oil temperature measurement (optional) 4 RPM Engine speed measurement (optional) 5 Fine filter 6 Coarse filter 7 Filter housing, exhaust gas inlet 8 Carbon canister 9 Oxygen (O2) sensor 10 Zero gas inlet reference (REF) 11 Calibrating gas inlet (CAL IN) 12 Gas outlet (GAS OUT) 13 Water outlet (WATER OUT) 14 Water inlet (WATER IN) 15 Nameplate with MID number and box code 16 Approval label, exhaust emissions test 17 Technical data 16 15 5 6 7 8 10 11 9 2 2 3 4 11 17 13 14 12 2.3 Switching on Connect the WGA3 via the power pack to the power supply. Operate the ON/OFF switch. 3 Menu Structure 3.1 Operating the WGA3 > Measuring mode Settings Versions Maintenance Navigation in the menu is performed with the arrow keys . Confirm your selection in each case with ENTER The cursor position is indicated by ">". NOTE: The menu can contain more lines than are shown in the display. These extra lines can be selected by scrolling with the arrow keys . Use the ESC key to jump one step back or cancel a function. >>Capture system : Clip-on trigger sensor >Operation : 4-stroke In lines in which a ">" already precedes “>> Capture system“, it is possible to make an input or >Pulse : 1 start anrate action. Press ENTER and select the desired settings with . 2120-ENG- 6 Manual WGA3 3.2 Measuring mode The main menu appears after the device has been switched on. It takes approx. 30 seconds for the WGA3 to warm up. > Measuring mode Settings Versions Maintenance CO 0.000 % vol HC 0 ppm vol LAMBDA ---RPM 0 1/min | | | | CO2 0.00 % vol O2 21.10 % vol PEF 0.523 Temp 80 °C The measured values are displayed and the device is ready for use. PEF P.E. Factor The P.E.F. is permanently calculated by the measuring bench. It can be between 0.470 and 0.585. The current P.E.F. is displayed in the measuring mode window at bottom right and read out directly from the measuring bench. 3.2.1 Function menu Calling up the function menu Press the F2 function key in measuring mode to access the function menu. Here you can call up function that you required for the relevant operating mode. Settings in the function menu >Engine speed registration Fuel type Zero gas Rinse Leak test Pump on/off Zero gas >>Capture status system : Clip-on trigger Operating sensor Display negative values >Operation : 4-stroke >Pulse rate : 1 >Capture system >>Operation >Pulse rate >Capture system >Operation >>Pulse rate 2120-ENG- Selection of engine speed registration via Clip-on trigger sensor Pickup clamp TD/TN signal Magnetic Sensor : Clip-on trigger sensor : 4-stroke : 1 Selection of operating principle : Clip-on trigger sensor : 4-stroke : 1 Setting of pulse rate 4-stroke 2-stroke Speed pulses per crankshaft revolution 7 Manual WGA3 Fuel type >Fuel type Zero gas Rinse Leak test Leak test >Normal Pump on/off Super 95 Zero gas Super Plus 98 Operating status Liquefied petroleum gas Display negative values Selection of fuel type. Back with ESC Zero gas >Zero gas Rinse Leak test Pump on/off Zero gas Operating status >Zero gas calibration. Please wait... Display negative values GAS Set Actual CO [% full] 0.000 0.000 CO2 [% full] 0.00 0.00 Zero calibration is automatically carried out before the start of each measurement. The device adapts itself to the ambient air in the process. The measuring channels HC, CO and CO2 are set to 0 % vol and O2 to 20.93 %. Zero gas calibration can be started here manually. Back with >ESC< Rinse >Rinse Leak test Pump on/off Operating status Display negative values Device is rinsing End by pressing >ENTER< The WGA3 is rinsed with fresh air. Back with ENTER Leak test >Leak test Pump on/off Operating status Display negative values Leak test – seal tube system! Continue by pressing >ENTER< Cancel with >ESC< 2120-ENG- Leak test The leak test is automatically requested every 24 hours by the device. No measurement can be taken if the leak test has not been passed. The leak test can also be started manually. Please follow the instructions in the display. 8 Manual WGA3 Leak test active! Please wait ... DvP :-450.7 mbar DnP : 969.3 mbar NOTE: Leak test passed! Remove seal DnP: Pressure after pump (atmospheric pressure with pump gauge pressure) DvP: Pressure before pump (relative pump vacuum) Gas conduit system leaky! Remove seal If the leak test is not passed, please eliminate the error/fault and carry out the leak test again. Error no.: U168 Measuring bench error: Low pressure in system very high, examine flexible tube line or filter and clean, if required! Observe error message. Pump on/off Leak test >Pump on/off Operating status Display negative values Only required in the event of servicing by a technician. Pump is automatically monitored in measuring mode. Display negative values Leak test Pump on/off Operating status >Display negative values 2120-ENG- Only required in the event of servicing by a technician. 9 Manual WGA3 3.3 Settings The device-specific settings are made in Settings. Measuring mode > Settings Versions Maintenance Time/Date >Time/Date System data Interfaces LCD (Display) Language Select the value to be changed and press ENTER. Warning: Data change could require a test gas calibration! >>Date : 02.12.2010 >Time : 11:48:30 Make the changes and confirm with ENTER. Back with ESC. System data Time/Date >System data Interfaces LCD (Display) Language >Constants Next gas calibration Next maintenance Device number System-specific values are displayed here. Changes cannot be made. >Exhaust gas values >Is automatically set : 17.08.2011 : 15.02.2011 : WGA0010006 >Is automatically set >As on nameplate Interfaces Time/Date System data >Interfaces LCD (Display) Language >>PC communication : Bluetooth USB Set up the connection to the computer being used here. The WGA3 can be connected by cable (USB) or Bluetooth to the computer. Blue = Bluetooth Green = USB LED See also Settings in the WOW software. 2120-ENG- 10 Manual WGA3 LCD (Display) Time/Date System data Interfaces >LCD (Display) Language >>Contrast (0-17) : >Brightness (0-17) : 2120-ENG- Setting of LCD display Confirm the adaptations with ENTER 3 7 NOTE! If the contrast and brightness values are changed, they are adapted only after the menu has been exited. 11 Manual WGA3 3.4 Version Measuring mode Settings > Versions Maintenance The different version states can be checked in succession and software updates made in the Version menu. Update >Update View Logbooks Version application Version package >Update Update of internal flash Update-Check Updates are transmitted by an external computer to an internal buffer of the WGA3. The new software is updated in the WGA3 only when it has been confirmed. First connect the WGA3 via a USB cable to the computer from which the update is to be loaded. If necessary, change the interfaces to USB in Settings. See Interfaces NOTE! For security reasons, updates are only possible via USB (cable connection!). The update process must not be interrupted! Update of internal flash Update >Update of internal flash Update-Check The last Software version is in the buffer and can be updated again within the WGA3. Start with ENTER. >>Start update --------------------------------------- Please follow the instructions in the LCD display. Update can be carried out When the system is not running correctly Update process successfully completed! Please restart the device! Now switch off the device at the main switch. IMPORTANT! Please wait 5 seconds and then switch back on 2120-ENG- 12 Manual WGA3 Update-Check Update-Check is used to check whether all the contained files have been fully and correctly installed. Update Update of internal flash >Update-Check Start the function with >ENTER< 0 of 19 files are missing, or are defective. File check has been completed to continue >ENTER< The update must be carried out again if files are missing (example: 2 of 19) after the check. View Logbooks The current version states of the software and hardware can be read out in these menus. Update >View Logbooks Version application Version package This menu is of relevance solely to service technicians and the calibration inspector. 3.5 Maintenance menu Measuring mode Settings Versions > Maintenance Test gas calibration >Test gas calibration Leak test Service RPM/TEMP NOTE: Test gas calibration may only be carried out by an authorised person. NOTE: In order the achieve the >>Password :5555 maximum accuracy, the >Start test gas calibration device must be switched on ---------------------------------------for at least 30 minutes. Start only by authorized person! Enter the password. > Values with data on test gas compare and correct if necessary! Continue with >F4< >>CO [% full] : 3.500 Leak test – seal tube system! Continue by pressing >ENTER< Cancel with >ESC< 2120-ENG- Scroll down with and compare the values with those of the test gas bottle. Correct these accordingly. Continue with F4. Carry out the leak test. See Leak test 13 Manual WGA3 >Zero gas calibration. Please wait... GAS Set Actual CO [% full] 0.000 0.000 CO2 [% full] 0.00 0.00 Connect test gas bottle Continue with >ENTER< Stop with >ESC< Set pressure test gas! Pressure range: 969.1 – 979.1 Current value : 965.2 mbar Adjustment CO2 13.61 CO 3.493 O2 0.01 Carefully open the valve on the pressure gauge of the test gas bottle and set the required test pressure (see Actual value). The instantaneously measured completed! Continue >ENTER< % full | Propane 1822 ppm.vol values are shown in the display. The result is displayed. % full | PEF 0.508 % full | Pressure 972.5 mbar Adjustment successfully completed! Turn off gas bottle Continue by pressing >ENTER< Remove the test gas bottle from the WGA3 Leak test Test gas calibration >Leak test Service RPM/TEMP Start manual Leak test. See Leak test Service Test gas calibration Leak test >Service RPM/TEMP This menu is of relevance solely to service technicians and the calibration inspector. RPM/TEMP Test gas calibration Leak test Service >RPM/TEMP 2120-ENG- The values currently measured via the DTB - engine speed and engine temperature - can be displayed in this menu. 14 Manual WGA3 4 Maintenance 4.1 General information on maintenance The WGA3 must be maintained/serviced on a regular basis. The maintenance must be carried out every 6 months. The device must be calibrated once a year with test gas (see Test gas calibration ). A visual inspection must be conducted every day. The maintenance must be carried out by an authorised expert. Only original spare and wearing parts may be used for maintenance purposes. These can be obtained exclusively from the device manufacturer. The User Manual must be carefully kept with the WGA3 exhaust gas device. The maintenance verifications must be filed in the maintenance handbook. These must be kept for a period of five years. The maintenance handbook must be submitted upon request to the calibration inspector for inspection. WARNING: Do not inject compressed air into any of the inlets! 4.1.1 Work instructions every 180 days Switch off the WGA3 at the main switch on the front. Visually inspect the sampling sensor and the hose. Check the sampling sensor and the hose for fouling and damage and clean if necessary. Check the leak test seal for damage. Clean the exhaust gas hose with compressed air. IMPORTANT! To do so, remove the hose from the WGA3 and the exhaust gas sensor. Replace the bag filter in the exhaust gas sampling hose. Please observe the direction of flow of the filter. Replace fine filter 5. Please use only the provided filter key to open the filter housing. o Clean the filter housing with a clean cloth. o Tighten the filter housing hand-tight only. Clean coarse filter 6, replace if necessary. Please use only the provided filter key to open the filter housing. o Clean the metal filter. Replace if heavily fouled. o Clean the filter housing with a clean cloth. o Tighten the filter housing hand-tight only. 5 6 Visual inspection Check that all plug connections / cable connections are firmly seated. Check all cables for damage. Replace damaged cables and plugs. Print out the maintenance verification using the WOW! software. File the printed maintenance verification in the maintenance handbook. 2120-ENG- 15 Manual WGA3 4.1.2 Additionally every 360 days Checking the error message "Measuring bench vacuum too high" Plug in the mains power cable and switch on the device. Half year maintenance successfully! Maintenance performed? Yes >ENTER< No >ESC< Confirm the message with "YES" >ENTER<. Leak test – seal tube system! Continue by pressing >ENTER< Cancel with >ESC< Carry out the Leak test >Zero gas calibration. Please wait... GAS Set Actual CO [% full] 0.000 0.000 CO2 [% full] 0.00 0.00 The device automatically goes into measuring mode after zero gas calibration has been completed. CO 0.000 % vol HC 0 ppm vol LAMBDA ---RPM 0 1/min Now pressure-test the exhaust gas hose with the pump running. After a short time the following error messages appear: | | | | CO2 0.00 % vol O2 21.10 % vol PEF 0.523 Temp 80 °C Error no.: U162 Measuring bench error: Low pressure in system too high, examine flexible tube line or filter and clean, if 5 Delete this message with the >ESC< key. Settings in the WOW! Software To be able to use the WGA3 for exhaust emissions testing in conjunction with the WOW! software, you must set up the connection to the WGA3 in the software program settings. Set the connection type for the WGA3 to Bluetooth. See Interfaces. In the WOW! software the WGA3 must then be selected and the box code entered. This can be found on the nameplate. See also the software manual. 2120-ENG- 16 Manual WGA3 6 WGA3 Operating Program (Motorcycle Exhaust Emission Test) The WGA3 operating program serves to control the WGA3 exhaust gas measurement device via a PC. (Only in conjunction with motorcycle exhaust emission test.) If you are using the WGA3 in conjunction with a WOW! Emission system, the WGA3 is controlled via the WOW! software 4.x or 5.x. 6.1 Installing the operating program 1. Insert the supplied CD WOW! WGA3 in the CD-ROM drive. The installation program starts automatically. The software is available for downloading on our home page. www.wow-portal.com > Service > Treiber und Programme 2. Click on Install and on Close when the button changes. 3. Start the WGA3 operating program via the Start menu Start/Programs/WOW!/WGA. 6.2 Interfaces to the PC The WGA3 can be connected by USB cable or Bluetooth to the PC. Set the connection type first on the WGA3. Switch on the WGA3 at the main switch on the front. The device-specific settings are made in Settings. Measuring mode > Settings Versions Maintenance Interfaces Time/Date System data >Interfaces LCD (Display) Language >>PC communication : Bluetooth USB Set the connection to the PC being used here. The LED indicates the set connection type Blue = Bluetooth LED Green = USB USB: Connect the WGA3 via a USB cable to the PC and then click on (1) USB. Bluetooth: Click on (2) Bluetooth and then enter the box code. 2 1 2120-ENG- 17 Manual WGA3 The box code is printed on the nameplate of the WGA3 (3). 3 Make sure the spelling is correct. 6.3 Operating program The operating program is self-explanatory and easy to use. Please always refer to the (1) command line at the top in the program; this is where the current status and the necessary operator steps are displayed, e.g. a due leak test or a zero gas calibration. Start the measurement by selecting (2) Start. Select (3) Freeze to freeze the current measured values. Select (4) Print to print out the current measured values. You will be prompted via the (1) command line to perform a (7) leak test, (5) zero calibration or (6) HC residue test. Error messages from the WGA3 can be called up via (8) Messages. 1 2 3 4 5 6 7 8 For further information on the WGA3, please also refer to the WGA3 Manual. 2120-ENG- 18 Manual WGA3 7 Replacing the O2 Sensor The O2 sensor must be replaced no later than when the device prompts you to do so. >Error no: U35 The O2 sensor voltage is too low! Please replace the O2 sensor soon. Preconditions for replacing the O2 sensor: Coarse and fine filters must be cleaned or replaced. Procedure: Switch off the device at the main switch. NOTE! Because the O2 sensor is an integral part of the test, only original replacement sensors may be fitted. See Spare parts and accessories IMPORTANT! Tighten the O2 sensor hand-tight only. Make sure that the O-ring for the seal is in place. >Zero gas calibration. Please wait... GAS Set Actual CO [% full] 0.000 0.000 CO2 [% full] 0.00 0.00 2120-ENG- Switch on the device, zero gas calibration is carried out. 19 Manual WGA3 8 Calibration 8.1 Information on initial calibration MID The WGA3 is approved in accordance with MID (Measurement Instrument Directive) on the basis of European Directive 2004/22/EC by the Physikalisch-Technische Bundesanstalt (PTB) (German institute for science and technology for metrology and physical safety engineering). The nameplate of the WGA3 contains the mark of conformity with the year of initial calibration (after M in the square box). The WGA3 was checked for conformity by the gauging office and then sealed. 1 The exhaust gas measurement device (example: ABB.1) was initially calibrated in 2011 and therefore has calibration validity until the end of 2012. 8.2 Recalibration Recalibration must be performed by a German calibration agency or by an officially recognised inspection agency. Here the national symbols for recalibration are incorporated in addition to the MID identification. Perform the following checks: Check that the device matches the design by referring to the available type approval and visually inspect for completeness and integrity of the calibration seals. Check the service documents to be kept by the user. In the case of replaced constructional units, the parts used must conform to the design requirements. Check that there are instructions for use. If necessary, seal the device at the designated points. Check that the device matches approval-conforming software versions and checksums. If test is successfully passed: Apply the main stamp at the point designated in the type approval. 2120-ENG- 20 Manual WGA3 9 Technical Data Gas analysis CO, CO2, HC NDIR procedure O2 Electrochemical sensor Measuring bench manufacturer LumaSense Technologies Type designation Andros Model 6500, BAR-97 compliant Warm-up time < 1 minute, typ. 30 secs. Reaction time CO, CO2, HC < 15 secs. at sensor inlet Gas flow rate 3 … 6 l/min Calibration Annually Type approval MID (Measurement Instruments Directive 2004/22/EC by the Physikalisch-Technische Bundesanstalt PTB) Accuracy class Class 0 as per OIML R 99 Measurement ranges Measurement range Indication range Resolution CO 0 … 10.0 % vol. -2.00 … 20.0 % vol. 0.001 CO2 0 … 20.0 % vol. -2.00 … 21.0 % vol. 0.01 HC (n-hexanes) 0 … 10,000 ppm vol. -20.0 … 15,000 ppm vol. 1 O2 0 … 22.0 % vol. -2.00 … 25.0 % vol. 0.01 Lambda 0 … 5.000 0 … 5.000 0.001 PEF 0.470 ... 0.585 continuously calculated RPM (optional) 400 ... 10,000 min-1 0 ... 10,000 min-1 1 Oil temperature (optional) 0 ... 125 °C -10 ... 200 °C 0.1 Ambient conditions Ambient temperature 5 … 40 °C Ambient pressure 700 … 1100 mbar Rel. air humidity 5 … 90 %, non-condensing Interfaces Power supply 12 V DC via external power pack (230V) Bluetooth Class 1, This device complies with Part 15 of the FCC Rules USB V2.0 compliant Device data Power input 20 W Storage temperature 0 … 70°C Dimensions Width: 255 mm Height: 200 mm Depth: 305 mm Weight approx. 4.5 kg Housing Powder-coated aluminium Display 4 x 40 characters Keypad Embossed membrane, 10 keys with pressure point Maintenance Every 6 months 2120-ENG- 21 Manual WGA3 9.1 Spare parts and accessories Parts and accessories can be found on our website at wow-portal.com Partsmanager. You can directly, easily and uncompliated order the needed items by phone at your service partner To the Partsmanager 10 Fault messages No. U10 Fault Measurement channel overrun in #1 Explanation Too many measurement channels configured U12 Input fault U13 Input fault U14 Input fault U15 Input fault U16 Input fault U22 Not enough memory available. #1 Value outside setpoint range: 1st value is greater than 2nd value Value outside setpoint range: 1st value too small Value outside setpoint range: 1st value too big Value outside setpoint range: 2nd value too small Value outside setpoint range: 2nd value too big. System fault – internal memory overflow U26 Protocol could not be sent #1. U27 No communication possible #1. U28 Fault during transfer #1. U35 The voltage of the O2 sensor is too low! The O2 sensor should be replaced. Fault during calibration process. Calibration was terminated unexpectedly. Zero gas was not correctly carried out before calibration. To be able to perform a gas calibration, a zero gas calibration must first be carried out. Leak test was not correctly carried out before calibration. To be able to perform a gas calibration, a leak test must first be carried out and passed. HC remnants present! Petrol fumes in the chamber? Filter soaked with HC? U36 U38 U39 U40 2120-ENG- Protocol could not be sent to the module displayed, for example a test bench or diesel measuring head No communication with the module shown, for example test bench or diesel measuring head (for example data line to the measuring head/test bench interrupted). Data transfer to the module shown, for example test bench or diesel measuring head, interrupted (for example diesel measuring head is not connected) If this does not happen, measurements may no longer be possible. Remedy: Make sure test room (garage/workshop) is well ventilated. If this message appears three consecutive times despite a well-ventilated room, switch off the device, clean the exhaust gas pipe, prefilter and filter housing, replace the fine filter insert and clean the filter housing. Switch the device back on again (restart). Observe operating instructions! 22 Manual WGA3 U109 Zero gas was not activated. U110 Zero gas has taken too long. U111 Calibration was not activated. U112 Calibration has taken too long. U113 Communication fault between WDA2 and WGA2 U114 Unexpected data length in response protocol to #1 from diesel measuring head Command has not been accepted. U115 Smoke offset too big. U116 Smoke factor too small. Light from other sources, incorrect halogen bulb Halogen bulb dirty, halogen bulb defective U117 Offset temperature too large. U118 Temperature factor too large. U119 Pressure during offset calibration too big. U120 Pressure during factor calibration too big. U121 Fault during calibration of diesel measuring head. U122 Zero gas conditions not satisfied, HC too high or not stable Test bench fault: System fault. U137 U138 Test bench fault: Invalid data transfer U139 Test bench fault: Action currently not allowed. Poss. startup mode of test bench. Test bench fault: Problems in gas line system. Test bench fault: Invalid data length for command: #1. Test bench fault: Delete flash. Test bench fault: Write flash. Test bench fault: Download flash. Test bench fault: Action currently not allowed. Boot programme mode. Test bench fault: More than 1 zero gas since startup U140 U141 U142 U143 U144 U145 U146 2120-ENG- Possible causes: Calibration gas values are possibly outside the valid range: CO2 1.00 – 20.00 % CO 0.500 – 15.000 % Propane 100 – 60000 % PEF value invalid. Zero gas not carried out correctly Communication fault between WDA2 and WGA2 23 Manual WGA3 U147 U148 U149 U150 U151 U152 U153 U154 U155 U156 U157 U158 U159 U160 U161 U162 U163 U164 U165 U166 U167 U168 U169 U170 Test bench fault: Invalid command: #1. Test bench fault: System fault. Test bench fault: O2 data invalid Test bench fault: HC data invalid Test bench fault: HC final value invalid Test bench fault: HC zero value invalid Test bench fault: CO data invalid Test bench fault: CO final value invalid Test bench fault: CO zero value invalid Test bench fault: CO2 data invalid Test bench fault: CO2 final value invalid Test bench fault: CO2 zero value invalid Test bench fault: NOX data invalid Test bench fault: NOX zero value invalid Test bench fault: Leak test Test bench fault: Vacuum in system is too high. Test bench fault: Ambient temperature outside threshold. Test bench fault: Pressure in the test bench is too high Test bench fault: No IR signal Test bench fault: New O2 sensor required Test bench fault: New NOX sensor required. Test bench fault: Vacuum in system is too high Leak test: Pressure before pressure build-up is too low. Leak test: Pressure before pressure build-up is too high. U171 Leak test: Vacuum in the system is too high. U172 Leak test The necessary vacuum could not be built up. 2120-ENG- Command shown cannot currently be carried out by the test bench (NAK = negative acknowledge) Gas line system leaking! Remove seal Exhaust probe, exhaust pipe, filter clogged Gas outlet clogged Exhaust probe, exhaust pipe, filter clogged Possible causes: -System was not sealed -System was sealed too early (with running pump) -Gas line system leaking -Pump defective 24 Manual WGA3 U173 U174 Leak test: Excessive pressure drop, system leaking. Adjustment of calibration pressure has taken too long. Calibration process cancelled. 2120-ENG- 25 Manual WGA3 11 Legal Information 11.1 WEEE SYMBOL INFORMATION Correct disposal of this product (electric waste) (Applicable in the countries of the European Union and other European countries with a waste separation system) The identification on the product or in the accompanying documentation specifies that the product must not be disposed of together with domestic waste at the end of its service life. Please dispose of this product separately from other waste to prevent damage to the environment or human health through unregulated waste disposal. Recycle the device to promote the effective reuse of material resources. Private users should contact the dealer from whom they bought the product, or the responsible authorities, to find out how the device can be recycled in an environmentally friendly manner. 11.2 Complaints, warranty 1. The purchaser is obligated to inspect the product immediately upon receipt. If a defect is identified, this must be reported to WOW! in writing within 10 days of receipt of the product. If a defect is identified at a later stage, this must be reported in writing within 10 days of the discovery thereof. If such a defect is reported after the time period has expired, the assertion of such a defect and the associated rights shall be excluded. 2. If a defect exists, WOW! reserves the right to render subsequent performance either by correcting the defect or by supplying a new defect-free product. In the event of the failure of subsequent performance, the purchaser shall be entitled to reduce the purchase price or withdraw from the contract. 3. The warranty shall cover a period of one year. 4. Supplementary provision for transfer of software or use thereof: The purchaser is advised that, in accordance with the present technical development status, errors in the software program cannot be ruled out entirely. The purchaser shall inspect the software immediately upon delivery and notify WOW! of apparent defects immediately in writing. WOW! furnishes warranty to the effect that the software conforms in terms of its operation essentially to the description in the documentation or to the stipulations in the acknowledgement of the order. Furthermore, WOW! warrants neither specific qualities of the software programs nor their suitability for customer purposes or customer requirements. 2120-ENG- 26 Manual WGA3 11.3 Declaration of Conformity 2120-ENG- 27 Manual WGA3 2120-ENG- 28 International Offices GERMANY WOW! Würth Online World GmbH Schliffenstrasse Falkhof 74653 Künzelsau +49 (0) 7940/15-1770 +49 (0)7940/15-3299 Automotive engineering hotline: 0180 / 5005078 E-mail: [email protected] http://www.wow-portal.com AUSTRIA Würth Handelsgesellschaft m.b.H. Würth Strasse 1 3071 Böheimkirchen AUSTRIA +43 5 08242 0 +43 5 08242 5 33 33 E-mail: [email protected] http://www.wuerth.at BELGIUM Würth België N.V. Everdongenlaan 29 2300 Turnhout +32 14 445 566 +32 14 445 567 E-mail: [email protected] http://www.wurth.be BOSNIA-HERZEGOVINA WURTH BH d.o.o. Binjezevo bb 71240 Hadzici, BiH +387 33 775 000 +387 33 775 019 E-mail: [email protected] http://www.wurth.ba BULGARIA Würth Bulgarien EOOD Mladost 4 Business Park Sofia 1 1715 Sofia +359 2 965 99 55 +359 2 965 99 66 E-mail: [email protected] http://www.wuerth.bg CROATIA Würth-Hrvatska d.o.o. Franje Lucica 23/III 10000 Zagreb CROATIA +385 1 349 87 84 +385 1 349 87 83 E-mail: [email protected] http://www.wuerth.com.hr CYPRUS Wurth Cyprus Ltd. 4, Vitona Str. 2033 Strovolos Industrial Estate 2083 Lefkosia +357 22 512 086 +357 22 512 091 E-mail: [email protected] CZECH REPUBLIC Würth, spol. s r.o. Prumyslová zóna Neprevázka 137 29301 Mladá Boleslav +420 326 345 111 +420 326 345 119 E-mail: [email protected] http://www.wuerth.cz DENMARK Würth Danmark A/S Montagevej 6 DK-6000 Kolding +45 79 323 232 +45 79 323 242 E-mail: [email protected] http://www.wuerth.dk FRANCE Würth France SA Z.I. Ouest Rue Georges Besse - BP 13 67158 Erstein Cedex +33 3 88 645 300 +33 3 88 64 60 94 http://www.wurth.fr Assistance technique WOW! +33 3 88 64 54 42 du lundi au vendredi de 8h00 à 12h00 et de 13h30 à 17h00 UNITED KINGDOM Würth U.K. Ltd. 1 Centurion Way Erith Kent DA 18 4 AE +44 208 319 60 00 +44 208 319 64 00 E-mail: [email protected] http://www.wurth.co.uk GREECE Würth Hellas S.A. 23rd Klm. National Road Athens-Lamia 145 68 Krioneri +30 210 6 290 800 +30 210 8 161 691 E-mail: [email protected] http://www.wurth.gr HUNGARY Würth Szereléstechnika KFT Gyár utca 2 2040 Budaörs +36 23 418 130 +36 23 421 777 E-mail: [email protected] http://www.wuerth.hu IRELAND Würth Ireland Ltd. Monaclinoe Industrial Estate Ballysimon Road Limerick +353 61 430 200 +353 61 412 428 E-mail: [email protected] http://www.wuerth.ie 2120-ENG- / Version- 12/12/2012 ISRAEL Würth Israel Ltd. Hatohen 2 Zone 34 Caesarea Industrial Park P.O. Box 3585 +972 4 632 88 00 +972 4 627 09 99 E-mail: [email protected] http://www.wurth.co.il ITALY Würth S.r.l. Bahnhofstrasse 51 39044 Neumarkt (BZ) +39 0471 828 111 +39 0471 828 600 E-mail: [email protected] http://www.wuerth.it Assistenza WOW! +39 0471 827 789 MACEDONIA Wuerth - Macedonia d.o.o.e.l. ul. Prvomajska b.b. 1000 Skopje +389 2 272 80 80 +389 2 272 88 72 E-mail: [email protected] http://www.wurth.com.mk NETHERLANDS Würth Nederland B.V. Het Sterrenbeeld 35 5215 MK 's-Hertogenbosch Postbus 344 5201 AH 's-Hertogenbosch +31 73 6 291 911 +31 73 6 291 922 E-mail: [email protected] http://www.wurth.nl NORWAY Würth Norge AS Morteveien 12, Gjellerasen Naeringspark 1481 Hagan +47 464 01 500 +47 464 01 501 E-mail: [email protected] http://www.wuerth.no POLAND Würth Polska Sp. z o.o. u. Plochocinska 33 03-044 Warszawa +48 22 5 102 000 +48 22 5 102 001 E-mail: [email protected] http://www.wurth.pl PORTUGAL Würth Técnica de Montagem Lda. Estrada Nacional, 249-4 Abrunheira 2710-089 Sintra : +351 219 157 200 : +351 219 151 331 E-mail: [email protected] http:// www.wurth.pt SERBIA Wurth d.o.o. Pancevacki put 38 11210 Krnjaca - Beograd +381 11 2 078 200 +381 11 2 078 225 E-mail: [email protected] http://www.wurth.co.yu SLOVAKIA Würth s.r.o. Pribylinská ul. c. 2 83255 Bratislava 3 +421 2 49 201 211 +421 2 49 201 299 E-mail: [email protected] http://www.wurth.sk SWITZERLAND Würth AG Dornwydenweg 11 4144 Arlesheim +41 61 705 91 11 +41 61 705 94 94 E-mail: [email protected] http://www.wuerth-ag.ch SOUTH AFRICA Wuerth South Africa (Pty.) Ltd. P.O. Box 616 Isando 1600 Johannesburg +27 11 281 1000 +27 11 974 6169 E-mail: [email protected] http://www.wurth.co.za TURKEY Würth Sanayi Ürünleri Tic. Ltd. Sti. Eski Silivri Caddesi No. 46 34535 Mimarsinan Büyükcekmece +90 212 866 6200 +90 212 866 84 85 E-mail:[email protected] http://www.wurth.com.tr