1
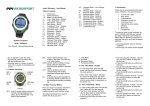
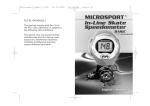
Outdoor Computer
arancia / AltiSki
User Manual / Gebrauchsanweisung
1.
1.1.
1.2.
2.
2.1.
3.
3.1.
4.
4.1.
4.2.
5.
5.1.
5.2.
6.
6.1.
7.
7.1.
8.
8.1.
Introduction
Button Functions
Major Function Modes
Time / Date Mode – Display
Time / Date Mode – Setup
Daily Alarm – Display
Daily Alarm – Setup
Countdown Timer – Display
Cuntdown Timer – Setup
Countown Timer – Usage
Stopwatch – Display
Stopwatch – Setup
Stopwatch – Usage
Stopwatch History – Display
Stopwatch History – Usage
Alternate Time Zone – Display
Alternate Time Zone – Setup
Temperature Mode – Display
Temperature Mode – Setup
9.
9.1.
9.2.
9.3.
9.4.
10.
10.1.
10.2.
10.3.
10.4.
10.5.
11.
11.1.
11.2.
11.3.
11.4.
1. Introduction
Thank you for purchasing the Microsport
Outdoor Computer: arancia. This watch
features:
•
•
•
•
•
•
•
•
•
•
Current time / date
Daily alarm
5 Stopwatches
Stopwatch history log
Countdown timer
Second time zone setting
Temperature readings
Altimeter w/ cumulative assent/descent
Barometer
Run Counter
To make the most of your purchase, be
sure to carefully read this user manual
and keep it handy for future reference.
Please take the following precautions in
using and caring for your new Microsport
arancia:
• Avoid exposing the watch to extreme
conditions
• Avoid rough use and/or severe impacts
• Do not attempt to open the watch
• Occasionally clean the watch with a
soft and moistened cloth
• Store the watch in a clean, dry place
when not in use for an extended period
of time.
1.1. Button Functions
SET/+:
[S/+]
ON/OFF:
[O/O]
MODE:
[M]
OPTION/-:
[O/-]
Light [L]
[S/+]: Used to access setting mode and
increase/ change digits during
Temperature Mode – Temperature
Features
Altimeter Mode – Display
Altimeter Mode – Setup
Altimeter Mode – Lock Altitude
Function
Altimeter Mode – Maximum
Altitude
Altimeter Mode – Barometeric
Pressure
Decent Mode – Display
Decent Mode – Trip Decent
Decent Mode – Rate of Decent
Decent Mode – Maximum Rate of
Decent
Decent Mode – Total Daily Decent
Decent Mode – Total Lifetime
Decent
Ascent Mode – Display
Ascent Mode – Trip Ascent
Ascent Mode – Rate of Ascent
Ascent Mode – Maximum Rate of
Ascent
Ascent Mode – Total Daily Ascent
setup. Stores intermediate or lap
times in the stopwatch.
[M]: Used to select between main
modes of the watch. Fast exit key
to all setup modes.
[O/O]: Used to confirm settings in setup;
Starts/ stops the stopwatch;
lock/unlock the altitude in altimeter
mode.
[O/-] Used to select functions of
corresponging main modes;
decreases/changes digits during
setup
[L]:
Activates the electric backlight for
3 seconds. NOTE excesive use of
the backlight decreases the battery
life.
1.2. Major Function Modes
Press any button to wake the watch from
sleep mode. Press the [M] button to
toggle among the main function modes.
11.5. Ascent Mode – Total Lifetime
Ascent
12.
Run Counter – Display
12.1. Run Counter – Trip Run Counter
12.2. Run Counter – Daily Run Counter
12.3. Run Counter – Lifetime Run
Counter
13.
Limited Warranty
The following indicators are used to
identify the mode you are in
:
T:
A:
:
:
R:
Table of contents
8.2.
arancia / AltiSki – User Manual
Time Mode
Temperature Mode
Altimeter Mode
Descent Mode
Ascent Mode
Run Mode
2. Time / Date Mode - Display
• To view time mode, press the [M]
button until the mode indicator displays
the clock symbol .
• When Time / Date mode is selected,
the watch will display the current time
on the top row and the current date,
temperature or number of runs on the
bottom row.
2.1. Time / Date Mode - Setup
• In Time / Date mode press and hold the
Set/+ button [S/+] for two seconds
• Use the [S/+] and [S/-] buttons to adjust
the seconds indicator.
• Press the [O/O] button to confirm your
selection.
• The countdown timer is now set
4.2. Countdown Timer – Usage
• When in countdown timer mode, press
the [O/O] button to start the countdown.
• Press the [O/O] button again to stop
the countdown.
• Press the [O/O] button again to resume
the countdown
• When the countdown timer expires the
alarm will sound for 30 seconds and
the timer will reset to the last
countdown timer setting.
• The countdown will continue to work in
the background even when switching to
other functions while the countdown is
running.
• Press the [O/-] button to proceed to the
Stopwatch Mode.
• Press the [O/O] button to confirm your
selection.
• The year indicator will flash. Use the
[S/+] and [O/-] buttons to select the
correct year.
• Press the [O/O] button to confirm your
selection.
• You have now completed the Date /
Time Mode quick set.
3. Daily Alarm - Display
• This watch includes a daily alarm.
When the daily alarm is ON, the alarm
will sound for 30 seconds at the alarm
time every day.
• To view the daily alarm display, press
the [O/-] button once while viewing the
Time mode.
• When the daily alarm is selected, the
watch will display the alarm setting
indicator in the top row and the daily
alarm time in the bottom row.
5. Stopwatch – Display
• This watch features 5 individual
stopwatch counters.
• Measuring capacity: measuring unit is
1/10 second. Measuring range is 99
hours, 59 minutes, 59.90 seconds
• To view the stopwatch, press the [O/-]
button three times while viewing Time
mode.
• When the stopwatch is selected, the
watch will display StP X (X is the
stopwatch session you are currently
using from 1 to 5) in the top row and
0:00 in the bottom row.
5.1. Stopwatch – Setup
• In stopwatch mode, press and hold the
[S/+] button for two seconds.
• The LAP/int indicator will flash.
• Both LAP and intermediate settings will
record time the same way, but the way
the information is displayed will vary.
The LAP setting will show the just the
• You can arm and disarm the alarm with
the [O/O] button.
3.1. Daily Alarm – Setup
• To set the daily alarm, press and hold
the [S/+] button for 2 seconds. The
hours indicator will flash.
• Use the [S/+] and [O/-] buttons to
adjust the hours indicator.
• Press the [O/O] button to confirm your
selection.
• At this time, the minutes indicator
should be flashing.
• Use the [S/+] and [O/-] buttons to
adjust the minutes indicator.
• Press the [O/O] button to confirm your
selection.
4. Countdown Timer – Display
• This watch includes a countdown timer.
• To view the countdown timer, press the
[O/-] button twice while viewing Time
mode.
last lap time when the [S/+] or [O/O]
buttons are pushed and in stopwatch
history mode. The Intermediate setting
will show the cumulative intermediate
times when the [S/+] or [O/O] buttons
are pushed and in stopwatch history
mode.
• Press the [O/-] button to select between
Lap and int settings.
• Press the [O/O] button to confirm your
selection.
5.2. Stopwatch – Usage
How to use the Stopwatch
• When in stopwatch mode, press the
[O/O] button to start the stopwatch.
The top row will now display -- -- -- and
the bottom row will display the current
stopwatch time.
• Press the [O/O] button again to finish or
interrupt the stopwatch. The top and
bottom rows will now display current
stopwatch time.
• When the countdown timer is selected,
the watch will display the countdown
time in the top row and the current
home time in the bottom row.
• You can start or interrupt the
countdown with [O/O].
4.1. Countdown Timer – Setup
• To set the countdown timer, press and
hold the [S/+] button for 2 seconds.
The hours indicator will flash.
• Use the [S/+] and [O/-] buttons to
adjust the hours indicator.
• Press the [O/O] button to confirm your
selection.
• At this time, the minutes indicator
should be flashing.
• Use the [S/+] and [S/-] buttons to adjust
the minutes indicator.
• Press the [O/O] button to confirm your
selection.
• At this time, the seconds indicator
should be flashing.
• Press the [O/O] button again to resume
the stopwatch. The top row will now
display -- -- -- and the bottom row will
display the current stopwatch time.
• While the stopwatch is running, users
may enter lap/int times by pressing the
[S/+] button. The top row will now
display first lap/int time and the bottom
row will display the cumulative
stopwatch time.
• After each successive lap/int time is
entered, the top row will display:
o the cumulative time of all the entered
intermediate times if the int setting
was selected
or
o the last lap time if the lap setting was
selected
• The bottom row will display the
cumulative stopwatch time.
• When you have finished the actual
stopwatch session, press the [O/-]
button to proceed to the stopwatch
history mode or press [S/+] to proceed
• The 12 H / 24 H indicator will flash.
Use the [O/-] button to select between
a 12 or 24 hour clock feature.
• Press the [O/O] button to confirm your
selection.
• The hours indicator will flash. Use the
[S/+] and [O/-] buttons to select the
correct hour.
• Press the [O/O] button to confirm your
selection.
• The minutes indicator will flash. Use
the [S/+] and [O/-] buttons to select the
correct minutes.
• Press the [O/O] button to confirm your
selection.
• The month indicator will flash. Use the
[S/+] and [O/-] buttons to select the
correct month.
• Press the [O/O] button to confirm your
selection.
• The days indicator will flash. Use the
[S/+] and [O/-] buttons to select the
correct day.
To access the stopwatch history mode,
press the [O/-] button 4 times while
viewing the Time Mode.
When the stopwatch history mode is
selected the watch will display St HSt
on the top row and either the current
home time or temperature on the
bottom row depending on your
selection made in temperature mode.
6.1. Stopwatch History – Usage
How to retrieve saved stopwatch
information
8.2. Temperature Mode – Temperature
Features
Current, Maximum, and Minimum
Temperatures
• In temperature mode, press the [O/-]
button to access the maximum
temperature reading.
• Press the [O/-] button again to access
the minimum temperature reading
• Both maximum and minimum
temperature readings can be cleared
independently by pressing and holding
the [S/+] button for 2 seconds while
viewing either the maximum or
minimum records respectively
• Surrounding temperatures are
generally 10 – 15°F / 5 – 8°C cooler
than watch readings due to the effects
of the user’s body temperature
• For more accurate readings, remove
the watch from your wrist and allow 510 minutes for sensors to adjust
6. Stopwatch History – Display
to the next available stopwatch to begin
recording another set of times following
the steps above. (Note that there are 5
available stopwatches. More stopwatch
information can be recorded by clearing
stopwatch data in the stopwatch history
mode or by recording over stopwatch
session #5.
To view saved stopwatch information,
press the [O/O] button in stopwatch
history mode to view the desired history
log
Press the [O/-] button to confirm your
selection and view the desired data.
Continue pressing the [O/-] button to
scroll through the different lap/int times
for that stopwatch log
Press the [O/O] button at any time to
view a different stopwatch log
To clear all saved stopwatch data,
press and hold the [S/+] button while
selecting a stopwatch history to view
7. Alternate Time Zone – Display
• To view the alternate time zone display,
press the [O/-] button 5 times while in
Time Mode.
• When the alternate time zone mode is
selected the watch will display the
alternate time zone time in the top row
and the home time mode in the bottom
row.
9. Altimeter Mode – Display
• To view Altitude Mode, press the [M]
button until the mode indicator displays
A.
• In altimeter mode the watch will display
altitude and barometric measurements
in the top row and the current home
time, current temperature, or run
counter depending our your personal
selection made in the temeprature
9.1. Altimeter Mode – Setup
• In altitude mode, press and hold the
[S/+] button for 2 seconds.
• The reference altitude reading will flash.
• Using the [S/+] and [O/-] buttons, enter
your reference altitude. Your reference
altitude should be obtained from a
reliable map source for your current
altitude.
• Once you researched and entered your
reference altitude, press the [O/O]
button to confirm your selection
7.1. Alternate Time Zone – Setup
• In the alternate time zone mode, press
and hold the Set/+ button [S/+] for two
seconds.
• The hours indicator will flash. Use the
[S/+] and [o/-] buttons to select the
correct hour, making sure to account
for a.m. A, or p.m. P.
• Press the [O/O] button to confirm your
selection.
• The minutes indicator will flash. Use
the [S/+] and [O/-] buttons to select the
correct minutes.
• Press the [O/O] button to confirm your
selection.
• The alternate time zone is now set.
Press the [O/-] to home time display.
8. Temperature Mode – Display
• In temperature mode the watch will
display temperatures in the top row and
temperature, time or run counter in the
bottom row.
8.1. Temperature Mode – Setup
• In temperature mode, press and hold
the [S/+] button for 2 seconds. The °F
or °C indicator will flash.
• Use the [O/-] button to select
between °F or °C.
• Use the [O/O] button to confirm your
selection.
• At this time the bottom row will flash.
• Use the [O/-] button to select between
time, temperature, or run counter to be
displayed in the bottom row.
• Use the [O/O] button to confirm your
selection.
• To view temperature mode, press the
[M] button until the mode indicator
displays T.
• The ft/m indicator will now flash.
• Use the [O/-] button to select your
desired unit of measurement.
• Press the [O/O] button to confirm your
selection
9.2. Altimeter Mode – Lock Altitude
Function
The altitude of the used is calcualted from
the barometric pressure information
provided by the built in sensor.
There are two possible reasons for a
change in the bbarometric pressure:
• Change in the waether conditions
• Change of the altitude
In order to avoid changes in the altitude
reading caused by the change of the
weather conditions we recommend to
lock the altitude to the actual reading
when not changing the altitude, i.e. over
night.
To do so simply press [O/O] in the
Altimeter Mode. The center line will then
show -- -- -- indicating that changes in the
altitude can not be made now.
To continue the altitude measurement
press [O/O] again in the altimeter mode.
The altitude is displayed again and
changes can be recorded.
9.3. Altimeter Mode – Maximum
Altitude
• In altitude mode, press the [O/-] button
to view the maximum altitude.
• The maximum altitude is the highest
altitude reached since the last reset.
• To clear / reset the maximum altitude,
press and hold the [S/+] button for 2
seconds.
9.4. Altimeter Mode – Barometric
Pressure
• In altitude mode, press the [O/-] button
to view the current barometric pressure.
10. Descent Mode – Display
• To view descent mode, press the [M]
button until the mode indicator
displays.
• In descent mode, the watch will display
altitude descent measurements on the
top row and the current home time,
current temperature, or run counter on
the second row depending on your
personal preference.
10.1. Descent Mode – Trip Descent
• In descent mode, the default view is the
total trip descent view.
11.5. Ascent Mode – Total Lifetime
Ascent
• In ascent mode, press the [O/-] button
4 times to view the total lifetime ascent.
• To clear/reset the total lifetime ascent,
press and hold the [S/+] button for 2
seconds.
12. Run Counter – Display
• To view the run counter press the [M]
button until the mode indicator displays
R.
• In run counter mode the watch will
display run information in the top row
and the current time, current
temperature, or run counter on the
second row depending on your
personal preference.
• A run is calculated based on altitude
adjustment. An additional run is added
to the total if a period of descent is
followed by an ascent of more than 60ft.
or 20m.
• To clear/reset the total trip descent,
press and hold the [S/+] button for 2
seconds.
10.2. Descent Mode – Rate of Descent
• In descent mode, press the [O/-] button
once to view the current rate of descent.
10.3. Descent Mode – Maximum Rate
of Descent
• In descent mode, press the [O/-] button
twice to view the maximum rate of
descent for the trip.
• To clear/reset the maximum rate of
descent, press and hold the [S/+]
button for 2 seconds.
10.4. Descent Mode – Total Daily
Descent
• In descent mode, press the [O/-] button
3 times to view the total daily descent.
• The total daily descent is automatically
reset daily at midnight.
12.1. Run Counter – Trip Run Counter
• In the run counter mode, the default
view is the trip run counter.
• A run is calculated based on altitude
adjustment. An additional run is added
to the total if a period of descent is
followed by an ascent of more than 60ft.
or 20m.
• To reset the total run counter, press
and hold the [S/+] button for 2 seconds.
12.2. Run Counter – Daily Run Counter
• To view daily run counter, press the
[O/-] button. The total number of runs
for the day will be displayed.
• A run is calculated based on altitude
adjustment. An additional run is added
to the daily runs if a period of descent
is followed by an ascent of more than
60ft. or 20m.
• The daily run counter is automatically
reset daily at midnight.
10.5. Descent Mode – Total Lifetime
Descent
• In descent mode, press the [O/-] button
4 times to view the total lifetime
descent.
• To clear/reset the total lifetime descent,
press and hold the [S/+] button for 2
seconds.
11. Ascent Mode – Display
• To view ascent mode, press the [M]
button until the mode indicator
displays
• In ascent mode, the watch will display
the total trip ascent on the top row and
the current home time, current
temperature, or run counter on the
second row depending on your
personal preference.
• To change the unit of measure, press
and hold the [S/+] button for 2 seconds.
• The inHg / mbar indicator will flash.
• Use the [O/-] button to select your
desired unit of measurement.
• Press the [O/O] button to confirm your
selection.
11.1. Ascent Mode – Trip Ascent
• In ascent mode, the default view is the
total trip ascent view.
12.3. Run Counter – Lifetime Run
Counter
• To view the lifetime run counter, press
the [O/-] button. The lifetime number of
runs for the watch will be displayed.
• A run is calculated based on altitude
adjustment. An additional run is added
to the daily runs if a period of descent
is followed by an ascent of more than
60ft. or 20m.
• To reset/clear the lifetime run counter,
press and hold the [S/+] button for 2
seconds.
13. Limited Warranty
During the time of warranty Microsport
can repair or exchange accepted claims
by it's decision. Please store the receipt
carefully for evidence of purchase.
This limited warranty is in lieu of all other
express or implied warranties, and
excludes refund of the purchase price. In
• To clear/reset the current rate of ascent,
press and hold the [S/+] button for 2
seconds.
11.2. Ascent Mode – Rate of Ascent
• In ascent mode, press the [o/-] button
once to view the current rate of ascent.
11.3. Ascent Mode – Maximum Rate of
Ascent
• In ascent mode, press the [O/-] button
twice to view the maximum rate of
ascent for the trip.
• To clear/reset the maximum rate of
ascent, press and hold the [S/+] button
for 2 seconds.
11.4. Ascent Mode – Total Daily Ascent
• In ascent mode, press the [O/-] button
3 times to view the total daily ascent.
• The total daily ascent is automatically
reset daily at midnight.
no event shall Microsport be liable for
direct, indirect, incidental, or
consequential damages arising out of the
product, and any recovery is limits to the
purchase price. No other person or
company is authorized to change this
limited warranty, and your dealer is solely
responsible for any other warranties.
The content of this operating instruction
are for information only. The product can
be changed during the continuous
process of product development without
warning.
Your Microsport Team hopes you enjoy
your arancia Watch and that it helps you
to achieve your personal goals better! If
you have any questions, comments or
critics please feel free to contact us.
Microsport GmbH & Co. KG
Gruental 10a
81925 Munich
Germany
Phone: +49 (0)89 307 255 99
Fax: +49 (0)89 307 255 98
E-mail: [email protected]
website: www.microsport.de