1
Jogging/Walking Speedometer
Jogging/Walking Speedometer
Jogging/Walking Speedometer
Table of Contents:
1. Quick Start Guide
2. Wrist Strap Installation/Removal
3. Setting the Time
4. Time Mode T
5. Speed Mode S
6. Distance Mode D
7. Heart Rate Mode ♥
8. Memory Mode M
9. Calibration Methods
10. Changing the Batteries
11. Additional Information
12. Trouble Shooting
13. Remarks
User Manual
1. Quick Start Guide
READ THIS FIRST
If at any point in these instructions you
have questions, please call +49 (0)89
30725599 or write an e-mail to
[email protected].
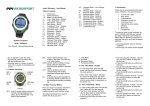
Display:
a. To begin, reset your receiver/watch
by pressing all four outer buttons until the screen goes blank.
b. In Time Mode T, press SET button upper left.
c. To change a value, press + button
(upper left) and - button (lower right).
d. Press START/STOP button (upper
right) to save the changes and continue to the next option- 12/24hr
time, time, date, etc.
e. You can always exit the Setup by
pressing MODE
Speed and Distance:
a. The accelerometer module can be
worn either as a stand alone unit or
as part of a heart rate chest strap.
ATTENTION: The Heart Rate can
only be detected when used with the
chest strap.
b. The Speed Module is activated when
inserted into the chest strap or the
belt clip. ATTENTION: Don’t forget
to remove the Speed Module after
usage in order not to drain the battery.
c. Press MODE (lower left on the
watch) and scroll to the S Speed or
D Distance setting.
d. Press START/STOP (upper right) to
begin data collection- as indicated by
the Symbol
below the status bar.
e. If the speed module could connet to
the display all data and functions are
displayed.
nCon:
This means the receiver is not able to
establish a wireless connection with the
accelerometer module. To correct this:
a.
Remove the accelerometer from
both sides of the belt clip or chest
strap and reconnect.
b. Press all four buttons until the screen
goes black and an r appears followed by a number. Press
START/STOP; this clears all memory and time.
c. Change the battery in the accelerometer module and the display. See
section 11.
Getting Started:
Your receiver/watch has a user friendly
menu system. The lower left button
toggles through the MODES, and the
lower right button toggles through the
OPTIONS within each MODE. The different Modes are:
T TIME
S
D
♥
M
SPEED
DISTANCE
HEART RATE
MEMORY
Locate the lower left button and toggle
through the five modes. The OPTIONS
within each MODE are listed below.
When in a particular mode, press the
OPTION/- button to view the various
options. Press MODE to return to the
main view at any time. The functions are
divided into the different main modes as
follows:
T: Time/date, Alarm 1, Alarm 2, Countdown Timer, Stopwatch, Stopwatch
nd
History, 2 Time Zone
S: Actual-, Average-, Maximum Speed,
Actual-, Average Pace
D: Trip Distance, Trip Time, Totsl Distance, Trip Calories, Total Calories,
Lap Counter
♥: Actual-, Average-, Maximum Heart
Rate
M: Memory for the last 7 active days for
the following functions:
Distance, Average-, Maximum
Speed, Average-, Maximum Heart
Rate, Trip Time, Average Pace, Day
Calories
By pressing MODE in any sub-function
you return to the corresponding main
mode.
2. Wrist Strap Installation/Removal:
Your receiver/watch has an innovative
removable strap system that allows
a. In Time Mode T press OPTION/(lower right) to view the countdown
timer.
b. Press the SET (upper right) then
press + & - to change the hours,
minutes and seconds.
c. Press START/STOP (upper right) to
confirm.
d. Press START/STOP again to activate countdown timer.
4c. Stopwatch
The stopwatch feature of your speedometer is very powerful and will store up
to twelve intermediate or lap times.
a. In the main stopwatch mode, press
SET (upper left) to select either intermediate or lap times.
b. Press OPTION/- to toggle between
either int or lap.
c. Press START/STOP (upper right) to
confirm.
use with a watch
style wrist band,
lanyard, or carabiner boot. It is
important to take
care when removing or installing the receiver
into the watch
band. This
should always be
done from the
front. Insert the
LIGHT (bottom)
button into the
band first and
then work your
way up both
sides to the top.
Once the bottom button and the lower
left and lower right buttons are in the
strap, pull the top of the band to fit the
receiver into the band. This band is
Stopwatch Basic Functions
a. In the stopwatch mode, press
START/STOP to activate and start
logging data.
b. Press SET to log a second set of
data- lap or intermediate time. The
circumference ring displays the
number of data sets you have stored
(the ring normally acts as a second
hand). There is a twelve set maximum. Once the twelve sets are full,
the stopwatch will overwrite the earliest data points, one at a time.
c. To end the stopwatch press
START/STOP
d. To reset the stopwatch to zero press
SET (upper left) to enter the setup
and START/STOP to reset. memory
at any time.
4d. Stopwatch History
designed and tested to last over 1000
times - if installed and removed properly.
3. Setting the Time
a. Press MODE until you have reached
the Time Mode T
b. Press SET (upper left) to activate the
Setup. Hr:12 or Hr:24 will appear.
c. Press + (upper left) or - (lower right)
to select; (the watch is pre-set to 12
Hr.)
d. Press START/STOP (upper right) to
confirm. Actual time will display and
the hour digit will flash.
e. Press + or - to change the hour digit.
Confirm with START/STOP (upper
right). The minute digits will flash.
f. Adjust using the same method and
confirm.
g. Adjust the date and confirm.
4. Time Mode T
When you log the various lap and split
times into the stopwatch mode, they also
log into the stopwatch stored data mode.
You can address the stored data as
follows:
a. When in the Time Mode T, press
OPTION/- five times and you will see
data.
b. Press START/STOP (upper right) to
view stored data in this mode.
c. You can now see the first lap/int
time.
d. While in Stopwatch History you can
toggle between lap and intermetiate
times by pressing SET
e. if you have recorded speed and
distance information – by running
while the stopwatch is on – you can
now review this data by pressing
OPTION
f. You can view the following information:
a. Distance of the period
In the time main mode the display shows
you the actual time and the date. Additionally there are 6 submodes of the time
mode
Alarm 1, Alarm 2, Countdown; Stopwatch, Stopwatch History, 2nd Time
Zone
4a. Setting the Alarms:
a. In Time Mode T, press OPTION/(lower right) once to view Alarm 1.
b. Press START/STOP again to turn
the alarm on (A1 on) or (A1 off).
c. Press SET (upper left) to change the
time, select a time using the + & (upper left and lower right).
d. Press START/STOP (upper right) to
confirm each time (hr/min) selection.
e. Set Alarm 2 (A2 on) or (A2 off) using
the same method.
4b. Using the Countdown Timer:
b. Average Speed of the period
c. Average Pace of the period
g. Press START/STOP while viewing to
advance to the next lap or intermediate time.
h. by pressing MODE you can always
exit the Stopwatch History and return
to the time main mode.
4e. Second Time Zone
Your Speedometer is equipped with an
alternate time zone clock. This is the
sixth option in the Time Mode.
a. Press OPTION/- six times to toggle
to the second time zone.
b. Press SET and then press + & - to
adjust the hours and minutes.
c. Press START/STOP to confirm each
selection.
Note: The PM or AM designation will
appear as a P or A to the left of the time.
The time displayed at the top is the real
time in the watch.
5. Speed Mode S
5a. Speed Mode Setup
Program the following items while in
Speed Mode S:
• View Option Heart Rate or Time at
the top of the display.
• Calibration multiplier (it is highly
recommended that you use this feature)
• Units (miles or kilometers)
• Weight (pounds or kilograms)
a. Scroll to any view on the Speed
Mode S.
b. Press SET to enter the setup.
c. Hrt or t will appear. These represent
a choice between heart rate or time
in the smaller display area at the top
of the display. (Speed is shown in
large digits on the bottom of the display)
d. Press OPTION/- to select one and
press START/STOP to confirm.
e. The next number displayed is the
calibration multiplier.
TO DETERMINE YOUR CALIBRATION
MULTIPLIER SEE SECTION 9 NOW.
Program your calculated number, from
section 9 press + & - and then press
START/STOP to confirm.
f.
Select miles or kilometers on the
next screen M or KM and press
START/STOP to confirm.
g. Confirm the weight in either pounds
or kilograms. (Press SET to toggle
between lbs or kg, the screen will
display SI – System International - at
the top for kilograms). Press
START/STOP to confirm.
h. Press + & - to enter weight and then
press START/STOP to confirm.
5b. Speed Mode Functions
•
•
•
•
•
Current Speed
Average Speed
Maximum Speed
Current Pace
Average Pace
Press OPTION/- (lower right) to toggle
through the various functions.
5c. Memory Reset
To reset the average speed, maximum
speed, and average pace functions
scroll to the Memory Mode M mode and
hold SET (upper left) for 3 seconds.
For a total memory reset (clear "lifetime"
data), simultaneously press all 4 left and
right buttons.
Note: This clears the time, date, and
calibration multiplier. Record these items
prior to reset because you will need to
re-enter them.
The following functions are available in
Speed mode:
6. Distance Mode D
tion multiplier. Record these items prior
to reset because you will need to reenter them.
•
•
7. Heart Rate Mode ♥
To reset the average and maximum
heart rate functions scroll to the Memory
Mode M and hold the SET (upper left)
for 3 seconds. (This will also clear the
Speed and Distance memory.)
7a. Heart Rate Mode Setup
a. Press SET (upper left) when in heart
rate mode.
b. Select whether you want the hi/low
zone alarm (beep) turned on with + &
- and press START/STOP (upper
right) to confirm.
c. Select the upper heart rate alarm
limit max with + & - and press
START/STOP to confirm.
d. Select the lower heart rate alarm
limit min with + & - and press
START/STOP to confirm.
e. Heart rate setup is now complete.
7b. Heart Rate Mode Functions
•
•
Current Heart Rate
Trip Average Heart Rate
Trip Maximum Heart Rate
7c. Heart Rate Memory Reset
8. Memory Mode M
Your receiver/watch is equipped with an
automatic internal seven day memory for
the last 7 days of activity.
This allows you to track your performance history on a daily basis within the
receiver watch itself. Each daily internal
memory record consists of the following:
•
•
•
•
Distance
Average Speed
Maximum Speed
Average Heart rate in Beats per
Minute
•
•
•
Maximum Heart rate in Beats per
Minute
Trip Time
Average Pace
Trip Calories
6a. Distance Mode Setup
If you've completed section 5a., skip
this; the data is already stored. Refer to
5a. (speed mode setup) as this is the
same procedure.
6b. Distance Mode Functions
•
•
•
•
•
•
Trip Distance
Trip Time
Total Distance (lifetime memory)
Trip Calories
Total Calories (lifetime memory)
Lap Counter
6c. Memory Reset
To reset the trip distance, trip time and
trip calorie functions scroll to the Memory Mode M and hold SET (upper left)
for 3 seconds. For a total memory reset
(clear "lifetime" data), press all 4 left
and right buttons the same time. This
also clears the time, date, and calibra-
The memory works on a rolling seven
active days, memory data will automatically be erased after seven active days
to save storage space on the receiver
watch.
8a. Memory Mode Data Retrieval
9. Calibration
a. Press MODE to toggle to M; data will
display.
b. Press OPTION/- to view the most
recent data set. (Either last active
day or today)
c. Continue pressing OPTION/- to view
all of the recorded data for that day.
d. Press START/STOP (upper right) to
switch days. (The date will be displayed at the top of the display.)
Your Jogging Speedometer is programmed with a set of variables which
describe the running style of an average
person. However your individual style
could differ significantly. This normally
affects the accuracy of the Speedometer
in a negative way.
Hint: To view a weekly performance
history of one item (example: average
speed) continue pressing START/
STOP. This feature allows you to easily
see a comparison of your daily performance.
The calibration has two independent
components: The calculation of the
personal multiplier and the running
style analysis.
For the occasional runner normally the
calculation of the personal multiplier is
sufficient.
The ambitious runner can increase the
accuracy further by performing a running style analysis. The best results
are achieved when you start with the
running style analysis, followed by the
calculation of the personal multiplier.
Now the different calibration routines for
the occasional (personal multiplier) and
ambitious runner (running style analysis
and personal multiplier) are described in
detail. Normally the error can be reduced to 4% by the calculation of the
personal multiplier alone. While the
calibration with running style analysis
and personal multiplier reduces the error
to ±2%.
The calculation of the personal multiplier
reduces the average difference from the
true distance.
Calibration for the ambitious runner
The mark below the axis represents the
true distance of your run. Above you see
examples of displayed distances for
various running speeds.
By calculating the correct personal
multiplier the balance point of the error
is optimised. This will reduce the error
for the slow running speed in the example above. On the numerical axis you get
the following picture:
Calibration for the occasional runner
For a better understanding of the
calibration for an occasional runner
please imagine a numerical axis. If you
run the same distance at different
speeds the results might be like this:
9a. Running style analysis CALIB
No matter at which speed you are running the displayed distance is always
close to the real distance. The average
error is usually below 2%. If you discover a lower accuracy there might have
been something wrong in the calibration
process. Please reset the speedometer
and redo the complete calibration. This
procedure can be done as often as you
like and will not damage your Jogging
Speedometer.
The following chapters explain the different calibration routines in detail. The
occasional runner can directly jump
to Chapter 9b. The Personal Multiplier PM.
During the running style analysis the
Jogging Speedometer calculates individual parameters which describe the
change in your running style when you
change your jogging speed. The closer
you follow the instructions for the running style analysis the more accurate
the results will be.
Before the calibration starts the following
randomly chosen initial state should be
valid.
The running style analysis allows the
Jogging Speedometer to adapt to your
personal technique. To stay in the picture of the numerical axis the results
after the running style analysis might be
like this:
the 10m measuring tape and the white
chalk included in your Jogging Speedometer original packaging.
Upper line: 50:50- indicates the receiver/watch is using the factory pre-set
values for all variables.
Put on the display and the chest belt and
activate the transmission between display and belt by pressing the START
button of your display.
Center Line: i.e. 1:23:08
Put on your running shoes and take this
Speedometer together with all components in your speedometer set to the
outside.
a. Press MODE until you reach the
Speed S or the Distance D Main
mode.
b. Press SET to enter Setup.
c. Press START/STOP until you reach
CALIB off .
d. Turn the Calibration to ON by pressing SET/+ or OPTION/-.
e. Confirm Calibration ON by pressing
START.
f. The receiver watch automatically
establishes a communication with
the accelerometer module.
Search for a plain running track and
mark a 50m long track. This is easy with
During Calibration, the following will
display:
Before you actually perform the running style analysis please read the
following pages carefully. This helps
you to understand the underlying
concept of the routine an well as to
avoid errors during the process.
The displayed distances are now independently from your speed and in a
close range. Normally already close to
the real distance also. But there is still a
possibility to get a systematic error during the running style analysis. I.e. mistakes in measuring the 50m distance or
stopping to late/early after the finish line
of the calibration run. This systematic
error can be compensated by the running coefficient which is also called
personal multiplier. When you set the
personal multiplier to the correct value
you will finally get the following result:
• 1 - indicates the number of the calibration run (you need to make 3
runs).
• 23 - the approximate number of
steps in that particular 50 meter calibration run.
• 08 - the approximate time in seconds
of the calibration run so far.
g. After the accelerometer and receiver
watch are linked together, a 15 second Countdown will start. Display
reads 1:00:15, 1:00:14…
h. After the countdown reaches 0 start
your first 50m run in a slow jogging
speed – this jog should take approximately 20 seconds.
i. After the finish line STOP! The
Speedometer automatically recog-
nizes you stopped and displays the
total number of steps and the total
time of the run for 10 seconds.
j. The receiver watch initiates the 2nd
run with another 15 second countdown. The display reads 2:00:15,
2:00:14…
k. Run the second calibration run at a
moderate jogging speed – approximately 16 to18 seconds. (You can go
the opposite direction this time to
save walking back)
l. Continue in the same manner until
the 3rd calibration run at a faster jogging speed – approximately 13-15
seconds.
m. The result of the calibration displays
in the upper line. i.e. 92:89
This ends the running style analysis.
The speedometer automatically returns
to the normal running mode where you
can check the improved accuracy.
Quality of the running style analysis
The following table gives you the correct
setting of the personal mulitplier PM for
reference distances of 400m an 1km.
real
in [m]
Displ
ayed
PM
real in
[km]
Displaye
d
PM
400
300
133
1,00
0,80
125
400
310
129
1,00
0,82
122
400
320
125
1,00
0,84
119
The calibration was successful when
both values i.e. 92:85 are between 50
and 99. The closer to 99 the more accurate the results will be. From now on, the
Speedometer will use your individual
running variables to calculate speed and
distance.
If one or both the values are not in the
50-99 range, the calibration is rejected
and the Speedometer will continue to
use the preset values. The display will
then show the values 50:50 again in the
upper row before terminating the calibration.
The biggenst impact on the quality of the
calibration has the variation of speed
levels for the calibration runs. Three
different levels (slow - moderate fast) give the best results.
ATTENTION! Fast does not mean you
are doing a sprint (running with your
toes first touching the ground), but fast
400
410
98
1,00
1,02
98
400
420
95
1,00
1,04
96
400
430
93
1,00
1,06
94
400
440
91
1,00
1,08
93
400
450
89
1,00
1,10
91
400
460
87
1,00
1,12
89
400
470
85
1,00
1,14
88
400
480
83
1,00
1,16
86
400
490
82
1,00
1,18
85
400
500
80
1,00
1,20
83
400
330
121
1,00
0,86
116
400
340
118
1,00
0,88
114
400
350
114
1,00
0,90
111
400
360
111
1,00
0,92
109
400
370
108
1,00
0,94
106
For programming the PM value into your
display please refer to 5a. Speed Mode
Setup.
400
380
105
1,00
0,96
104
10. Changing the Batteries
400
390
103
1,00
0,98
102
400
400
100
1,00
1,00
100
ATTENTION! Batteries consist of dangerous, poisonous materials. They
should never be swallowed or played
is your jogging high speed which you
can run in for about 15 min.
The slow run should take about 20 seconds, the moderate run 16-18 and the
fast run about 13-15 seconds.
These times are for reference only. The
ambitious runner can run faster if he
wants without affecting the quality of the
running style analysis.
You can redo the calibration as often as
you like. We recommend that you calibrate from time to time in order to adjust
to your training progress or to changes
in your running style such as after an
injury.
Please keep in mind that it is most important that you run with a constant
speed.A typical successful running style
analysis follows the following scheme:
1st run: slow
2nd run: moderate
with by children! Also batteries should
never be thrown away carelessly because of the damage to the environment. Your community offers battery
collections for proper disposal.
10a. Changing the display battery
a. Remove the display from the bracelet, carabiner or lanyard.
b. Remove the back cover from the
watch. There is a notch at the top.
Insert a fingernail or small screwdriver into the notch to lift the cover
off. Take care, do not damage the
circuit board or the wire antenna inside.
c. Remove the two battery retaining
screws. Take extra care; do not lose
these as they must be re-installed.
d. Remove the old battery and replace
it with a new one. Fit it inside the
metal holder and set it back on the
circuit board.
3rd run: fast jogging
9b. The Personal Multiplier PM
The preset value for the running coefficient or personal multiplier PM is 100.
You can leave this value unchanged
when the results of your Speedometer
after the running style analysis are accurate enough to satisfy your needs. If not
you can improve the accuracy by calculating your personal multiplier.
The value of the personal multiplier
calculates from the following formula:
(real distance) divided by (displayed
distance) multiplied by 100.
If the displayed distance is longer than
the real distance the personal multiplier
will be lower than 100, if the real distance is shorter than the displayed distance PM will be higher than 100.
e. Place the small screws in the holes
and then tighten with the screwdriver. Do not over tighten.
f. Replace the back cover and align the
two notches. (The one on the back
cover with the one on the watch
case) Make sure that the rubber
gasket on the back cover has not
come lose.
Note: If the "beep" does not work after
you finished, the back cover was not
properly replaced. Check the alignment
and adjust as necessary. There is a
small notch in the battery cover, this
should be at the twelve o’clock position
and aligned with the notch on the watch
case.
In some cases you can see all segments
on after replaciong the battery meaning
that you have accidentialy activated the
test mode. Simply take out the battery
one more time and try again until the
watch shows the normal functions.
10b. Changing of the speed modul
battery
a. Remove the back cap of the accelerometer module with an appropiate
coin.
b. Gently tap the module against the
palm of your hand to pop the battery
out of the module.
c. Replace the battery with the + side
face up and replace the cap.
11. Additional Information
Accuracy
The accuracy of your Speedometer is
highly influenced by the quality of the
running style analysis and the running
coefficient you have performed during
the calibration procedure (Chapter 9.).
If the calibration consisting of running
style analysis and running coefficient
was done carefully and successfully the
accuracy of your Speedometer is about
Solution: The current temperature is
higher or lower than the operating temperature of the speedometer (0 °C to 55
°C/ 32 °F to 131 °F).
Problem: Black display.
Solution: Temperature is too high,
perhaps the display has been exposed
to direct sunlight for too long.
Problem: The displayed actual speed
seems not to be realistic.
Solution A. The transmission may have
been interrupted for a short time. Such
an interruption has no significance for
the accuracy of the measurement of the
distance, as long as the interruption is
not for longer than 1 kilometre or 0.6
miles.
Solution B. The running style analysis
was either not performed at all or was
not accurate enough. Please study
98% from the real values. Please keep
in mind that your car or bicycle speedometer only has the same accuracy
when you want to compare distance
information provided by different speedometer types!
If the Speedometer works worse after
the calibration than without calibration
something definitely went wrong during
the calibration. Please read the chapter
9. Calibration again carefully and try to
figure out what might be the course for
this failure.
Running Belt
The accelerometer modules of the Microsport Speedometer are integrated in
the chest belt. When you run on a running belt your chest actually does not
move forward so no acceleration can be
measured.
However Microsport is aware that many
runners exercise on the running belt and
chapter 9b. again carefully and do another running style analysis.
Solution C. The running coefficient was
not adjusted correctly and your running
results show a systematically error.
Please read chapter 9a. and calculate
your personal running coefficient. Don't
forget to program it into the display after
calculating!
Problem: The communication between the chest belt and display
does not work.
Solution A. The contact plates on both
sides of the speed-module are defect.
Please send in the speed-module for
service.
Solution B. The battery is weak so the
distance between chest belt and display
is to long. You can check by bringing
chest belt and display close together
and check again. If the signal is ok then
you need to replace the batteries.
want to cumulate their total achievements and running history in the Speedometer watch. Microsport therefore has
equipped its running software in that
way that it works also on the running belt
with nearly the same accuracy as when
you run outdoor.
ATTENTION! Under certain circumstances this feature results in a speed
and distance reading on your display
when you run on the spot only! The
running software thinks that you are
running on a belt and enters the running
belt simulation mode.
Please have that in mind when you stop
your run i.e. in front of a red traffic light
and start running on the spot in order to
keep your body and muscles warm. If
you don't want that this distance is
added to the real running distance it is
most safe when you press STOP when
you pause your run and START when
you resume running.
13. Remarks
Microsport offers various accessories for
you speedometer for maintenance and
fashion.
- Battery Service Kit for maintenance of
your speedometer. Consists of 2
CR2032 batteries for the display and the
speed-module, spare screws, o-rings
and a small screwdriver.
- Bracelets and lanyards in different
colours
- Carabiner Clip for attaching your
display to a jacked, a rucksack or bag.
In case of any questions or problems not
dealt with in this manual please contact
our service number in Germany at: +49
(0)89 307 255 99
If you have to send in the Speedometer
for service and/or repair please use
proper packaging in order not to damage
Walking
The Speedometer is meant for walking
as well as jogging. Please note that a
running style analysis (chapter 9a.) is
not possible for walking! You can however improve the accuracy by findinf the
correct personal multiplier PM.
12. Troubleshooting
This section deals with the most common problems reported so far.
Problem: Nothing appears on the
display.
Solution: Press MODE, if the display
remains blank replace battery of watch
and press MODE again.
Problem: Display readings fade out.
Solution: Battery of watch are running
out and have to be replaced.
Problem: Slow display response.
your Speedometer during transport.
Please send to the nearest of the Microsport Service Centres (Addresses below). It is always helpful if you send in a
short explanation of the trouble or error
that occurred.
Maximum values:
Trip distance
99.99 km or 99.99 mi
Total distance 9999 km or 9999 mi
Trip calories
9999 kcal
Trip time
99 hr 59 min
Laps
99 laps
Limited Warranty
Microsport offers the original buyer of
this In-Line Skate Speedometer the
warranty corresponding to the laws in
the country of purchase beginning from
the date of the purchase for material
and/or manufacturing errors. This warranty does not cover manual damage,
damage during commercial usage, usual
wear and tear, accident and misguiding
the warnings in this manual. Also the
batteries are not covered by warranty.
ess of product development without
warning.
Range Devices (SRD) operating on
frequencies between 9 kHz and 25 GHz.
During the time of warranty Microsport
can repair or exchange accepted claims
by it's decision. Please store the receipt
carefully for evidence of purchase.
Your Microsport Team hopes you enjoy
your Speedometer and that it helps you
to achieve your personal goals better! If
you have any questions, comments or
critics please feel free to contact us.
The devices comply with the requirements of EEC directive 89/336/EEC with
regard to Electro Magnetic Com-patibility
and fulfil the requirements of 99/5/EC
with regard to Radio Equipment and
Systems (RES); Electro Mag-netic
Compatibility (EMC) standard for Short
Range Devices (SRD).
This limited warranty is in lieu of all other
express or implied warranties, and excludes refund of the purchase price. In
no event shall Microsport be liable for
direct, indirect, incidental, or consequential damages arising out of the Jogging
Speedometer, and any recovery is limits
to the purchase price. No other person
or company is authorized to change this
limited warranty, and your dealer is
solely responsible for any other warranties.
The content of this operating instruction
are for information only. The product can
be changed during the continuous proc-
Microsport GmbH & Co. KG
Gruental 10a
81925 Munich
Germany
Phone: +49 (0)89 307 255 99
Fax: +49 (0)89 307 255 98
E-mail: [email protected]
website: www.microsport.de
The MICORPSORT Jogging Speedometer meets the following standards for the
European Union and the USA.
The devices comply to the requirements
of ETS 300 683 Electro Magnetic Compatibility (EMC) standard for Short
FCC-ID: OWUACAMP915
The devices comply with Part 15 of the
FCC rules. Operation is subject to the
following two conditions:
This device may not cause harmful
interferences and this device must accept any interference received, including
interference that may cause undesired
operation.