1
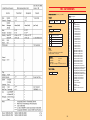
USER MANUAL (Version 1.08) CONTENT 1-2 SHORT DESCRIPTION SECURITY ADVICES CONSIGNMENT 3 4 4 REAR PANEL FRONT PANEL 4 5-6 SCHEME OF THE POTS, SWITCHES AND KEY BUTTONS START/STOP SYNC INTERN/EXTERN EDIT SHOTS: VALUE, RESOLUTION, OFFBEAT ECHO: TIME, DEPTH LOOP: RELEASE, VARIATIONS QUANTIZE INSTRUMENT HOLD/ECHO-SWITCHES DIAL-POT/KEY PLAY MODI BAR - LOOP (Loop-Lenght) CV / GATE OUTPUTS GATE-TRIGGER INPUTS 7-8 7 7 7 7 7 7 8 8 8 8 8 8 8 8 VISUALIZATIONS OF FUNCTIONS (CHARTS) QUANTIZE: REAL, LOOP QUANTIZE (LQ), QUANTIZE (Q) ECHO: DEPTH ECHO: VELOCITY / VALUE SHOTS: RESOLUTION SHOTS: MANUALLY VALUES (Velocity, Value) SHOTS: AUTOMATIC RANDOM VALUES SHOTS: LFO`s (sawtooth, inverted sawtooth) SHOTS: OFFBEAT (Example HiHat) LOOP (Recording schemata) VARIATIONS (Examples and normally play modi) 9-12 9 10 10 11 11 11 12 12 13 14 A SIMPLE EXAMPLE INIT (Reset user data) 19 MIDI MIDI RECEIVE MIDI SEND MIDI SYNCHRONIZATION MIDI IMPLEMENTATION CHART LIST OF SYSEX DATA 19-23 19-22 22 22 23 24 SAMPLE APPLICATIONS 25-26 ADDITIONAL INFORMATIONS DISTRIBUTION WARRENTY TERMS OF PRODUCTIONS DISPOSAL SUPPORT 27-28 27 28 28 28 28 ACKNOWLEDGMENT 28 15 EDIT (Adjustment of the parameters) GENERALLY INSTRUMENT MIDI CHANNEL UTILITY: DUMP SEND, DUMP RECEIVE, LOW DATA, HALF TIME ANALOG OUT SHUFFLE ON/OFF SEND CLOCK ON/OFF 1 16-18 16 16 17 17 18 18 18 2 SHORT DESCRIPTIONS The echometer is a midi sequencer/looper where you can record and playback midi notes and/or controller values from three independent tracks over up to four bars length in realtime or quantized if you want. Over implemented buttons, external Midipads or keys you can just record the timing of the events up to Midi. You can also trigger them analogwise over the gate input switch per track. The echometer is mainly designed to create, play and edit drums and percussion beats on the fly. Still you can edit basslines or melodies to be given out in addition or as it. Over up to six voltage control outputs for 0 to 5 volts you can also control and manage analogue components such as filters, analogue synthesizers or such stuff in a modular system. The enormous possibilities in combination with the midi are uncountable. SECURITY ADVICES don't use the tool in humid environment don't install close to heating places (radiators, stoves, open fire, direct sun-radiation) please pay attention to use the correct power supply adapter don't let the tool fall down, even if it is quiet robust don't put external voltage at the output-jacks for cleaning, don't use chemical cleanser or solvent, but only dry cloths CONSIGNMENT We deliver following accessories with the tool: IIn opposite to a classical step sequencer the echometer always sets the real step directly to the beat sceme, quantized or not, more as a looper does. To set/record steps there are several ways: SHOTS generate a note repeat quantized between 96th ticks over triolic scemes down to just quarter notes, The choice can me changed at any time on the fly. Power supply adapter AC/AC (230VAC - induced 14VAC, 300mA) Quickstart manual, optionally additional informations Step-up Plug-in Voltage Converter 45W (Convert 110V to 230V) for USA Alternatively you can also set single notes quantized or not. In realtime recording there will be also held the gate time, what is needed for notes and melodies at least. The Loop quantization (LQ) can also be choosend afterwards. The Echometer has several echo or repeat functions: A loop with up to 4 bars length can be played either endless, once or - comparable with a real echo - slowly going down with the volume; this can be set with the release button. New steps can be added or deleted at any time that the loop can vary constantly. Echos can be added or deleted from single steps with the echo buttons called time and depth without changing the looped beat in his structure. These changes can be recorded over four bars length separately per track to be played back automatically, what is a part of the hold function. The hold function is freezing the current state of the loops to play them back endless To still get additional variations, you can go ahead playing more things with it without changing the loop. The Echo still can be set on or off all the time. With the mute function you can temporary cut one of the tracks, The Length of the Loops can be varied between one, two or four bars on the fly. With the VARIATIONS-pot you can add random functions to the running loops and the loop lengths. So you can easily realize playable arrangements live. The Sequencer can run with the internal clock in tempi from 15 til 230 bpm or externally synced over Midi-clock. Each of the three tracks can also be a monophonic line of notes, sending control changes and pitch bend in addition, the midi channel can be choosen free for every track. Two additional Control-Voltage outputs from 0 to 5V per Track can be set in different combinations. Many additonal configuration settings can be choosen over the edit menu individually. All settings are stored in the unit and can not be lost by turning it off. They can be saved in addition externally over Midi-Dump. 3 4 5 6 SCHEME OF THE POTS, SWITCHES AND KEY BUTTONS START/STOP Starts or stops the internal sequencer with adjusted tempo (sync-switch aside must be in position INT, EDIT off) LOOP: RELEASE-Pot Determines the decay of the loop (decrease of Velocity/Value) CENTER: endless Loop (no Release) CLEAR ALL: all played sequence-data will be deleted (except for Mute/Hold) CLEAR POS: all sequence-data at active position will be deleted (except for Mute /Hold) SYNC INT/EXT Sequencer gets started internal INT or external EXT via Midi-Clock EDIT Activates the EDIT-mode to adjust parameters and to record them (sequencer must be stopped) P L E A S E N O T E : The notes and controller of a track can't be deleted seperatly. Advice: But there is a possibility to delete notes pointedly with played SHOTs at VALUE=0, even screened. Equally controller values can be put screened. SHOTS: VALUE-Pot Adjustment of Velocity/Value LEFT: fixed value 0..127, RIGHT: RND - Random-value, DOWN - LFO: sawtooth from 4 values UP - LFO: inverted sawtooth from 4 values OFFBEAT-switch: Raster displaced per half LOOP: VARIATIONS-Pot You can vary a leveled loop while it is playing. CENTER: Variations off TO LEFT/RIGHT: Random on Velocity/Value (different procedures) To the right additionally: Random too on Velocity/Value and additionally playbackvariations on/off: The order of the measures of the 4-measured loops are generated and played by random. This sequence is 8 measures long and depends on the adjusted length of the loops ( 1, 2 or 4 measures). If BAR=1 measure 1,2,3 or 4 of the loop will be chosen and be played 8 measures. If BAR=2 of all measures will be chosen two and be repeated 4 times. If Bar=4 of all measures will be chosen 4 and be repeated 2 times. SHOTS: RESOLUTION-Pot Adjustment of the Note-Repeat-Raster ECHO: TIME-Pot Adjustment of the Note-Repeat-Raster ECHO: DEPTH-Pot LEFT: Feedback+value reverse RIGHT: Feedback+value decaying To the steps of the running sequence can be added a midi echo. The grid as well as the decay- and attack time can be constantly modified during the session. The movements of the controllers are constantly recorded and, after activating MUTE, at the according track automatically played. The echo also can be switched on and off at MUTE. There are separate recordings for every track possible. After run-off the 8 measures a new sceme will be generated and played. The variation can be stopped any time (pot OFF) or started again (pot to the right). You should rather use this function when no steps are recorded, because you never know which measure of the loop is activated (maybe for experiments). 7 DIAL - Data Entry The function of the dial controller in the edit mode is changing values and navigating through the menus. In the play menu there can be switched between tempo and view/ entering of notes by pushing the controller. Nearer descriptions can be found in the according chapters. QUANTIZE: Right switch REAL = no Quantize, play with Gatetime (play in Tick-mode). Pushing the red push-button generates Note-On, to let loose Note-Off. As long as the button is pushed, before placed notes will be deleted. LQ (LOOP QUANTIZE) = Play as with REAL, but the LOOP will be quantized belated in the memory, depending from the left switch. As long as the button is pushed, before placed notes will be deleted. Q (QUANTIZE) = play quantized. Depending from the left switch, the notes will be played at the following raster-point. Note -Off is placed automatically in front of the note (not via releasing the button). With this you can generate quantized bounded notes (important for drumloop-samples). Notes will always be added. PLEASE NOTE: REAL+LQ = Bass Mode (Playing of notes in realtime / Quantize with Gatetime) Q = Drum Mode (quantized bounded notes) MODE - Here you choose the play-mode: MUTE: the red push-buttons mute the according track (red HOLD-LED is blinking) PLAY: with the red key-buttons several steps can be placed in dependence of the adjustments of the QUANTIZE-switch. SHOTS: as long as the red button is pushed note-sequences (or controller) are generated depending on the adjustments of the SHOT-pot. BAR-LOOP-switch Determines the playback-time of the sequence. It can be 1, 2 or 4 measures. To arrange LOOPs faster, at position 1 or 2 the according steps of the not played measures are recorded too. That means: if BAR is at 1 all other measures are recorded with the same played steps. So the sequence goes on looping, even if you switch to BAR 4 ( because all measures are the same). Because of this, you can play the measures only separately when BAR= 4. If BAR is =2, the sceme is always 2-measured and recorded are always 1 and 3, as well as 2 and 4. INSTRUMENT: Right switch NT: NOTE - With the left switch adjusted note A, B or C is played. A and B are fixed adjusted notes. The same is C adjusted in EDIT-mode, but can be diversified with the DIAL-pot. C1, C2: Controller 1 or C2 will be played (pitch bend or control change) HOLD/ECHO - key button Keybutton switched forward activates HOLD of the track on/off (red LED permanent on/off). Keybutton switched backwards activates/ deactivates the echo of the track (little red ECHO-LED on/off) HOLD: Activating HOLD freezes the LOOP of the track. RELEASE becomes effectless. Nothing more can be recorded. ECHO: Only notes can generate an echo (no controller). But the Echo can be notes or controller or both (adjustable in EDIT-mode) CV/GATE-OUTPUTS Analogue CV- output of tracks 0..5V. Can be configured differently: gate of the note, notenumber, velocity, value controller 1, value controller 2 or all together, accordingly value from ECHO on/off. GATE-INPUTS Analogue 5V-Trigger (as external possibility to play the track, the same as with the red push-buttons) 8 VISUALIZATIONS OF FUNCTIONS (CHARTS) ECHO different effects of DEPTH QUANTIZE FUNCTIONS REAL, LOOPQUANTIZE (LQ) and QUANTIZE (Q) Note lenght ECHO - VELOCITY / VALUE different effects of DOWN and REVERSE Key on Key off 9 10 SHOTS different effects of RESOLUTION (Pulses) SHOTS: LFO’s Sawtooth and inverted sawtooth with different resolutions. The LFO’s have ever 3 values and the zero point per time interval. Note lenght Key on Key off SHOTS: manually adjust Create manually continuous controller value waves or velocity waves (with Tick resolution). SHOTS: OFFBEAT (push pull - shifting) Example of OFFBEAT: two shifted HiHats in off beat SHOTS: automatically random values Create randomized values (velocity or controller values )with 8th resolution. 11 12 LOOP: Recording steps with different lenght of the loop To arrange LOOPS faster, at position 1 or 2 the according steps of the not played measures are recorded too. That means: if BAR is at 1 all other measures are recorded with the same played steps. So the sequence goes on looping, even if you switch to BAR 4 ( because all measures are the same). Because of this, you can play the measures only separately when BAR= 4. If BAR is =2, the sceme is always 2-measured and reorded are always 1 and 3, as well as 2 and 4. LOOP VARIATIONS You can vary a leveled loop while it is playing. The order of the measures of the 4-measured loops are generated and played by random. This sequence is 8 measures long and depends on the adjusted length of the loops ( 1,2 or 4 measures). After run-off the 8 measures a new sceme will be generated and played. The variation can be stopped any time (pot OFF) or started again (pot to the right). You should rather use this function when no steps are recorded, because you never know which measure of the loop is activated ( maybe for experiments). If BAR=1 measure 1,2,3 or 4 of the loop will be chosen and be played 8 measures. IIf BAR=2 of all measures will be chosen two and be repeated 4 times. If Bar=4 of all measures will be chosen 4 and be repeated 2 times. NORMAL MODI (No variations) 13 14 A SIMPLE EXAMPLE EDIT MODE (Edit user data) With a simple example we would like to demonstrate the functionality of this tool. Please let the tool switched off. Put the switches and pots into following positions: All pots in center-position, all QUANTIZE- and INSTRUMENT-switches upwards. LOOP-BAR-swich at 1 (LOOP-length= 1 measure), MODE-switch on PLAY (green LED is illuminated), EDIT-switch upwards, SYNC-switch downwards at INT (internal sequencer), switch aside on STOP. 1. Please connect a sound- expander (drum-module, sampler, synthesizer e.g.) via MIDI (Echometer-MIDI-out in expander-MIDI-in) 2. Adjust the MIDI-channel of the expander at 1 (or the value changed in the Echometer) 3. Switch the tools on 4. In the display of the Echometer appear one after the other the version-number, message about loading of the user-data (Err or Yes) and at least the adjusted tempo. 5. With the dial-pot you can adjust the tempo (revolving the pot) 6. By pushing on the dial-pot you switch between notes/controller-display and the tempo-display 7. The sequencer is stopped. Nevertheless you can actuate notes with the red push-buttons. 8. Push the red button of track 1. Now the note A from track 1 must be hearable with velocity 127 (velocity adjustable with SHOT-value- pot). Please note that the expandersound-volume depends on velocity. 9. If you cannot hear anything, check the MIDI-channel or the audio-output of the expander. (How to change the MIDI-channel in the Echometer see beneath EDIT-mode) 10. Now you can start the sequencer (switch top right at START) 11. A one-measured loop is running now. By pushing/releasing the red push-button from track 1 you can play a rhythm. The rhythm will be recorded in realtime-raster (ticks) and be played endlessly (RELEASE-pot in center-position). 12. If you want: Delete the sequence completely by revolving shortly the RELEASE-pot to CLEAR ALL or delete only several notes by revolving shortly to CLEAR POS. 13. Turn the RELEASE-pot at a value between 1 and 6. Now the loop accordingly sounds slow or fast out. Everytime you can put new steps. 14. Delete the sequence and switch the right QUANTIZE-pot on LQ (LOOP QUANTIZE). 15. Play again steps and then listen to the result: At the beginning the notes sound in realtime and then in the repetition quantized as 16th notes. 16. Delete the sequence, let the RELEASE-pot at CLEAR ALL and switch the MODE-switch upwards to SHOTS (yellow LED is illuminated). Keep the red push-button pushed and at the same time dial the SHOTS-resolution-pot. Now you will hear automatically generated notes in SHOT-raster. If you want to record the notes, turn on the RELEASE-pot again. 17. Instead of the RESOLUTION-pot now you turn the VALUE-pot. So you can vary the velocity of the played notes. Try the effects of RND (RANDOM) and of the two LFOpositions up/down. 18. Delete the sequence and switch the INSTRUMENT-switch from track 1 to C. Push the dial- pot to reach the note-sight. Now you can change the note with the dial-pot. Play SHOTS and revolve the dial-pot- and then listen to the result. Attention: the note-track is monofon. You can always generate only one note per track. 19. With help of SHOTS play 4th -notes and then activate ECHO (ECHO-push-button shortly down). Turn on both ECHO-pots to listen to the result. The movements of the pots will be recorded always in the back and be played automatically with HOLD (each track separately). 20. Nevertheless the echo always can be switched on or off. 15 In the EDIT-mode you fulfill the following adjustments: INSTRUMENT - Instrument-configuration of the push-buttons A, B, C (note numbers) C1,C2 (control change or pitch bend) - Echo of the track: Notes: on/off, Controller: off, Pb=pitch bend, control change number) CHANNEL - the MIDI channel of the tracks (1..16) UTILITY - Midi-Dump send/receive - Datareduction on/off (L=LowData)): limit RESOLUTION/TIME to max. 32th - Sequencer in Half-Time on/off (H=Halftime) ANALOGUE OUT - the routing for the analouge-outputs (All, Gate, Note, Velo, CC1, CC2) SHUFFLE - global Shuffle on/off, (fix 8th-shuffle) SEND CLOCK - Sends MIDI-realtime-data (START,STOP,CLOCK) at external Sync on/off Edit of parameters: 1. Switch the EDIT-pot in stopped sequence-mode to EDIT (downwards) 2. One of the EDIT-mode-LEDs shines permanently or blinks. Pushing the dial-pot you can switch between the EDIT- menu-selection (LED blinks) and the menu itself (LED shines permanently). 3. While blinking LED you can choose the menu by dialing the dial-pot and you change into menu by pushing the dial-pot (LED shines permanently). 4. The menus are edited differently: INSTRUMENT You can switch into the INSTRUMENT menu as follows: > EDIT switch on EDIT > at blinking menu LED by turning the dial controller switch to INSTRUMENT (in case of permanent blinking LED push the dial controller before) > in case of selected INSTRUMENT menu (blinking INSTRUMENT LED) push the dial controller to get to the menu. Note numbers A,B,C / Controller C1, C2: The red push-buttons select the track. Turn the push-button you want to edit into according position. In the display you can see the value, which changes by revolving the dial-pot. Echos of the Tracks: With the HOLD/ECHO-push-buttons you can change to the adjustments of echo. The echoLED of the selected track is illuminated. Switch the right INSTRUMENT-switch to NT (note) and turn ON or OFF (echo-note on or off). Switch on C1 or C2 . If the echo shall be a controller choose the controllernumber, at pitchbend Pb. If no controller shall be sendet: OFF. Range: N o t e s : 0..127 (C-2..G8) C o n t r o l l e r : off, Pb (pitch bend), 0..119 (Control change numbers) 16 MIDI CHANNEL You can switch into the CHANNEL menu as follows: > EDIT switch on EDIT > at blinking menu LED by turning the dial controller switch to CHANNEL (in case of permanent blinking LED push the dial controller before) > in case of selected CHANNEL menu (blinking CHANNEL LED) push the dial controller to get to the menu. ANALOG OUT You can switch into the ANALOG OUT menu as follows: > EDIT switch on EDIT > at blinking menu LED by turning the dial controller switch to ANALOG OUT (in case of permanent blinking LED push the dial controller before) > in case of selected ANALOG OUT menu (blinking ANALOG OUT LED) push the dial controller to get to the menu. The red push-buttons select the track. With the dial-pot you adjust the MIDI channel: 1..16 > Selecting of the output-jack with the red push-buttons of the track : double pushing switches between jack up/down (green LED shines at jack down). > With the dial-pot you adjust the value. > The ECHO-push-buttons turn the analogue echo on/off (ECHO-LED displays the condition) UTILITY You can switch into the UTILITY menu as follows: > EDIT switch on EDIT > at blinking menu LED by turning the dial controller switch to UTILITY (in case of permanent blinking LED push the dial controller before) > in case of selected UTILITY menu (blinking UTILITY LED) push the dial controller to get to the menu. > In these menus the functions/ values are activated with the red push-button of track 1. 4 UTILITY-menus exist: d S - Dump Send - sending of the adjusted data via Midi-out per SYSEX > shortly push on red key 1 sends data via MIDI - out d r - Dump Receive - receiving of SYSEX-data > shortly push on red key 1 > Echometer wait of incomming Sysex data > now send Sysex data from external device to the MIDI-Input > Display receipt the Receiving with OK or Err > Dump receive can be stopped with the red push buttons 2 or 3. L - Low Data - Datareduction H - Half Time - the internal sequencer runs at adjusted tempo only with half of the tempo LOW DATA (Datareductions): The data amount sent per a time-unit by MIDI is limited, but the echometer is able to generate more data already at middle tempo (for example permanent sending of ticks on various tracks). Therefor the output of the controllers RESOLUTION and TIME can be delimited to a maximum of thirtysecond notes. Short tick cluster mostly won't be a problem. Maybe there should be experimented. Please consider, the cable-connected sound expander could have problems with too lange data amounts, beacause the receiving memories (input-buffer) may overflow. HALF TIME (the internal sequencer runs at adjusted tempo only with half of the tempo): At HALF TIME the internal loop runs a half slower. Please consider, in relation to the MIDI-Clock all temporarily indications of the controllers RESOLUTION/ TIME of course will show twice as fast grids than really played in that case. Valuation: All: (all values without gate), GAt:Gate, nt:Note number, VEL:Velocity, CC1: CC1-value, CC2: CC2-value SHUFFLE You can switch into the SHUFFLE menu as follows: > EDIT switch on EDIT > at blinking menu LED by turning the dial controller switch to SHUFFLE (in case of permanent blinking LED push the dial controller before) > in case of selected SHUFFLE menu (blinking SHUFFLE LED) push the dial controller to get to the menu. > Switch ON/OFF with the dial-pot (turn the pot). The rhythm only can be modulated on SHUFFLE globally (ON or OFF). It is not variable. With activated SHUFFLE all RESOLUTION/TIME-values are adapted to the SHUFFLE ( don`t accord always with the scale-values), because the shuffle is based on shifted triplets. SEND CLOCK You can switch into the SEND CLOCK menu as follows: > EDIT switch on EDIT > at blinking menu LED by turning the dial controller switch to SEND CLOCK (in case of permanent blinking LED push the dial controller before) > in case of selected SEND CLOCK menu (blinking SEND CLOCK LED) push the dial controller to get to the menu. > Switch ON/OFF with the dial-pot (turn the pot). > See below in chapter MIDI SYNCHRONIZATION ADVICE: Outside of EDIT the conditions of SHUFFLE, SEND CLOCK and halftime are signalised by shining EDIT-LED (at halftime: utility-LED). You can leave the EDIT-mode out of any position by switching the EDIT-switch. Only now the data will be stored permanently in the internal EEPROM ( signalised by YES on the display). If you turn off the echometer while editing , the at least changed data will get lost. An example: A RESOLUTION of 4 does not mean a quarter note anymore, but a half note. 17 18 INIT (Reset user data) Turning on the machine the internal data can be back-uped to the factory settings. For this purpose push all three red push-buttons while turning on as long as in the display appears NI> Let the buttons off in that case > then YES appears shortly as affirmation and the visuIN al display returns into the according mode. Now the data is reseted. Attention! Consider the deletion of all prior USER data in the internal memory. If necessary if should be saved first via MIDI-Dump. MIDI - HOW TO RECEIVE MIDI-DATA HOW TO PLAY NOTES With a connected keyboard via MIDI-in you can play notes with VELOCITY. With a keyboard all notes are availability at the same time, therefore with the left instrument-switches (15) you can adjust two different ways of playing: Switch (16) on NT (Note) and Switch (15) on C In this common modus the echometer can identify and let run all notes played with the keyboard on the adjusted MIDI-channel. In this case it doesn`t matter which notes are assigned to the switch (15) wether to A,B or C. Velocity is identified too. 19 This modus can be used as a MIDI-to-CV-Interface in connection with CV-outputs. The note numbers are displayed with Moog- characteristic (1V per octave) on 5 octaves. The range is determined in the following way: note numbers from 24- 83 correspond voltage from 0..5 Volt. example MIDI-to-CV-Interface 20 Switch (16) on NT(note) and switch (15) on A or B In this mode the echometer can only identify and play the notenumbers according to switch-position A,B or C in EDIT-mode instrument . All other notes sended via keyboard will be ignored. With this function it is possible to controll all three tracks on the same MIDI-channel with max. 9 different notes. This might be important for the connection of drumpads, e.g., which all send on the same MIDI-channel and differ only in note numbers. Note number = Controller value MIDI - HOW TO SEND MIDI-DATA The echometer can send a noteline with 4 bar length per track, and it is possible that each tick can have a different note number (max.384 notes). Additionally you have 2 controller tracks, on which you can send the data of a controller or of pitch bend. All three lines per track (1x note, 2x controller) always send on the same MIDI-channel. Further on the notes of the notetrack (only these!) can create an echo which is made of notes with a rising or decaying velocity or made of controller/pitch bend with rising or decaying values. HOW TO CREATE CONTROLLER MIDI - SYNCHRONIZATION When the right instrument- switch (16) is on position C1 or C2, the arriving notes create the according value of the defined contoller or pitchbend command of the track. Deep notes create small values and high notes create big values. Range: Note numbers 24 .. 84 = control change values values 0 .. 120 The sequencer can be started and synchronisized externally via MIDI-CLOCK. Please put the switch SYNC (6) on EXT. Than it can be started and stopped with a connected sequenzer. Now the switch START (5) has no function. The velocity now is determined from the external sequencer. In the display appears S n c . The ECHOMETER follows following instructions: START, STOP, CLOCK, CONTINUE (but than always starts on One). A D V I C E : The ECHOMETER follows only midi-notes, no controller or pitchbend- commands! Running with internal clock the echometer sends the according MIDI-clock-data. Running with external clock the sending of clock-data can be switched on or off in EDITmode (SENDCLOCK ON/OFF). 21 22 MIDI - LIST OF SYSEX DATA S Y S E X B U L K D U M P (nonreal sysex data) D A T A description: FORMAT : Nr Header Data 1 2 3 4 5 6 7 8 9 10 11 12 13 14 15 16 17 18 19 20 21 22 23 24 25 26 27 28 29 30 31 32 33 34 35 36 37-40 41 42 43-70 HEADER: HEX F0 7D 09 01 06 description: F0 begin sysex data 7D ID 09 device Flame Echometer 01 version 1 06 command: all data DATA: 140 bytes (70 bytes user data cut into low nibble and high nibble = 140 bytes) example: 1 data byte: low nibble: high nibble: send 2 bytes low+high: 11110001 0001 1111 00000001+00001111 END OF SYSEX: HEX bytes parameter End of sysex F7 24 1 1 1 1 1 1 1 1 1 1 1 1 1 1 1 1 1 1 1 1 1 1 1 1 1 1 1 1 1 1 1 1 1 1 1 1 4 1 1 28 Tempo Midi-channel Track 1 Midi-channel Track 2 Midi-channel Track 3 Note number A Track1 Note number A Track2 Note number A Track3 Note number B Track1 Note number B Track2 Note number B Track3 Note number C Track1 Note number C Track2 Note number C Track3 Echo controller Track 1 Echo controller Track 2 Echo controller Track 3 Flag Echo Note on/off Track 1 Flag Echo Note on/off Track 2 Flag Echo Note on/off Track 3 Controller number C1 Track 1 Controller number C2 Track 1 Controller number C1 Track 2 Controller number C2 Track 2 Controller number C1 Track 3 Controller number C2 Track 3 Routing analog out jack top Track 1 Routing analog out jack bottom Track 1 Routing analog out jack top Track 2 Routing analog out jack bottom Track 2 Routing analog out jack top Track 3 Routing analog out jack bottom Track 3 Flags analog echo jacks Track 1 Flags analog echo jacks Track 2 Flags analog echo jacks Track 3 Flag shuffle on/off Flag send clock on/off Edit menus Flag data reduction Flag half clock intern sequencer reserved SAMPLE APPLICATIONS CONTROL A ANALOGUE LOWPASS FILTER With this setup you can create rhytmically filter sweeps synchronized to MIDI-Clock. The CV-outputs of the Echometer control the CV-inputs of the filter. MIDI-TO-CV INTERFACE Note numbers 24-83 = voltage 0-5Volt (5 Octaves per 1V/Oct.) example MIDI-to-CV-Interface MIDI-Sound/DrumExpander CONTROL MIDI-SOUND/DRUM-EXPANDER + ANALOGUE FILTER Example for a combination of MIDI-Expander (control via MIDI) and analogue effect (control via CV) 25 26 ADDITIONAL INFORMATIONS DISTRIBUTION WARRENTY EUROPA Schneiders Buero - Sales & Distribution Andreas Schneider Alexanderstraße 7 10178 Berlin Germany phone: fax: email: web: +49-(0)30-9789 4131 +49-(0)30-9789 4132 [email protected] www.schneiders-buero.de Beginning from the date of purchase a 1-year warranty is guaranteed for this device in case of any manufacturing errors or other functional deficiencies during runtime.The warranty does not apply in case of: damage caused by misuse mechanical damage arising from careless treatment (dropping, vigorous shaking, mishandling, etc) damage caused by liquids penetrating the device heat damage caused by overexposure to sunlight or heating electric damage caused by improper connecting (wrong power supply/ jacks/ MIDI connections/ voltage problems) If you have any complaints please contact your dealer or send an e-mail to: [email protected] TERMS OF PRODUCTION conformity: CE, RoHS, UL USA Analogue Haven Shawn Cleary 1223 Wilshire Blvd. # 597 Santa Monica, CA 90403 USA DISPOSAL The device is produced with RoHS-conformity (subject to the regulations of the European Union) and is free of hazardous substances (like mercury, plumb, cadmium and hexavalent chrome). But electronical scrap is hazardous waste. Please don’t add this to consumer waste. For a environment-friendly disposal of waste please contact your distributor or specialist dealer. phone: 310-451-7744 email: [email protected] web: www.analoguehaven.com SUPPORT Actually and additional informations, updates, downloads, and more: http://flame.fortschritt-musik.de ACKNOWLEDGMENT For help and accistance a big thanks to: Thomas Wagner, Anne-Kathrin Metzler, Lena Bünger, Paul Schultz, Robert Junge, Schneiders Büro Berlin and Shawn Cleary (Analogue haven, Los Angeles) 27 28