1
Satlook Lite
USER MANUAL
Contents
Satlook Lite - Description .
.
.
.
.
.
page 3
Getting Started
.
.
Power On/Off
Power Supply and Battery
How to use the meter
.
.
.
.
.
page 4
Menu .
.
EasyFind
Search
Spectrum
Send DiSEqC
Positioner
Beeper On / Off
Favourites
LNB Setup Menu
Setup
.
.
.
.
.
page 6
.
.
.
.
.
.
.
.
.
.
.
.
.
.
.
.
.
.
page 11
page 13
page 15
page 17
page 18
page 19
.
.
Appendix A – Using LiteEdit to Edit Satellites
Appendix B – Using LiteEdit to Load Firmware
Appendix C – LNB Type Description
.
Appendix D – DiSEqC Description
.
Appendix E – DVB-S Description .
.
Appendix F – Technical Specification
.
(Updated: September 15, 2012)
2
Satlook Lite – Description
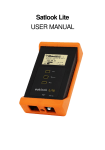
Emitor´s Satlook Lite is developed in Sweden for exact alignment and adjustment of
satellite dishes. It is designed to be extremely easy to use. Simply select the satellite
you want to find or install and the meter will try to identify that satellite only.
When finding the satellite the meter will show exact digital readouts for SNR and
Quality in order to get a perfect result of the installation.
The Satlook Lite is microprocessor controlled, making it very reliable and accurate.
Signal strength is presented on the LCD-display.
The meter searches for one satellite at a time in "EasyFind" mode. You can also choose
to view the signal in spectrum mode.
The Satlook Lite is very sensitive and can detect even the weakest signals.
The instrument can supply Voltage (13/18/21 Volt), 22 kHz and DiSEqC to LNBs. The
meter is short-circuit protected by an automatic current sensing circuit and the battery is
protected from an Over Temperature condition.
The Satlook Lite is charged via an external DC power-source of 12 volt, 1.2 amp. It
operates with 8xAA rechargeable batteries. The unit will operate for about one hour
with fully charged batteries.
3
Getting Started
Power ON/OFF
To turn the unit ON, simply push and press down the OK button for two seconds.
NOTICE: The unit will start loading firmware which takes about 10 seconds. The unit
will "beep" in a steady pace and the LCD back-light will be lit during start-up. The unit
starts in Easy Find mode on the last selected satellite position.
To turn the unit OFF, push and hold down the Ok button for two seconds.
Power supply and battery
The Satlook Lite can be operated by an external power-supply through the VDC port,
using an external power-source (12v dc, max 1.2A). Connect the power-source and
hold down the ON button until the unit turns On. To turn the unit OFF when the unit is
fed by an external power-supply, simply disconnect the power-source.
Discharged batteries take about 14 hours to fully recharge. The recharging is
controlled by the units microprocessor and is indicated on the display. Please notice
that to obtain full capacity of new batteries it is necessary to fully charge and fully
discharge the battery-pack several times.
The meter has 8 x AA rechargeable NiMe batteries in the battery-compartment. Apart
from recharging the battery the unit does not need any particular maintenance. The
unit should be recharged when the battery is empty (indicated with a battery-indicator
symbol on the display. A fully charged battery is operational for about an hour
depending on the external LNB load.
How to use the meter
Start by connecting the meter to the LNB of the dish and then turn the meter On. (The
LNB setup needs to match the LNB in use – see page 8)
The instrument starts in the "EasyFind" mode which makes it easy to detect the satellite
desired.
The instrument has a preset list of satellites which can be selected by using the
Up/Down buttons. When a satellite is displayed, the meter immediately starts to
search for that satellite.
Current DiSEqC Command
LNB Voltage and
22kHz signal
Battery
Charge
Selected Satellite and
Orbital Position
LNB
Type
Frequency
and
Polarisation
Signal Level
4
The signal level will increase on the signal bar if any satellite signal is detected. If the
beeper is enabled, then the pitch of the beeper will increase with signal strength. Once
the instrument locks on a satellite transponder, the display is changed to include SNR
(signal to noise ratio) and BER (bit error rate) bars and numeric values.
SNR Bar
BER Bar
Once “LOCKED” on a signal, the satellite is confirmed with the MPEG data stream
using the TSID and ONID (transport stream ID and Original Network ID) for the chosen
transponder
The sequence of steps in locking are:
•
“LOCKED” is displayed and the SNR/Quality bars are shown.
•
“Identifying…” is shown.
•
“Identified OK” is displayed if TSID and ONID from transponder match for the
desired satellite.
If the ONID and TSID do not match, then “Wrong Satellite” is displayed alternating with
the actual ONID and TSID found for this transponder. When the ONID and TSID to
match are both zero, then the actual ONID and TSID are displayed.
Once the correct satellite is found, then the dish can be “peaked” using the SNR bar
and the BER bar for reference. The SNR should be as high as possible, and the BER
bar should be as high as possible. (The BER value should be as low as possible – the
BER bar is shown in reverse for ease in maximising the signal.) If the beeper is
enabled, when a signal is locked, the pitch of the signal is reporting the SNR.
5
Menu
The following menu is shown on the display when pressing down the "OK" button in
the "EasyFind" mode:
This is the Main Menu. Use the "UP"/"DOWN" buttons to scroll up and down in the
menu system. Use the "OK" button to choose the selected function.
Pressing the "OK" button when the arrow “>” is pointing towards "EasyFind" will return
to the "EasyFind" mode. In this mode, the satellite to be used can be selected by
pressing Up/Down.
Identify Satellite
This function uses the satellite list and tunes each entry momentarily. If there is a lock,
then the TSID and ONID are checked for a match. If these match, then the satellite is
identified.
Search
When the Search function starts, the "UP"/"DOWN" buttons select the parameter to
change and the “OK” button changes the parameter (or starts the search or exits).
This function searches for a DVB-S signal every 10Mhz. It starts at the lowest
frequency for the LNB type (10670MHz for Universal) and samples every 10MHz until a
signal is detected. The "UP"/"DOWN" buttons select the direction of the search. As
each frequency is checked, the RF value is shown. When a DVB-S signal has locked,
the display changes to show the Symbol Rate and FEC. When the NIT information is
available, it is also shown. (ONID is “Original Network ID”, and TSID is “Transport
Stream ID”)
6
If the signal is locked, then pressing “OK” will re-start the search function and allow
this transponder to be saved in the satellite list. The satellite entries are displayed
and “UP” and “DOWN” are used to select the entry before the new transponder will
be saved. “OK” will save the signal parameters with the name “New”. The “Edit
Transponder” function can then be used to update the name.
Spectrum
Pressing the "OK" button when the arrow “>” is pointing towards "Spectrum" displays
the Spectum Parameters screen.
The “Up” and “Down” buttons select the settings of the LNB Voltage, 22kHz signal, and
DiSEqC, and the Spectrum bandwidth and the “OK” button changes the setting.
Pressing “OK” when “Spectrum” is highlighted will display the spectrum.
The frequency step size can be set to 1MHz or 5MHz, which gives a bandwidth of
120MHz or 600MHz.
The start and stop frequencies are shown at the bottom of the screen. These are
adjusted for the current LNB type that is selected from the LNB Menu. The spectrum is
shown for a 120MHz portion.
When the spectrum is displayed, pressing the “Up” and “Down” buttons will change the
cursor frequency up or down. The cursor frequency is indicated beside the cursor and
can be used to determine a peak.
7
Pressing the “OK” button when the spectrum is displayed, will return to the Spectrum
Parameters screen.
Pressing and holding the “OK” button with the cursor on a peak, will go to the search
function and if the peak is a valid signal will lock and display the parameters. If the
signal is locked, then pressing “OK” will re-start the search function and allow this
transponder to be saved in the satellite list. The satellite entries are displayed and
“UP” and “DOWN” are used to select the entry before the new transponder will be
saved. “OK” will save the signal parameters with the name “New”. The “Edit
Transponder” function can then be used to update the name.
Send DiSEqC
Pressing “OK” when the arrow “>” is pointing to “Send DiSEqC” will enter the
selection menu where the DiSEqC commands LNB1, LNB2, LNB3, LNB4 can be sent.
When you select one of the LNB commands, it is sent at the next tuning. The
EasyFind satellite selected may have a DiSEqC command already selected. When
you send a different command with “Send DiSEqC” it will replace the DiSEqC for the
EasyFind satellite temporarily. If the EasyFind satellite is changed, then any new
DiSEqC command for the new satellite will be used. This command can also be used
for the Search function. (When the selection is “NONE”, no DiSEqC command is sent,
however the last DiSEqC command sent will still be active. To make sure that the
DiSEqC switch is in the default position, the LNB voltage is dropped momentarily.)
Positioner
Pressing “OK” when the arrow “>” is pointing to “Positioner” will enter the selection
menu where the Positioner Commands GoEast, GoWest, Halt, GotoX reside. GoEast
and GoWest send the DiSEqC command to move the positioner East or West. The
movement continues for 127 seconds or until the “Halt” command is sent. The
command GotoX accepts an angle using the “Up” and “Down” keys and moves the
positioner to this angle when the “OK” key is pressed. This movement is calculated
using the current instrument latitude and longitude, and so for the movement to be
correct, the user must enter the current latitude and longitude in MyLatitude and
MyLongitude.
Beeper
Pressing "OK" when the arrow “>” is pointing to "Beeper ON/OFF" will either turn the
BEEPER ON or OFF. The beeper can be used for an audible indication when
watching the display is not practical.
8
Favourites
Pressing "OK" when the arrow “>” is pointing to "Favourites" will allow the satellites
used to be used chosen from the available satellite list . When “Favourites” is entered,
each satellite will show an asterisk after the satellite name if it is a favourite. Press “OK”
to either add or remove a satellite from the EasyFind list. For saving, select “Save and
Exit” and this setting will be restored on power on. Normally, the Favourites list will be a
small selection of satellites from the satellite list.
LNB Setup Menu
The LNB Type is normally selected automatically for each satellite entry. Pressing "OK"
when the arrow “>” is pointing to "LNB Setup Menu" will allow selection of the LNB
type. LNB type details are shown in Appendix C. When the LNB type is selected, then
select “Save and Exit”. This setting will be used until power off and will override the
automatic selection. If a Satellite is selected that is not compatible with the LNB type
(for instance a C Band LNB and Ku Band Satellite frequency), then a message “Check
LNB setting!” is displayed.
Edit Satlist
The satellite list can be edited with a PC running “LiteEdit” as described in Appendix A,
but satellite entries can be edited directly on the Satlook Lite.
Edit Transponder
Pressing “OK” when “Edit Transponder” is highlighted will show the satellite parameters
starting at entry 0. “UP” and “DOWN” move in the list. The entry number for the
satellite is shown at the upper left.
Entry Number
When the satellite is shown that need to be edited, press “OK” and changes to this
entry can be made. The parameter to be changed is highlighted. Pressing “UP” or
“DOWN” chooses the parameter to be changed or “Quit”. Pressing “OK” allows editing
of a parameter.
Add Transponder
If another transponder is required, choose “Add Transponder” and Press “OK”. The
satellite entries are shown as in the “Edit Transponder” function. Pressing “OK” again
9
will duplicate the satellite entry shown and add it to the favourites list. Now you can use
the edit function to change the required parameters.
Delete Transponder
If a transponder is no longer required, choose “Delete Transponder” and Press “OK”.
The satellite entries are shown as in the “Edit Transponder” function. Pressing “OK”
again will delete the entry from the satellite list and the favourites list. Before the
satellite is deleted, a confirmation is required.
Save Satlist
The changes made by editing are made permanent by choosing “Save Satlist” and
Pressing “OK”. This writes the satellite list and favourites list to a permanent file
immediately.
Setup
Pressing "OK" when the arrow “>” is pointing towards "Setup" will enter the setup
mode. In setup mode these parameters can be adjusted. These settings will be
restored on power on.
•
•
•
•
•
Language: English, Spanish, French, German, Portuguese and Swedish
Auto power off: 1 min, 2 min, 5 min, 10 min, 30 min and always on.
LCD backlight: On or Off.
LCD Contrast: Lighter or Darker.
Info: Shows software version, Satlist version loaded, battery power, etc.
10
Appendix A – Using LiteEdit to Edit Satellites
The Satellite list (Satlist) stored in the Satlook Lite can be changed using the LiteEdit
program. Use “Channel List > Open” to load a satellite list to edit.
Clicking on a name allows editing the details for this entry. The “File description”
entry is displayed on the Setup > Info screen of the Satlook Lite, and can be used to
verify what satellite list is loaded on the Satlook Lite. It can be edited from any entry,
although there is only one “File description”.
A new entry can be added, or an existing entry can be deleted by clicking on the
name to select the entry and then using Entry > Insert or Entry > Delete. The
Insert/Delete keys can also be used.
When entering a frequency to identify a satellite, if the ONID and TSID are not known,
enter 0 and instead of “Wrong Satellite”, the actual ONID and TSID are displayed.
The “satlist.lst” files are stored as *.csv files. A typical file starts like:
"VERSION";2;"Europe 11-4-2012";;;;;;;;;
"DVB";"Intelsat45E";11656;0;2960;5;0;1;65535;"E";450;0
"DVB";"Turksat 42E";11729;0;15553;3;0;50600;126;"E";420;0
"DVB";"Hellas 39E";12524;0;30000;5;1;13;28;"E";390;0
"DVB";"Eutelsat36E";11652;0;3111;2;0;10167;10100;"E";360;0
"DVB";"Eurobird33E";11599;0;15710;2;0;100;829;"E";330;0
11
The details for each line are:
DVB/DSS: Transponder DVB encoding or DSS (DirecTV) encoding
(Stored in *.csv file as: “DVB” or “DSS”
Name: Satellite Name (up to 16 characters)
Freq: Transponder Frequency in MHz
SR: Transponder Symbol Rate in ksym/sec
Pol: Polarization and LNB Voltage
(Stored in file as 0 =V-13V, 1=H-18V, 2=R-13V, 3=L-18V, 4 =V-21V, 5=H-21V,
6=R-21V, 7=L-21V)
FEC: Transponder FEC 1/2, 2/3 etc.
(Stored in the file as 0=1/2, 1 = 2/3, 2=3/4, 3=5/6 4=6/7, 5=7/8)
22kHz: Should the 22kHz signal be on
(Stored in file as 0=off and 1=on)
TSID: Transponder Transport Stream ID transmitted in Network Identification Table
ONID: Transponder Original Network ID transmitted in Network Identication Table
(if the TSID and ONID are both 0, then when a transponder locks, the TSID and
ONID will be displayed instead of “Wrong Satellite”)
Pos: Satellite Position in Degrees and tenths
(stored in file as X 10 )
E/W: Satellite position as East/West
(Stored in file as “E” or “W”)
DiSEqC:
lower 3 bits 0=off, 1=LNB1, 2=LNB2, 3=LNB3, 4=LNB4 If a DiSEqC command
is required for tuning, this can be added to the satlist file instead of manual
selection.
Upper 5 bits: This defines the LNB to use for this selection. (See Appendix C
for LNB conversion details)
0 = Universal
1 = 9.75
2= 10.0
3= 10.05
4= 10.6
5 = 10.7
6 = 10.75
7 = 11.0
8 = 11.2
9 = 11.25
10 = 11.3
11 = 11.475
12 = 10.7 Universal
13 = 5.15 C Band
14 = 5.95 C Band
15 = IF (no conversion from received to displayed frequency)
16 = DirecTV
17 = DishPro
18 = DTV SL3 SWM
19 = DTV SL5 SWM
12
Appendix B – Using LiteEdit to Load Firmware
LiteEdit is the utility used for updating the firmware on the Satlook Lite. You can
check the installed firmware version using the Info menu which will show the current
version. In order to load firmware, you must have a PC which supports an RS232
connection. The firmware loading must be performed with the external charger
connected. The RS232 cable to be used is supplied as part of the kit with the Satlook
Lite. Most laptops do not have an RS232 connection, but a USB to RS232 adapter
can be purchased at low cost. Connect the Rs232 cable from the computer to the
instrument. You will need to connect the Satlook Lite to the charger as part of the
firmware update process, but do not connect it yet. Run the “LiteEdit” application.
Use the “Update Firmware” menu item to select a COM port. Select the RS232 port
on the computer. Normally, the port is COM1 but some USB to RS232 converters will
use some other port. If desirable, this USB to RS232 conversion device can be
made to always use COM1 by clicking Control Panel / Device Manager / Ports and in
the Advanced settings for the adapter set to COM1.
When the COM port has been selected, LiteEdit will prompt you to remove one
battery and connect the charger cable to begin the download.
13
Normally the download will start and indicate the number of bytes remaining to
transfer. Sometimes, the Satlook Lite might miss the download request and continue
to start. If this happens, unplug the instrument and restart the firmware download.
At the end of the download, use the Setup->Info screen to check the “SW version” to
ensure that the new version is loaded.
The slave processor version is the “FW version”. If there is a new slave version to be
loaded, use the “Update Slave Firmware” button in LiteEdit. Check the Setup->Info
screen to ensure that the new version has loaded.
14
Appendix C – LNB Type Description
There are several bands used for satellite transmission in use worldwide. In Europe,
Ku band is predominantly used with some C band usage. In the US, C band, Ku
band and Ka are used. The Ku band in US is divided into DBS (Direct Broadcast
Satellite) and FSS (Fixed Satellite Service) bands. The satellite transmission bands
are:
Europe Ku band: 10.7 GHz – 12.75GHz
US C band: 3GHz – 4.5GHz
US DBS band: 12.2GHz – 12.7GHz
US FSS 11.7Ghz – 12.2GHz
US Ka: 18.3GHz – 18.8GHz and 19.7GHz – 20.2GHz
Because the losses in coax are quite high for these frequencies, the satellite signal is
first downconverted to a more manageable 950 MHz to 2150 MHz by the LNB for
transmission from the dish to the receiver. This is called the IF (intermediate
frequency) or also the L Band. The legacy LNB types do a straight conversion using
a LO (local oscillator) which is mixed with the incoming signal. This gives a sum and
a difference frequency. Where the LO frequency is below the incoming frequency,
this results in: Freqsatellite – FreqLO = Freqreceiver This is the normal case. In C Band,
however, the LO frequency is above the incoming frequency so: FreqLO – Freqsatellite =
Freqreceiver
Satellite signals are transmitted as polarized waves so that the spectrum can be used
to maximum advantage. Signals can have Vertical, Horizontal, Right circular or Left
circular polarisation. Most LNBs can switch between V/H or R/L using voltage
switching of 13V or 18V. The conventions are:
13V = V or R
18V = H or L
The legacy LNBs supported are:
9.75, 10.0. 10.05, 10.6, 10.7, 10.75, 11.0, 11.2, 11.25, 11.3, 11.475
There are two C band LNBs. The C band standard is 5.15GHz, but 5.95Ghz is also
used. Normal polarisation switching is used: 13V = V or R, 18V=H or L
The “IF” LNB is “pass thru” – No conversion is performed.
It is important to remember that after the LNB does the conversion, the frequency
passed into the meter is in the range 950MHZ to 2150MHz. The LNB setting in the
instrument is used only to make the calculation from Satellite frequency and then
tune the instrument.
15
Universal LNB
The Universal LNB can receive either horizontal or vertical polarisations depending
on the LNB line voltage. 13V is used to select Vertical polarisation and 18V is used
to select Horizontal polarisation.
The Ku band for satellite reception is 2050 MHz wide (12750 - 10700) while the
receiver input is only 1100 MHz wide (2150 – 950). To allow the full reception of the
entire Ku band, two different local oscillator (LO) frequencies are used in the
Universal LNB. This LO frequency is switched in the Universal LNB by using the 22
KHz tone. When it is off, then the LO frequency used is 9750 MHz and when on,
10600 MHz is used.
The four frequency ranges for the Universal LNB are sometimes called quadrants
and is diagrammed below showing the overlap.
13V
Vertical
22 KHz Off
Low Band
10700V MHz
13V
Vertical
22 KHz On
Hi Band
18V
Horizontal
22 KHz Off
Low Band
18V
Horizontal
22 KHz On
Hi Band
11900V MHz
11550V MHz
10700H MHz
12750V MHz
11900H MHz
11550H MHz
16
12750H MHz
Appendix D – DiSEqC Description
About DiSEqC
DiSEqC is an acronym for “Digital Satellite Equipment Control” and is achieved using
the 22kHz signalling tone. The 22 kHz signal is imposed on the LNB DC voltage of
13V or 18V at a level of 0.65V p-p. Normally, the 22kHz signal is either continuously
on or off. When a DiSEqC message is to be sent, if the 22kHz is on, it is turned off
for a “quiet period” before the message. Then the DiSEqC message is sent as a
series of bytes with an odd parity bit appended. The bits are formed by modulation of
the 22kHz signal as shown below.
Most DiSEqC commands are 3 bytes in length but some can be up to 6 bytes long,
so the transmission time of a DiSEqC message is on the order of 40 to 80
milliseconds.
DiSEqC Commands Supported in Satlook Lite
LNB1: 0xe0, 0x10, 0x38, 0xc0
LNB2: 0xe0, 0x10, 0x38, 0xc4
LNB3: 0xe0, 0x10, 0x38, 0xc8
LNB4: 0xe0, 0x10, 0x38, 0xcc
Positioner Commands Supported in Satlook Lite
GoEast: 0xe0, 0x31, 0x68, 0x7f
GoWest: 0xe0, 0x31, 0x69, 0x7f
Halt: 0xe0, 0x31, 0x6b
GotoX: 0xe0, 0x31, 0x6e, 0xaa, 0xbb where aa and bb are calculated from
MyLatitude, MyLongitude, and GotoX angle.
For the full DiSEqC specifications, see http://www.eutelsat.com/satellites/4_5_5.html)
17
Appendix E - DVB-S Description
DVB-S uses phase shift keying to digitally modulate a carrier. Quadrature phase
shift keying is used in both and the digital data is encoded as a 90 degree phase shift
in the signal. This gives 4 possible states for each sampling interval. The sampling
interval is called the Symbol Rate and each state of 2 bits is a Symbol. During
transmission, this data is interleaved to allow recovery during noise bursts and
redundant data is added called FEC (forward error correction). During reception, the
data is re-shuffled to restore the order and the FEC data is used to correct the
bitstream as necessary.
This bitstream is called a “transport stream”. A transport stream is made up of
packets. All packets are the same length of 188 bytes and they all start with the sync
byte 0x47 so that when the data is read, a starting point can be located. Each packet
also contains a PID (packet identification). The information in the transport stream
consists of several video and audio streams and also SI tables (Service Information)
to allow the receiver to decode and display the correct data. There are several types
of tables in the SI called PSI data. This table data is generally longer than one
packet so several packets are assembled together to make a “section” which can be
up to 4096 bytes.
1) Program Association Table (PAT): for each service in the multiplex, the PAT
indicates the PID of the corresponding Program Map Table (PMT). It also gives the
location of the Network Information Table (NIT).
2) Program Map Table (PMT): the PMT identifies and indicates the PIDs of the
video, audio, and other streams that make up each service.
3) Network Information Table (NIT): the NIT gives the Network Number, Name and
Satellite Position of the satellite. It also lists all the other transponders on the
satellite.
4) Service Description Table (SDT): the SDT gives information about each service in
this transport stream.
Once these tables are decoded by the receiver, the correct PID for the audio and
video streams can be found and presented to the video and audio decoders. In
DVB-S, the video streams are presented in MPEG-1 or MPEG-2 encoding (usually
MPEG-2) but can be presented in the newer HD format MPEG-4.
(For a more complete understanding, see ISO 13818-1 “Information technology,
Generic coding of moving pictures and associated audio information: Systems”)
18
Appendix F - Technical specification
•
•
•
•
•
•
•
•
•
•
•
•
•
•
•
•
•
•
•
•
•
•
•
•
Input frequency: 920-2150MHz
Input level: 35-100 dBuV
Input/output impedance: 75 Ohm, F-connector
Measuring method (Analog):
RF Signal presentation in thermometer scale.
Loudspeaker tone changes with signal level when enabled
Measuring method (Digital):
Quality (derived from BER - bit error rate)
SNR (signal/noise-ratio)
Scales showing max signal and max values
EasyFind satellite identification: By using the Symbol Rate / FEC in the
signal and the ONID/TSID in the transport stream
Search automatically acquires DVB-S transponders using advanced
demodulator to determine FEC and Symbol Rate.
Spectrum Analyzer 950 MHz to 2150 MHz.
Backlit 128x64 Pixels LCD.
PC connection: RS232 with DB9 connector
LNB Power: 13V or 18V. 21V selectable.
22 kHz tone: Standard 22 KHz signal superimposed at 0.65V p-p on LNB-A
DiSEqC: Yes, according to 1.0.
Battery: Rechargeable 8x AA rechargeable batteries of 1600mA each.
Battery Life: About 1 hour on fully charged batteries.
Weight: About 0.7 kg including batteries.
Accessories: Orange rubber casing.
Power-supply of 100-240VAC 12V, 900mA
Car-charger
Made in Sweden by SB Scandinavia AB
web: www.emitor.se
19