1
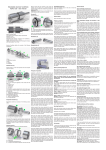
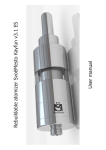
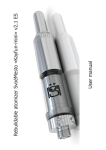
Kayfun Lite - User Manual (English)
DOWNLOAD USER MANUAL IN PDF
Rebuildable atomizer SvoeMesto Kayfun Lite - User manual
Specifications:
Material: Stainless Steel
The material of the transparent body: Polycarbonate
Diameter: 22 mm
Connector Type: 510
Dimensions (not including connectors and mouthpiece) / weight / volume: 51,5
mm. / ~ 4.5 ml.
Weight (not including mouthpiece) with transparent window/ with metal
window: 71 g. / 81 g.
Atomizer SvoeMesto Kayfun Lite consists of the following components:
1.
2.
3.
4.
5.
Base
Evaporation chamber
Body
Top cap
Mouthpiece
Atomizer base (1)
Atomizer base (1) is the most important and most complex part of the device:
1a - Bottom part of the atomizer
1b - the air intake
1c - O-ring, ensuring the tightness of the contact with the body (3)
1d – Negative pole
1e - Positive pole
1f – Coil screws
1g – Air duct
1h - Grooves for supplying liquid from the tank to the evaporation chamber (2) and air
outlet from the evaporation chamber to the tank
1i - Positive pole insulator (1f)
1j - E-liquid duct. Liquid flows through it into the tank when filling through the hole (1m)
1k - Center pin insulator (1h)
1l - Screw for e-liquid dust hole
1m - E-liquid dust hole
Evaporation chamber (2)
Evaporation chamber (2) consists of the following components:
2a - the body of the evaporation chamber
2b - the cap of the evaporation chamber
The body of the evaporation chamber (2a) is screwed to the atomizer base (1).
The cap of the evaporation chamber (2b) is screwed onto the body of the evaporation
chamber (2a).
Evaporation chamber is made of two parts to simplify wick installation
Atomizer body (3)
Atomizer body (3) consists of the following elements:
3a – Metal rings
3b – Transparent polycarbonate ring
3c - o-rings to ensure tight seal between rings (3a) and (3b)
Base kit comes with two versions of (3b): clear and metallic.
Clear ring allows you to visually monitor the amount of liquid in the tank; metallic ring
provides the highest reliability.
WARNING: transparent ring is a consumable item and is not covered by the
manufacturer’s warranty.
Top cap (4)
Cap (4) consists of:
4a - cap
4b - o-ring ensures tight connection to the body (3)
4c - o-ring, ensuring tight connection with the cap of the evaporation chamber (2)
Cover (4) is screwed onto the body (3) with the top of the evaporation chamber (2b) resting
against o-ring (4c)
Mouthpiece (5)
Wrapping the coil
The coil is made of resistance wire wrapped around the wick - folded in several layers of
silica rope.
The ends of the wire are fixed under the cap screws (1f).
The coil is located diagonally between the screws (1f) at 1.5 - 2 mm above the air duct
(1g), so that incoming air is distributed evenly round the coil when the user inhales.
Tails of the wick fit in the free space along the sides of the poles (1d) and (1e), so that they
are above the grooves (1h), but don’t get into them.
Principles of operation
«Atomizer» is from the word «atomize» meaning «to break down into atoms».
The atomizer contains a resistance coil that is energized using an attached battery.
When the coil is covered with e-liquid and the battery is engaged, the coil heats up quickly
and boil the lower layer of e-liquid. This vaporization (or so-called «Explosive evaporation»)
forms a steam «cocoon» around the coil.
This cocoon rises and expands in volume atomizing the upper layer of e-liquid on the coil.
This, subsequently, produces a mixture of steam and dispersed liquid particles which we
perceive as a «smoke».
Since there is no combustion used in this process, the result of atomization is not smoke but
vapor, to be more accurate - fog.
The e-liquid is stored in the tank system which is located between the walls of the outer
chassis and the evaporation chamber.
The evaporator chamber (2) has special grooves (1h) that serve as ducts for e-liquid to flow
into the evaporation chamber which is mounted to the atomizer base (1).
The tank is sealed and air tight when the cap is closed, so liquid does not flood the
evaporation chamber through these grooves - air pressure inside the tank prevents it.
Drinking bowl for birds works on the same principle: liquid does not come out of turned
upside down water-filled bottle if you deep bottle neck in a bowl of water.
Water comes out of the bottle only when the level of liquid in the bowl drops below the level
of the bottle neck - then some amount of water will pour out, fill the bowl up the bottle and then stop again.
Another example: Take a straw, deep half of it vertically in the water, close the top opening
of the straw with your finger and pull it out of the water.
Low air pressure at the top of the straw will hold water in it, but as soon as you release your
finger the sealing of the air bubble is broken, pressure equalizes and water discharges.
Kayfun Lite works on the same principle.
When the user initiates the inhalation process, negative pressure is formed inside the
evaporation chamber which draws a small amount of e-liquid through the grooves (1h) into
the evaporation chamber where it gets absorbed by the wick located directly above these
grooves.
Low pressure is produced in the tank due to the transfer of e-liquid to the evaporation
chamber.
When the user has completed the inhalation process, the pressure in both the evaporation
chamber and the tank are normalized due to the air being passed back into the tank
through the ducts.
During the inhalation process, the evaporation chamber receives liquid from the tank
through the grooves (1h) and after the inhalation the tank receives air from the evaporation
chamber.
This process can be visually observed as air bubbles rising from the grooves in the tank
(provided the transparent ring is being used).
E-liquid that entered the evaporation chamber during the inhalation is absorbed by the wick.
The wick is saturated and distributes e-liquid over the coil. The coil heats up and
«atomizes» liquid.
At the next inhalation this cycle is repeated until there is no more liquid in the tank or the
battery is depleted.
Assembling Kayfun Lite
Kayfun Lite assembly occurs in the order in which the details are numbered:
Wick/coil assembly is installed.
Evaporation chamber (2) is screwed in atomizer base (1), then body (3), cover (4) and
mouthpiece (5) are screwed onto each other.
Disassembly happens in the reverse order.
Filling e-liquid
Kayfun Lite filling can be done in two ways.
Method #1 («classic»)
- Unscrew the cap (4)
- Pour e-liquid into the space between the body (3) and vaporizing chamber (2)- Screw the
cap back on
Method #2 (through the e-liquid dust hole)
- Turn Kayfun Lite mouthpiece down
- Unscrew (1l)
- Insert the nose of the bottle in the hole (1m)
– Fill the tank by squeezing the bottle. The air will escape from the tank into evaporation
chamber through the same grooves (1h).
- Take out the nose of the bottle from the valve, screw (1l), turn Kayfun Lite mouthpiece
up.
When refilling using method #1, it is important to consider that the tank is no longer air
tight. This will enable the e-liquid to flow into the evaporation chamber through the grooves
(1h).
When the cap is screwed back onto the device, this can also form a small amount of
pressure which forces a bit of the e-liquid into the evaporation chamber.
Both effects can potentially add up to produce a small amount of flooding in the evaporation
chamber.
This technique can take a bit of practice and should be conducted in a timely manner.
When refilling using method #2, it is important not to overfill the tank. Over filling the tank
can produce flooding in the evaporation chamber.
A small amount of air must remain in the tank to allow the pressures of both the
evaporation chamber and the tank to equalize during the inhalation process by way of the
ducts.
It is recommended to leave approximately 2-3 mm of space at the top of the tank or end of
the window during the refill process.
Excess of e-liquid can be removed from the Kayfun Lite this way: turn Kayfun-min
mouthpiece down; put a napkin under mouthpiece, blow Kayfun Lite through the air intake
(1b) - the excess of e-liquid from evaporation chamber will flow out through the mouthpiece
to the napkin.
Before operating Kayfun Lite
After assembling the coil, evaporation chamber and collector-tank it is recommended to
check atomizer resistance.
Resistance should be measured between the screw (1g) and the body (1a).
You should fix detected short circuits before you start using the atomizer on battery mod.
Never use shorted Kayfun Lite on unprotected battery mods - this can cause
damage of the mod and even fire.
Places where short circuit may occur, causes and remedies:
For starters, inspect Kayfun Lite for the presence of foreign metal objects that can cause a
short circuit and remove them.
Place / reason: too long ends of the coil are shorting to the walls of the evaporation
chamber or the opposite pole
Remedy: Cut ends of the wire, so they would not stick out from under the screw heads
Place / reason: Coil lies too low on the air duct and touches the poles by middle coils.
Remedy: Lift the coil.
Place / reason: Coils touch each other
Remedy: straighten the coils so that neighboring coils do not touch each other
Place / reason: one of the insulators (1i) or (1k) is damaged
Solution: Replace the insulator
If the meter, on the contrary, shows the «infinite resistance», check the coil for breaks.
Servicing Kayfun Lite
Kayfun Lite servicing includes its regular refilling, cleaning/washing, replacing and dry
burning the coil.
Refill Kayfun Lite as needed.
Periodically disassemble and wash Kayfun Lite under running water.
We recommend doing this every time before switching to e-liquid with different taste.
Periodically change the coil.
With the lapse of time sludge deposits can accumulate on the coil wire, which has a
negative impact on the taste.
This sludge can be removed by «Dry Burning».
Dry burning
- Remove the lid, drain the excess of e-liquid from the tank, remove the evaporation
chamber
- Soak up remaining liquid from the coil and wick with a cloth
- Screw Kayfun Lite onto the battery as it is
- Press and hold the battery power button for 5-7 seconds to let the coil heat up, then
release for 5-7 seconds
- Repeat this procedure till all e-liquid has evaporated from the wick and all deposits burned
off the coil
Please note that in the process of dry burning wick gradually loses its ability to absorb
liquid.
So after 3-5 dry burns we still recommend to replace coil and a wick.
General advices
Find comfortable nicotine level.
When you use Kayfun Lite for the first time, try to start from nicotine level twice less than
you used to!
For example, if you used 12 mg/ml liquid - start from 6 mg/ml on Kayfun Lite.
Kayfun Lite has excellent nicotine delivery and vapor production capabilities, so it is easy to
get nicotine overdose for want of habit.
Choose optimal for you nicotine level, but we do not recommend using e-liquid with level
higher than 12 mg/ml with Kayfun Lite - it can be dangerous to your health.
Find comfortable strength and duration of the draw.
When using Kayfun Lite, draw should be different from what you got used to with
conventional cartomizers and tanks.
It has to be smoother and lighter.
Remember that the stronger/tighter you make a puff, the more liquid comes into the
evaporation chamber and the greater the chance of overflow.
Find comfortable for your strength and duration that would allow all e-liquid entering the
evaporation chamber to evaporate during the draw.
Find comfortable power level (voltage, resistance)
Power is the ratio of the square of the voltage to the resistance.
If you have a 2 ohm resistance coil, and the battery produces 3.7 volt - power is equal to
3.7 * 3.7 / 2 = 6.85 watts.
In practice, the "comfort zone" for most of vapers is somewhere between 8 and 12 watts.
Less than 8 watts will result in low vapor production and nicotine consumption.
More than 12 watts can result in the loss of flavor and burnt taste.
If you are using a battery mod that has variable wattage feature, you can set desired power
directly on the device.
If you are using variable voltage battery mod, measure the resistance of your coil and
calculate required voltage using following formula: Voltage = square root of the power
divided by the resistance.
Of course you can also find comfortable voltage using old school trial-and-error method.
If you are planning to use Kayfun Lite on mechanical mod or other fixed-voltage device,
calculate the target coil resistance based on desired power and voltage of your device and
then build the coil with target resistance.
For example, when using the battery mod stabilized at 3.7 volt, coil resistance of 1.6 ohms
will give you 8.56 watts of power – it is in the «comfort zone».
To quickly calculate the power / voltage / resistance, refer to the following table:
Press - draw - release
Use the rule of «Press - draw - release».
This means that you should press the power button before the draw and release it after the
draw.
This will give the coil time to heat up before draw and evaporate excess of e-liquid after it.
Do not fill the tank to the top
When refilling, leave small amount of air in the tank so there is something to expand during
the draw and e-liquid could flow into evaporation chamber.
When refilling through the вгые рщду, stop when e-liquid covers the transparent body part;
when refilling through the top cap, leave 2-3 mm of air at the top of the tank.
Keep it clean
Disassemble and wash Kayfun Lite periodically, change / Dry burn the coil, check the
integrity of the o-rings.
Treat with care
Treat Kayfun Lite with care, do not throw or drop it - it can cause damage and negative
impact on the appearance.
Do not use for other purposes
Kayfun Lite is designed for vaping only, don’t fill it with liquids not intended for vaping.
Be careful with organic wicks
Be especially careful if you are using organic materials (such as cotton) for building your
wick.
These materials, in contrast to silica, are combustible and dry-burning can’t be used with
them.
Make sure there is always enough liquid in the tank and that organic wick is soaked with eliquid all the time.
Using SS mesh wick
Oxidized stainless steel mesh wick may be used in Kayfun Lite, but this is not an intended
operation mode for the device. Consistency of operation and overall functionality of the
device in this case is not guaranteed, although it may very well work fine.
Possible problems and their solutions
The problem: Short circuit / no contact
What to do: see «Before operating Kayfun Lite»
The problem: Kayfun Lite sloshing, flooding, liquid flows out through the duct hole.
First you need to check if the tank is airtight.
If the tank is not sealed, e-liquid will pour out of it into evaporation chamber by the
principle of communicating vessels, and then it will flow through the air duct.
Check if evaporation chamber (3) is firmly screwed to the base; all o-rings are in place and
intact: (1с), (3с), (4b), and especially - (4c).
O-ring (4c) is the easiest one to lose during disassembly/assembly.
Also make sure that the transparent window (3b) is not cracked in case you use it.
Also make sure that the screw (1l) in place and tightly screwed.
If you have verified that the seal is not broken, but the problem still persists - let's try to
find and eliminate the cause.
There may be several more reasons for leaks:
The reason: Wick is too long and/or coil lies too low over the air duct.
What happens: If the wick is too long and it takes all the available space in the
evaporation chamber, then, when swollen with e-liquid, it leans to the posts (1d) and (1e)
at the level of the air duct or even higher.
Liquid begins to flow from the wick to the poles and then into the duct.
In this case the duct becomes kind of extension of the wick.
The same happens when coil lies too low over the air duct - swollen with liquid wick can
stick out between the coils and touch the poles.
What to do: shorten the wick, position it correctly on the sides of the poles, lift coil higher
over the air duct.
The reason: With each draw, evaporation chamber receives more e-liquid than can be
evaporated; as a result e-liquid floods the evaporation chamber and flows through the duct
out.
There may be several reasons for this:
Reason number 1: insufficient heating temperature, or rather lack of power (voltage) to
the coil, when coil can’t heat up to required temperature
What to do: Increase the power (voltage) on the battery mod or build a coil with less
resistance.
Probably batteries are depleted - charge/replace battery if it is the case.
Reason number 2: Too strong/long draw
Try to inhale slowly and smoothly.
You need to get used to the lighter draw, especially if you are used to hard draws of
conventional cartomizers and tanks.
Find comfortable for your strength and duration of the draw that would at the same time
allow all e-liquid entering the evaporation chamber to evaporate during the draw and
Kayfun Lite would not overflow/slosh.
You will quickly get used to this type of draw and will get the most from your Kayfun Lite.
Minor leaks may also happen if the tank is filled completely, or it is filled more than halfway
while Kayfun Lite is lying horizontally or with mouthpiece tilted down for some time.
In this case, one of the grooves (1h) could be at the top "in the air" and another one at the
bottom dipped into e-liquid.
In this case the air will escape from evaporation chamber through the top groove and eliquid will flow from the tank to the evaporation chamber through the bottom groove.
Naturally this process stops as soon as both grooves are covered with e-liquid.
Make sure that both grooves are always covered with e-liquid, keep Kayfun Lite horizontally
in such a way that the mouthpiece is always slightly higher than the evaporation chamber.
Even better, keep it in the vertical (or near vertical) position if your battery mod allows it.
Leaks may also happen when ambient temperature and/or pressure changes abruptly, for
example when you walk into a heated room from the cold or in an airplane during
takeoff/landing.
It may even happen during rapid ascent/descent in express elevator.
Solid (metal) parts of the device are expanding/shrinking with temperature/pressure
change, changing the volume of the tank and causing e-liquid to flow into the evaporation
chamber.
Pressure drop causes the process similar to what happens when you draw, just without
heating the coil.
To avoid leakage in such cases we recommend you to keep/transfer Kayfun Lite upside
down i.e. mouthpiece down.
In this case, grooves (1h) will be at the top in the «air bubble» and when the temperature
or pressure changes, air will flow between evaporation chamber and tank instead of eliquid.
The problem: Burnt taste. This problem is opposite to the leakage. Dry wick is the most
common cause of burnt taste.
The reason: Too high heating temperature, to be exact - excessive power (voltage) is
applied to the coil. This heats up the coil above desired temperature.
What to do: reduce the power (voltage) on the battery mod or install higher resistance
coil.
The reason: No liquid left in the tank.
What to do: Refill the tank
The reason: Tails of the wick are packed too tightly in the evaporation chamber.
What happens: Too tightly packed wick may block grooves (1h) and obstruct e-liquid flow
from the tank to evaporator chamber.
What to do: Place wick properly.
It must lie free over the grooves (1h) but should not be pressed against or stuck into them.
The reason: The grooves (1h) are blocked
What happens: Pieces of wick are stuck in grooves (1h)
What to do: Remove pieces of wick from grooves (1h)
The reason: Holding Kayfun Lite upside down (mouthpiece part down) all the time, for
example when lying down.
What happens: In this position liquid does not cover grooves (1h). As a result, liquid
doesn’t flow into evaporation chamber and does not saturate wick during the draw.
What to do: Do not use Kayfun Lite in this position
The reason: Too long piece of the resistance wire is left between the screws and the wick.
What happens: The pieces of resistance wire that don’t contacts the wick get easily
overheated
What to do: Adjust the coil position to eliminate long resistance wire legs not contacting
the wick.
The reason: Resistance wire is wrapped too loose around the wick
What happens: Coils that don’t contact the wick get easily overheated
What to do: Rebuild coil correctly: resistance wire should have contact with the wick along
the length of the coil
The reason: Resistance wire is wrapped too tight around the wick
What happens: Resistance wire pinches the wick and obstructs the flow of e-liquid along
it, this can be the reason of burnt taste
What to do: Rebuild coil correctly: resistance wire should not pinch the wick
The problem: Burnt taste and flooding at the same time
The reason: Yes, this can also happen if during assembly you don’t place tails of the wick
along the grooves but leave them lifted.
This is usually done out of habit - wick tails are placed this way in some popular
cartomizers.
What happens: In this case, when you draw, liquid flows into evaporation chamber, does
not find wick tails to suck into (they are raised up), eventually rises over the air duct level
and overflows.
Meanwhile coil remains dry causing burnt taste.
What to do: Install wick correctly
The problem: The draw is too tight
The reason: Very large coil and/or wick
What happens: Air flow in evaporation chamber gets obstructed
What to do: Setup the coil and wick correctly
The reason: The blockage of the air duct (1g)
What happens: Something obstructs the airflow through the duct
What to do: Remove the obstruction
WARNING: Some flavorings that make up liquids for electronic cigarettes have a
devastating impact on the polycarbonate material transparent body part is made of.
If you use such a liquid, please use metal body part instead of polycarbonate body part in
order to avoid breakage.
The manufacturer is not responsible for the destruction of a transparent body part due to
usage of «aggressive» flavors and reminds you that the transparent body part is a
consumable item and is not covered by the warranty by the manufacturer.