1
Look foward to it.
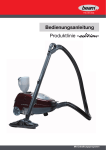
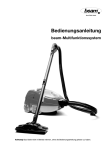
User Manual
»
« series
With descaling programme
Look foward to it.
Contents
Important Advice for Users………………………………………………… p. 3
Starting Up……………………………………………………………… p. 4 + 5
Shutting Down……………………………………………………………… p. 5
Standard Accessories / Intended Use……………………………… p. 6 + 7
Cleaning and Maintenance………………………………………………… p. 8
Boiler Descaling……………………………………………………………… p. 9
Hot Water Module Descaling…………………………………………… p. 10
Technical Data…………………………………………………………… p. 10
Service Address…………………………………………………………… p. 10
Alerts / Errors……………………………………………………………… p. 11
2
Important Advice for Users
Congratulations on the purchase of this beam product.
Your choice confirms your strong technical knowledge and your excellent taste. Ultimately, you have chosen a high-tech product, which has
been manufactured using only materials of the highest quality.
Please take the time to read the User Manual carefully before starting
Up to hand so that you can refer
your new appliance andStarting
keep the Manual
to it in the future.
This Manual contains the information you need for proper use, correct
operation, appropriate cleaning, care and maintenance of the appliance.
It is essential that you are familiar with and follow the instructions in the
Manual to ensure risk-free use, as well as your own safety during operation, cleaning, care and maintenance. This User Manual cannot foresee
every conceivable use of the appliance.
If you would like more information or if specific problems arise that are
not covered in sufficient detail in this User Manual, then please contact
bean GmbH directly to request the necessary information.
1. Description of equipment
The beam multi-function system impresses due to its ease of use, ingenious technology and enormous versatility. It sets new standards in
terms of hygiene and cleaning, makes the job much easier and saves
time, drastically reduces the use of harmful cleaning agents that are
bad for the environment, and ensures perfect cleanliness and a healthy
feel-good ambience.
2. Purpose of use
The beam multi-function system can be used for thorough cleaning of
surfaces and objects and to clear unpleasant odours from the air indoors.
3. Safety
• Please follow precisely for your own safety and for the safety of others!
3.1 Warnings
• The appliance may only be operated by people who are familiar with
its use. Remember that the steam jet may cause damage if used incorrectly.
• The appliance must not be used by children. Children do not understand the risks that may arise when dealing with electrical equipment
and, therefore, children must never be left unattended with such equipment.
• Never use a faulty appliance or an appliance with a damaged power
cable.
• Do not put cleaning agents, perfume or other chemical substances
into the tank.
• Warning! Do not suction flammable or explosive substances or hot
ash!
• Never immerse the appliance in water or other liquids. Never spray the
appliance with water.
• Never touch the steam jet. Risk of burning!
• Never aim the steam jet at people or animals. Nor at electrical sockets,
connections or equipment. Risk of burning!
• Do not use the appliance if other people are present in the working
area.
• Refrain from any unsafe working methods.
• Do not use the steam jet for direct cleaning of electronic equipment
(e.g. computers, televisions, telephones etc.).
• Before cleaning ovens, fridges etc. always disconnect the power first
to ensure these are switched off. You must follow the manufacturers‘
specific instructions.
• Warning! The appliance may not be used to clean items that contain
asbestos or other harmful substances.
• Caution! In the following instances steam may not be used or may only
be used with the greatest care: on objects made from leather, Alcantara, velour or other sensitive materials, on waxed or painted surfaces,
polished wood surfaces and for direct contact with bonding agents or
Starting Up
silicone. Please always follow the manufacturer‘s instructions. For sensitive materials carry out a test first on a sample or on an inconspicuous,
concealed area. Always start on the lowest setting. Pre-heat windows or
other glass surfaces with a low steam setting from a distance of approx.
30 cm and clean in combination with suction.
3.2 Precautionary measures
• Operation of the appliance is subject to national regulations.
• Always ensure the appliance is in proper working order before starting
up.
• Perform regular checks on the power cable, plug and steam suction
hose for damage or signs of wear.
• Do not start the appliance if the steam suction hose or power cable
are damaged.
• Place the appliance on a stable and level surface. Never place it on
warm or hot surfaces. Choose somewhere that is not accessible to children or pets.
• Do not position the appliance in direct proximity to heat sources (fires,
heaters or other heat-emitting objects).
• Position the appliance somewhere with good air circulation to prevent
overheating.
• Never expose the appliance to the weather (rain, snow, frost etc.).
• Never touch the appliance, plug or electrical cables with wet hands
or feet.
• Do not bend, squeeze or run over the steam suction hose.
• Never pull on the power cable or on the appliance itself when disconnecting the mains plug.
• Protect the power cable from heat sources, steam and oil, and from
damage by avoiding pulling, squeezing or running over the cable.
• Never leave the appliance unattended when it is connected to the
mains.
• To prevent unauthorised use of the appliance, ensure all switches are
off and the power is disconnected during breaks.
• Always disconnect from the mains before cleaning and maintenance
work.
• Only perform maintenance work that is described in the User Manual.
Only use original spare parts and accessories.
• Do not undertake any technical modifications on the appliance.
• Never repair or open the appliance yourself. Repairs may only be performed by authorised personnel.
• Take the appropriate precautions when using acidic descaling agents.
Protect sensitive surfaces, especially natural stone and wood, from
spray and droplets.
• Some drops of condensation may form at the start of steam cleaning
– wipe these up with a cloth.
Tipp:
To minimise the occurrence of condensation (caused when the steam
hose and attachments are not at operating temperature) it is recommended that you allow the steam to flow for a few seconds on the maximum
setting before starting the cleaning work. This ensures the steam hose
and attachments heat up more quickly.
3
Look foward to it.
Starting Up
Starting Up
Fill with water
Settings
1
1a)
2
2a)
Insert the plug on the
power cable into an earthed
Schuko socket.
Fill the reservoir with
tap water.
Do not use distilled water, cleaning
agents, perfume or other chemical
substances.
Switch on the main switch.
Do not operate the switch with your
foot.
1b)
Fill the filter bowl with
tap water (up to the MIN.
mark).
Close the cover. Never
stand the appliance
upright.
Press the “Steam” control
button ☞ to heat up the
appliance.
2b)
❷
❶ LED 1:
• Flashes during heat-up phase
• Stays on permanently once temperature is reached
Do not use distilled water.
❸
❶
❷ LED 2:
• Flashes when reservoir requires refill
• Flashes when filter bowl too full
• Flashes when hot water module
requires refill
1c)
Marking
separator plate
❸ LED 3:
• Flashes while the soleplate heats up
• Stays on permanently once soleplate
is up to temperature
MIN = normal fill level
MAX = filter bowl full – suction
switches off
2c)
Attach hose
1d)
Insert the connector of the
steam suction hose into the
socket until the you hear
the click of the safety hook.
Do not suction flammable or
explosive substances or hot ash.
4
❺
❹
❻
Press the “Suction” control
button 1 x ☞ to activate
the suction unit.
Look foward to it.
Starting Up
Shutting Down
Steam cleaning
We recommend:
3
3a)
❼
❿
3b)
❽
❾
Press button ❼ 1x briefly:
To switch suction On / Off, hold
down button ❼ to select suction
level.
(Image 2c)
LED 4: low suction
LED 5: medium suction
❹
❺
❻ LED 6: high suction
Pull steam lever ❽ to
trigger steam.
❿ Child lock
Set a suitable steam level
using control knob :
Turning towards - reduces the
steam level.
Turning towards + increases the
steam level.
4
4a) On low suction run approx. 1 litre of clean
water through the used parts (suction hose,
extension pipes etc.) to clean these.
4b) Unplug the appliance from the mains.
4c) Empty and clean the filter bowl.
4d) Pull out the steam suction hose for it to dry
out.
4d) Store the appliance with open filter bowl in a
well ventilated and frost-free room.
Warning! Protect the appliance from frost.
Hot water mode
3c)
Open the cover.
Fill the hot water module with
tap water and insert into the
appliance.
Button ❾ on the handle for
hot water mode:
3d)
• Hold the button down for 3 sec.:
Hot water module is activated
and LED lights up.
You will find videos on
starting up and usage at
www.beam.de/kundenportal.html
Use steam lever ❽ for an
improved soaking effect
during cleaning. Deactivate
the hot water module:
• Press button ❾ on the handle briefly,
LED goes off.
Follow the instructions on the hot
water module. Not for sensitive
materials.
5
Look foward to it.
Standard Accessories
Extension pipe
item no.: 8015GR
Steam suction hose
item no.: 801810
Brush nozzle in natural hair
item no.: 800601
NO ATTACHMENT
Extraction nozzle, 238 mm
item no.: 8020
Extension pipe
item no.: 8015GR
Upholstery, mattresses and
carpet cleaning.
Glass surfaces, windows
(display windows), mirrors
Rubber lip with brush attachment
item no.: 80202
Hard floors, e.g.: tiles, granite,
marble, wood, PVC, laminate etc.
Rubber lip insert
item no.: 80201
NO ATTACHMENT
Extraction nozzle, 146 mm
item no.: 8021
On sensitive surfaces, e.g.
parquet Reduce steam flow
Do not use hot water module
Upholstery, mattresses,
car seats, doormats and vehicle
interior cleaning
Glass surfaces, windows
and mirrors
Rubber lip with brush attachment
item no.: 802102
Rubber lip attachment
item no.: 802101
Nylon brush attachment
item no.: 802105
6
Almost all surfaces, window frames,
sills, interior doors, kitchen cupboards,
synthetic surfaces, etc.
Pre-cleaning of heavily soiled
surfaces, windows, rubber or
synthetic doormats, etc.
Look foward to it.
Standard Accessories
NO ATTACHMENT
Spot-jet nozzle
item no.: 8012
Round brush small
Perlon
Corner brush
item no.: 7110
Joint nozzle narrow
item no.: 8010
Joint nozzle broad
item no.: 8011
For corners, edges, window profiles
Mortices, siphons, tile joints
For attaching to the spot-jet nozzle.
Improves cleaning on stubborn dirt
Warning! Do not use on sensitive
surfaces or glass!
Can be used with or without
the spot-jet nozzle and
thethree-jet nozzle.
For dry suction the joint nozzles can
be used directly on the pipe or steam
suction hose.
Attaches to the appliance.
Activated using the handle.
Specifically for stubborn dirt and to
increase the soaking effect.
Open the cover
Hot water module
item no.: 8009
Funnel
Warning! Do not use on sensitive
materials!
For filling the reservoir to
produce steam.
Optional Accessories
Used on the rectangular
nozzle body for:
Rubber lip insert
item no.: 801405
Rectangular brush
item no.: 8014GR
hard floors, e.g.: tiles, granite,
marble, wood, PVC, laminate, etc.
Used on the rectangular
nozzle body for:
Is used on the handle or
with the extension pipe
Carpets, rugs, etc.
Carpet / hard floor insert
item no.: 801404
Dry suction on hard floors
7
Look foward to it.
Cleaning and Care
Cleaning, care and maintenance
Notes on the HEPA filter
It is essential to clean the appliance and the accessory parts
after use to maintain performance and function and to avoid
scaling in the hose, in the extension pipes and in the filter
bowl, which is not only unhygienic but can also lead to unpleasant odours.
Your beam multi-function system is equipped with a HEPA
filter system. The HEPA filter traps microscopic particles.
The multi-function system achieves a high filter effect in
combination with the hydro power filter. To maintain this
the HEPA filter must be regularly cleaned and replaced as
necessary.
Cleaning and care
Only wash the appliance with a damp cloth. Do not use any
aggressive cleaning agents!
Removing the HEPA filter
Maintenance
Push the two fixing clips into the centre and open the air
outlet grille and remove with the HEPA filter.
Spray the connectors of the extension pipes and the safety
handle as needed with a suitable lubricant. Replace damaged
washers.
Impurities can be removed by brushing and tapping carefully. Do not use cleaning agents or water to clean the filter.
Warning!
You must never open or dismantle the appliance. Any unauthorised access could be dangerous and void the warranty.
Always make sure the power cable and the plug are not damaged or worn. Please contact the beam Service department
for a replacement.
Checking and cleaning the HEPA filter
The HEPA filter must be replaced if it has mould, spores or
dark spots. If the HEPA filter does get wet it must be completely dry before use.
HEPA filter order no. 8090098
Notes on the mesh filter
Regular service
Inserting the mesh filter
Regular inspections at the beam Service Centre extend service life and reliability.
Lightly turn and press the filter to position it on the connector in the filter bowl.
Keep the original packaging as transport protection.
Cleaning the mesh filter
Remove the filter from the connector by turning and pulling
it at the same time. Remove any loose dirt. Tap the mesh
filter, rinse well under running water, and clean with the
spot-jet nozzle if required.
8
Look foward to it.
Descale, Rinse, Ready
After a set operating period the appliance will alert you that it needs to be descaled when it is switched on.
When this happens the appliance will be inoperable for approx. 5 seconds and the LEDs on both control knobs will flash
in sequence.
Warning! Descalers can be harmful. Read the information on the descaler packaging and follow the safety instructions.
Descalers or vinegar may cause damage to surfaces. Wipe up drops immediately. Only use suitable and
recommended descalers.
Only perform descaling on a cooled appliance.
Descaling
Rinse (perform 2 x)
Find a suitable container. Hold the
appliance over the container and empty
the boiler by opening the drain plug. Then
close it again tightly,
and switch off the main switch!
Open the cover of the
reservoir and empty
Empty the reservoir
Warning: Descaler residue can
be harmful.
Fill the reservoir with
0.5 litres of recommended
descaler* and close
the cover
Plug in the power cable,
switch on main switch.
Fill the reservoir with 1 litre of clean tap
water.
Fill
with
water
Plug in the power cable, switch on
main switch!
*QR-Code: Ordering link
for descaler
Hold down the “Steam” control button for
approx. 10 seconds to start the rinsing
programme.
Rec. descaler item no.: 8050
Internet shop www.beam.de
Hold down the “Steam”
control button for approx.
10 seconds to start the
descaling programme.
Listen to the pump at regular
intervals.
15 min.
Do not switch off or unplug the
appliance.
15 min.
There will be a beep after approx.
15 minutes as well as a visual signal –
end of rinsing programme
Do not switch off or unplug the
appliance.
Do not switch off or
unplug the appliance.
Find a suitable container. Hold the
appliance over the container and empty
the boiler by opening the drain plug. Then
close it again tightly,
and switch off the main switch!
There will be a beep after
approx. 15 minutes as well
as a visual signal – end of
descaling
Empty the reservoir
Do not switch off or unplug
the appliance.
Warning: Descaler residue can be
harmful. Rinse out carefully to get rid
of any residue.
Now perform the “Rinse”
stage
Your beam steam cleaner is now ready
for use again.
Warning! Do not operate the appliance before the complete descaling and rinsing programme has been performed.
If the descaling and rinsing programme is interrupted the entire process must be repeated.
9
Look foward to it.
Hot Water Module Descaling
Important
Use of the hot water module causes limescale to form
over time depending on the hardness of the water used.
To prevent a fault caused by limescale in the steam hose
we recommend that you descale the steam hose as described below after the hot water module has been filled
approx. 10 times.
Datenblatt
Datasheet
beam “Edition” series
Electrical connection
Nominal voltage
230 V AC 50 Hz
Total output
3350 W
Boiler nominal consumption
2200 W
Troubleshooting
(boiler made from stainless steel INOX 18/10)
No steam or hot water is produced when the steam lever
is pressed.
Motor nominal consumption
1150 W
Check whether the hose nozzle in the steam suction hose
connector is clogged with limescale.
Automatic refill system
Yes
Steam temperature max. 150 °C
Steam pressure max.
4,5 bar
Safety test
CE
Weight approx. 10 kg
Size (l x w x h)
53 x 35 x 28
Iron nominal consumption
850 W
If it is, proceed as follows:
Descaling “steam hose”
Fill the hot water module with approx. 200 ml water and
approx. 50 ml vinegar. Insert the hot water module into
the appliance and turn on the appliance as described in
the “Starting Up” video (steam in combination with hot
water module).
Warning! Press the steam lever until the full contents of
the hot water module have flushed out. Steam into a container big enough to hold all the descaling agent.
Rinse out the hot water module with clean water to remove any residue.
Please call Customer Service if this does not resolve the
problem.
Warning! Descalers can be harmful.
Note: Vinegar and descalers can damage contact surfaces. Wipe up drops immediately.
Order spare parts and accessories conveniently
from our online shop:
www.beam.de
Service Address
beam GmbH
Illertalstraße 3
D-89281 Altenstadt / Iller
Telefon: +49 (0)8337 74000
Telefax: +49 (0)8337 740010
eMail: [email protected]
10
incl. hot water module for the toughest dirt
Legal Notice
This Manual contains the information you need for proper
use, correct operation, appropriate cleaning, care and maintenance of the appliance.
It is essential that you are familiar with and follow the instructions in this User Manual to ensure risk-free use, as
well as your own safety during operation, cleaning, care and
maintenance. This User Manual cannot foresee every conceivable use of the appliance. Moreover, we hereby advise
that the content of this User Manual does not constitute part
of an earlier or existing agreement, undertaking or legal position, nor does it amend the same. All obligations on the
part of beam GmbH arise from the specific purchase agreement in question. The User Manual contains information
that is protected by copyright. Any copying or translation into
another language must be approved in writing in advance by
beam GmbH.
Guarantee
Our Terms of Guarantee apply to the guarantee and warranty.
Look foward to it.
Alerts / Errors
Alert CauseRemedy
LED 11 on handle flashing and a Hot water module empty
Refill hot water module
“short interval” beep sounds and check the bottle is
positioned correctly
Distilled water in the Empty the hot water module and refill
hot water module
with tap water
LED 3 on “Steam” control button
Water reservoir for steam Fill water reservoir with clean
flashing and a “long interval” production empty
tap water
beep sounds
Filter bowl reached max. fill level Empty filter bowl and fill with
fresh water up to MIN. marking
LEDs on both control buttons
Appliance has limescale
Perform descaling, see page 9
flashing in sequence
LED 1 on “Steam” control button
Appliance heating up
Stops flashing after approx 3 minutes,
flashing
appliance is then ready to use.
During work the flashing merely advises you
that heating is correct
LEDs 4 to 6 on “Suction” control Suction not yet activated
Press the “Suction” control button once
button flashing briefly with the suction hose inserted
Error CauseRemedy
Suction getting weaker
Mesh filter dirty
Clean mesh filter, see page 8
Foreign body in hose Check suction hose for foreign
bodies and remove these
Hepa filter and black strainer Check filter, clean and replace if
dirty or worn out needed
Suction runs briefly, but then
Too much water in the filter bowl,
Empty filter bowl and refill with
stops max. fill level reached
fresh water up to the MIN marking
Separator plate not fully or Push the separator plate in the filter
incorrectly positioned bowl downwards, or correct position
Sensors and filter bowl dirty Clean filter bowl with built-in
parts
Poor steam performance
Limescale in hose
Descale hose, see page 10
No steam coming out Child lock activated
Release child lock on handle
Hot water module activated, Press button 9 on the handle
LED 11 lit or flashing briefly to deactivate the hot water module
again and then press the steam lever
Steam very wet Hot water module activated Press button 9 on the handle briefly to
deactivate the hot water module again
Too much or too little steam
Steam flow control knob Set the right steam flow using
in wrong position
the control kno
Hot water module not working Not activated on handle Press button 9 on the handle
for 3 seconds until LED 11 lit
Hot water module not fully Remove hot water module
engaged from appliance and then reinsert
Limescale in hot water pump Perform hot water descaling,
see page 10
No function on handle Contact problem
Check whether steam suction hose is
correctly inserted into the connector
11
Look foward to it.
beam. A clean affair.
beam GmbH
Illertalstraße 3 • D-89281 Altenstadt
Tel. +49 (0)8337 740021 · Facsimile: +49 (0) 8337-7400-10
www.beam.de