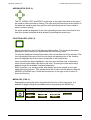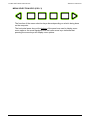
1
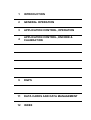
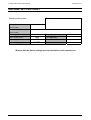
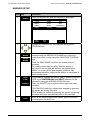
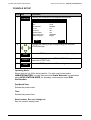
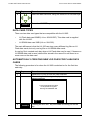
OPERATORS MANUAL
FOR THE
LH 665 VRT
SERIAL APPLICATION CONTROL
LH No. 020-801-UK Version 1.00
LH Technologies Denmark ApS
Mølhavevej 2
9440 Aabybro
Denmark
Tel. +45 9696 2500
Fax. +45 9696 2501
Internet: http://www.lh-agro.com/
1
INTRODUCTION
2
GENERAL OPERATION
3
APPLICATION CONTROL, OPERATION
4
APPLICATION CONTROL, ENCODE &
CALIBRATION
9
DGPS
11
DATA CARDS AND DATA MANAGEMENT
12
INDEX
Introduction
INTRODUCTION ..............................................................................................................1.3
MACHINE SETTING CHART ...........................................................................................1.5
INTRODUCTION
1.2
LH 665 VRT OPERATORS MANUAL
LH AGRO
LH 665 VRT OPERATORS MANUAL
INTRODUCTION
INTRODUCTION
Congratulations on purchasing the LH 665 advanced DGPS computer.
The LH 665 is an advanced and reliable product, which, - if used in accordance
with this manual – will prove to be a reliable tool for many years to come.
Your new LH 665 is designed to be user friendly, which makes operation easy – in
the form of a large screen, and clearly marked back-lit keys. The LH 665 is
furthermore, upgradeable via a PCMCIA card, which ensures that you can
implement future developments without having to remove the unit from the vehicle.
The LH 665 can be used for yield monitoring as well as application control and
navigation purposes. The LH 665 can furthermore be used with DGPS for
precision farming purposes.
This operator's manual is split up so that each function is described individually.
We recommend, that you start by reading the chapter concerning operating the
LH 665. After reading this chapter, You will feel more comfortable operating the
LH 665, which will give you a good foundation for delving further into the LH 665
as described in the remaining chapters describing the individual functions.
A machine-setting chart is included in this manual. This machine setting chart
contains information needed for correct operation and will, as a rule, be filled in by
the engineer when the unit is fitted.
LH AGRO
1.3
INTRODUCTION
LH 665 VRT OPERATORS MANUAL
We have endeavoured to deliver a fault free product. To ensure optimal use of the
equipment we ask that great attention be paid when reading the manual. We are
more than happy to help should any queries arise, both when the product is used
for the first time and at any later date. Regarding responsibility for use of the
product we refer to our sales and delivery terms especially paragraph 7, which
follows:
7.
7.2
Product usage.
•
Any use of the product is at the sole risk of the buyer. The
buyer is therefore not entitled to any form for compensation
caused by, for example, any of the following:
•
Disturbance to/from any electronic services or products that do
not confirm to the standards for CE marking,
•
Missing or poor signal coverage or a succession hereof from
external transmitters/receivers, used by the buyer,
•
Functional faults, which apply to or from a PC-program or PCequipment, not delivered by the seller,
•
Faults that may arise from the buyers negligence to react to
warnings and fault messages from the product, or which can be
traced to negligence and/or absent constant control of the work
carried out in comparison to the planned job.
When implementing any new equipment the buyer must take great care
and pay attention. Any doubts as to correct operation/use should
result in contacting the sellers service department.
This manual may not be altered, copied or manipulated in any way. Unoriginal
manuals can lead to operational faults damaging machines or crops as a
consequence thereof. LH Agro can therefore not be held responsible for damages
incurred, which can be traced to the use of unoriginal or manipulated manuals.
Original manuals can be requisitioned at any time from LH Agro.
With regards
LH Technologies Denmark ApS
Mølhavevej 2
9440 Aabybro
Denmark
Tel. +45 96 96 25 00
Fax. +45 96 96 25 01
1.4
LH AGRO
LH 665 VRT OPERATORS MANUAL
INTRODUCTION
MACHINE SETTING CHART
Machine setting chart:
Dealer:
Fitting date:
(Not encoded)
Machine type:
(Not encoded)
Monitor –serial number:
Box calibration:
GPS Check Sum
OFF
Volt calibration:
Primary speed sensor
GPS
Controller make:
WHEEL
Controller model:
Secondary speed sensor
! Ensure that the above settings are encoded before work commences.
LH AGRO
1.5
INTRODUCTION
1.6
LH 665 VRT OPERATORS MANUAL
LH AGRO
General operation
OVERVIEW ......................................................................................................................2.2
OPERATING THE LH 665 ................................................................................................2.3
ON/OFF SWITCH (POS. 1)......................................................................................2.3
AREA OVERRIDE SWITCH (POS. 5)......................................................................2.3
THE SCREEN ..........................................................................................................2.3
USING THE KEYS ...................................................................................................2.3
ARROW KEYS (POS. 6)......................................................................................2.4
FUNCTION KEYS (POS. 4) .................................................................................2.4
MENU KEY (POS. 2) ...........................................................................................2.4
MENU SELECTION KEYS (POS. 3)....................................................................2.5
NOTES .............................................................................................................................2.6
GENERAL OPERATION
LH 665 VRT OPERATORS MANUAL
OVERVIEW
Screen section A
7
1
Screen section B
6
2
5
Screen section C
3
4
Pos. Description
2.2
1
ON/OFF switch.
2
Menu key.
3
Menu selection keys.
4
Function keys.
5
Arrow keys.
6
Area override switch.
7
PCMCIA –drive for data cards.
LH AGRO
LH 665 VRT OPERATORS MANUAL
GENERAL OPERATION
OPERATING THE LH 665
ON/OFF SWITCH (POS. 1)
The LH 665 is switched on and off with the switch positioned in the upper left-hand
corner. The computer will not react if the computer is switched off by mistake
whilst, e.g. copying data until the task is finished.
Note!
The possibility to make a back up of data to a data card is given every
time the LH 665 is switched off. Copying the data to a data card is
necessary if the unit is used in connection with DGPS to produce field
maps. Press the COPY key if this is desired. If no backup is required
then simply press the CANCEL key.
AREA OVERRIDE SWITCH (POS. 5)
The switch in the lower right-hand corner is used for manually stopping the area
counter. The area counter status is shown on the display.
Note!
The computer controlling the implement is fitted with a sensor that
automatically starts and stops the area counter dependant on the
implement status. The manual area override switch should only be
used, therefore, when the signal from the automatic sensor is not
desired.
THE SCREEN
The screen is split into three sections. The top section (A) always shows the field,
load, DGPS status and the data card status.
The middle section (B) shows the functions selected using the function keys (pos.
4).
The lower section (C) shows the function of the menu selection keys (pos. 3); the
grain type being harvested and the area count status.
The middle section (B) can also be split into two using the SHOW/HIDE MAP key.
Pressing the SHOW MAP key will display a map of the field if DGPS equipment is
connected.
USING THE KEYS
The LH 665 is operated using “soft keys” (the function of the key changes in
relation to the operating program). There are four main groups; arrow keys,
function keys, menu key, menu selection keys.
LH AGRO
2.3
GENERAL OPERATION
LH 665 VRT OPERATORS MANUAL
ARROW KEYS (POS. 6)
The UP, DOWN, LEFT and RIGHT arrow keys on the right-hand side of the panel
are used to select and alter a setting. The right and left arrow keys at the bottom of
the panel are used to page through the menu selections and are never used to
select or alter a setting.
An arrow symbol is displayed in the main operating screen next to the field or the
load; this symbol indicates what is altered by pressing the arrow keys.
FUNCTION KEYS (POS. 4)
Screen section B on the LH 665 has four sub-sections. The function/information
displayed in these sections is determined with the function keys.
To alter the displayed function/information, the sub-section has to be selected. The
four sub-sections are next to the function keys and pressing one of the function
keys will highlight the section that corresponds to the function key.
Once a section has been highlighted, use the menu election keys to determine
which function/information the section will have. Pressing the lower arrow keys
pages through the available functions/information.
Some functions, e.g. working width, also display an arrow symbol on the righthand side of the function. This indicates that the function can be altered using the
ARROW UP/DOWN keys. Press the function key to the right of the function to
leave this function.
MENU KEY (POS. 2)
Repeatedly pressing the menu key alters the function of the menu keys. It is
possible to page through the available menus by pressing the MENU key.
Key
Function
Repeatedly pressing this key pages through the following options:
FIELD
CAL
2.4
LOAD
SETUP
HIDE MAP
OPTIONS
DIAG.
LH AGRO
LH 665 VRT OPERATORS MANUAL
GENERAL OPERATION
MENU SELECTION KEYS (POS. 3)
The function of the menu selection keys alters depending on what is being done
on the computer.
The horizontal arrow keys at the bottom of the panel are used to display more
menu options. An arrow displayed over the lower arrow keys indicates that
pressing the arrow keys will display more options.
LH AGRO
2.5
GENERAL OPERATION
LH 665 VRT OPERATORS MANUAL
NOTES
2.6
LH AGRO
Application control,
operation
THE APPLICATION CONTROL PROGRAM ....................................................................3.2
DATA PER FIELD ....................................................................................................3.2
OPERATION.....................................................................................................................3.3
SETTING THE LH 665 TO APPLICATION CONTROL ............................................3.3
DEFINING FIELDS BEFORE START ......................................................................3.4
STARTING AND NAMING FIELDS..........................................................................3.5
START NEW FIELD .................................................................................................3.5
START NEW LOAD .................................................................................................3.6
USING LOAD NUMBERS ........................................................................................3.6
CHANGING BETWEEN THE ENCODED FIELD AND LOAD NUMBERS ...............3.7
CHANGE FIELD...................................................................................................3.7
CHANGE LOAD ...................................................................................................3.7
SELECTING THE TARGET FILE.............................................................................3.7
MARKERS................................................................................................................3.8
THE CONNECTION BETWEEN FIELD AND LOAD KEYS......................................3.9
FUNCTION KEYS ..................................................................................................3.10
TARGET RATE ..................................................................................................3.10
ACTUAL RATE ..................................................................................................3.10
AREA .................................................................................................................3.10
WORKING WIDTH.............................................................................................3.11
TOTAL UNITS....................................................................................................3.11
GROUND SPEED ..............................................................................................3.11
AREA PER HOUR .............................................................................................3.11
DISTANCE .........................................................................................................3.11
TGT FILE RATE.................................................................................................3.12
GPS INFORMATION .........................................................................................3.12
LAT/LON ............................................................................................................3.12
COMPASS HEADING........................................................................................3.12
ELEVATION .......................................................................................................3.13
CARD INFORMATION.......................................................................................3.13
DATE/TIME ........................................................................................................3.13
TARGET FILE ....................................................................................................3.13
FIELD NAME......................................................................................................3.13
LOAD NAME ......................................................................................................3.14
LIGHT BAR PASS NUMBER .............................................................................3.14
MAP ZOOM........................................................................................................3.14
DIAGNOSTICS ...............................................................................................................3.15
SYSTEM DIAGNOSTICS .......................................................................................3.15
SENSOR DIAGNOSTICS.......................................................................................3.16
GPS DIAGNOSTICS ..............................................................................................3.16
RAW NMEA............................................................................................................3.17
APPLICATION CONTROL, OPERATION
LH 665 VRT OPERATORS MANUAL
IMPORTANT
Correct encodement and calibration of the LH 665 are essential before
correct operation of the following functions.
The procedure for encoding and calibration of the LH 665 are described in the
respective chapters in this operator’s manual.
THE APPLICATION CONTROL PROGRAM
The most important functions for application control are:
Application rates
Area
•
Target rate
•
Area covered for the field
•
Actual rate
•
Actual working width
•
Average actual rate
•
Hectare per hour
•
Total units
Forward speed
•
Kilometres per hour
•
Distance
Other functions
•
Date and time
•
Map zoom
DATA PER FIELD
All application control data is connected to a field number, this is to ease data
registration.
3.2
•
Each field has a number and can be given a name.
•
Each field can use only one application task.
•
Each field can be split into loads.
•
Each load can be, e.g. a spreader full, a hopper load, etc.
•
Each load has a number and can be given a name.
•
The sum of, i.e. the area, the distance, etc. for each individual
load, is equal to the total for the field.
LH AGRO
LH 665 VRT OPERATORS MANUAL
APPLICATION CONTROL, OPERATION
OPERATION
SETTING THE LH 665 TO APPLICATION CONTROL
The LH 665 may need setting up for application control. The following procedure
sets the computers “operating mode”.
Step Key
1
Procedure
Press the MENU key until the following menu selection keys
appear at the bottom of the display (screen section C):
CAL
2
SETUP
Press the SETUP key to display the following:
SWATH
3
MARKS
CROP
CARD
Press the lower ARROW keys until the following is displayed:
LOAD
4
DIAG
SETUP
CONSOLE
VEHICLE
CONSOLE
MEMORY
Press the MONITOR key and this screen is displayed:
CONSOLE SETUP
Operating Mode
APPLICATION RATE
Day/Month/Year
1/06/1999
Time
11:23
Serial Number
9800085
Box cal.
774
Voltage cal.
487
GPS Check Sum
OFF
Field Marker input
INTERNAL
EDIT
EXIT
Use the ARROW UP/DOWN keys to highlight Operating
Mode.
5
6
LH AGRO
EDIT
Press the EDIT key and select APPLICATION RATE
using the ARROW UP/DOWN keys.
ACCEPT
When APPLICATION RATE has been selected under
Operating Mode press the ACCEPT key.
3.3
APPLICATION CONTROL, OPERATION
LH 665 VRT OPERATORS MANUAL
DEFINING FIELDS BEFORE START
It is practical to encode all fields (with names if required) before work commences.
Field numbers are controlled by the LH 665 and are shown on the upper left-hand
side of the display (screen section A) (F1:, F2:,etc). To the right of the field number
a name of max. 8 characters can be encoded (i.e. F1: TOPFIELD).
It is easiest to use the field numbers that are allocated in the farm’s field plans if
this is possible. In practice many fields in the field plans are split up into smaller
“part” fields and these lots are allocated an extra level, e.g. F1.1, F1.2, etc. In
these cases, the field name in the LH 665 can be utilised to organise the field
numbers in the LH 665 in relation to the field numbers in the field plans.
Example:
Field no. in the LH 665
F1:
F2
F3
Field name in the LH 665
F1.1
F1.2
F2
The field number encoded in the field name is the same as the field number in the
farm’s field plans.
255 fields can be stored in the LH 665. Do not start more fields than necessary in
the LH 665, as they cannot be deleted individually and take up space in the
memory.
3.4
LH AGRO
LH 665 VRT OPERATORS MANUAL
APPLICATION CONTROL, OPERATION
STARTING AND NAMING FIELDS
Step Key
1
Procedure
Press the MENU key until the following menu selection keys
appear at the bottom of the display (screen section C):
FIELD
2
FIELD
LOAD
HIDE MAP
OPTIONS
Press the FIELD key twice to show the following screen:
F1:
DG
ACTIVE FIELD
F1:
PRESS TO EDIT NAME
PRODUCT
PRODUCT 1
ACCEPT
ACTIVE CONFIGURATION
CONTROLLER
LH 5000
VIEW
CONFIG
CHANNEL
N/A
CANCEL
3
If there is not a rectangular box around the field section press
the function key to the right of the section.
4
Press the right ARROW key to move the cursor and use,
thereafter, the ARROW UP/DOWN keys to select the letter.
Move the cursor to the right using the right ARROW key. The
field name can have max. 8 characters. If the active
configuration is correct, press the ACCEPT key.
5
6
VIEW
CONFIG
ACCEPT
If the configuration is incorrect and needs changing, press
the VIEW CONFIG key and follow the steps 4 to 7 as
described on page 3.7.
Press the ACCEPT key.
START NEW FIELD
Step Key
LH AGRO
Procedure
1
Follow steps 1 – 3 as described above.
2
Press the ARROW UP key until CREATE NEW FIELD is
displayed. Name the field and select the correct crop type as
described above, press the ACCEPT key.
3.5
APPLICATION CONTROL, OPERATION
LH 665 VRT OPERATORS MANUAL
START NEW LOAD
The procedure for starting new loads is almost the same as described above for
starting new fields.
Step Key
1
Procedure
Press the MENU key until the following menu keys are
displayed at the bottom of the screen (screen section C).
FIELD
2
LOAD
LOAD
MARKS
Press the LOAD key twice to display the following screen:
F1:
L1:
DG
ACTIVE LOAD
L1:
PRESS TO EDIT NAME
PRODUCT
PRODUCT 1
ACTIVE CONFIGURATION
CONTROLLER
LH 5000
ACCEPT
CHANNEL
N/A
CANCEL
3
The loads can be named and the procedure for this is the
same as for naming fields.
4
Press the ACCEPT key.
ACCEPT
Note!
We recommend creating new loads as the need arises and not like
fields before harvest.
USING LOAD NUMBERS
Typically the fields will be worked as one load. It is not necessary to split the fields
into loads unless it is required. The following example shows a field split into two
loads.
Example of a field split into two loads:
Load 1
3.6
Load 2
This example shows how it is possible to
split a field into two different loads.
The marked area (load 2) shows an area
of the field that was, e.g. wet.
LH AGRO
LH 665 VRT OPERATORS MANUAL
APPLICATION CONTROL, OPERATION
CHANGING BETWEEN THE ENCODED FIELD AND LOAD NUMBERS
Small arrows are shown to the left of the field/load number (screen section A). The
field numbers can be paged through if the arrows are to the left of the field
number. If however the arrows are to the left of the load number then paging
though the loads is possible.
CHANGE FIELD
If the small arrows are not to the left of the field number, pressing the FIELD key
allows paging through all fields using the ARROW UP/DOWN keys.
Press the ACCEPT key to accept the field.
CHANGE LOAD
If the small arrows are not to the left of the load number, pressing the LOAD key
allows paging through all fields using the ARROW UP/DOWN keys.
Press the ACCEPT key to accept the load.
SELECTING THE TARGET FILE
To select the file used for the application task, do as follows:
If the LH 665 is to be used for logging data only and not controlling the application
rate, select NONE when selecting the target file.
Step Key
Procedure
Press the MENU key until the following menu selection keys
appear at the bottom of the display (screen section C):
1
FIELD
LOAD
SHOW MAP
Press the FIELD key twice.
2
FIELD
3
VIEW
CONFIG
Press the VIEW CONFIG key.
4
EDIT
TGT FILE
Press the EDIT TGT FILE key.
5
OPTIONS
Select the target file using the ARROW UP/DOWN keys and
press the ACCEPT key (the file information can be viewed by
pressing the VIEW INFO key).
ACCEPT
6
7
8
LH AGRO
ACTIVE
ON/OFF
EXIT
ACCEPT
Press the ACTIVE ON/OFF key and a "tick" will appear in
the ACTIVE box on the display.
Press the EXIT key.
Press the ACCEPT key.
3.7
APPLICATION CONTROL, OPERATION
LH 665 VRT OPERATORS MANUAL
MARKERS
The internal markers in the LH 665 are used together with DGPS positions to mark
positions in the field whilst working, i.e. wet areas, weeds, stones, etc.
Step Key
1
Procedure
Press the MENU key until the following menu selections keys
are displayed at the bottom of the screen (screen section C):
FIELD
2
MARKS
LOAD
SHOW MAP
OPTIONS
Pressing the MARKS key displays the following:
MARK 1
MARK 2
MARK 3
MARK 4
The marker name and type can be altered, and the
procedure for this is described in the ENCODE chapter under
MARKER SETUP.
CONTINUOUS marking is started and stopped by pressing
the key.
SPOT marking is started by pressing the key and stops
automatically after a few seconds.
The LH 665 beeps and the marker being used flashes when
one or more markers are being used.
3.8
LH AGRO
LH 665 VRT OPERATORS MANUAL
APPLICATION CONTROL, OPERATION
THE CONNECTION BETWEEN FIELD AND LOAD KEYS
The following example shows how, amongst others, the total weight shown is
affected when the LOAD key is pressed or not:
Step Key
Procedure
1
Press on of the four FUNCTION keys to highlight a section
on the screen.
2
Whilst the section is highlighted press the lower ARROW
keys until the WEIGHT key is shown, then press this key.
3
Press the MENU key until the following menu selection keys
are shown at the bottom of the display (screen section C):
FIELD
LH AGRO
LOAD
SHOW MAP
OPTIONS
4
LOAD
The total units for the load can be seen when the LOAD key
is pressed. If the total units for another load is to be seen
then change the load (see page 3.7).
5
FIELD
The total units for the field can be seen when the FIELD key
is pressed. If the total units for another load is to be seen
then change the load (see page 3.7).
It is possible to switch between showing information for a
field or a load.
3.9
APPLICATION CONTROL, OPERATION
LH 665 VRT OPERATORS MANUAL
FUNCTION KEYS
All function keys are displayed in the following manner:
Step Key
Procedure
1
Screen section B is split up in four sub-sections. Each subsection has a corresponding function key to the right of the
screen.
Press one of the function keys to highlight one of the subsections.
2
Pressing the lower ARROW keys whilst the sub-section is
highlighted displays the available function keys. Pressing one
of these keys will change the function to the selected and the
display will return to normal.
TARGET RATE
Step Key
1
TARGET
RATE
Procedure
XX.XX x/ha
The target rate for the present position in the field. This can
be set to automatic (where the amount to be applied is taken
from the target file selected) or manual (where the amount to
be applied can be manually adjusted in steps, the size of the
steps is encoded as described on page 4.4).
Select between automatic or manual target rate using the
LEFT/RIGHT ARROW keys.
ACTUAL RATE
Step Key
1
ACTUAL
RATE
Procedure
XX.XX x/ha
The actual rate (from the controller). When the implement
sensor is active (not counting area) the average rate is
displayed.
AREA
Step Key
1
3.10
AREA
Procedure
XX.XXX ha
The worked area for the present field or load.
LH AGRO
LH 665 VRT OPERATORS MANUAL
APPLICATION CONTROL, OPERATION
WORKING WIDTH
Step Key
1
SWATH
Procedure
X.XX M
The present working width in metres sent from the implement
controller.
Press the lower RIGHT ARROW key to display more functions.
TOTAL UNITS
Step Key
1
TOTAL
UNITS
Procedure
XXXXX units
Total units for the present field or load.
GROUND SPEED
Step Key
1
GROUND
SPEED
Procedure
XX.X km/hr
The actual speed displayed in kilometres per hour.
AREA PER HOUR
Step Key
Procedure
1
XX.X ha/hr
The present work rate displayed in hectares per hour.
AREA
PER HR
DISTANCE
Step Key
1
DISTANCE
Procedure
XXX M
The measured distance for the present field or load (the
distance displayed is normally for the load and will only be
displayed for the whole field when the field key is displayed).
Press the lower RIGHT ARROW key to display more functions.
LH AGRO
3.11
APPLICATION CONTROL, OPERATION
LH 665 VRT OPERATORS MANUAL
TGT FILE RATE
Step Key
1
TGT FILE
RATE
Procedure
XX.X Units/ha
The application rate as defined by the target file. This
function can be used if the target rate has been set to
manual and the rate from the file is required to be seen.
GPS INFORMATION
Step Key
Procedure
1
This function presupposes that GPS equipment is
connected.
SAT X
The number of satellites that positional signals are being
received from.
FRQ X.X
The frequency of the positional transmitter (beacon or geostationary transmitters).
DIFF/OFF
Differential signal status.
SNR X.X
Signal to Noise Ratio for beacon or geo-stationary systems.
GPS
INFO
LAT/LON
Step Key
Procedure
1
This function presupposes that GPS equipment is
connected.
XX.XXXXXX N
Latitude displayed in degrees, minutes and ten thousands of
a minute.
XX.XXXXXX E
Longitude displayed in degrees, minutes and ten thousands
of a minute.
LAT
LON
COMPASS HEADING
3.12
Step Key
Procedure
1
This function presupposes that GPS equipment is
connected.
X.X deg
The direction of travel expressed as degrees. When driving
north the compass heading is 0.0 degrees, when driving east
the compass heading will be 90.0 degrees.
COMPASS
HEADING
LH AGRO
LH 665 VRT OPERATORS MANUAL
APPLICATION CONTROL, OPERATION
Press the lower RIGHT ARROW key to display more functions.
ELEVATION
Step Key
1
ELEV
Procedure
This function presupposes that GPS equipment is
connected.
XXX M
The height above sea level displayed in metres.
CARD INFORMATION
Step Key
1
CARD
INFO
Procedure
XX.X % SPACE FREE
The logging time in percent remaining on the data card.
DATE/TIME
Step Key
1
DATE
TIME
Procedure
DATE XX/XX/XXXX
The present date.
TIME XX:XX
The present time.
TARGET FILE
Step Key
Procedure
1
Information contained in the selected target file.
TARGET
FILE
Press the lower RIGHT ARROW key to display the last functions.
FIELD NAME
Step Key
1
LH AGRO
FIELD
NAME
Procedure
XXXXXXXX
The selected field’s name.
3.13
APPLICATION CONTROL, OPERATION
LH 665 VRT OPERATORS MANUAL
LOAD NAME
Step Key
Procedure
1
XXXXXXXX
The selected load’s name.
LOAD
NAME
LIGHT BAR PASS NUMBER
Step Key
Procedure
1
X A-B
The present pass number.
LIGHTBAR
PASS #
MAP ZOOM
3.14
Step Key
Procedure
1
XXX m
When in automatic zoom, the map on the screen will
automatically zoom in or out to fill as much of the screen as
possible.
Pressing the RIGHT arrow key allows for manual zoom of the
map. Use the ARROW UP/DOWN keys to zoom in or out.
Pressing the LEFT arrow key returns the map zoom function
to automatic zoom.
MAP
ZOOM
LH AGRO
LH 665 VRT OPERATORS MANUAL
APPLICATION CONTROL, OPERATION
DIAGNOSTICS
It is possible to see various information in the diagnostic menus for faultfinding
purposes.
Each diagnostic menu can be left by pressing the EXIT key.
The displayed information and what it can be used for is described in the chapters
that concern the information.
Step Key
1
Procedure
Press the MENU key until the following menu selection keys
are displayed (screen section C):
CAL.
2
DIAG
DIAG
SETUP
Press the DIAG key to display the following menu selection
keys (page through the available diagnostics using the
LEFT/RIGHT ARROW keys):
SYSTEM
SENSORS
GPS
RAW NMEA
SYSTEM DIAGNOSTICS
Step Key
1
SYSTEM
Procedure
Press the SYSTEM key to display the following:
SYSTEM DIAGNOSTICS
Hardware version
Vesta: 1.7
Serial number
9800085
ROM version
2.21
Program version
4.1.2
Operating memory
18944 bytes
Storage memory
314566 bytes
Vehicle battery
13.7 Volts
EXIT
LH AGRO
3.15
APPLICATION CONTROL, OPERATION
LH 665 VRT OPERATORS MANUAL
SENSOR DIAGNOSTICS
Step Key
Procedure
1
Press the SENSOR key to display the following:
SENSOR
SENSOR DIAGNOSTICS
Flow rate
X.XXXX uns/sec
Ground speed
X.X km/hr
Master/Drive A Switch
X.XXX volts
EXIT
GPS DIAGNOSTICS
More information about the following two diagnostic menus can be found in the
DGPS chapter in this manual.
Step Key
Procedure
1
Press the GPS key to display the following:
GPS
GPS DIAGNOSTICS
UTC TIME
XX:XX:XX
Latitude
XXXXX.XXXX N
Longitude
XXXXX.XXXX E
ELEVATION
XXX m
GPS Speed
X.X km/hr
Number of satellites
X
Differential Status
ON
Beacon/Sat. Frequency
X.XXXX
Differential SNR
XX.X
HDOP/PDOP
X.X / X.X
Antenna/Rcvr. Voltage
X.XX / X.XX
ADD-ON
GPS
EXIT
Pressing the ADD-ON GPS key displays information for the
LH ADD-ON GPS module. This key has no function if no
such module is fitted.
3.16
LH AGRO
LH 665 VRT OPERATORS MANUAL
APPLICATION CONTROL, OPERATION
RAW NMEA
Step Key
Procedure
1
Press the RAW NMEA key to display the following:
RAW NMEA
NMEA DIAGNOSTICS
DG
Valid GGA and VTG strings…
$GPGGA, 162021.00, 4849.91914,N, 01112.1394
$GPVTG, 178,T,178, M, 006.46, N, 011.97, K*44
EXIT
GGA and VTG strings are not shown if a LH ADD-ON GPSmodule is fitted, as the positional signals from these modules
use a different format.
LH AGRO
3.17
APPLICATION CONTROL, OPERATION
LH 665 VRT OPERATORS MANUAL
NOTES
3.18
LH AGRO
Application control,
Encode & calibration
ENCODE ..........................................................................................................................4.2
ENCODE MENUS/VALUES .....................................................................................4.2
CREATING A CONTROLLER FOR APPLICATION CONTROL ..............................4.3
ADVANCED SETTINGS ......................................................................................4.5
APPLICATION CONTROL SETUP ..........................................................................4.6
MARKER SETUP .....................................................................................................4.7
DATA CARD SETUP................................................................................................4.8
LOAD SETUP...........................................................................................................4.8
CONSOLE SETUP...................................................................................................4.9
MEMORY SETUP ..................................................................................................4.10
GPS SETUP...........................................................................................................4.11
MAP SETUP...........................................................................................................4.11
CALIBRATION................................................................................................................4.12
THE CALIBRATION MENUS .................................................................................4.12
AREA CALIBRATION.............................................................................................4.12
FORWARD SPEED................................................................................................4.13
FAULTFINDING..............................................................................................................4.14
NOTES ...........................................................................................................................4.16
APPLICATION CONTROL, ENCODE & CALIBRATION
LH 665 VRT OPERATORS MANUAL
ENCODE
The necessary values for application control are encoded in the following menus.
ENCODE MENUS/VALUES
All encodements are selected as follows (presupposes APPLICATION
CONTROL is selected under Operating Mode as described on page 3.3):
Step Key
Procedure
Press the MENU key until the following menu selection keys
are displayed at the bottom of the screen (screen section C):
1
CAL
2
3
SETUP
SETUP
DIAG
Press the SETUP key.
Page through the available encode menus using the lower
ARROW keys:
APP RATE
CONFIG
MARKS
CARD
LOAD
CONSOLE
MEMORY
GPS
MAP
When encoding a numerical value simply pressing the arrow keys will move the
cursor to the next digit, e.g. if a value of 12.4 is to be encoded, use the left arrow
key to select the first digit (1) arrow up until 1 is displayed. Now move the cursor to
the right using the right arrow key and encode the value 2, move the cursor to the
right again.
4.2
LH AGRO
LH 665 VRT OPERATORS MANUAL
APPLICATION CONTROL, ENCODE & CALIBRATION
CREATING A CONTROLLER FOR APPLICATION CONTROL
The following procedure should be followed to "create" an implement controller in
the LH 665:
Step Key
1
Procedure
Press the MENU key until the following menu selection keys
appear at the bottom of the display (screen section C):
CAL
2
SETUP
APP RATE
CONFIG
4
CREATE
NEW
DIAG
Press the SETUP key to display the following:
APP RATE
CONFIG
3
SETUP
MARKS
CARD
LOAD
Press the APP RATE CONFIG key.
Press the CREATE NEW key and the following is displayed:
APP RATE CONFIG
Controller Make
LH AGRO
Controller Model
LH 5000
Product
PRODUCT 1
Units
KG
Ground Speed Sensor
GPS
App Distance From GPS
0 ft fwd
Full Swath
From Controller
Tgt Units:Controler Units
1:1.0000
Target Rate Increment
1.0
Actual Rate Scale Factor
1.000
EDIT
EXIT
Use the ARROW UP/DOWN keys to highlight the required
encodement.
5
6
EDIT
ADVANCED
SETTINGS
Press the EDIT key and select the required value using the
ARROW UP/DOWN keys.
Press the ADVANCED SETTINGS key to alter any of the
advanced settings described on page 4.5.
Controller Make/Model:
Select LH AGRO as the Controller Make and LH 5000 as the Controller
Model.
Product:
Select the product to be used. The name of the product can be edited in the
second screen that appears when the EDIT key has been pressed.
LH AGRO
4.3
APPLICATION CONTROL, ENCODE & CALIBRATION
LH 665 VRT OPERATORS MANUAL
Units:
Select the units to be used in the main operating screen. If the unit of measure to
be used is KG, it is necessary to select another unit of measure, return to the main
operating screen, then return back to setup and alter the unit of measure to KG.
This will be fixed in later version.
Ground Speed Sensor:
As the LH 665 is not fitted with any wheel sensor GPS must be selected as the
Ground Speed Sensor. Forward speed will be calculated via the DGPS signals the
LH 665 receives.
App Distance From GPS:
This is the distance in feet (3 feet = approx. 1 metre) from the DGPS antenna to
the position that the aggregate is applied.
Example:
The DGPS antenna is fitted on the top of the tractor cab, a fertiliser distributor is
being used and the fertiliser hits the ground 20 metres behind the spreader. The
distance from the DGPS antenna to the back of the fertiliser spreader is 4 metres.
The distance to be entered is; 20 metres + 4 metres = 24 metres (approx. 72 feet).
As the implement is behind the antenna this should be entered as 72 Ft back.
Full Swath:
This cannot be altered in this version.
Tgt Units:Controller Units:
The default setting is 1:1.0000. This ratio is used to convert the units in a target file
to the units of application for the aggregate. DO NOT ALTER THIS SETTING.
Target Rate Increment:
This setting determines how much the application rate is increased/decreased by
when in manual mode.
Actual Rate Scale Factor:
The default setting is 1.000. This setting is used if problems arise in the logged file
(*.yld) due to large application amounts.
If the setting is 1.000 the actual rate in the log file will correspond to the actual
rate.
If the setting is 0.100 the actual rate in the log file will correspond to 10% of the
actual rate.
If the setting is 0.010 the actual rate in the log file will correspond to 1% of the
actual rate.
4.4
LH AGRO
LH 665 VRT OPERATORS MANUAL
APPLICATION CONTROL, ENCODE & CALIBRATION
ADVANCED SETTINGS
Target Rate Outside Field:
The default setting is Zero. This setting is used to determine what rate should be
applied if the implement is outside the field boundary (from the target file).
When the default setting (Zero) is used and the implement is not in the field
boundary, the application rate will be set to 0.
If TGT default is selected then the default rate (from the file) will be used if the
implement is not in the field boundary.
If Use last is selected then the last rate applied before the implement left the field
boundary will be used.
Controller Time Delay:
The time, in seconds, the implement takes to adjust the present rate to a newer
rate.
Actual Rate Units:
Ignore this setting.
Log Actual Rate:
The default setting is YES. If no log of what has actually happened in the field is
required set this to NO.
LH AGRO
4.5
APPLICATION CONTROL, ENCODE & CALIBRATION
LH 665 VRT OPERATORS MANUAL
APPLICATION CONTROL SETUP
Step Key
1
APP RATE
CONFIG
Procedure
Press the APP RATE CONFIG key and this screen is
displayed:
APP RATE CONFIG
PRODUCT
CONTROLLER
CHANNEL
PRODUCT 1
LH 5000
N/A
EDIT
SETTINGS
2
DELETE
EXIT
Highlight the controller that is to be encoded using the
ARROW UP/DOWN keys.
3
EDIT
SETTINGS
Press the EDIT SETTINGS key if any of the settings for the
selected controller are to be altered (see above for
description of settings).
4
CREATE
NEW
Pressing the CREATE NEW key creates a new controller as
described on page 4.3.
DELETE
Press the DELETE key if a controller/product is to be
deleted.
5
6
4.6
CREATE
NEW
EXIT
When the controller settings are correct press the EXIT key.
LH AGRO
LH 665 VRT OPERATORS MANUAL
APPLICATION CONTROL, ENCODE & CALIBRATION
MARKER SETUP
Step Key
1
MARKS
Procedure
Press the MARKS key and the following is displayed:
MARKER SETUP
MARK
NAME
TYPE
MARK 1
Stones
SPOT
MARK 2
Weeds
CONTINUOUS
MARK 3
Draining
CONTINUOUS
MARK 4
Other
EDIT
NAVN
2
3
EDIT
NAME
EDIT
TYPE
ACCEPT
5
LH AGRO
EXIT
Highlight the marker to be encoded with the ARROW
UP/DOWN keys.
SAVE
NAME
4
EDIT
TYPE
SPOT
EXIT
After pressing this key the name of the marker can be
changed using the ARROW UP/DOWN keys. Move the
cursor from letter to letter using the RIGHT/LEFT ARROW
keys.
Press the SAVE NAME key when the marker name is
encoded.
The marker name does not affect how the marker is
registered in the LH 665. All markers are registered as
marker 1-4 in the LH 665 and mapping software. We
recommend therefore, noting which marker is associated to
which marker name.
It is possible to change the marker type by pressing the EDIT
TYPE key. CONTINUOUS and SPOT markers can be
selected by using the ARROW UP/DOWN keys.
Press the ACCEPT key once the marker type have been
encoded.
CONTINUOUS marking is started and stopped by pressing
the marker key during operation.
SPOT marking is started by pressing the marker key during
operation and stops automatically after a few seconds.
When all the marker names and marker types have been
encoded press the EXIT key.
4.7
APPLICATION CONTROL, ENCODE & CALIBRATION
LH 665 VRT OPERATORS MANUAL
DATA CARD SETUP
As many data card and data management functions are the same for all
operating modes in the LH 665, the functions are described in the DGPS and
DATA CARD AND DATA MANAGEMENT chapters in this manual.
LOAD SETUP
Step Key
1
LOAD
Procedure
Press the LOAD key and this screen is displayed:
LOAD SETUP
Field:
Load:
Speed Sensor
Start Date:
5
19/9/2000
16:15
Controller
LH AGRO LH 5000
EXIT
Highlight the setting to be changed using the ARROW
UP/DOWN keys.
3
4
L10:
WHEEL
Start Time:
EDIT
2
F1: HILTON
EDIT
A
ACCEPT
EXIT
When the setting is highlighted, press the EDIT key.
Alter the setting using the ARROW UP/DOWN keys and
press the ACCEPT key.
Press the EXIT key when all the settings are correct.
Speed sensor:
The sensor used for the selected load is encoded here. WHEEL is normally used.
4.8
LH AGRO
LH 665 VRT OPERATORS MANUAL
APPLICATION CONTROL, ENCODE & CALIBRATION
CONSOLE SETUP
Step Key
1
CONSOLE
Procedure
Pressing the CONSOLE key displays this screen:
CONSOLE SETUP
Operating Mode
APPLICATION RATE
Day/Month/Year
3/10/2000
Time
14:00
Serial number
9900085
Box cal
774
Voltage cal
487
GPS Check Sum
OFF
Field marker input
INTERNAL
EPROM Language
English
EDIT
2
3
4
5
EXIT
Highlight the setting to be changed using the ARROW
UP/DOWN keys.
EDIT
ACCEPT
EXIT
Press the EDIT key when the required setting is highlighted.
Alter the setting using the ARROW UP/DOWN keys and
press the ACCEPT key
Press the EXIT key when all of the settings are encoded.
Operating Mode:
Select what the LH 665 is being used for. For bulk crop harvest select
HARVESTMASTER, for grain harvest select Grain Harvest, for application
select APPLICATION RATE, for boundary measurement select Site
Verification.
Day/Month/Year:
Encode the present date.
Time:
Encode the present time.
Serial number, Box cal, Voltage cal.:
See the machine setting chart.
LH AGRO
4.9
APPLICATION CONTROL, ENCODE & CALIBRATION
LH 665 VRT OPERATORS MANUAL
GPS Check Sum:
If the DGPS receiver sends a “check sum” then set this encodement to ON. The
standard setting is OFF.
Field marker input:
Select whether the internal markers are used (select INTERNAL) or whether an
external marking module is used (select EXTERNAL).
EPROM language:
Select the operating language of the LH 665.
MEMORY SETUP
Step Key
Procedure
1
Press the MEMORY key to display this screen:
MEMORY
MEMORY SETUP
Active Field/Load:
Field:
F9: HILTON
Load: PRODUCT 1
L10:
Fields
Loads
243
Loads (All Modes)
245
Available memory
378628 bytes
% Memory used
28 %
CLEAR
LOAD
2
CLEAR
LOAD
3
ERASE
MEMORY
4
PRINT
SUMMARY
5
4.10
EXIT
119
ERASE
MEMORY
PRINT
SUMMARY
EXIT
Pressing this key allows selection of a load to be deleted.
Pressing the CLEAR ALL key will delete all loads in
APPLICATION RATE mode without deleting the field
names.
Pressing this key removes all fields and loads from the
memory. All field names will be erased; the kg-calibration for
the individual crop types will be erased.
Not available in this version.
To leave this menu, press the EXIT key.
LH AGRO
LH 665 VRT OPERATORS MANUAL
APPLICATION CONTROL, ENCODE & CALIBRATION
GPS SETUP
This key has no function unless an ADD-ON GPS model 3000, 3050, or 3100 is
connected to the LH 665. If such a module is connected, please read the DGPS
chapter. Leave this menu using the EXIT key.
MAP SETUP
Step Key
1
MAP
Procedure
Press the MAP key to display this screen:
MAP SETUP
Coverage Map
ON
Boundary Map
ON
Target Map
ON
EDIT
2
3
4
5
EXIT
Highlight the setting to be changed using the ARROW
UP/DOWN keys.
EDIT
ACCEPT
EXIT
Press the EDIT key when the required setting is highlighted.
Alter the setting using the ARROW UP/DOWN keys and
press the ACCEPT key
Press the EXIT key when all of the settings are encoded.
Coverage Map:
Leave this on the default setting of ON if a map is required to be displayed on the
screen. If this is set to OFF, no map will be displayed on the screen.
Boundary Map:
Leave this on the default setting of ON. If a boundary map has been created using
the BOUNDARY function, the field boundary will be displayed.
Target Map:
When this is set to the default setting of ON, a map will be displayed on the screen
and erased
LH AGRO
4.11
APPLICATION CONTROL, ENCODE & CALIBRATION
LH 665 VRT OPERATORS MANUAL
CALIBRATION
These menus allow calibration of the functions that are necessary for application
control.
THE CALIBRATION MENUS
All the calibration menus are selected as follows (presupposes APPLICATION
RATE is selected as the operating mode as described on page 3.3).
Step Key
1
Procedure
Press the MENU key until the following menu selection keys
are displayed
CAL
2
CAL
SETUP
DIAG
Press the CAL key and the following calibration menu items
will be displayed:
AREA
DISTANCE
AREA CALIBRATION
After working a field with a known area it is possible to calibrate the LH 665 so
that the measured area is the same as the actual area. Differences in area arise
when working, i.e. short work when conditions do not allow for continuous
adjustment of the working width.
Step Key
1
Press the AREA key.
2
Press the top function key to select the field to be area
calibrated. Select the field using the ARROW UP/DOWN
keys.
2
Highlight the ACTUAL HA section with the function key and
adjust the actual area to the known area using the ARROW
UP/DOWN keys.
3
4
5
4.12
AREA
Procedure
PERFORM
CAL
ACCEPT
EXIT
Press the PERFORM CAL key when the actual area has
been encoded. The measured area will be adjusted to be the
same as the actual area.
Press the ACCEPT key and select the next field for area
calibration.
Press the EXIT key when all required fields are area
calibrated.
LH AGRO
LH 665 VRT OPERATORS MANUAL
APPLICATION CONTROL, ENCODE & CALIBRATION
FORWARD SPEED
This calibration is for the secondary speed sensor only, which is not fitted as
standard.
Step Key
1
DISTANCE
Procedure
Press the distance key and the following is displayed:
DISTANCE CALIBRATION:
SELECT SENSOR:
WHEEL
ENTER
DISTANCE
2
Select which sensor the LH 665 receives the secondary
speed signal from (normally WHEEL, see the encodement
chapter).
3
ENTER
DISTANCE
Measure a 100-metre stretch and drive to the start mark. HA
ON must be displayed (screen section C). Press the ENTER
DISTANCE key.
4
CLEAR
DISTANCE
Press the CLEAR DISTANCE key to reset the distance
counter.
5
START
TRAVEL
Press the START TRAVEL key and drive the measured 100metre stretch. The distance travelled is counted.
STOP
TRAVEL
Stop exactly at the stop mark and press the STOP TRAVEL
key.
PERFORM
CAL
Adjust ACTUAL DISTANCE with the ARROW UP/DOWN
keys to 100 m and press the PERFORM CAL key.
6
4
5
LH AGRO
EXIT
ACCEPT
EXIT
PRESS THE accept KEY TO ACCEPT THE FORWARD
SPEED CALIBRATION.
Press the EXIT key twice when forward speed calibration is
finished.
4.13
APPLICATION CONTROL, ENCODE & CALIBRATION
LH 665 VRT OPERATORS MANUAL
FAULTFINDING
Fault
Cause
Solution
The application
rate on the
implement
controller =0:
No connection between the
LH 665 and the implement
controller.
Check the connection
between the LH 665 and the
implement controller.
The LH 665 is receiving no
DGPS signals.
See "No DGPS signal (D or
G not displayed)" on page
4.15.
The implement is outside the If the implement is outside
field boundary.
the field boundary and the
"Target rate outside field"
setting is set to Zero the
application rate will be = 0.
See page 4.5
The application rate from the Check that the application
target file = 0.
rate for the area being
applied.
The area measured
in the LH 665 is
not the same as
the implement
controller:
No connection between the
LH 665 and the implement
controller.
Check the connection
between the LH 665 and the
implement controller.
GPS speed is different than
actual forward speed
displayed on the implement
controller.
The accuracy of GPS speed
varies depending on the
quality of the DGPS receiver.
The forward speed sensor
on the implement controller
has not been calibrated
correctly.
Calibrate the forward speed
sensor fitted to the
implement controller.
The LH 665 did not count
area when the application
rate is 0.
The LH 665 only measures
area when the application
rate is greater than 0.
The working width (swath)
If the implement controller is
displayed on the LH 665 = 0. working and the working
width is greater than 0,
check the connection
between the LH 665 and the
implement controller.
The area override switch is
The area override switch
"down" on the front of the LH must be "up" to measure
665
area.
4.14
LH AGRO
LH 665 VRT OPERATORS MANUAL
APPLICATION CONTROL, ENCODE & CALIBRATION
Fault
Cause
Solution
Nothing is shown
on the display:
The main cable to the LH
665 is not connected or
damaged
Check that the main cable is
connected and not damaged.
An external unit, i.e. a DGPS Disconnect all external units
receiver is connected
and switch the LH 665 on. If
incorrectly.
the display on the LH 665
works then check the
connections to the external
unit.
One of the LH 665 sensor
cables is damaged or
incorrectly connected.
Disconnect all sensors one
by one until the display
works. The last wire to be
disconnected may be
damaged.
No DGPS signal (D The DGPS receiver is not
or G not
sending any signals to the
displayed):
LH 665.
Some DGPS receivers can
take up to 15 minutes to
“lock” on to a signal when
they are started for the first
time.
Check that all connections
are good and that the cable
is not damaged.
Wrong cable between the LH Both the LH 665 and the
665 and the DGPS receiver. DGPS receiver can be
damaged if the cable
between the LH 665 and the
DGPS receiver is incorrect.
The DGPS receiver is
connected to the wrong
socket on the LH 665.
LH AGRO
The DGPS receiver must be
connected to “PORT 1” on
the LH 665.
4.15
APPLICATION CONTROL, ENCODE & CALIBRATION
LH 665 VRT OPERATORS MANUAL
NOTES
4.16
LH AGRO
DGPS
DGPS OPERATION..........................................................................................................9.2
DGPS STATUS ON THE SCREEN..........................................................................9.2
GPS DIAGNOSTICS ................................................................................................9.3
RAW NMEA..............................................................................................................9.4
DGPS ENCODEMENT .....................................................................................................9.5
GPS SETUP.............................................................................................................9.5
NMEA MESSAGE ................................................................................................9.5
GPS/PORT CONFIGURATION............................................................................9.5
BEACON DIFFERENTIAL....................................................................................9.6
DGPS
LH 665 VRT OPERATORS MANUAL
DGPS OPERATION
This chapter describes operating the LH 665 in conjunction with DGPS for yield
logging, field boundary measurement and application rate control.
There are many ways to show DGPS information in the LH 665 and they are
described here, as these are common for all operating modes.
DGPS STATUS ON THE SCREEN
The current DGPS status is shown in the top right corner of the display, if logging
positional data has been selected. The following describes various different status
situations:
9.2
--
Shows that logging has been selected, but that no data is being
transferred to the data card, e.g. the machine is stopped.
--Î
Î
Shows that logging has been selected but that no positional signals
are being received either from satellites or the differential transmitter.
DGÎ
Î
Shows that the LH 665 is receiving a GPS and a differential signal.
The GPS receiver has a signal from at least 4 satellites (3
dimensional). The arrow indicates that the data is being logged to a
data card.
DG
As above, but the data is not being logged to a data card.
GÎ
Î
Shows that the LH 665 is receiving a GPS signal, but no differential
signal. The GPS receiver is receiving signals from at least 4 satellites
(3 dimensional). The arrow indicates that data is being logged to a
data card.
DgÎ
Î
shows that the LH 665 is receiving a GPS and a differential signal. The
GPS receiver is receiving signals from 3 satellites (2 dimensional). The
arrow indicates that data is being logged to a data card.
LH AGRO
LH 665 VRT OPERATORS MANUAL
DGPS
GPS DIAGNOSTICS
Step Key
1
Procedure
Press the menu key until the following menu selection keys
are displayed at the bottom of the screen (screen section C):
CAL
2
DIAG
Press the DIAG key to display the following:
DIAG
3
GPS
DIAG
SETUP
SENSORS
GPS
RAW NMEA
Pressing the GPS key displays the following:
GPS DIAGNOSTICS
UTC TIME
16:18:02
Latitude
04850.1417 N
Longitude
01112.1672 E
Elevation
498 m
GPS speed
0.0 km/hr
Number of satellites
6
Differential Status
ON
Beacon/Sat. Frequency
0.0000
Differential SNR
0.0
HDOP/PDOP
1.2 / 0.0
Receiver Voltage
0.00
ADD-ON
GPS
EXIT
Pressing the ADD-ON GPS key displays information about
the ADD-ON GPS module. This key has no function if no
such module is fitted.
UTC Time:
Greenwich Mean Time (GMT), the current time at Greenwich, England.
Latitude:
Latitude displayed in degrees, minutes and part minutes.
Longitude:
Longitude displayed in degrees, minutes and part minutes.
Elevation:
The height above sea level displayed in metres.
GPS Speed:
The present forward speed, calculated from, the DGPS receiver, displayed in kph.
Number of satellites:
Displays the number of satellites signals are being received from.
LH AGRO
9.3
DGPS
LH 665 VRT OPERATORS MANUAL
Differential Status:
ON or OFF shows whether differential signals are being received or not.
Beacon/Sat. Frequency:
Displays the frequency that differential signals are being received from when
beacon or geo-stationary differential receivers are used.
Differential SNR:
The Signal to Noise Ratio shows the strength of the differential signal in relation to
background interference. A suitable SNR is between 10 to 18 (the higher the
better).
HDOP/PDOP:
HDOP expresses the quality of the horizontal GPS position. PDOP expresses the
distance between the satellites signals are being received from. When the
satellites are close to each other the PDOP value will be high and the positional
data is not as accurate as a low PDOP.
Receiver Voltage:
If this shows 5 volts or higher then the antenna is not connected to the DGPS
receiver (only if an ADD-ON GPS module is fitted). When the antenna is fitted
correctly 0.5 or less is displayed.
RAW NMEA
Step Key
1
RAW NMEA
Procedure
The following screen is displayed when the RAW NMEA key
is pressed:
NMEA DIAGNOSTICS
DG
Valid GGA and VTG strings…
$GPGGA, 162021.00, 4849.91914,N, 01112.1394
$GPVTG, 178,T,178, M, 006.46, N, 011.97, K*44
EXIT
The NMEA strings are not shown if an ADD-ON GPS module
is connected.
9.4
LH AGRO
LH 665 VRT OPERATORS MANUAL
DGPS
DGPS ENCODEMENT
There are some things that must be set up before the LH 665 can log positional
data to a data card. These settings are the same for all operating modes and we
refer to the DATA CARD chapter in this operator’s manual.
GPS SETUP
If an ADD-ON GPS model 3000, 3050 or 3100 is fitted there are some
encodements needed for correct operation. A description of these encodements
follows:
Step Key
1
GPS
Procedure
Press the GPS key and this screen is displayed:
GPS SETUP
NMEA MESSAGE
GPS/PORT CONFIGURATION
BEACON DIFFERENTIAL
SATELLITE DIFFERENTIAL
LIGHTBAR
GUIDANCE
EDIT
2
3
4
EXIT
Highlight the setting to be changed using the ARROW
UP/DOWN keys.
EDIT
EXIT
Press the EDIT key when the required menu is selected.
When all GPS encodements are finished, press the EXIT key
NMEA MESSAGE
The ADD-ON GPS module uses the Trimble TSIP protocol for transmitting
positional data to the LH 665. This means that NMEA strings are not used and are
not shown under RAW-GPS diagnostics.
GPS/PORT CONFIGURATION
It is not necessary at present to change any of these settings and we recommend
therefore that no encodements take place.
LH AGRO
9.5
DGPS
LH 665 VRT OPERATORS MANUAL
BEACON DIFFERENTIAL
Selecting this allows encodement of the beacon receiver (only available if an ADDON GPS module is fitted).
The beacon receiver can be encoded as to how it searches for differential signals.
The three methods are selected thus:
Step Key
Procedure
Highlight BEACON DIFFERENTIAL using the ARROW
UP/DOWN keys.
1
2
EDIT
Press the EDIT key and this screen is displayed:
BEACON SETUP
Mode:
Auto Range
Channel 0 Frequency
AUTO
Channel 1 Frequency
AUTO
EDIT
EXIT
3
Select which setting is to be altered using the ARROW
UP/DOWN keys.
4
Press the EDIT key when the required setting is highlighted.
EDIT
5
When the settings are encoded press the EXIT key.
EXIT
Mode:
The beacon receiver has three possible methods of searching for a differential
signal, which of the three possibilities depends on local conditions:
•
Auto Range; Standard setting. The receiver finds and remembers the three
closest beacon transmitters.
•
Auto Power; the receiver finds and remembers the three beacon transmitters
in the receiver range that send the strongest signal. The differential signal
used will always be the strongest.
•
Manuel; the two frequencies to be used must be manually encoded.
Channel 0/1 Frequency:
Encode the two frequencies that the beacon receiver is to receive signal on if
MANUEL is selected under Mode.
9.6
LH AGRO
Data cards and data
management
DATA CARDS.................................................................................................................11.2
DATA CARD SET-UP.............................................................................................11.2
USING DATA CARDS ....................................................................................................11.4
THE FIRST TIME A DATA CARD IS USED ...........................................................11.4
DATA CARD TYPES..............................................................................................11.5
AUTOMATICALLY CREATING NEW LOG FILES FOR FLASH DATA CARDS ....11.5
AUTOMATICALLY CREATING NEW LOG FILES FOR SRAM DATA CARDS .....11.6
KG CALIBRATION AND DATA LOGGING TO A CARD ........................................11.7
DATA MANAGEMENT....................................................................................................11.7
COPY TO CARD................................................................................................11.7
SHOW ALL FILES..............................................................................................11.8
ERASE ALL........................................................................................................11.8
FILE OPTIONS ..................................................................................................11.8
COPY TO FILE ..................................................................................................11.8
RESTORE FILE .................................................................................................11.8
ERASE FILE ......................................................................................................11.8
LOG FILE ...............................................................................................................11.9
CHANGING THE LOG FILE...............................................................................11.9
CREATE FILE ....................................................................................................11.9
FILE NAMES ..........................................................................................................11.9
YIELD FILES......................................................................................................11.9
FILED BOUNDARY FILES.................................................................................11.9
APPLICATION RATE FILES ..............................................................................11.9
NAVIGATION FILES ..........................................................................................11.9
UPGRADING THE LH 665 ...........................................................................................11.10
DATA CARDS & DATA MANAGEMENT
LH 665 VRT OPERATORS MANUAL
DATA CARDS
This chapter discusses all data card related functions found in the LH 665. This
chapter is for all operating modes as all data card functions are almost the same
for all operating modes
DATA CARD SET-UP
The LH 665 must be set-up to log positional data to a data card.
Step Key
1
Procedure
Press the MENU key until the following menu selection keys
are shown at the bottom of the display (screen section C):
CAL.
2
SETUP
3
4
DIAG
SETUP
Press the SETUP key.
Page through the available encodement menus using the
ARROW keys:
CARD
APP RATE
CONFIG
MARKS
CARD
LOAD
CONSOLE
MEMORY
GPS
MAP
Press the CARD key to display this screen:
CARD SETUP
Logging device
MEMORY CARD
Logging interval
2 seconds
Log file
EDIT
99010501.yld
COPY TO
CARD
SHOW ALL
FILES
EXIT
Highlight the setting to be changed using the ARROW
UP/DOWN keys.
5
6
7
11.2
EDIT
ACCEPT
EXIT
When the setting is highlighted press the EDIT key.
Alter the setting using the ARROW UP/DOWN keys and
press the ACCEPT key.
When all settings have been encoded press the EXIT key.
LH AGRO
LH 665 VRT OPERATORS MANUAL
DATA CARDS & DATA MANAGEMENT
Logging device:
Select whether yield and positional data is to be written directly to a data card if
GPS equipment is connected (select MEMORY CARD) or if no data logging if no
GPS equipment is connected (select NONE).
Logging interval:
This setting determines how often yield and positional data is written to the data
card. The interval to select depends on the PC program being used to create field
maps. Selecting 1-second intervals will probably result in more positions than the
PC program needs. Ask the PC program supplier for more information.
The following shows how the logging interval and logging hours relate:
Logging hours / logging interval
1 sec.
2 sec.
3 sec.
0.5 MB card
6.7
13.5
20.3
1.0 MB card
15.7
31.5
47.3
2.0 MB card
33.8
67.6
101.4
4.0 MB card
69.8
139.7
209.5
Many different file types can be stored on the data card if the data card is larger
than 4MB, which makes it difficult to determine the number of logging hours per
logging interval
Log file:
It is possible to select which file applied rates and positional data are written in
(see page 11.8).
LH AGRO
11.3
DATA CARDS & DATA MANAGEMENT
LH 665 VRT OPERATORS MANUAL
USING DATA CARDS
THE FIRST TIME A DATA CARD IS USED
Insert the data card in the LH 665 before the unit is switched on. The LH 665
automatically determines the data card type. If the data card being used is
different than the one supplied with the LH 665 then the procedure is as follows:
Step Key
Procedure
1
Switch the LH 665 off.
2
Insert the data card and switch the LH 665 on again.
3
This screen is displayed:
CARD TYPE: UNKNOWN
Select card type
SRAM CARD
ATA FLASH CARD
ACCEPT
4
5
CANCEL
Select the card type being used using the ARROW
UP/DOWN keys.
ACCEPT
Press the ACCEPT key and the following screen may be
displayed (depending on data card type):
CARD TYPE: SRAM
Select SRAM Card size
256 KB
512 KB
1 MB
2 MB
4 MB
Other SRAM Sizes not supported
ACCEPT
11.4
CANCEL
LH AGRO
LH 665 VRT OPERATORS MANUAL
Step Key
6
7
DATA CARDS & DATA MANAGEMENT
Procedure
Select the data card size using the ARROW UP/DOWN keys.
ACCEPT
Press the ACCEPT key.
DATA CARD TYPES
There are two data card types that are compatible with the LH 665:
•
LH Flash data card 32MB (LH no. 904-665RC). This data card is supplied
with the LH 665.
•
LH SRAM data card 1MB (LH no. 904-565).
The main difference is that the LH 665 can store many different log files on LH
Flash data cards, but only one log file on LH SRAM data cards.
A new log file is created each day when a LH Flash data card is used. If however a
LH SRAM data card is used, data will be stored in the same file until there is no
more room on the data card.
AUTOMATICALLY CREATING NEW LOG FILES FOR FLASH DATA
CARDS
The following procedure is for when the LH 665 is switched on for the first time
each day:
Step Key
Procedure
1
Switch the LH 665 on with the card inserted.
2
After starting the following is displayed:
CREATE LOG FILE
A new log file must be created
for 22/4/1999 to log data
New log file: 99042201.YLD
ACCEPT
3
LH AGRO
ACCEPT
CANCEL
Pressing the ACCEPT key will create a new log file for the
day.
11.5
DATA CARDS & DATA MANAGEMENT
LH 665 VRT OPERATORS MANUAL
AUTOMATICALLY CREATING NEW LOG FILES FOR SRAM DATA
CARDS
The following procedure is for when the LH 665 is switched on for the first time
each day:
Step Key
Procedure
1
Switch the LH 665 on with the data card inserted.
2
After starting the following is displayed:
SELECT LOG FILE
Log file 99042202.YLD
Currently exists for 24/4/1999
Press ACCEPT to add to this file
Press ERASE FILE to initialise card
ACCEPT
3
4
ACCEPT
ERASE
FILE
ERASE
FILE
CANCEL
Pressing the ACCEPT key adds data to the existing log file.
Pressing the ERASE FILE displays the following screen:
ERASE FILE
WARNING:
File 99042202.YLD will be erased from
the card
Press ERASE to continue…
Press CANCEL to abort
ERASE
11.6
CANCEL
LH AGRO
LH 665 VRT OPERATORS MANUAL
Step Key
5
ERASE
DATA CARDS & DATA MANAGEMENT
Procedure
Pressing the ERASE key deletes the data on the card and
displays the following screen:
CREATE LOG FILE
A new log file must be created
for 22/4/1999 to log data
New log file: 99042201.YLD
ACCEPT
6
ACCEPT
CANCEL
Press the ACCEPT key and a new file for the day is created.
KG CALIBRATION AND DATA LOGGING TO A CARD
It is possible to copy the memory to a data card when the LH 665 is switched off.
This copying of the memory to a data card is necessary when the LH 665 is used
together with DGPS equipment as the kg calibration data is also copied to the data
card.
Press the COPY key and kg calibration data and the memory are copied to the
data card. The LH 665 will automatically switch off after copying the data.
The data card must not be removed until the LH 665 switches off.
DATA MANAGEMENT
As all of the functions under CARD SETUP are similar for all operating modes they
are described one by one in the following:
The following functions are found under CARD SETUP follow steps one to four on
page 11.2.
COPY TO CARD
Step Key
1
LH AGRO
COPY TO
CARD
Procedure
Pressing the COPY TO CARD key, copies all data in the LH
665 to the data card.
11.7
DATA CARDS & DATA MANAGEMENT
LH 665 VRT OPERATORS MANUAL
SHOW ALL FILES
Step Key
1
SHOW ALL
FILES
Procedure
Shows all files on the data card. It is possible to page
through the files using the ARROW UP/DOWN keys.
ERASE ALL
Step Key
1
ERASE
ALL
Procedure
Removes all files found on the data card.
Use this function with caution!
FILE OPTIONS
Step Key
1
FILE
OPTIONS
Procedure
Pressing this key displays more functions for the selected
file:
COPY TO FILE
Step Key
1
COPY TO
FILE
Procedure
Pressing this key copies all data from the LH 665 to the data
card.
RESTORE FILE
Step Key
1
RESTORE
FILE
Procedure
Pressing this key copies the selected file from the data card
to the LH 665.
Use this function with caution! Only use this function
after much thought. Loss of data will almost always
occur when restoring files (depending on the age of the
file being restored).
ERASE FILE
Step Key
1
11.8
ERASE
FILE
Procedure
Deletes the selected file from the data card.
Use this function with caution!
LH AGRO
LH 665 VRT OPERATORS MANUAL
DATA CARDS & DATA MANAGEMENT
LOG FILE
All files on the data card are shown when EDIT is selected for log file under
CARD SETUP; it is also possible to create a new file.
CHANGING THE LOG FILE
Step Key
1
ACCEPT
Procedure
The file to be logged to can be selected using the ARROW
UP/DOWN keys.
CREATE FILE
Step Key
1
CREATE
FILE
Procedure
A new log file is created when the CREATE FILE key is
pressed.
FILE NAMES
YIELD FILES
The LH 665 always names log files with the suffix YLD. The files are named after
the date and the number of files on the data card with the same date. The first
yield file created on, i.e. 25/07-1999 will be named 99072501.YLD. If other log files
are created on the same day the last two digits will be changed, so the second log
file for 25/07-1999 will be named 99072502.YLD and so on.
FILED BOUNDARY FILES
When the LH 665 is used for field boundary measurements, the log file will be
saved with the suffix BDY. The files are named in the same way as yield files.
APPLICATION RATE FILES
Application rate files created on the farm’s PC are named by the software used to
create the task. All files of this type are suffixed TGT.
A log file is created automatically by the LH 665 when an application rate task is
carried out. These log files contain information of what actually happened in the
field and are named as for yield files.
NAVIGATION FILES
Navigation files created on the farm’s PC are named by the software used to
create the navigation file. All file of this type are suffixed PFN.
LH AGRO
11.9
DATA CARDS & DATA MANAGEMENT
LH 665 VRT OPERATORS MANUAL
UPGRADING THE LH 665
The operating software for the LH 665 is under constant development. It is
possible to upgrade the LH 665 via a data card, or via a PC connection, which
means that the LH 665 can be upgraded with out removing the monitor.
The procedure for upgrading the LH 665 via a data card is as follows:
Step Key
1
2
SHOW
FILES
Procedure
Insert the data card that contains the upgrade file and switch
the LH 665 on. Press the SHOW FILES key.
Select the upgrade file to be used with the ARROW
UP/DOWN keys, press the ACCEPT key.
The LH 665 will be upgraded with the new operating
software.
Each time the LH 665 is switched on it looks for a valid upgrade file on the data
card. If no new upgrade file is found the LH 665 starts normally. If there is a new
upgrade file on the data card and this upgrade is not required press the CANCEL
key.
ACCEPT
Upgrading the LH 665 should only be done if necessary. It is always a good idea
to contact LH Agro before upgrading the LH 665.
LH Agro cannot be held responsible for any data loss in connection with upgrading
the LH 665.
11.10
LH AGRO
Index
INDEX.............................................................................................................................12.2
INDEX
LH 665 VRT OPERATORS MANUAL
INDEX
-A-
Copy to card ......................................11.7
Actual rate..........................................3.10
Copy to file.........................................11.8
Actual rate scale factor ........................4.4
Coverage map ...................................4.11
Actual rate units ...................................4.5
Create file ..........................................11.9
Advanced settings ...............................4.5
Creating a controller for application
control ..................................................4.3
App. rate config....................................4.6
-D-
Application distance from GPS Antenna
.............................................................4.4
Data card information.........................3.13
Application rate control setup...............4.6
Data card types..................................11.5
Application rate files...........................11.9
Data cards .........................................11.4
Area ...................................................3.10
Data logging.........................................3.7
Area Calibration .................................4.12
Data per field .......................................3.2
Area override switch ............................2.3
Date .....................................................4.9
Area per hour.....................................3.11
Date/Time ..........................................3.13
Arrow keys ...........................................2.4
Defining fields before start ...................3.4
Automatically creating log files for SRAM
data cards ..........................................11.6
Diagnostics ........................................3.15
Automatically creating new log files for
FLASH data cards .............................11.5
Differential status .................................9.4
-BBeacon mode (Add-On GPS only).......9.6
Beacon setup (Add-On GPS only) .......9.6
Beacon/Sat. frequency.........................9.4
Boundary map ...................................4.11
Box cal .................................................4.9
-CChanging fields ....................................3.7
Changing loads....................................3.7
Changing the log file ..........................11.9
Channel 0/1 Frequency (Add-On GPS
only) .....................................................9.6
Differential SNR ...................................9.4
Distance.............................................3.11
-EElevation (height above sea level) .......9.3
Encode.................................................4.2
Encode menus/Values.........................4.2
EPROM Language.............................4.10
Erase all.............................................11.8
Erase file............................................11.8
Erase memory ...................................4.10
-FField boundary files............................11.9
Field marker input ..............................4.10
Clear loads.........................................4.10
Field name .........................................3.13
Compass heading..............................3.12
File names .........................................11.9
Controller make/model.........................4.3
File options ........................................11.8
Controller time delay ............................4.5
Forward speed calibration..................4.13
12.2
LH AGRO
LH 665 VRT OPERATORS MANUAL
INDEX
Full swath.............................................4.4
Menu selection keys ............................2.5
Function keys.......................................2.4
-N-
-G-
Navigation files ..................................11.9
GPS Diagnostics..........................3.16;9.3
NMEA Messages (Add-On GPS only) .9.5
GPS Information ................................3.12
NMEA Strings ......................................9.4
GPS Setup.........................................4.11
No DGPS signal (D or G not displayed)
...........................................................4.15
GPS Speed..........................................9.3
GPS/Port configuration (Add-On GPS
only) .....................................................9.5
Nothing is shown on the display ........4.15
Number of satellites .............................9.3
GPS-Check sum ................................4.10
-O-
Ground speed ....................................3.11
On/Off switch .......................................2.3
Ground speed sensor ..........................4.4
Operating mode ...................................4.9
-H-
Operating the LH 665...........................2.3
HDOP/PDOP .......................................9.4
Operation .............................................3.3
Height above sea level.......................3.13
Overview..............................................2.2
-I-
-P-
Introduction ..........................................1.3
Product ................................................4.3
-L-
-R-
Latitude ................................................9.3
Raw NMEA ........................................3.17
Latitude/Longitude .............................3.12
Receiver voltage ..................................9.4
Lightbar pass # ..................................3.14
Restore file.........................................11.8
Lightbar pass number ........................3.14
-S-
Load name.........................................3.14
Selecting the target file ........................3.7
Log actual rate .....................................4.5
Sensor Diagnostics............................3.16
Log file ...............................................11.3
Serial number ......................................4.9
Logging device...................................11.3
Setting the LH 665 to application control
.............................................................3.3
Logging interval .................................11.3
Logging what has actually happened in
the field ................................................4.5
Show all files......................................11.8
Shutdown...........................................11.7
Longitude .............................................9.3
Speed sensor.......................................4.8
-M-
Start new field ......................................3.5
Machine setting chart...........................1.5
Start new load......................................3.6
Manual application rates ......................4.4
Starting and naming fields ...................3.5
Map setup ..........................................4.11
Swath.................................................3.11
Map zoom ..........................................3.14
System diagnostics............................3.15
Markers................................................4.7
-T-
Menu key .............................................2.4
Target file...........................................3.13
LH AGRO
12.3
INDEX
LH 665 VRT OPERATORS MANUAL
Target map ........................................4.11
Total units ..........................................3.11
Target rate .........................................3.10
-U-
Target rate increment...........................4.4
Units.....................................................4.4
Target rate outside field boundary .......4.5
Upgrading the LH 665......................11.10
TGT File rate......................................3.12
Using load numbers.............................3.6
Tgt units contra controller units............4.4
Using markers......................................3.8
The application control program ..........3.2
Using the LH 665 for data logging only 3.7
The application rate on the implement
controller = 0 ......................................4.14
UTC Time ............................................9.3
The area measured in the LH 665 is not
the same as the implement controller 4.14
Voltage cal ...........................................4.9
The first time a data card is used.......11.4
The screen...........................................2.3
Time.....................................................4.9
12.4
-V-WWorking width ....................................3.11
-YYield files ...........................................11.9
LH AGRO
LH 665 VRT OPERATORS MANUAL
INDEX
NOTES
LH AGRO
12.5
INDEX
12.6
LH 665 VRT OPERATORS MANUAL
LH AGRO