1
Installation and user’s guide
H-1000-5180-01-A
NDI AUTOsense
touch trigger module
© 2008 Renishaw plc. All rights reserved.
This document may not be copied or reproduced in whole or in part, or
transferred to any other media or language, by any means, without the
prior written permission of Renishaw.
The publication of material within this document does not imply freedom
from the patent rights of Renishaw plc.
Disclaimer
RENISHAW HAS MADE CONSIDERABLE EFFORTS TO ENSURE
THE CONTENT OF THIS DOCUMENT IS CORRECT AT THE DATE OF
PUBLICATION BUT MAKES NO WARRANTIES OR REPRESENTATIONS
REGARDING THE CONTENT. RENISHAW EXCLUDES LIABILITY,
HOWSOEVER ARISING, FOR ANY INACCURACIES IN THIS
DOCUMENT.
Trademarks
RENISHAW® and the probe emblem used in the RENISHAW logo are
registered trademarks of Renishaw plc in the UK and other countries.
apply innovation is a trademark of Renishaw plc.
All other brand names and product names used in this document are
trade names, service marks, trademarks, or registered trademarks of their
respective owners.
Renishaw part no: H-1000-5180-01-A
Issued: 11 2008
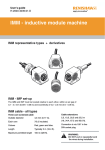
NDI AUTOsense touch trigger module
installation and user’s guide
Care of equipment
Care of equipment
Renishaw probes and associated systems are precision tools used for
obtaining precise measurements and must therefore be treated with
care.
CAUTION: The product should not be included in general
rubbish.
Changes to equipment
Renishaw reserves the right to improve, change or modify its
hardware or software without incurring any obligations to make
changes to Renishaw equipment previously sold.
Care of equipment
Warranty
Renishaw plc warrants its equipment provided that it is installed
exactly as defined in associated Renishaw documentation.
Prior consent must be obtained from Renishaw if non-Renishaw
equipment (e.g. interfaces and/or cabling) is to be used or substituted
for Renishaw equipment. Failure to comply with this will invalidate the
Renishaw warranty.
Claims under warranty must be made from authorised service
centres only, which may be advised by the supplier or distributor.
Patents
Aspects of the NDI AUTOsense touch trigger module system have
patents applied for.
!
CAUTION: The NDI AUTOsense touch trigger module will only
work with genuine AUTOsense module styli. When switching
on the module ensure a genuine stylus is fitted and that the
stylus is not in contact with any surface until the module status
LED turns green.
EC DECLARATION OF CONFORMITY
Renishaw plc declare that the product:
Name(s):
MSP3
Description:
NDI AUTOsense touch trigger module
Part no.:
A-3053-2300
has been manufactured in conformity with the following standards:
BS EN 61326-1:2006
Electrical equipment for
measurement, control and laboratory
use - EMC requirements Part 1: General requirements
Immunity to Table 2 - industrial locations.
Emission to Class A - industrial
locations.
and that it complies with the requirements of the following directive:
2004/108/EC
Electromagnetic compatibility
The above information is summarised from the full EC Declaration of
Conformity. A copy is available from Renishaw on request.
Contents
Contents
1 Introduction.................................................................................... 6
2 Product description........................................................................ 7
2.1 The AUTOsense touch trigger module kit............................. 7
2.1.1
The AUTOsense module.......................................... 8
3 Product installation......................................................................... 9
3.1 Creating and connecting an AUTOsense stylus
assembly............................................................................ 10
4 Product operation......................................................................... 13
4.1 Operational modes.............................................................. 13
4.2 Operation............................................................................ 14
4.3 Accuracy of measurement.................................................. 14
4.4 Calibration........................................................................... 15
5 Technical data ............................................................................. 16
5.1 Measuring performance...................................................... 16
5.1.1
Technical specification............................................ 16
6 Applications guide........................................................................ 17
6.1 Stylus selection................................................................... 17
6.1.1
The list of available styli.......................................... 18
6.1.2
Recommended stylus limits.................................... 18
7 Product maintenance................................................................... 19
1
Introduction
Introduction
This installation and user’s guide is for the NDI AUTOsense touch
trigger module (see figure 1):
The AUTOsense module is a dual function stylus holder that enables
touch trigger probing for both single-point and scanning. The
AUTOsense module is only compatible with supported NDI hand-held
probes.
Figure 1 - NDI AUTOsense touch trigger module
Product description
2
Product description
2.1
The AUTOsense touch trigger module kit
The standard AUTOsense module kit (Renishaw part no.
A-3053-4200) comprises the following components (see figure 2):
•
NDI AUTOsense module
A-3053-2300
•
Ø 4 mm (0.16 in) x 30 mm
(1.18 in) stylus
A-5004-1188
•
Ø 6 mm (0.24 in) x 60 mm
(2.36 in) stylus
A-5004-1189
•
Two M4 stylus tools (boxed)
A-3053-2196
•
Cleaning kit
A-1085-0016
•
System installation and
user’s guide CD
H-1000-5181
•
Kit box
A-1015-8550
Product description
2.1.1
The AUTOsense module
The module body incorporates a kinematic connector that attaches to
the stylus assembly mount on supported NDI hand-held probes.
Figure 2 - The NDI AUTOsense touch trigger module boxed kit
Product installation
3
Product installation
Before using the NDI AUTOsense system assemble a supported
stylus to the module, connect the stylus assembly to the probe and
qualify it. Once qualified the AUTOsense stylus assembly can be
attached to and removed from the probe with no additional calibration.
Supported
NDI probe
Stylus
assembly
mount
Quick
release
AUTOsense touch
trigger module
AUTOsense
stylus assembly
Supported stylus
Figure 3 - The NDI AUTOsense system components
10
3.1
Product installation
Creating and connecting an AUTOsense stylus
assembly
1.
Screw/thread a stylus into the AUTOsense module by hand.
2.
Hold the AUTOsense module in one hand and insert a stylus tool
through the eyehole of the supported stylus.
3.
Tighten the supported stylus to a maximum tightening torque
of 2 Nm - 17.7 ibf.in.
AUTOsense touch
trigger module
Supported
stylus
Stylus tool
Figure 4 - Stylus fitting
Product installation
4.
11
Connect the AUTOsense stylus assembly to the stylus assembly
mount so the alignment marks line up.
Alignment
marks
Figure 5 - NDI AUTOsense module alignment
12
Product installation
5.
Tighten the connection by turning the quick release lever until it
stops.
6.
Perform a stylus calibration as described in the ‘OPTOTRAK
PROseries User Documentation’.
Quick
release
lever
Figure 6 - NDI AUTOsense module fitting
Product operation
4
Product operation
4.1
Operational modes
13
The various modes of the NDI AUTOsense module are indicated by
the two status LED’s on the side of the module:
Solid Blue
Module is in sleep mode. If the probe is not used
for a period of time the module is switched into
sleep mode. The software will automatically wake
the probe.
Flashing Blue
Module is auto-zeroing which may take 8 seconds
to find optimum sensitivity for the stylus connected.
Solid Green
Module has auto-zeroed successfully and is ready
to measure. Green also indicates the module is not
in contact with a surface.
Solid Red
Module auto-zeroed successfully and is in
measuring mode contacting the surface. Position
data signals are being generated.
Flashing Red
Module failed to auto-zero and will NOT take data
points. Check that a stylus is present and that the
stylus is correctly tightened.
NOTE: Whilst the module is auto-zeroing ensure the stylus does NOT
come into contact with any surface.
Always recalibrate the module and stylus if the stylus has been
removed.
14
4.2
Product operation
Operation
NOTE: When the stylus has been replaced or changed, the auto
zeroing will take up to 8 seconds.
NDI AUTOsense module auto zero results in flashing red:
•
Ensure that the stylus mounting threads on the stylus and the
AUTOsense module are clean
•
Ensure the stylus ball and shank are entirely free of contacts
during the auto-zeroing process
•
You must only use NDI AUTOsense module styli
NOTE: While flashing red, the module will not sense surfaces.
4.3
Accuracy of measurement
Operator variability when measuring with the NDI AUTOsense module
can be significantly reduced by careful selection of the measuring
mode and stylus configuration for the job in hand. Following these
simple rules will result in successful data collection.
Use scanning mode only when:
•
The part is rigid – for example an engine block.
Always use point measurement mode when:
•
The part is not rigid (sheet metal or plastic components).
Product operation
15
Whilst measuring :
•
Do not touch the stylus tip or stylus shank with any part of the
body as this can issue false triggers.
•
Only touch the surface being measured with the stylus tip.
•
Use consistent amount of force between the stylus tip and part.
•
Use consistent amount of force when calibrating and when
measuring.
•
Use the minimum amount of force required to trigger the probe
when measuring.
4.4
Calibration
Perform a stylus calibration as described in the ‘OPTOTRAK
PROseries User Documentation’.
16
Technical data
5
Technical data
5.1
Measuring performance
NOTE: The following data is derived from high accuracy test rig with a
Ø 6 mm (0.24 in) x 30 mm (1.18 in) stylus measurements and may not
represent the performance achievable on a probe.
5.1.1
Technical specification
Product compatibility
The NDI AUTOsense module is suitable
for use with supported NDI hand-held
probes.
Dimensions
Diameter
Length
Probe mount
Stylus mount
Sensing directions
Sealing
Repeatibility
Trigger force
Pre-travel
Pre-travel variation
Weight
51 mm (2.01 in)
62.85 mm (2.47 in)
Renishaw autojoint
Thread M4 x 0.7 mm
6-way
(±X, ±Y, ±Z)
IP30
1 µm 2 σ (0.0000394 in)
0.02 - 0.04 Nm (2 - 4 gf)
4.5 µm (0.000177 in)
1 µm (0.0000349 in)
161 g (5.68 oz)
Applications guide
6
Applications guide
6.1
Stylus selection
17
The NDI AUTOsense module comes supplied with two matching styli
which are specially designed for the highest accuracy and sensitivity.
The stylus design is carefully matched to the module contact sensing
system. Third party styli should not be used.
NOTE: Choosing the best stylus for a given application is an
important factor in achieving optimum probe performance.
When selecting a stylus, it is important that the stylus length is kept to
the minimum required to access all features to be measured.
It is also important to ensure that the stylus ball diameter chosen is as
large as is practical. This not only ensures that the stylus will be as
stiff as possible, but also reduces the stylus susceptibility to surface
form and surface finish.
18
Applications guide
6.1.1
The list of available styli
Part number
A-5004-1188
A-5004-1189
A-5004-0291
A-5004-0293
Ball Ø
mm (in)
4 (0.16)
6 (0.24)
3 (0.12)
6 (0.24)
Length
mm (in)
30 (1.18)
60 (2.36)
30 (1.18)
30 (1.18)
ELW*
mm (in)
6.5 (0.26)
55.5 (2.19)
6.5 (0.25)
25.4 (1.0)
* Effective working length.
6.1.2
Recommended stylus limits
Owing to the modular construction of the NDI AUTOsense module,
it is recommended that the limits shown in figure 7 are applied when
selecting styli to be used.
•
No star or cranked styli
Max: 60 mm
Max Ø: 6 mm
Figure 7 - Recommended stylus limits
Product maintenance
7
19
Product maintenance
NOTE: Maintenance of the NDI AUTOsense module is restricted
to the periodic cleaning of the stylus M4 mating faces and the three
rollers and three sets of balls. To aid cleaning of these couplings, each
NDI AUTOsense module is supplied with a Renishaw cleaning kit.
Each Renishaw cleaning kit contains a specialised material to
effectively remove contamination from location faces.
Styli that are not attached to the probe should be stored in their
transport boxes, to prevent contamination and damage.
Renishaw plc
New Mills, Wotton-under-Edge,
Gloucestershire, GL12 8JR
United Kingdom
T +44 (0)1453 524524
F +44 (0)1453 524901
E [email protected]
www.renishaw.com
For worldwide contact details, please
visit our main website at
www.renishaw.com/contact
*H-1000-5180-01*