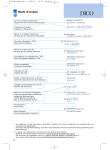
Download User Guide
Transcript
User Guide for students and tutors
This user guide is designed to introduce the main functions in Towards International
Business English.
However, we strongly recommend that you read the full user manual as well, as it provides
you with a thorough overview of all the program features. Here you will find in-depth
information and samples of the different types of exercises.
Towards International Business English is comprised of three modules:
-
Soft Skills (module 1)
Business Skills (module 2)
Everyday Skills (module 3)
Each module opens at a click on its respective number in the vertical list of modules a
on the left side of the screen.
You open the exercises by choosing a component
the exercise c you wish to work on.
b in the current module; then click on
Only then the material site will open in the main window. The material site contains features
such as instructions, material (e.g. written and audio texts, videos, graphs, etc.) and the
1
corresponding exercises. You will receive short explanations of the words printed in bold if
you move the cursor onto them d .
To open an exercise window in order to work on it, click on one of the links labeled ‘click
here to go to the exercises’ e .
You can use the icons marked with an arrow j j in the navigation bar at the bottom of your
screen to navigate between the individual tasks of the exercise opened.
To have your answer automatically checked by the program, click on the ‘check’ icon f in
the bottommost right hand corner of your screen. To view the sample answer, click on the h
icon. When you click on g , you can review your own answer. If you wish to do the exercise
once more, click on i .The blue box located in the middle of the bottom of your screen k
shows the status of the exercise (‘unbearbeitet” = original, ‘gespeichert’ = saved, ‘neu
bearbeiten” = try again, etc.).
Some exercises will not have an automatically checked answer, but can be sent to your
online tutor. In this case after clicking the ‘check’ icon a dialogue window asking you what
you want to do next will appear.
2
These are your options:
:
’:
(save) here you can save your solution for further editing yet without sending it
your tutor.
(send) here you can send your text or recording to your online tutor.
After having sent your solution, you cannot edit it any further until you get the
correction back from your tutor.
In case you should need help despite the deliberately intuitive design of the exercises, click
on the icon indicating the exercise type l in the bottom left hand corner. Then you will
get information about the exercise type and how it works m .
If you wish to work through individual exercises several times or save a number of exercises
under a chosen heading (e.g. ‘listening comprehension’) you can add them to your Personal
Card Box and access it directly in the task bar on the right hand side of your screen. You
can add an exercise to your card box by clicking on the ‘add to card box’ icon in the exercise
opened. You can monitor your progress in the task bar on the right which shows exercises as
‘complete’ , ‘in progress’ , and ‘incomplete’ .
The contact bar in the upmost right hand corner of your screen provides you with numerous
additional resources, such as links to online dictionaries, grammars, and business
magazines.
A click on
will redirect you to the online dictionary leo.org which you can use to look up
new words while working through the tasks.
The search option
types.
allows you to search the program for specific topics and/or exercise
In addition to that, the students of a class can communicate with each other via chat
forum .
and
The administrative area of your course:
3
When you click the admin icon
in the contact bar in the upper right hand corner of your
screen you reach the administrative area of your course. There you can change your contact
details and manage you tutor´s corrections of your writing tasks.
For students:
When you go to the administrative area of your course you will see the following areas:
Nutzer (User)
System (system)
Korrekturen (corrections)
Nutzer (user):
In the user area ‘Nutzer > Verwaltung” (user administrative) you can change your user
details.
System (system):
In the system area of your course you can change some general settings for your course. It´s
strongly recommended to use the default settings.
In the area ‘System > Klasse wechseln’ (system > change class) you can change your active
class. If you are taking part in more than one course at a time, the active class is important,
in order to decide which tutor will receive your writing or speaking exercises by clicking
‘Senden”. Only the tutor of the active class will receive those exercises.
Korrekturen (corrections)
In case you have deactivated the pop-up blocker for your DUO course, you will get a pop-up
window with your tutor´s corrections whenever he or she has sent you a new one.
4
In case you did not receive such a pop-up window, you can see you tutors corrections in the
‘Korrekturen > Neu’ (corrections > new) area. There you will find the list of newly received
exercises. The overview shows when the exercises were sent to you and if it is a correction
by your personal tutor or the e-tutor. By clicking on the exercise icon below ‘Aktionen’
(actions) the corrected exercise will open up in a new window.
The DUO correction tool for writing exercises
DUO has developed a special tool for teachers in order to facilitate the correction of the
writing exercises of their students.
b
a
c
d
The correction tool´s window is made up by four fields:
a) Field for the correction mark´s abbreviation.
5
b) Text field where your text is displayed.
c) Field where the correction marks are shown in its long form, not the abbreviated form
d) Field for explanation of the mistake.
On the left you will see the ‘Korrekturzeichen’ (correction mark). You can click on them to see
what word they are referring to and read the explanation your tutor wrote for you.
Anm
Anmerkung (comment)
G
Grammatik (grammar)
Nom
Nominativ (nominative)
Gen
Genititv (genitive)
Dat
Dativ (dative)
Akk
Akkusativ (accusative)
Sb
Satzbau (sentence structure)
A
Ausdruck (expression)
In
Inhalt (content)
R
Rechtschreibung (spelling)
Z
Zeichensetzung (punctuation)
Orth
Orthografie (orthography)
Ign
Ignorieren (ignore)
You can correct your errors and save the edited version of your text by clicking the check
button on the right bottom corner of the exercise window. Then choose ‘Speichern’ for saving
instead of ‘Senden’ for sending the text to your tutor.
For tutors:
When you go to the administrative area of your course you will see the following areas:
Nutzer (User)
Klassen (classes)
System (system)
Korrekturen (corrections)
Nutzer (user):
In the user area ‘Nutzer > Verwaltung’ (user > administrative) [icon] you can see a list of all
the users in the classes you are tutoring by introducing ‘%’ in the search field on the right and
clicking ‘absenden” (send).
In the area ‘Nutzer > Aktive’ (user > active) you can see who´s online at this very moment.
On the right of your list you will find activity icons [icons] to send an e-mail, a short message
or change the user data.
Klassen (classes)
6
In the class area ‘Klassen > Verwaltung’ (classes > administrative) you can see a list of all
the classes you are tutoring. The activity icons here will send a short message to every user
in the class or will open the chat window of every user. The ‘Benutzerlisten’ (user lists) show
you, again,
a) every user in the class or
b) just the ones who are online at the moment
b
a
System (system):
In the system area of your course you can change some general settings for your course. It´s
strongly recommended to use the default settings.
In the area ‘System > Klasse wechseln” (system > change class) you can change your active
class. This means that you will open the chat room of this class when you click on chat icon.
For learners who are taking part in more than one course at a time, the active class is
important, in order to decide which tutor will receive the writing or speaking exercises by
clicking ‘Senden”. Only the tutor of the active class will receive those exercises and users
might have to change the settings according to the exercises they are working on.
Korrekturen (corrections)
Here you can receive and correct the exercises your learners have sent to you. You can also
send them back to the learner without the need of an additional program.
Receiving new exercises for correction: ‘Korrektur > Neu”
In this area you have the list of newly received exercises. You cannot correct anything there,
it´s just an overview.
7
c
d
f
a
g
b
e
a) ‘Klasse”: class of the learner, who sent the exercise
b) ‘Lerner’: username of the learner, who sent the exercises
c) ‘Übung’: the exercise´s code
d) ‘Datum’: date on which the learner sent the exercise to you
To the right you have some activities:
e) You can write an e-mail to the learner or see the original text, the person sent to you.
f) To do so, click the icon ‘Originaltext”.
In case of a writing exercise you can see the learner´s original text but you cannot correct
anything here yet. In case of a speaking exercise this window will be empty.
g) By clicking the grey square you can select exercises in order to move them for further
correction. There are two options to correct the exercise. We strongly recommend to use the
online one:
- ‘Online-Korrektur’: If you click on this icon the selected exercises will be moved to the
‘Online’ area of your correction area. Here you can do the correction.
- ‘Offline-Korrektur’: If you click on this icon the selected exercises will be moved to the
Offline area where you can download it to your computer. Since this may cause data loss,
please use the ‘Online-Korrektur”.
Correcting writing exercises ‘Korrektur > Online”
In order to correct a learner´s exercise, you have to move it from ‘Korrekturen > Neu’ to
‘Korrekturen > Online” first (see above).
To open the ‘Korrektur – Online’ area, click ‘Online’ on the left tool bar of the administrative
area. You will get a list of exercises with the following ‘Aktionen” (actions):
b
d
e
a
c
a) ‘E-Mail”: You can write an e-mail to the student.
b) ‘Aufgabenstellung” Here you can see the task the learner was working on.
c) ‘Originaltext”: Here you can see the original text, the person sent to you. To do so, click
the icon ‘Originaltext”. In case of a writing exercise you can see the learner´s original text but
8
you cannot correct anything here yet. In case of a speaking exercise this window will be
empty.
d) ‘Korrektur’: Click here to start your correction. The text will open up in a new window with
the DUO correction tool. Be sure you have closed all the other windows (like
‘Aufgabenstellung” or ‘Originaltext’ before opening the correction tool.
e) By clicking the grey square you can select exercises in order to send them back to your
learner. To do so mark the square and click the green check mark. This will move the
exercise into the ‘Erledigt’ (done) area of your correction area and simultaneously send back
the exercise to your learner.
The DUO correction tool for writing exercises
DUO has developed a special tool for teachers in order to facilitate the correction of the
writing exercises of your learners.
a
b
d
c
The correction tool´s window is made up by four fields:
a) Field for the correction mark´s abbreviation you have chosen from a dropdown list for
every mistake.
b) Text field where the learner´s text is shown. You can write a comment below the text by
simply clicking into the field.
c) Field where the correction marks are shown in its long, not the abbreviated version
9
d) Field for your explanation of the mistake.
How to use the correction tool
In order to correct and comment on the learner´s text you mark a word, a word combination
or complete sentences with you mouse. By clicking the right mouse button a dialogue
window opens up. Choose ‘Fehler korrigieren’ (correct error). This will open a new window
where you can do the ‘Fehlerbeschreibung’ (error description). Choose a ‘Korrekturzeichen’
(correction mark) from the dropdown menu in the top left corner of the window.
You can choose from the following correction marks:
Anm
Anmerkung (comment)
G
Grammatik (grammar)
Nom
Nominativ (nominative)
Gen
Genititv (genitive)
Dat
Dativ (dative)
Akk
Akkusativ (accusative)
Sb
Satzbau (sentence structure)
A
Ausdruck (expression)
In
Inhalt (content)
R
Rechtschreibung (spelling)
Z
Zeichensetzung (punctuation)
Orth
Orthografie (orthography)
Ign
Ignorieren (ignore)
In case non of these are matching the comment you want to make on the marked word or
phrase we recommend to use ‘Anmerkung’. We also recommend to use either R or Orth for
spelling msitakes.
10
After choosing a correction mark you can give a further comment or explanation in the text
field. After you have finished your correction on this part of the text, click ‘ok” to close the
‘Fehlerbeschreibung” window.
The word or phrase you have commented on will be underlined and you will see the
correction mark on the left side and the long explanation at the bottom of the window.
Finishing and saving a correction
In order to finish your correction click ‘Datei > Korrektur speichern’ on the top left corner of
the correction tool window. Then close the window. You might be asked again if you want to
save the changes you made. Click ‘Ja” (yes).
To send back the text to your learner choose the exercises by checking the grey square box
in the ‘Online” area and click the green check mark (‘zu erledigte Korrekturen”).
Correcting oral exercises
Open and listen to an oral exercise
Exercises with a music icon are oral exercises. Your learner recorded his voice and sent the
recording to you. You can listen to the recording by clicking the music icon. The recording will
open up in a new window. In order to give feedback on the recording you can write an e-mail
to your learner, have a voice chat or discuss it in a classroom meeting.
11


