1
Renishaw plc
New Mills, Wotton-under-Edge,
Gloucestershire, GL12 8JR
United Kingdom
T +44 (0)1453 524 524
F +44 (0)1453 524 901
E [email protected]
www.renishaw.com
Installation and user’s guide
H-2000-5085-02-I
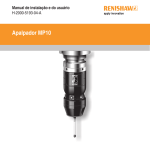
MP7 - MP8 - MP9 probe systems
For worldwide contact details, please
visit our main website at
www.renishaw.com/contact
*H-2000-5085-02*
© 2003 - 2004 Renishaw. All rights reserved.
Disclaimer
This document may not be copied or
reproduced in whole or in part, or transferred
to any other media or language, by any
means, without the prior written permission
of Renishaw.
Considerable effort has been made to
ensure that the contents of this document
are free from inaccuracies and omissions.
However, Renishaw makes no warranties
with respect to the contents of this document
and specifically disclaims any implied
warranties. Renishaw reserves the right to
make changes to this document and to the
product described herein without obligation
to notify any person of such changes.
The publication of material within this
document does not imply freedom from
the patent rights of Renishaw plc.
Trademarks
Renishaw® and the probe emblem used in the
RENISHAW logo are registered trademarks of
Renishaw plc in the UK and other countries.
apply innovation is a trademark of
Renishaw plc.
All brand names and product names used in
this document are trade names, service marks,
trademarks, or registered trademarks of their
respective owners.
Renishaw part no: H-2000-5085-02-I
Issued: 11. 2004
1
Installation and user's guide
MP7 - MP8 - MP9 probe systems
2
FCC DECLARATION (USA)
FCC Section 15.19
This device complies with Part 15 of the FCC
rules.
Operation is subject to the following two
conditions:
1. This device may not cause harmful interference.
2. This device must accept any interference
received, including interference that may cause
undesired operation.
FCC Section 15.105
This equipment has been tested and found to
comply with the limits for a Class A digital device,
pursuant to Part 15 of the FCC rules. These limits
are designed to provide reasonable protection
against harmful interference when the equipment
is operated in a commercial environment.
This equipment generates, uses, and can radiate
radio frequency energy and, if not installed and
used in accordance with the instruction manual,
may cause harmful interference to radio
communications.
Operation of this equipment in a residential area is
likely to cause harmful interference, in which case
you will be required to correct the interference at
your own expense.
FCC Section 15.21
The user is cautioned that any changes or
modifications not expressly approved by Renishaw
plc, or authorised representative could void the
user's authority to operate the equipment.
FCC Section 15.27
The user is also cautioned that any peripheral
device installed with this equipment such as a
computer, must be connected with a high-quality
shielded cable to insure compliance with FCC
limits.
3
Installation and users guide
MP 7 - 8 - 9 PROBE SYSTEMS
The probe touch-trigger mechanism and operating
envelope are common to all types. However to suit
different operational requirements, each type
incorporates a unique probe switch-on/switch-off
method.
MP7
Spin-on/spin-off.
MP8
Shank pressure switch-on/switch off.
MP9
Spin-on/timer-off.
MP7 - MP9 CENTRIFUGAL SWITCH
The centrifugal switch incorporated in MP7 and
MP9 probes rattles when the probe body is
shaken. This is quite normal and should not be
the cause of any concern.
WARRANTY
Equipment requiring attention under warranty
must be returned to your supplier. No claims will
be considered where the probe has been misused,
or repairs or adjustments have been attempted by
unauthorised persons.
CARE OF THE PROBE
Keep system components clean and treat the
probe as a precision tool.
CHANGES TO EQUIPMENT
Renishaw reserves the right to change
specifications without notice.
PROBE IP RATING
X8
CNC MACHINE
CNC machine tools must always be operated by
competent persons in accordance with
manufacturers instructions.
PATENT NOTICE
Features of MP7-8-9 probes and features of similar
probes are the subjects of the following patents
and or patent applications.
EP 0390342
EP 0695926
JP 2,945,709 US 5,040,931
US 5,669,151
SAFETY
ELECTRICAL
Only qualified persons should
adjust switches or replace fuses.
Remove the mains supply from
units before removing covers.
OPERATOR
MP8 probes should only be
rotated by hand or standard
spindle orientation, when
mounted in the machine spindle.
4
Contents
SYSTEM INSTALLATION
Typical probe systems ............................ 5
Two OMM's and remote indicator ........... 6
System performance ............................... 7
Operating envelope .................................. 8
Probe features ......................................... 9
MP7 - 9 with centre ball adjustment ....... 10
MP7 - 9 with adjusting plate .................... 11
MP7 - 9 with adjusting plate and
taper shank .............................................. 12
MP8 with adjusting plate and
taper shank .............................................. 13
MP8 probe/shank units ........................... 14
MP7 - 8 - 9 enhanced trigger circuit ....... 15
MP7 - 8 - 9 stylus spring pressure
adjustment ................................................ 16
MP7 - 8 - 9 battery covers and battery .. 17
MP7 - 8 - 9 stylus on-centre adjustment
using adjustment plate ............................. 19
MP7 - 8 - 9 stylus on-centre adjustment
using centre ball ....................................... 20
OPERATION
Probe moves ............................................ 21
Software requirements ............................. 22
Software for machining centres (simple to
use canned cycles for basic features) ... 23
MP7 - 8 - 9 modes of operation .............. 25
MP7 - 8 - 9 switch-on / switch-off .......... 25
MP7 - 9 spin on ........................................ 26
MP8 shank switch on ............................... 27
Gauging moves for probe ........................ 28
MP7 spin off .............................................. 29
SERVICE and MAINTENANCE .............. 30
Weak link for styli with steel shaft ........... 30
Diaphragm inspection .............................. 31
Diaphragm replacement .......................... 32
SCREW TORQUE VALUES ................... 33
FAULT FINDING ..................................... 35
APPENDIX 1 Adaptor and
Extensions ................................................ 38
APPENDIX 2 power supply
unit (PSU3) ............................................... 39
APPENDIX 3 optical module
machine (OMM) ....................................... 39
APPENDIX 4 MI 12 interface unit ............ 40
APPENDIX 5 optical module
interface (OMI) ......................................... 41
PARTS LIST ............................................ 43
5
TYPICAL PROBE SYSTEMS
A workpiece set-up and inspection probe is in effect another tool
see pages 39 and 41
OMM - Optical module machine
in the system. A probe cycle may be included at any stage of the
OMP - Optical module probe
machining process.
OMI - Optical machine interface
Signals are transmitted between the probe and the machine’s
control, via the OMP and OMM + MI 12 or alternatively the OMP and
OMI.
Mounting bracket
Machine spindle
OMI (one only)
Optional - PSU3
+ CNC control
power supply unit
Shank
(size 25 - 50)
OMM
CNC
(one or two)
MP7 - 8 - 9
machine
+ MI 12
Battery
inspection
control
+ CNC control
cover
probe
MI 12 interface unit
or MI 12 board
Cable
Probe head
OMP - LEDs
Stylus
7 x transmission LEDs
Workpiece
Typical tool
setting probe
Optional - PSU3
power supply unit
Optional - PSU3
power supply unit
MI 5, MI 8 or MI 8-4
interface unit
6
TWO OMMs and REMOTE INDICATOR
OMM TANDEM MOUNTING
Installations with exceptionally long
spindle travel, may require a second
OMM to cover signal reception over
the full working envelope of the probe.
The reception cones of OMM 1
and OMM 2 overlap, so they
act as one receiver.
REMOTE INDICATOR
When the probe contacts a surface
an MI 12 LED changes state and a
bleep is emitted.
If the MI 12 is hidden from the
operator, a remote lamp or bleeper
may be placed in a position where
it is easily seen or heard.
Remote
indicator
OMM TWIN MOUNTING
Each spindle of a twin spindle
machine can accept a
probe. Although both
OMM 1 and OMM 2
are switched on, only
one probe may be
used at any one time.
OMM 1
MI 12
OMM 2
Spindle
travel
CNC machine
control
OMM 1
MI 12
CNC machine
control
OMM 2
7
SYSTEM PERFORMANCE
PROBE REPEATABILITY
Maximum 2 sigma (2σ
σ) value
Repeatability of 1.0 µm (40 µin) is valid for
test velocity of 480 mm/min (1.57 ft/min) at
stylus tip, using stylus 50 mm (1.97 in) long.
STYLUS TRIGGER FORCE
Set at factory using stylus 50 mm (1.97 in) long.
X and Y trigger forces vary around the stylus seating.
X/Y direction lowest force 0.75 N/75 gf (2.64 ozf)
X/Y direction highest force 1.4 N/140 gf (4.92 ozf)
Z direction force
4.2 N/420 gf (14.83 ozf)
STYLUS OVERTRAVEL
See page 21
OPTICAL SIGNAL RANGE
Minimum 10 mm (0.39 in)
Maximum 3 metres (9.84 ft)
ENVIRONMENT
PROBE/OMP
OMM
MI 12 INTERFACE
OMI
PSU3
OPERATING ENVELOPE
Natural reflective surfaces within the machine may
increase the signal transmission range.
Coolant residue accumulating on the OMP diodes
and OMM or OMI window, will have a detrimental
effect on transmission performance. Wipe clean as
often as is necessary to maintain unrestricted
transmission.
Operation in temperatures of 0 °C to 5 °C or 50 °C
to 60 °C (32 °F to 41 °F or 122 °F to 140 °F) will
result in some reduction in range.
WARNING
If two systems are operating in close proximity, take
care to ensure that signals transmitted from the
OMP on one machine, are not received by the OMM
or OMI on the other machine, and vice versa.
OMM and OMI POSITION
To assist finding the optimum position of the OMM
during system installation, signal strength outputs
are available on the MI 12 interface.
OMI signal strength is displayed on an OMI
multi-coloured LED.
TM
TEMPERATURE
Storage
–10 °C to 70 °C
(14 °F to 158 °F)
Operating
5 °C to 50 °C
(41 °F to 122 °F)
BATTERY
TEMPERATURE
Duracell MN1604
Storage
- Short term –30 °C to 70 °C (–22 °F to 158 °F)
- Long term
5 °C to 40 °C (41 °F to 104 °F)
Operating
Operating life
Shelf life
TM
10 °C to 40 °C (50 °F to 104 °F)
See page 18
2.1/2 years at 20 °C (68 °F)
Duracell Trademark of Duracell Batteries Ltd.
8
VERTICAL
OPERATING ENVELOPE for MP7 - 8 - 9 PROBES with 35° or 70° OUTPUT
OMP
35°
70°
OMM
or
OMI
Optical centre line
HO
RIZ
ON
TA
L
OMM ±20°
Spindle travel
Beams must always overlap
OMI
±25°
OMM ±10°
OMP
±20°
OMI
±15°
1
re
met
(3.2
8 ft)
OMM ±15°
OMP ±10°
3
res
met
(9.8
4 ft)
OMI ±20°
OMP ±15°
2
tre
me
s (6
.56
ft)
9
PROBE
MP7 - MP9
FEATURES
MP8
On-centre
adjusting plate
Shank translation
screw adjusters
Ø8 mm ball
(optional)
Battery
cover
Shank
Shank
switch
Battery
cover seal
OMP
(Optical module probe)
Battery
7 x transmit LED (Tx)
Stylus spring
pressure adjustment
+
=++=
Enhanced
trigger circuit
'O' Ring
Probe
head
Weak link
Align head contacts
with OMP contacts
Stylus
COLLISION PROTECTION
optional
A weak link is fitted between the
probe and stylus, to protect the
probe in the event of excessive
stylus overtravel.
10
MP7 - 9 with CENTRE BALL ADJUSTMENT
dimensions mm (in)
TO FIT SHANK
1. Remove battery covers and battery.
2. Remove adjusting plate.
3. Fit shank and centre ball to probe.
4. Set stylus on-centre position - see page 20.
5. Replace battery and covers.
70° OMP
shown
with optional
Ø8 mm ball
Socket low head screw
M4 x 12 mm long (four)
Ø62 (Ø2.44)
Ø48
(Ø1.89)
22
(0.87)
Lock
washer
Alternative
probe outputs
70°
Pull stud
(not supplied
by Renishaw)
35°
17.5°
17.5°
Ø6
(Ø0.23)
21.5
Stylus
(0.85)
50 (1.96) long.
Other length styli
may be used.
Ø8 (Ø0.31)
Centre ball pivot
3.3 (0.12)
35° OMP 47.5 (1.87)
58.9 (2.32)
70° OMP 45.1 (1.77)
Z Overtravel 8 (0.31)
X-Y Overtravel 17.5°
60.8 (2.39)
Taper shank to suit machine
(Not supplied by Renishaw)
11
MP7 - 9 with ADJUSTING PLATE
dimensions mm (in)
TO FIT SHANK
1. Remove battery covers and battery.
2. Fit shank to probe.
3. Set stylus on-centre position - see page 19.
4. Replace battery and covers.
Disc washer
Socket head screw
M4 x 12 mm long (two)
Flat washer
70° OMP shown
Ø48
(Ø1.89)
Alternative probe outputs
22
Ø62
70° Adjusting
(0.87) (2.44)
plate
Pull stud
(not supplied
by Renishaw)
➤
35°
17.5°
17.5°
Ø6
(0.24)
21.5
Stylus
(0.85)
50 (1.97) long.
Other length styli
may be used.
35° OMP 47.5 (1.87)
70° OMP 45.1 (1.77)
Z Overtravel 8 (0.31)
X-Y Overtravel 17.5°
Typical
taper
shank
B
A
63.0 (2.48)
64.9 (2.55)
Dimensions A and B
see table opposite
GAUGE LINE
12
MP7 - 9 with ADJUSTING PLATE and TAPER SHANK
dimensions mm (in)
Shank mounting
Shank manufacturing details
see page 19
A
❃ For reference only ❃ Four holes M4 x 0.7
equi-spaced
B
❃18 (0.7)
45°
Pull Stud
(not supplied
by Renishaw)
45°
❃ 36 (1.4)
Ø15
(0.59)
❃ 3 (1.12)
M4 x 0.7 x 10 deep ❃ 7 (0.27)
❃ Two holes
GAUGE LINE
Shanks available from Renishaw - Please quote the Part No. when ordering equipment
Shank
Part No.
Taper
M-2033-6637
40
50 (1.969)
19.1 - 19.0 (0.752 - 0.748)
M-2033-6636
45
50 (1.969)
19.1 - 19.0 (0.752 - 0.748)
M-2033-6635
50
50 (1.969)
19.1 - 19.0 (0.752 - 0.748)
ANSI B5.50 - 1985
M-2033-7031
40
50 (1.969)
19.1 - 19.0 (0.752 - 0.748)
(CAT)
M-2033-7032
45
50 (1.969)
19.1 - 19.0 (0.752 - 0.748)
M-2033-7033
50
35 (1.377)
19.1 - 19.0 (0.752 - 0.748)
M-2033-6445
40
40 (1.575)
27 (1.063)
M-2033-6446
45
45 (1.772)
33 (1.299)
M-2033-6447
50
50 (1.969)
38 (1.496)
DIN 69871
BT
A
B
13
70° OMP shown
Ø48
(Ø1.89)
MP8 with ADJUSTING PLATE and TAPER SHANK
dimensions mm (in) Shank switch
B
Alternative probe outputs
Dimension B see table opposite
22
(0.87)
Ø62
(2.44)
70°
Adjusting
plate
7.13 (0.28)
Ø14.25 (Ø.56)
35°
Pull stud
(Not supplied
by Renishaw)
17.5°
17.5°
Ø6
(0.24)
Typical
taper shank
21.5
Stylus
50 (1.97) long. (0.85)
Other length styli
may be used.
A
63.0 (2.48)
64.9 (2.55)
35° OMP 47.5 (1.87)
70° OMP 45.1 (1.77)
Dimension A
see table opposite
GAUGE LINE
Z Overtravel 8 (0.31)
X-Y Overtravel 17.5°
90°
Drive slot
Thread for Pull Stud
To save battery life, the shank switch
must NOT be depressed, during the
time the probe is held in the tool store.
It may be necessary to provide a
storage location with a clearance
around the switch.
14
MP8 PROBE/SHANK UNITS
dimensions mm (in)
MP8 probe/shanks available from Renishaw - Please quote the Part No. when ordering equipment
Part No.
MP8 probe/shank
with battery
Probe
and tool kit.
output
A-2033-6812
A-2033-6704
A-2033-7104
A-2033-0802
A-2033-6765
A-2033-6771
A-2033-7191
A-2033-0799
A-2033-6815
A-2033-7192
A-2033-0806
A-2033-0808
A-2033-6773
A-2033-6778
A-2033-0803
A-2033-0805
▲
▲
▲
❃
▲❃
▲
▲
❃
❃
35°
35°
35°
35°
35°
35°
35°
35°
70°
70°
70°
70°
70°
70°
70°
70°
Description
Shank
specification
Shank ISO
taper size
BT
40
BT
50
ANSI B5.50 - 1985 (CAT) 40
ANSI B5.50 -1985 (CAT) 50
DIN 69871
40
DIN 69871
50
ANSI (CAT) MODIFIED 40
ANSI (CAT) MODIFIED 50
BT
40
BT
50
ANSI B5.50 - 1985 (CAT) 40
ANSI B5.50 - 1985 (CAT) 50
DIN 69871
40
DIN 69871
50
ANSI (CAT) MODIFIED 40
ANSI (CAT) MODIFIED 50
Dimensions
A
35
50
35
65
50.6
50.6
35
65
35
50
35
35
50.6
50.6
35
35
B
(1.38)
(1.97)
(1.38)
(2.56)
(1.99)
(1.99)
(1.38)
(2.56)
(1.38)
(1.97)
(1.38)
(1.38)
(1.99)
(1.99)
(1.38)
(1.38)
14
24
14
36.8
14
36.8
14
36.8
14
24
14
36.8
14
36.8
14
36.8
▲ These kits are more commonly used.
❃
These shank specifications are for certain Cincinatti Milacron machines.
Generally to ANSI B5.50 - 1985 (CAT), but with a metric thread for the pull stud.
(0.55)
(0.94)
(0.55)
(1.45)
(0.55)
(1.45)
(0.55)
(1.45)
(0.55)
(0.94)
(0.55)
(1.45)
(0.55)
(1.45)
(0.55)
(1.45)
15
MP7 - 8 - 9
ENHANCED TRIGGER CIRCUIT
Only qualified persons
should change settings
Probes subjected to high levels of
vibration or shock loads, may
release spurious readings. The
enhanced trigger circuit improves the
probes resistance to these effects.
To enable or disable the enhanced
trigger circuit, remove the probe
head to gain access to the wire link.
Then manually transfer the link
from SKT 1-2 (disabled), to
SKT 3-2 (enabled) or vice versa.
Grease 'O' ring
before refitting head
1
When the enhanced trigger circuit is
changed from enabled to disabled or
vice versa, the probe output delay is
changed, therefore it is essential the
probe be recalibrated prior to its
first use, using the software routines
shown on page 23.
3
2
SOCKET (SKT) 1-2
OR
TAKE CARE
KEEP ALL COMPONENTS CLEAN DO NOT ALLOW COOLANT OR
PARTICLES TO ENTER THE PROBE.
DO NOT TOUCH ELECTRONIC
COMPONENTS WHEN CHANGING
SETTINGS.
SOCKET (SKT) 3-2
MP7 and MP9 Factory set Disabled SKT 1-2
MP8
Factory set Enabled SKT 3-2
16
MP7 - 8 - 9
STYLUS SPRING PRESSURE ADJUSTMENT - Gauging Force
Spring pressure within the probe
causes the stylus to sit in one unique
position, and return to this position
following each stylus deflection.
Stylus pressure is set by Renishaw.
The user should only adjust spring
pressure in special circumstances
e.g. excessive machine vibration or
insufficient pressure to support the
stylus weight.
To adjust spring pressure, remove
the probe head to gain access to the
spring pressure adjusting screw.
Slacken the locknut, and turn the
adjusting screw anticlockwise to
reduce pressure (more sensitive)
or clockwise to increase pressure
(less sensitive). A stop prevents
damage, which could be caused by
overtightening the adjusting screw.
Finally tighten the locknut to 1 Nm
(0.74 lbf.ft) and replace the probe
head.
ENSURE THAT THE OMP IS KEPT CLEAN.
DO NOT ALLOW COOLANT OR PARTICLES
TO ENTER THE PROBE.
STYLUS SPRING PRESSURE ADJUSTMENT
AND USE OF STYLI OTHER THAN
CALIBRATION STYLUS TYPE, MAY CAUSE
REPEATABILITY TO DIFFER FROM THE
TEST CERTIFICATE RESULTS.
Locknut 7 mm AF
Stop
Adjusting screw
2.0 mm AF
Stylus
2.5 mm AF
Align contact pins before
connecting probe head.
DO NOT rotate probe head
when located in OMP housing.
17
MP7 - 8 - 9
BATTERY COVERS and BATTERY
Cover
seal
(5)
Battery
cover
Battery
cover
(2)
2.5mm AF
(4)
Screw
Label
(1)
Screw
(3)
Battery
To replace exhausted battery - remove cover
1. Slacken screws (1) and remove battery
cover (2).
2. Remove battery (3).
Do not remove second cover, to change
battery.
Probe/shank mounting and stylus on-centre
adjustment - remove second cover
3. Remove screw (4) and battery cover (5).
- see page 19.
IMPORTANT
Insert battery as
shown on label
DO NOT leave exhausted battery in probe
Dispose of exhausted batteries in
accordance with local regulations
To replace battery covers
4. Check that battery cover seals are seated,
and lubricate seals lightly with a mineral oil
or grease.
5. Replace cover (5) - with Renishaw logo.
6. Replace battery with polarity as shown on label,
7. Replace battery cover (1) - with battery symbol.
Tighten battery cover screws to 1.1 Nm
(0.8 lbf.ft).
18
MP7 - 8 - 9 BATTERY LIFE EXPECTANCY
Alkaline battery
Duracell type MN 1604 or equivalent
5% USAGE - 72min/day
STAND-BY LIFE
MP7 - MP8
MP9
CONTINUOUS LIFE
MP7 - MP8 - MP9
Minimum
Typical
Minimum
Typical
Minimum
Typical
Minimum
Typical
458 days
764 days
42 days
70 days
33 days
50 days
53 hrs
92 hrs
Probe battery
Power for the probe is supplied by a Type
PP3 9V battery.
Low battery indication
When MI 12 or OMI low battery LED lights up,
battery voltage is low and the end of useable
battery life is approaching.
(The low battery LED will only light up during
the probe operating mode)
- see APPENDIX pages 40 and 42.
The machine control may also be
programmed to flag up a low battery alarm.
Typical battery reserve life.
Using an alkaline battery at 5% usage,
the probe will typically continue to
operate for
8 hours, after the MI 12/OMI low
Battery LED lights up.
The probe will revert to the stand-by
mode after changing the battery.
19
MP7 - 8 - 9
STYLUS ON-CENTRE ADJUSTMENT USING ADJUSTING PLATE
Stylus alignment with the spindle’s centre
line need only be approximate, except in
the following circumstances.
1. When probe vector software is used.
2. When the machine control software
cannot compensate for an offset stylus.
3. The stylus must be parallel to the
spindle axis to prevent stylus stem contact
against the side of deep holes - see
page 20.
2.5 mm AF
How to check stylus position
Mount the probe in the machine spindle and
use one of the following procedures.
1. Rotate stylus close to a reference
surface, check if the gap is constant.
2. Rotate stylus against low force dial test
indicator, which does not unseat the probe.
3. Use method advised by machine tool
supplier.
Adjustment
1. If adjustment is required, remove the
battery covers and battery.
2. Slacken the two probe/shank clamping
screws half of one turn, so that the disc
washers maintain a slight clamping grip.
3. There are four adjusting screws A.
Each will move the probe relative to the
shank, in the X or Y direction as pressure
is applied. Tighten individually.
Back off after each movement.
4. When stylus target position is obtained,
tighten all screws - see page 33.
5. Replace battery and battery covers.
2 mm AF
3 mm AF
A
Four
on-centre
adjusting
screws
Two clamping screws
MP7 - 8 - 9
20
MP7 - MP9
STYLUS ON-CENTRE ADJUSTMENT USING CENTRE BALL - OPTIONAL
Stylus alignment - see page 19
The centre ball is used for applications
where the stylus stem must be parallel
with the spindle centre line.
The probe body pivots on a centre ball,
which allows the stylus stem to be set
parallel to the side of a bored hole, to
avoid stem contact.
Centre ball
How to check stylus position
See page 19.
Adjustment
1. If adjustment is required, remove the
battery covers and battery.
2. Slacken and adjust the four
probe/shank screws to realign the
probe head.
4. When the stylus target position is
obtained, tighten all screws - see
page 33.
5. Replace the battery and battery covers.
Probe/shank screw
Gap
3 mm AF
MP7 - 9
ALL MP7 and MP9 PROBES
IF A PROBE/SHANK UNIT IS
ACCIDENTALLY DROPPED, IT
SHOULD BE CHECKED FOR ONCENTRE POSITION.
➤
DO NOT HIT OR TAP THE PROBE TO
ACHIEVE ON-CENTRE ADJUSTMENT
Reference Surface
21
PROBE MOVES
To ensure a trigger signal is given,
drive the probe against the
workpiece to a target beyond the
expected surface, but within the
limits of stylus overtravel.
(4.34 in)
High probing speeds are desirable,
however a probing velocity must be
chosen which allows the machine to
stop within the limits of stylus
overtravel. Follow feed rate
guidelines given by supplier.
110.2 mm
A probe trigger signal is generated
when the probe is in the operating
mode and the stylus is driven
against a surface and is deflected.
The machine control records
the probe contact position and
instructs machine motion to stop.
21.5 mm
(0.85 in)
Ø62 mm
(Ø2.24 in)
Z
X-Y
17.5°
X-Y
17.5°
After the probe stylus touches the
surface, reverse clear of the
surface.
Probe gauging moves should be
made at constant speed.
Single and double touch
If the probe operating sequence is
based on a single touch, then the
probe may be returned to its start
point, following a gauging move.
Stylus overtravel limits
Stylus
length
X-Y
Z
50 mm
(1.96 in)
21.5 mm
(0.84 in)
8 mm
(0.31 in)
100 mm
(3.93 in)
36.5 mm
(1.43 in)
8 mm
(0.31 in)
22
PROBE MOVES
Single and double touch continued
With some types of controllers, it is an advantage to
use the two touch method. The first move finds the
surface quickly. The probe is then reversed to a
position clear of the surface, before making the
second touch at a slower feed rate, thereby
recording the surface position at a higher resolution.
Gauging speed
Gauging speeds are not limited by the transmission
system delay, which has a repeatability of less than
2 µs. System delays are constant for each direction
measurement is taken. These delays are
automatically cancelled out and need not be taken
into account, provided a datum move is made in the
same direction and velocity as each measurement
move.
Signal delay times
1. Error signal delay
A delay of 48 ms maximum for the OMM + MI 12 or
41 ms maximum for the OMI, will elapse between an
error occurring and the output indicating error.
2. Probe signal delay
The speeds will be limited by the ability of the
machine tool control system to process the probe
interface signal, and bring the machine to a halt
within the probe overtravel limits. There is a nominal
delay of 140 µs with a repeatability of 2 µs for each
interface, from the time the probe actually operates to
the MI 12/OMI interface indicating a probe change of
state. Activating the enhanced trigger circuit will add
a further nominal 7 milliseconds.
SOFTWARE REQUIREMENTS
VERIFY YOUR SOFTWARE
1-1 Does your software have calibration routines
which compensate for stylus on centre
errors. If not you must set the probe stylus on
centre mechanically.
Note : When using probe styli which are not
on spindle centre. Spindle orientation
positioning repeatability is important to avoid
probe measurement errors.
1-2 Does your software compensate for probe
triggering characteristics in all measuring
directions.
2-1 JOB SET-UP REQUIREMENTS
Does the software automatically adjust the
program co-ordinate system to the relevant setup feature on the component.
3-1 INSPECTION REQUIREMENTS
Simple to use canned cycles for standard
features:
Bore/Boss.
Web/Pocket.
Single Surface.
Simple to use canned cycles for optional
features:
Angle Measurement.
Vector 3 Point Bore/Boss.
Vector Single Surface.
Good software will allow the following functions:
❋
❋
❋
❋
Update work co-ordinate systems for positioning.
Report measured sizes and update tool offsets
for automatic tool offset compensations.
Print data in the form of an inspection report to
an external PC/printer.
Set tolerances on features.
23
SOFTWARE for MACHINING CENTRES
Simple to use canned cycles for basic features
CALIBRATION
INSPECTION
Probe XY offset
calibration
Bore and boss
measure
Stylus ball radius
calibration
Web and pocket measure
Probe length
calibration
Internal and external corner find
PROBE COLLISION
PROTECTION
XYZ single surface
position
TOOL SETTING PROBE
Length setting
(rotating and non
rotating)
Diameter setting
(rotating)
Broken tool
Inspection print-out
COMPONENT No. 1
OFFSET NO.
NOMINAL
TOLERANCE
DIMENSION
99
1.5000
97
200.0000
DEVIATION FROM
COMMENTS
NOMINAL
.1000
.1000
.0105
.2054
OUT OF TOL
24
SOFTWARE for MACHINING CENTRES
Simple to use canned cycles for additional features
INSPECTION
Bore and boss (three point)
Stock allowance
Bore and boss on PCD
Angled web and pocket
measure
4th axis measure
Angled surface measure
Feature to feature measure
25
MP7 - 8 - 9
MODES of OPERATION
Probe power on/off
Probe power switch on/off, only occurs when the
probe is located in the machine’s spindle.
Modes of operation
Probes have two modes of operation.
1. Stand-by mode - The OMP uses a small
current, while passively waiting for the
switch-on signal.
2. Operating mode - Activated by one of the
methods described below. Probe signals are
only transmitted during the operating mode.
SWITCH-ON
MP7, MP8 and MP9 time delays
Following probe switch-on, a minimum 7 seconds
must elapse before switch-off. A further minimum 7
seconds must elapse before the probe can be
switched on again.
SWITCH-OFF
MP7 and MP9
Spin the probe for a minimum one
second, and a maximum 4
seconds at 500 rev/min ±10%.
A centrifugal switch, switches the
probe on.
MP7
Spin the probe for a minimum one second, and a maximum
4 seconds at 500 rev/min ±10% to switch the probe off.
MP9
A timer allows the probe to remain on for 3 minutes
(± 1 min 10 sec). The timer will be reset for a further
3 minutes probe available, each time the stylus is
triggered during its operating cycle.
Following a clear 3 minutes after switch-on, or 3 minutes
after the last probe trigger, the system 'times out' and
switches the probe off.
MP8
A pressure switch incorporated in
the shank, automatically switches
the probe on, whenever the shank
is placed in the machine spindle.
MP8
The shank switch is released and switches the probe off,
when the probe is removed from the machine spindle.
The shank switch must not be held depressed during
storage in the tool changer.
26
MP7 - 9 SPIN ON
The flow chart is provided as a guide
only. Gauge moves are dependant on
the control system.
START
➤
READ
LOW BATTERY
SIGNAL
➤
➤
IS
LOW BATTERY
CLEAR ?
➤
READ ERROR
SIGNAL AND
STATUS SIGNAL
NO
YES
➤
SPIN PROBE AT
500 rev/min
FOR 1 SECOND
➤
SYSTEM FAULT
➤
➤
➤
YES
➤
OUTPUT ALARM
LOW BATTERY
CALL
OPERATOR
➤
➤
NO
IS ERROR
CLEAR AND STATUS
READY ?
PROBE READY
FOR USE
see page 28
➤
ORIENTATE PROBE
TO FIXED
POSITION FOR USE
WAIT
7 SECONDS
MINIMUM
OUTPUT ALARM
➤
➤
➤
YES
➤
YES
NO
IS ERROR
PRESENT AND STATUS
NOT READY ?
➤
IS ERROR
CLEAR AND STATUS
READY ?
NO
END
27
MP8 SHANK SWITCH ON
The flow chart is provided only as a guide.
Gauge moves are dependant on the control
system.
MP8
START
➤
END
➤
➤
INSERT PROBE
IN MACHINE
SPINDLE
CALL
OPERATOR
READ ERROR
AND STATUS
➤
➤
SYSTEM FAULT
➤
TRANSMISSION
INTERRUPTED
NO
IS ERROR
CLEAR ?
➤
PROBE NOT READY
➤
YES
SYSTEM FAULT
IS STATUS
READY ?
➤
STYLUS
IN CONTACT
NO
YES
PROBE READY
FOR USE
see page 28
➤
➤
28
GAUGING MOVES FOR PROBE
The flow chart is provided only as a guide.
Gauge moves are dependant on the control system.
PROBE READY
FOR USE
READ AND STORE
START POSITION
REGISTERS
➤
➤
➤
➤
MP7
(spin switch off)
MEASURING
MOVE
TO TARGET
➤
OPTIONAL
RECOVERY
LOOP
➤
IS
ERROR
CLEAR ?
NO
➤
OUTPUT ALARM
TRANSMISSION
LOST
RETURN TO
START POSITION
➤
➤
NO
NO
➤
IS
STYLUS
DEFLECTED ?
➤
➤
➤
RETURN TO
START POSITION
READ AND
STORE
INTERRUPT
POSITION
OUTPUT ALARM
NO TRIP OCCURRED
➤
➤
To switch probe off,
return probe to tool
magazine.
MP9
(timer switch off)
YES
YES
MP7 see page 29
for spin off cycle
MP8
YES
IS
TARGET
REACHED ?
RETURN TO
START POSITION
➤
➤
➤
A timer switches
probe off.
Note: Stylus trigger
resets OMP timer
29
MP7 SPIN OFF
The flow chart is provided only as a guide.
Gauge moves are dependant on the control
system.
START
➤
READ ERROR
SIGNAL AND
STATUS SIGNAL
➤
NO
➤
➤
IS ERROR
PRESENT AND STATUS
NOT READY ?
NO
YES
YES
➤
➤
➤
SPIN PROBE AT
500 rev/min
FOR 1 SECOND
OUTPUT ALARM
SYSTEM FAULT
➤
➤
WAIT
7 SECONDS
MINIMUM
CALL
OPERATOR
➤
➤
NO
PROBE OFF
IS ERROR
PRESENT AND STATUS
NOT READY ?
➤
END
IS ERROR
CLEAR AND STATUS
READY ?
YES
➤
30
SERVICE and MAINTENANCE
SAFETY
SWITCH POWER OFF WHEN WORKING INSIDE ELECTRICAL COMPONENTS
THE PROBE IS A PRECISION TOOL HANDLE WITH CARE
ENSURE THE PROBE IS FIRMLY SECURED IN ITS MOUNTING
Although Renishaw probes require little maintenance, the performance of the probe
will be adversely affected if dirt, chips or liquids are allowed to enter the sealed
working parts. Therefore keep all components clean and free from grease and oil.
Periodically check cables for signs of damage, corrosion or loose connections.
WEAK LINK FOR STYLI WITH STEEL SHAFT - Optional
In the event of excessive stylus overtravel, the weak link stem is
designed to break, thereby protecting the probe from damage.
Fitting stylus with weak link onto probe
Take care to avoid stressing the weak link
during assembly - see page 33
To remove a broken stem
Weak link stem
12 mm
(0.47 in)
Note: THE WEAK LINK IS NOT USED WITH CERAMIC SHAFT STYLI
31
DIAPHRAGM INSPECTION
PROBE DIAPHRAGMS
The probe mechanism is
protected from coolant and
debris by two diaphragms,
these provide adequate
protection under normal
working conditions.
The user should periodically
check the outer diaphragm, for
signs of damage and coolant
leakage. If this is evident
replace the outer diaphragm.
The outer diaphragm is
resistant to coolant and oils.
However if the outer diaphragm
is damaged, the inner
diaphragm could become
weakened with prolonged
immersion in certain coolants
and oils.
The user must not remove the
inner diaphragm. If damaged,
return the probe to your
supplier for repair.
11
Lightly
grease
here
WARNING: NEVER ATTEMPT TO REMOVE DIAPHRAGM WITH METAL
OBJECTS
32
OUTER DIAPHRAGM INSPECTION
1. Remove the stylus
2. Unscrew the front cover.
3. Inspect outer diaphragm for
damage.
4. To remove outer diaphragm, grip
near the middle and pull upwards.
INNER DIAPHRAGM INSPECTION
5. Inspect inner diaphragm for damage.
If damaged return the probe to
your supplier for repair.
DO NOT REMOVE INNER
DIAPHRAGM
OUTER DIAPHRAGM
REPLACEMENT
6. Screw tool fully into stylus holder.
7. Fit new diaphragm.
8. The diaphragm must locate
centrally in the stylus holder
groove.
9. Press diaphragm to expel
trapped air.
10. Remove tool.
11. Lightly smear medium grease on
front cover lower surface.
Then refit cover and tighten.
12. Refit stylus
33
SCREW TORQUE VALUES - Nm (lbf.ft)
3 mm AF
3 Nm (2.21 lbf.ft)
OMM or OMI
1.5 - 3.5 Nm
(1.1 - 2.6 lbf.ft)
5 Nm
(3.68 lbf.ft)
25 Nm
(18.44 lbf.ft)
Shank
Adjusting plate
HOLD
MP7 – MP9
Ø8 mm ball - optional
OMP
2.5 mm AF
1.5 Nm (1.10 lbf.ft)
Align electrical
contacts
Weak link
Optional
Stylus
3 mm AF
3 Nm (2.21 lbf.ft)
Probe
head
7 mm AF
1 Nm (0.74 lbf.ft)
2 Nm
(1.47 lbf.ft)
5 mm AF
2 Nm
(1.47 lbf.ft)
3 mm AF
3 Nm (2.21 lbf.ft)
2.5 mm AF
1.1 Nm (0.8 lbf.ft)
34
SCREW TORQUE VALUES - Nm (lbf.ft)
Shank
Screw M3 x 8 mm long
2.5 mm AF
1.5 Nm
(1.10 lbf.ft)
2.5 mm AF
1.5 Nm
(1.10 lbf.ft)
Washer
OMP
Align electrical
contacts
Shank
MA6
adaptor
OMP
Align electrical
contacts
MPE
extension
housing
Probe
head
Align electrical
contacts
LPE
extension
bar
LP2
probe
M16
thread
Automatic
electrical
connection
HOLD
C spanner
Normal
1-12 Nm
(7.37-8.84 lbf.ft)
Maximum
20 Nm
(14.74 lbf.ft)
35
FAULT FINDING - If in doubt, consult your probe supplier.
PROBE FAILS TO SWITCH ON
Probe is already
If necessary switch
switched on.
probe off.
Dead battery.
Change battery.
Battery installed
incorrectly.
Check battery installation.
Probe not properly
aligned with
OMM/OMI.
Check alignment and if
OMM/OMI fixing is secure.
Beam obstructed.
Check if OMM/OMI window
is clean/remove obstruction.
OMM/OMI signal
too weak.
See performance envelope.
See page 8.
No OMI start signal.
See page 41.
No power to MI 12
or OMI.
Check if stable 24 V supply
is available.
Check connections and
fuses.
PROBE STOPS IN MID-CYCLE
Beam obstructed.
Check OMI/MI 12 error LED.
Remove obstruction.
PROBE CRASHES
Inspection probe
using toolsetting
probe signals.
When two systems active,
isolate tool setting probe.
Workpiece obstructing Review probe software.
probe path.
Probe length offset
missing.
Review probe software.
POOR PROBE REPEATABILITY
Debris on part.
Clean part.
Tool change
repeatability poor.
Verify probe repeatability
using single point move.
Loose mounting of
Check and tighten as
probe on shank/loose appropriate.
stylus.
Probe orientated 180° Verify probe position,
from calibrated
check on-centre setting.
position, or due to
M19 orientation.
Calibration and
update of offsets not
occurring.
Review probe software.
Review probe software.
Probe collision.
Find cause and rectify.
Damaged cable.
Check cables.
Power supply lost.
Check power supply.
Calibration and
probing speeds not
the same.
Probe unable to find
target surface.
Part missing or out of
position.
Calibrated feature has Check position.
moved.
Measurement occurs Review probe software.
as stylus leaves surface.
36
FAULT FINDING - If in doubt, consult your probe supplier.
POOR PROBE REPEATABILITY continued
Probing occurs within
Review probe software.
the machine’s
acceleration and
deceleration
zones.
Probe feedrate too
high.
Perform simple
repeatability trials
at various speeds.
Temperature variation
causes excessive
machine and
workpiece movement.
Minimise temperature
changes.
Increase frequency
of calibration.
Machine has poor
repeatability due to
loose encoders, tight
slideways and/or
accident damage.
Perform health check on
machine.
PROBE FAILS TO SWITCH OFF
Probe in time out
Wait 3 min (±1 min 10 sec)
mode.
for probe to switch off.
Probe placed in
User lighter styli.
carousel, during time
Review use of time out
out mode can be reset mode.
by carousel activity.
PROBE STATUS LED FAILS TO ILLUMINATE
Battery installed
Check battery installation.
incorrectly.
MI 12 POWER LED FAILS TO ILLUMINATE
WITH POWER ON
Faulty electrical
Check all connections.
contact.
Fuse blown.
Locate and replace blown
fuse.
Incorrect power
supply.
Ensure power supply is
is 24 Vdc.
MI 12 LOW BATTERY LED REMAINS
ILLUMINATED
Battery Installed
Check battery installation.
incorrectly.
Battery dead.
Replace battery.
37
FAULT FINDING - If in doubt, consult your probe supplier.
PROBE IS TRANSMITTING SPURIOUS READINGS Loose mountings or styli.
loose connections.
Damaged cables.
Check and replace
cable if damage is
PROBE FAILS TO RESEAT
found.
Probe trigger occurred
Electrical or optical
Move transmission
on reseat.
interference.
cables away from other
Inner and/or outer probe
cables carrying high
diaphragm is damaged.
currents.
inner diaphragm
System malfunctioning or
Shield from intense
inducing intermittent
light sources e.g.
xenon beams.
errors.
Electrically isolate
OMM from the machine
to prevent any
possibility of earth
loop.
Ensure there are no
arc welders,
stroboscopes or
other high intensity
light sources in close
proximity to the probe
system.
Poorly regulated power
correctly regulated.
power supply.
Ensure power supply is
Excessive machine
vibration.
Eliminate vibration.
Check and tighten
CORRECTLY
Move stylus clear of
workpiece.
Inspect/replace outer
diaphragm.
Return to supplier if
is damaged.
38
APPENDIX 1
ADAPTOR and EXTENSIONS
A maximum of one extension housing or extension is permitted per installation
OMP
Ø62 (2.44)
EXTENSION HOUSING
Extension housings allow deeper
access into workpiece features.
Extension housings fit between
the OMP and probe head.
MPE Probe head
extension Ø62 (2.44)
housing
Stylus
Shank
ADAPTOR + EXTENSION BAR
Features with restricted access can be
probed using an LP2 probe.
The MA6 adaptor allows an LP2 probe to
be used in place of the
MP7, MP8 or MP9 probe head, which is
substituted with an
MA6 + LP2.
Further reach is obtained by
adding an LPE extension between
the MA6 adaptor and LP2 probe.
Shank
dimensions mm (in)
35° OMP 87.9 (3.46)
70° OMP 87.4 (3.44)
MPE1 100 (3.94) 30
MPE2 150 (5.90) (1.18)
MPE3 200 (7.87)
MP7-8-9 probe head replaced with
MA6 adaptor + LPE extension + LP2 probe
OMP
Ø62 (2.44)
MA6
LPE
adaptor extension bar
Ø25 (0.98)
LP2
probe
40.8
(1.6)
25
(0.98)
LPE1 50 (1.96)
35° OMP 87.9 (3.46)
LPE2 100 (3.94)
70° OMP 87.4 (3.44)
LPE3 150 (5.90)
Stylus
39
APPENDIX 2
PSU3 POWER SUPPLY UNIT
The PSU3 is fully described in
User's guide H-2000-5057
The PSU3 provides a +24 V supply for
Renishaw interface units when a power
supply is not available from the CNC
machine control.
APPENDIX 3
OMM (OPTICAL MODULE MACHINE)
The OMM is fully described in
User's guide H-2000-5044
2
1
Front view
3
4
Power LED
When the green LED is lit,
the power supply is on.
Rear view
Mains switch
On/Off
KEEP WINDOW CLEAN
To fully maintain
effective signal
transmission
1. Red LED
Lit when power is on.
2. LEDs x 3
Transmit infra-red control signals
to the probe.
3. Green LED
Lit when signal is received from
the probe.
4. Yellow LED
Lit when the MI 12 sends a start,
error, reset signal to the probe.
40
APPENDIX 4
MI 12 INTERFACE UNIT
The MI 12 is fully described in
User's guide H-2000-5073
MI 12
MI 12-B
1. Audible indicator (bleeper)
The speaker is behind the front
panel.
4. LED probe status
Lit when probe is seated.
Off when stylus is deflected or an error
has occurred.
2. LED error
Lit when optical beam obstructed,
probe out of range, probe switched
off, etc.
5. LED power
Lit when power is on.
3. LED low battery
Replace probe battery as soon as
practicable, after this LED lights up.
5. Start button - switch SW1
Manual start push button.
Press button to switch system to operating
mode. Alternatively a signal from the
machine control can be used for the same
41
APPENDIX 5
OMI (OPTICAL MACHINE INTERFACE)
The OMI is fully described in
User's guide H-2000-5062
1. LED (yellow) – START signal status.
Lit when a START signal is transmitted
to the probe.
This LED will either flash once when a
machine controlled START signal is
commanded, or flash continuously at
one second intervals when the system
is set to 'Auto–start' mode and is
awaiting a probe transmission signal.
2. LED (red, yellow, green) – Infra red SIGNAL
strength received from probe.
As long as there is power to the system, this
LED will always be lit. It is a tri–colour LED and
indicates as follows :
Red
- Signal received from the probe is
either too weak or not there at all
(i.e. no signal).
Yellow -
Signal received is marginal.
i.e. The OMI is at the edge of its
operating envelope. Correct operation
in this region cannot be guaranteed.
Green -
Signal received is good and system
will operate correctly.
Note :
1. During a start transmission, the SIGNAL
LED will change through red to yellow and green.
This is the normal power up sequence.
2. The SIGNAL LED will flash (yellow or green)
if optical interference is being received whilst
the probe is not transmitting.
42
MAGNETIC LABEL
3
KEEP WINDOW
CLEAN
To fully maintain
effective signal
transmission
1
2
6
To assist the machine
operator, a summary of OMI
LED activity is provided on a
magnetic label, which may be
attached to the machine tool.
3. LED (clear x 3)
These LEDs transmit infra-red control
signals to the probe.
5. LED (red, green) – PROBE STATUS.
This bi–colour LED is lit when the OMI is powered.
Green - Probe is seated.
Red
- Probe is triggered or an
error has occurred.
The change of colour of this LED will coincide with
the probe status output devices changing state.
4. LED (red) – LOW BAT.
When the OMP battery voltage falls
below a set level, the low battery
output device changes state, and
causes the LOW BAT LED to
commence flashing on and off
4 times per second.
Replace the OMP battery as soon as
is practicable after the LED starts
flashing.
6. LED (red) – ERROR.
Lit when an error condition exists.
i.e. optical beam obstructed, probe out of optical
range, probe has switched off or battery is
exhausted.
When an error condition exists the probe status
output will be held in a triggered state and the probe
status LED will be RED.
The error LED illuminating will coincide with the error
output device changing state.
4
5
43
PARTS LIST - Please quote the Part No. when ordering equipment
Type
Part No.
Description
MP7 system
A-2033-6410
MP7 35° probe, battery, stylus Ø6 mm ball x 50 mm long,
MP7 system
A-2033-6411
MP7 70° probe, battery, stylus Ø6 mm ball x 50 mm long,
MP7 system
A-2115-0020
MP7 35° probe, battery, stylus Ø6 mm ball x 50 mm long,
MP7 system
A-2115-0021
MP7 70° probe, battery, stylus Ø6 mm ball x 50 mm long,
MP7 probe
A-2033-0700
MP7 35° probe, adjusting plate, battery, Ø8 mm centre ball & tool kit.
MP7 probe
A-2033-0701
MP7 70° probe, adjusting plate, battery, Ø8 mm centre ball & tool kit.
OMM, mounting bracket, MI 12 interface and tool kit.
OMM, mounting bracket, MI 12 interface and tool kit.
OMI, mounting bracket and tool kit.
OMI, mounting bracket and tool kit.
MP8 probe
—
See page 14.
MP9 system
A-2034-6001
MP9 35° probe, battery, stylus Ø6 mm ball x 50 mm long,
MP9 system
A-2034-6002
MP9 70° probe, battery, stylus Ø6mm ball x 50 mm long,
OMM, mounting bracket, MI 12 interface and tool kit.
OMM, mounting bracket, MI 12 interface and tool kit.
MP9 system
A-2115-0022
MP9 35° probe, battery, stylus Ø6 mm ball x 50 mm long,
MP9 system
A-2115-0023
MP9 70° probe, battery, stylus Ø6 mm ball x 50 mm long,
MP9 probe
A-2034-0035
MP9 35° probe, adjusting plate, battery, Ø8 mm centre ball & tool kit.
MP9 probe
A-2034-0036
MP9 70° probe, adjusting plate, battery, Ø8 mm centre ball & tool kit.
OMI, mounting bracket and tool kit.
OMI, mounting bracket and tool kit.
SOFTWARE
Software
—
Probe software for machine tools - See Data Sheet H-2000-2289.
44
PARTS LIST - Please quote the Part no. when ordering equipment
Type
Part no.
Stylus
A-5000-3709
Weak link kit
Weak link
Spanner
Battery
TK
A-2085-0068
M-2085-0069
P-TLO9-0003
P-BT03-0001
A-2053-7531
OMM
O-M-I
Mtg brkt
MI 12
MI 12-B
Panel mtg
PSU3
A-2033-0576
A-2115-0001
A-2033-0830
A-2075-0142
A-2075-0141
A-2033-0690
A-2019-0018
MPE1
MPE2
MPE3
MA6
LPE1
LPE2
LPE3
A-2033-6571
A-2033-6595
A-2033-6667
A-2063-7774
A-2063-7001
A-2063-7002
A-2063-7003
Description
ACCESSORIES
PS3-1C ceramic stylus Ø6 mm ball x 50 mm long.
Styli are fully listed in Renishaw styli guide H-1000-3200.
Weak link kit comprising: two stylus weak link stems and spanner.
Stylus weak link stem.
Spanner for stylus weak link stem.
9 V alkaline battery.
Probe tool kit for MP7-8- 9 comprising : Ø1.98 mm stylus tool,
Hexagon keys 1.5 mm, 2.0 mm, 2.5 mm, 3.0 mm and 4.0 mm AF.
OMM complete with cable Ø5.1 mm x 25 m (Ø0.2 in x 82 ft).
O-M-I complete with cable 8 m long (26.2 ft).
OMM/O-M-I mounting bracket with fixing screws, washers and nuts.
MI 12 interface unit.
MI 12 interface board.
Panel mounting kit for MI 12 interface unit.
PSU3 power supply unit 85-264 V input.
EXTENSIONS and ADAPTOR
MPE1 extension housing Ø62 x 100 mm long with holding screws.
MPE2 extension housing Ø62 x 150 mm long with holding screws.
MPE3 extension housing Ø62 x 200 mm long with holding screws.
MA6 Adaptor, allows LP2 probe to be used in place of MP7-8-9 probe.
LPE1 extension bar Ø25 x 50 mm long.
LPE2 extension bar Ø25 x 100 mm long.
LPE3 extension bar Ø25 x 150 mm long.
Renishaw plc
New Mills, Wotton-under-Edge,
Gloucestershire, GL12 8JR
United Kingdom
T +44 (0)1453 524 524
F +44 (0)1453 524 901
E [email protected]
www.renishaw.com
Installation and user’s guide
H-2000-5085-02-I
MP7 - MP8 - MP9 probe systems
For worldwide contact details, please
visit our main website at
www.renishaw.com/contact
*H-2000-5085-02*