1
353 PRECISION ALTIMETER TESTER
353 PRECISION ALTIMETER TESTER
OPERATING INSTRUCTIONS
OPERATING INSTRUCTIONS
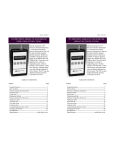
The Model 353 provides Altitude,
Rate of Climb (R of C), and Leak
testing at the stroke of a key. It is
microprocessor based and its accuracy is ± 0.02% of full scale including all effects of linearity, repeatability, hysteresis and temperature over the range of 23 ºF to 122
°F. Altitude can be displayed in
feet or meters and R of C in fpm or
mpm. Resolution is to the nearest
foot or meter. Other display options
include user selectable pressure
units of inches of Mercury, mm of
Mercury or millibars. Included is a
feature for leak testing of aircraft
altimeter systems.
The Model 353 provides Altitude,
Rate of Climb (R of C), and Leak
testing at the stroke of a key. It is
microprocessor based and its accuracy is ± 0.02% of full scale including all effects of linearity, repeatability, hysteresis and temperature over the range of 23 ºF to 122
°F. Altitude can be displayed in
feet or meters and R of C in fpm or
mpm. Resolution is to the nearest
foot or meter. Other display options
include user selectable pressure
units of inches of Mercury, mm of
Mercury or millibars. Included is a
feature for leak testing of aircraft
altimeter systems.
TABLE OF CONTENTS
TABLE OF CONTENTS
Subject
Page
Keypad functions ----------------------------------------------------------1
Measure Mode -------------------------------------------------------------2
Program Mode -------------------------------------------------------------2
Units Select --------------------------------------------------------------2
Damp Rate Select-------------------------------------------------------4
Auto Shut Off -----------------------------------------------------------5
User Info Select / Start-up Header information --------------------6
Contrast Select ----------------------------------------------------------8
R of C Rate Select ------------------------------------------------------9
Changing the battery ------------------------------------------------------9
Re-zeroing Procedures/Maintenance Recommendation ------ 10, 11
Accuracy Recertification / Re-calibration --------------------------- 12
Program / Re-zero Lockout--------------------------------------------- 13
Specifications ------------------------------------------------------------ 14
Subject
Page
Keypad functions ----------------------------------------------------------1
Measure Mode -------------------------------------------------------------2
Program Mode -------------------------------------------------------------2
Units Select--------------------------------------------------------------2
Damp Rate Select-------------------------------------------------------4
Auto Shut Off -----------------------------------------------------------5
User Info Select / Start-up Header information --------------------6
Contrast Select ----------------------------------------------------------8
R of C Rate Select ------------------------------------------------------9
Changing the battery ------------------------------------------------------9
Re-zeroing Procedures/Maintenance Recommendation -------10, 11
Accuracy Recertification / Re-calibration --------------------------- 12
Program / Re-zero Lockout -------------------------------------------- 13
Specifications ------------------------------------------------------------ 14
F/N 353:440-3
Apr. 24, 2000
353ope3coverMay 22 2000....
page 1
F/N 353:440-3
Apr. 24, 2000
Wednesday, June 13, 2001 14:17
KEYPAD FUNCTIONS
KEYPAD FUNCTIONS
ON/OFF & BACKSPACE KEY
Turns the tester on and then turns it off from the Measure
Mode. Also serves as a backspace key when editing in the
Program Mode. The backspace function takes the user out
of a programmable register without changing the previous
setting. Pressing this key repeatedly will return the user to the
Measure Mode and then shut off the tester.
ON/OFF & BACKSPACE KEY
Turns the tester on and then turns it off from the Measure
Mode. Also serves as a backspace key when editing in the
Program Mode. The backspace function takes the user out
of a programmable register without changing the previous
setting. Pressing this key repeatedly will return the user to the
Measure Mode and then shut off the tester.
LEAK & UP ARROW KEY
In the Measure Mode activates and deactivates the LEAK
function per FAR 91.411 guidelines. After an aircraft’s
static system is evacuated to desired level, LEAK starts a 120
second settling time countdown (reduce settling time in 30
sec increments by pressing LEAK again). A 60 second leak test
follows displaying starting altitude in upper right and current altitude
in upper left. Leak in FPM or MPM is displayed after test period. Up
arrow key is used to scroll through the programmable registers when
the unit is in the Program Mode. Once a programmable register is
selected the up arrow
can be used to edit that register.
LEAK & UP ARROW KEY
In the Measure Mode activates and deactivates the LEAK
function per FAR 91.411 guidelines. After an aircraft’s
static system is evacuated to desired level, LEAK starts a 120
second settling time countdown (reduce settling time in 30
sec increments by pressing LEAK again). A 60 second leak test
follows displaying starting altitude in upper right and current altitude
in upper left. Leak in FPM or MPM is displayed after test period. Up
arrow key is used to scroll through the programmable registers when
the unit is in the Program Mode. Once a programmable register is
selected the up arrow
can be used to edit that register.
R of C & DOWN ARROW KEY
In the Measure Mode activates and deactivates the Rate of
Climb function. R of C is displayed on top line with
instantaneous altitude remaining on bottom. The time period
over which the R of C is calculated can be adjusted to user
preference through the Program Mode. Down arrow key is used to
scroll through programmable registers with the unit in the Program
Mode. Once a programmable register is selected the down arrow
can be used to edit that register.
R of C & DOWN ARROW KEY
In the Measure Mode activates and deactivates the Rate of
Climb function. R of C is displayed on top line with
instantaneous altitude remaining on bottom. The time period
over which the R of C is calculated can be adjusted to user
preference through the Program Mode. Down arrow key is used to
scroll through programmable registers with the unit in the Program
Mode. Once a programmable register is selected the down arrow
can be used to edit that register.
PRGM & ENTER KEY
Puts the tester into Program Mode (with prompt for
password if Lockout is set) from Measure Mode. When in
the Program Mode, pressing this key selects the
programmable register to be edited . After the register has
been edited, pressing the PRGM key enters the new setting into the
tester’s non-volatile memory. This key also acts as a forward space
key when editing user input such as the header name.
PRGM & ENTER KEY
Puts the tester into Program Mode (with prompt for
password if Lockout is set) from Measure Mode. When in
the Program Mode, pressing this key selects the
programmable register to be edited . After the register has
been edited, pressing the PRGM key enters the new setting into the
tester’s non-volatile memory. This key also acts as a forward space
key when editing user input such as the header name.
1
353oper 3May 22 2000.pub
page 1
1
Wednesday, June 13, 2001 14:19
MEASURE MODE
MEASURE MODE
The Measure Mode is the tester’s start up mode. Measured altitude or
absolute pressure is displayed in user selected units.
The Measure Mode is the tester’s start up mode. Measured altitude or
absolute pressure is displayed in user selected units.
PROGRAM MODE
PROGRAM MODE
The Program Mode is used to configure the tester for Measure
Mode operation. The configurable registers that are found in the
Program Mode are Units Select, Damp Rate Select, User Info Select,
Contrast Select, R of C Rate Select and Exit. The tester can be put into
the Program Mode at any time during Measure Mode operation by
pressing the PRGM key (if Lockout is set, the correct code must be
entered when prompted - see page 13 for Lockout instructions). The
top line of the display will read “PROGRAM MODE”. The bottom
line will read “UNITS SELECT”. Press the up or down arrow keys to
scroll through the Program Mode to the desired register.
The Program Mode is used to configure the tester for Measure
Mode operation. The configurable registers that are found in the
Program Mode are Units Select, Damp Rate Select, User Info Select,
Contrast Select, R of C Rate Select and Exit. The tester can be put into
the Program Mode at any time during Measure Mode operation by
pressing the PRGM key (if Lockout is set, the correct code must be
entered when prompted - see page 13 for Lockout instructions). The
top line of the display will read “PROGRAM MODE”. The bottom
line will read “UNITS SELECT”. Press the up or down arrow keys to
scroll through the Program Mode to the desired register.
UNITS SELECT
UNITS SELECT
The standard engineering units available on the Precision Altimeter
Tester are the following:
The standard engineering units available on the Precision Altimeter
Tester are the following:
1. FEET
2. INCHES OF Hg
3. MM OF Hg
4. METERS
5. MILLIBARS
To change engineering unit of measure the tester should be “ON” and
in the Measure Mode. Then use the following steps:
Keystroke
Display
1. FEET
2. INCHES OF Hg
3. MM OF Hg
4. METERS
5. MILLIBARS
To change engineering unit of measure the tester should be “ON” and
in the Measure Mode. Then use the following steps:
Keystroke
Display
1. Press PRGM key.
Top line reads “PROGRAM
MODE” and bottom line reads
“UNITS SELECT”.
1. Press PRGM key.
Top line reads “PROGRAM
MODE” and bottom line reads
“UNITS SELECT”.
2. Press ENTER key (right
arrow).
Top line reads “UNITS SELECT”
and bottom shows current
engineering unit.
2. Press ENTER key (right
arrow).
Top line reads “UNITS SELECT”
and bottom shows current
engineering unit.
2
353oper 3May 22 2000.pub
page 2
2
Wednesday, June 13, 2001 14:19
3. Press up or down
arrow key until desired
engineering unit is displayed.
Engineering units on bottom line
of display change.
3. Press up or down
arrow key until desired
engineering unit is displayed.
Engineering units on bottom line
of display change.
4. Press ENTER key (right
arrow) to select engineering
unit.
Top line reads “PROGRAM
MODE” and bottom line reads
“UNITS SELECT”.
4. Press ENTER key (right
arrow) to select engineering
unit.
Top line reads “PROGRAM
MODE” and bottom line reads
“UNITS SELECT”.
5. Press the backspace
key.
Display returns to Measure Mode
in new engineering unit.
5. Press the backspace
key.
Display returns to Measure Mode
in new engineering unit.
arrow
3
353oper 3May 22 2000.pub
page 3
arrow
3
Wednesday, June 13, 2001 14:19
DAMP RATE SELECT
DAMP RATE SELECT
Adjustable damping is available to steady the display when measuring
pulsating altitude or pressure. The Precision Altimeter Tester has
damping rates of 0.1, 0.2, 0.5, 1, 2, and 5 seconds. Damping is done
by averaging new data from the pressure sensor against previously
collected data. The microprocessor collects data from the sensor every
0.1 seconds. When set at 0.1 seconds, the display updates every 0.5
seconds showing the current 0.1 second pressure reading. When set at
5 seconds, the display updates every 0.5 seconds showing the average
of the previous 5 seconds readings. Therefore, at this setting it takes 5
seconds from the time pressure is changed until the tester displays the
actual applied pressure.
Adjustable damping is available to steady the display when measuring
pulsating altitude or pressure. The Precision Altimeter Tester has
damping rates of 0.1, 0.2, 0.5, 1, 2, and 5 seconds. Damping is done
by averaging new data from the pressure sensor against previously
collected data. The microprocessor collects data from the sensor every
0.1 seconds. When set at 0.1 seconds, the display updates every 0.5
seconds showing the current 0.1 second pressure reading. When set at
5 seconds, the display updates every 0.5 seconds showing the average
of the previous 5 seconds readings. Therefore, at this setting it takes 5
seconds from the time pressure is changed until the tester displays the
actual applied pressure.
To set the damp rate:
To set the damp rate:
Keystroke
Display
Keystroke
Display
1. From the Measure Mode,
press the PRGM key.
Top line reads “PROGRAM
MODE” bottom line reads
“UNITS SELECT”.
1. From the Measure Mode,
press the PRGM key.
Top line reads “PROGRAM
MODE” bottom line reads
“UNITS SELECT”.
2. Press the up
key.
Bottom line reads “DAMP RATE
SELECT”.
2. Press the up
key.
Bottom line reads “DAMP RATE
SELECT”.
3. Press ENTER key (right
arrow).
Top line reads “DAMP RATE
SELECT”, bottom line reads
current damp rate.
3. Press ENTER key (right
arrow).
Top line reads “DAMP RATE
SELECT”, bottom line reads
current damp rate.
4. Press the up or down
arrow keys to change to
desired rate.
Bottom line shows new damp rate
in seconds.
4. Press the up or down
arrow keys to change to
desired rate.
Bottom line shows new damp rate
in seconds.
5. Press ENTER key (right
arrow).
Selects damp rate, top line reads
“PROGRAM MODE”, bottom
line reads “UNITS SELECT”.
5. Press ENTER key (right
arrow).
Selects damp rate, top line reads
“PROGRAM MODE”, bottom
line reads “UNITS SELECT”.
6. Press the backspace
key.
Returns to Measure Mode.
6. Press the backspace
key.
Returns to Measure Mode.
arrow
arrow
4
353oper 3May 22 2000.pub
page 4
arrow
arrow
4
Wednesday, June 13, 2001 14:19
AUTO SHUT-OFF
AUTO SHUT-OFF
Enabling the Auto Shut-Off feature allows the tester to turn itself off
after a user selected period of keypad inactivity. Selectable options
include DISABLED, 10 Minutes, 20 Minutes, 30 Minutes, 45 Minutes
and 60 Minutes. Disabling this feature limits the tester to being turned
off by using the ON/OFF key only. Units are shipped from the factory
with the Auto Shut-Off set for 10 Minutes. To change the auto shut-off
setting, follow the steps below.
Enabling the Auto Shut-Off feature allows the tester to turn itself off
after a user selected period of keypad inactivity. Selectable options
include DISABLED, 10 Minutes, 20 Minutes, 30 Minutes, 45 Minutes
and 60 Minutes. Disabling this feature limits the tester to being turned
off by using the ON/OFF key only. Units are shipped from the factory
with the Auto Shut-Off set for 10 Minutes. To change the auto shut-off
setting, follow the steps below.
Keystroke
Display
Keystroke
Display
1. From the Measure Mode,
press the PRGM key.
Top line reads “PROGRAM
MODE”, bottom line reads
“UNITS SELECT”.
1. From the Measure Mode,
press the PRGM key.
Top line reads “PROGRAM
MODE”, bottom line reads
“UNITS SELECT”.
2. Press up
Top line reads “PROGRAM
MODE”, bottom line reads
“USER INFO SELECT”.
2. Press up
Top line reads “PROGRAM
MODE”, bottom line reads
“USER INFO SELECT”.
3. Press ENTER key (right
arrow), then up arrow key
three times.
Top line reads “AUTO SHUTOFF”, bottom reads “ENTER TO
SELECT”.
3. Press ENTER key (right
arrow), then up arrow key
three times.
Top line reads “AUTO SHUTOFF”, bottom reads “ENTER TO
SELECT”.
4. Press ENTER key (right
arrow), then the up or
down arrow keys until
desired shut-off time is shown.
Top line reads “AUTO SHUTOFF”, bottom line toggles to
“DISABLED”, “10 MINUTES”,
“20 MINUTES”, “30 MINUTES”,
“45 MINUTES” and “60
MINUTES”.
4. Press ENTER key (right
arrow), then the up or
down arrow keys until
desired shut-off time is shown.
Top line reads “AUTO SHUTOFF”, bottom line toggles to
“DISABLED”, “10 MINUTES”,
“20 MINUTES”, “30 MINUTES”,
“45 MINUTES” and “60
MINUTES”.
5. Press ENTER key (right
arrow).
Desired Auto Shut-Off time is
selected, top line reads “AUTO
SHUT-OFF”, bottom reads
“ENTER TO SELECT”.
5. Press ENTER key (right
arrow).
Desired Auto Shut-Off time is
selected, top line reads “AUTO
SHUT-OFF”, bottom reads
“ENTER TO SELECT”.
6. Press the backspace
key twice.
Returns to Measure Mode.
6. Press the backspace
key twice.
Returns to Measure Mode.
arrow key twice.
arrow
5
353oper 3May 22 2000.pub
page 5
arrow key twice.
arrow
5
Wednesday, June 13, 2001 14:19
USER INFO SELECT
USER INFO SELECT
The User Info Select register is designed to provide the user with
information on the hardware and software in the tester. This register
stores information on the sensor’s serial number, software version, date
of last calibration, Auto Shut-Off status and the instrument Start-Up
Header. This Header appears on the top display line when the tester is
turned on. The second line displays the Full Scale of the tester in the
last engineering units selected. The factory setting of the Header is
“MERIAM INSTR.” but can be edited to show a custom alphanumeric string as desired by the user. To view or configure any Unit
Info Select register, follow the keystrokes listed below.
The User Info Select register is designed to provide the user with
information on the hardware and software in the tester. This register
stores information on the sensor’s serial number, software version, date
of last calibration, Auto Shut-Off status and the instrument Start-Up
Header. This Header appears on the top display line when the tester is
turned on. The second line displays the Full Scale of the tester in the
last engineering units selected. The factory setting of the Header is
“MERIAM INSTR.” but can be edited to show a custom alphanumeric string as desired by the user. To view or configure any Unit
Info Select register, follow the keystrokes listed below.
Keystroke
Display
Keystroke
Display
1. From the Measure Mode,
press the PRGM key.
Top line reads “PROGRAM
MODE”. Bottom line reads
“UNITS SELECT”
1. From the Measure Mode,
press the PRGM key.
Top line reads “PROGRAM
MODE”. Bottom line reads
“UNITS SELECT”
2. Press the up
two times.
Bottom line changes to “USER
INFO SELECT”
2. Press the up
two times.
Bottom line changes to “USER
INFO SELECT”
3. Press the ENTER key ( ).
Bottom line shows S/N.
3. Press the ENTER key ( ).
Bottom line shows S/N.
4. Press the up
arrow key.
Software version number shown.
4. Press the up
arrow key.
Software version number shown.
5. Press the up
arrow key.
Manufacture date shown.
5. Press the up
arrow key.
Manufacture date shown.
6. Press the up
arrow key.
Top line reads “AUTO SHUT
OFF”, bottom reads “ENTER TO
SELECT”. See steps on page 5.
6. Press the up
arrow key.
Top line reads “AUTO SHUT
OFF”, bottom reads “ENTER TO
SELECT”. See steps on page 5.
7. Press the up
arrow key.
Top line reads “LOCKOUT
CODE”, bottom reads “ENTER
TO SELECT”. See steps on page
13.
7. Press the up
arrow key.
Top line reads “LOCKOUT
CODE”, bottom reads “ENTER
TO SELECT”. See steps on page
13.
arrow key
Continued on next page...
Continued on next page...
6
353oper 3May 22 2000.pub
page 6
arrow key
6
Wednesday, June 13, 2001 14:19
8. To edit the Header, press the
up arrow key .
Top line reads “HEADER
NAME”, bottom line reads
“MERIAM INSTR.”, cursor
flashes at bottom left.
8. To edit the Header, press the
up arrow key .
Top line reads “HEADER
NAME”, bottom line reads
“MERIAM INSTR.”, cursor
flashes at bottom left.
9. Press the up or down
arrow keys to set the
alpha-numeric value.
Displays a number between 0 and
9, a letter from A to Z, / or a
blank space.
9. Press the up or down
arrow keys to set the
alpha-numeric value.
Displays a number between 0 and
9, a letter from A to Z, / or a
blank space.
10. Press ENTER key (right
arrow) to accept the selected
value.
Cursor advances one space to
right.
10. Press ENTER key (right
arrow) to accept the selected
value.
Cursor advances one space to
right.
11. Repeat steps 11 and 12
until the desired Header
is shown.
11. Repeat steps 11 and 12
until the desired Header
is shown.
12. If an error is made, press
the back arrow key until
cursor is over the incorrect
value. Follow step 9 - 11 to
correct. Press the right
arrow to advance the cursor
without changing values.
Corrected value is displayed.
12. If an error is made, press
the back arrow key until
cursor is over the incorrect
value. Follow step 9 - 11 to
correct. Press the right
arrow to advance the cursor
without changing values.
Corrected value is displayed.
13. When Header is complete
press the PRGM key to
advance cursor to line end.
Cursor flashes at bottom right.
13. When Header is complete
press the PRGM key to
advance cursor to line end.
Cursor flashes at bottom right.
14. Press ENTER key (right
arrow).
Top line reads “PROGRAM
MODE” bottom reads “UNITS
SELECT”.
14. Press ENTER key (right
arrow).
Top line reads “PROGRAM
MODE” bottom reads “UNITS
SELECT”.
15. Press the backspace
key.
arrow
Returns to Measure Mode.
7
353oper 3May 22 2000.pub
page 7
15. Press the backspace
key.
arrow
Returns to Measure Mode.
7
Wednesday, June 13, 2001 14:19
CONTRAST SELECT
CONTRAST SELECT
The Contrast Select register allows the user to adjust the character
contrast of the LCD display to provide the best visibility for the
ambient conditions. If during the contrast adjustment an error is made
pressing the backspace
key returns the display to the previous
contrast setting. To adjust the contrast follow the keystrokes below:
The Contrast Select register allows the user to adjust the character
contrast of the LCD display to provide the best visibility for the
ambient conditions. If during the contrast adjustment an error is made
pressing the backspace
key returns the display to the previous
contrast setting. To adjust the contrast follow the keystrokes below:
Keystroke
Display
Keystroke
Display
1. From the Measure Mode
press the PRGM key.
Top line reads “PROGRAM
MODE” bottom reads “UNITS
SELECT”.
1. From the Measure Mode
press the PRGM key.
Top line reads “PROGRAM
MODE” bottom reads “UNITS
SELECT”.
2. Press the up
three times.
Bottom line reads “CONTRAST
SELECT”.
2. Press the up
three times.
Bottom line reads “CONTRAST
SELECT”.
3. Press ENTER key (right
arrow).
Top line reads “CONTRAST
ADJUST”, bottom line shows a
numeric value.
3. Press ENTER key (right
arrow).
Top line reads “CONTRAST
ADJUST”, bottom line shows a
numeric value.
4. Press up arrow to decrease
contrast or down arrow to
increase the contrast.
LCD lightens or darkens
depending on value set.
4. Press up arrow to decrease
contrast or down arrow to
increase the contrast.
LCD lightens or darkens
depending on value set.
5. Press the PRGM key.
Accepts selected setting, top line
reads “PROGRAM MODE”,
bottom reads “UNITS SELECT”.
5. Press the PRGM key.
Accepts selected setting, top line
reads “PROGRAM MODE”,
bottom reads “UNITS SELECT”.
6. Press backspace
Returns to Measure Mode.
6. Press backspace
Returns to Measure Mode.
arrow key
arrow key.
8
353oper 3May 22 2000.pub
page 8
arrow key
arrow key.
8
Wednesday, June 13, 2001 14:19
R OF C RATE SELECT
R OF C RATE SELECT
The R of C Rate Select feature allows the user to customize the time
period over which the Rate of Climb is calculated. When testing for
rapidly changing climb, short time periods are desirable. Longer
periods yield the most stable display for calibrating climb indicators.
To change the R of C Rate, follow the keystrokes listed below.
The R of C Rate Select feature allows the user to customize the time
period over which the Rate of Climb is calculated. When testing for
rapidly changing climb, short time periods are desirable. Longer
periods yield the most stable display for calibrating climb indicators.
To change the R of C Rate, follow the keystrokes listed below.
Keystroke
Display
Keystroke
Display
1. From the Measure Mode
press the PRGM key.
Top line reads “PROGRAM
MODE” bottom reads “UNITS
SELECT”.
1. From the Measure Mode
press the PRGM key.
Top line reads “PROGRAM
MODE” bottom reads “UNITS
SELECT”.
2. Press the up
four times.
Bottom line reads “R of C RATE
SELECT”.
2. Press the up
four times.
Bottom line reads “R of C RATE
SELECT”.
3. Press ENTER key (right
arrow).
Top line reads “R of C RATE
SELECT” bottom line reads value
3. Press ENTER key (right
arrow).
Top line reads “R of C RATE
SELECT” bottom line reads value
4. Press up or down arrow
key to select the desired Rate.
Bottom line shows R of C Rate in
seconds.
4. Press up or down arrow
key to select the desired Rate.
Bottom line shows R of C Rate in
seconds.
5. Press ENTER key (right
arrow).
Accepts new R of C Rate , top
line reads “PROGRAM MODE”,
bottom reads “UNITS SELECT”.
5. Press ENTER key (right
arrow).
Accepts new R of C Rate , top
line reads “PROGRAM MODE”,
bottom reads “UNITS SELECT”.
6. Press backspace
Returns to Measure Mode.
6. Press backspace
Returns to Measure Mode.
arrow key
arrow key.
arrow key
arrow key.
CHANGING THE BATTERY
CHANGING THE BATTERY
The tester is powered by a 9 volt alkaline (or lithium) battery. When
the output of the battery under load drops below 6.5 volts the display
flashes “LOW POWER DETECT” and “REPLACE BATTERY”. To
replace the battery locate the battery compartment in the bottom rear of
the tester. Push down on the small rectangular area on the battery
cover and slide the cover out the bottom of the unit. Pull the battery
connector off the battery terminals. Plug the new battery into the
connector and install in the compartment. Slide the battery cover on
until the locking clip locks into the tester housing.
The tester is powered by a 9 volt alkaline (or lithium) battery. When
the output of the battery under load drops below 6.5 volts the display
flashes “LOW POWER DETECT” and “REPLACE BATTERY”. To
replace the battery locate the battery compartment in the bottom rear of
the tester. Push down on the small rectangular area on the battery
cover and slide the cover out the bottom of the unit. Pull the battery
connector off the battery terminals. Plug the new battery into the
connector and install in the compartment. Slide the battery cover on
until the locking clip locks into the tester housing.
9
353oper 3May 22 2000.pub
page 9
9
Wednesday, June 13, 2001 14:19
RE-ZEROING PROCEDURE / MAINTENANCE RECOMMENDATIONS
RE-ZEROING PROCEDURE / MAINTENANCE RECOMMENDATIONS
To maintain the accuracy of the 353 Precision Altimeter Tester,
periodic re-zeroing is recommended. Zero shift can occur in the
absolute pressure sensor. While zero shift will not alter the calibration
curve in any way, shift of sufficient magnitude can cause the indicated
accuracy to fall outside of factory specification. Meriam recommends
re-zeroing the 353 every sixty (60) days during seasonal use or after
twenty-five (25) exposures to extreme temperature conditions (below
23° F or above 104° F). The maintenance procedure is given below.
To maintain the accuracy of the 353 Precision Altimeter Tester,
periodic re-zeroing is recommended. Zero shift can occur in the
absolute pressure sensor. While zero shift will not alter the calibration
curve in any way, shift of sufficient magnitude can cause the indicated
accuracy to fall outside of factory specification. Meriam recommends
re-zeroing the 353 every sixty (60) days during seasonal use or after
twenty-five (25) exposures to extreme temperature conditions (below
23° F or above 104° F). The maintenance procedure is given below.
Accurate values for elevation above sea level, outside air temperature
and “corrected to sea level” barometric pressure will be needed to
complete the re-zero procedure. Most certified repair stations will
know their elevation above sea level. Temperature to ±3° F is
adequate. The “corrected to sea level” barometric pressure should be
obtained from the user’s standard or from another reliable and accurate
source. Never use station (uncorrected) barometer in the re-zero
procedure.
Accurate values for elevation above sea level, outside air temperature
and “corrected to sea level” barometric pressure will be needed to
complete the re-zero procedure. Most certified repair stations will
know their elevation above sea level. Temperature to ±3° F is
adequate. The “corrected to sea level” barometric pressure should be
obtained from the user’s standard or from another reliable and accurate
source. Never use station (uncorrected) barometer in the re-zero
procedure.
To Re-zero, follow the procedure below. If a Lockout is set, performing step 2, below, will result in a Lockout prompt. The Lockout code
will need to be input before access to the Re-zero is permitted. See
page 13 for details.
To Re-zero, follow the procedure below. If a Lockout is set, performing step 2, below, will result in a Lockout prompt. The Lockout code
will need to be input before access to the Re-zero is permitted. See
page 13 for details.
Keystroke
Display
Keystroke
Display
1.Turn unit on and allow 15 min. Measure Mode activated.
warm up. Vent pressure conn- Previously selected units and
ection to atmosphere.
current value shown.
1.Turn unit on and allow 15 min. Measure Mode activated.
warm up. Vent pressure conn- Previously selected units and
ection to atmosphere.
current value shown.
2.Press up and down
arrow keys simultaneously.
Top line reads “ZEROING
SOURCE”, bottom line reads
“SEA LEVEL PRESS.”
2.Press up and down
arrow keys simultaneously.
Top line reads “ZEROING
SOURCE”, bottom line reads
“SEA LEVEL PRESS.”
3.Press right arrow key to
select this “ZERO SOURCE”.
For other zeroing options, see
OPTIONS after Step 8 below.
Top line reads previously stored
“ELEV”, bottom line reads
“CHANGE? YES”.
3.Press right arrow key to
select this “ZERO SOURCE”.
For other zeroing options, see
OPTIONS after Step 8 below.
Top line reads previously stored
“ELEV”, bottom line reads
“CHANGE? YES”.
10
353oper 3May 22 2000.pub
page 10
10
Wednesday, June 13, 2001 14:19
4.a.To enter new ELEV, press
right arrow key.Use up or
down arrow keys to change
the first position.Use right
arrow key.Continue procedure
until correct ELEV is shown.
Top line reads “ELEVATION
VALUE:”, bottom line shows old
value.Cursor flashes at first
position while value is corrected,
then moves to right once right
arrow key is pressed.
4.a.To enter new ELEV, press
right arrow key.Use up or
down arrow keys to change
the first position.Use right
arrow key.Continue procedure
until correct ELEV is shown.
Top line reads “ELEVATION
VALUE:”, bottom line shows old
value.Cursor flashes at first
position while value is corrected,
then moves to right once right
arrow key is pressed.
4.b.To accept stored ELEV, use
up or down arrow key to
toggle to “NO” and press right
arrow key.
“CHANGE? YES” changes to
“CHANGE? NO” and previously
stored ELEV is accepted.
4.b.To accept stored ELEV, use
up or down arrow key to
toggle to “NO” and press right
arrow key.
“CHANGE? YES” changes to
“CHANGE? NO” and previously
stored ELEV is accepted.
5.Right arrow key completes
ELEV screen.
Top line reads previously stored
“TEMP”, bottom line reads
“CHANGE? YES”.
5.Right arrow key completes
ELEV screen.
Top line reads previously stored
“TEMP”, bottom line reads
“CHANGE? YES”.
6.To enter new TEMP, follow
Step 4.a. To accept the TEMP
displayed, follow Step 4.b.
Top and bottom lines read similar
to 4.a. and 4.b. above.
6.To enter new TEMP, follow
Step 4.a. To accept the TEMP
displayed, follow Step 4.b.
Top and bottom lines read similar
to 4.a. and 4.b. above.
7.Right arrow key completes
TEMP screen.
Top line reads “SEA LEVEL
VALUE:”, bottom line reads
previously stored value.
7.Right arrow key completes
TEMP screen.
Top line reads “SEA LEVEL
VALUE:”, bottom line reads
previously stored value.
8.To enter a new “SEA LEVEL
VALUE”, follow Step 4.a.
To accept displayed value, use
right arrow key to finish.
Re-zero procedure is completed
and display returns to Measure
Mode.
8.To enter a new “SEA LEVEL
VALUE”, follow Step 4.a.
To accept displayed value, use
right arrow key to finish.
Re-zero procedure is completed
and display returns to Measure
Mode.
OPTIONS
A.At “ZEROING SOURCE”
menu (see Step 3), use up
arrow key to move to
“FACTORY ZERO” source.
“FACTORY ZERO” is displayed.
Upon use of right arrow key, the
factory zero is restored.Display
returns to Measure Mode.
OPTIONS
A.At “ZEROING SOURCE”
menu (see Step 3), use up
arrow key to move to
“FACTORY ZERO” source.
“FACTORY ZERO” is displayed.
Upon use of right arrow key, the
factory zero is restored.Display
returns to Measure Mode.
B.Use up arrow key to move
to “REF TO ABS ZERO”.Apply
complete vacuum (<10 microns).
Use right arrow key to finish.
“REF TO ABS ZERO” is
displayed.Upon use of right
arrow key - after complete vacuum
is applied - a new zero is taken.
B.Use up arrow key to move
to “REF TO ABS ZERO”.Apply
complete vacuum (<10 microns).
Use right arrow key to finish.
“REF TO ABS ZERO” is
displayed.Upon use of right
arrow key - after complete vacuum
is applied - a new zero is taken.
11
353oper 3May 22 2000.pub
page 11
11
Wednesday, June 13, 2001 14:19
ACCURACY RECERTIFICATION / RECALIBRATION
ACCURACY RECERTIFICATION / RECALIBRATION
The Precision Altimeter Tester’s accuracy can be recertified using a
± 0.0035% of reading absolute deadweight tester. The tester should be
checked at a minimum of four test points: 25%, 50%, 75% and 100%
of the units range (900 mm Hg Abs.). Before performing the evaluation, perform the re-zeroing procedure (see Page 10) using the most
accurate “corrected to sea level” barometric pressure possible and
consider the following information.
The Precision Altimeter Tester’s accuracy can be recertified using a
± 0.0035% of reading absolute deadweight tester. The tester should be
checked at a minimum of four test points: 25%, 50%, 75% and 100%
of the units range (900 mm Hg Abs.). Before performing the evaluation, perform the re-zeroing procedure (see Page 10) using the most
accurate “corrected to sea level” barometric pressure possible and
consider the following information.
1. Use the User Unit Select option in Program Mode to match the
Precision Altimeter Tester units to the deadweight tester units. Be sure
to match the temperature reference of the deadweight tester to the
Precision Altimeter Tester temperature reference (0° C for inches Hg
and mm Hg units; Millibars has no temperature reference).
1. Use the User Unit Select option in Program Mode to match the
Precision Altimeter Tester units to the deadweight tester units. Be sure
to match the temperature reference of the deadweight tester to the
Precision Altimeter Tester temperature reference (0° C for inches Hg
and mm Hg units; Millibars has no temperature reference).
2. Correct the deadweight tester readings for ambient temperature
when it is different from the reference temperature. The Precision
Altimeter Tester does this automatically.
2. Correct the deadweight tester readings for ambient temperature
when it is different from the reference temperature. The Precision
Altimeter Tester does this automatically.
3. The local gravity where the evaluation is being performed must be
corrected for on the deadweight tester. Standard gravity reference is
980.665 cm/sec/sec (45° north latitude at sea level).
3. The local gravity where the evaluation is being performed must be
corrected for on the deadweight tester. Standard gravity reference is
980.665 cm/sec/sec (45° north latitude at sea level).
4. Make sure there are no leaks in the system.
4. Make sure there are no leaks in the system.
The evaluation described will confirm if the 353 is operating within its
accuracy specification over the operating temperature range. An out of
spec 353 should be returned to the factory for recalibration. No field
recalibration is possible. Call your Meriam Instrument distributor or
the factory for a Return Material Authorization (RMA) number.
The evaluation described will confirm if the 353 is operating within its
accuracy specification over the operating temperature range. An out of
spec 353 should be returned to the factory for recalibration. No field
recalibration is possible. Call your Meriam Instrument distributor or
the factory for a Return Material Authorization (RMA) number.
Meriam Instrument
10920 Madison Ave.
Cleveland, OH 44102
Ph. (216) 281-1100
Fax (216) 281-0228
Meriam Instrument
10920 Madison Ave.
Cleveland, OH 44102
Ph. (216) 281-1100
Fax (216) 281-0228
All 353 Precision Altimeter Testers recalibrated at the factory are
returned with certificates of NIST traceability.
All 353 Precision Altimeter Testers recalibrated at the factory are
returned with certificates of NIST traceability.
12
12
353oper 3May 22 2000.pub
page 12
Wednesday, June 13, 2001 14:19
LOCKOUT SELECT
LOCKOUT SELECT
Enabling the Lockout feature prevents unauthorized users from making changes to the configuration of the tester. To enter Program
Mode, or to Re-Zero the tester, the user must first enter the
“password” (two-digit Lockout Code) when prompted, within about 40
seconds. An incorrect code (or timeout) will return the unit to
Measure Mode. Any two-digit numeric code can be programmed.
The factory Lockout Code of 00 disables the Lockout. To set the
Lockout Code, follow the keystrokes listed below:
Enabling the Lockout feature prevents unauthorized users from making changes to the configuration of the tester. To enter Program
Mode, or to Re-Zero the tester, the user must first enter the
“password” (two-digit Lockout Code) when prompted, within about 40
seconds. An incorrect code (or timeout) will return the unit to
Measure Mode. Any two-digit numeric code can be programmed.
The factory Lockout Code of 00 disables the Lockout. To set the
Lockout Code, follow the keystrokes listed below:
Keystroke
Display
Keystroke
Display
1. From the Measure Mode,
press the PRGM key. If the
Lockout is set, enter the
correct “password” when
prompted.
Top line reads “PROGRAM
MODE”, bottom line reads
“UNITS SELECT”.
1. From the Measure Mode,
press the PRGM key. If the
Lockout is set, enter the
correct “password” when
prompted.
Top line reads “PROGRAM
MODE”, bottom line reads
“UNITS SELECT”.
2. Press the up
key twice.
Bottom line reads “USER INFO
SELECT”.
2. Press the up
key twice.
Bottom line reads “USER INFO
SELECT”.
3. Press ENTER key (right
arrow), then the up arrow
key four times.
Top line reads “LOCKOUT
CODE”, bottom line reads
“ENTER TO SELECT”.
3. Press ENTER key (right
arrow), then the up arrow
key four times.
Top line reads “LOCKOUT
CODE”, bottom line reads
“ENTER TO SELECT”.
4. Press ENTER key (right
arrow), then press the up or
down arrow keys to change
to the first digit. Press the right
arrow key to proceed .
Bottom line shows old Lockout
code. Cursor flashes at first
position while value is changed,
then moves to right position once
right arrow key is pressed.
4. Press ENTER key (right
arrow), then press the up or
down arrow keys to change
to the first digit. Press the right
arrow key to proceed .
Bottom line shows old Lockout
code. Cursor flashes at first
position while value is changed,
then moves to right position once
right arrow key is pressed.
5. Press ENTER key (right
arrow) when desired code is
set. Lockout is activated.
Top line reads “LOCKOUT
CODE”, bottom line reads
“ENTER TO SELECT”.
5. Press ENTER key (right
arrow) when desired code is
set. Lockout is activated.
Top line reads “LOCKOUT
CODE”, bottom line reads
“ENTER TO SELECT”.
6. Press the backspace
key twice.
Returns to Measure Mode.
6. Press the backspace
key twice.
Returns to Measure Mode.
arrow
arrow
13
353oper 3May 22 2000.pub
page 13
arrow
arrow
13
Wednesday, June 13, 2001 14:19
PRODUCT SPECIFICATIONS
MODEL NUMBER AND RANGE:
353-AI0900
ALTITUDE:
0-900 mm Hg Abs
-2000 to +60000 feet
Exceeds FAR 43 Appendix E.
PRODUCT SPECIFICATIONS
MODEL NUMBER AND RANGE:
353-AI0900
ALTITUDE:
0-900 mm Hg Abs
-2000 to +60000 feet
Exceeds FAR 43 Appendix E.
LEAK: Test function per FAR 91.411 guidelines:
(1) a 120 second settling time display.
(2) for the next 60 seconds the display holds the initial altitude
and displays the current altitude.
(3) the final display shows the 60 second leak rate in feet or
meters per minute
LEAK: Test function per FAR 91.411 guidelines:
(1) a 120 second settling time display.
(2) for the next 60 seconds the display holds the initial altitude
and displays the current altitude.
(3) the final display shows the 60 second leak rate in feet or
meters per minute
RATE OF CLIMB: Display exceeds ± 6000 feet per minute
RATE OF CLIMB: Display exceeds ± 6000 feet per minute
NIST TRACEABLE ACCURACY:
± 0.02% of FS (FS.= 900 mm Hg Abs)
Equivalents: ± 7 feet at sea level
± 10 feet at 10,000 feet
Zero Stability (twelve months)
NIST TRACEABLE ACCURACY:
± 0.02% of FS (FS.= 900 mm Hg Abs)
Equivalents: ± 7 feet at sea level
± 10 feet at 10,000 feet
Zero Stability (twelve months)
TEMPERATURE :
± 24 feet at 35,000 feet
± 77 feet at 60,000 feet
± 0.05% of FS
Storage: -40° to 140°F (-40° to 60°C)
Operating: 23° to 122°F (-5° to 50°C)
TEMPERATURE :
± 24 feet at 35,000 feet
± 77 feet at 60,000 feet
± 0.05% of FS
Storage: -40° to 140°F (-40° to 60°C)
Operating: 23° to 122°F (-5° to 50°C)
PRESSURE LIMIT: 4000 mm Hg Abs (~5 atm)
PRESSURE LIMIT: 4000 mm Hg Abs (~5 atm)
POWER:
9 volt Alkaline battery. 9 volt Lithium batteries can
also be used and are recommended below 32 ºF (0 °C).
POWER:
9 volt Alkaline battery. 9 volt Lithium batteries can
also be used and are recommended below 32 ºF (0 °C).
MEDIA COMPATIBILITY:
MEDIA COMPATIBILITY:
DISPLAY:
Fluids compatible with 316ss.
5 significant digit LCD (0.25" high).
2 line x 16 alphanumeric characters
DISPLAY:
Fluids compatible with 316ss.
5 significant digit LCD (0.25" high).
2 line x 16 alphanumeric characters
CONNECTIONS: 1/8" female NPT, 316ss.
CONNECTIONS: 1/8" female NPT, 316ss.
ENCLOSURE: (6.5" x 3.6" x 2.25") ABS plastic case WT: 14 ozs.
ENCLOSURE: (6.5" x 3.6" x 2.25") ABS plastic case WT: 14 ozs.
14
14
353oper 3May 22 2000.pub
page 14
Wednesday, June 13, 2001 14:19