1
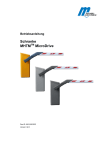
Operating Instructions
Swing Gate
MPS 122
5817,0002EN
Version: 01
Seite 1/50
Table of contents
1.
Delivery ................................................................................................................. 4
1.1
1.2
2.
Safety .................................................................................................................... 5
2.1
2.2
2.3
2.4
3.
Power-off state .......................................................................................................... 29
Commissioning .......................................................................................................... 29
Normal motions ......................................................................................................... 30
Special cases ............................................................................................................ 31
Program MPS-Diag............................................................................................. 32
8.1
8.2
8.3
8.4
8.5
8.6
5817,0002EN
Version: 01
Digital inputs and outputs .......................................................................................... 22
Relay outputs ............................................................................................................. 23
Diagnosis display....................................................................................................... 25
CAN-Bus addressing and termination ....................................................................... 28
Mode: MPS Standard ......................................................................................... 29
7.1
7.2
7.3
7.4
8.
Safety note ................................................................................................................ 21
Commissioning .......................................................................................................... 21
Further settings .......................................................................................................... 21
Description of MBC110 functions ..................................................................... 22
6.1
6.2
6.3
6.4
7.
Foundations ............................................................................................................... 12
Preparation for the installation ................................................................................... 14
Foundation anchors ................................................................................................... 16
Electrical connections ................................................................................................ 17
Commissioning .................................................................................................. 21
5.1
5.2
5.3
6.
General ........................................................................................................................ 8
Housing and lane width ............................................................................................... 9
Left-hand and right-hand versions ............................................................................. 10
Overview controllers .................................................................................................. 11
Assembly and installation ................................................................................. 12
4.1
4.1
4.2
4.3
5.
General safety instructions .......................................................................................... 5
Proper use ................................................................................................................... 5
Symbols in these instructions ...................................................................................... 6
Work safety.................................................................................................................. 7
Product description ............................................................................................. 8
3.1
3.2
3.3
3.4
4.
Scope of supply for the Swing Gate ............................................................................ 4
Technical data ............................................................................................................. 4
Connecting a laptop to controller MBC-110 .............................................................. 33
Using the program MPS-Diag ................................................................................... 34
Function and parameter settings ............................................................................... 34
Downloading between MBC-110 and MMC-120 ....................................................... 44
Reading out errors ..................................................................................................... 45
Status interrogation ................................................................................................... 46
Seite 2/50
9.
Technical support .............................................................................................. 47
10.
Spare parts and accessories ............................................................................. 47
11.
Guarantee ........................................................................................................... 47
12.
Taking out of service ......................................................................................... 48
13.
Appendix ............................................................................................................ 49
13.1 Schematic diagrams .................................................................................................. 49
5817,0002EN
Version: 01
Seite 3/50
Delivery
1.
Delivery
1.1
Scope of supply for the Swing Gate
1 x swing gate with drive
1 x control cabinet
1 x motor controller MMC-120
1 x logic controller MBC-110
1 x power supply
3 x M8 fastening material
1 x set of documents
Optional extras:
- Windows software MPS-Diag for setting functions and parameters, and for
fault diagnosis
- USB/RS-232 converter with cable for use with MPS-Diag software
1.2
Technical data
MODEL
TECHNICAL DATA
UNIT
MPS 122
Voltage
VAC
Frequency
Hz
50-60
Duty cycle
%
100
Degree of protection
IP
44
s
1.5 – 4.0
s
1.5 – 4.0
Opening time
Closing time
1
1
1
110-240
Diameter
mm
159
Width
mm
925
Height
mm
1000
Depending on width of gate
The data given in the table may change as a result of technical
changes!
5817,0002EN
Version: 01
Seite 4/50
Safety
2.
Safety
2.1
General safety instructions
The design of MAGNETIC swing gates complies with the state of
the art and they are manufactured and tested to ensure safe, reliable operation and that they leave our works in perfect condition.
Nevertheless, the system can give rise to dangers to persons and
goods if it is improperly used. The operating instructions must therefore be read completely and the safety instructions observed.
In the event of improper use, the manufacturer is absolved from any
liability and will refuse guarantee claims.
2.2
Proper use
A MAGNETIC swing gate may only be used to provide controlled
access for pedestrians who wish to enter a restricted-access zone
which is normally under surveillance.
Only controllers MBC and MMC may be used to control operation of
the swing gate. Before changing or modifying the product or the
control modules, consult the manufacturer.
Only original spare parts and accessories from MAGNETIC may be
used.
IMPORTANT NOTE!
MAGNETIC is not responsible for any type of material damage, injury to persons, or other faults or accidents that arise from failing to
observe the conditions for proper use!
5817,0002EN
Version: 01
Seite 5/50
2.3
Symbols in these instructions
The following warning and instruction symbols indicate situations
which could give rise to potential hazards for persons or goods, or
important instructions relating to operation of the barrier.
The text passages to which these symbols relate must be read and
observed without fail.
Components from suppliers may have their own safety regulations
and instructions for use. These must also be observed.
CAUTION!
This symbol accompanied by the word "CAUTION" indicates a
situation which could entail a danger to life and limb.
The measures given to avoid this hazard must be strictly observed.
ATTENTION!
This symbol accompanied by the word "ATTENTION" indicates a
situation in which there could be a danger of material damage.
The measures given to avoid this hazard must be strictly observed.
IMPORTANT NOTE!
This symbol accompanied by the words "IMPORTANT NOTE" indicates text containing important information,
These sections contain specific instructions on installation, application, and maintenance.
5817,0002EN
Version: 01
Seite 6/50
RECYCLING!
When the swing gate is taken out of service at the end of its useful
life, it must be disposed of in accordance with local laws and regulations.
The materials used must be sorted and disposed of separately.
Similarly, the regulations concerning the disposal of lubricants (oil
and grease) and other auxiliary materials must be observed.
2.4
-
-
5817,0002EN
Version: 01
Work safety
When working on the gate, the mains voltage must be switched
off and safeguarded against unintentional restarting.
Before commissioning, make sure the barrier is adequately fastened to a secure foundation.
A lockable two-pole main circuit breaker must be installed on
site
A residual current device (RCD) must be installed on site.
These operating instructions and all other accompanying documents must be stored so that they are accessible at any time for
the operating and maintenance personnel.
Before commissioning, all electrical and mechanical functions
must be checked.
The electrical installation must be carried out in accordance with
the accompanying circuit diagrams.
The electrical installation must be carried out by trained specialist personnel.
Covers on mains plugs, mains units, and electric wiring may only
be removed by trained specialist personnel.
Before maintenance work or troubleshooting for electrical faults,
the main switch must be turned off without fail.
When the unit is switched on, or when power returns after a
power failure, the barrier automatically becomes operative
again.
Seite 7/50
Product description
3.
Product description
3.1
General
The MPS swing gate is a user-friendly pedestrian barrier developed
to provide controlled access for persons, in simple security applications, to zones which are normally under surveillance.
They are also used to supplement our turnstiles and flap barriers, in
particular to zones which need control of persons carrying luggage
or in wheelchairs.
Basically, the swing gate can be used in both directions. As supplied, the swing gate is designed for bi-directional operation and to
open through 90° in each direction. Using special PC software, the
opening angle can be changed to between 10° and 300°. Further
parameters, such as speed, hold-open time, etc. can also be modified using the software.
The swing gate is opened by an external access-control system operating through digital inputs. Closure is fully automatic following
expiry of an adjustable hold-open time.
The drive system, which consists of our MHTM (Magnetic High
Torque Motor) in combination with a planetary reduction gear, ensures a powerful, precise motion sequence. Depending on your requirements, the swing gate can be locked in the three end positions
by means of an electro-mechanical clutch.
A high degree of force can be applied to the barrier element to force
it out of its locked position without causing damage to it. A slipping
clutch or similar device is not required. After a forced opening, the
barrier returns automatically to its original position.
The entire drive is maintenance-free and almost entirely free of
wear; it contains no limit switches or similar devices.
In the event of a power failure, the swing gate is free to open in both
directions.
The housing is a ground stainless-steel cylinder with a diameter of
159 mm. The barrier element can be supplied in several different
lengths. The swing gate housing is fastened to the floor with three
M8 screws.
5817,0002EN
Version: 01
Seite 8/50
Product description
3.2
Housing and lane width
" B " (max 1960)
O 159
5
480
1000
O 38
390
"D"
)
(B
ts
ch 0°
Re 9
° A)
90 ks (
n
Li
B = total width including MPS column
D = passage width
Fig. 3.1
5817,0002EN
Version: 01
Installation dimensions
Seite 9/50
Product description
3.3
Left-hand and right-hand versions
Normally, Swing Gate MPS 122 is designed for bi-directional operation and to open through 90° in each direction. At both end-positions
there are mechanical stops, which are set so that the maximum
opening of the gate is 2x92°.
In operation, the barrier stops ca. 2° before the mechanical end
stops.
Normally, the swing gate is configured as a right-hand version, i.e.
the right stop is the reference point to which the gate moves when it
is switched on. There are, however, applications in which it is not
acceptable to have a mechanical stop at the right position, e.g. so
that a barrier can be opened in the escape direction.
In such cases, the swing gate can be reconfigured using the software so that the left stop is the reference point. The right stop can
then be set, for example, so that it is at 180°, which allows the barrier to be pushed open from the right position.
Fig.3.2
5817,0002EN
Version: 01
Left-hand and right-hand versions
Seite 10/50
Product description
3.4
Overview controllers
1
3
2
4
6
5
Fig.3.3
Mounting plate (control cabinet)
1 – logic controller MBC-110
2 – transformer power supply
3 – mains filter
4 – mains switch
5 – terminal block for mains connection
6 – 42V cable to MPS column
5817,0002EN
Version: 01
Seite 11/50
Assembly and installation
4.
Assembly and installation
4.1
Foundations
For installation of the housing, a level concrete surface (PC250 concrete) or equivalent robust industrial floor is required. If there is a
flagged or tiled surface, it is essential that the anchors grip securely
in the foundation; in that case longer anchors may be necessary.
For outdoor applications, the foundation should reach an 800mm
frostline and be steel reinforced.
The requirements for concrete foundations can be seen in Fig. 4-1.
Two empty conduits are required for cables to and from the housing.
Wiring must be carried out according to the circuit diagram and the
schematics. Any additional wiring, for example for access-control
equipment, must be planned by the customer. Make sure that cables laid in the conduits have sufficient length projecting out of the
concrete floor.
Consult MAGNETIC if there are any points you are not clear about.
5817,0002EN
Version: 01
Seite 12/50
Assembly and installation
Schraube DIN933 M8x80 A2 (rostfrei) (3x)
screw DIN933 M8x80 A2 (stainless) (3x)
Federring DIN128 A8 A2 (rostfrei) (3x)
spring washer DIN128 A8 A2 (stainless) (3x)
Scheibe DIN9021 d8,4 A2 (rostfrei) (3x)
washer DIN9021 d8,4 A2 (stainless) (3x)
O 159
Einzelheit/Detail B
Ankerstange mit Innengewinde M8 (3x)
anchor bolt with inside thread M8 (3x)
B
800 (Frosttiefe / Frost depth)
Bereich für Leerrohre caO70mm
Datenleitung und Netzleitung unbedingt
in getrennten Leerrohren verlegen
area for conduit approx.O 70mm
data lines and AC power lines
must not run within the same conduit
1
q 300
TK O 105
3 x 120°
ca
ap . O
pr o 70
x. O B
70 er ei
ar c h
ea f ür
fo r Le
co er r
nd oh
ui t re
O 14
s
Boh rt ie
fe 9 0m
O 14 d
m (3 x)
rilling de
p th 90
mm (3
x)
Ansicht Fundament ohne MPS
view foundation without MPS
Fig. 4.1
Foundation and conduit drawing
1 – Conduit for external power supply, PG21 (28 mm)
2 – Conduit for control leads, display, light barrier supply, PG36 (42 mm)
3 – Conduit for motor, resolver, brake, earth connection (4 sqmm), PG36 (42 mm)
4 – Alternative mains lead, PG21 (28 mm)
5817,0002EN
Version: 01
Seite 13/50
Assembly and installation
4.1 Preparation for the installation
The barrier is supplied completely assembled (except for the u-bar).
Fig.4.2
For proper installation of the barrier, the steps described below are
essential.
Fig. 4.3
Fig.4.4
Undo and remove the M8 countersunk screw holding the cover.
5817,0002EN
Version: 01
Seite 14/50
Assembly and installation
Fig.4.5
Remove the cover and the sealing.
Fig. 4.6
Undo and remove the four M8 countersunk screws.
Fig.4.7
Lift off the outer tube with the barrier.
5817,0002EN
Version: 01
Seite 15/50
Assembly and installation
4.2
Foundation anchors
The barrier should be mounted as shown in Fig. 44.8. The MPS
housing is fastened to the foundation with three hexagon-head
screws and anchors.
These fastening materials are included in the scope of supply.
Fig. 4.8 MPS floor mounting
1 – MPS housing tube
2 – Screws M8, spring washers, plain washers (3 of each)
1. Place the housing base at the intended location, so that the cutout in the tube shown in Fig. 4.7 is approximately centred on and in
the direction of the required home position.
2. Introduce the leads from below.
3. Mark the holes.
4. Move the housing base to the side.
5. Drill three holes for the anchors.
Important note!
The hardening time for
resin cartridges varies
with the ambient temperature:
>20° ---- 10 min
10°-20° ---- 20 min
0°-10° ---- 1 h
-5°-0° ---- 4 h
5817,0002EN
Version: 01
6. Fit the three anchors with M8 female threads.
7. Place the housing base over the anchors (take car not to damage
the conduits and cables).
8. Secure the housing base to the foundation with M8 screws into
the anchor threads.
Seite 16/50
Assembly and installation
4.3
Electrical connections
CAUTION!
Connections of electrical wiring may only be carried out by a
trained and qualified electrician.
4.3.1
Cable connections
Two cables must be connected between the MPS swing gate and
the control cabinet:
- a CAN connection between the MBC-110 and the MMC-120
- a 42V supply from the transformer to the terminal block in the MPS
Fig.4.9 Connection cables
5817,0002EN
Version: 01
Seite 17/50
Assembly and installation
Draw the leads coming from the MPS upwards and connect
them as shown in the wiring diagram.
2
1
Fig.4.10
Strain-relief fitting for wiring
1 – CAN cable
2 – 42V cable
1
2
Fig.4.11
Wiring terminals
1 – motor controller MMC-120
2 – Connect CAN cable at MMC-120 motor controller
4.3.1
Mains connection
The mains cable is connected in the control cabinet (see attached
schematic diagrams).
4.3.2
Control lead connections at MBC-110
The control and signal leads are connected at the MBC-110 controller (see attached schematic diagrams).
5817,0002EN
Version: 01
Seite 18/50
Assembly and installation
4.3.3
Re-assembling the MPS column
1. Replace the outer tube with the barrier.
2. Rotate the outer tube so that the slot in the upper cover plate is
approximately centred over the stop screw.
Fig. 4.12 Location relative to stop screw
3. Replace the four M8 countersunk screws and tighten them.
4. Do not fit the cover yet.
4.3.4
Setting the two mechanical end stops
1. Turn the outer tube with the barrier clockwise until the stop
screw contacts the right end-stop.
2. Loosen the screw of the right end-stop and move the stop until it
is ca. 92° clockwise from the required home position.
3. Retighten the screw firmly.
Fig. 4.13 Setting the right end-stop
5817,0002EN
Version: 01
Seite 19/50
Assembly and installation
4. Turn the outer tube with the barrier anti-clockwise until the stop
screw contacts the left end-stop.
5. Loosen the screw of the left end-stop and move the stop until it
is ca. 92° anti-clockwise from the required home position.
6. Retighten the screw firmly.
Fig. 4.14 Setting the left end-stop
7. Mount the barrier.
8. Put the swing gate into service (see “Commissioning”) and
check that the positions are correct. If the positions are not correct, the mechanical end-stops must be readjusted.
9. Refit the O-ring.
10. Replace the cover.
11. Replace and tighten the M8 countersunk screw to secure the
cover and seal.
5817,0002EN
Version: 01
Seite 20/50
Commissioning
5.
Commissioning
5.1
Safety note
CAUTION!
Before commissioning for the first time, make sure that all assembly and installation instructions have been followed and that the
electrical connections have been correctly made.
Faulty installation or connections can cause malfunctions which
could result in injuries.
The notes on assembly and installation in these operating instructions must be strictly observed.
5.2
Commissioning
1. Make sure there are no obstructions to operation of the swing
gate. The passage through the barrier must be clear.
2. Switch on the power supply at the mains switch on the control
cabinet.
3. When starting for the first time, it may first be necessary to load
the software for motor controller MMC-120 from the logic controller. This procedure can take up to one minute. Please do not
switch the power off during this operation, otherwise the procedure will have to be repeated. On future occasions, this procedure is not required when the power supply is switched on.
4. Next, the swing gate will carry out homing, i.e. it will move first to
the mechanical end-stop and then to the home position.
5. The swing gate is controlled through the digital inputs and outputs on the MBC-110 controller.
5.3
Further settings
If you have to change functions or parameters, please see the section “Program MPS-Diag". To use the program, you will need a laptop or PC with the Windows software MPS-Diag.
5817,0002EN
Version: 01
Seite 21/50
Description of MBC110 functions
6.
Description of MBC110 functions
6.1
Digital inputs and outputs
6.1.1
Technical data of the inputs
- All inputs are galvanically isolated by optoelectronic couplers
- Input voltage: 24V ±10%
- Input current: 10 mA per input
- Impulse length for inputs: 100 ms – 300 ms
6.1.2
Functions of the digital inputs
Input
Function
Input 1
Input 2
Emergency
Open left
Input 3
Open right
Input 4
Close (lock) the swing gate
Input 5
Manual reset
Input 6
Not used
Input 7
Not used
Input 8
Not used
Input 9
Not used
Input 1 = emergency
This input permits free passage through the swing gate in an emergency situation. The input is fail-safe, i.e. the swing gate is only operative when a continuous signal is present.
When the continuous signal fails, power to the motor is cut off and
the u-bar can be moved freely.
The input operates via a second channel directly on the end stage
of the motor amplifier. It is assigned a higher ranking than all other
inputs.
When several swing gates are to be opened in parallel by an external emergency-stop switch, the inputs must be galvanically isolated
by an additional relay to prevent voltage coupling between the individual swing gates.
5817,0002EN
Version: 01
Seite 22/50
Description of MBC110 functions
Input 2 = Function: open barrier to left
Opening impulse for open barrier to left
If the signal is applied for longer, the hold-open time is restarted
Inputs 3 = Function: open barrier to right
Opening impulse for open barrier to right
If the signal is applied for longer, the hold-open time is restarted.
Inputs 4 = Function: close (lock) the barrier
Input for higher-level closure of the barrier. Opening signals are no
longer accepted. The barrier can be locked at this input. However,
input 1 (emergency situation) retains a higher level, i.e. even when
the barrier is locked, it is still possible to open the barrier completely.
Inputs 5 = Function: manual reset
Input for manually resetting the control system after a power failure.
Input is only required when the function “Manual reset” is also active.
Inputs 6 - 9 = not used
6.2
Relay outputs
6.2.1
Technical data of the outputs
- Potential-free relay contacts are connected together in groups
- Switched voltage: 5 – 48V
- Switched current: 10 mA – 1 A
6.2.2
Output
Function
K1
K2
Global error / power failure
Barrier in home position
K3
Barrier in left end-position
K4
Barrier in right end-position
K5
Counting impulse on reaching left endposition
Counting impulse on reaching right endposition
K6
5817,0002EN
Version: 01
Function of the outputs
Seite 23/50
Description of MBC110 functions
Relay 1 = Global error / alarm output
When certain errors occur, a continuous signal is given at this output; it continues as long as the error persists.
Possible errors are:
- Running time of barrier too long = obstacle detected
- CAN communication with final stage is impaired
- Hardware fault in final stage
- Software error in final stage
- Homing is being carried out
- Power failure
- Manual reset expected (only when selected)
IMPORTANT NOTE!
Relay 1 operation is fail-safe, i.e. a power failure or a wire breakage at the relay output is also indicated at the global error output.
This means that the relay contact pair is closed as long as there is
no error. As soon as the global error described above occurs, the
relay contacts open.
Relay 2 = Barrier in home position
A continuous signal is given at this output when the barrier is in
home position.
Relay 3 = Barrier in left end-position
A continuous signal is given at this output when the barrier is in the
left end-position.
Relay 4 = Barrier in right end-position
A continuous signal is given at this output when the barrier is in the
right end-position.
Relay 5 = Counting impulse left
A counting impulse 500 ms long is given at this output when the barrier reaches the left end-position.
Relay 6 = Counting impulse right
A counting impulse 500 ms long is given at this output when the barrier reaches the right end-position.
5817,0002EN
Version: 01
Seite 24/50
Description of MBC110 functions
6.3
Diagnosis display
6.3.1
Functions of the diagnosis display
For diagnosis, the MBC-110 has a 7-segment display. This can,
however, only be read with the outer tube and barrier removed. It is
therefore recommended that errors are read via the serial interface
using the diagnosis program MPS-Diag.
Normal operation
The dot blinks continually at 0.5 Hz.
6.3.2
Homing
The letter “H” blinks at 10 Hz when the home position is approached
at low speed following a power failure. When the home position is
reached, the display reverts to that for normal operation.
HH
The buzzer sounds during the homing procedure.
6.3.3
Waiting for a manual reset
A white bar runs in a circle, clockwise until the reset signal is present. Afterwards the display reverts to that for normal operation. The
display time for each state is 0.5 s.
Display when waiting for a manual reset.
6.3.4
Display of software version status
First the letter "U" is displayed, then the first information (with dot),
then the second information, followed by a pause. Then the cycle
begins again. The display time for each state is 2 s.
Example for software version V1.4.
U!4
5817,0002EN
Version: 01
Seite 25/50
Description of MBC110 functions
6.3.5
Display of error codes
First the letter "E" (Error) is displayed, then the first figure of the error code, then the second figure, followed by a pause. Then the cycle begins again. The display time for each state is 2 s.
Example for Error code 23
e2#
Error code
01
02
05
07
20
21
22
40
41
50-57
5D
5E
5F
60
61
62
63
64
65
66
70-7F
Description of fault
Obstacle detected by run-time monitor
Emergency input is activated
Barrier has been pushed in wrong direction
Vandalism detected
Fault at MMC controller
Final stage of MMC servo-device cannot be switched on
MMC lifeguarding error
Error during homing
Wrong program mode
Software error
Checksum error in EEPROM
Checksum error in flash
Watchdog error
Error when initialising CAN protocol stack
Error when initialising CAN bus
Error in CAN-servo address
Error downloading controller parameters to servo
Reserved
Error I²C-EEPROM
Software error
Error downloading MMC-Firmware
Self-resetting
Yes
Yes
Yes
Yes
No
No
No
No
No
No
No
No
No
No
No
No
No
No
No
No
No
Self-resetting errors are shown for not more than 20 seconds after
elimination of the error. However as long as the error persists, the
error code will be displayed.
When there is a non-self-resetting error, the barrier will go out of
service. The error code will then be continuously displayed until the
control system is returned to operation following elimination of the
fault.
5817,0002EN
Version: 01
Seite 26/50
Description of MBC110 functions
6.3.6
Hold-open time
The hold-open time is displayed as a countdown in one-second
steps. If the remaining time is still more than 9s, a special character
(according to the enabled direction) is displayed, or an “F” (Free) for
clearance in both directions. Normally, the maximum time is 25s.
Enabled left
F
F
Enabled right
F. 9. 8.7. 6. 5.4. 3. 2.1. 0
5817,0002EN
Version: 01
Seite 27/50
Description of MBC110 functions
6.4
CAN-Bus addressing and termination
The MBC-110 logic controller and the MMC-120 motor controller
exchange data on a CAN bus line. Each of the controllers must
therefore have a fixed CAN address assigned to it. In addition, a
termination resistor must be activated at both ends of the bus to
prevent interference.
The CAN addresses and the termination are set using four DIP
switches on both controllers.
The correct DIP switch settings are shown below:
Termination
CAN-Address
CAN-Address
CAN-Address
Fig. 6.1
DIP
DIP
DIP
DIP
1
2
3
4
MBC-110
MMC-120
ON
OFF
OFF
OFF
ON
OFF
OFF
OFF
DIP switches CAN
Fig.6.2
CAN DIP switches MBC-110
Fig.6.3
CAN DIP switches MMC-120
Incorrect DIP switch settings can result in the swing gate failing to
operate or in faults during operation.
5817,0002EN
Version: 01
Seite 28/50
Mode: MPS Standard
7.
Mode: MPS Standard
7.1
Power-off state
In the power-off state, no current is applied to the motor and the barrier is unlocked. The barrier is free to rotate.
7.2
Commissioning
7.2.1
Starting routine
When the supply voltage is switched on, the system first checks
which reset option is selected.
If “Manual reset” is selected, the control system waits for a reset impulse at the “Manual reset” input, and then carries out homing.
When “Auto reset” is selected, homing is carried out immediately.
7.2.2
Homing
The system carries out homing to determine where the barrier is by
moving it to the mechanical end-stop. This is carried out at reduced
speed and torque. During homing, the buzzer gives an acoustic
warning. The homing direction depends on whether a left or right
gate has been selected.
With a left gate, when the power is switched on again, the barrier rotates clockwise at low speed until it reaches the mechanical endstop. On reaching the end-stop, the barrier reverses and runs anticlockwise to the defined home position (default setting = 90°). Once
it has reached the home position, the MPS is ready for use.
With a right gate, when the power is switched on again, the barrier
rotates anti-clockwise at low speed until it reaches the mechanical
end-stop. On reaching the end-stop, the barrier reverses and runs
clockwise to the defined home position (default setting = 90°). Once
it has reached the home position, the MPS is ready for use.
If the function “Brake applied in home position” is activated, the
brake will be applied.
5817,0002EN
Version: 01
Seite 29/50
Mode: MPS Standard
Fig. 7.1: Homing for left and right gates
7.3
Normal motions
In the three possible positions, the swing gate is held by the motor
with a low torque. If the function “Brake activated” is selected for
one or more positions, no current is applied to the motor in these
positions and current is applied to the brake instead.
If no clearance is given for one of the two opening directions, then
the barrier is in the home position. The brake is always activated as
soon as there is an attempt to move the swing gate out of the home
position (see special cases).
On receipt of a clearance impulse for one direction, the barrier is
opened in the direction of passage. When it reaches the endposition, the barrier is either held in position by the motor or by activation of the brake (depending on the function selected).
On expiry of the hold-open time, the barrier returns automatically to
the home position.
5817,0002EN
Version: 01
Seite 30/50
Mode: MPS Standard
7.4
Special cases
7.4.1
Obstacle detected during a motion
If the gate is stopped during its motion, e.g. by a user who stops, or
by a piece of luggage becoming jammed, then, depending on the
function selected, one of the following measures will be carried out:
1. There is no reaction.
2. The barrier returns to the initial position and immediately restarts
the motion.
3. The barrier continues to press with reduced force and speed.
4. The barrier retracts a short distance, then reverses and runs in
the original direction again
7.4.2
Pushing in the wrong direction
If someone attempts to push the barrier in the wrong direction during a motion, the brake is applied immediately. After a pause the
brake is released again. The brake will be activated again immediately if the attempt to push the barrier in the wrong direction continues, and so on.
Otherwise, when the brake is released, the gate will continue in the
original direction and stop on reaching the end-position.
7.4.3
Attempted vandalism
The barrier is locked in its inactive position. If a force greater than
the maximum holding force is applied to the gate, the brake is released and then applied again immediately, and so on. It is thus
possible to move the gate in a succession of small steps. If the attempted vandalism is interrupted, the barrier returns to its original
end-position.
7.4.4
Emergency situation
If the input IN1 “Emergency” is interrupted during operation, the barrier goes to a safe condition. The power supply is immediately cut
off to both the motor and the brake. The control system returns to
operation when there is again voltage at input IN1.
5817,0002EN
Version: 01
Seite 31/50
Program MPS-Diag
8.
Program MPS-Diag
Swing Gate MPS 122 is configured in our works so that it can be put
into service for applications that require opening through 90° in each
direction without further programming.
If functions and parameters have to be changed on site, the optional
program MPS-Diag is available.
In addition, you will need a laptop or PC with an RS-232 interface. If
the computer does not have an RS-232 interface, a USB/RS-232
converter will also be required.
Fig.8.1
5817,0002EN
Version: 01
Program MPS-Diag
Seite 32/50
Program MPS-Diag
8.1
Connecting a laptop to controller MBC-110
Connect the RS-232 interface on the MBC-110 using a normal DB9
extension cable (all pins connected 1:1, no leads crossed) to the
RS-232 interface on your laptop or PC.
If the computer does not have an RS-232 interface, you must use a
USB/RS-232 converter. Don’t forget to install a driver for the
USB/RS-232 converter on your laptop/PC!
Fig.8.2
5817,0002EN
Version: 01
Connecting a laptop to the MBC-110
Seite 33/50
Program MPS-Diag
8.2
Using the program MPS-Diag
To use the program MPS-Diag for configuration of a swing gate, you
must first install the program on a laptop or PC.
1. To do this, start the program MPS-DiagSetupxxx.exe and follow
the instructions in the installation routine.
2. Then start the program MPS-Diag on your laptop or PC.
3. Select the COM port of your computer in the “Options” menu.
8.3
Function and parameter settings
Functions and parameters are set using the Windows program
MPS-Diag.
The following functions can be set by the customer:
-
5817,0002EN
Version: 01
Gate type, left / right
Brake applied / not applied in end-position left / right / home, during
vandalism attempts or pushing the barrier in the wrong direction
Selecting the size of the u-bar
Reset source
Behaviour after impact detection
Hold-open time
Speed
Heating activated
Programming of both end-positions and home position
Reset all parameters to factory default values
Seite 34/50
Program MPS-Diag
8.3.1
Selection of gate type, left / right
This point informs the control system whether the gate is a left or a
right version. On a right gate, the barrier homes against the right
mechanical end-stop. On a left gate, the barrier homes against the
left mechanical end-stop.
Fig. 8.3 Example: left gate 2 x 90°
Fig. 8.4 Example: right gate 2 x 90°
5817,0002EN
Version: 01
Seite 35/50
Program MPS-Diag
8.3.2
Brake applied / not applied
This point informs the control system whether the brake should be
applied in one of the three positions or not, in cases of attempted
vandalism or in cases of pushing the barrier in the wrong direction.
The system provides for independent setting for each of the five options
Fig. 8.5 Options for brake settings
8.3.3 Size of the barrier (u-bar)
At this point, the width of the barrier must be selected.
Fig. 8.6 Selection of barrier width
8.3.4 Reset source
This point determines whether the control system waits for an impulse at the input “Manual reset” or starts immediately with homing
after a power failure.
Fig. 8.7 Selection of reset source
5817,0002EN
Version: 01
Seite 36/50
Program MPS-Diag
8.3.5 Behaviour when an obstacle is detected
This point determines how the barrier reacts when an obstacle is detected (stalled condition).
1. There is no reaction.
2. The barrier returns to the initial position and immediately restarts
the motion.
3. The barrier continues to press with reduced force and speed.
4. The barrier retracts a short distance, then reverses and runs in the
original direction again.
Fig. 8.8: Behaviour when an obstacle is detected (stalled condition)
8.3.6
Hold-open time
At this selection point, the hold-open time can be set between 0 and
25 seconds in steps of 100 ms. An entry of 50, thus, corresponds to
5 seconds.
Fig. 8.9: Setting the hold-open time
5817,0002EN
Version: 01
Seite 37/50
Program MPS-Diag
8.3.7
Speed
At this selection point, one of three preset speeds (0 = slow / 1 =
medium / 2 = fast) can be chosen for normal operation, subject to
the condition that the barrier width is less than 1.30 m (see Section
7.2.3).
If the barrier width is more than 1.30 m, only Speed 0 (slow) can be
selected.
Fig. 8.10: Setting the speed
8.3.8
Heating active when stationary
This point determines whether the heating is activated when the gate
is stationary.
Heating is only required when the barrier is used at ambient temperatures below 0°C.
Fig. 8.11: Setting the heating
5817,0002EN
Version: 01
Seite 38/50
Program MPS-Diag
8.3.9
Teach-in for three possible positions
As standard, the MPS is supplied for 2 x 90° opening. The three positions can, however, be changed independently of each other.
There is an entry screen in MPS-Diag for this purpose.
Fig. 8.12: Calling up the screen for setting target positions
Setting the three target positions is a multi-stage process.
Fig. 8.13: Setting target positions
5817,0002EN
Version: 01
Seite 39/50
Program MPS-Diag
First, homing must be carried out. To do this, the MBC control system is brought to service mode. Then the three positions can be
changed:
Fig. 8.14: Homing procedure
The home position is the first that can be changed:
Fig. 8.15: Changing the home position
5817,0002EN
Version: 01
Seite 40/50
Program MPS-Diag
The left position is the second one that can be changed:
Fig. 8.16: Changing the left position
Thirdly, the right position can be changed:
Fig. 8.17: Changing the right position
5817,0002EN
Version: 01
Seite 41/50
Program MPS-Diag
Finally, confirmation restarts the MBC control system.
Fig. 8.18: Resetting the MBC control system
8.3.10 Reset all parameters to factory default settings
At this point, all parameters can be reset to their factory default settings.
1. Open the “View” menu and select “Parameters”.
Fig. 8.19 Menu Parameters
5817,0002EN
Version: 01
Seite 42/50
Program MPS-Diag
2. A new “Parameters” menu will appear in the title bar. Click on this
menu and select “Restore all parameters to factory default settings”.
Fig. 8.20 Menu “Restore all parameters to factory default settings”
3. This is followed by a security prompt to prevent it being done unintentionally.
Fig. 8.21 Menu “Confirm”
By clicking on “Yes”, all parameters will be returned to their factory
default settings. By clicking on “No”, the procedure is cancelled.
5817,0002EN
Version: 01
Seite 43/50
Program MPS-Diag
8.4
Downloading between MBC-110 and MMC-120
Every time the MBC-110B is booted after power has been cut off, a
software check is carried out between the MBC-110 and the connected MMC-120 servo-controller. This checks that the servocontroller has the correct software and also that the correct version,
which corresponds to the MBC-110 application software, is loaded
If it is detected that the servo-controller has the wrong software or
the wrong version, then the correct software will be automatically
downloaded from the MBC-110 to the MMC-120.
The software can, however, be loaded manually from the MBC-110
to the MMC-120 using the Windows program MPS-Diag.
Fig.8.22 Programming using the program MPS-Diag
5817,0002EN
Version: 01
Seite 44/50
Program MPS-Diag
8.5 Reading out errors
Error codes on the MBC-110 and MMC-120 can only be read directly after removing the outer tube and the barrier. The program
MPS-Diag offers the possibility of reading errors from the MBC-110
and MMC-120 controllers through the serial interface.
Fig. 8.23 Reading error codes from MBC-110 and MMC-120
5817,0002EN
Version: 01
Seite 45/50
Program MPS-Diag
8.6 Status interrogation
The status of the inputs, outputs and DIP switches can only be read
directly on the MBC-110 after removing the outer tube and the barrier. The program MPS-Diag therefore allows you to read the status
of the inputs, outputs, and DIP switches via the serial interface.
IMPORTANT NOTE!
The status of the DIP switches for setting the CAN bus parameters
and those of the RS485-/422 interface cannot be read using MPSDiag. This is only possible directly on the controllers. It is therefore
essential to check these settings before assembling the MPS!
Fig. 8.24 Reading the status of the inputs, outputs and DIP switches
5817,0002EN
Version: 01
Seite 46/50
Technical support
9. Technical support
If a fault occurs during operation that cannot be rectified by a qualified electrician, contact your authorised contractual partner.
IMPORTANT NOTE!
Before making a telephone call, please note the data on the type
plate, such as type, serial number, version etc.
10.
Spare parts and accessories
Exploded drawings with details of spare parts and their part numbers will be supplied on request.
11.
Guarantee
The manufacturer reserves the right to make technical changes and
modifications without prior notice.
Subject to the condition that the operating instructions are observed,
and that no inadmissible operations are carried out on the technical
equipment, and that the installation has suffered no mechanical
damage, MAGNETIC provides the following guarantee on all mechanical and electrical components:
-
5817,0002EN
Version: 01
3 years after delivery
2 years after commissioning
Seite 47/50
Taking out of service
12.
Taking out of service
RECYCLING!
The relevant regional regulations and laws covering the disposal of
substances, materials, and machine parts must be observed. Materials that can be recycled must be handed over to specialised
disposal partners.
In the interests of a clean environment, you must ensure the responsible handling, use and disposal of all materials.
Packaging material
When the barrier and its accessories have been unpacked, the
packaging materials must be sorted and separated for disposal.
Barrier
When disposing of a barrier or parts of a barrier, the materials must
be sorted and recycled separately.
Electrical and electronic components
The materials used in electrical and electronic components must be
disposed of separately. They may contain plastics and toxic substances.
IMPORTANT NOTE!
To ensure proper disposal of electrical and electronic components,
you can consult MAGNETIC or a competent electrician.
Lubricants and auxiliary substances
Lubricants and auxiliary substances (e.g. oils, greases etc.) must be
properly stored and must not be allowed to enter the environment in
an uncontrolled fashion.
CAUTION!
It is forbidden to dispose of combustible or inflammable materials
together with normal rubbish.
5817,0002EN
Version: 01
Seite 48/50
13. Appendix
13.1
Schematic diagrams
The schematic diagrams are supplied as a separate document.
5817,0002EN
Version: 01
Seite 49/50
MAGNETIC Autocontrol GmbH
Grienmatt 20
D - 79650 Schopfheim
Germany
Tel.: +49 7622 695 5
Fax: +49 7622 695 602
eMail: [email protected]
www.ac-magnetic.com
5817,0002EN
Version: 01
Seite 50/50