1
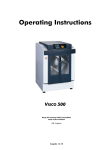
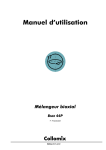
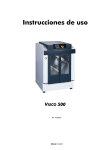
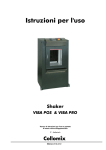
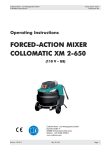
Operating Instructions Biaxialmixer BIAX 22/33/44 ROTA 20/30 DYNAX 400 GB - Englisch Edition G1.2-10 ROTA 20 / 30 BIAX 22/33/44 DYNAX400 Collomix Rühr- und Mischgeräte GmbH D-85080 Gaimersheim Contents 1. Layout drawings ...................................................................................3 1.1. Biaxial mixer with sliding door BIAX 22/33/44 and DYNAX 400 ............3 1.2. Biaxial mixer ROTA 20/30 .....................................................................4 1.3. Control and display components ...........................................................5 2. General information ............................................................................6 3. For your safety......................................................................................6 3.1 3.2 3.3 3.4 Pictograms and symbols used in this manual .........................................6 Proper use ............................................................................................6 General safety instructions ....................................................................7 Safety-relevant components ..................................................................7 4. Using the machine for the first time ....................................................8 4.1. 4.2. 4.3. 4.4. 4.5. Installing the machine – Transport notes................................................8 Moving the machine..............................................................................8 Activating the PERMA lubrication system ................................................9 Trial run ................................................................................................9 Door interlock system ............................................................................9 5. Operation ...........................................................................................10 5.1. 5.2. 5.3. 5.4. 5.5. 5.6. Switching on the machine ...................................................................10 Loading the container .........................................................................10 Starting the mixing cycle......................................................................10 Ending the mixing cycle .......................................................................11 Stand-by .............................................................................................11 Triggering the EMEGENCY STOP function ............................................11 6. Trouble-shooting ................................................................................12 6.1. Initialization ........................................................................................12 6.2. Error messages....................................................................................13 7. Maintenance and cleaning ................................................................15 7.1. 7.2. 7.3. 7.4. 7.5. Inspections..........................................................................................15 Cleaning .............................................................................................15 Maintenance .......................................................................................15 Maintenance checklist .........................................................................16 Layout of the control system ................................................................17 8. Annex .................................................................................................18 8.1. 8.2. 8.3. 8.4. 2 Technical data.....................................................................................18 Warranty.............................................................................................18 Recycling and disposal.........................................................................19 Declaration of CE conformity ...............................................................19 Edition G1.2-10 Collomix Rühr- und Mischgeräte Gmbh D-85080 Gaimersheim 1. 1.1. ROTA 20 / 30 BIAX 22/33/44 DYNAX400 Layout drawings Biaxial mixer with sliding door BIAX 22/33/44 and DYNAX 400 5 8 4 6 2 3 7 1 Machine components 1. Locking lever 5. Control panel 2. Manual door release 6. Sliding door 3. Top clamping table 7. Bottom clamping table 4. Main switch 8. Emergency Stop (at the rear) Edition G1.2-10 3 ROTA 20 / 30 BIAX 22/33/44 DYNAX400 1.2. Collomix Rühr- und Mischgeräte GmbH D-85080 Gaimersheim Biaxial mixer ROTA 20/30 5 8 6 4 2 3 7 1 Machine components 1. Locking lever 5. Control panel 2. Manual door release 6. Door 3. Top clamping table 7. Bottom clamping table 4. Main switch 8. Emergency Stop 4 (at the rear) Edition G1.2-10 Collomix Rühr- und Mischgeräte Gmbh D-85080 Gaimersheim 1.3. ROTA 20 / 30 BIAX 22/33/44 DYNAX400 Control and display components 11 13 1 10 10. Control buttons Button E Button I Mixing cycle I (works setting 1:00 minutes) Button II Mixing cycle II (works setting 2:00 minutes) Button III Mixing cycle III (works setting 3:00 minutes) OPEN the mixing unit QUIT stand-by mode STOP mixing cycle prematurely ACKNOWLEDGE messages 11. Display for 230V mains voltage and 24V control voltage 12. LCD Display 13. EMERGENCY STOP button Edition G1.2-10 5 ROTA 20 / 30 BIAX 22/33/44 DYNAX400 2. Collomix Rühr- und Mischgeräte GmbH D-85080 Gaimersheim General information The ROTA/BIAX is a stationary mixer for closed, tightly closing, round, rectangular and oval containers made of metal or plastic. It can be used to mix paints, master batches, house paints, industrial paints and plasters as well as other low-viscosity materials. Practical applications are to be found in the wholesale and retail paint trade, in the paint, lacquer and chemical industries, and many other related sectors. This shaker is particularly ideal as a component in paint dosing systems. The clamped container rotates simultaneously about its longitudinal and transverse axis at 2 different speeds, which are adapted to the material in question. The required mixing time and the suitability of the container are to be determined before attempting to use the shaker. This manual is intended for persons who operate the machine. 3. For your safety Although the machine has been developed, manufactured and tested in accordance with fundamental safety requirements, an element of risk is still present! Therefore, read this manual before you work with the machine Keep this manual within immediate reach of the machine 3.1 Pictograms and symbols used in this manual The "caution" symbol is used to indicate a situation in which persons are at risk of suffering physical injury. The warning must be heeded at all costs. The "stop" symbol is used to indicate a situation in which the machine is at risk of being damaged. The "hazardous electric voltage" symbol is used to indicate live components that may pose a risk to life and limb. Those parts of the manual that are important for the correct and safe operation of the machine are printed in bold type. 3.2 Proper use The machine must not be operated in any way other than described in this manual. The term ‘improper use’ applies in particular to the following: Operation with defective or missing parts. The bridging or deactivation of any safety devices. Operation of the machine in areas with a potentially explosive atmosphere. The use and installation of non-original replacement parts. Running the machine for too long, which can potentially lead to the mixing container bursting. The consequences of improper use can be personal injury to the user or third party, as well as material damages to the appliance or mixing material. 6 Edition G1.2-10 Collomix Rühr- und Mischgeräte Gmbh D-85080 Gaimersheim 3.3 ROTA 20 / 30 BIAX 22/33/44 DYNAX400 General safety instructions Observe the electrical regulations in force as well as the additional instructions listed in this manual when you install the machine. Installation and use of the machine for the first time must be carried out by a trained specialist. The machine is to be used only by persons who are acquainted with the working principles of the machine and also with the safety and accident prevention regulations in force in your country. Check that the machine is in the proper condition and that all parts are in good working order before beginning with your work. Do not operate the machine with any defective or missing parts. Any maintenance work or repairs must only be carried out by qualified personnel. Before performing any maintenance work or repairs be sure to disconnect the machine from the power supply by pulling out the power plug. Use only original replacement parts. Close the machine when not in use and turn off at the main switch. Projecting parts may injure you and others. 3.4 Safety-relevant components Closed housing The housing is a stationary safeguard and partition that can only be opened with the use of tools. Machine door with interlock The door is an interlocking safeguard and partition. It is impossible to start the machine when the door is open. The door is not unlocked until after the mixing cycle is ended and the mixing container released. Latching magnet for the mixing unit The mixing unit is locked in vertical position by a magnetically actuated latching pin. When the magnet is deactivated, the latching pin is pushed back by spring force and releases the mixing unit. Clamping table switch A microswitch on the upper clamping table monitors whether a container is clamped in the mixing unit. It is impossible to start the mixing cycle when no container is clamped in place. For the switch to trigger a switching pulse it has to be pressed up by the springmounted upper clamping table. Emergency Stop function: With the Emergency Stop function you can reliably interrupt the control voltage supply so that the machine is unable to move. bring the machine to a halt when it is running. Edition G1.2-10 7 ROTA 20 / 30 BIAX 22/33/44 DYNAX400 4. Collomix Rühr- und Mischgeräte GmbH D-85080 Gaimersheim Using the machine for the first time 4.1. Installing the machine – Transport notes Your biaxial mixer is delivered in reusable cardboard packaging on a wooden pallet. Please immediately check the packaging when received, as well as the appliance during unpacking, for any visible signs of external damage. Keep all parts of the original packaging for any necessary return transport. Use a suitable hoist to lift the machine off the pallet. Fit the door handle with the supplied mounting materials. Place the machine on firm, level ground. Slight unevenness can be compensated with the height-adjustable machine feet (SW17+19). 4.2. Moving the machine The mixer has two transport rollers on the bottom of the housing. These transport rollers can be made to protrude out of the mixing compartment by turning two screws in the base plate of the mixing compartment. Before moving the ROTA 20/30 you must remove the door. To do so, simply pull out the two hinge pins. Use a cordless screwdriver (counter-clockwise rotation) or some other suitable tool size SW 17 to turn out the transport rollers on both sides of the machine. Carefully tilt the mixer and move it. When you are finished moving the machine, turn the transport rollers back in and compensate any unevenness with the height-adjustable feet. Screw Turning out the rollers Moving the machine It is necessary to open the door in order to be able to firmly grip the machine during transport. 8 Edition G1.2-10 Collomix Rühr- und Mischgeräte Gmbh D-85080 Gaimersheim ROTA 20 / 30 BIAX 22/33/44 DYNAX400 4.3. Activating the PERMA lubrication system The machine comes with a PERMA© long-time lubricator which is to be installed before you use the machine for the first time. Proceed as follows: For an easier installation, first open the mixing unit completely.. The lubrication nipple on the hub is on the left side. Activate the PERMA cartridge by turning the grey activation screw into the cartridge until the holding clip is torn off completely. Remove also the black cap at the top of the cartridge. Screw the cartridge into the adapter which was fitted to the hub at the factory.. Write the date of installation on the cartridge. The lubrication is guaranteed for approx. 1 year. Please read the accompanying original PERMA documentation. PERMA© lubrication 4.4. Trial run It is best to carry out a trial run with an empty mixing container when you are starting up the machine for the first time or after carrying out maintenance work or repairs. Remove all tools and any other loose items from the inside of the machine. If the machine wobbles while it is working, adjust the machine feet to compensate the differences in height. It is prohibited to operate the machine on its shipment pallet. 4.5. Door interlock system The mixer is equipped with a door interlock system which locks the door as soon as the mixing cycle is started. Releasing the safety door interlock Remove the plastic plug cap from the left side of the machine. Use a screwdriver to push the release button of the door interlock Open the door. Do not start the machine if any safety devices are defective or modified! Do not open the machine by hand until the mixing unit has come to a standstill. Some machine parts run on after the machine is switched off – Risk of injury! Edition G1.2-10 9 ROTA 20 / 30 BIAX 22/33/44 DYNAX400 5. Collomix Rühr- und Mischgeräte GmbH D-85080 Gaimersheim Operation 5.1. Switching on the machine The machine is switched on with the main switch (4). Switch-on is followed by an initialization routine. The word READY appears in the display when initialization is completed. If any errors occur during initialization they will be indicated in the display in plain text. For further information see 6 Messages and troubleshooting. Collomix BIAX init... Version X.XX Collomix BIAX init... d 80 / c 25 / v 144 Collomix BIAX init... 000011 cycles Ready 1:00 2:00 3:00 5.2. Loading the container Open the door (if necessary cancel "STAND-BY“ mode by pressing button E). Unlock the lower clamping table (7) by pressing the locking lever (1) to the left and pulling it forward. If the mixing container is higher than the position of the clamping table, press button E to widen the mixing unit. Secure the container handle with a rubber band or adhesive tape and place the mixing container on the mixing table in central position. It is also possible to mix several identical containers simultaneously. In this case, make sure the containers are placed on the clamping table in a symmetrical arrangement. Securing the handle with a rubber band Push the clamping table back into the machine until it latches in place. Place container in central position 5.3. Starting the mixing cycle Close the door (the door has to be closed to start the mixing cycle). Ready 1:00 2:00 3:00 Start the mixing cycle by pressing one of the timer buttons I, II or III. The corresponding mixing time is indicated in the LCD display above the buttons. The mixing container is clamped in place and the mixing cycle is started automatically. The remaining mixing time is indicated in the LCD display as the mixing cycle progresses. Mixing t = 1.00 clamping Pot clampt Mixing t = mixing 10 Edition G1.2-10 0.59 Collomix Rühr- und Mischgeräte Gmbh D-85080 Gaimersheim ROTA 20 / 30 BIAX 22/33/44 DYNAX400 5.4. Ending the mixing cycle The mixing unit is automatically moved to the 12 o'clock position and the clamping pressure released when the mixing time is over. The door is then unlocked. You can end the mixing cycle prematurely before the mixing time is over by pressing button E. The mixing cycle is immediately ended, the mixing unit positioned, the clamping pressure released, and the door unlocked. Unlock the lower clamping table (7) by pressing the locking lever (1) to the left and pulling it forward. Important: When you have finished using the machine, be sure to switch it off with the main switch! 5.5. Stand-by t = 0.00 or Mixing t = wait 0.00 Mixing t = unclamping 0.00 Ready 1:00 2:00 3:00 E 000 Stand-by > press "E" to quit If approximately 60 minutes pass without the user actuating any function, the biaxial mixer will automatically switch to stand-by mode. All unnecessary consumers are switched off and the door can no longer be opened. To quit stand-by mode, press BUTTON E. The machine will then return to base position and you are again able to open the door. 5.6. Triggering the EMEGENCY STOP function You can press the Emergency Stop button to switch off the machine if ever the container develops a leak or its handle becomes loose or some other potentially dangerous situation for man or machine arises while the mixing cycle is in progress. After the EMERGENCY STOP button is pressed, the mixing unit will coast to a standstill and remain in this position. The mixing unit is not moved automatically to the 12 o'clock position! Ready 1:00 Release the clamping pressure from the mixing unit by pressing button E and remove the container. The machine is in base position; mixing can be continued. 3:00 E20 Emergency stop > unlock switch Unlock EMERGENCY STOP E20 Emergency stop > press “E“ to quit Unlock the EMERGENCY STOP button by hand and press button E to cancel the error message. Open the door and turn the mixing unit by hand until it latches in the 12 o'clock position. 2:00 wait Please unclamp > press “E“ to quit Open the door and position the mixing unit by hand ? Ready 1:00 2:00 3:00 The EMERGENCY STOP button does not disconnect the machine from the mains power supply! Therefore, before performing any maintenance work or repairs always be sure to disconnect the machine from the mains by pulling out the power plug! Edition G1.2-10 11 ROTA 20 / 30 BIAX 22/33/44 DYNAX400 6. Collomix Rühr- und Mischgeräte GmbH D-85080 Gaimersheim Trouble-shooting Using the trouble-shooting tables listed in this chapter, you can check whether you are able to correct the errors yourself or whether you need to call the customer service department. Before calling the customer service department, please make a note of the machine’s serial number, the error code being shown in the display and also the status of the LEDs on the control panel. The machine’s serial number can be found on the machine’s rating plate (9). 6.1. Initialization Initialization is performed each time the mixer is switched on. The following error messages may appear as a result. Please note that all maintenance and servicing jobs must be left strictly to authorized and suitably trained personnel. LEDs 230 V 24 V 230 V 24 V 230 V 24 V 230 V 24 V 230 V 24 V 230 V 24 V 230 V 24 V 230 V 24 V Display Items to remedy / actions to take empty Check the power supply Check the SI 3 fuse Check the connector / cable of the control pcb empty Check the connector / cable of the display pcb The display is defective The control pcb is defective E010 door open > Close door Check the 24 V fuse Check the connector / cable of the transformer The transformer is defective E010 door open > Close door Door open Check the connector / cable of the door switch The door switch is defective E020 emergency stop > press "E" to quit EMERGENCY STOP actuated Check the connector / cable of the EMERGENCY STOP EMERGENCY STOP switching element is defective Collomix BIAX init.. E025 door not locked Door unlocked by hand Check the door interlock system Check the connector / cable of the door interlock system Container already clamped, unclamp by hand The mixing unit is not in the 12 o'clock position Check the clamping table proximity switch Check the connector / cable of the clamping table proximity switch Latching pin blocked Check the connector / cable of the mixing unit magnet The mixing unit magnet is defective The mixing unit is not in the 12 o'clock position E060 not unclamped > press "E" to quit E080 MU unlocked > press "E" to quit All maintenance and servicing jobs must be left strictly to authorized and suitably trained personnel. This applies in particular to work performed with the housing open. 12 Edition G1.2-10 Collomix Rühr- und Mischgeräte Gmbh D-85080 Gaimersheim ROTA 20 / 30 BIAX 22/33/44 DYNAX400 6.2. Error messages The following table provides an overview of possible errors and their remedies. Please note that all maintenance and servicing jobs must be left strictly to authorized and suitably trained personnel. This applies in particular to those jobs printed on a gray background which have to be performed with the housing open. Fault Machine status Items to remedy / actions to take E000 Stand-by 60 minutes have passed without the user actuating any function; the machine is in stand-by mode Press button E to cancel stand-by mode E010 Door open The door has been opened Close the door The door is closed and the LED for 24V is not on Check the fuse for 24 V Check the 24 V circuit Check the transformer The door is closed and the LED for 24V is on Check the door interlock system Check the lead/connector to the door interlock EMERGENCY STOP actuated Release the EMERGENCY STOP EMERGENCY STOP not actuated Check the EMERGENCY STOP switching element Check the lead/connector to the EMERGENCY STOP E020 Emergency stop E025 Door not locked E030 Pot not found E040 Max open E050 Pot defective Door unlocked by hand Lock the door by hand Door not unlocked by hand Check the door interlock system Check the lead/connector to the door interlock There is no container in the mixing unit Load a container A container is loaded in the mixing unit The container is too small Check the clamping table switch Check the programmable cam The threaded spindles are dirty Clean and lubricate the threaded spindles The mixing unit is fully open Note that the maximum container height is 400mm The mixing unit is not fully open Clean and lubricate the threaded spindles Clean and lubricate the guide columns The container is defective Press button "P" to reinitialize the machine Correct the clamping pressure Check whether the clamping table / clamping table switch moves smoothly Check the lead/connector to the "clamping" proximity switch The "clamping" proximity switch/programmable cam/ clamping table microswitch or control pcb is defective The container is not defective Edition G1.2-10 13 ROTA 20 / 30 BIAX 22/33/44 DYNAX400 Collomix Rühr- und Mischgeräte GmbH D-85080 Gaimersheim Fault Machine status Items to remedy / actions to take E060 not disclamped The container is clamped check clamping motor, brushes and control pcb The container is not clamped The mixing unit is not at 12 o'clock position, move by hand Check whether the clamping table / clamping table switch moves smoothly Check the lead/connector to the "clamping" proximity switch E070 MU locked E080 MU unlocked Latching pin blocked The latching pin is blocked – clean and lubricate, replace if necessary Latching pin released Check the lead/connector to the switch of the mixing unit magnet The switch of the mixing unit magnet is defective The mixing unit is not 12 at o'clock position, move by hand Check the lead/connector to the switch of the mixing unit magnet The switch of the mixing unit magnet is defective The latching pin is blocked – clean and lubricate, replace if necessary Check the lead/connector to the mixing unit magnet The mixing unit magnet is defective Latching pin blocked Latching pin released E120 Speed too low The mixing unit rotates The mixing unit does not rotate E130 Speed too high Check the lead/connector to the "position" proximity switch The "position" proximity switch is defective Check the fuse for SI 2 motor Check the lead/connector to the motor The motor / rectifier or control pcb is defective Decrease the motor speed The actions printed on a gray background have to be performed by authorized and suitably trained personnel. 14 Edition G1.2-10 Collomix Rühr- und Mischgeräte Gmbh D-85080 Gaimersheim 7. ROTA 20 / 30 BIAX 22/33/44 DYNAX400 Maintenance and cleaning Regular maintenance is necessary to ensure that the machine remains in good working condition at all times. If the machine is in constant use, it is important to lubricate the most important parts in accordance with the schedule described below. How often you repeat the maintenance depends on how long the machine is operated. Always pull out the power plug before carrying out any maintenance work. 7.1. Inspections Check all safety-relevant parts of the machine before beginning with your work. Arrange for authorized personnel to replace defective or damaged parts before you work again with the machine. 7.2. Cleaning If any material escapes from the mixing container when it is inside the machine, remove it immediately. Use a rag or a spatula. Take care not to damage any connecting leads or sensors. Dirty threaded spindles can be cleaned with a rag or a wire brush. When you have finished cleaning the threaded spindles, lubricate them again with Molycote BR 2 Plus. Important! Never clean the machine with a high-pressure cleaner or the like. This could wash the lubricating grease out of the ball bearings, leaving them to run dry. This will result in serious damage. Ball bearings which have run dry must be replaced immediately! 7.3. Maintenance Every week: Remove any dirt from the machine. Apply a thin coat of lubricating oil at the two guide columns of the mixing unit. Every 6 months: Check the PERMA lubricating cartridge (2) and replace it when necessary 1 4 Lubricate the threaded spindle (4) and the spindle shaft with Molykote BR 2 plus. Check that the lock pin at the mixing unit magnet moves smoothly. 2 Check the tension of the V-belt. Replace the V-belt if it is worn or damaged. Check that the locking lever (5) moves smoothly and lubricate lightly with grease. 3 Check that the bottom clamping table and the slide (3) move smoothly. Remove any dirt. Check that all ball bearings move smoothly. Ball bearings are to be found on the two clamping jaws, on the drive shaft at the transmission gear and on the clamping tables. Check that the door pull is in good working condition. Check that the door lock is in good working good. Check the degree of wear on the carbon brushes. Minimum length is approx. 9 mm. Edition G1.2-10 5 1 2 3 4 5 Guide columns PERMA cartridge Slide pull out mechanism threaded spindle Locking lever 15 ROTA 20 / 30 BIAX 22/33/44 DYNAX400 Collomix Rühr- und Mischgeräte GmbH D-85080 Gaimersheim 7.4. Maintenance checklist Maintenance checklist for BIAX 22/33 - ROTA 20/30 - BIAX 44 – DYNAX 400 Machine number Counter total: Date of maintenance: Location of the machine Maintenance technician Cleaning the machine Clean the inside and the outside of the machine Remove paint residues from the spindle and the spindle shaft with a steel brush Remove paint residues from between the upper clamping table and the clamping table carrier. Inspections Check the drive belt for wear and tension. Check that the latching pin on the mixing unit magnet moves smoothly. Check that the locking lever moves smoothly and lubricate it with a little grease. Check that the slide with the clamping table moves smoothly. Remove any dirt. Check all ball bearings to see that they move smoothly. There are ball bearings on the slide pull-out, the two clamping jaws, the transmission drive shaft and the clamping tables. Check that the door pull-out is in good working orde. Check that the door lock works. A special key is supplied to release the safety door lock. See Fehler! Verweisquelle konnte nicht gefunden werden. Fehler! Verweisquelle konnte nicht gefunden werden. for a description. Check the state of wear of the carbon brushes. They should have a minimum length of approximately 9 mm. Bevel gears must always be replaced in complete sets. Lubricating the machine Check the amount of PERMA lubricant; if necessary, replace the cartridge. Lubricate the threaded spindles and the spine shaft with MOLIKOTE BR2+. Brush a little lubricating oil on the guide columns of the mixing unit. Brush a little lubricating oil on the latching pin. Miscellaneous Replace the fuses on the pcb: S1, S2 = 6.3 AT 250V; S3 = 4.0 AT 250V (use only sand-filled, flow fuses) Add more spare fuses as required Carry out a function test with a large and a small container. Comments Date: 16 Signature of the maintenance technician: Edition G1.2-10 Collomix Rühr- und Mischgeräte Gmbh D-85080 Gaimersheim ROTA 20 / 30 BIAX 22/33/44 DYNAX400 7.5. Layout of the control system 24 V Fuse 230V Mixer Motor Fuses: No. SI1 SI2 SI3 Value 6.3A T 6.3A T 4.0A T Connector ST 1 1 2 assignment: Lead Function violet 24V AC from transformer violett Function 24 V fuse 230V mixer motor 230V primary transformer / electronics ST 3 1 2 3 4 5 6 Lead white white blue --black Function ST 4 1 2 3 4 Lead blue --red Function ST 6 1 2 3 4 5 Lead brown brown Schwarz Blau Grün/gelb Function ST 10 1 2 3 4 Leitung weiß --weiß Funktion ST 14 1 2 3 Lead brown black blue Function Speedometer Mixer motor Clamp motor 230V AC to transformer L1 N PE Netzeingang NOT-AUS "Clamp" proximity switch Keyboard Display 230V primary transformer and electronics ST 15 1 2 3 4 5 6 Lead 4 5 1 2 -3 ST 16 1 2 3 4 Lead green green gray gray Function ST 18 1 2 3 Lead brown black blue Function Leitung white white red+ blue - Funktion ST 19 3 4 7 8 2 Function Door magnet + 24 V Door contact signal Door locked signal Mixing unit magnet Mixing unit magnet switch “Position“ proximity switch Turn rightFU Speed FU Jumper assignment: ST2 Closed for BIAX/ROTA ST5 Closed for VIBA ST8 1-2 Service / 2-3 Operation LED signals: Display Meaning LD 1 „Clamp“ proximity switch LD 2 „Position“ proximity switch LD 3 Switch magnet mixing unit LD 4 door closed LD 5 door locked LD 6 magnet mixing unit LD 7 door magnet open 1 not by Dynax 400 / 2 only by Dynax 400 Edition G1.2-10 17 ROTA 20 / 30 BIAX 22/33/44 DYNAX400 8. Collomix Rühr- und Mischgeräte GmbH D-85080 Gaimersheim Annex 8.1. Technical data Type of machine: ROTA 20 ROTA 30 Supply voltage: Rated power: Fuse: Max. container weight: container height: Max. container base area: Oval containers øb 365 øt 405 mm Dimensions (w x d x h): BIAX 44 DYNAX 400 3~,N, PE; 400 Volt/50Hz 1,1 kW 1,1 kW 1,1 kW 1,1 kW 1,1 kW 2,2 kW 16 A 16 A 16 A 16 A 16 A 16 A app. 170 rpm app. 130 rpm 25 kg 30 kg 25 kg 30 kg 40 kg 40 kg - 35 kg - 35 kg - 35 kg - 35 kg 40 kg 40 kg 60 - 350 mm 60 - 400 mm 60 - 350 mm 60 - 400 mm - 330 mm - 330 mm - 365 mm - 365 mm 365 mm 365 mm optional optional included included included included Noise emission: Machine weight: BIAX 33 L1, N, PE; 230 Volt/50 Hz Speed/mixing unit: Rec. Long-term operating weight: BIAX 22 110 - 450 mm 110 - 450 mm < 65 dB (A) measured according toDIN 45.635 192 kg 207 kg 206 kg 217 kg 235 kg 234 kg 730 x 800 x 1060 mm 780 x 800 x 1090 mm 730 x 840 x 1090 mm 780 x 840 x 1120 mm 830 x 857 x 1112 mm 830 x 857 x 1112 mm 8.2. Warranty The manufacturer undertakes to provide, as part of the general terms of supply and delivery, a twelve-month warranty. This warranty applies to single-shift operation and is counted from the date of initial start-up. It covers all defects arising from faulty material or workmanship. Please note that all warranty claims must be accompanied by the original delivery note or initial start-up report. All essential warranty repair work must only be carried out by adequately trained service engineers or by third parties with express prior authorization from Collomix. The carrying out of unauthorized repairs may render the warranty null and void. Please return any defective parts or machines carriage-paid to our factory. Collomix reserves the right to decide on whether cost-free parts replacement is applicable. Parts and labor covered by the warranty will be supplied free of charge. The warranty does not cover travel costs, expenses or possible overnight accommodation resulting from warranty repairs carried out off our premises. Any further responsibility, with particular reference to damage claims, including foregone profit or other material losses on the part of the customer, is expressly excluded. Warranty and liability claims for personal or material damages are excluded if attributable to one or more of the following causes: 18 Incorrect operation of the machine, as defined in the operating instructions Failure to observe the instructions in the operating manual with respect to set-up, initial start-up, operation and maintenance of the machine Faults or damage caused by excessive accumulations of dirt and/or incorrect cleaning schedules, with particular reference to leaks and damaged containers Operation of the machine with defective safety and/or protection devices Unauthorized structural modifications to the machine Incorrect monitoring of parts subject to wear and consumables Unauthorized repairs and/or the fitting of non-original spare parts Damage caused by the impact of foreign bodies or force majeure We reserve the right to make amendments as a result of ongoing advances in the technical field. Edition G1.2-10 Collomix Rühr- und Mischgeräte Gmbh D-85080 Gaimersheim ROTA 20 / 30 BIAX 22/33/44 DYNAX400 8.3. Recycling and disposal The transport packaging consists of recyclable material. Please dispose of it accordingly. At the end of the machine's working life, the materials used in its construction must be properly recycled. If you have any questions concerning the disposal of any materials, please contact the manufacturer. 8.4. Declaration of CE conformity We declare herewith that this product conforms with the following standards and standard-setting documents: DIN EN ISO 12100-1, DIN EN ISO EN 12100-2, DIN EN ISO 954-1, DIN EN ISO 141211, DIN EN 55011, DIN EN 61000-6-2, DIN EN 61000-4-2, DIN EN 61000-4-3, DIN EN 61000-4-4, DIN EN 61000-4-5 in accordance with the provisions of directives 2006/95/EEC, 2004/108/EC, 2006/42/EC. Technical file at: Collomix Rühr- und Mischgeräte GmbH, Abt. Technische Entwicklung, Daimlerstr. 9, 85080 Gaimersheim, Germany Gaimersheim, 29.12.2009 Alexander Essing General Manager Manufacturer: Collomix Rühr- und Mischgeräte GmbH Daimlerstr. 9, D-85080 Gaimersheim Federal Republic of Germany Tel.: ++49 (0)8458 32 98 - 0 Fax: ++49 (0)8458 32 98 30 This declaration of conformity will lose its validity if any changes or modifications are made to the machine without the manufacturer's approval. Edition G1.2-10 19 ROTA 20 / 30 BIAX 22/33/44 DYNAX400 Collomix Rühr- und Mischgeräte GmbH D-85080 Gaimersheim Collomix Rühr- und Mischgeräte GmbH Daimlerstr. 9, D-85080 Gaimersheim Federal Republic of Germany Tel.: ++49 (0)8458 32 98 - 0 Fax: ++49 (0)8458 32 98 30 20 Edition G1.2-10