1
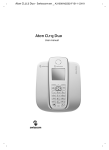
Handy Pìco
Operating Instructions
GAP
The Handy at a glance
The Handset
Receiver Inset
Display
Keys for
menu operation
Menu-/ON
Keypad
Short-code dialling/
internal/ last number repetition
Microphone
The Charger
/OFF-/Signal keys
The technology at a glance
- The enhanced-feature handset for DECT devices and
systems with GAP
- Digital transmission in accordance with the DECT
standard
- Short code memory for 20 phone numbers
- Adjustable volume
- Standard NiCd or NiMH batteries of various capacities can be used
(size AA / miniature)
Table of contents
1
Table of contents
1
1.1
1.2
1.3
1.4
1.5
1.6
1.7
Getting to know and connecting your Handy
Initial steps...........................................................................................................3
Some technical information…........................................................................3
Charging and handling batteries ...................................................................4
Installing / changing the batteries.................................................................5
Notes on operating the Handy.......................................................................5
Default settings on delivery.............................................................................6
Cleaning and maintenance..............................................................................6
2
2.1
2.2
2.3
2.4
2.5
2.6
2.7
2.8
General operation
User guide...........................................................................................................7
Entering names and text ..................................................................................8
Display indicator - stand-by mode..............................................................10
Display indicator - switching on: ready to dial .........................................10
Display indicator - stand-by mode: preparing to dial ............................11
Display indicator-idle state: last number redial........................................11
Display indicator - dialling with short-code ..............................................12
Calling up the local menu ..............................................................................13
3 Basic settings
3.1 Selecting a base-set........................................................................................14
3.2 Assigning Handset to a base-set ................................................................14
4 Telephoning: Basic Functions / Extra Features
4.1 Accepting a call (incoming) ........................................................................16
4.2 Initiating a call (outgoing calls) - Preparing to dial .................................16
4.3 Ending a call ......................................................................................................17
4.4 Mute function....................................................................................................17
4.5 Last number redial - individual last number redial ..................................17
4.6 Last number redial - History function .........................................................18
4.7 Short code - general...................................................................................... 19
4.8 Storing names and numbers.........................................................................19
4.9 SOS emergency numbers.............................................................................20
4.10 Deleting short-code memory .......................................................................21
4.11 Dialling with the short code feature(preparing to dial).........................22
4.12 Using emergency numbers ..........................................................................22
4.13 Switching on/off the keypad ........................................................................23
4.14 Switching on/off the Handset ......................................................................23
4.15 Temporarily switching off the Handset.......................................................23
4.16 The volume in the Handset ...........................................................................24
4.17 Activating the lock / changing the PIN .....................................................24
4.18 Making a call with lock enabled..................................................................25
4.19 Disabling the lock............................................................................................25
4.20 Setting the Handset ringing type ................................................................26
2
Table of contents
5
5.1
5.2
5.3
Settings / Programming
Overview of the functions in the set up menu .........................................27
Switching on/off keyclick ..............................................................................28
Measuring the field strength ........................................................................28
Index .....................................................................................................29
6
6.1
6.2
6.3
6.4
6.5
6.6
6.7
Appendix
Acoustic signalling ..........................................................................................30
CE 0188 for the portable part .......................................................................30
Overview of menu items ................................................................................31
Symbols used in the display .........................................................................32
Trouble shooting ..............................................................................................32
Technical Data..................................................................................................33
Service................................................................................................................33
1
1.1
Getting to know and connecting your Handy
3
Initial steps
1. Charging the batteries
The enclosed batteries have to be installed before the handset can be
used. They are not precharged and therefore have to be charged first.
A complete basic charge during initial operation takes approx. 14 hours
(also refer to ”Initial operation: Preparation - charging and handling
batteries“).
However, the handset can also be used after a short charging time of,
e.g. 1 hour; the specified standby or talktimes, however, cannot be
attained in this case.
To charge the batteries, connect the power pack to the socket at the
bottom of the charger and connect the plug to the mains. Place the
handset in the charger; the charging process commences.
2. Logging the handset in to a base system
To be able to use the handset to make a call, first of all it has to be logged in to a base station.
To do so, carry out the procedure described in the chapter entitled
”Assigning the handset to a base”.
This guide describes the operation of your handset. Additional functions
can be used depending on which base you use this device. For further
information, please refer to the instructions for your base system.
1.2 Some Technical Information…
The Handy Pìco is a cordless telephone conforming to the DECT (Digital
European Cordless Telephone) standard. It consists of a handset and a
charger.
Note
The speech in the handset is encrypted by the requirements stipulated in
the DECT standard: this offers protection against eavesdropping by scanners. The voice quality is not adversely affected.
Usage in connection with hearing aids can result in interference.
4
1
Getting to know and connecting your Handy
1.3 Charging and handling batteries
Charging
When installing from new or after a prolonged time in storage, the batteries
for the Handset must be initially charged up. Place the Handset in the
charger.
The Handset can be used with different battery types (e.g. NiCd 650 mAh,
NiCd 700 mAh, NiMH 1200 mAh, etc.): ensure that only identical
batteries are fitted.
When charging for the first time the batteries are charged for 14
hours: this does not happen constantly, but in pulses.
In normal use (i.e. when the Handset is placed in the charger after the
"Battery Low" is indicated) the batteries will charge more quickly.
During use the charge is reduced: the display shows these reductions at
different stages (100,80,70,60, etc.).
After changing the batteries no capacity value is given (the same
applies for a charged battery, as this is an unknown state for the Handset).
The display will show: ___%
Only after a few hours will the normal indicator appear with a percentage
value.
If disconnected from the power supply for several hours (e.g. holidays or
during a lengthy installation), the batteries should be removed as they will
lose too much charge and will need to be fully re-charged before the unit
is to be used again.
Handling the batteries
Apart from charging the batteries as a result of normal usage, there is no
particular handling instruction necessary in order to maximise the efficiency of the batteries.
NI-CD
NI-MH
Note:
Even so, the battery is a consumable and its capacity and the resulting
operating time will eventually diminish.
Dispose of used batteries in accordance with local regulations. Do not
dispose with household waste!
Only rechargeable batteries can be used!
1
Getting to know and connecting your Handy
5
1.4 Installing/changing the batteries
Remove the cover of the battery chamber by pressing gently on the upper
edge where the clips are situated. Remove the old batteries. Fit the new
batteries as indicated. Slide back the cover, making sure the lock is engaged.
Only fit identical battery types with identical capacity.
Only use rechargeable batteries!
1.5
Notes on operating the Handy
Handy as well as charger unit must be located within transmission range of
the base set.
Avoid installing the unit in the direct vicinity of other electronic equipment,
such as, hi-fi systems, office or microwave equipment, to exclude mutual
interference. Also avoid an installation location in the vicinity of heat sources, e.g. radiators.
Place the unit on a non-slip mat so that the plastic feet of the unit are not
damaged by the furniture coating, leaving undesirable marks on the furniture surface. For obvious reasons, the manufacturer cannot be held responsible for such damage.
6
1
1.6
Getting to know and connecting your Handy
Default settings on delivery
The Handy Pìco is delivered with the following basic settings:
• No phone numbers stored
• Ringer melody level 2
• Ringer volume level 5
• Handset volume normal
• Keypad lock inactive
• Key click switched on
• PIN „0000“/Telephone lock off
These default settings can be changed according to your own personal
requirements and connection conditions.
1.7
Cleaning and maintenance
Simply wipe the plastic with a slightly damp cloth or an anti-static cloth: do
not use a dry cloth and avoid the use of cleaning or scouring fluids.
2
2.1
General operation
User Guide
Your new telephone is simple to use
thanks to the user guide in the display
Menu key
The menu is activated and cancelled by pressing the Menu key. It is
context sensitive as to which menu
item is prompted (see Overview of
Menu Items)
In the first line of the display you are
shown (with the help of symbols)
the current status of the Handset
(see Symbols in the Display). In the
first line of text available functions
are presented as clear text. In the
second line of text you are given
the relevant sub-options from these
functions, presented as text and
abbreviations. You have the following options:
Option 1: OK-key
Make selection by pressing the
OK-key. For example, you can
now enter a short-dial code or
change an existing one.
The OK-key basically serves as
confirmation of a selection or storing an entry.
Option 2: STOP-key
End the menu display by pressing
the Stop-key. With the stop-key
you can terminate use at any time,
i.e. cancel keying-in. Repeated
pressing will take you to the previous menu level and eventually to
stand-by mode.
Option 3: Cursor keys
With the cursor keys you can
scroll forward (right key) or backward (left key) to select a menu
item or an entry.
7
8
2
2.2
General operation
Entering names and text
Entering characters is possible when
"A-Z" is displayed in the 2nd row of
text.
Letters, numbers and various
punctuation marks are available
(keys "0" and "1").
Entry is via the numeric keypad. Every number is assigned to several characters located on the upper half of the keys.
Selecting characters
Press once = 1st character
Press twice = 2nd character
The last character is followed by the key number, followed again by the
first character, etc.
Character selected
Press the key for the next character
Should you need to select the same character on the same
key:
Press the right cursor key and select the character again
Example: character selection ABC - Key number 2
1st Press key "2"
Displays letter "A"
2nd Press key "2"
Displays letter "B"
3rd Press key "2"
Displays letter "C"
4th Press key "2"
Displays number "2"
5th Press key "2"
Displays letter "A"
Each name can hold a maximum of 13 characters.
2
General operation
Delete characters: press left cursor key
Press the right cursor key and
the cursor moves one place to
the right: select more characters. Press again generates a
blank space.
Example: Enter the name "OTTO"
Press number key 6 three times for
"O"
Press number key 8 once for "T".
As you need the same letter again,
press the right cursor key to select
the next letter and press number 8
again for "T".
Press number key 6 three times for
"O"
9
10
2
General operation
Prompts in the display will help you when operating the unit. The actual
mode of the machine will determine which options are available and are
presented in the 2nd line of text.
2.4 Display indicator - stand-by mode
When at rest the following status is
indicated:
The Handset is ready to use; there
is no connection and no call is being
signalled.
In the 2nd line of text the selected
base-set is indicated (A,B…) as well
as the current battery capacity. This is
displayed in steps of 20% or 10%
If the Handset has an estimated
charge of 0%, a warning message is
displayed and accompanied by a warning signal. A connected call in progress cannot be continiued. If, on the
other hand, at this point there is a
radio connection, there is 3 minutes
operating time remaining.
When the Handset is placed in the
base-set, you will hear a short acknowledgement tone. It is now
being charged as the battery did not
have a full charge and "POWER"
appears in the display.
When the signal becomes
weaker, i.e. the Handset is outside
the range of base-set or is not logged-on to a base-set, the message
"NO BASE" appears.
2.5 Display indicator- switching on: ready to dial
At "Ready to dial" the following status is indicated: the Handset is switched on via the ON/OFF key there is radio connection to the baseset.
The telephone is now ready for you to dial a number. In the second line of
the display you are shown various options. For example, choose a number
from the last number redial ( ) or select a short-code ( )
2
2.5
General operation
11
Display indicator - stand-by mode: preparing to dial
At preparing to dial the following status is indicated: The handset is in
stand-by mode; there is no radio connection to the base-set.
You can enter the telephone number
in to the keypad (max. 24 places).
A number stored in last number
redial or in short-code can be recalled by pressing the relevant key and
the number is shown in the display.
Corrections can also be made retrospectively, in which numbers can be
added or deleted from the end by
using the left cursor key and replaced with the correct numbers.
By pressing the ON/OFF key the
radio connection is automatically made and the number dialled.
2.6
Display indicator-idle state: last number redial
The handset is in an idle state.
On pressing the last number
redial key, the first number in the
last number redial memory is displayed. The last five phone numbers
which were dialled manually are in
the last number redial memory; the
oldest one of these five numbers is deleted when dialling a new phone
number.
The second phone number which is
stored can be recovered by pressing
the last number redial key again.
The third number is indicated by
pressing the last number redial
key yet again etc. After pressing
for a fifth time, pressing it again then
displays the first phone number.
If you wish to dial the displayed phone number, press the ON/OFF key.
12
2
General operation
Numbers longer than 15 digits: only the last 15 digits are displayed. As
mentioned in section 2.5 you also have the option of correcting or adding
to the number.
Telephone numbers stored in last number redial are retained even
after changing the battery
2.7
Display indicator – Dialling with short-code
The Handset is in stand-by
mode
with the cursor keys you can
immediately reach the first and last
location numbers ( :21, :01).
The following will enable you to
select target location numbers:
Press the short-code key.
Select a number either by keying in
the memory location number
(01-21) in the key pad or by scrolling through the memory by either
the cursor keys or the shortcode key. The corresponding
name is displayed.
After pressing the OK key the
corresponding number is displayed. The option to amend numbers is identical to manual dialling
and last number redialling.
If you want to select the displayed
number, press the ON/OFF key
Numbers longer than 15 digits: only the last 15 digits are displayed.
2
2.8
General operation
Calling up the local menu
Press the menu key
The ”MENU” menu item then
appears.
Upon confirmation by means of the
OK key, either ”SYSTEM” or the
local menu appear depending on
whether the handset is logged into
a base and is within the (radio)
range.
The first menu item in the local
menu is displayed; use the arrow
keys to move to the desired menu
item.
13
14
3
3.1
Basic settings
Selecting a base-set
The Handset can be assigned to up to 4 base-set (A,B,C,D)
This means you can use the Handset in various locations. If you change
location then select the appropriate base-set or allow the system to select
the most favourable base-set via the AUTO function. Please note that the
Handset can only select between those base-sets to which it has already
been assigned: it will then choose the base-set with the strongest signal at
that time.
press menu key
confirm with the OK Key
select SET UP
press OK Key
select NEW BASE
press OK Key
select required base-set
(i.e. A, B…)
or
Select AUTO
press OK Key
Select another menu item or quit
menu with menu key
3.2
Assigning Handset to a base-set
The Handset must be assigned to a base-set in order to make calls. When
logging on essential data is transferred from the base-set. In order to
assign the Handset to a base-set or a base system, it is necessary to carry
out programming at the Handset as well as the base-set prior to logging
on.
Please also read the chapter entitled ”Logging on” in the operating instructions for your base/base system.
3
Basic settings
press menu key
press OK Key
/
select SET UP
press OK Key
/
select NEW BASE
/
select required base (i.e.A,B,..)
DO NOT SELECT AUTO
press OK Key
press OK Key
/
select LOG IN
press OK Key
enter PIN (delivered default value
0000)
Now prepare your base/base
system for the log-in procedure
(refer to corresponding operating instructions).
!
only now press OK Key: the process of logging-in can take several
seconds
The further control of the procedure
is effected via the corresponding
base station (refer to the respective
operating instructions or the prompt
on the display).
15
16
4
4.1
Telephoning: Basic Functions / Extra Features
Accepting a call (incoming)
On receiving a call
The phone rings and the following messages depends on the base system in
use.
Accepting the call
By picking up the Handset from the base-set (automatically switches on
the Handset)
Or
By pressing the ON/OFF Key
4.2
Initiating a call (outgoing calls) - Preparing to dial
Calls are initiated by entering the phone number. A phone number which has
been dialled is stored in the last number redial memory when switching off the
handset. You can also utilise the convenient possibilities of the phone number
memory for speed dialling or last number redial.
Enter the phone number
Press the ON/OFF key
Make the call.
If the service is available:
• Display of the call charges during
the call (depending on the base
used).
Otherwise
• Display of the call duration in minutes/seconds after the first minute has
lapsed at the latest.
Internal functions:
Internal functions such as initiating a call to a second handset which is logged
into the same base or switching a call between two handsets, are initiated by
means of the ”Internal key” (INT). The further procedure depends on the corresponding base (refer to the operating instructions for your GAP base).
4
4.3
Telephoning: Basic Functions / Extra Features
17
Ending a call (internal and external)
Press the ON
Or
Replace Handset in the charger
4.4
Mute function
The microphone of the telephone is switched off by the mute key. The
other person on the line now cannot hear you.
The Handset is connected on a call
press menu key
press 0 key
Microphone is switched off
MIC OFF! is displayed for 3 seconds
press menu key
press 0 key
microphone is reactivated
MIC ON! is displayed for 3 seconds
4.5
Last number redial - individual last number redial
Phone numbers do not have to be entered manually when redialling them.
They can be dialled automatically at the touch of a button by means of the
last number redial function. The last 5 phone numbers are available for this.
/OFF
KEY is in a ready-to-dial state, i.e. a radio link has been set
The handset
up. Various possibilities are shown on the second line of the display
depending on which device you are operating your handset (e.g. dialling a
phone number out of the last number redial (
) or via short code
(
)).
Press the last number redial key.
Press the OK key.
The phone number which was dialled
last is dialled again.
18
4
Telephoning: Basic Functions / Extra Features
4.6
Last number redial - History function
It is not necessary to manually enter numbers for redialling: at the touch of
a button you can dial with the last number redial.
This stores the last 5 dialled calls = history function
You can display these numbers in the display and activate the redial.
The last dialled number will overwrite the oldest entry in the last number
memory.
Handset in stand-by state or
ready to dial
Press the last number redial
key
The last number dialled is displayed.
Corrections or additions to the
number is possible (see also
"General Information - Display
Indicators when telephoning)
Press the last number redial
key
The last-but-one dialled number is
displayed, and so on.
Required number is selected
in stand-by mode
Number is dialled after pressing
the ON/OFF key
Or
in Ready to Dial the number is
dialled by pressing the OK key
Numbers longer than 15 digits:
only the last 15 digits are displayed.
As mentioned in section 2.6 you
also have the option of correcting
or adding to the number.
Telephone numbers stored in last number redial are retained even
after changing the battery.
4
4.7
Telephoning: Basic Functions / Extra Features
19
Short-code - general
The Handset can store 21 numbers and names. Stored entries can be
retrieved either by scrolling with the cursor keys or by entering the
memory location number (01-21).
As a special feature it is possible to give the Handset its own name (max.
13 characters) which is displayed when stand-by in the upper text line.
This name must be stored in memory
location number 21.
4.8
Storing names and numbers
press menu key
press OK key
select NAME/NO.
/
press OK key
press OK key
Select memory location
or
/
The first memory location is indicated. You can now enter a two
digit location number or user
the cursor key to locate an empty
field or to re-use a field. If location
is unoccupied "-------" is displayed.
press OK key
Key in name: for further details see
section "General Information: entering names and text"
Complete the keying in of the
name by pressing the OK key
Note:
The user should ensure that all
stored numbers are correctly
programmed.
20
4
Telephoning: Basic Functions / Extra Features
Enter telephone number
or
( )
Make corrections with the left
cursor key
Press the last number
redial key to transfer number to the short-code
memory.
press OK Key
Search for the next available location or leave this function by pressing the menu key.
Note:
If a dialling pause is required press the short-code key
priate point.
4.9
at the appro-
SOS Emergency numbers
Your new telephone contains special short-code memory locations for
emergency numbers: two of which are reserved for "Police" and "Fire
Dept". Enter the actual numbers for these services in your area (i.e. 999)
The third number is for your own choice, for example your local doctor,
etc. These numbers are always ready for dialling in any operating mode
and are simple to recall (se section 4.7 "Calling emergency numbers)
Emergency numbers are stored as follows:
press menu key
select NAME/NO.
press OK key
select PROG. SOS-NO.
press OK key
select either one of the pre-programmed numbers (Fire
Dept/Police) or the personalised
number (name)
press OK key
4
(
Telephoning: Basic Functions / Extra Features
For the personalised number now
enter the name
press OK key
)
enter telephone number
make corrections if necessary with
cursor keys
press OK key
4.10
Deleting short-code memory
Press menu key
press OK key
select NAME/NO.
press OK key
select DEL.NAME/NO.
press OK key
or
Select memory location either by
using cursor keys
OR
by entering the 2 digit number
press OK key
Memory location is deleted.
You can now delete another shortcode memory or quit this function
via the menu key.
You can also delete all shortcode memory at once. Instead
of selecting DELETE NAME/NO.
choose DELETE ALL and press
the OK key twice.
21
22
4
4.11
Telephoning: Basic Functions / Extra Features
Dialling with the short code feature(preparing to dial)
The handy is in an idle state
but a radio link has not been set up.
The arrow keys can be used to
reach the first/last short code
memory: = 21;
=1
or:
A short code number can be
selected directly by means of the
following procedure:
Press the short code key
or
( )
Selection of the memory location:
The selection of the memory location can be made with the aid of the
arrow keys or by entering the
two-digit number.
If you wish to see the stored phone
number, press the OK key. You can
now make corrections or extensions
to the phone number which are
actually dialled but not stored or call
up the last number redial.
Only the last 15 digits are displayed in the case of phone
numbers longer than 15
digits.
A radio link is set up and the displayed short code destination is selected by pressing the ON / OFF
key.
4.12
Using emergency numbers
You will always have the option of dialling one of the two pre-programmed
numbers (Police/Fire Dept) and the third personalised SOS number (see
section 4.4). Dial as follows:
press menu key
press 1 key
select the name with the cursor keys
By pressing the ON/OFF key the
radio connection is made and the
emergency number is dialled.
4
Telephoning: Basic Functions / Extra Features
4.13
23
Switching on and off the keypad
The keypad lock blocks the keys thus preventing accidental dialling during
transportation, for example. If the keypad lock is switched on, then the only
available option is to switch it off. There is one exception: an emergency
call - this can be made at any time. An active keypad lock is switched off
when placing the handset in the charger after an interruption in the power
supply to the handset (removal of the batteries) or after taking a call. Incoming calls can be taken in the normal way.
Switching on the keypad
press menu key
press star key
Switching off the keypad
press menu key
press star key
4.14
Switching on/off the Handset
You can switch off the mobile unit when:
You do not want to be disturbed by incoming calls
You are outside the range of the base-set and you wish to save the batteries
To switch off press and hold ON/OFF key for two seconds. When the
handset is switched off "POWER OFF" appears in the display
To switch on again, press the ON/OFF key
When powered off incoming calls are not signalled!
4.15
Temporarily switching off the Handset
If you do not wish to accept an incoming call pressing the STOP key will
stop the telephone ringing!
24
4
Telephoning: Basic Functions / Extra Features
4.16
The volume in the handset
The pre-set volume in the handset can be increased. VOLUME HIGH or
VOLUME STANDARD is displayed for 3 seconds after changing
Increasing the volume in the handset
press menu key
press hash key
Switching handset volume back to standard
press menu key
press hash key
4.17
Activating the lock/changing the PIN
This device can be protected against unauthorised use by allocating a PIN
If a PIN is issued in the following way, outgoing calls can only be made if
the PIN is entered beforehand.
Handset is in stand-by mode
press menu key
press OK key
/
select TEL.-LOCK ON/OFF
press OK key
enter new personalised PIN (i.e.
1234)
enter PIN once again
press OK key
The unit is now locked. Outgoing
calls can only be made by entering
this PIN
Please take careful note of the PIN. If you forget this PIN the unit can
only be unlocked by a Service Engineer
4
4.18
Telephoning: Basic Functions / Extra Features
Making a call with lock enabled
Press ON/OFF key
enter the PIN (i.e. 1234)
After correct PIN the handset is
„ready to dial“. Display message
depends on the used base set.
Dial required number
4.19
Disabling the lock
Handset is in stand-by mode
press menu key
select TEL.-LOCK ON/OFF
press OK key
enter PIN
press OK key
The unit is now unlocked
25
26
4
Telephoning: Basic Functions / Extra Features
4.20 Setting the Handset ringing type
The ringing type to signal incoming calls can be individually configured for tune and volume.
10 melodies and 8 volume settings are available.
At volume level 01 the tone sounds only once in order not to disturb users
meetings, for example.
When delivered the Handset is set at volume 05 and melody 02.
press menu key
press OK Key
select VOLUME/MELODY
press OK Key
select VOLUME or MELODY
press OK Key
to set the volume:
8 levels: 00 = no ringing type;
01 = short click;
02…07 = volume
to set the melody:
10 melodies 01-10
press OK Key
press menu key
5
5.1
27
Settings / Programming
Overview of the functions in the set up menu
Various settings for operating the
handset are combined in the set
up menu.
The set up menu can be found in
the local menu (as a submenu).
The default values (state upon
delivery) are:
Key click:
Note:
on
A description of how to programme the log-in procedure can
be found earlier on in these operating instructions.
press
OK key
28
5
5.2
Settings / Programming
Switching on/off keyclick
The keyclick is an acoustic acknowledgement on pressing a key. When
delivered the key click is switched on: the following will enable you to
switch if off or vice versa.
press menu key
press OK Key
/
select SET UP
/
select BEEP=ON
or BEEP=OFF
press OK Key
press OK Key
press OK Key
Press menu key to select other
menu items
5.3
Measuring the field strength
In order to assist you in deciding on the choice of location for the baseset, you can measure the field strength. The quality of the connection to
the three strongest base-sets is then indicated (The display information
about „KE1“ and „KE2“ is redundant).
press menu key
press number 5
In the top line the three strongest base-sets are indicated. In the lower line
their field strengths are compared. If the field strength is too weak, this
indicated by two dashes (--) Quit this function by pressing the menu key
Index
29
Accepting a call................................16
Acoustic signalling ..........................30
Approval ............................................30
Calling up the local menu ..............13
Calls - incoming................................16
Calls - outgoing ................................16
CE - symbol.......................................30
Charging the batteries.............3, 4, 5
Changing the PIN............................24
Cleaning ...............................................6
DECT standard ...................................3
Deleting the short code
Making an emergency call............22
Measuring the field strength ........28
Menu items - overview...................31
Mute function....................................17
Names ..................................................8
Outgoing calls...................................16
Overview ..............................................b
Overview of menu items ................31
Preparing to dial ...............................11
Ready-to-dial ....................................10
Selecting a base ...............................14
Service................................................34
memory...............................................21
Delivery state ......................................6
Display .........................................10, 32
Emergency numbers................20, 22
Encryption............................................3
Ending a call ......................................17
Faults ..................................................33
Handling the batteries ......................4
Hearing aids ........................................3
History function ................................18
Idle state.............................................10
Incoming calls ...................................16
Initiating a call ...................................16
Key click.............................................28
Keypad lock ......................................23
Last number redial ...............11, 17-18
Local menu ........................................13
Lock .............................................24, 25
Logging a handset in to a base....14
Log-in..................................................14
Making a call with lock enabled..25
Set up location....................................5
Set up menu .....................................27
Short code .........................................19
Signalling ...........................................30
SOS numbers ............................20, 22
Switching on/off the handset .......23
Symbols..............................................32
Technical data...................................33
Technology......................................3, b
Temporarily switching off the
handset ..............................................23
Texts ......................................................8
Tone ringing ......................................26
User guide ...........................................7
Volume ...............................................24
30
Appendix: Acoustic signalling / Approval and CE Marks
6.1
Acoustic signalling
•
The dialling tone is a continous signal. It sounds when the handset
is switched on. This means: you can dial the phone number to reach
someone via the public telephone network.
•
The ringing tone is a signal with a short tone, long pause rhythm. It
sounds after the phone number has been dialled. This means: the
connection has been established.
•
The busy tone has a swift rhythm of short tones and pauses. It
sounds after the phone number has been dialled. This means: the
connection or line which has been dialled is busy.
6.2
CE 0188 X for the portable part
The product complies with the basic requirements of all respective directives of the European Union Council. The specified conformity assessment
procedures were performed.
The portable part meets the requirements of the following EU directives:
CTR 6 (94/471/EG) (Edition I)
CTR 10 (94/472/EG) (Edition I)
CTR 22 (97/525/EG) (Edition I)
EN 50081-1 (01/92)
EN 50082-1 (01/92)
ETS 300 329 (06/97)
EN 60950-A4 (07/96)
EN 41003 (06/97)
Appendix: Overview of menu items
6.3
(
Overview of menu items
)
(only in range of the
assigned base-set)
31
32
Appendix: Symbols used in the display / Trouble shooting
6.4
Symbols used in display
9 different symbols are used to help you operate the Handset:
Ready to use indicator: logged-on and in range of the base-set.
microphone switched off
active when pressing the last number redial key to select a redial number
when preparing to dial (history function)
deactivated on retrieval of the telephone number or by completing or leaving the procedure
activated on pressing the short-code key when prompted to select or programming a short-code number
deactivated on retrieval of the number, or by completing or leaving the
procedure.
active when the Handset is locked against unauthorised use
active when DTMF is installed - this symbol is controlled by the base-set
active when the handset is switched to LOUD
active when the keypad is disabled
6.5
Trouble Shooting
● no functionality
➠ battery low ➠ change battery.
Check that the batteries are correctly fitted especially ensuring the
contacts are free from dust, etc.
(see1.4)
➠ assign the Handset to the baseset (see 3.1)
● no battery status display
➠ battery has been changed (display only appears on reaching 60%
capacity ➠ change battery (see
1.3)
33
Appendix: Technical Data / Service
6.6
Technical Data
Standard:
Transmission/reception frequency:
Range:
Operating time:
- Standard battery
2x700 mAh / NiCd / Size AA
- Power battery (accessory)
-
Slimline batterypack (accessory)
Dimensions:
Weight incl. batteries:
* The standby times are approximate
and depend upon the position of the
base and its distance from the handset(s).
6.7
Service
DECT GAP
1880 - 1900 MHz
up to 300 m
(in buildings up to 50 m)
Standby*:
up to 45 h
Talktime:
up to 5 h
Standby*:
up to 70 h
Talktime:
up to 8 h
Standby*:
up to 40 h
Talktime:
up to 4.5 h
150 mm x 52 mm x 20 - 25 mm
(depends on the battery cover
used)
180 g
This device fulfills the requirements of the EU regulations:
92/31/EWG „Electromagnetic compatibility“
93/68/EWG „Electric resources for use within
certain voltage ranges“
This is designated by the CE label.
Subject to changes
Hagenuk GmbH
Westring 431
D 24118 Kiel
User´s Manual Handy Pìco
Mat.-Nr. 3100.558
Edition 12/98