1
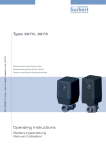
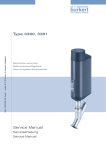
Type3280, 3285
Electromotive control valve
Elektromotorisches Regelventil
Vanne de régulation électromotorisée
Operating Instructions
Bedienungsanleitung
Manuel d‘utilisation
We reserve the right to make technical changes without notice.
Technische Änderungen vorbehalten.
Sous réserve de modifications techniques.
© 2015 Bürkert Werke GmbH
Operating Instructions 1504/00_EU-ML_00810387 / Original DE
Type 3280, 3285

Electromotive control valve Type 3280, 3285
Contents
1
2
Operating instructions.........................................................................................................................................................5
1.1
Symbols.......................................................................................................................................................................................5
1.2
Definition of terms..................................................................................................................................................................5
Authorized use..............................................................................................................................................................................6
2.1
Restrictions................................................................................................................................................................................6
3
Basic safety instructions..................................................................................................................................................7
4
General information.................................................................................................................................................................8
5
6
4.1
Contact address......................................................................................................................................................................8
4.2
Warranty.......................................................................................................................................................................................8
4.3
Information on the Internet................................................................................................................................................8
System description....................................................................................................................................................................9
5.1
Intended use..............................................................................................................................................................................9
5.2
General description...............................................................................................................................................................9
5.3
Designs........................................................................................................................................................................................9
5.3.1
Electromotive stroke valve Type 3280............................................................................................10
5.3.2
Electromotive disk valve Type 3285................................................................................................10
5.3.3
Electric control.....................................................................................................................................11
Technical data..............................................................................................................................................................................12
6.1
Conformity...............................................................................................................................................................................12
6.2
Standards.................................................................................................................................................................................12
6.3
Operating conditions.........................................................................................................................................................12
6.4
Mechanical data....................................................................................................................................................................13
6.5
Electrical data........................................................................................................................................................................13
6.5.1
Derating.................................................................................................................................................14
6.6
Fluidic data..............................................................................................................................................................................15
6.7
Type label.................................................................................................................................................................................15
3
english
Type 3280, 3285

7
Installation....................................................................................................................................................................................16
7.1
Safety instructions..............................................................................................................................................................16
7.2
Fluid installation...................................................................................................................................................................16
7.3
Electrical installation..........................................................................................................................................................17
7.4
DIP switch settings.............................................................................................................................................................18
7.5
8
7.4.1
Setting the DIP switch for Type 3280............................................................................................19
7.4.2
Setting the DIP switch for Type 3285............................................................................................21
LED display..............................................................................................................................................................................23
7.5.1
Display elements standard................................................................................................................23
7.5.2
Display elements NAMUR NE 107.................................................................................................23
Start-up..............................................................................................................................................................................................24
8.1
Functions of the standard version..............................................................................................................................24
8.2
Functions of the positioner version...........................................................................................................................25
8.2.1
9
10
Setting options.....................................................................................................................................26
Maintenance, troubleshooting..................................................................................................................................29
9.1
Safety instructions..............................................................................................................................................................29
9.2
Maintenance...........................................................................................................................................................................29
9.3
Cleaning....................................................................................................................................................................................29
9.4
Troubleshooting....................................................................................................................................................................29
Spare parts.....................................................................................................................................................................................31
10.1 Accessories.............................................................................................................................................................................31
11
Packaging and transport................................................................................................................................................32
12
Storage...............................................................................................................................................................................................32
13
Disposal.............................................................................................................................................................................................32
4
english
Type 3280, 3285
Operating instructions
1
Operating instructions
The operating instructions describe the entire life cycle of the device. Keep these instructions in a location which is
easily accessible to every user, and make these instructions available to every new owner of the device.
Important safety information.
Read the operating instructions carefully and thoroughly. Study in particular the chapters entitled “Basic safety
instructions” and “Authorized use”.
▶▶The operating instructions must be read and understood.
1.1
Symbols
Danger!
Warns of an immediate danger!
▶▶Failure to observe the warning may result in a fatal or serious injury.
Warning!
Warns of a potentially dangerous situation!
▶▶Failure to observe the warning may result in serious injuries or death.
Caution!
Warns of a possible danger!
▶▶Failure to observe this warning may result in a moderate or minor injury.
Note!
Warns of damage to property!
• Failure to observe the warning may result in damage to the device or the equipment.
Indicates important additional information, tips and recommendations.
Refers to information in these operating instructions or in other documentation.
→→Designates a procedure which you must carry out.
1.2
Definition of terms
In these instructions the term "device" always refers to the electromotive control valve Type 3280 and 3285.
5
english
Type 3280, 3285
Authorized use
2
Authorized use
Non-conforming use of the electromotive control valve Type 3280 and 3285 may be a hazard to people,
nearby equipment and the environment.
▶▶The electromotive control valve is designed to control the flow of non-aggressive, clean and non-corrosive liquid
and gaseous medium.
▶▶Do not use the device outdoors.
▶▶Do not expose the valve to direct sunlight.
▶▶Use Type 3280 and 3285 only in conjunction with third-party devices and components recommended and
authorized by Bürkert.
▶▶The device must be used in compliance with the characteristics and commissioning and use conditions specified in the contractual documents and in the user manual.
▶▶Use the control valve only when in perfect condition and always ensure proper storage, transportation, installation and operation.
▶▶Only use the device as intended.
2.1
Restrictions
If exporting the device, observe any existing restrictions.
6
english
Type 3280, 3285
Basic safety instructions
3
Basic safety instructions
These safety instructions do not make allowance for any
• contingencies and events which may arise during the assembly, operation, and maintenance.
• local safety regulations – the operator is responsible for observing these regulations, also in relation to the installation personnel.
Risk of injury from high pressure.
▶▶Before loosening lines and valves, cut off the pressure and deaerate or drain lines.
Risk of injury due to electrical shock.
▶▶Before working on the system or device, switch off and isolate the power supply to prevent reactivation of the
device.
▶▶Observe applicable accident prevention and safety regulations for electrical equipment!
Risk of burns or risk of fire if used for a prolonged duty cycle through hot device surface.
▶▶Keep the device away from highly flammable substances and medium and do not touch with bare hands.
General hazardous situations.
To prevent injuries:
▶▶Do not use Type 3280 and 3285 in potentially explosive areas.
▶▶Do not subject the actuator housing and actuator cover to mechanical loading.
▶▶Do not make any internal or external modifications on the device. Do not paint housing parts or screws.
▶▶Avoid using the control valve in the vicinity of strong magnetic fields.
▶▶Secure the device from unintentional actuation.
▶▶Only trained technicians may perform installation and maintenance work.
▶▶After an interruption in the power supply, ensure that the process is restarted in a defined or controlled
manner.
▶▶Observe the general rules of technology.
Note!
Electrostatic sensitive components and modules!
The device contains electronic components which react sensitively to electrostatic discharge (ESD). Contact with
electrostatically charged persons or objects are hazardous to these components. In the worst case scenario, they
will be destroyed immediately or will fail when energized.
• Observe the requirements in accordance with EN 61340-5-1 to minimize or avoid the possibility of damage
caused by sudden electrostatic discharge!
• Do not touch electronic components while the supply voltage is switched on!
7
english
Type 3280, 3285
General information
4
General information
4.1
Contact address
Germany
Bürkert Fluid Control Systems
Sales Center
Christian-Bürkert-Str. 13-17
D-74653 Ingelfingen
Tel. + 49 (0) 7940 - 10 91 111
Fax + 49 (0) 7940 - 10 91 448
E-mail: [email protected]
International
Contact addresses are found on the final pages of the printed operating manual.
You can also find information on the Internet under:
www.burkert.com
4.2
Warranty
The warranty is only valid if the electromotive control valve Type 3280 and 3285 is used correctly in accordance
with the specified operating conditions.
4.3
Information on the Internet
The operating instructions and data sheets for Types 3280 and 3285 can be found on the Internet at:
www.burkert.com
8
english
Type 3280, 3285
System description
5
System description
5.1
Intended use
The electromotive control valve Type 3280 and 3285 is designed to control the flow of non-aggressive, clean and
non-corrosive liquid and gaseous medium. Only clean, liquid or gaseous medium, which does not react with the
bodies and sealing materials, may be controlled.
Note!
Unsuitable medium will damage the body and the seals.
Unsuitable medium may damage the body and the seals.
• Use suitable medium only.
• Check chemical compatibility in individual cases.
5.2
General description
The control valve regulates the flow rate with the aid of a stepper motor drive which is controlled by the control
electronics. Therefore, no external motor control is required.
Basic functions of the control electronics:
• Control of the valve opening by processing the external set-point values (via analog input or digitally via büS or
CANopen)
• Output of the valve states via the LED display
• Position detection after power failure
- if power fails, the current position of the valve is retained
- when power is restored, the internal control electronics automatically detects it’s current position
• Reduction in the energy consumption
- The valve is designed to hold its position without the active use of the motor. As soon as the desired position
is achieved, motor is turned off and the valve uses only fraction of power required to move the valve
5.3
Designs
The following versions of the electromotive control valve are available:
• electromotive 2/2-way stroke valve Type 3280 (DN2, DN3, DN4, DN6)
- Control standard
- Control positioner
• electromotive 2/2-way disk valve Type 3285 (DN8, DN10, DN12, DN15, DN20, DN25)
- Control standard
- Control positioner
9
english
Type 3280, 3285
System description
5.3.1
Electromotive stroke valve Type 3280
The valve spindle is driven by a stepper motor. The angular movement of the motor is converted to translational
movement with the aid of a threaded spindle. The valve spindle is connected rigidly to the threaded spindle. The valve
spindle is connected to a control cone. Depending on the angular position of the motor, the position of the control
cone varies with respect to the valve seat. This results in the different positions (e. g open/close) of the valve. The
valve seat is sealed by an elastomer seal.
Linear stepper
motor
Control electronics
Threaded spindle
Valve spindle
Control cone
Elastomer seal
Body
Figure 1:
Electromotive stroke valve Type 3280
5.3.2
Electromotive disk valve Type 3285
The disk valve consists of a stepper motor with gearbox which transfers the rotational torque to the actuator shaft via
coupling. The actuator shaft has control disc attached to it. A fixed disk with a mouth attached to the body is used
as a valve seat. The control disc is pressed onto the fixed disk by a supporting spring. The fixed disc and the control
disc are positioned in such a way that the rotational movement of control disc opens or closes the opening mouth
in the fixed disc; thereby opening or closing the valve. The design of the fixed disk enables the flow rate values to
be changed continuously depending on the position of the control disc.
Control electronics
Stepper motor with
gearbox
Coupling
Actuator shaft
Spring
Fixed disc
Control disc
Body
Figure 2:
Electromotive disk valve Type 3285
10
english
Type 3280, 3285
System description
5.3.3
Electric control
The control valves 3280 and 3285 feature an electromotive actuator with an electric control.
The device version is stated on the type label: 0 means standard, x means positioner.
Control standard:
The standard control valve converts an external standard signal (position set-point value) into a valve position. Both
valve end positions are indicated by the LED status. Additionally, the digital output indicates when the closed valve
position has been achieved.
Control positioner:
The positioner control valve converts an external standard signal (position set-point value) into a valve position. The
position of the actuator is controlled according to the position set-point value. The current position (POS) of the
electromotive valve is recorded by the position measuring system. The position controller compares this position
actual value to the set-point value (CMD) specified as the standard signal. In case of a control difference (Xd1), the
motor control signal is sent to the actuating drive as the actuating variable. Z1 is a disturbance value.
Z1
CMD
Xd1
+
Position setpoint value
CTRL
POS
Valve opening
Position controller
Electromotive
actuator
Continuous valve
POS
Position measuring
system
Position control circuit
Figure 3:
Signal flow diagram position controller
Both valve end positions are indicated by the LED status. Moreover, the position actual value recorded using the
position measuring system is output via the M12 circular plug-in connector.
It is possible to communicate with the device digitally (e.g. for transferring the set-point or the actual value) via
CANopen* or büS**.
* C
ANopen - A CAN-based field bus (Controller Area Network) used in automation technology to link
devices.
** büS - A CANopen-based field bus with additional functions.
The positioner version also features some special functions (see chapter “8.2.1”), which can be set up using the
Bürkert Communicator.
The operating instructions for the Bürkert Communicator can be found at www.burkert.com.
11
english
Type 3280, 3285
Technical data
6
Technical data
6.1
Conformity
The electromotive control valve Type 3280 and 3285 is compliant with EC directives as stated in the EC Declaration of Conformity.
6.2
Standards
The applied standards, which are used to demonstrate compliance with the EC Directives, are listed in the EC type
test certificate and/or the EC Declaration of Conformity.
6.3
Operating conditions
Warning!
Risk of injury due to malfunction if device used outdoors.
▶▶Do not use the device outdoors and avoid heat sources which may cause the permitted temperature range to
be exceeded.
▶▶Protect the device from direct sunlight and humidity.
Permitted temperatures
Ambient temperature
-10 to +60 °C (observe derating curve, see chapter “6.5.1”)
Medium temperature
0 to +70 °C
Medium temperature for
oxygen
0 to +60 °C
Permitted air humidity
Air humidity< 95 %, non-condensing
Authorized medium
Medium non-aggressive, clean and non-corrosive liquid and gaseous medium which do
not attack the bodies and sealing materials.
Check resistance in individual cases (see chemical resistance chart at
www.burkert.com).
If medium is contaminated or contain particals, connect a suitable dirt filter
upstream.
Control functionsDepending on the version, the seat of the valve is closed with or against the
medium flow:
Type 3280: flow direction under seat
Type 3285: flow direction over seat
Circuit function
A
2/2-way valve for continuous control of the flow rate in output A, motorized,
without power motionless
M
12
P
english
Type 3280, 3285
Technical data
6.4
Mechanical data
Materials
Type 3280
Type 3285
Actuator housing
Black Plastic parts: PPS GF40,
Anthracite Plastic parts: PC GF10
Black Plastic parts: PPS GF40,
Anthracite Plastic parts: PC GF10,
in contact with medium: PPS GF40
Body
Brass (MS) or
stainless steel (VA)
Brass (MS) or
stainless steel (VA)
Sealing material
FKM, NBR or EPDM
FKM or NBR,
technical ceramic
Other materials in the
fluid area
Stainless steel (VA)
Stainless steel (VA)
Connections
Type 3280
G 1/4, G 3/8, NPT 1/4 or NPT 3/8
Type 3285
G 1/2, G 3/4, G 1, NPT 1/2, NPT 3/4 or NPT 1
Weight
Type 3280 ~ 0.7 kg (with VA body)
Type 3285 DN8/10 DN12/15 DN20/25 Dimensions 6.5
~ 0.8 kg (with VA body)
~ 1.2 kg (with VA body)
~ 1.5 kg (with VA body)
see data sheet
Electrical data
Electrical data
Control standard
Control positioner
Connections
circular plug-in connector
(M12 x 1, 8-pole)
circular plug-in connector
(M12 x 1, 8-pole)
Operating voltage
24 V DC ±10 % residual ripple < 10 %
24 V DC ±10 % residual ripple < 10 %
Power consumption
Type 3280: max. 8 W
Type 3280: max. 8 W
Type 3285: max. 12 W
Type 3285: max. 12 W
Standby power consumption
approx. 1 W
approx. 2 W
Actuating time (0...100 %)
Type 3280: approx. 2.5 s, for setting
“Valve actuating speed normal”, see
chapter “7.4”
Typ 3280: approx. 2.5 s, for setting
“Valve actuating speed normal”, see
chapter “8.2.1”
Type 3285: approx. 4 s, for setting
“Valve actuating speed normal”, see
chapter “7.4”
Type 3285: approx. 4 s, for setting
“Valve actuating speed normal”, see
chapter “8.2.1”
Analog input
(Set-point value input)
4...20 mA or 0...10 V (adjustable,
see chapter “7.4”)
0...20 mA, 4...20 mA, 0...5 V or
0...10 V, see chapter “8.2.1”
Input impedance
for analog input
60 Ω at 4...20 mA /
resolution 40 µA
22 kΩ at 0...10 V /
resolution 20 mV
60 Ω at 0...20 mA and 4...20 mA /
resolution 40 µA
22 kΩ at 0...5 V and 0...10 V /
resolution 20 mV
english
13
Type 3280, 3285
Technical data
Electrical data
Control standard
Control positioner
Analog output
(actual value output)
-
0...20 mA, 4...20 mA, 0...5 V, 0...10 V
(adjustable, see chapter “8.2.1”)
Analog output
-
max. current for voltage output 10 mA
max. load for current output 560 Ω
Digital output
active, max. 100 mA current
limitation, PNP,
switching voltage = Usupply-1 V
short-circuit proof
-
Limit switch
contactless end position detection
-
Position measuring system
-
non-contact, high resolution, and thus
wear-free position measuring system
Communication interface
-
büS or CANopen*
as per EN 60034-1: S3 50 %,
depending on the operating
conditions.
Observe derating curve, see chapter
“6.5.1”
Duty cycle
as per EN 60034-1: S3 50 %,
depending on the operating
conditions.
Observe derating curve, see chapter
“6.5.1”
* 3.3 V signal voltage, reliable communication decreases as the line length and transfer rate increases
6.5.1
Derating
Duty cycle [%]
The maximum duty cycle of the valve depends on the maximum ambient temperatures and the current required by the
stepper motor. The derating curve can be used to indicate the maximum duty cycle permissible at the corresponding
ambient temperature. By switching on the low power function a higher duty cycle can be achieved (Warning: during
low power function, max medium pressure is reduced; if violated Valve will not move or malfunction).
100
90
80
70
60
50
40
30
20
10
Normal operation
Low power function
5 10 15 20 25 30 35 40 45 50 55 60 65 70
Max. ambient temperature [°C]
Figure 4:
Derating curve
14
english
Type 3280, 3285
Technical data
6.6
Fluidic data
Definition DN
DN designates the orifice of the seat, not the orifice of the port connection.
Type
Orifice
3280
2
3
4
6
3285
8
10
12
15
20
25
1)
Port
connection
KVs value [m³/h] 1)
Max. pressure for flammable gases [bar]
Max. pressure
[bar]
G 1/4
0.15
3
6
NPT 1/4
0.15
3
6
G 1/4
0.3
3
6
NPT 1/4
0.3
3
6
G 3/8
0.5
3
6
NPT 3/8
0.5
3
6
G 3/8
0.9
3
6
NPT 3/8
0.9
3
6
G 1/2
1.8
3
6
NPT 1/2
1.8
3
6
G 1/2
2.5
3
6
NPT 1/2
2.5
3
6
G 3/4
3.9
3
6
NPT 3/4
3.9
3
6
G 3/4
6.0
3
6
NPT 3/4
6.0
3
6
G1
8.8
3
6
NPT 1
8.8
3
6
G1
12.3
3
6
NPT 1
12.3
3
6
The KVs value is a flow rate value for water, measurement at +20 °C and 1 bar pressure difference above the fully opened valve.
6.7
Type label
Nominal diameter
Sealing material
Electronic valve version
Body material
D-74653 Ingelfingen
Type
3280 X DN25 EPDM MS
NPT 1/4 PN 6 bar
24 V DC 8 W
Tamb see manual
268611
SN000000
Port connection, Pressure range
Voltage, Max. power consumption
W3ZLT
Identity number, Serial number
Ambient temperature
Figure 5:
Description of the type label (Example)
15
english
Type 3280, 3285
Installation
7
Installation
7.1
Safety instructions
DANGER!
Risk of injury from high pressure in the system or device.
▶▶Before working on the system or device, cut off the pressure and deaerate/drain lines.
Risk of injury due to electrical shock.
▶▶Before working on the system or device, switch off the power supply and secure to prevent reactivation.
▶▶Observe applicable accident prevention and safety regulations for electrical equipment.
Warning!
Risk of injury from improper installation.
▶▶Installation may be carried out only by trained technicians and with the appropriate tools!
▶▶Secure system against unintentional activation.
▶▶Following installation, ensure a controlled or defined restart.
7.2
Fluid installation
DANGER!
Risk of injury from high pressure in the system or device.
▶▶Before working on the system or device, cut off the pressure and deaerate or drain lines.
Installation position: any position, preferably with actuator above and installed vertically with the actuator cover
upwards
Procedure:
→→Clean pipelines and port connections.
→→Install a dirt filter before the valve inlet (≤ 0.3 mm).
Note!
Caution risk of breakage!
• Do not use plastic actuator housing as a lever arm.
→→Hold the device with a suitable tool (open-end wrench) on the body and screw into the pipeline.
→→Observe flow direction. The arrow on the body indicates the direction of flow.
16
Type 3280: Flow direction below seat, is always closed against the medium flow;
Type 3285: Flow direction above seat, is always closed with the medium flow.
english
Type 3280, 3285
Installation
Figure 6:
7.3
Direction of flow Type 3280, Flow direction
below seat
Figure 7:
Direction of flow Type 3285, Flow direction
above seat
Electrical installation
None of the electrical inputs and outputs of the device are galvanically isolated from the supply voltage.
DANGER!
Risk of injury due to electrical shock.
▶▶Before working on the system or device, switch off and isolate the power supply to prevent reactivation of the
device.
▶▶Observe applicable accident prevention and safety regulations for electrical equipment.
Note!
Damage to the electromotive control valve due to incorrect supply voltage.
• The supply voltage must correspond with the voltage indicated on the type label.
• If the ground connection is not connected, the conditions of the EMC Law will not be met.
Procedure:
→→Connect the electromotive control valve according to the table.
When the supply voltage is applied, the electromotive control valve is ready for operation.
Designation of the circular connector (M12 x 1, 8-pole):
3
4
2
5
8
6
1
7
Figure 8:
Circular connector M12 x 1, 8-pole
17
english
Type 3280, 3285
Installation
Pin assignment for the standard version:
Pin
Configuration
External circuit
1
Supply +
24 V DC ±10 %, max. residual ripple 10 %
2
Supply GND
24 V DC GND
3
do not connect!
Electrically insulate wire on connection line
4
do not connect!
Electrically insulate wire on connection line
5
do not connect!
Electrically insulate wire on connection line
6
Set-point value input +
4...20 mA / 0...10 V, not galvanically isolated
7
Binary output
0...5 V (log. 0), 10...30 V (log. 1), not galvanically isolated
8
Signal GND
Signal GND
Shielding
-
Body *
* The threaded sleeve of the M12 circular connector is connected to the valve body. Connect the body to a suitable ground connection. To
ensure electromagnetic compatibility (EMC), ensure that the cable is as short as possible and the cross-section is as large as possible.
Pin assignment for the positioner version:
Pin
Configuration
External circuit
1
Supply +
24 V DC ±10 %, max. residual ripple 10 %
2
Supply GND
24 V DC GND
3
CAN low
CAN low**
4
CAN high
CAN high**
5
CAN GND
CAN GND**
6
Set-point value input +
0...20 mA / 4...20 mA / 0...5 V / 0...10 V,
not galvanically isolated
7
Actual value output
0....20 mA / 4...20 mA / 0...5 V / 0...10 V,
not galvanically isolated
8
Signal GND
Signal GND
Shielding
-
Body *
* T
he threaded sleeve of the M12 circular connector is connected to the valve body. Connect the body to a suitable ground connection. To
ensure electromagnetic compatibility (EMC), ensure that the cable is as short as possible and the cross-section is as large as possible.
** 3.3 V signal voltage, reliable communication decreases as the line length and transfer rate increases.
7.4
DIP switch settings
DANGER!
Risk of injury due to electrical shock.
▶▶Before opening the actuator cover, switch off and isolate the power supply to prevent reactivation of the
device.
▶▶Observe applicable accident prevention and safety regulations for electrical equipment.
Although the factory settings are ideal for most applications, the settings can be adjusted with DIP switches. The
DIP switches can be set to “ON” or “OFF” position depending on the factory order code.
The DIP switches are accessible on the electronic PCB by opening the actuator cover.
18
english
Type 3280, 3285
Installation
7.4.1
Setting the DIP switch for Type 3280
Opening the actuator cover
Actuator cover
Connection plate
with control
electronics
Screws
Figure 9:
Actuator housing
Body
Opening the actuator cover, Type 3280
→→Disconnect the power supply from the device.
→→Carefully loosen the 4 screws on the underside of the actuator housing using a suitable tool. The screws need
not be completely unscrewed, as they are designed not to fall out.
Note!
The connection plate is only plugged in and may fall down when the actuator cover is removed.
→→Secure actuator cover and connection plate with control electronics against falling down and remove the
actuator cover.
Setting the DIP switch
Control electronics
DIP switches
Figure 10:
Location of the DIP switch, Type 3280
→→DIP switch, set to “ON” or “OFF” depending on required function. To do this, carefully actuate the particular
DIP switch using a suitable tool.
19
english
Type 3280, 3285
Installation
2
ON 1
Figure 11:
3
4
DIP switches
Description of the function
DIP switches
Position
1
OFF
Normal operating direction of the set-point value (e.g. setpoint value 4...20 mA corresponds to position 0...100 %),
increasing
ON
Reversal of the operating direction of the set-point value (e.g. no function
set-point value 20...4 mA corresponds to position 0...100 %),
decreasing
OFF
Set-point value input 4...20 mA
Set-point value source
analog input
ON
Set-point value input 0...10 V
Set-point value source
field bus (büS or
CANopen)
OFF
Valve actuating speed: normal mode
büS
ON
Valve actuating speed: slow mode
CANopen
OFF
Low power function: off
no function
ON
Low power function: on, lower force,
less heat generation in the valve
no function
2
3
4
Function for the standard version
Function for the positioner version
no function
The change in function does not become effective until the supply voltage is applied again.
A more precise description of the functions can be found in chapter “8 Start-up”.
Closing the actuator cover
Note!
Damage or malfunction due to ingress of dirt and moisture!
• To guarantee protection class IP, ensure that the actuator housing has been installed correctly.
Do not clamp any loose cables!
→→Carefully attach actuator cover.
→→Insert 4 screws by hand into the designated holes on the underside of the actuator housing and screw in first
thread turn.
20
→→Tighten screws (tightening torque: 2 Nm).
english
Type 3280, 3285
Installation
7.4.2
Setting the DIP switch for Type 3285
Opening the actuator cover
Screws
Actuator cover
Connection plate
with control
electronics
Actuator housing
Body
Figure 12:
Opening the actuator cover, Type 3285
→→Disconnect the power supply from the device.
→→Carefully loosen the 4 screws on top of the actuator housing using a suitable tool. The screws need not be
completely unscrewed, as they are designed not to fall out.
Note!
The connection plate is only plugged in and may fall down when the actuator cover is removed.
→→Secure actuator cover and connection plate with control electronics against falling down and remove the
actuator cover.
Setting the DIP switch
Control electronics
DIP switches
Figure 13:
Location of the DIP switch for Type 3285
→→DIP switch, set to “ON” or “OFF” depending on required function. To do this, carefully actuate the particular
DIP switch using a suitable tool.
21
english
Type 3280, 3285
Installation
2
ON 1
Figure 14:
3
4
DIP switches
Description of the function
DIP switches
Position
1
OFF
Normal operating direction of the set-point value (e.g. setpoint value 4...20 mA corresponds to position 0...100 %),
increasing
no function
ON
Reversal of the operating direction of the set-point value (e.g.
set-point value 20...4 mA corresponds to position 0...100 %),
decreasing
no function
OFF
Set-point value input 4...20 mA
Set-point value source
analog input
ON
Set-point value input 0...10 V
Set-point value source
field bus (büS or
CANopen)
OFF
Valve actuating speed: normal mode
büS
ON
Valve actuating speed: slow mode
CANopen
OFF
Low power function: off
no function
ON
Low power function: on, lower force,
less heat generation in the valve
no function
2
3
4
Function for the standard version
Function for the positioner version
The change in function does not become effective until the supply voltage is applied again.
A more precise description of the functions can be found in chapter “8 Start-up”.
Closing the actuator cover
Note!
Damage or malfunction due to ingress of dirt and moisture!
• To guarantee protection class IP, ensure that the actuator housing has been installed correctly.
Do not clamp any loose cables!
→→Carefully attach actuator cover.
→→Insert 4 screws by hand into the designated holes on top of the actuator housing and screw in first thread
turn.
22
→→Tighten screws (tightening torque: 2 Nm).
english
Type 3280, 3285
Installation
7.5
LED display
With the aid of the positioner version, it is possible to use the Bürkert Communicator Software to toggle the LED
colors between standard and NAMUR NE 107.
7.5.1
Display elements standard
LED color
Status
Display
white
continuously on
Normal operation
white
flashing
Booting phase when voltage applied
yellow
continuously on
Valve completely open
green
continuously on
Valve closed
red
flashing
Error
white, green or red
flashing
Is used to identify a device in the büS network. The
„flashing“ status is started in the Bürkert Communicator
Software when selecting the device
no color or LED off
-
Valve without power supply
7.5.2
Display elements NAMUR NE 107
LED color
Status
Display
white
continuously on
Normal operation
green
continuously on
Active diagnosis
red
continuously on
Error
white, green or red
flashing
Is used to identify a device in the büS network. The
„flashing“ status is started in the Bürkert Communicator
Software when selecting the device
no color or LED off
-
Valve without power supply
23
english
Type 3280, 3285
Start-up
8
Start-up
Warning!
Danger due to improper operation.
Improper operation may result in injuries as well as damage to the device and the area around it.
▶▶The operating personnel must know and have understood the contents of the operating instructions.
▶▶Observe the safety instructions and intended use.
▶▶Only adequately trained personnel may operate the device.
Before start-up, carry out fluid and electrical installation of the valve.
Electromotive control valve Type 3280 and 3285 has different functions which can be configured and parametrized
via the DIP switches.
8.1
Functions of the standard version
The following basic functions can be activated or changed via the DIP switches.
Function
Description
Zero point shut-off
The valve has a zero point shut-off which guarantees that the valve closes tight
when input signals are below a threshold of 2 % of the input signal. The valve is
closed when values are below this threshold.
Interruption in the power
supply
When the power supply is interrupted, the valve remains in its respective position.
When the supply voltage is applied again, the control electronics automatically
detect its current valve position and will automatically adjust the valve position if
standard signal has changed.
Digital output
When the valve reaches the closed position, the position can be relayed e.g. to a
PLC via the binary output.
10 to 30 V = log “1” = valve closed
Analog input
(set-point value input)
0...10 V standard signal or 4...20 mA standard signal, see chapter “7.4”. With a
set-point value input of 4...20 mA, the valve stops in the current position and the
LED flashes red (signal error detection) if the value of the input signal falls below
4 mA.
Effective direction
The normal effective direction of the set-point value can be set to increasing or
decreasing (see chapter “7.4”). If valves are set to increasing, the valve is opened
as far as possible with the largest set-point.
Valve actuating speed
Two valve actuating speeds can be set (see chapter “7.4”). At normal valve speed
the electromotive control valve moves from the closed valve position to the open valve
position (0...100 %) in 2.5 s (Type 3280), 4 s (Type 3285). At slow valve speed the
control valve moves from 0...100 % in 5 s (Type 3280), 10 s (Type 3285).
24
english
Type 3280, 3285
Start-up
Low power function
8.2
The control valve has a low power function which can be adjusted (see chapter
“7.4”). When the function is switched on, the motor is supplied with lower current.
The motor then provides a lower torque; as a result the maximum permitted medium
pressure is lower. The function may be used only at very low differential pressures
from input to output (max. medium pressure 3 bar, max. differential pressure 1 bar).
Functions of the positioner version
Electromotive control valve Type 3280 and 3285 has different functions, which can be changed via the DIP
switches and communications software.
Function
Description
Zero point shut-off
The valve features a zero point shut-off which ensures sealing of the valve with
input signals below a set input signal threshold. The valve is closed when values are
below this threshold. See chapter “8.2.1”.
Interruption in the power
supply
When the power supply is interrupted, the valve remains in its respective position.
When the supply voltage is applied again, the control electronics automatically
detect its current valve position and will automatically adjust the valve position if
standard signal has changed.
Correction characteristic
for adapting the operating characteristic
Use this additional function to select a transfer characteristic in relation to the setpoint value (set-point position, CMD) and the valve stroke (POS) for correcting the
flow or operating characteristic. See chapter “8.2.1”.
Insensitivity range
The position controller is only activated once a defined control difference has been
achieved. See chapter “8.2.1”.
Effective direction
Reversal of the effective direction of the set-point value. See chapter “8.2.1”.
Safety position
Definition of the safety position for set-point value input < 4 mA. See chapter
“8.2.1”.
Value actuating speed
Input of the opening and closing time. See chapter “8.2.1”.
Analog input (set-point
value input)
4...20 mA; 0...20 mA; 0...5 V; 0...10 V can be set as standard signals, see chapter
“8.2.1”.
Analog output (actual
value output)
4...20 mA; 0...20 mA; 0...5 V; 0...10 V can be set as standard signals, see chapter
“8.2.1”.
User calibration
Changing the factory calibration of the signal input. See chapter “8.2.1”.
Energy save function
The control valve features a set table energy-saving function. When the energysaving function is switched on, less current is supplied to the motor. The motor then
provides a smaller torque, resulting in a reduced max. permissible medium pressure.
Only use the energy-saving function with very low differential pressures from OnClosed output (max. medium pressure 3 bar, max. differential pressure 1 bar). See
chapter “8.2.1”.
büS / CANopen
büS or CANopen can be selected as the field bus. See chapter “7.4”.
Analog input / Field bus
(Set-point value source)
Analog output or field bus (büS/CANopen) can be selected as the set-point value
source. See chapter ““7.4”.
25
english
Type 3280, 3285
Start-up
8.2.1
Setting options
The Bürkert Communicator software enables communication with valves 3280 and 3285.
The operating instructions for the Bürkert Communicator can be found at www.burkert.com.
INPUT/OUTPUT
Selected standard signal
Enter the used standard signal for the set-point value or actual value in this menu item (can be selected as the
set-point value source for analog input, see chapter “7.4”).
- Current 4...20 mA
- Current 0...20 mA
- Voltage 0...10 V
- Voltage 0...5 V
CHARACT
Select the transfer characteristic between input signal (position set-point value) and stroke (correction
characteristic)
Use this auxiliary function to select a transfer characteristic with reference to set-point value (nominal position, CMD)
and valve stroke (POS) for correction of the flow-rate or operating characteristic.
The flow characteristic kV = f(s) indicates the flow-rate of a valve, expressed by the kV value depending on the
position/angle s. It is specified by the design of the valve seat and the seat seal. In general two types of flow characteristics are implemented, the linear and the equal percentage.
In the case of linear characteristics identical kV value changes kV are assigned to identical stroke changes ds
(dkv=nlin*ds).
In the case of an equal percentage characteristic an equal percentage change of the kV value corresponds to a
stroke change ds (dkv/kv=neqlprct*ds).
The operating characteristic Q = f(s) states the correlation between the volume flow Q, which flows through the
valve installed in the system, and the position/angle s.
In the case of control tasks for closed-loop control systems it is usually particular demands which are placed on
the course of the operating characteristic, e.g. linearity. For this reason it is occasionally necessary to correct the
course of the operating characteristic in a suitable way. Equal percentage characteristics 1:25, 1:33, 1:50, 25:1,
33:1 and 50:1 and a linear characteristic can be set. Furthermore, a characteristic can be freely programmed via
nodes or automatically calibrated.
CUTOFF
Sealing function for position controller
This function causes the valve to be sealed outside the control area. Enter the limits for the position set-point
value (CMD) after which the actuator is closed fully.
DIR.CMD
Effective sense or effective direction of the position controller set-point value
Use this auxiliary function to set the sense of effective direction between the input signal (INPUT) and the nominal
position (CMD) of the actuator.
X.TIME
Limiting the control speed
Smaller control speeds can be entered in order to limit the control speed.
26
english
Type 3280, 3285
Start-up
F.LIMIT
Energy-saving function
The control valve features a set table energy-saving function. When the energy-saving function is switched on, less
current is supplied to the motor. The motor then provides a smaller torque, resulting in a reduced max. permissible
medium pressure. Only use the energy-saving function with very low differential pressures from On-Closed output
(max. medium pressure 3 bar, max. differential pressure 1 bar).
X.LIMIT
Limits the mechanical stroke range
This function limits the (physical) stroke to specified % values (lower and upper). In doing so, the stroke range of
the limited stroke is set equal to 100 %. If the limited stroke range is left during operation, negative actual position
or actual position greater than 100 % are indicated.
Factory setting: Lower position limit = 0 %, Upper position limit = 100 %
Adjustment range:
Lower position limit:
Upper position limit:
Limited
stroke (%)
0...20 % of the total stroke
80...100 % of the total stroke
Physical
stroke
(%)
Unlimited stroke
Limited
stroke
Set-point value [mA](INPUT)
SIGNAL.SIM
Simulation of the set-point value
Use this function to simulate the set-point value. The set set-point value source is ignored by the device during
simulation. The following types of signal can be entered:
Sinus
Sine wave
Square
Square wave
Triangle
Triangle wave
Fixed
Manual input of a fixed set-point value
27
english
Type 3280, 3285
Start-up
The following parameters can be set for the selected waveform:
Menu option
Offset
Amplitude
Parameter setting
(Zero offset as %)
(Amplitude as %)
Schematic representation with sine wave
70 %
50 %
Offset as %
t
70 %
Amplitude as %
50 %
t
Perisode
(Cycle duration in s)
70 %
Period in s
50 %
t
X.CONTROL
Parameterization of the position controller, insensitivity range (dead band) of the position controller
Input of the dead band in %, with regard to the scaled stroke/rotation angle range. This function ensures that the
controller is only activated once a certain control difference has been achieved.
SAFEPOS
Input of the safety position
With a set-point value input of 4...20 mA, it is possible to enter how the actuator should react if the value of the
input signal falls below 4 mA (signal error detection). The actuator can be moved to the respective end positions
or stay in the current position.
CAL INP
Calibration of the position set-point value (4...20 mA; 0...20 mA; 0...5 V; 0...10 V)
The set-point value input can be re-calibrated using this auxiliary function. Acceptance of the min. input signal
(0 mA; 4 mA; 0 V): Create the minimum value of the input signal at the input and confirm it in the software.
Acceptance of the max. input signal (20 mA; 5 V; 10 V): Create the maximum value of the input signal at the input
and confirm it in the software.
FACTORY RESET
Reset to the factory settings
Use this function to reset all user settings to the delivery status. All parameters, except for the calibration values,
are reset to default values. The hardware is subsequently reset.
DIAGNOSIS
Errors can be read via this function.
TOGGLE LED DISPLAY
Toggle the LED colors between standard and NAMUR NE 107
Use this function to toggle the colors for displaying the device status between standard and NAMUR NE 107.
28
english
Type 3280, 3285
Maintenance, troubleshooting
9
Maintenance, troubleshooting
9.1
Safety instructions
DANGER!
Risk of injury from high pressure in the system or device.
▶▶Before working on the system or device, cut off the pressure and deaerate/drain lines.
Risk of injury due to electrical shock.
▶▶Before working on the system or device, switch off and isolate the power supply to prevent reactivation of the
device.
▶▶Observe applicable accident prevention and safety regulations for electrical equipment.
Warning!
Risk of injury from improper maintenance work.
▶▶Maintenance may be carried out only by trained technicians and with the appropriate tools!
▶▶Secure system against unintentional activation.
▶▶Following maintenance, ensure a controlled restart.
9.2
Maintenance
The electromotive control valve Type 3280 and 3285 is maintenance-free under normal conditions.
9.3
Cleaning
Use the normal cleaning agents to clean the Type 3280 and 3285. Use no alkaline cleansing agents, as these
have a damaging effect on the materials used.
9.4
Troubleshooting
In malfunctions occur, check:
• the port connectors,
• whether the operating pressure is within the permitted range,
• the power supply and the standard signals.
29
english
Type 3280, 3285
Maintenance, troubleshooting
Problem
Possible cause
Remedial action
LED is not lit
No power supply
→→Check the electrical connections
LED flashes
sporadically
white
The power supply collapses periodically device software reboots each time
→→Select power supply with adequate
power
→→Check cable for possible lose
connections
LED flashes red
/ LED illuminates
red
The residual ripple of the supply voltage is too
high
→→Use power supply with a smooth output
voltage at the required power
→→After eliminating the fault, restart the
device for normal operating
(isolate from power supply)
Temperature too high
→→Observe max. ambient temperature /
medium temperature; if required reduce
duty cycle (see Derating curve)
→→After eliminating the fault, restart the
device for normal operating
(isolate from power supply)
Standard signal is < 4 mA; cable break
→→Check cable for possible lose
connections
No flow rate
available
The set-point value is below the limit for the
zero point shut-off
→→Increase set-point value
Valve opens even Operating direction of the set-point value has
though it should been set incorrectly
close
→→Change direction of the set-point
Motor is making
an unusual
droning noise
→→Return device to the manufacturer to
Gearbox or motor blocked
have the fault repaired
Valve is not
Low power function activated; motor torque
opening / closing for medium pressure too low
correctly
→→Deactivate low power function
Valve is not
sealed
→→Install dirt filter and return device to the
Dirt between seal and valve seat
manufacturer for cleaning
30
english
Type 3280, 3285
Spare parts
10
Spare parts
Caution!
Risk of injury and/or damage by the use of incorrect parts.
Incorrect accessories and unsuitable spare parts may cause injuries and damage the device and the surrounding
area.
▶▶Use original accessories and original spare parts from Bürkert only.
10.1
Accessories
Designation
Order number
Connection cable M12 x 1, 8-pole, 2 m
prefabricated cable
919 061
Connection cable M12 x 1, 8-pole, 2 m
prefabricated shielded cable
918 991
buS stick set (including power supply unit)
772 426
Bürkert-Communicator-Software
Download at www.burkert.com
31
english
Type 3280, 3285
Packaging and transport
11
Packaging and transport
Note!
Transport damage.
Inadequately protected devices may be damaged during transportation.
• Protect the device against moisture and dirt in shock-resistant packaging during transportation.
• Prevent the temperature from exceeding or dropping below the permitted storage temperature.
• Using protective caps, protect the electrical interfaces from damage.
12
Storage
Note!
Incorrect storage may damage the device.
• Store the device in a dry and dust-free location!
• Storage temperature: -20 °C...+70 °C.
13
Disposal
Note!
Damage to the environment caused by parts contaminated with medium.
• Dispose of the device and packaging in an environmentally friendly manner.
• Observe applicable disposal and environmental regulations.
Observe the national waste disposal regulations.
32
english
www.burkert.com