1
TS730S.book
1 ページ
2005年7月19日 火曜日 午後1時59分
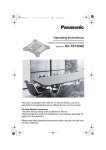
Operating Instructions
Conference Recording Speakerphone System
Model No.
KX-TS730
This unit is compatible with Caller ID. To use this feature, you must
subscribe to the appropriate service offered by your service provider.
Please read these Operating Instructions before using the unit and save
for future reference.
For assistance, visit our website: http://www.panasonic.com for
customers in the U.S.A. or Puerto Rico.
TS730S.book
2 ページ
2005年7月19日 火曜日 午後1時59分
Table of Contents
Introduction
Accessory information . . . . . . . . . . . . . . 3
Important safety instructions . . . . . . . . . 4
For best performance . . . . . . . . . . . . . . . 5
Preparation
Connections . . . . . . . . . . . . . . . . . . . . . . 6
Controls and displays . . . . . . . . . . . . . . . 7
Controls . . . . . . . . . . . . . . . . . . . . . . 7
Setting the unit before use . . . . . . . . . . . 8
Setting the dialing mode . . . . . . . . . . 8
Making/Answering Calls
Making calls . . . . . . . . . . . . . . . . . . . . . . 9
PAUSE button (for PBX/long distance
service users) . . . . . . . . . . . . . . . . . . 9
Answering calls . . . . . . . . . . . . . . . . . . 10
Useful features during a call. . . . . . . . . 10
MUTE button . . . . . . . . . . . . . . . . . . 10
Flash button . . . . . . . . . . . . . . . . . . 10
For Call Waiting service users . . . . 10
Temporary tone dialing (for rotary/pulse
service users) . . . . . . . . . . . . . . . . . 10
Phonebook
Using the phonebook . . . . . . . . . . . . . . 11
Adding items to the phonebook . . . 11
Calling someone in the phonebook . 12
Editing items in the phonebook . . . . 13
Erasing an item in the phonebook . 13
Erasing all items in the phonebook . 13
Chain dial feature . . . . . . . . . . . . . . 13
Ringer settings . . . . . . . . . . . . . . . . . . . 19
Ringer volume . . . . . . . . . . . . . . . . . 19
Ringer tone . . . . . . . . . . . . . . . . . . . 19
Display options . . . . . . . . . . . . . . . . . . . 19
LCD contrast . . . . . . . . . . . . . . . . . . 19
Display language . . . . . . . . . . . . . . . 19
Telephone settings . . . . . . . . . . . . . . . . 20
Flash time . . . . . . . . . . . . . . . . . . . . 20
Other options . . . . . . . . . . . . . . . . . . . . 20
Caller ID Number Auto Edit . . . . . . . 20
Key tone . . . . . . . . . . . . . . . . . . . . . 20
Recording a conversation
Recording a conversation . . . . . . . . . . . 21
Playing back a recorded conversation . 21
Useful Information
Display messages . . . . . . . . . . . . . . . . 23
Troubleshooting . . . . . . . . . . . . . . . . . . 23
General use . . . . . . . . . . . . . . . . . . . 23
Programmable settings . . . . . . . . . . 23
Making/answering calls . . . . . . . . . . 23
Phonebook . . . . . . . . . . . . . . . . . . . 24
Caller ID . . . . . . . . . . . . . . . . . . . . . 25
Power failure . . . . . . . . . . . . . . . . . . 25
FCC and other information . . . . . . . . . . 26
Specifications . . . . . . . . . . . . . . . . . . . . 27
Index
Index . . . . . . . . . . . . . . . . . . . . . . . . . . . 28
Warranty . . . . . . . . . . . . . . . . . . . . . . . . 29
Customer services . . . . . . . . . . . . . . . . 31
Caller ID Service
Using Caller ID service. . . . . . . . . . . . . 14
Caller list. . . . . . . . . . . . . . . . . . . . . . . . 14
Viewing the caller list and calling
back . . . . . . . . . . . . . . . . . . . . . . . . 14
Editing a caller’s phone number before
calling back . . . . . . . . . . . . . . . . . . . 15
Storing caller information into the
phonebook . . . . . . . . . . . . . . . . . . . . 16
Erasing caller information . . . . . . . . 16
Programmable Settings
Programming via direct commands . . . 17
Direct commands chart . . . . . . . . . . 17
Programming using the function keys . 18
2
For assistance, please visit http://www.panasonic.com/consumersupport.
TS730S.book
3 ページ
2005年7月19日 火曜日 午後1時59分
Introduction
Thank you for purchasing a Panasonic Conference Recording
Speakerphone System.
We recommend keeping a record of the following information for future reference.
Serial No.
(found on the bottom of the unit)
Date of purchase
Name and address of dealer
Attach your purchase receipt here.
Accessory information
Included accessories
L To order replacement accessories, call 1-800-332-5368.
TTY users (hearing or speech impaired users) can call 1-866-605-1277.
No. Accessory items
Order number
1
AC adaptor
PQLV10Y
1
2
Telephone line cord
PQJA10075Z
1
3
Interface cable
PQJA10170Z
1
4
Interface box
PQLP10265Z
1
1
2
3
Quantity
4
For assistance, please visit http://www.panasonic.com/consumersupport
3
TS730S.book
4 ページ
2005年7月19日 火曜日 午後1時59分
Introduction
Important safety
instructions
When using this unit, basic safety
precautions should always be followed to
reduce the risk of fire, electric shock, or
personal injury.
1. Read and understand all instructions.
2. Follow all warnings and instructions
marked on this unit.
3. Unplug this unit from power outlets
before cleaning. Do not use liquid or
aerosol cleaners. Use a damp cloth for
cleaning.
4. Do not use this unit near water, for
example near a bathtub, wash bowl,
kitchen sink, etc.
5. Place the unit securely on a stable
surface. Serious damage and/or injury
may result if the unit falls.
6. Do not cover slots and openings on the
unit. They are provided for ventilation
and protection against overheating.
Never place the unit near radiators, or
in a place where proper ventilation is
not provided.
7. Use only the power source marked on
the unit. If you are not sure of the type
of power supplied to your home,
consult your dealer or local power
company.
8. Do not place objects on the power
cord. Install the unit where no one can
step or trip on the cord.
9. Do not overload power outlets and
extension cords. This can result in the
risk of fire or electric shock.
10. Never push any objects through slots
in this unit. This may result in the risk of
fire or electric shock. Never spill any
liquid on the unit.
11. To reduce the risk of electric shock, do
not disassemble this unit. Take the unit
to an authorized service center when
service is required. Opening or
removing covers may expose you to
dangerous voltages or other risks.
4
Incorrect reassembly can cause
electric shock when the unit is
subsequently used.
12. Unplug this unit from power outlets and
refer servicing to an authorized service
center when the following conditions
occur:
A. When the power cord is damaged
or frayed.
B. If liquid has been spilled into the
unit.
C. If the unit has been exposed to rain
or water.
D. If the unit does not work normally
by following the operating
instructions. Adjust only controls
covered by the operating
instructions. Improper adjustment
may require extensive work by an
authorized service center.
E. If the unit has been dropped or
physically damaged.
F. If the unit exhibits a distinct change
in performance.
13. During thunderstorms, avoid using
telephones except cordless types.
There may be a remote risk of an
electric shock from lightning.
14. Do not use this unit to report a gas
leak, when in the vicinity of the leak.
SAVE THESE
INSTRUCTIONS
CAUTION:
Installation
L Never install telephone wiring during a
lightning storm.
L Never install telephone jacks in wet
locations unless the jack is specifically
designed for wet locations.
L Never touch uninsulated telephone
wires or terminals unless the telephone
line has been disconnected at the
network interface.
L Use caution when installing or modifying
telephone lines.
For assistance, please visit http://www.panasonic.com/consumersupport
TS730S.book
5 ページ
2005年7月19日 火曜日 午後1時59分
Introduction
L Do not touch the plug with wet hands.
L The AC adaptor is used as the main
disconnect device. Ensure that the AC
outlet is installed near the unit and is
easily accessible.
WARNING:
L To prevent the risk of fire or electrical
shock, do not expose this product to rain
or any type of moisture.
L Unplug this unit from power outlets if it
emits smoke, an abnormal smell or
makes an unusual noise. These
conditions can cause fire or electric
shock. Confirm that smoke has stopped
and contact the Panasonic Call Center
at 1-800-211-PANA (7262).
For best performance
Environment
L Keep the unit away from electrical noise
generating devices, such as fluorescent
lamps and motors.
L The unit should be kept free from
excessive smoke, dust, high
temperature and vibration.
L The unit should not be exposed to direct
sunlight.
L Do not place heavy objects on top of the
unit.
L When you leave the unit unused for a
long period of time, unplug this unit from
power outlet.
L The unit should be kept away from heat
sources such as heaters, kitchen stoves,
etc. It should not be placed in rooms
where the temperature is less than 5 °C
(41 °F) or greater than 40 °C (104 °F).
Damp basements should also be
avoided.
Routine care
L Wipe the outer surface of the unit with a
soft cloth. Do not use benzine, thinner or
any abrasive powder.
Operation
L At the beginning of a call, both parties
should speak alternately. This enables
the unit to adapt to its environment and
let both parties speak effectively.
L Do not move the unit while it is in use.
L Keep your hands away from the unit
during calls.
L Keep files, cups, coffee pots, etc., away
from the unit.
L Use the unit in a quiet room.
L This unit is designed to be used in a
room that is no more than 380 square
feet in area.
For assistance, please visit http://www.panasonic.com/consumersupport
5
TS730S.book
6 ページ
2005年7月19日 火曜日 午後1時59分
Preparation
Connections
1
Interface box
Interface cable
To disconnect the
interface cable, pull
out the cable while
pushing the tabs.
2
To power outlet (120 V AC, 60 Hz)
AC adaptor
Fasten the
interface cable.
Fasten the
AC adaptor
cord.
Bottom of the
interface box Hooks
Telephone
line cord
To single-line
telephone jack
(RJ11C)
Note:
L Use only provided Panasonic AC adaptor PQLV10 (9V/850 mA) for proper product
operation. In case of power outage, this product will not work.
L The AC adaptor must remain connected at all times. (It is normal for the adaptor to feel
warm during use.)
L The AC adaptor should be connected to a vertically oriented or floor-mounted AC outlet.
Do not connect the AC adaptor to a ceiling-mounted AC outlet, as the weight of the
adaptor may cause it to become disconnected.
If you subscribe to an DSL service
L Please attach a noise filter (contact your DSL provider) to the telephone line between
the interface box and the telephone line jack in the event of the following:
– Noise is heard during conversations.
To single-line
– Caller ID features (page 14) do not
telephone jack
(RJ11C)
function properly.
Telephone line cord
Noise filter
(For DSL users)
6
For assistance, please visit http://www.panasonic.com/consumersupport
TS730S.book
7 ページ
2005年7月19日 火曜日 午後1時59分
Preparation
Controls and displays
Controls
A
C
B
A
C
A
C
RE
PE
AT
SK
IP
C
AUDIO OUT
(page 21)
A
K X-TS 730
FLASH
Display
{FLASH}
REDIAL /PAUSE
{F1}, {F2}, {F3}
STOP
SP-PHONE
SET
REPEAT
{SET}
{MUTE} {CLEAR}
{REDIAL}
{PAUSE}
SKIP
{s} (SP-PHONE)
{<} {>}
{STOP}
A Microphone
B Speaker
C IN USE Indicator
Using the {<} and {>} keys
L The keys work as the speaker volume keys (page 9).
L Pressing the keys allows you to scroll through function menu (page 18).
L Pressing the keys allows you to enter the caller list (page 14).
For assistance, please visit http://www.panasonic.com/consumersupport
7
TS730S.book
8 ページ
2005年7月19日 火曜日 午後1時59分
Preparation
Function keys ({F1}, {F2}, {F3})
By pressing a function key, you can select
the function displayed directly above it.
L The functions displayed will vary
depending on how you are using the
unit.
L When a function does not appear or
is displayed above a function key,
the function key will not work.
PLAY
MENU
k
Setting the unit before
use
Setting the dialing mode
If you cannot make calls, change this
setting depending on your telephone line
service.
“Tone” (default): For tone dial service.
“Pulse”: For rotary pulse dial service.
1
Press {MENU} ({F2} key), then press
{#}, {1}, {2}, {0}.
2
3
Press {1} (Pulse) or {2} (Tone).
Press {SAVE} ({F3} key), then press
{STOP}.
L In these operating instructions, function
key names are written inside brackets,
the same way as the unit keys.
Example:
Unit keys: {s}, {STOP}, etc.
Function keys: {PLAY}, {MENU},
{k}, etc.
8
For assistance, please visit http://www.panasonic.com/consumersupport
TS730S.book
9 ページ
2005年7月19日 火曜日 午後1時59分
Making/Answering Calls
2
3
Making calls
Speaker
Press {s} or {CALL} ({F1} key).
When finished talking, press {s} to
hang up.
To redial the last number dialed
{REDIAL}
{PAUSE}
{<} {>}
{MUTE}
{CLEAR}
{s}
1
Press {s}.
L IN USE indicators will light in green.
2
3
Dial the phone number.
When finished talking, press {s}.
Note:
L At the beginning of a call, both parties
should speak alternately. This enables
the unit to adapt to its environment and
let both parties speak effectively.
L If the other party has difficulty hearing
you, press {<} to decrease the speaker
volume.
L Use the unit in a quiet room.
To adjust the speaker volume
While using the speakerphone, press {<}
or {>} repeatedly. 16 levels (high to low)
are available. “Receiver volume” is
displayed.
To dial after confirming the entered
number
1
Enter the phone number.
L To correct a digit, press {CLEAR}.
Enter the correct number.
L If a pause is required when dialing,
press {PAUSE} where needed.
L To cancel, press and hold {CLEAR}
until the entered phone number
disappears.
1
2
Press {s}.
Press {REDIAL}.
To make a call using the redial list
The last 10 phone numbers dialed are
stored in the redial list.
1
Press {REDIAL}.
L The last number dialed will be
displayed.
2
Press {<} or {>} repeatedly to display
the desired number.
OR
Press {REDIAL} repeatedly to display
the desired number.
L To delete the displayed item, press
{ERASE} ({F1} key).
L To exit the list, press {STOP}.
3
Press {s} or {CALL} ({F3} key).
PAUSE button (for PBX/long
distance service users)
A pause is sometimes required when
making calls using a PBX or long distance
service.
For example, if you need to dial the line
access number “9” when making outside
calls with a PBX:
1
2
Press {9}.
3
Press {s} or {CALL} ({F1} key).
Press {PAUSE}, then dial the phone
number.
Note:
L A 3.5 second pause is inserted each
time {PAUSE} is pressed. Press
repeatedly to insert longer pauses.
For assistance, please visit http://www.panasonic.com/consumersupport
9
TS730S.book
10 ページ
2005年7月19日 火曜日 午後1時59分
Making/Answering Calls
Answering calls
When a call is being received, the IN USE
indicators flash.
1
2
Press {s}.
When finished talking, press {s}.
Adjusting the ringer volume
4 levels (high/medium/low/off) are
available. To change the ringer volume
setting, see page 19.
OR
While a call is being received, press {<}
or {>} repeatedly to select the desired
volume.
Useful features during a
call
MUTE button
You can mute your voice during a
conversation. While mute is turned on you
will be able to hear the other party, but the
other party will not be able to hear you.
To mute your voice, press {MUTE}.
L “-Mute-” will be displayed and the IN
USE indicators will light in red.
L To return to the conversation, press
{MUTE}.
Flash button
For Call Waiting service users
To use Call Waiting, you must subscribe to
Call Waiting service from your telephone
service provider.
This feature allows you to receive calls
while you are already talking on the phone.
If you receive a call while on the phone,
you will hear a Call Waiting tone.
Press {FLASH} to answer the 2nd call.
L The 1st call is put on hold while you
answer the 2nd call.
L To switch between calls, press
{FLASH}.
Note:
L Please contact your telephone company
for details and availability of this service
in your area.
L This unit does not support Call Waiting
with Caller ID service (Call Waiting
Caller ID display).
Temporary tone dialing (for
rotary/pulse service users)
You can temporarily switch the dialing
mode to tone when you need to access
touch tone services (for example,
answering services, telephone banking
services, etc.).
Press {*} (TONE) before entering access
numbers which require tone dialing.
Note:
L The dialing mode will return to pulse
when you hang up.
Pressing {FLASH} allows you to use
special features of your host PBX such as
transferring an extension call, or accessing
optional telephone services such as Call
Waiting.
Note:
L To change the flash time, see page 20.
10
For assistance, please visit http://www.panasonic.com/consumersupport
TS730S.book
11 ページ
2005年7月19日 火曜日 午後1時59分
Phonebook
Using the phonebook
The phonebook allows you to make calls
without having to dial manually. You can
add 100 names and phone numbers to the
phonebook and search for phonebook
entries by name.
Adding items to the phonebook
1
Press {k} ({F3} key).
L The display shows the number of
items in the phonebook.
2
3
Press {ADD} ({F1} key).
Alphabet character table
Enter the name (max. 16 characters.
See “Available character entries” for
details).
Enter name [ABC]
>=Go back
CHAR.
4
5
Press {SET}.
Enter the phone number (max. 32
digits).
Enter phone no.
>=Go back
L If a pause is required when dialing,
press {PAUSE} where needed
(page 9).
6
7
Available character entries
2 character entry modes (Alphabet
character and Extended character) are
available. To change the current character
entry mode, press {CHAR.} ({F3} key) on
the enter name screen.
L When Alphabet character mode is
selected, “[ABC]” is displayed on the
enter name screen. When Extended
character mode is selected, “[AÄÅ]” is
displayed.
L To change between uppercase and
lowercase (A→a), press {*}.
Press {SET} or {SAVE} ({F3} key).
L To add other items, repeat from step
2.
L If you want to change the name and/
or number, see page 13.
Press {STOP}.
L When “>=Go back” is displayed, you
can go back to the previous screen by
pressing {>}.
Key
{0}
{1}
{2}
Characters
0 Space
#&’( )@ ,–./ 1
ABC2
abc2
{3} D E F 3
def3
{4} GH I 4
ghi4
{5} J K L 5
jkl5
{6} M N O 6
mno6
{7} P Q R S 7
pqrs7
{8} T U V 8
tuv8
{9} W X Y Z 9
wxyz9
{#} #
Extended character table
Key Characters
{0}
0 Space
{1}
#&’()@,–./1
{2}
ABCÀÁÂÃÄÅÆÇ2
abcàáâãäåæç2
For assistance, please visit http://www.panasonic.com/consumersupport
11
TS730S.book
12 ページ
2005年7月19日 火曜日 午後1時59分
Phonebook
Phonebook items can be searched for
alphabetically by scrolling through the
phonebook items.
Key Characters
{3}
˜ 3
DEFÈÉÊËE
{4}
d e f è é ê ë e˜ 3
G H I Ì Í Î Ï ˜I İ ˘I 4
g h i ì í î ï ˜i ı ˘ı 4
{5}
1
2
Press {k} ({F3} key).
3
Press {CALL} ({F1} key) or {s}.
JKL5
jkl5
{6}
M N O Ñ Ò Ó Ô Õ Ö ø*1 6
m n o ñ ò ó ô õ ö ø*1 6
{7}
PQRS
Ş*1
ß7
Press {<} or {>} to scroll the
phonebook items.
L To exit the phonebook, press
{STOP}.
To search for a name by initial
p q r s Ş*1 ß 7
{8}
˜ 8
TUVÙÚÛÜU
{9}
t u v ù ú û ü u˜ 8
ˆ *1 9
WXYZW
1
2
ˆ *1 9
wxyzW
{#} #
*1 The same letter as capital (or small) will
be displayed.
3
<
To enter character or number
The dial keys can be used to enter
characters. To enter a character, press the
appropriate dial key, repeatedly if
necessary. To enter another character that
is located on the same dial key, first press
{ } ({F2} key) to move the cursor to the
next space.
<
<
To edit/correct a mistake
Press { } ({F1} key) or { } ({F2} key) to
move the cursor to the character or
number you wish to erase, then press
{CLEAR}. Enter the appropriate character
or number.
Press {k} ({F3} key).
Press the dialing button ({0} to {9},
{#}, or {*}) which corresponds to the
first letter you are searching for (see the
character table, page 11).
Example: “LISA”
Press {5} repeatedly to display any
name with the initial “L”.
L If there is no item corresponding to
the letter you selected, the next item
will be displayed.
Press {<} repeatedly to display the
desired item.
L To exit the phonebook, press
{STOP}.
L To dial the displayed number, press
{CALL} ({F1} key) or {s}.
To search using {SEARCH}
1
2
Press {k} ({F3} key).
Press {SEARCH} ({F3} key).
Index search
[ABC2]
Note:
L Press and hold {CLEAR} to erase all
characters or numbers.
BACK
Example: “SAM”
Press {<} five times.
Press { } ({F3} key) three times.
<
Calling someone in the
phonebook
3
12
Press {SET}.
For assistance, please visit http://www.panasonic.com/consumersupport
TS730S.book
13 ページ
2005年7月19日 火曜日 午後1時59分
Phonebook
4
Press {<} or {>} repeatedly to display
any name with the initial “S”.
L To dial the displayed number, press
{CALL} ({F1} key) or {s}.
2
3
Press {MENU} ({F2} key).
Editing items in the phonebook
4
1
2
3
4
Search the item you want to edit.
Press {YES} ({F2} key).
L To cancel erasing, press {NO} ({F1}
key).
5
Press {STOP}.
5
6
7
Press {SET}.
8
Press {STOP}.
Press {MENU} ({F2} key).
Press {SELECT} ({F3} key) at “Edit”.
Edit the name if necessary. See the
character table on page 11 for
character entry.
Edit the phone number if necessary.
Press {SET} or {SAVE} ({F3} key).
L To edit other items, repeat from
step 1.
Erasing an item in the
phonebook
1
2
3
4
5
6
Search the item you want to erase.
Press {MENU} ({F2} key).
Press {<} or {>} to select “Erase”.
Press {SELECT} ({F3} key).
Press {YES} ({F2} key).
L To cancel erasing, press {NO} ({F1}
key).
L To erase other items, repeat from
step 1.
Press {STOP}.
Erasing all items in the
phonebook
1
Press {k} ({F3} key).
Press {SELECT} ({F3} key) at “All
erase”.
L “All erase?” will be displayed.
Chain dial feature
This feature allows you to dial phone
numbers from the phonebook while you
are on a call.
Example: Using a long distance calling
card
1 Dial from the phonebook:
1-800-012-3456 (Calling card access
number).
2 When prompted, dial from the
phonebook:
1234 (Calling card PIN).
3 When prompted, dial from the
phonebook:
1-555-012-3456 (the person you want
to call).
1
During an outside call, press {k}
({F3} key).
2
Display the desired item. (See page 12
for a search.)
3
Press {CALL} ({F1} key).
L Repeat from step 1 to dial other
numbers.
Note:
L When storing a calling card access
number and your PIN in the phonebook
as one phonebook item, press {PAUSE}
to add pauses after the number and PIN
as necessary (page 9).
L If you have rotary or pulse service, you
need to press {*} before pressing {k}
({F3} key) in step 1 to change the dialing
mode temporarily to tone.
For assistance, please visit http://www.panasonic.com/consumersupport
13
TS730S.book
14 ページ
2005年7月19日 火曜日 午後1時59分
Caller ID Service
Using Caller ID service
Caller list
This unit is Caller ID compatible. To use
Caller ID features, you must subscribe to
Caller ID service from your telephone
service provider.
Caller information for the last 50 different
callers will be logged in the caller list. You
can use this list to return missed calls.
L Caller information includes caller names
and phone numbers, the date and time
of calls, and the number of times the
caller called.
Caller ID features
When an outside call is being received, the
calling party’s name or telephone number
will be displayed.
BROWN,NANCY
1-555-666-7777
Caller information for the last 50 different
callers will be logged in the caller list,
allowing you to return missed calls. Caller
information is stored by the most recent
call to the oldest.
L When Caller ID information is received
and it matches a phone number stored
in the phonebook, the stored name will
be displayed and logged in the caller list.
(Personalized name display)
L If the unit cannot receive caller
information, the following will be
displayed:
“Out of area”: The caller dialed from
an area which does not provide Caller ID
service.
“Private caller”: The caller
requested not to send caller information.
“Long distance”: The caller called
you long distance.
L If the unit is connected to a PBX system,
caller information may not be received
properly. Consult your PBX supplier.
Note:
L Please contact your telephone service
provider for details and availability of this
service in your area.
14
Missed calls
If a call is not answered, the unit treats the
call as a missed call. The number of
missed calls is shown on the display. This
lets you know if you should view the caller
list to see who called while you were out.
Viewing the caller list and
calling back
1
Press {MENU} ({F2} key), then press
{SELECT} ({F3} key) or {SET}.
L You can use {<} or {>} to enter the
caller list.
2
Press {<} to search from the most
recent call, or press {>} to search from
the oldest call.
L To exit the caller list, press {STOP}.
3
Press {CALL} ({F1} key) or {s}.
Note:
L Calling back will not be possible if the
caller information does not include a
phone number.
L In some cases, you may have to edit the
number before dialing. (For example,
you may have to delete “1” and the area
code. See page 15.)
For assistance, please visit http://www.panasonic.com/consumersupport.
TS730S.book
15 ページ
2005年7月19日 火曜日 午後1時59分
Caller ID Service
Displayed symbols
L If the same caller calls more than once, it
will be displayed with the number (“×2”
to “×9”). Only the date and time of the
most recent call will be stored.
L A Q is displayed next to items which
have already been viewed or answered.
Editing a caller’s phone number
before calling back
You can edit a phone number in the caller
list by removing its area code and/or the
long distance code “1”.
1
2
Press {<} or {>} to enter the caller list.
3
Press {EDIT} ({F2} key) repeatedly
until the phone number is shown in the
desired format.
Each time you press {EDIT} ({F2} key),
the phone number will be rearranged
into one of 3 patterns.
1 Local phone number
Example: 321-5555
Press {<} or {>} repeatedly to display
the desired item.
2 Area code – Local phone number
Example: 555-321-5555
3 1 – Area code – Local phone
number
Example: 1-555-321-5555
4
Caller ID number auto edit feature
Once you call back an edited number (see
“Editing a caller’s phone number before
calling back”), the unit can automatically
edit other incoming phone number, which
comes from that same area code, each
time you receive a call.
For example, you can use this feature to
set the unit to ignore the area code of
callers in your area code, so that you can
call these local numbers using caller
information without dialing the area code.
To activate this feature, you must edit an
item in the caller list (see “Editing a caller’s
phone number before calling back”), then
call that number. After that, calls from that
caller’s area code will be edited
automatically.
This feature can be turned on or off
(page 20). The default setting is ON.
Note:
L The unit can remember up to 4 area
codes to be edited. Phone numbers from
the 4 most recently edited area codes
will be automatically edited.
L This feature will not be activated until
edited numbers are called back.
L If you move to another area, you can
turn this feature off to erase previously
edited area codes. To use this feature
again, turn it on and reprogram the area
codes you want to edit once again.
Press {CALL} ({F1} key) or {s} to call
back.
For assistance, please visit http://www.panasonic.com/consumersupport
15
TS730S.book
16 ページ
2005年7月19日 火曜日 午後1時59分
Caller ID Service
Storing caller information into
the phonebook
1
2
Items in the caller list can be stored into the
phonebook.
1
2
Press {<} or {>} to enter the caller list.
3
Press {SAVE} ({F3} key).
L If there is no name information for the
caller, “Enter name” will be
displayed.
1 Enter the name if necessary
(page 11, step 3).
2 Press {SET}.
3 Press {SET} or {SAVE} ({F3} key).
L To continue storing other items,
repeat from step 2.
4
Press {STOP} to exit.
Press {<} or {>} repeatedly to display
the desired item.
L To edit the number, press {EDIT}
({F2} key) repeatedly until the
number is shown in the desired
format (page 15, step 3).
3
Press {<} or {>} to enter the caller list.
Press {ERASE} ({F1} key).
L “All erase?” will be displayed.
L To cancel erasing, press {NO} ({F1}
key).
Press {YES} ({F2} key).
Note:
L If the caller information in the caller list
does not include a phone number, you
cannot store it in the phonebook.
Erasing caller information
Erasing a selected item
1
2
Press {<} or {>} to enter the caller list.
3
Press {CLEAR}.
L To erase other items, repeat from
step 2.
L To exit the caller list, press {STOP}.
Press {<} or {>} repeatedly to display
the desired item.
Erasing all items
Make sure that you have no missed calls.
16
For assistance, please visit http://www.panasonic.com/consumersupport.
TS730S.book
17 ページ
2005年7月19日 火曜日 午後1時59分
Programmable Settings
Programming via direct commands
You can program features using “direct commands”– special codes that take you directly
to the feature you wish to program and allow you to select the desired setting. There is no
need to scroll through the unit’s sub-menus.
Details of each feature can be found on the corresponding pages.
Important:
L Before programming, make sure the unit is not being used.
1
2
Press {MENU} ({F2} key).
Press {#}.
Enter direct No.
:
BACK
3
4
Enter the desired feature code (shown below).
5
6
Press {SAVE} ({F3} key).
Enter the desired setting code (shown below).
L This step may vary depending on the feature being programmed.
Press {STOP} to exit programming mode.
Note:
L If the unit beeps 5 times, you entered an invalid code. Enter the correct code.
L If you make a mistake or enter the wrong code, press {CLEAR}.
Direct commands chart
Note:
L The default settings are indicated by *.
Feature
Feature code
Setting code
Page
Ringer volume
{1} {6} {0}
{1}: Low {2}: Medium
{3}: High* {0}: Off
page 19
Ringer tone
{1} {6} {1}
{1}–{3}: Tone pattern 1*–3
page 19
LCD contrast
{1} {4} {5}
{1}–{6}: Level 1–6
(Default: 3)
page 19
Key tone
{1} {6} {5}
{1}: On* {0}: Off
page 20
Caller ID number auto edit
{2} {1} {4}
{1}: On* {0}: Off
page 20
Set dial mode
{1} {2} {0}
{1}: Pulse {2}: Tone*
page 8
For assistance, please visit http://www.panasonic.com/consumersupport
17
TS730S.book
18 ページ
2005年7月19日 火曜日 午後1時59分
Programmable Settings
Feature
Feature code
Setting code
Page
Set flash time
{1} {2} {1}
{1}: 900 ms {2}: 700 ms*
{3}: 600 ms {4}: 400 ms
{5}: 300 ms {6}: 250 ms
{7}: 200 ms {8}: 160 ms
{9}: 110 ms {0}: 100 ms
{*}: 90 ms {#}: 80 ms
page 20
Change language
{1} {1} {0}
{1}: English* {2}: Spanish
page 19
Programming using the function keys
You can program features using the functions keys ({F1}, {F2} and {F3} keys).
For your reference, a chart of all programmable functions is printed below. Details for each
item can be found on the corresponding pages.
Important:
L Before programming, make sure the unit is not being used.
1
2
3
4
5
6
7
8
To begin programming, press {MENU} ({F2} key).
Press {<} or {>} to scroll through the main menu.
Press {SELECT} ({F3} key) to select the desired main menu item.
Press {<} or {>} to scroll through the sub-menu.
Press {SELECT} ({F3} key) to select the desired sub-menu item.
Press {<} or {>} repeatedly to select the desired setting.
Press {SAVE} ({F3} key) to save the new setting.
Press {STOP} to exit programming mode.
Note:
L The default settings are indicated by *.
Main menu
Caller list
Ringer
setting
Initial
setting
Sub-menu
Option
Ringer volume
Ringer tone
LCD contrast
Key tone
Caller ID edit
Set dial mode
Set flash time
Low, Medium, High*, Off
pattern 1*–3
Level 1–6 (Default: 3)
On*, Off
On*, Off
Pulse, Tone*
900 ms, 700 ms*, 600 ms,
400 ms, 300 ms, 250 ms
200 ms, 160 ms, 110 ms,
100 ms, 90 ms, 80 ms
English*, Spanish
Change language
18
Reference page
for programming
page 14
page 19
page 19
page 19
page 20
page 20
page 8
page 20
page 19
For assistance, please visit http://www.panasonic.com/consumersupport
TS730S.book
19 ページ
2005年7月19日 火曜日 午後1時59分
Programmable Settings
During programming:
L To exit programming, press {STOP} at
any time.
L You can press {SET} instead of
pressing {SELECT} ({F3} key) and
{SAVE} ({F3} key).
L To go back to the previous menu, press
{BACK} ({F1} key).
L A Q indicates the current setting.
Ringer settings
Ringer volume
4 levels (high/medium/low/off) are
available.
Display options
LCD contrast
You can adjust the unit display contrast.
There are 6 levels.
1
Press {MENU} ({F2} key), then press
{#}, {1}, {4}, {5}.
2
3
Press {1} to {6} (Level 1 to 6).
Press {SAVE} ({F3} key), then press
{STOP}.
Display language
You can select either “English” or
“Español” as the display language.
1
Press {MENU} ({F2} key), then press
{#}, {1}, {6}, {0}.
1
2
Press {MENU} ({F2} key), then press
{#}, {1}, {1}, {0}.
Press {1} to {3}, or {0} to select the
desired setting.
{1}: Low
{2}: Medium
{3}: High {0}: Off
2
3
Press {1} (English) or {2} (Spanish).
Press {SAVE} ({F3} key), then press
{STOP}.
Note:
L If you select a language you cannot
read, press {MENU} ({F2} key)
{#} {1} {1} {0} {1} {SAVE} ({F3} key)
to change the display language to
English.
3
Ringer tone
You can change the ringer tone heard
when an outside call is received. There are
3 tones.
1
Press {MENU} ({F2} key), then press
{#}, {1}, {6}, {1}.
2
3
Press {1} to {3} (Tone pattern 1 to 3).
Press {SAVE} ({F3} key) or
{GUARDAR}, then press {STOP}.
Press {SAVE} ({F3} key), then press
{STOP}.
For assistance, please visit http://www.panasonic.com/consumersupport
19
TS730S.book
20 ページ
2005年7月19日 火曜日 午後1時59分
Programmable Settings
Telephone settings
Other options
Flash time
Caller ID Number Auto Edit
The flash time depends on your telephone
exchange or host PBX.
You can turn the Caller ID number auto
edit feature (page 15) on or off.
1
Press {MENU} ({F2} key), then press
{#}, {1}, {2}, {1}.
1
Press {MENU} ({F2} key), then press
{#}, {2}, {1}, {4}.
2
Press {0} to {9}, {*} or {#} to select
the desired setting.
{1}: 900 ms {2}: 700 ms
{3}: 600 ms {4}: 400 ms
{5}: 300 ms {6}: 250 ms
{7}: 200 ms {8}: 160 ms
{9}: 110 ms {0}: 100 ms
{*}: 90 ms {#}: 80 ms
(ms=milliseconds)
2
3
Press {1} (On) or {0} (Off).
3
Press {SAVE} ({F3} key), then press
{STOP}.
Note:
L The setting should stay at 700 ms unless
pressing {FLASH} fails to pick up the
Call Waiting call.
L If the unit is connected via a PBX, certain
PBX functions (call transferring, etc.)
may not work correctly. Consult your
PBX supplier for the correct setting.
20
Press {SAVE} ({F3} key), then press
{STOP}.
Key tone
You can select whether or not key tones
are heard when keys are pressed.
Includes confirmation tones and error
tones.
1
Press {MENU} ({F2} key), then press
{#}, {1}, {6}, {5}.
2
3
Press {1} (On) or {0} (Off).
Press {SAVE} ({F3} key), then press
{STOP}.
For assistance, please visit http://www.panasonic.com/consumersupport
TS730S.book
21 ページ
2005年7月19日 火曜日 午後1時59分
Recording a conversation
Recording a conversation
The total recording capacity is about 120 minutes.
A maximum of 64 items can be recorded.
L If 64 items have been recorded,
conversation recording memory will
become full even if the total recording
time is less than 120 minutes.
1
Press {REC.} ({F1} key), while talking.
L When recording starts, the remaining
recording time will be displayed in
minutes for about 3 seconds.
“-2way recording-” will be
displayed while recording.
L If the remaining recording time is less
than 6 minutes, the IN USE indicators
will flash slowly in amber and green,
and the remaining time will be
displayed as shown below:
Remaining time
Display
less than 6 minutes → Remaining:5min
less than 5 minutes → Remaining:4min
less than 4 minutes → Remaining:3min
less than 3 minutes → Remaining:2min
conversations without using the unit’s
recording memory.
L Recorded conversations are also routed
through the AUDIO OUT jack during
playback.
L Connect “AUX IN” or “LINE IN” jack of
recording equipment using an optional
audio cable with a 3.5 mm mono plug.
Many states have imposed regulations
on the manner in which 2-way telephone
conversations may be recorded, so you
should inform the other party that the
conversation is being recorded. Consult
your telephone service provider for
further information.
L For Call Waiting service users
If you receive a call during recording,
perform the following to answer the 2nd
call:
– If you do not want to record the 2nd
call, press {STOP}, then press
{FLASH}.
– If you want to record the 2nd call,
press {FLASH}. The unit continues
recording.
less than 2 minutes → Remaining:1min
less than 1 minute*1 → Remaining:0min
*1 When recording starts, the remaining
recording time will be displayed in seconds
for about 3 seconds.
L If mute is on, the IN USE indicators flash
in red.
2
To stop recording, press {STOP}.
L If memory becomes full, “ Memory
full” will be displayed. To record
additional conversations, erase
unnecessary conversations.
Using the AUDIO OUT jack
Playing back a recorded
conversation
{#} (SKIP >)
{0} (22)
{*} (< REPEAT)
{<} {>}
{STOP}
When conversations have been recorded,
“
” and the total number of recorded
conversations are displayed while the unit
is in standby mode.
AUDIO OUT jack
L Conversations are also routed through
the AUDIO OUT jack. This allows you to
connect recording equipment (cassette
recorder, computer, etc.) and record
Press {PLAY} ({F1} key).
#1
Play
00:00:01
<
22
For assistance, please visit http://www.panasonic.com/consumersupport
>
21
TS730S.book
22 ページ
2005年7月19日 火曜日 午後1時59分
Recording a conversation
L The unit will play back the new recorded
conversations.
L When you have no new recorded
conversations, the unit will play back all
recorded conversations.
L If the unit has no recorded
conversations, the display will show
“No recordings”, and the unit will go
back to standby mode.
Note:
L The current conversation number (for
example, “#1”) is displayed during
playback.
Key
{*} (<)
Repeat conversation
L If {*} (<) is pressed
within the first 2 seconds,
the previous conversation
will be played.
L If {*} (<) is pressed
during playback of the
first conversation, the first
conversation will be
repeated.
{#} (>)
Skip conversation
{0} (22)
Pause playback
L To resume playback,
press {PLAY} ({F2} key).
L To stop playback
completely, press
{STOP}.
{STOP}
Stop playback
During playback
Key
Command
{FF}
({F3} key)
Change fast-forward speed
(four times or sixty times
normal speed), each time
you press {FF}
L If {PLAY} ({F2} key) is
pressed during fastforwarding, playback will
be resumed at normal
speed.
L The selected speed will
flash on the display (“x4”
or “x60”).
{REW}
({F1} key)
22
Change rewind speed (four
times or sixty times normal
speed), each time you
press {REW}
L If {PLAY} ({F2} key) is
pressed during rewinding,
playback will be resumed
at normal speed.
L The selected speed will
flash on the display (“x4”
or “x60”).
Command
To adjust the speaker volume
Press {>} or {<} repeatedly during
playback. 8 levels (high to low) are
available. “Receiver volume” is
displayed.
Erasing a specific conversation
1
Press {ERASE} ({F2} key) while
listening to the conversation you want
to erase.
2
Press {SELECT} ({F3} key) at
“Individual erase”.
L The display shows “Erased”, then
the next one will be played.
Erasing all conversation
1
Press {ERASE} ({F2} key) while
listening to the conversation.
2
Press {<} or {>} to select
“All erase”.
3
Press {SELECT} ({F3} key).
L The display shows “All Erased”.
For assistance, please visit http://www.panasonic.com/consumersupport
TS730S.book
23 ページ
2005年7月19日 火曜日 午後1時59分
Useful Information
Display messages
One of the following messages will be displayed in the condition described below.
Display message
Cause & solution
Phonebook full
L There is no space to store new items in the phonebook.
Erase unnecessary items (page 13).
No items stored
Memory full
L Your phonebook, redial list or caller list is empty.
L Conversation recording memory is full. Erase
unnecessary items (page 22).
Troubleshooting
General use
Problem
Cause & solution
The unit does not work.
L Check the connections (page 6).
L Unplug the unit’s AC adaptor or Interface cable to reset
the unit. Reconnect the adaptor or interface cable and
try again.
I cannot hear a dial tone.
L Confirm that the telephone line cord is connected
(page 6).
L Disconnect the unit from the telephone line and connect
a known working telephone. If the working telephone
operates properly, contact our service personnel to
have the unit repaired. If the working telephone does
not operate properly, contact your telephone company.
Programmable settings
Problem
Cause & solution
I cannot program items.
L Do not pause for over 1 minute while programming.
While programming, the
unit starts to ring.
L A call is being received. Answer the call and start again
from the beginning after a call is finished.
Making/answering calls
Problem
Cause & solution
Noise is heard while
talking.
L If your unit is connected to a telephone line with DSL
service, we recommend connecting a noise filter
between the unit and the telephone line jack (page 6).
Contact your DSL provider for details.
L If your unit is near noisy equipment such as computers
or fans, you may not be able to hear easily the other
party’s voice. Turn off noisy equipment on both parties.
For assistance, please visit http://www.panasonic.com/consumersupport
23
TS730S.book
24 ページ
2005年7月19日 火曜日 午後1時59分
Useful Information
Problem
Cause & solution
Short silences, echoes,
or speech cuts occur.
L At the beginning of a call, both parties should speak
alternately. This enables the unit to adapt to its
environment and let both parties speak effectively.
L Do not move the unit while it is in use.
L Keep your hands away from the unit during calls.
L Keep files, cups, coffee pots, etc., away from the unit.
L The other party’s phone might not be full duplex. For
best sound quality, the other party should use a handset
phone or full duplex speakerphone.
L Use the unit in a quiet room.
The other party’s voice is
muffled or sounds “in a
well”.
L Speak closer to the unit.
L If your room has glazed windows, we recommend that
you draw a curtain or pull a blind.
I cannot make a call.
L The dialing mode may be set incorrectly. Set the dial
mode (page 8) to match the type of telephone service
you have (tone or pulse).
I cannot redial by
pressing {REDIAL}.
L If the last number dialed was more than 48 digits long,
the number will not be redialed correctly.
L If you press {REDIAL} after you have entered the
phone number, this button functions as the {PAUSE}
button. To redial, press {s}, then press {REDIAL}, or
press {REDIAL}, select desired phone number by
pressing {<} or {>}, then press {s} or {CALL}.
I cannot make long
distance calls.
L Make sure that you have long distance service.
Phonebook
Problem
Cause & solution
I cannot store an item in
the phonebook.
L You cannot store an item in the phonebook while the
unit is in speakerphone mode, or while listening to
recorded conversations.
L Do not pause for over 1 minute while storing.
While storing an item in
the phonebook, the unit
starts to ring.
L A call is being received. Answer the call and start again
from the beginning after a call is finished.
The display exits the
phonebook while
searching.
L The unit automatically exits after 1 minute of inactivity.
24
For assistance, please visit http://www.panasonic.com/consumersupport
TS730S.book
25 ページ
2005年7月19日 火曜日 午後1時59分
Useful Information
Caller ID
Problem
Cause & solution
The unit does not display
the caller’s name and/or
phone number.
L You have not subscribed to Caller ID service. Contact
your telephone service provider to subscribe.
L If your unit is connected to any additional telephone
equipment such as Caller ID box or wireless telephone
jack, disconnect the unit from the equipment and plug
the unit directly into the wall jack.
L If your unit is connected to a telephone line with DSL
service, we recommend connecting a noise filter
between the unit and the telephone line jack (page 6).
Contact your DSL provider for details.
L The name display service may not be available in some
areas. Contact your telephone service provider for
details.
L Other telephone equipment may be interfering with this
unit. Disconnect the other equipment and try again.
L The caller requested not to send caller information
(page 14).
L Generally caller information is displayed from the 2nd
ring.
L If the unit is connected to a PBX system, caller
information may not be received properly. Consult your
PBX supplier.
The caller list/incoming
phone numbers are not
edited automatically.
L The Caller ID number auto edit feature is turned off.
Turn it on and try again (page 20).
L You need to call back the edited number to activate
Caller ID number auto edit.
I cannot dial the phone
number edited in the
caller list.
L The phone number you dialed might have an incorrect
edited pattern (for example, the long distance “1” or the
area code is missing). Edit the phone number with
another pattern (page 15).
The display exits the
caller list while searching.
L The unit automatically exits after 1 minute of inactivity.
Power failure
Problem
Cause & solution
The unit will not function.
L This product is not designed to make calls in the event
of a power failure.
For assistance, please visit http://www.panasonic.com/consumersupport
25
TS730S.book
26 ページ
2005年7月19日 火曜日 午後1時59分
Useful Information
FCC and other information
This equipment complies with Part 68 of
the FCC rules and the requirements
adopted by the ACTA. On the bottom of
this equipment is a label that contains,
among other information, a product
identifier in the format US:ACJ----------.
If requested, this number must be
provided to the telephone company.
L Registration No
............(found on the bottom of the unit)
L Ringer Equivalence No.
(REN).......0.1B
A plug and jack used to connect this
equipment to the premises wiring and
telephone network must comply with the
applicable FCC Part 68 rules and
requirements adopted by the ACTA. A
compliant telephone cord and modular
plug is provided with this product. It is
designed to be connected to a
compatible modular jack that is also
compliant.
The REN is used to determine the
number of devices that may be
connected to a telephone line. Excessive
RENs on a telephone line may result in
the devices not ringing in response to an
incoming call. In most but not all areas,
the sum of RENs should not exceed five
(5.0). To be certain of the number of
devices that may be connected to a line,
as determined by the total RENs, contact
the local telephone company. For
products approved after July 23, 2001,
the REN for this product is part of the
product identifier that has the format
US:AAAEQ##TXXXX. The digits
represented by ## are the REN without a
decimal point (e.g., 03 is a REN of 0.3).
notify the customer as soon as possible.
Also, you will be advised of your right to
file a complaint with the FCC if you
believe it is necessary.
The telephone company may make
changes in its facilities, equipment,
operations or procedures that could
affect the operation of the equipment. If
this happens the telephone company will
provide advance notice in order for you
to make necessary modifications to
maintain uninterrupted service.
If trouble is experienced with this
equipment, for repair or warranty
information, please contact a Factory
Servicenter or other Authorized Servicer.
If the equipment is causing harm to the
telephone network, the telephone
company may request that you
disconnect the equipment until the
problem is resolved.
Connection to party line service is
subject to state tariffs. Contact the state
public utility commission, public service
commission or corporation commission
for information.
If your home has specially wired alarm
equipment connected to the telephone
line, ensure the installation of this
equipment does not disable your alarm
equipment. If you have questions about
what will disable alarm equipment,
consult your telephone company or a
qualified installer.
If this equipment causes harm to the
telephone network, the telephone
company will notify you in advance that
temporary discontinuance of service may
be required. But if advance notice isn’t
practical, the telephone company will
26
For assistance, please visit http://www.panasonic.com/consumersupport
TS730S.book
27 ページ
2005年7月19日 火曜日 午後1時59分
Useful Information
This device complies with Part 15 of the
FCC Rules. Operation is subject to the
following two conditions:
(1) This device may not cause harmful
interference, and (2) this device must
accept any interference received,
including interference that may cause
undesired operation.
CAUTION:
Any changes or modifications not
expressly approved by the party
responsible for compliance could void
the user’s authority to operate this
device.
NOTE:
This equipment has been tested and
found to comply with the limits for a
Class B digital device, pursuant to Part
15 of the FCC Rules. These limits are
designed to provide reasonable
protection against harmful interference in
a residential installation. This equipment
generates, uses, and can radiate radio
frequency energy and, if not installed and
used in accordance with the instructions,
may cause harmful interference to radio
communications. However, there is no
guarantee that interference will not occur
in a particular installation. If this
equipment does cause harmful
interference to radio or television
reception, which can be determined by
turning the equipment off and on, the
user is encouraged to try to correct the
interference by one or more of the
following measures:
− Reorient or relocate the receiving
antenna.
− Increase the separation between the
equipment and receiver.
− Connect the equipment into an outlet on
a circuit different from that to which the
receiver is connected.
− Consult the dealer or an experienced
radio/TV technician for help.
Specifications
Speakerphone unit
Operating environment:
5 °C – 40 °C (41 °F – 104 °F)
Dimensions:
Approx. height 64 mm x width 279 mm x
depth 279 mm (217/32" x 11" x 11")
Mass (Weight):
Approx. 970 g (2.14 lb.)
Audio Out:
Typical: Approx. −3 dBm (at 10 kΩ),
0.03 mW
Maximum: Approx. 0 dBm (at 10 kΩ),
0.06 mW
ø3.5 mm mono mini jack
Power consumption:
Standby: Approx. 4.0 W
Maximum: Approx. 7.0 W
Power supply:
AC adaptor (120 V AC, 60 Hz)
Interface box
Dimensions:
Approx. height 32 mm x width 67 mm x
depth 76 mm (11/4" x 25/8" x 3")
Mass (Weight):
Approx. 60 g (0.13 lb.)
Note:
L Design and specifications are subject to
change without notice.
L The illustrations in these instructions
may vary slightly from the actual
product.
For assistance, please visit http://www.panasonic.com/consumersupport
27
TS730S.book
28 ページ
2005年7月19日 火曜日 午後1時59分
Index
Index
A Accessories: 3
Answering calls: 10
Audio output: 21
C Caller ID number auto edit: 15, 20
Caller ID service: 14
Caller list
Calling back: 14
Editing: 15
Erasing: 16
Storing: 16
Viewing: 14
Call waiting tone: 10
Chain dial: 13
Controls: 7
D Display language: 19
Display messages: 23
F FCC and other information: 26
Flash button: 10
Flash time: 20
Function keys: 8
Function menu
Direct commands: 17
Table: 18
I Installation
AC adaptor: 6
Interface box: 6
Interface cable: 6
Telephone line cord: 6
K Key tone: 20
L LCD contrast: 19
M Making calls: 9
Memory capacity: 21
Mute: 10
P Pause: 9, 13
Personalized name display: 14
Phonebook
Adding: 11
Calling: 12
Editing: 13
Erasing: 13
Power failure: 6, 25
Pulse service: 10
R Recording a conversation: 21
Recording time: 21
28
S
T
V
W
Redial: 9
Redial list: 9
Ringer tone: 19
Ringer volume: 19
Rotary service, tone dialing: 10
Safety instructions: 4
Specifications: 27
Sp-phone: 9
Troubleshooting
Caller ID: 25
General use: 23
Making/answering calls: 23
Phonebook: 24
Power failure: 25
Programmable settings: 23
TTY: 3
Volume control: 9, 22
Warranty: 29
For assistance, please visit http://www.panasonic.com/consumersupport
TS730S.book
29 ページ
2005年7月19日 火曜日 午後1時59分
Warranty
PANASONIC CONSUMER
ELECTRONICS COMPANY, DIVISION
OF PANASONIC CORPORATION OF
NORTH AMERICA
One Panasonic Way,
Secaucus, New Jersey 07094
PANASONIC PUERTO RICO, INC.
San Gabriel Industrial Park,
Ave. 65 de Infantería, Km. 9.5,
Carolina, Puerto Rico 00985
Panasonic Telephone Products
Limited Warranty
✄
Limited Warranty Coverage
If your product does not work properly because of a defect in materials or
workmanship, Panasonic Consumer Electronics Company or Panasonic Puerto
Rico, Inc. (collectively referred to as “the warrantor”) will, for the length of the period
indicated on the chart below, which starts with the date of original purchase
(“Limited Warranty period”), at its option either (a) repair your product with new or
refurbished parts, or (b) replace it with a new or a refurbished product. The decision
to repair or replace will be made by the warrantor.
Parts
Labor
One (1) Year
One (1) Year
During the “Labor” Limited Warranty period there will be no charge for labor. During
the “Parts” Limited Warranty period, there will be no charge for parts. You must
mail-in your product during the Limited Warranty period. This Limited Warranty
excludes both parts and labor for batteries, antennas, and cosmetic parts (cabinet).
This Limited Warranty only applies to products purchased and serviced in the
United States or Puerto Rico. This Limited Warranty is extended only to the original
purchaser and only covers products purchased as new.
Mail-In Service
For assistance in the continental U.S.A. in obtaining repairs please ship the product
to:
Panasonic Services Company Customer Servicenter
4900 George McVay Drive Suite B Door #12 McAllen, TX 78503
For assistance in Puerto Rico call Panasonic Puerto Rico, Inc. (787)-750-4300 or
fax (787)-768-2910.
When shipping the unit carefully pack, include all accessories, and send it prepaid,
adequately insured and preferably in the original carton. Include a letter detailing
the complaint and provide a day time phone number where you can be reached.
IF REPAIR IS NEEDED DURING THE LIMITED WARRANTY PERIOD THE
PURCHASER WILL BE REQUIRED TO FURNISH A SALES RECEIPT/PROOF
OF PURCHASE INDICATING DATE OF PURCHASE, AMOUNT PAID AND
PLACE OF PURCHASE. CUSTOMER WILL BE CHARGED FOR THE REPAIR
OF ANY UNIT RECEIVED WITHOUT SUCH PROOF OF PURCHASE.
For assistance, please visit http://www.panasonic.com/consumersupport
29
TS730S.book
30 ページ
2005年7月19日 火曜日 午後1時59分
Limited Warranty Limits And Exclusions
This Limited Warranty ONLY COVERS failures due to defects in materials or
workmanship, and DOES NOT COVER normal wear and tear or cosmetic damage.
The Limited Warranty ALSO DOES NOT COVER damages which occurred in
shipment, or failures which are caused by products not supplied by the warrantor,
or failures which result from accidents, misuse, abuse, neglect, mishandling,
misapplication, alteration, faulty installation, set-up adjustments, misadjustment of
consumer controls, improper maintenance, power line surge, lightning damage,
modification, introduction of sand, humidity or liquids, or rental use of the product,
or service by anyone other than a Factory Servicenter or other Authorized Servicer,
or damage that is attributable to acts of God.
THERE ARE NO EXPRESS WARRANTIES EXCEPT AS LISTED UNDER
“LIMITED WARRANTY COVERAGE”. THE WARRANTOR IS NOT LIABLE FOR
INCIDENTAL OR CONSEQUENTIAL DAMAGES RESULTING FROM THE USE
OF THIS PRODUCT, OR ARISING OUT OF ANY BREACH OF THIS LIMITED
WARRANTY. (As examples, this excludes damages for lost time, lost calls or
messages, cost of having someone remove or re-install an installed unit if
applicable, travel to and from the servicer. The items listed are not exclusive, but
are for illustration only.) ALL EXPRESS AND IMPLIED WARRANTIES,
INCLUDING THE WARRANTY OF MERCHANTABILITY, ARE LIMITED TO THE
PERIOD OF THE LIMITED WARRANTY.
Some states do not allow the exclusion or limitation of incidental or consequential
damages, or limitations on how long an implied warranty lasts, so the exclusions
may not apply to you.
This Limited Warranty gives you specific legal rights and you may also have other
rights which vary from state to state. If a problem with this product develops during or
after the Limited Warranty period, you may contact your dealer or Servicenter. If the
problem is not handled to your satisfaction, then write to the warrantor’s Consumer
Affairs Department at the addresses listed for the warrantor.
PARTS AND SERVICE, WHICH ARE NOT COVERED BY THIS LIMITED
WARRANTY, ARE YOUR RESPONSIBILITY.
30
For assistance, please visit http://www.panasonic.com/consumersupport
TS730S.book
31 ページ
2005年7月19日 火曜日 午後1時59分
Customer services
Customer Services Directory
Obtain Product Information and Operating Assistance; locate your nearest
Dealer or Servicenter; purchase Parts and Accessories; or make Customer
Service and Literature requests by visiting our Web Site at:
http://www.panasonic.com/consumersupport
or, contact us via the web at:
http://www.panasonic.com/contactinfo
You may also contact us directly at: 1-800-211-PANA (7262),
Monday-Friday 9 am-9 pm; Saturday-Sunday 10 am-7 pm, EST.
TTY users (hearing or speech impaired users) can call 1-877-833-8855.
Accessory Purchases
Purchase Parts, Accessories and Instruction Books online for all
Panasonic Products by visiting our Web Site at:
http://www.pasc.panasonic.com
or, send your request by E-mail to:
[email protected]
You may also contact us directly at:
1-800-332-5368 (Phone) 1-800-237-9080 (Fax Only)
(Monday - Friday 9 am to 8 pm, EST.)
Panasonic Services Company
20421 84th Avenue South, Kent, WA 98032
(We Accept Visa, MasterCard, Discover Card, American Express, and
Personal Checks)
TTY users (hearing or speech impaired users) can call 1-866-605-1277.
Service in Puerto Rico
Panasonic Puerto Rico, Inc.
San Gabriel Industrial Park, Ave. 65 de Infantería, Km. 9.5,
Carolina, Puerto Rico 00985
Phone (787)750-4300, Fax (787)768-2910
For assistance, please visit http://www.panasonic.com/consumersupport
31
TS730S.book
32 ページ
2005年7月19日 火曜日 午後1時59分
If you need assistance with setup or operation;
1
2
3
Visit our website: http://www.panasonic.com/consumersupport
Contact us via the web at: http://www.panasonic.com/contactinfo
Call us at: 1-800-211-PANA (7262)
TTY users (hearing or speech impaired users) can call 1-877-833-8855.
When you ship the product;
L Carefully pack your unit, preferably in the original carton.
L Attach a letter, detailing the symptom, to the outside of the carton.
L Send the unit to Panasonic Services Company Customer Servicenter, prepaid and
adequately insured.
L Do not send your unit to Panasonic Consumer Electronics Company listed below or to
executive or regional sales offices. These locations do not repair consumer products.
Copyright:
This material is copyrighted by Panasonic Communications Co., Ltd., and may be
reproduced for internal use only. All other reproduction, in whole or in part, is prohibited
without the written consent of Panasonic Communications Co., Ltd.
© 2005 Panasonic Communications Co., Ltd. All Rights Reserved.
Panasonic Consumer Electronics Company,
Division of Panasonic Corporation of North America
One Panasonic Way, Secaucus, New Jersey 07094
Panasonic Puerto Rico, Inc.
San Gabriel Industrial Park, Ave. 65 de Infantería, Km. 9.5,
Carolina, Puerto Rico 00985
PQQX14652VA F0305-4075 D