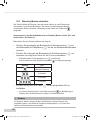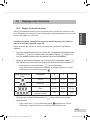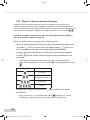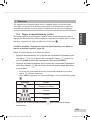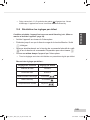
1
DEUTSCH ENGLISH FRANÇAIS ITALIANO NEDERLANDS ESPAÑOL D-32372 Minden Umschlag_Caffeo_Bistro_EU_2.3.indd 1 Bedienungsanleitung Operating Instructions Guide d’utilisation Istruzioni per l‘uso Gebruiksaanwijzing Manual de Instrucciones Návod k obsluze Návod na použitie ČESKY Melitta Haushaltsprodukte GmbH & Co. KG SLOVENSKY Version 2.3 10/2014 30.10.2014 09:00:41 8 9 10 7 11 6 5 4 12 13 14 3 2 C D F G H J 15 1 16 A 18 E 19 20 17 Umschlag_Caffeo_Bistro_EU_2.3.indd 2 B 30.10.2014 09:00:41 DEUTSCH Liebe Kundin, lieber Kunde! Herzlichen Glückwunsch zum Kauf Ihrer Melitta® CAFFEO®. Wir freuen uns, Sie als Kaffeeliebhaber und Melitta® CAFFEO®-Genießer begrüßen zu dürfen. Mit Ihrem neuen Qualitätsprodukt Melitta® CAFFEO® werden Sie viele besondere Kaffeemomente erleben. Genießen Sie Ihre LieblingsKaffeespezialitäten mit allen Sinnen und lassen Sie sich verwöhnen. Für einzigartigen Genuss sorgen der Milchaufschäumer Perfect Cappuccino, mit dem Sie einen traumhaften Milchschaum für diverse Kaffeespezialitäten zubereiten können sowie der 2-Kammer-Bohnenbehälter Bean Select, bei dem Sie die Wahlmöglichkeit zwischen zwei unterschiedlichen Bohnensorten haben. Damit Sie und Ihre Gäste lange Freude mit der Melitta® CAFFEO® haben, lesen Sie bitte aufmerksam die Bedienungsanleitung durch und bewahren Sie diese sorgfältig auf. Falls Sie weitere Informationen benötigen oder Fragen zum Produkt haben, wenden Sie sich bitte direkt an uns oder besuchen Sie uns im Internet unter www.melitta.de oder www.melitta.at. Wir wünschen Ihnen nun viel Freude mit Ihrem neuen Kaffeevollautomaten. Ihr Melitta® CAFFEO®-Team ® Registered trademark of a company of the Melitta Group 1 Heft_Caffeo_Bistro_EU_2.3_041114.indd 1 04.11.2014 15:54:35 Inhaltsverzeichnis 1 Hinweise zu dieser Bedienungsanleitung ...............................................4 1.1 1.2 1.3 2 3 Allgemeine Sicherheitshinweise .............................................................6 Beschreibung des Geräts .......................................................................9 3.1 3.2 3.3 4 7 Aufstellen.................................................................................................. 11 Anschließen.............................................................................................. 12 Bohnenbehälter füllen .............................................................................. 12 Wasserbehälter füllen ............................................................................... 13 Erstes Einschalten.................................................................................... 13 Kaffeestärke einstellen ............................................................................. 14 Bezugsmenge einstellen .......................................................................... 14 Ein- und Ausschalten ............................................................................15 5.1 5.2 6 Legende zu Abbildung A............................................................................. 9 Legende zu Abbildung B ............................................................................ 9 Display...................................................................................................... 10 Inbetriebnahme ..................................................................................... 11 4.1 4.2 4.3 4.4 4.5 4.6 4.7 5 Symbole im Text dieser Bedienungsanleitung............................................ 4 Bestimmungsgemäßer Gebrauch .............................................................. 5 Nicht bestimmungsgemäßer Gebrauch...................................................... 5 Gerät einschalten ..................................................................................... 15 Gerät ausschalten .................................................................................... 15 Melitta® Claris®-Wasserfilter einsetzen..................................................16 Espresso oder Café Crème zubereiten.................................................17 7.1 7.2 7.3 Eine Tasse Espresso oder Café Crème zubereiten ................................. 17 Zwei Tassen Espresso oder Café Crème zubereiten ............................... 17 Espresso oder Café Crème mit Pulverkaffee zubereiten ......................... 18 8 Milchschaum zubereiten .......................................................................19 9 Heißwasser zubereiten .........................................................................21 2 Heft_Caffeo_Bistro_EU_2.3_041114.indd 2 04.11.2014 15:55:03 DEUTSCH 10 Funktionseinstellungen .........................................................................22 10.1 10.2 10.3 10.4 10.5 10.6 Wasserhärte einstellen ............................................................................. 22 Energie-Spar-Modus einstellen ................................................................ 23 Stand-by-Modus einstellen ....................................................................... 24 Brühtemperatur einstellen ........................................................................ 25 Zurücksetzen auf Werkseinstellungen ..................................................... 26 Mahlgrad einstellen .................................................................................. 27 11 Pflege und Wartung ..............................................................................28 11.1 11.2 11.3 11.4 11.5 11.6 Allgemeine Reinigung .............................................................................. 28 Perfect Cappuccino reinigen .................................................................... 28 Brüheinheit reinigen ................................................................................. 29 Integriertes Reinigungsprogramm ............................................................ 30 Integriertes Entkalkungsprogramm .......................................................... 33 Wasserbehälter entkalken ........................................................................ 36 12 Transport und Entsorgung ....................................................................37 12.1 Vorbereitung für den Transport, Frostschutz und Maßnahmen bei längerem Nichtgebrauch .......................................................................... 37 13 Störungen beheben ..............................................................................39 3 Heft_Caffeo_Bistro_EU_2.3_041114.indd 3 04.11.2014 15:55:03 1 Hinweise zu dieser Bedienungsanleitung Klappen Sie zur besseren Orientierung die Auffaltseiten auf der Vorder- und Rückseite dieser Bedienungsanleitung auf. 1.1 Symbole im Text dieser Bedienungsanleitung Die Symbole in dieser Bedienungsanleitung weisen Sie auf besondere Gefahren im Umgang mit Ihrer Melitta® CAFFEO® hin oder geben Ihnen nützliche Hinweise. Warnung! Texte mit diesem Symbol enthalten Informationen zu Ihrer Sicherheit und weisen Sie auf mögliche Unfall- und Verletzungsgefahren hin. Vorsicht! Texte mit diesem Symbol enthalten Informationen über zu vermeidende Fehlbedienungen und weisen Sie auf mögliche Gefahren von Sachschäden hin. Hinweis Texte mit diesem Symbol enthalten zusätzliche wertvolle Informationen für den Umgang mit Ihrer Melitta® CAFFEO®. 4 Heft_Caffeo_Bistro_EU_2.3_041114.indd 4 04.11.2014 15:55:03 DEUTSCH 1.2 Bestimmungsgemäßer Gebrauch Die Melitta® CAFFEO® ist ausschließlich für die Zubereitung von Kaffee und Kaffeespezialitäten, für die Erwärmung von Wasser sowie für die Erwärmung von Milch außerhalb des Geräts geeignet. Das Gerät ist für den Hausgebrauch und nicht für den gewerblichen Gebrauch bestimmt. Der bestimmungsgemäße Gebrauch umfasst, • dass Sie die Bedienungsanleitung aufmerksam lesen, verstehen und beachten. • dass Sie insbesondere die Sicherheitshinweise beachten. • dass Sie die Melitta® CAFFEO® innerhalb der Betriebsbedingungen einsetzen, die in dieser Bedienungsanleitung beschrieben sind. 1.3 Nicht bestimmungsgemäßer Gebrauch Als nicht bestimmungsgemäßer Gebrauch gilt, wenn Sie die Melitta® CAFFEO® anders einsetzen, als es in dieser Bedienungsanleitung beschrieben ist. Warnung! Durch nicht bestimmungsgemäßen Gebrauch können Sie sich verletzen oder an heißem Wasser oder Dampf verbrühen. Hinweis Der Hersteller haftet nicht für Schäden, die auf einen nicht bestimmungsgemäßen Gebrauch zurückzuführen sind. 5 Heft_Caffeo_Bistro_EU_2.3_041114.indd 5 04.11.2014 15:55:03 2 Allgemeine Sicherheitshinweise Das Gerät entspricht den folgenden Europäischen Richtlinien: – 2006 / 95 / EG (Niederspannung), – 2004 / 108 / EG (Elektromagnetische Verträglichkeit), – 2011 / 65 / EU (RoHS), – 2009 / 125 / EG (Ökodesign / ErP). Das Gerät ist nach dem neuesten Stand der Technik gebaut. Dennoch gibt es Restgefahren. Um Gefahren zu vermeiden, müssen Sie die Sicherheitshinweise beachten. Für Schäden durch Nichtbeachtung von Sicherheitshinweisen übernimmt Melitta® keine Haftung. Bitte lesen Sie die folgenden Hinweise aufmerksam durch. Wenn Sie die Hinweise nicht einhalten, kann dies Ihre eigene Sicherheit und die des Geräts beeinträchtigen. 6 Heft_Caffeo_Bistro_EU_2.3_041114.indd 6 04.11.2014 15:55:03 DEUTSCH Warnung! Gefahr durch elektrischen Strom Falls das Gerät oder das Netzkabel beschädigt ist, besteht Lebensgefahr durch einen Stromschlag. Beachten Sie die folgenden Sicherheitshinweise, um Gefährdungen durch elektrischen Strom zu vermeiden: – Verwenden Sie kein beschädigtes Netzkabel. – Ein beschädigtes Netzkabel darf ausschließlich durch den Hersteller, seinen Kundendienst oder eine ähnlich qualifizierte Person ersetzt werden. – Öffnen Sie keine fest verschraubten Abdeckungen vom Gehäuse des Geräts. – Verwenden Sie das Gerät nur, wenn es sich in technisch einwandfreiem Zustand befindet. – Ein defektes Gerät darf ausschließlich von einer autorisierten Werkstatt repariert werden. Reparieren Sie das Gerät nicht selbst. – Nehmen Sie keine Änderungen am Gerät, an seinen Bestandteilen und am Zubehör vor. – Tauchen Sie das Gerät nicht in Wasser. Warnung! Verbrennungs- und Verbrühungsgefahr Austretende Flüssigkeiten und Dämpfe können sehr heiß sein. Teile des Geräts werden ebenfalls sehr heiß. Beachten Sie die folgenden Sicherheitshinweise, um Verbrühungen und Verbrennungen zu vermeiden: – Vermeiden Sie Hautkontakt mit den austretenden Flüssigkeiten und Dämpfen. – Berühren Sie während des Betriebs keine Düsen am Auslauf. 7 Heft_Caffeo_Bistro_EU_2.3_041114.indd 7 04.11.2014 15:55:03 Warnung! Allgemeine Sicherheit Beachten Sie die folgenden Sicherheitshinweise, um Personen- und Sachschäden zu vermeiden: – Greifen Sie während des Betriebs nicht in den Innenraum des Geräts. – Das Gerät und sein Netzkabel sind von Kindern unter 8 Jahren fernzuhalten. – Dieses Gerät kann von Kindern ab 8 Jahren sowie von Personen mit verringerten physischen, sensorischen oder mentalen Fähigkeiten oder Mangel an Erfahrung und Wissen benutzt werden, wenn sie beaufsichtigt werden oder bezüglich des sicheren Gebrauchs des Geräts unterwiesen wurden und die daraus resultierenden Gefahren verstehen. – Kinder dürfen nicht mit dem Gerät spielen. Reinigung und Benutzerwartung dürfen nicht von Kindern unter 8 Jahren durchgeführt werden. Kinder über 8 Jahren müssen bei der Reinigung und Benutzerwartung beaufsichtigt werden. – Trennen Sie das Gerät von der Stromversorgung, wenn es längere Zeit unbeaufsichtigt ist. 8 Heft_Caffeo_Bistro_EU_2.3_041114.indd 8 04.11.2014 15:55:03 DEUTSCH 3 Beschreibung des Geräts 3.1 Legende zu Abbildung A Bildnummer Erklärung 1 Tropfschale mit Tassenblech und Tresterbehälter (innen) 2 „Perfect Cappuccino“-Milchaufschäumer 3 Wasserbehälter 4 Bedientaste für Kaffeestärke 5 Bedientaste für Dampfbezug 6 Ventilschalter für Dampf- und Heißwasserbezug 7 Display 8 2-Kammer-Bohnenbehälter „Bean Select“ 9 Kippschalter für Bohnenbehälter „Bean Select“ 10 Pulverschacht mit Deckel 11 Ein-/Aus-Taste 12 Kaffeemengenregler 13 Bedientaste für Eintassenbezug 14 Bedientaste für Zweitassenbezug 15 Höhenverstellbarer Auslauf 16 Schwimmer zur Wasserstandsanzeige in der Tropfschale 3.2 Legende zu Abbildung B Bildnummer Erklärung 17 Netzkabel 18 Brüheinheit und Typenschild (hinter der Abdeckung) 19 Mahlgradverstellung 20 Netzschalter 9 Heft_Caffeo_Bistro_EU_2.3_041114.indd 9 04.11.2014 15:55:04 3.3 Symbol Display Bedeutung Dampfventil Anzeige Erklärung / Aufforderung leuchtet Temperatur für Dampfbezug erreicht Ventil öffnen blinkt Ventil geöffnet Wasserbehälter leuchtet Pulverschacht Wasserbehälter füllen blinkt Deckel des Pulverschachts geöffnet leuchtet Pulverkaffeebezug erfolgt nach Drücken der Bedientaste für Eintassenbezug leuchtet 1 Bohne: mild 2 Bohnen: normal 3 Bohnen: stark 4 Bohnen: sehr stark blinkt Bohnenbehälter füllen; das Blinken endet nach dem nächsten Kaffeebezug. leuchtet Gerät reinigen blinkt Integriertes Reinigungsprogramm läuft leuchtet Tropfschale und Tresterbehälter leeren blinkt Tropfschale und Tresterbehälter einsetzen leuchtet Gerät entkalken blinkt Integriertes Entkalkungsprogramm läuft Kaffeestärke Reinigen Tropfschale und Tresterbehälter Entkalken 10 Heft_Caffeo_Bistro_EU_2.3_041114.indd 10 04.11.2014 15:55:04 DEUTSCH 4 Inbetriebnahme Für die erste Inbetriebnahme führen Sie bitte die im Folgenden beschriebenen Punkte durch. Wenn Sie diese Punkte durchgeführt haben, ist das Gerät betriebsbereit. Sie können anschließend Kaffee zubereiten. Wir empfehlen Ihnen, die ersten beiden Tassen Kaffee nach der ersten Inbetriebnahme wegzugießen. 4.1 • Aufstellen Stellen Sie das Gerät auf einer stabilen, ebenen und trockenen Fläche auf. Halten Sie einen Abstand von etwa 10 cm zur Wand und zu anderen Gegenständen ein. Vorsicht! – Stellen Sie das Gerät niemals auf heißen Flächen oder in feuchten Räumen auf. – Transportieren oder lagern Sie das Gerät nicht in niedrig temperierten Verkehrsmitteln oder Räumen, da das Restwasser gefrieren oder kondensieren könnte und es zu Schäden am Gerät kommen kann. Beachten Sie die Hinweise auf Seite 37. • Der Tresterbehälter befindet sich bereits in der Tropfschale. Bitte achten Sie darauf, dass die Tropfschale bis zum Anschlag in das Gerät eingeschoben ist. Hinweise – Bewahren Sie das Verpackungsmaterial inklusive Hartschaumstoff für Transporte und eventuelle Rücksendungen auf, um Transportschäden zu vermeiden. – Es ist ganz normal, dass sich vor der ersten Inbetriebnahme Kaffee- und Wasserspuren im Gerät befinden. Das liegt daran, dass das Gerät im Werk auf seine einwandfreie Funktion geprüft wurde. 11 Heft_Caffeo_Bistro_EU_2.3_041114.indd 11 04.11.2014 15:55:04 4.2 • Anschließen Stecken Sie das Netzkabel in eine geeignete Steckdose. Warnung! Brandgefahr und Gefahr eines elektrischen Schlags durch falsche Netzspannung, falsche oder beschädigte Anschlüsse und Netzkabel – Stellen Sie sicher, dass die Netzspannung mit der Spannung übereinstimmt, die auf dem Typenschild des Geräts angegeben ist. Das Typenschild befindet sich an der rechten Seite des Geräts hinter der Abdeckung (Abb. B, Nr. 18). – Stellen Sie sicher, dass die Steckdose den geltenden Normen bezüglich der elektrischen Sicherheit entspricht. Wenden Sie sich in Zweifelsfällen an eine Elektro-Fachkraft. – Verwenden Sie niemals beschädigte Netzkabel (beschädigte Isolierung, blanke Drähte). – Lassen Sie beschädigte Netzkabel während der Garantiezeit ausschließlich durch den Hersteller und danach ausschließlich durch qualifiziertes Fachpersonal ersetzen. 4.3 Bohnenbehälter füllen Durch den 2-Kammer-Bohnenbehälter „Bean Select“ können Sie zwei verschiedene Kaffeesorten parallel verwenden. Füllen Sie z. B. eine Kammer mit EspressoBohnen und die andere mit Café-Crème-Bohnen. Über den Kipphebel können Sie dann bequem zwischen den Sorten wechseln. • Füllen Sie den Bohnenbehälter (Abb. A, Nr. 8) mit frischen Kaffeebohnen. Jede der zwei Kammern kann mit maximal 135 g Kaffeebohnen befüllt werden. Vorsicht! • – Füllen Sie den Bohnenbehälter ausschließlich mit Kaffeebohnen. – Füllen Sie niemals gemahlene, gefriergetrocknete oder karamellisierte Kaffeebohnen in den Bohnenbehälter. Wählen Sie die gewünschte Bohnensorte aus, indem Sie den Kipphebel auf die entsprechende Kammer stellen. 12 Heft_Caffeo_Bistro_EU_2.3_041114.indd 12 04.11.2014 15:55:04 DEUTSCH Warnung! Gefahr für Personen mit Koffein-Unverträglichkeit. Da immer eine Restmenge der zuvor verwendeten Bohnen oberhalb des Mahlwerks verbleibt, vermischen sich beim Umschalten auf eine andere Bohnensorte die beiden Sorten. Daher können die ersten zwei Tassen nach dem Umschalten auf entkoffeinierte Bohnen noch koffeinhaltigen Kaffee enthalten. Somit ist erst die dritte zubereitete Tasse Kaffee nach dem Umschalten koffeinfrei. Hinweis Wenn der Kipphebel beim Brühvorgang senkrecht steht, gelangen keine Bohnen in das Mahlwerk. 4.4 Wasserbehälter füllen • Klappen Sie den Deckel des Wasserbehälters (Abb. A, Nr. 3) hoch und ziehen Sie den Wasserbehälter nach oben aus dem Gerät. • Füllen Sie den Wasserbehälter bis zur max.-Markierung mit frischem Leitungswasser und setzen Sie ihn wieder ein. 4.5 Erstes Einschalten Alle Leitungen im Gerät wurden werkseitig entwässert und belüftet. Deshalb leuchtet beim ersten Einschalten nach der Aufheizphase das Symbol für das Ventil und das Gerät muss über das Ventil entlüftet werden. Das Entlüften ist nur bei der ersten Inbetriebnahme des Geräts sowie nach dem Entwässern und Belüften notwendig. Beachten Sie dazu Seite 37. • Schalten Sie den Netzschalter (Abb. B, Nr. 20) in die Position „I“. • Drücken Sie die Ein-/Aus-Taste , um das Gerät einzuschalten. → Die Ein-/Aus-Taste blinkt. Das Gerät heizt auf. Nach dem Aufheizen leuchtet das Symbol für das Ventil . • Stellen Sie ein Gefäß unter den Perfect Cappuccino und schieben Sie das Dampfrohr nach unten, bis es unterhalb des Gefäßrands steht. • Stellen Sie ein Gefäß unter den Auslauf. • Drehen Sie den Ventilschalter (Abb. A, Nr. 6) im Uhrzeigersinn, um das Ventil zu öffnen. 13 Heft_Caffeo_Bistro_EU_2.3_041114.indd 13 04.11.2014 15:55:04 → Das Symbol für das Ventil Perfect Cappuccino. • blinkt. Wasser läuft in das Gefäß unter dem Sobald kein Wasser mehr herausläuft und das Symbol für das Ventil leuchtet, drehen Sie den Ventilschalter gegen den Uhrzeigersinn, um das Ventil zu schließen. → Das Gerät führt eine automatische Spülung durch, wobei heißes Wasser aus dem Auslauf fließt. Anschließend leuchtet die Ein-/Aus-Taste . Das Gerät ist betriebsbereit. 4.6 • Kaffeestärke einstellen Drücken Sie mehrmals die Bedientaste für Kaffeestärke zwischen vier möglichen Stärkegraden auszuwählen. → Ihre Auswahl wird über die Bohnensymbole Anzeige , um im Display angezeigt. Kaffeestärke mild normal (Werkseinstellung) stark sehr stark • Sie können das Kaffeearoma auch über die Einstellung des Mahlgrads verändern. Beachten Sie dazu Seite 26. 4.7 • Bezugsmenge einstellen Drehen Sie den Kaffeemengenregler (Abb. A, Nr. 12), um die Bezugsmenge stufenlos von 30 ml bis 220 ml einzustellen (Regler nach links: 30 ml, Regler in der Mitte: 125 ml, Regler nach rechts: 220 ml). 14 Heft_Caffeo_Bistro_EU_2.3_041114.indd 14 04.11.2014 15:55:04 DEUTSCH • 5 Ein- und Ausschalten 5.1 Gerät einschalten Schalten Sie den Netzschalter (Abb. B, Nr. 20) in die Position „I“. → Das Gerät befindet sich im Stand-by-Modus. Die Ein-/Aus-Taste leuchtet rot. • Stellen Sie ein geeignetes Gefäß unter den Auslauf. • Drücken Sie die Ein-/Aus-Taste , um das Gerät einzuschalten. → Die Ein-/Aus-Taste blinkt. Das Gerät heizt auf. Das Gerät führt eine automatische Spülung durch, wobei heißes Wasser aus dem Auslauf fließt. Anschließend leuchten die Ein-/Aus-Taste und die Bohnensymbole . Das Gerät ist betriebsbereit. 5.2 Gerät ausschalten • Stellen Sie möglichst ein Gefäß unter den Auslauf. • Drücken Sie die Ein-/Aus-Taste Modus zu schalten. , um das Gerät in den Stand-by- → Das Gerät führt eine automatische Spülung des Kaffeewegs durch. Die Brühkammer fährt in die Ruhestellung. Die Ein-/Aus-Taste leuchtet rot. • Schalten Sie den Netzschalter (Abb. B, Nr. 20) in die Position „0“, um das Gerät komplett auszuschalten. Hinweise – Das Gerät führt bei jedem Einschalten eine automatische Spülung durch. – Schalten Sie das Gerät nur über den Netzschalter aus, wenn es sich im Stand-by-Modus befindet, da ansonsten die Gefahr besteht, dass die Brüheinheit nicht in der richtigen Position ist. 15 Heft_Caffeo_Bistro_EU_2.3_041114.indd 15 04.11.2014 15:55:05 6 Melitta® Claris®-Wasserfilter einsetzen Der Melitta® Claris®-Wasserfilter filtert Kalk und andere Schadstoffe aus dem Wasser. Bitte setzen Sie ihn erst nach der ersten Inbetriebnahme in das Gerät ein. Wenn Sie den Filter verwenden, müssen Sie das Gerät seltener entkalken und können die Wasserhärte auf den Härtegrad 1 stellen (beachten Sie dazu Seite 22). Durch den sicheren Schutz vor Verkalkung verlängert sich die Lebensdauer Ihres Geräts. Der Wasserfilter sollte regelmäßig – spätestens jedoch nach 2 Monaten – gewechselt werden. Der Wasserfilter ist im Fachhandel erhältlich. • Stellen Sie am blauen Ring oben am Melitta® Claris®-Wasserfilter den aktuellen Monat ein. So können Sie leicht erkennen, wann der Melitta® Claris®-Wasserfilter gewechselt werden muss. • Stellen Sie den Wasserfilter für einige Minuten in ein Glas mit frischem Leitungswasser, bevor Sie ihn einsetzen. • Klappen Sie den Deckel des Wasserbehälters (Abb. A, Nr. 3) hoch und ziehen Sie den Wasserbehälter nach oben aus dem Gerät. • Leeren Sie den Wassertank. • Schrauben Sie den Melitta® Claris®-Wasserfilter mittels der Einschraubhilfe am unteren Ende des mitgelieferten Kaffeelöffels vorsichtig in das Gewinde am Boden des Wasserbehälters ein. • Füllen Sie den Wasserbehälter bis zur max.-Markierung mit frischem Leitungswasser und setzen Sie ihn wieder ein. • Stellen Sie ein Gefäß unter den Perfect Cappuccino und schieben Sie das Dampfrohr nach unten, bis es unterhalb des Gefäßrands steht. • Drehen Sie den Ventilschalter (Abb. A, Nr. 6) im Uhrzeigersinn, um das Ventil zu öffnen. → Wasser läuft in das Gefäß unter dem Perfect Cappuccino. Aufgrund der automatischen Stop-Funktion müssen Sie den Ventilschalter mehrfach öffnen und schließen. • Sobald das Symbol für den Wasserbehälter leuchtet, drehen Sie den Ventilschalter gegen den Uhrzeigersinn, um das Ventil zu schließen. → Das Gerät ist betriebsbereit. 16 Heft_Caffeo_Bistro_EU_2.3_041114.indd 16 04.11.2014 15:55:05 DEUTSCH Hinweis Der Melitta® Claris®-Wasserfilter sollte nicht über einen längeren Zeitraum trocken stehen. Wir empfehlen daher, den Melitta® Claris®-Wasserfilter bei längerem Nichtgebrauch des Geräts in einem Glas Wasser im Kühlschrank aufzubewahren. 7 Espresso oder Café Crème zubereiten 7.1 Eine Tasse Espresso oder Café Crème zubereiten Voraussetzungen: Das Gerät ist betriebsbereit (siehe „Ein- und Ausschalten“ auf Seite 15). Die gewünschte Kaffeestärke und Bezugsmenge sind eingestellt (siehe Seite 14). Die gewünschte Kaffeesorte im Bohnenbehälter ist ausgewählt. • Stellen Sie ein geeignetes Gefäß unter den Auslauf. • Drücken Sie die Bedientaste für Eintassenbezug . → Der Mahlvorgang und die Kaffeeausgabe starten. Die Ausgabe wird automatisch beendet, wenn die eingestellte Bezugsmenge erreicht ist. • Um die Kaffeeausgabe vorzeitig abzubrechen, drücken Sie die . Bedientaste für Eintassenbezug 7.2 Zwei Tassen Espresso oder Café Crème zubereiten Voraussetzungen: Das Gerät ist betriebsbereit (siehe „Ein- und Ausschalten“ auf Seite 15). Die gewünschte Kaffeestärke und Bezugsmenge sind eingestellt. Die gewünschte Kaffeesorte im Bohnenbehälter ist ausgewählt. • Stellen Sie zwei geeignete Gefäße nebeneinander unter den Auslauf. • Drücken Sie die Bedientaste für Zweitassenbezug . → Der zweimalige Mahlvorgang und die Kaffeeausgabe starten. Die Ausgabe wird automatisch beendet, wenn die eingestellte Bezugsmenge erreicht ist. • Um die Kaffeeausgabe vorzeitig abzubrechen, drücken Sie die Bedientaste für Zweitassenbezug . 17 Heft_Caffeo_Bistro_EU_2.3_041114.indd 17 04.11.2014 15:55:05 7.3 Espresso oder Café Crème mit Pulverkaffee zubereiten Voraussetzungen: Das Gerät ist betriebsbereit (siehe „Ein- und Ausschalten“ auf Seite 15). Die gewünschte Bezugsmenge ist eingestellt. • Öffnen Sie den Deckel des Pulverschachts (Abb. A, Nr. 10). → Das Symbol für den Pulverschacht • blinkt. Füllen Sie maximal einen Kaffeelöffel frischen Pulverkaffee in den Pulverschacht. Vorsicht! • – Füllen Sie den Pulverschacht ausschließlich mit Pulverkaffee. InstantProdukte können die Brüheinheit verkleben. – Füllen Sie niemals mehr als einen Kaffeelöffel (liegt dem Gerät bei) Pulverkaffee ein, da sonst die Brüheinheit überfüllt wird. Schließen Sie den Deckel des Pulverschachts. → Das Symbol für den Pulverschacht Eintassenbezug leuchten. und die Bedientaste für • Stellen Sie ein geeignetes Gefäß unter den Auslauf. • Drücken Sie die Bedientaste für Eintassenbezug . → Die Kaffeeausgabe startet. Sie wird automatisch beendet, wenn die eingestellte Bezugsmenge erreicht ist. • Um die Kaffeeausgabe vorzeitig abzubrechen, drücken Sie die Bedientaste für Eintassenbezug . Hinweis Wenn Sie innerhalb von 90 Sekunden nach dem Öffnen des Pulverschachts keinen Kaffee beziehen, schaltet das Gerät wieder auf den Betrieb mit Kaffeebohnen um und wirft den Pulverkaffee in den Tresterbehälter, um die spätere Gefahr einer Brühkammerüberfüllung zu umgehen. 18 Heft_Caffeo_Bistro_EU_2.3_041114.indd 18 04.11.2014 15:55:05 DEUTSCH 8 Milchschaum zubereiten Voraussetzung: Das Gerät ist betriebsbereit (siehe „Ein- und Ausschalten“ auf Seite 15). • Stellen Sie ein Gefäß mit Milch unter den Perfect Cappuccino. Achten Sie darauf, dass der Quirl des Perfect Cappuccino in die Milch eingetaucht ist. • Füllen Sie das Gefäß maximal zu einem Drittel, da sich beim Aufschäumen das Volumen der Milch stark vergrößert. • Drücken Sie die Bedientaste für Dampfbezug . → Die Bedientaste für Dampfbezug blinkt. Das Gerät heizt auf. Wenn die Dampftemperatur erreicht ist, leuchten die Bedientaste für Dampfbezug und das Symbol für das Ventil . Warnung! Verbrennungs- und Verbrühungsgefahr durch heißes Dampfrohr, heißen Dampfschlauch und heißen Quirl Berühren Sie niemals während der Nutzung das Dampfrohr, den Dampfschlauch oder den Quirl des Perfect Cappuccino. • Drehen Sie den Ventilschalter (Abb. A, Nr. 6) im Uhrzeigersinn, um das Ventil zu öffnen. → Das Symbol für das Ventil und die Bedientaste für Dampfbezug blinken. Der Quirl schäumt die Milch auf und erwärmt sie gleichzeitig. Sie erreichen ein besseres Schaumergebnis, wenn Sie den Quirl beim Aufschäumen auf- und abbewegen. • Drehen Sie den Ventilschalter gegen den Uhrzeigersinn, um das Ventil zu schließen und damit das Aufschäumen zu beenden. Das Volumen der Milch sollte sich etwa verdoppelt haben und das Gefäß sollte fühlbar erwärmt sein. • , um vom Drücken Sie die Bedientaste für Dampfbezug Dampfmodus in den normalen Betriebsmodus zu wechseln. 19 Heft_Caffeo_Bistro_EU_2.3_041114.indd 19 04.11.2014 15:55:05 • Warten Sie, bis das Dampfrohr abgekühlt ist und drehen Sie dann das Dampfrohr mit Quirl gegen den Uhrzeigersinn vom Perfect Cappuccino ab (Abb. E). • Ziehen Sie den Quirl des Perfect Cappuccino vom Dampfrohr nach unten ab (Abb. F). • Spülen Sie das Dampfrohr und den Quirl unter fließendem Wasser oder im Geschirrspüler. • Drehen Sie das gereinigte Dampfrohr mit Quirl im Uhrzeigersinn auf den Perfect Cappuccino, bis es einrastet. Hinweis Wir empfehlen, kalte Milch mit einem hohen Eiweißgehalt zu verwenden. Für einen guten Milchschaum ist nicht der Fett-, sondern der Eiweißgehalt der Milch ausschlaggebend. 20 Heft_Caffeo_Bistro_EU_2.3_041114.indd 20 04.11.2014 15:55:06 DEUTSCH 9 Heißwasser zubereiten Voraussetzung: Das Gerät ist betriebsbereit (siehe „Ein- und Ausschalten“ auf Seite 15). • Legen Sie ein Tuch unter den Perfect Cappuccino, um eventuell auslaufendes Restwasser aufzufangen. • Ziehen Sie den Quirl des Perfect Cappuccino vom Dampfrohr nach unten ab (Abb. F). • Stellen Sie ein Gefäß unter das Dampfrohr und schieben Sie das Dampfrohr nach unten, bis es unterhalb des Gefäßrands steht. • Drehen Sie den Ventilschalter (Abb. A, Nr. 6) im Uhrzeigersinn, um das Ventil zu öffnen. → Das Symbol für das Ventil Dampfrohr in das Gefäß. blinkt. Heißes Wasser läuft aus dem • Wenn die gewünschte Wassermenge erreicht ist, drehen Sie den Ventilschalter gegen den Uhrzeigersinn, um das Ventil zu schließen. • Warten Sie, bis das Dampfrohr abgekühlt ist und schieben Sie den Quirl von unten wieder auf das Dampfrohr, bis er einrastet. 21 Heft_Caffeo_Bistro_EU_2.3_041114.indd 21 04.11.2014 15:55:06 10 Funktionseinstellungen 10.1 Wasserhärte einstellen Benutzen Sie den beiliegenden Teststreifen, um die Wasserhärte in Ihrem Gebiet zu ermitteln. Beachten Sie bitte die Anweisungen auf der Verpackung des Teststreifens. Werkseitig ist die Wasserhärte 4 eingestellt. Voraussetzung: Das Gerät befindet sich im Stand-by-Modus (siehe „Ein- und Ausschalten“ auf Seite 15). Bitte stellen Sie die Wasserhärte zur Erhaltung der Gerätequalität wie folgt ein: • Drücken Sie gleichzeitig die Bedientaste für Eintassenbezug und die Bedientaste für Dampfbezug , bis die vier Bedientasten schwach leuchten. • , um Drücken Sie mehrmals die Bedientaste für Dampfbezug zwischen den vier möglichen Wasserhärtegraden auszuwählen. → Die Bedientaste für Dampfbezug leuchtet hell. Ihre Auswahl der Wasserhärte gemäß der Tabelle wird über die Bohnensymbole im Display angezeigt. Wasserhärtebereich • Eigenschaften °d °e °f weich 0 - 10 0 - 13 0 - 18 mittel 10 - 15 13 - 19 18-27 hart 15 - 20 19 - 25 27-36 sehr hart (Werkseinstellung) > 20 > 25 > 36 Drücken Sie die Ein-/Aus-Taste zu bestätigen. , um die ausgewählte Wasserhärte → Je nach Auswahl blinken 1 bis 4 Bohnensymbole befindet sich wieder im Stand-by-Modus. im Display. Das Gerät 22 Heft_Caffeo_Bistro_EU_2.3_041114.indd 22 04.11.2014 15:55:06 DEUTSCH 10.2 Energie-Spar-Modus einstellen Das Gerät schaltet nach der letzten Aktion automatisch (je nach Einstellung) in den Energie-Spar-Modus (das Gerät verbraucht so deutlich weniger Energie als im Bereitschaftsmodus). Sie können für den Energie-Spar-Modus verschiedene Zeiten einstellen. Werkseitig ist das Gerät auf 15 Minuten eingestellt. Voraussetzung: Das Gerät befindet sich im Stand-by-Modus (siehe „Ein- und Ausschalten“ auf Seite 15). Bitte stellen Sie den Energie-Spar-Modus wie folgt ein: • Drücken Sie gleichzeitig die Bedientaste für Eintassenbezug und die Bedientaste für Dampfbezug , bis die vier Bedientasten schwach leuchten. • Drücken Sie mehrmals die Bedientaste für Kaffeestärke , um zwischen vier möglichen Zeiten für den Timer auszuwählen. → Die Bedientaste für Kaffeestärke leuchtet hell. Ihre Auswahl wird über die Bohnensymbole im Display angezeigt. Anzeige Zeit 5 Minuten 15 Minuten (Werkseinstellung) 30 Minuten aus • Drücken Sie die Ein-/Aus-Taste bestätigen. , um die ausgewählte Zeit zu → Je nach Auswahl blinken 1 bis 4 Bohnensymbole zur Bestätigung im Display. Das Gerät befindet sich wieder im Stand-by-Modus. Hinweis Durch Drücken einer beliebigen Taste wecken Sie das Gerät aus dem EnergieSpar-Modus. Die Funktion der gedrückten Taste (z. B. Kaffee zubereiten) wird direkt ausgeführt, nur die Aufheizphase dauert etwas länger. 23 Heft_Caffeo_Bistro_EU_2.3_041114.indd 23 04.11.2014 15:55:06 10.3 Stand-by-Modus einstellen Das Gerät schaltet 30 Minuten nach der letzten Aktion (je nach Einstellung) automatisch in den Stand-By-Modus. Sie können für den Stand-by-Modus verschiedene Zeiten einstellen. Werkseitig ist das Gerät auf 30 Minuten eingestellt. Voraussetzung: Das Gerät befindet sich im Stand-by-Modus (siehe „Ein- und Ausschalten“ auf Seite 15). Bitte stellen Sie den Stand-by-Modus wie folgt ein: • Drücken Sie gleichzeitig die Bedientaste für Eintassenbezug und die Bedientaste für Dampfbezug , bis die vier Bedientasten schwach leuchten. • Drücken Sie mehrmals die Bedientaste für Zweitassenbezug zwischen vier möglichen Zeiten für den Timer auszuwählen. , um → Die Bedientaste für Zweitassenbezug leuchtet hell. Ihre Auswahl wird über die Bohnensymbole im Display angezeigt. Anzeige Zeit 30 Minuten (Werkseinstellung) 2 Stunden 4 Stunden 8 Stunden • Drücken Sie die Ein-/Aus-Taste bestätigen. , um die ausgewählte Zeit zu → Je nach Auswahl blinken 1 bis 4 Bohnensymbole zur Bestätigung im Display. Das Gerät befindet sich wieder im Stand-by-Modus. Hinweis Im Stand-by-Modus verbraucht das Gerät deutlich weniger Energie. Wir empfehlen jedoch, das Gerät bei längerem Nichtgebrauch (z. B. auch über Nacht) am Netzschalter auszuschalten. 24 Heft_Caffeo_Bistro_EU_2.3_041114.indd 24 04.11.2014 15:55:06 DEUTSCH 10.4 Brühtemperatur einstellen Werkseitig ist die Brühtemperatur auf Stufe 2 (mittel ) eingestellt. Voraussetzung: Das Gerät befindet sich im Stand-by-Modus (siehe „Ein- und Ausschalten“ auf Seite 15). Bitte stellen Sie die Brühtemperatur wie folgt ein: • Drücken Sie gleichzeitig die Bedientaste für Eintassenbezug und die Bedientaste für Dampfbezug , bis die vier Bedientasten schwach leuchten. • Drücken Sie die Bedientaste für Eintassenbezug möglichen Brühtemperaturen auszuwählen. → Die Bedientaste für Eintassenbezug leuchtet hell. → Ihre Auswahl wird über die Bohnensymbole Anzeige , um zwischen drei im Display angezeigt. Brühtemperatur niedrig mittel (Werkseinstellung) hoch • Drücken Sie die Ein-/Aus-Taste Brühtemperatur zu bestätigen. , um die ausgewählte → Je nach Auswahl blinken 1 bis 3 Bohnensymbole befindet sich wieder im Stand-by-Modus. im Display. Das Gerät 25 Heft_Caffeo_Bistro_EU_2.3_041114.indd 25 04.11.2014 15:55:07 10.5 Zurücksetzen auf Werkseinstellungen Voraussetzung: Das Gerät befindet sich im Stand-by-Modus (siehe „Ein- und Ausschalten“ auf Seite 15). • Schalten Sie das Gerät am Netzschalter aus. • Warten Sie, bis die rote Leuchte in der Ein-/Aus-Taste • Drücken Sie gleichzeitig die Bedientaste für Kaffeestärke Bedientaste für Zweitassenbezug . • Schalten Sie gleichzeitig das Gerät am Netzschalter ein. verlischt. und die → Alle Einstellungen sind auf die Werkseinstellungen zurückgesetzt. Übersicht der Werkseinstellungen: Funktionseinstellung Werkseinstellung Kaffeestärke normal Wasserhärte Wasserhärte 4 Energie-Spar-Modus Stand-By-Modus Brühtemperatur 15 Minuten 30 Minuten mittel 26 Heft_Caffeo_Bistro_EU_2.3_041114.indd 26 04.11.2014 15:55:07 DEUTSCH 10.6 Mahlgrad einstellen Der Mahlgrad wurde vor der Auslieferung optimal eingestellt. Wir empfehlen Ihnen daher, den Mahlgrad erst nach etwa 1 000 Kaffeezubereitungen (etwa 1 Jahr) zu justieren. Sie können den Mahlgrad nur einstellen, während die Mühle läuft. Stellen Sie den Mahlgrad also unmittelbar nach dem Start eines Kaffeebezugs ein. Sollte das Kaffeearoma nicht intensiv genug sein, so empfehlen wir, den Mahlgrad feiner einzustellen. • Stellen Sie den Hebel (Abb. B, Nr. 19) in eine der drei Positionen (von der Rückseite des Geräts aus gesehen). Hebelposition Mahlgrad links fein mittig mittel rechts grob (Werkseinstellung) 27 Heft_Caffeo_Bistro_EU_2.3_041114.indd 27 04.11.2014 15:55:07 11 Pflege und Wartung 11.1 Allgemeine Reinigung • Reinigen Sie das Gerät von außen mit einem weichen, angefeuchteten Tuch und einem handelsüblichen Geschirrspülmittel. • Leeren und reinigen Sie die Tropfschale regelmäßig, spätestens, wenn der Schwimmer (Abb. A, Nr. 16) oben aus dem Tassenblech hervorsteht. • Reinigen Sie den Tresterbehälter regelmäßig, z. B. im Geschirrspüler. Vorsicht! – Verwenden Sie keine scheuernden Tücher, Schwämme oder Reinigungsmittel, um Beschädigungen der Geräteoberfläche zu vermeiden. – Reinigen Sie die Tropfschale nicht im Geschirrspüler, da es sonst zu Verformungen kommen kann. 11.2 Perfect Cappuccino reinigen • Legen Sie ein Tuch unter den Perfect Cappuccino, um eventuell auslaufendes Restwasser aufzufangen. • Drehen Sie das Dampfrohr mit Quirl gegen den Uhrzeigersinn vom Perfect Cappuccino ab (Abb. E). • Ziehen Sie den Quirl des Perfect Cappuccino vom Dampfrohr nach unten ab (Abb. F). • Spülen Sie das Dampfrohr und den Quirl unter fließendem Wasser oder im Geschirrspüler. • Schieben Sie den Quirl von unten wieder auf das Dampfrohr, bis er einrastet. • Drehen Sie das gereinigte Dampfrohr mit Quirl im Uhrzeigersinn auf den Perfect Cappuccino, bis es einrastet. Hinweis Bei häufigem Reinigen im Geschirrspüler kann es zu leichten Farbveränderungen am Tresterbehälter und am Perfect Cappuccino kommen. 28 Heft_Caffeo_Bistro_EU_2.3_041114.indd 28 04.11.2014 15:55:07 DEUTSCH 11.3 Brüheinheit reinigen Voraussetzung: Das Gerät befindet sich im Stand-by-Modus (siehe „Ein- und Ausschalten“ auf Seite 15). Hinweis Für einen optimalen Schutz Ihres Geräts empfehlen wir Ihnen, die Brüheinheit einmal pro Woche unter fließendem Leitungswasser zu reinigen. • Schalten Sie den Netzschalter (Abb. B, Nr. 20) in die Position „0“, um das Gerät komplett auszuschalten. • Fassen Sie in die Mulde an der rechten Seite des Geräts (Abb. B, Nr. 18) und ziehen Sie die Abdeckung nach rechts ab. • Drücken und halten Sie den roten Knopf am Griff der Brüheinheit (Abb. H) und drehen Sie den Griff im Uhrzeigersinn bis zum Anschlag (etwa um 75°). • Ziehen Sie die Brüheinheit am Griff aus dem Gerät heraus. • Belassen Sie die Brüheinheit in ihrem Zustand (bewegen oder verdrehen Sie nicht die Bestandteile der Brüheinheit). • Spülen Sie die Brüheinheit als Ganzes unter fließendem Wasser gründlich von allen Seiten ab. Achten Sie insbesondere darauf, dass die in Abb. J dargestellte Fläche frei von Kaffeeresten ist. Vorsicht! Reinigen Sie die Brüheinheit niemals im Geschirrspüler. • Lassen Sie die Brüheinheit abtropfen. • Entfernen Sie gegebenenfalls Kaffeereste von den Flächen im Inneren des Geräts, auf die die Brüheinheit eingesetzt wird. • Setzen Sie die Brüheinheit wieder in das Gerät ein und drehen Sie den Griff der Brüheinheit entgegen dem Uhrzeigersinn bis zum Anschlag, um die Brüheinheit zu verriegeln. 29 Heft_Caffeo_Bistro_EU_2.3_041114.indd 29 04.11.2014 15:55:07 • Setzen Sie die zwei Verrastungen der Abdeckung hinten in das Gerät ein und schwenken Sie die Abdeckung nach links, bis sie einrastet. • Schalten Sie den Netzschalter (Abb. B, Nr. 20) in die Position „I“. • Das Gerät befindet sich wieder im Stand-by-Modus. 11.4 Integriertes Reinigungsprogramm Das integrierte Reinigungsprogramm entfernt Rückstände und Kaffeeöl-Reste, die nicht von Hand beseitigt werden können. Es dauert insgesamt etwa 15 Minuten. . Während des gesamten Vorgangs blinkt das Symbol für Reinigen Für ein optimales Reinigungsergebnis empfehlen wir, vorher die Brüheinheit zu reinigen (siehe Seite 29). Voraussetzung: Das Gerät befindet sich im Stand-by-Modus (siehe „Ein- und Ausschalten“ auf Seite 15). Vorsicht! – Führen Sie das integrierte Reinigungsprogramm alle 2 Monate oder nach etwa 200 gebrühten Tassen durch, spätestens jedoch, wenn das Symbol im Display leuchtet. für Reinigen – Verwenden Sie ausschließlich die Reinigungstabs von Melitta® für Kaffeevollautomaten. Diese Reinigungstabs sind exakt auf die Melitta® CAFFEO® abgestimmt. Wenn Sie andere Reinigungsmittel verwenden, kann dies zu Schäden am Gerät führen. Bitte führen Sie das integrierte Reinigungsprogramm wie folgt durch: 1 Entfernen Sie – falls vorhanden – den Melitta® Claris®-Wasserfilter aus dem Wasserbehälter (siehe Seite 16). 2 Drücken Sie gleichzeitig die Bedientaste für Eintassenbezug die Ein-/Aus-Taste für etwa 3 Sekunden. und → Das Symbol für Reinigen blinkt. Das Symbol für die Tropfschale leuchtet. 3 Leeren Sie die Tropfschale und den Tresterbehälter. 4 Setzen Sie die Tropfschale ohne den Tresterbehälter wieder ein und stellen Sie den Tresterbehälter unter den Auslauf. 30 Heft_Caffeo_Bistro_EU_2.3_041114.indd 30 04.11.2014 15:55:07 DEUTSCH Phase 1 angezeigt. Während der Phase 1 wird im Display ein Bohnensymbol → Zunächst werden zwei automatische Spülgänge durchgeführt. Das Symbol für den Pulverschacht leuchtet. 5 Öffnen Sie den Deckel des Pulverschachts. → Das Symbol für den Pulverschacht 6 blinkt. Werfen Sie einen Reinigungstab ein (Abb. G) und schließen Sie den Deckel des Pulverschachts. → Das Symbol für den Wasserbehälter leuchtet. → Phase 1 ist beendet. Phase 2 Während der Phase 2 werden im Display zwei Bohnensymbole 7 angezeigt. Klappen Sie den Deckel des Wasserbehälters (Abb. A, Nr. 3) hoch und ziehen Sie den Wasserbehälter nach oben aus dem Gerät. Füllen Sie den Wasserbehälter bis zur max.-Markierung mit frischem Leitungswasser und setzen Sie ihn wieder ein. → Die Bedientaste für Dampfbezug leuchtet. → Phase 2 ist beendet. Phase 3 Während der Phase 3 werden im Display drei Bohnensymbole angezeigt. 8 Drücken Sie die Bedientaste für Dampfbezug . → Das integrierte Reinigungsprogramm startet. Dieser Vorgang dauert etwa 10 Minuten. Anschließend leuchtet die Bedientaste für Dampfbezug . 9 Leeren Sie den Tresterbehälter und stellen Sie ihn wieder unter den Auslauf. 10 Drücken Sie die Bedientaste für Dampfbezug . 31 Heft_Caffeo_Bistro_EU_2.3_041114.indd 31 04.11.2014 15:55:08 → Phase 3 ist beendet. Phase 4 Während der Phase 4 werden im Display vier Bohnensymbole angezeigt. → Das integrierte Reinigungsprogramm wird fortgesetzt. Dieser Vorgang dauert etwa 5 Minuten. Wasser fließt aus dem Auslauf sowie im Inneren des Geräts in die Tropfschale. Anschließend leuchtet das Symbol für die Tropfschale . 11 Leeren Sie die Tropfschale und den Tresterbehälter und setzen Sie sie wieder ein. → Die Ein-/Aus-Taste leuchtet nach einer kurzen Aufheizphase. Die Bedientasten und die Bohnensymbole leuchten. Das Gerät ist betriebsbereit. Hinweis Wenn während der Reinigung das Symbol für das Ventil leuchtet: – Stellen Sie ein Gefäß unter den Perfect Cappuccino und drehen Sie den Ventilschalter (Abb. A, Nr. 6) im Uhrzeigersinn, um das Ventil zu öffnen. blinkt. – Das Symbol für das Ventil – dauerhaft leuchtet, drehen Sie den Sobald das Symbol für das Ventil Ventilschalter gegen den Uhrzeigersinn, um das Ventil zu schließen. – Das integrierte Reinigungsprogramm wird fortgesetzt. 32 Heft_Caffeo_Bistro_EU_2.3_041114.indd 32 04.11.2014 15:55:08 DEUTSCH 11.5 Integriertes Entkalkungsprogramm Das integrierte Entkalkungsprogramm entfernt Kalkrückstände im Inneren des Geräts. Es dauert insgesamt etwa 15 Minuten. Während des gesamten Vorgangs . blinkt das Symbol für Entkalken Voraussetzung: Das Gerät befindet sich im Stand-by-Modus (siehe „Ein- und Ausschalten“ auf Seite 15). Vorsicht! – Führen Sie das integrierte Entkalkungsprogramm alle 3 Monate durch im Display leuchtet. oder wenn das Symbol für Entkalken – Verwenden Sie ausschließlich Melitta® ANTI CALC Espresso Machines Entkalker. Diese Entkalkungsprodukte sind exakt auf die Melitta® CAFFEO® abgestimmt. – Verwenden Sie niemals Essig oder andere Entkalkungsmittel. Bitte führen Sie das integrierte Entkalkungsprogramm wie folgt durch: 1 Entfernen Sie – falls vorhanden – vor dem Entkalken den Melitta® Claris®-Wasserfilter aus dem Wasserbehälter (siehe Seite 16). 2 Drücken Sie gleichzeitig die Bedientaste für Zweitassenbezug die Ein-/Aus-Taste für etwa 3 Sekunden. → Das Symbol für Entkalken leuchten. und und das Symbol für die Tropfschale Phase 1 Während der Phase 1 wird im Display ein Bohnensymbol angezeigt. 3 Leeren Sie die Tropfschale und den Tresterbehälter. 4 Setzen Sie die Tropfschale ohne den Tresterbehälter wieder ein und stellen Sie den Tresterbehälter unter den Perfect Cappuccino. → Das Symbol für den Wasserbehälter 5 leuchtet. Klappen Sie den Deckel des Wasserbehälters (Abb. A, Nr. 3) hoch, ziehen Sie den Wasserbehälter nach oben aus dem Gerät und leeren Sie diesen vollständig. 33 Heft_Caffeo_Bistro_EU_2.3_041114.indd 33 04.11.2014 15:55:08 6 Geben Sie das Entkalkungsmittel (z. B. Melitta® ANTI CALC Espresso Machines Flüssigentkalker) entsprechend der Hinweise auf der Verpackung in den Wasserbehälter. Warnung! Gefahr von Hautreizungen durch Entkalker Beachten Sie die Sicherheitshinweise und Mengenangaben auf der Verpackung des Entkalkers. 7 Setzen Sie den Wasserbehälter wieder ein. 8 Drücken Sie die Bedientaste für Dampfbezug . → Phase 1 ist beendet. Phase 2 Während der Phase 2 werden im Display zwei Bohnensymbole angezeigt. → Das integrierte Entkalkungsprogramm wird gestartet. Wasser fließt im Inneren des Geräts in die Tropfschale. Dieser Vorgang dauert etwa 10 Minuten. Anschließend leuchtet das Symbol für das Ventil . 9 Ziehen Sie den Quirl des Perfect Cappuccino vom Dampfrohr nach unten ab (Abb. F). 10 Drehen Sie den Perfect Cappuccino so, dass das Dampfrohr im Tresterbehälter steht. Warnung! Verbrennungsgefahr durch heißes Dampfrohr oder heißen Quirl Berühren Sie niemals während der Heißwasserausgabe das Dampfrohr oder den Quirl des Perfect Cappuccino. 11 Drehen Sie den Ventilschalter (Abb. A, Nr. 6) im Uhrzeigersinn, um das Ventil zu öffnen. → Das Symbol für das Ventil blinkt. Die Entkalkungslösung fließt aus dem Dampfrohr in das Gefäß. Dieser Vorgang dauert etwa 10 Minuten. 34 Heft_Caffeo_Bistro_EU_2.3_041114.indd 34 04.11.2014 15:55:08 DEUTSCH → Anschließend leuchten das Symbol für die Tropfschale und das Symbol für den Wasserbehälter , weil die Entkalkungslösung vollständig durchgelaufen ist. 12 Leeren Sie die Tropfschale und den Tresterbehälter. 13 Setzen Sie die Tropfschale ohne den Tresterbehälter wieder ein und stellen Sie den Tresterbehälter unter den Perfect Cappuccino. 14 Spülen Sie den Wasserbehälter gründlich aus, füllen Sie ihn bis zur max.-Markierung mit frischem Leitungswasser und setzen Sie ihn wieder ein. → Die Bedientaste für Dampfbezug leuchtet. 15 Drücken Sie die Bedientaste für Dampfbezug . → Phase 2 ist beendet. Phase 3 Während der Phase 3 werden im Display drei Bohnensymbole angezeigt. → Das Symbol für das Ventil blinkt. Wasser fließt aus dem Dampfrohr in das Gefäß. Anschließend leuchtet das Symbol für das Ventil . 16 Drehen Sie den Ventilschalter gegen den Uhrzeigersinn, um das Ventil zu schließen. → Wasser fließt im Inneren des Geräts in die Tropfschale. Anschließend leuchtet das Symbol für die Tropfschale . 17 Leeren Sie die Tropfschale und den Tresterbehälter und setzen Sie sie wieder ein. 18 Warten Sie, bis das Dampfrohr abgekühlt ist und schieben Sie den Quirl von unten wieder auf das Dampfrohr, bis er einrastet. → Die Ein-/Aus-Taste leuchtet nach einer kurzen Aufheizphase. Die Bedientasten und die Bohnensymbole leuchten. Das Gerät ist betriebsbereit. 35 Heft_Caffeo_Bistro_EU_2.3_041114.indd 35 04.11.2014 15:55:08 11.6 Wasserbehälter entkalken Sie sollten den Wasserbehälter regelmäßig entkalken, um eine einwandfreie Funktion zu gewährleisten. • Klappen Sie den Deckel des Wasserbehälters (Abb. A, Nr. 3) hoch und ziehen Sie den Wasserbehälter nach oben aus dem Gerät. • Entfernen Sie – falls vorhanden – vor dem Entkalken den Melitta® Claris®-Wasserfilter aus dem Wasserbehälter (siehe Seite 16). • Füllen Sie den Wasserbehälter mit einem handelsüblichen Entkalkungsmittel. Wir empfehlen Ihnen den flüssigen Schnellentkalker von Swirl®. Beachten Sie dabei die Anweisungen des Herstellers des Entkalkungsmittels. • Spülen Sie den Wasserbehälter anschließend gründlich mit klarem Wasser. • Setzen Sie gegebenenfalls den Melitta® Claris® -Wasserfilter wieder in den Wasserbehälter ein (siehe Seite 16). • Füllen Sie den Wasserbehälter bis zur max.-Markierung mit frischem Leitungswasser und setzen Sie ihn wieder ein. 36 Heft_Caffeo_Bistro_EU_2.3_041114.indd 36 04.11.2014 15:55:09 DEUTSCH 12 Transport und Entsorgung 12.1 Vorbereitung für den Transport, Frostschutz und Maßnahmen bei längerem Nichtgebrauch Gerät entwässern und belüften Wir empfehlen, das Gerät bei längerem Nichtgebrauch und vor einem Transport zu entwässern und zu belüften. Damit ist das Gerät auch vor Frostschäden geschützt. Voraussetzung: Das Gerät befindet sich im Stand-by-Modus (siehe „Ein- und Ausschalten“ auf Seite 15). • Stellen Sie ein Gefäß unter den Perfect Cappuccino. • Drücken Sie gleichzeitig die Bedientaste für Dampfbezug Ein-/Aus-Taste für länger als 2 Sekunden. → Die Bedientaste für Dampfbezug Wasserbehälter leuchtet. • blinkt. Das Symbol für den Klappen Sie den Deckel des Wasserbehälters (Abb. A, Nr. 3) hoch und ziehen Sie den Wasserbehälter nach oben aus dem Gerät. → Die Bedientaste für Dampfbezug • und die blinkt. Sobald das Symbol für das Ventil in der Anzeige leuchtet, drehen Sie den Ventilschalter (Abb. A, Nr. 6) im Uhrzeigersinn, um das Ventil zu öffnen. → Aus dem Perfect Cappuccino tritt Dampf aus. Das Symbol für das Ventil und die Bedientaste für Dampfbezug blinken. Sobald das Gerät entwässert und belüftet ist, leuchten die Bedientaste für Dampfbezug und das Symbol für das Ventil . • Drehen Sie den Ventilschalter gegen den Uhrzeigersinn, um das Ventil zu schließen. → Das Gerät befindet sich im Stand-by-Modus. • Setzen Sie den leeren Wasserbehälter wieder ein. 37 Heft_Caffeo_Bistro_EU_2.3_041114.indd 37 04.11.2014 15:55:09 • Schalten Sie das Gerät am Netzschalter komplett aus. • Ziehen Sie den Netzstecker. Hinweis Der Melitta® Claris®-Wasserfilter sollte nicht über einen längeren Zeitraum trocken stehen. Wir empfehlen daher, den Melitta® Claris®-Wasserfilter bei längerem Nichtgebrauch des Geräts in einem Glas Wasser im Kühlschrank aufzubewahren. Transport • Entwässern und belüften Sie das Gerät. • Leeren und reinigen Sie die Tropfschale und den Tresterbehälter. • Leeren Sie den Wasserbehälter und den Bohnenbehälter. Saugen Sie tief sitzende Bohnen ggf. mit einem Staubsauger aus. • Transportieren Sie das Gerät möglichst in der Originalverpackung inklusive Hartschaumstoff, um Transportschäden zu vermeiden. Vorsicht! Transportieren oder lagern Sie das Gerät nicht in niedrig temperierten Verkehrsmitteln oder Räumen, da das Restwasser gefrieren oder kondensieren könnte und es zu Schäden am Gerät kommen kann. Entsorgung • Entsorgen Sie das Gerät bitte umweltgerecht über geeignete Sammelsysteme. 38 Heft_Caffeo_Bistro_EU_2.3_041114.indd 38 04.11.2014 15:55:09 DEUTSCH 13 Störungen beheben Störung Ursache Kaffee läuft nur tropfenweise. Mahlgrad zu fein. Mahlgrad gröber einstellen. Brüheinheit reinigen. Evtl. entkalken. Evtl. integriertes Reinigungsprogramm durchführen. Kaffee läuft nicht. Wasserbehälter nicht gefüllt oder nicht richtig eingesetzt. Wasserbehälter füllen und auf richtigen Sitz achten. Evtl. Ventil öffnen bis Wasser aus dem Gerät läuft und Ventil wieder schließen. Brüheinheit verstopft. Brüheinheit reinigen. Mahlwerk mahlt Bohnen fallen nicht keine Kaffeebohnen. ins Mahlwerk (zu ölige Bohnen). Maßnahme Leicht an den Bohnenbehälter klopfen. Kipphebel steht senkrecht. Kipphebel nach rechts oder links stellen. Fremdkörper im Mahlwerk Hotline kontaktieren. lautes Geräusch des Fremdkörper im Mahlwerks Mahlwerk Hotline kontaktieren. Bohnensymbole blinken, obwohl Bohnenbehälter gefüllt ist. nicht ausreichend gemahlene Bohnen in der Brühkammer Bedientaste für Eintassenoder bezug Zweitassenbezug drücken. Symbol für das leuchtet Ventil außer der Reihe. Luft befindet sich in den Ventil öffnen bis Wasser aus Leitungen im Inneren des dem Gerät läuft und Ventil Geräts. wieder schließen. Evtl. Brüheinheit reinigen. 39 Heft_Caffeo_Bistro_EU_2.3_041114.indd 39 04.11.2014 15:55:09 Störung Ursache Brüheinheit lässt sich nach Entnahme nicht mehr einsetzen. Brüheinheit ist nicht korrekt verriegelt. Prüfen, ob der Griff für die Verriegelung der Brüheinheit korrekt eingerastet ist. Antrieb ist nicht in der richtigen Position. Gerät aus- und wieder einschalten und anschließend gleichzeitig die Bedientasten für Ein- und Zweitassenbezug für länger als 2 Sekunden drücken. Der Antrieb fährt in Position. Anschließend die Brüheinheit wieder einsetzen und die korrekte Verriegelung prüfen. Bedientasten Brüheinheit fehlt oder ist für Ein- und nicht richtig eingesetzt. Zweitassenbezug Brühkammer ist überfüllt. blinken abwechselnd mit der Ein-/Aus-Taste . durchlaufendes Blinken aller Bedientasten Maßnahme Systemfehler Brüheinheit richtig einsetzen. Gerät am Netzschalter ausund wieder einschalten (ggf. wiederholen), bis der Stand-byModus angezeigt wird. Gerät am Netzschalter ausund einschalten, bei Misserfolg Gerät an den Service senden. Wenden Sie sich an die Hotline*, wenn die oben genannten Maßnahmen die Störungen nicht beheben oder andere, hier nicht aufgeführte Störungen auftreten. *Deutschland: 0571 861900 Österreich: 0662 4395 11-0 Heft_Caffeo_Bistro_EU_2.3_041114.indd 40 04.11.2014 15:55:09 ENGLISH Dear Customer, Congratulations on buying your Melitta® CAFFEO®. We would like to welcome you as a coffee lover and enthusiast of Melitta® CAFFEO®. With this Melitta® CAFFEO® quality product you will experience many special coffee moments. Enjoy your favourite coffee specialities with all your senses and indulge yourself. With the Perfect Cappuccino milk frother, you can prepare fantastic milk froth for various coffee specialities, and with the twochamber bean container Bean Select, you can select from two different bean types, ensuring unique coffee enjoyment. Please read these operating instructions carefully and thoroughly and keep them in a safe place so that you and your guests can enjoy the Melitta® CAFFEO® for a long time to come. Should you require more information or if you have any questions on this product, please contact us directly or visit us on the Internet at www.melitta.de. We hope you enjoy your new fully automatic coffee maker. Your Melitta® CAFFEO® team ® Registered trademark of a company of the Melitta Group 41 Heft_Caffeo_Bistro_EU_2.3_041114.indd 41 04.11.2014 15:55:09 Table of contents 1 Information about these operating instructions .....................................44 1.1 1.2 1.3 2 3 General safety instructions ...................................................................46 Appliance description ............................................................................49 3.1 3.2 3.3 4 7 Placement ................................................................................................ 51 Connection ............................................................................................... 52 Filling the bean container ......................................................................... 52 Filling the water tank ................................................................................ 53 Switching on for the first time ................................................................... 53 Adjusting the coffee strength .................................................................... 54 Adjusting the dispensed quantity.............................................................. 54 Switching on and off..............................................................................55 5.1 5.2 6 Legend for Figure A .................................................................................. 49 Legend for Figure B.................................................................................. 49 Display...................................................................................................... 50 Starting up.............................................................................................51 4.1 4.2 4.3 4.4 4.5 4.6 4.7 5 Symbols in the text of these operating instructions .................................. 44 Intended use............................................................................................. 45 Non-intended use ..................................................................................... 45 Switching on the appliance....................................................................... 55 Switching off the appliance....................................................................... 55 Inserting the Melitta® Claris® water filter ................................................56 Preparing espresso or café crème ........................................................57 7.1 7.2 7.3 Preparing one cup of espresso or café crème ......................................... 57 Preparing two cups of espresso or café crème ........................................ 57 Preparing espresso or café crème with ground coffee ............................. 58 8 Preparing milk froth ...............................................................................59 9 Preparing hot water...............................................................................60 42 Heft_Caffeo_Bistro_EU_2.3_041114.indd 42 04.11.2014 15:55:09 10.1 10.2 10.3 10.4 10.5 10.6 Adjusting the water hardness ................................................................... 61 Setting the energy-saving mode............................................................... 62 Setting the stand-by mode ....................................................................... 63 Adjusting the brewing temperature........................................................... 64 Resetting the appliance to the default settings......................................... 65 Adjusting grinding fineness ...................................................................... 66 ENGLISH 10 Function settings ...................................................................................61 11 Care and maintenance..........................................................................67 11.1 11.2 11.3 11.4 11.5 11.6 General cleaning ...................................................................................... 67 Cleaning the Perfect Cappuccino ............................................................. 67 Cleaning the brewing unit ......................................................................... 68 Integrated cleaning programme ............................................................... 69 Integrated descaling programme.............................................................. 72 Descaling the water tank .......................................................................... 75 12 Transport and disposal .........................................................................76 12.1 Preparation for transport, protection against freezing and measures for longer periods of non-use ................................................................... 76 13 Troubleshooting ....................................................................................78 43 Heft_Caffeo_Bistro_EU_2.3_041114.indd 43 04.11.2014 15:55:09 1 Information about these operating instructions For a clearer overview, unfold the fold-out pages on the front and back of these operating instructions. 1.1 Symbols in the text of these operating instructions The symbols in these operating instructions indicate specific hazards associated with handling your Melitta® CAFFEO®, or provide useful tips. Warning! Sections with this symbol contain information for your safety and point to possible accident and injury hazards. Caution! Sections with this symbol contain information about incorrect operation that should be avoided and point to possible material damage hazards. Note Sections with this symbol contain valuable additional information for operating your Melitta® CAFFEO®. 44 Heft_Caffeo_Bistro_EU_2.3_041114.indd 44 04.11.2014 15:55:09 Intended use ENGLISH 1.2 The Melitta® CAFFEO® is exclusively designed for preparation of coffee and coffee specialities, for heating water as well as for heating milk outside of the appliance. The appliance is intended for home use only and not for commercial purposes. Proper use means: • that you carefully read, understand, and comply with the operating instructions. • that you especially comply with the safety instructions. • that you use the Melitta® CAFFEO® within the operating conditions specified in these operating instructions. 1.3 Non-intended use Non-intended use is defined as using the Melitta® CAFFEO® in a manner that differs from the use described in these operating instructions. Warning! Non-intended use can lead to injury or scalding with hot water or steam. Note The manufacturer bears no liability for damage that is attributed to non-intended use. 45 Heft_Caffeo_Bistro_EU_2.3_041114.indd 45 04.11.2014 15:55:10 2 General safety instructions The appliance conforms to the following European directives: – 2006 / 95 / EC (low voltage), – 2004 / 108 / EC (electromagnetic compatibility), – 2011 / 65 / EU (RoHS), – 2009 / 125 / EC (eco-design / ErP). The appliance has been built using the latest technology. Residual dangers nevertheless exist. You must observe the safety instructions to avoid dangers. Melitta® accepts no liability for damage caused by failure to observe the safety instructions. Please carefully read the following instructions all the way through. Failure to comply with the instructions can affect your own safety and the safety of the appliance. 46 Heft_Caffeo_Bistro_EU_2.3_041114.indd 46 04.11.2014 15:55:10 Danger due to electrical current If the appliance or the power cable is damaged, the risk of a fatal electric shock is run. Observe the following safety instructions to avoid dangers due to electrical current: – Do not use a damaged power cable. – A damaged power cable may only be replaced by the manufacturer, its customer service or a similarly qualified person. – Do not open any covers firmly screwed onto the appliance housing. – Only use the appliance when it is in a technically flawless condition. – A defective appliance may only be repaired by an authorised workshop. Do not repair the appliance yourself. – Do not undertake any changes to the appliance, its components or its accessories. – Do not immerse the appliance in water. ENGLISH Warning! Warning! Risk of burning and scalding Escaping fluids and steam may be very hot. Parts of the appliance also become very hot. Observe the following safety instructions to avoid scalds and burns: – Prevent skin from coming into contact with escaping fluids and steam. – Do not touch any nozzles on the outlet during operation. 47 Heft_Caffeo_Bistro_EU_2.3_041114.indd 47 04.11.2014 15:55:10 Warning! General safety Observe the following safety instructions to avoid personal injury and material damage: – Do not reach into the interior of the appliance during operation. – The appliance and its power cable must be kept out of the reach of children under 8 years of age. – This appliance may be used by children over 8 years of age and by persons with reduced physical, sensory or mental capabilities or a lack of experience and knowledge if they are supervised or have been instructed in using the appliance safely and understand the resulting risks. – Children must not play with the appliance. Cleaning and maintenance must not be undertaken by children younger than 8 years of age. Children over 8 years of age must be supervised during cleaning and maintenance. – Disconnect the appliance from the power supply when it is left unsupervised for a long time. 48 Heft_Caffeo_Bistro_EU_2.3_041114.indd 48 04.11.2014 15:55:10 Appliance description 3.1 Legend for Figure A Fig. number Explanation 1 Drip tray with cup plate and coffee grounds container (internal) 2 "Perfect Cappuccino" milk frother 3 Water tank 4 Button for coffee strength 5 Button for steam dispensing 6 Valve switch for steam and hot water dispensing 7 Display 8 Two-chamber bean container „Bean Select“ 9 Tilt lever for "Bean Select" bean container 10 Ground coffee chute with lid 11 ON /OFF button 12 Coffee quantity regulator 13 Button for one-cup dispensing 14 Button for two-cup dispensing 15 Height-adjustable outlet 16 Water level indicator float for the drip tray 3.2 Legend for Figure B Fig. number 17 ENGLISH 3 Explanation Power cable 18 Brewing unit and identification label (behind the cover) 19 Grinding fineness adjustment 20 Power switch 49 Heft_Caffeo_Bistro_EU_2.3_041114.indd 49 04.11.2014 15:55:10 3.3 Symbol Display Meaning Steam valve Water tank Ground coffee chute Display Explanation/prompt Illuminated Temperature for steam dispensing is reached Open valve Flashing Valve open Illuminated Fill the water tank Flashing Lid of the ground coffee chute is open Illuminated Ground coffee dispenses upon pressing the single-cup dispensing button Illuminated 1 Bean: mild 2 Beans: normal 3 Beans: strong 4 Beans: very strong Flashing Fill bean container; flashing stops after dispensing the next coffee. Illuminated Clean appliance Flashing Integrated cleaning programme is running Illuminated Empty drip tray and coffee grounds container Flashing Insert drip tray and coffee grounds container Illuminated Descaling appliance Flashing Integrated descaling programme is running Coffee strength Cleaning Drip tray and coffee grounds container Descaling 50 Heft_Caffeo_Bistro_EU_2.3_041114.indd 50 04.11.2014 15:55:10 Starting up ENGLISH 4 When starting the appliance for the first time, please carry out the following steps. When you have completed these steps, the appliance is ready for operation. You can now prepare coffee. We recommend pouring away the first two cups of coffee after the first start up. 4.1 • Placement Place the appliance on a stable, level, and dry surface. Make sure that there is a distance of about 10 cm to the wall and other surrounding objects. Caution! – Never place the appliance on hot surfaces or in damp areas. – Do not transport or store the appliance in vehicles or rooms at low temperatures, as the remaining water could freeze or condense and thereby damage the appliance. Follow the instructions on page 76. • The coffee grounds container is located in the drip tray. Please make sure that the drip tray is pushed into the appliance all the way to the stop. Notes – Keep the packaging material, including hard foam elements, in order to avoid damage during transport or in case of return shipments. – It is normal to find traces of coffee and water in the machine before it is started up for the first time. This is because the appliance has already been tested for faultless function at the factory. 51 Heft_Caffeo_Bistro_EU_2.3_041114.indd 51 04.11.2014 15:55:11 4.2 • Connection Plug the power cable into an appropriate power socket. Warning! Danger of fire and electric shock due to incorrect supply voltage, incorrect or damaged connections and power cable. – Ensure that the supply voltage corresponds to the supply voltage specified on the identification label of the appliance. The identification label is on the right side of the appliance behind the cover (Fig. B, no. 18). – Make sure that the power socket meets the applicable standards for electrical safety. If in doubt, contact a qualified electrician. – Never use damaged power cables (damaged insulation, bare wires). – During the guarantee period, have the damaged power cable replaced only by the manufacturer; only after the guarantee period have it replaced by qualified specialists. 4.3 Filling the bean container Thanks to the two-chamber bean container „Bean Select“, you can have the choice between two different types of coffee. For example, you can fill one chamber with espresso beans and the other with café crème beans. Then you can conveniently switch between the two types using the tilt lever. • Fill the bean container (Fig. A, no. 8) with fresh coffee beans. Each of the two chambers can be filled with a maximum of 135 g of coffee beans. Caution! • – Fill the bean container with coffee beans only. – Never fill the bean container with ground, freeze-dried, or caramelised coffee beans. Select the desired bean type by setting the tilt lever to the appropriate chamber. 52 Heft_Caffeo_Bistro_EU_2.3_041114.indd 52 04.11.2014 15:55:11 ENGLISH Warning! Hazard for persons allergic to caffeine. Since a residual quantity of the previously used beans remains above the grinder, the two types of beans mix when changing to a different bean type. Consequently, when switching over to decaffeinated beans the first two cups may still contain coffee that is not decaffeinated. This means that only the third cup of coffee prepared after the switchover is free of caffeine. Note When the tilt lever is vertical during the brewing process, no beans fall into the grinder. 4.4 Filling the water tank • Lift the lid of the water tank (Fig. A, no. 3) and pull the water tank up and out of the appliance. • Fill the water tank to the max. mark with fresh tap water and reinsert it. 4.5 Switching on for the first time All of the tubes have been drained and aired out at the factory. For this reason, illuminates after the heat-up phase when starting up the symbol for the valve for the first time and the appliance must be vented using the valve. Venting is only necessary when starting up for the first time as well as after draining and airing out. You can find more information on page 76. • Switch the power switch (Fig. B, No. 20) to position „I“. • Press the ON/OFF button to switch the appliance on. → The ON /OFF button flashes. The appliance heats up. After the heat-up phase, the valve symbol illuminates. • Place a vessel under the Perfect Cappuccino and push the steam pipe downwards until it is positioned below the brim of the vessel. • Place a vessel below the outlet. • Turn the valve switch (Fig. A, no. 6) clockwise to open the valve. → The valve symbol Cappuccino. flashes. Water runs into the vessel below the Perfect 53 Heft_Caffeo_Bistro_EU_2.3_041114.indd 53 04.11.2014 15:55:11 • When water is no longer dispensed and the valve symbol is illuminated, turn the valve switch anti-clockwise to close the valve. → The appliance performs an automatic rinse and hot water flows out of the outlet. The ON/OFF button is then illuminated. The appliance is ready for operation. 4.6 • Adjusting the coffee strength Press the button for coffee strength four possible coffee strengths. several times to select among → Your selection will then be shown with the bean symbols Display on the display. Coffee strength mild normal (factory setting) strong very strong • You can also adjust the coffee flavour by changing the grinding fineness setting. You can find more information on page 66. 4.7 • Adjusting the dispensed quantity Turn the coffee quantity regulator (Fig. A, No. 12) to adjust the dispensed quantity variably from 30 ml to 220 ml (regulator to the left: 30 ml, regulator in the middle: 125 ml, regulator to the right: 220 ml). 54 Heft_Caffeo_Bistro_EU_2.3_041114.indd 54 04.11.2014 15:55:11 • Switching on and off 5.1 Switching on the appliance ENGLISH 5 Switch the power switch (Fig. B, No. 20) to position „I“. → The appliance is in stand-by mode. The ON/OFF button • Place a suitable vessel under the outlet. • Press the ON/OFF button lights up red. to switch the appliance on. → The ON /OFF button flashes. The appliance heats up. The appliance performs an automatic rinse and hot water flows out of the outlet. Then the ON/OFF button and the bean symbols illuminate. The appliance is ready for operation. 5.2 Switching off the appliance • If possible, place a vessel under the outlet. • Press the ON/OFF button mode. to switch the appliance to stand-by → The appliance performs an automatic rinse of the coffee lines. The brewing chamber goes into resting position. The ON/OFF button lights up red. • Switch the power switch (Fig. B, No. 20) to position „0“ to turn off the appliance completely. Notes – The appliance performs an automatic rinse every time it is switched on. – When the appliance is in stand-by mode, only switch it off using the power switch, otherwise there is a danger that the brewing unit will not be in the correct position. 55 Heft_Caffeo_Bistro_EU_2.3_041114.indd 55 04.11.2014 15:55:11 6 Inserting the Melitta® Claris® water filter The Melitta® Claris® water filter removes lime and other harmful substances from the water. Please only insert it after starting up the appliance for the first time. When using the filter, the appliance does not require descaling as often, and the water hardness can be set to 1 (you can find more information on page 61). The service life of your appliance will be extended thanks to the reliable protection from lime scale. The water filter should be changed regularly; however, after two months at the latest. The water filter is available in specialised shops. • Set the current month on the blue ring on top of the Melitta® Claris® water filter. This way, you can easily see when it is time to change the Melitta® Claris® water filter. • Put the water filter in a glass with fresh tap water for several minutes before you insert it. • Lift the lid of the water tank (Fig. A, no. 3) and pull the water tank up and out of the appliance. • Empty the water tank. • Carefully screw the Melitta® Claris® water filter into the thread on the base of the water tank using the screw-in aid at the bottom end of the coffee scoop provided. • Fill the water tank to the max. mark with fresh tap water and reinsert it. • Place a vessel under the Perfect Cappuccino and push the steam pipe downwards until it is positioned below the brim of the vessel. • Turn the valve switch (Fig. A, no. 6) clockwise to open the valve. → Water now runs into the vessel beneath the Perfect Cappuccino. Due to the automatic stop function, you must open and close the valve switch several times. • As soon as the water tank symbol anti-clockwise to close the valve. illuminates, turn the valve switch → The appliance is ready for operation. 56 Heft_Caffeo_Bistro_EU_2.3_041114.indd 56 04.11.2014 15:55:11 ENGLISH Note The Melitta® Claris® water filter should not remain dry over an extended period of time. We therefore recommend storing the Melitta® Claris® water filter in the refrigerator in a glass of water when the appliance will not be in use for extended periods. 7 Preparing espresso or café crème 7.1 Preparing one cup of espresso or café crème Prerequisite: The appliance is ready for operation (see „Switching on and off“ on page 55). The desired coffee strength and dispensed quantity are set (see page 54). The desired coffee type in the bean container is selected. • Place a suitable vessel under the outlet. • Press the button for one-cup dispensing . → The grinding process and coffee dispensing start now. Dispensing ends automatically when the set dispensed quantity is reached. • To stop dispensing coffee prematurely, press the button for one-cup dispensing . 7.2 Preparing two cups of espresso or café crème Prerequisite: The appliance is ready for operation (see „Switching on and off“ on page 55). The desired coffee strength and dispensed quantity are set. The desired coffee type in the bean container is selected. • Place two suitable vessels beside each other under the outlet. • Press the button for two-cup dispensing . → The double grinding process and dispensing of coffee start now. Dispensing ends automatically when the set dispensed quantity is reached. • To stop dispensing coffee prematurely, press the button for two-cup dispensing . 57 Heft_Caffeo_Bistro_EU_2.3_041114.indd 57 04.11.2014 15:55:12 7.3 Preparing espresso or café crème with ground coffee Prerequisite: The appliance is ready for operation (see „Switching on and off“ on page 55). The desired dispensed quantity is set. • Open the lid of the ground coffee chute (Fig. A, no. 10). → The ground coffee chute symbol • flashes. Fill a max. of one coffee scoop of fresh ground coffee into the ground coffee chute. Caution! • – Fill the ground coffee chute with ground coffee only. Instant products can clog up the brewing unit. – Never pour in more than one coffee scoop (supplied with the appliance) of ground coffee, otherwise the brewing unit will be overfilled. Close the lid of the ground coffee chute. → The ground coffee chute symbol illuminate. and the button for one-cup dispensing • Place a suitable vessel under the outlet. • Press the button for one-cup dispensing . → Coffee dispensing now starts. It ends automatically when the set dispensed quantity is reached. • To stop dispensing coffee prematurely, press the button for one-cup dispensing . Note If you do not dispense coffee from the appliance within 90 seconds after opening the ground coffee chute, the appliance will automatically switch back to coffee bean operation and will discard the ground coffee into the coffee grounds container to prevent later risk of overfilling the brewing chamber. 58 Heft_Caffeo_Bistro_EU_2.3_041114.indd 58 04.11.2014 15:55:12 Preparing milk froth ENGLISH 8 Prerequisite: The appliance must be ready for operation (see „Switching on and off“ on page 55). • Place a vessel with milk under the Perfect Cappuccino. Make sure that the whisk of the Perfect Cappuccino is immersed in the milk. • Fill the appliance to one third maximum, as the volume of milk increases significantly when frothed. • Press the button for steam dispensing . → The button for steam dispensing flashes. The appliance heats up. When the steam temperature has been reached, the button for steam dispensing and the valve symbol illuminate. Warning! There is danger of burn injuries and scalding due to the hot steam pipe, steam hose and hot whisk. Never touch the steam pipe, the steam hose, or the whisk of the Perfect Cappuccino when in use. • Turn the valve switch (Fig. A, no. 6) clockwise to open the valve. → The valve symbol and the button for steam dispensing flash. The whisk froths the milk and heats it at the same time. You will achieve better frothing results if you move the whisk up and down while frothing. • Turn the valve switch anti-clockwise to close the valve and end the frothing process. The volume of milk should have about doubled and the vessel should be warm to the touch. • Press the button for steam dispensing to the normal operating mode. • Wait until the steam pipe has cooled down and then twist off anticlockwise the steam pipe with whisk from the Perfect Cappuccino (Fig. E). • Pull the whisk of the Perfect Cappuccino downward to remove it from the steam pipe (Fig. F). to switch from steam mode 59 Heft_Caffeo_Bistro_EU_2.3_041114.indd 59 04.11.2014 15:55:12 • Rinse off the steam pipe and the whisk under running water or wash them in the dishwasher. • Turn the cleaned steam pipe with whisk clockwise onto the Perfect Cappuccino until it locks into place. Note We recommend using cold milk with a high protein content. It is not the fat content, but rather the protein content that is the determining factor for good milk froth. 9 Preparing hot water Prerequisite: The appliance must be ready for operation (see „Switching on and off“ on page 55). • Place a cloth under the Perfect Cappuccino to catch any residual water that may escape. • Pull the whisk of the Perfect Cappuccino downward to remove it from the steam pipe (Fig. F). • Place a vessel under the steam pipe and slide the steam pipe downward until it is below the brim of the vessel. • Turn the valve switch (Fig. A, no. 6) clockwise to open the valve. → The valve symbol and into the vessel. now flashes. Hot water flows out of the steam pipe • When the desired water quantity is reached, turn the valve switch anticlockwise to close the valve. • Wait until the steam pipe cools down and slide the whisk from below onto the steam pipe until it locks into place. 60 Heft_Caffeo_Bistro_EU_2.3_041114.indd 60 04.11.2014 15:55:12 Function settings ENGLISH 10 10.1 Adjusting the water hardness Use the test strip provided to determine the water hardness in your area. Comply with the instructions on the test strip package. The appliance is factory-adjusted to water hardness 4. Prerequisite: The appliance is in stand-by mode (see „Switching on and off“ on page 55). To maintain appliance quality, please adjust the water hardness as follows: • Press the buttons for one-cup dispensing and for steam dispensing simultaneously until the four buttons are weakly illuminated. • several times to select Press the button for steam dispensing among the four possible degrees of water hardness. → The button for steam dispensing is brightly illuminated. Your water hardness selection according to the table is shown with the bean symbols on the display. Water hardness range • Properties °d °e °f soft 0 - 10 0 - 13 0 - 18 medium 10 - 15 13 - 19 18-27 hard 15 - 20 19 - 25 27-36 very hard (factory setting) > 20 > 25 > 36 Press the ON/OFF button to confirm the selected water hardness. → Depending on the selection, 1 to 4 bean symbols The appliance goes back to stand-by mode. flash on the display. 61 Heft_Caffeo_Bistro_EU_2.3_041114.indd 61 04.11.2014 15:55:12 10.2 Setting the energy-saving mode After the last action, the appliance automatically (depending on the settings) switches to energy-saving mode (the appliance thus consumes much less energy than in stand-by mode). You can set different times for the energy-saving mode. The appliance is factory-set at 15 minutes . Prerequisite: The appliance is in stand-by mode (see „Switching on and off“ on page 55). Please set the energy-saving mode as follows: • Press the buttons for one-cup dispensing and for steam dispensing simultaneously until the four buttons are weakly illuminated. • Press the button for coffee strength the four possible timer settings. several times to select among → The button for coffee strength is brightly illuminated. Your selection is shown with the bean symbols on the display. Display Time 5 minutes 15 minutes (factory setting) 30 minutes OFF • Press the ON/OFF button to confirm the selected time. → Depending on the selection, 1 to 4 bean symbols flash on the display as confirmation. The appliance goes back to stand-by mode. Note You can wake up the appliance from the energy-saving mode by pressing any of the buttons. The function of the pressed button (e.g. prepare coffee) will be performed directly, only the heat-up phase takes a little longer. 62 Heft_Caffeo_Bistro_EU_2.3_041114.indd 62 04.11.2014 15:55:13 ENGLISH 10.3 Setting the stand-by mode 30 minutes after the last action (depending on the settings), the appliance automatically switches to stand-by mode. You can set different times for the standby mode. The appliance is factory-set at 30 minutes . Prerequisite: The appliance is in stand-by mode (see „Switching on and off“ on page 55). Please set the stand-by mode as follows: • Press the buttons for one-cup dispensing and for steam dispensing simultaneously until the four buttons are weakly illuminated. • Press the button for two-cup dispensing among the four possible timer settings. several times to select → The button for two-cup dispensing is brightly illuminated. Your selection is shown with the bean symbols on the display. Display Time 30 minutes (factory setting) 2 hours 4 hours 8 hours • Press the ON/OFF button to confirm the selected time. → Depending on the selection, 1 to 4 bean symbols flash on the display as confirmation. The appliance goes back to stand-by mode. Note In standby mode, the appliance consumes much less energy. However, we recommend switching the appliance off via the power switch if it will not be used for an extended period (e.g. also overnight). 63 Heft_Caffeo_Bistro_EU_2.3_041114.indd 63 04.11.2014 15:55:13 10.4 Adjusting the brewing temperature The brewing temperature is factory-set at level 2 (medium ). Prerequisite: The appliance is in stand-by mode (see „Switching on and off“ on page 55). Please set the brewing temperature as follows: • Press the buttons for one-cup dispensing and for steam dispensing simultaneously until the four buttons are weakly illuminated. • Press the button for one-cup dispensing possible brewing temperatures. → The button for one-cup dispensing to select among the three is brightly illuminated. → Your selection will then be shown with the bean symbols Display on the display. Brewing temperature low medium (factory setting) high • Press the ON/OFF button temperature. to confirm the selected brewing → Depending on the selection, 1 to 3 bean symbols The appliance goes back to stand-by mode. flash on the display. 64 Heft_Caffeo_Bistro_EU_2.3_041114.indd 64 04.11.2014 15:55:13 ENGLISH 10.5 Resetting the appliance to the default settings Prerequisite: The appliance is in stand-by mode (see „Switching on and off“ on page 55). • Switch the appliance off via the power switch. • Wait until the red light in the ON/OFF button • Press the buttons for coffee strength simultaneously. • At the same time, switch the appliance on via the power switch. extinguishes. and for two-cup dispensing → All settings are now reset to the factory settings. Overview of factory settings: Function settings Factory settings Coffee strength normal Water hardness Water hardness 4 Energy-saving mode Standby mode Brewing temperature 15 minutes 30 minutes medium 65 Heft_Caffeo_Bistro_EU_2.3_041114.indd 65 04.11.2014 15:55:13 10.6 Adjusting grinding fineness The grinding fineness level was optimally adjusted prior to delivery. Consequently, we recommend that you only readjust grinding fineness after dispensing approximately 1,000 coffees (about 1 year). You can only set the grinding fineness while the mill is running. Thus, adjust grinding fineness directly after coffee dispensing starts. If the coffee flavour is not sufficiently intense, then we recommend that you set a finer grinding level. • Place the lever (Fig. B, no. 19) in one of the three positions (as viewed from the rear of the appliance). Lever position Grinding fineness Left Fine Centre Medium Right Coarse (factory setting) 66 Heft_Caffeo_Bistro_EU_2.3_041114.indd 66 04.11.2014 15:55:13 Care and maintenance ENGLISH 11 11.1 General cleaning • Clean the outside of the appliance with a soft, damp cloth and ordinary dishwashing liquid. • Empty and clean the drip tray regularly, at the latest when the float (Fig. A, no. 16) projects out of the cup plate. • Clean the coffee grounds container regularly, e.g. in the dishwasher. Caution! – To avoid damage to the appliance surface, do not use scouring cloths, sponges or cleaning products. – Do not clean the drip tray in the dishwasher; this could cause deformation. 11.2 Cleaning the Perfect Cappuccino • Place a cloth under the Perfect Cappuccino to catch any residual water that may escape. • Turn the steam pipe with whisk anti-clockwise, away from the Perfect Cappuccino (Fig. E). • Pull the whisk of the Perfect Cappuccino downward to remove it from the steam pipe (Fig. F). • Rinse off the steam pipe and the whisk under running water or wash them in the dishwasher. • Slide the whisk onto the steam pipe from below until it locks into place. • Turn the cleaned steam pipe with whisk clockwise onto the Perfect Cappuccino until it locks into place. Note Frequent washing in the dishwasher can cause slight discolourations on the coffee grounds container and on the Perfect Cappuccino. 67 Heft_Caffeo_Bistro_EU_2.3_041114.indd 67 04.11.2014 15:55:14 11.3 Cleaning the brewing unit Prerequisite: The appliance is in stand-by mode (see „Switching on and off“ on page 55). Note For optimal protection of your appliance, we recommend that you clean the brewing unit under running tap water once a week. • Switch the power switch (Fig. B, No. 20) to position „0“ to turn off the appliance completely. • Reach into the recess on the right side of the appliance (Fig. B, no. 18) and pull off the cover to the right. • Press and hold the red button on the handle of the brewing unit (Fig. H) and turn the handle clockwise to the stop (by about 75°). • Use the handle to pull the brewing unit out of the appliance. • Leave the brewing unit as it is (do not move or twist the components of the brewing unit). • Thoroughly rinse off the entire brewing unit from all sides under running water. Particularly ensure that the surface shown in Fig. J is free of coffee residues. Caution! Never clean the brewing unit in the dishwasher. • Let the brewing unit drip dry. • If necessary, remove coffee residues from the surfaces in the interior of the appliance where the brewing unit is inserted. • Reinsert the brewing unit into the appliance and turn the handle of the brewing unit anti-clockwise to the stop to lock. • Insert the two catches of the cover into the back of the appliance and swing the cover to the left until it locks into place. • Switch the power switch (Fig. B, No. 20) to position „I“. • The appliance goes back to stand-by mode. 68 Heft_Caffeo_Bistro_EU_2.3_041114.indd 68 04.11.2014 15:55:14 The integrated cleaning programme removes residues, including coffee oil residues, that cannot be eliminated by hand. It takes a total of approximately 15 minutes. The flashes during the entire process. cleaning button ENGLISH 11.4 Integrated cleaning programme For optimal cleaning results, we recommend that you clean the brewing unit beforehand (see page 68). Prerequisite: The appliance is in stand-by mode (see „Switching on and off“ on page 55). Caution! – Run the integrated cleaning programme every 2 months or after approximately 200 brewed cups of coffee; at the latest, however, run the lights up on the display. programme when the symbol for cleaning – Only use Melitta® cleaning tabs for fully automatic coffee makers. These cleaning tabs are designed specifically for Melitta® CAFFEO®. The use of other cleaning agents can damage the appliance. Run the integrated cleaning programme as follows: 1 Remove the Melitta® Claris® water filter – if used – from the water tank (see page 56). 2 Press the button for one-cup dispensing simultaneously for about 3 seconds. and the ON/OFF button → The symbol for cleaning flashes. The drip tray symbol illuminates. 3 Empty the drip tray and coffee grounds container. 4 Reinsert the drip tray without the coffee grounds container and place the coffee grounds container under the outlet. Phase 1 During Phase 1, one bean symbol is shown on the display. → First, two automatic rinsing processes are carried out. The ground coffee chute symbol illuminates. 69 Heft_Caffeo_Bistro_EU_2.3_041114.indd 69 04.11.2014 15:55:14 5 Open the lid of the ground coffee chute. → The ground coffee chute symbol 6 flashes. Throw in a cleaning tab (Fig. G) and close the lid of the ground coffee chute. → The symbol for the water tank illuminates. → Phase 1 is completed. Phase 2 During Phase 2, two bean symbols 7 are shown on the display. Flip up the lid of the water reservoir (Fig. A, no. 3) and pull the water tank up and out of the appliance. Fill the water reservoir to the max. mark with fresh tap water and re-insert it. → The button for steam dispensing illuminates. → Phase 2 is completed. Phase 3 During Phase 3, three bean symbols 8 Press the button for steam dispensing are shown on the display. . → The integrated cleaning programme starts. This stage lasts approximately 10 minutes. The button for steam dispensing is then illuminated. 9 Empty the coffee grounds container and put it back under the outlet. 10 Press the button for steam dispensing . → Phase 3 is completed. 70 Heft_Caffeo_Bistro_EU_2.3_041114.indd 70 04.11.2014 15:55:14 During Phase 4, four bean symbols ENGLISH Phase 4 are shown on the display. → The integrated cleaning programme continues. This stage takes approximately 5 minutes. Water flows out of the outlet as well as in the interior of the appliance into the drip tray. Subsequently, the symbol for the drip tray illuminates. 11 Empty the drip tray and the coffee grounds container and then reinsert them. → The ON/OFF button illuminates after a short heat-up phase. The buttons and the bean symbols illuminate. The appliance is ready for operation. Note If the valve symbol lights up during the cleaning process: – Place a vessel under the Perfect Cappuccino and turn the valve switch (Fig. A, no. 6) clockwise to open the valve. flashes. – The valve symbol – stays illuminated, turn the valve switch As soon as the valve symbol anti-clockwise to close the valve. – The integrated cleaning programme continues. 71 Heft_Caffeo_Bistro_EU_2.3_041114.indd 71 04.11.2014 15:55:14 11.5 Integrated descaling programme The integrated descaling program removes lime scale in the interior of the appliance. It takes a total of approximately 15 minutes. The symbol for descaling flashes during the entire process. Prerequisite: The appliance is in stand-by mode (see „Switching on and off“ on page 55). Caution! – Carry out the integrated descaling programme every 3 months or when the illuminates on the display. descaling symbol – Only use Melitta® ANTI CALC Espresso Machines descaling agent. These cleaning tabs are specifically designed for the Melitta® CAFFEO®. – Never use vinegar or other descaling agents. Run the integrated descaling programme as follows: 1 Before descaling, remove – if necessary – the Melitta® Claris® water filter from the water tank (see page 56). 2 Press the button for two-cup dispensing simultaneously for about 3 seconds. → The descaling symbol and the ON/OFF button and the drip tray symbol illuminate. Phase 1 During Phase 1, one bean symbol is shown on the display. 3 Empty the drip tray and coffee grounds container. 4 Reinsert the drip tray without the coffee grounds container, and place the coffee grounds container under the Perfect Cappuccino. → The symbol for the water reservoir illuminates. 5 Lift the lid of the water tank (Fig. A, no. 3) and pull the water tank up and out of the appliance and then empty it completely. 6 Add the descaling agent (e.g. Melitta® ANTI CALC Espresso Machines liquid descaling agent) to the water tank according to the instructions on the packaging. 72 Heft_Caffeo_Bistro_EU_2.3_041114.indd 72 04.11.2014 15:55:14 ENGLISH Warning! The descaling agent can cause skin irritations Comply with the safety instructions and the dosing information specified on the descaling agent packaging. 7 Reinsert the water tank. 8 Press the button for steam dispensing . → Phase 1 is completed. Phase 2 During Phase 2, two bean symbols are shown on the display. → The integrated descaling programme is started. Water flows inside the appliance into the drip tray. This stage lasts approximately 10 minutes. Then the valve symbol illuminates. 9 Pull the whisk of the Perfect Cappuccino downward and off of the steam pipe (Fig. F). 10 Turn the Perfect Cappuccino so that the steam pipe is inside the coffee grounds container. Warning! Risk of burns through hot steam pipe or hot whisk Never touch the steam pipe or the whisk of the Perfect Cappuccino during hot water dispensing. 11 Turn the valve switch (Fig. A, no. 6) clockwise to open the valve. → The valve symbol flashes. The descaling solution flows out of the steam pipe into the vessel. This stage lasts approximately 10 minutes. → The drip tray symbol and the water tank symbol will be illuminated when the descaling solution has flowed through the entire appliance. 12 Empty the drip tray and coffee grounds container. 13 Reinsert the drip tray without the coffee grounds container, and place the coffee grounds container under the Perfect Cappuccino. 73 Heft_Caffeo_Bistro_EU_2.3_041114.indd 73 04.11.2014 15:55:15 14 Thoroughly rinse the water tank, fill it to the max. mark with fresh tap water and reinsert it. → The button for steam dispensing illuminates. 15 Press the button for steam dispensing . → Phase 2 is completed. Phase 3 During Phase 3, three bean symbols are shown on the display. → The valve symbol flashes. Water flows out of the steam pipe into the vessel. Then the valve symbol illuminates. 16 Turn the valve switch anti-clockwise to close the valve. → Water flows inside the appliance into the drip tray. Subsequently, the symbol for the drip tray illuminates. 17 Empty the drip tray and the coffee grounds container and then reinsert them. 18 Wait until the steam pipe cools down and slide the whisk onto the steam pipe, from below, until it locks into place. → The ON/OFF button illuminates after a short heat-up phase. The buttons and the bean symbols illuminate. The appliance is ready for operation. 74 Heft_Caffeo_Bistro_EU_2.3_041114.indd 74 04.11.2014 15:55:15 ENGLISH 11.6 Descaling the water tank You should descale the water tank regularly to ensure faultless function. • Lift the lid of the water tank (Fig. A, no. 3) and pull the water tank up and out of the appliance. • Before descaling, remove – if necessary – the Melitta® Claris® water filter from the water tank (see page 56). • Fill the water tank with a commercial descaling agent. We recommend the rapid descaling agent in liquid form from Swirl®. While performing the descaling, closely observe the instructions of the product manufacturer. • Then rinse the water tank thoroughly with clear water. • When using the Melitta® Claris® water filter, reinsert it into the water tank (see page 56). • Fill the water tank to the max. mark with fresh tap water and reinsert it. 75 Heft_Caffeo_Bistro_EU_2.3_041114.indd 75 04.11.2014 15:55:15 12 Transport and disposal 12.1 Preparation for transport, protection against freezing and measures for longer periods of non-use Draining and airing out the appliance We recommend draining and airing out the appliance if it is not going to be used for extended periods of time or prior to transport. This also protects the appliance against frost damage. Prerequisite: The appliance is in stand-by mode (see „Switching on and off“ on page 55). • Place a vessel under the Perfect Cappuccino. • and the ON/OFF button Press the button for steam dispensing simultaneously for longer than 2 seconds. → The button for steam dispensing illuminates. • Lift the lid of the water tank (Fig. A, no. 3) and pull the water tank up and out of the appliance. → The button for steam dispensing • flashes. The symbol for the water tank flashes. As soon as the valve symbol illuminates on the display, turn the valve switch (Fig. A, no. 6) clockwise to open the valve. → Steam emerges from the Perfect Cappuccino. The valve symbol and the button for steam dispensing flash. As soon as the appliance is drained and aired out, the button for steam dispensing and the valve symbol illuminate. • Turn the valve switch anti-clockwise to close the valve. → The appliance is in stand-by mode. • Reinsert the empty water tank. • Switch the appliance off completely via the power switch. 76 Heft_Caffeo_Bistro_EU_2.3_041114.indd 76 04.11.2014 15:55:15 Pull out the power plug. ENGLISH • Note The Melitta® Claris® water filter should not remain dry over an extended period of time. We therefore recommend storing the Melitta® Claris® water filter in the refrigerator in a glass of water when the appliance will not be in use for extended periods. Transport • Drain and air out the appliance. • Empty and clean the drip tray and coffee grounds container. • Empty the water tank and the bean container. If necessary, remove beans from the bottom with a vacuum cleaner. • Transport the appliance in the original packaging if possible, including the hard foam elements, to prevent transport damage. Caution! Do not transport or store the appliance in vehicles or rooms at low temperatures, as the remaining water could freeze or condense and thereby damage the appliance. Disposal • Please dispose of the appliance in an environmentally responsible manner by means of suitable collection systems. 77 Heft_Caffeo_Bistro_EU_2.3_041114.indd 77 04.11.2014 15:55:15 13 Troubleshooting Problem Cause Solution Coffee only drips through. Grinding fineness is too fine. Set the grinding fineness coarser. Clean the brewing unit. Descale, if necessary. Run the integrated cleaning programme, if necessary. Coffee does not flow. Water tank not filled or incorrectly inserted. Fill the water tank and make sure it is inserted correctly. Open the valve until water flows out of the appliance and then close it again. Brewing unit obstructed. Clean the brewing unit. Beans do not drop into the grinder (beans are too oily). Tap lightly on the bean container. The tilt lever is vertical. Move the tilt lever to the right or left. Foreign objects in the grinder Call the hotline. Loud grinder noise. Foreign objects in the grinder Call the hotline. The bean symbols flash even though the bean container is full. Insufficient quantity of ground beans in the brewing chamber Press the button for one-cup or two-cup dispensing . dispensing The valve symbol illuminates out of turn. There is air in the lines inside the appliance. Open the valve until water flows out of the appliance and then close it again. If necessary, clean the brewing unit. Grinder does not grind coffee beans. 78 Heft_Caffeo_Bistro_EU_2.3_041114.indd 78 04.11.2014 15:55:15 Cause Solution The brewing unit can no longer be reinserted after removal. The brewing unit is not properly locked. Check whether the handle for locking the brewing unit is correctly engaged. The actuator is not in the proper position. Switch the appliance off and on again, an then press the buttons for one- and twocup dispensing simultaneously for longer than 2 seconds. The actuator moves into position. Then reinsert the brewing unit and make sure it is correctly locked into place. The buttons for one- and two-cup dispensing flash alternately with the ON/OFF button The brewing unit is missing or is not properly inserted. Insert the brewing unit properly. The brewing chamber is overfilled. Switch the appliance off and on again via the power switch (repeat if necessary), until standby mode is displayed. System error Switch the appliance off and on again via the power switch, if this does not work, send the appliance to Customer Service. . Continuous flashing of all buttons ENGLISH Problem Please contact the Melitta® hotline, if the above mentioned solutions do not help to solve the problem: +49 571/ 86 1900. 79 Heft_Caffeo_Bistro_EU_2.3_041114.indd 79 04.11.2014 15:55:16 Chère cliente, cher client! Nous vous félicitons pour l’achat de votre machine entièrement automatique CAFFEO® de Melitta®. Nous nous réjouissons de vous compter parmi les gourmets et amateurs de Melitta® CAFFEO®. Grâce à votre nouvelle machine de qualité CAFFEO® de Melitta®, vous allez partager des moments exceptionnels de plaisir café. Savourez vos spécialités à base de café préférées en ouvrant tous vos sens et laissez vous emporter. Le réservoir de café en grains « Bean select » à 2 compartiments vous permet de choisir entre deux sortes de café en grains. Avec le mousseur à lait « Perfect Cappuccino », vous pouvez préparer une mousse de lait de rêve pour diverses spécialités à base de café Afin que vous et vos invités puissiez profiter longtemps de votre machine CAFFEO® de Melitta®, veuillez lire attentivement ce mode d‘emploi et conservez-le soigneusement. En cas de demande d‘informations supplémentaires ou d‘autres questions relatives au produit, vous pouvez vous adresser directement à nous ou vous rendre sur notre site www.melitta.fr ou www.melitta.be. Nous vous souhaitons de délicieux moments de plaisir avec votre nouvelle machine à café automatique. Votre équipe CAFFEO® Melitta® ® Registered trademark of a company of the Melitta Group 80 Heft_Caffeo_Bistro_EU_2.3_041114.indd 80 04.11.2014 15:55:16 Sommaire Consignes relatives au mode d‘emploi .................................................83 1.1 1.2 1.3 2 3 Consignes générales de sécurité..........................................................85 Description de l‘appareil........................................................................87 3.1 3.2 3.3 4 7 Installation ................................................................................................ 89 Branchement ............................................................................................ 90 Remplir le réservoir de café en grains...................................................... 90 Remplir le réservoir d‘eau ........................................................................ 91 Première mise en marche ........................................................................ 92 Réglage de l‘intensité du café .................................................................. 93 Régler la quantité de préparation ............................................................. 93 Mise en marche et arrêt de l‘appareil....................................................94 5.1 5.2 6 Légende relative à l‘image A .................................................................... 87 Légende relative à l‘image B .................................................................... 88 Écran d‘affichage...................................................................................... 88 Mise en service .....................................................................................89 4.1 4.2 4.3 4.4 4.5 4.6 4.7 5 Symboles contenus dans le texte du mode d‘emploi ............................... 83 Utilisation réglementaire ........................................................................... 84 Utilisation non-réglementaire.................................................................... 84 FRANÇAIS 1 Mise en marche de l‘appareil ................................................................... 94 Arrêt de l‘appareil ..................................................................................... 94 Mise en place du filtre à eau Melitta® Claris® ........................................95 Préparation d‘un expresso ou d‘un café long .......................................96 7.1 7.2 7.3 Préparation d‘une tasse d‘expresso ou de café long ............................... 96 Préparation de deux tasses d‘expresso ou de café long.......................... 96 Préparation d‘un expresso ou d‘un café long avec du café moulu ........... 97 8 Préparation de la mousse de lait ..........................................................98 9 Préparation de l‘eau chaude ...............................................................100 81 Heft_Caffeo_Bistro_EU_2.3_041114.indd 81 04.11.2014 15:55:16 10 Réglages des fonctions.......................................................................101 10.1 10.2 10.3 10.4 10.5 10.6 Régler la dureté de l‘eau ........................................................................ 101 Régler le mode économie d‘énergie....................................................... 102 Régler le mode Stand-by (veille) ............................................................ 103 Réglage de la température de chauffe ................................................... 104 Réinitialiser les réglages par défaut ....................................................... 105 Réglage de la finesse de la mouture ...................................................... 106 11 Entretien et maintenance ....................................................................107 11.1 11.2 11.3 11.4 11.5 11.6 Nettoyage courant .................................................................................. 107 Nettoyer le Perfect Cappuccino.............................................................. 107 Nettoyer la chambre d‘extraction............................................................ 108 Programme de nettoyage automatique .................................................. 109 Programme de détartrage automatique ................................................. 112 Détartrage du réservoir d‘eau................................................................. 115 12 Transport et fin de vie du produit ........................................................ 116 12.1 Préparation au transport, protection contre le gel et mesures en cas de non-utilisation prolongée ................................................................... 116 13 Remédier aux problèmes .................................................................... 118 82 Heft_Caffeo_Bistro_EU_2.3_041114.indd 82 04.11.2014 15:55:16 1 Consignes relatives au mode d‘emploi 1.1 Symboles contenus dans le texte du mode d‘emploi Les symboles contenus dans ce mode d‘emploi vous donnent des indications quant aux dangers particuliers liés à l‘utlisation de votre CAFFEO® de Melitta® ou vous donnent des conseils utiles. FRANÇAIS Pour une meilleure compréhension, vous pouvez déplier les pages d‘illustrations se trouvant au début et à la fin de ce mode d‘emploi. Avertissement ! Les textes présentant ce symbole contiennent des informations relatives à votre sécurité et vous informent d‘un éventuel risque d‘accident et de blessure. Prudence ! Les textes présentant ce symbole contiennent des informations relatives aux mauvaises manipulations à éviter et vous informent d‘un possible risque de dégâts matériels. Remarque Les textes présentant ce symbole contiennent des informations supplémentaires précieuses quant à l‘utilisation de votre appareil CAFFEO® de Melitta®. 83 Heft_Caffeo_Bistro_EU_2.3_041114.indd 83 04.11.2014 15:55:16 1.2 Utilisation réglementaire Votre CAFFEO® de Melitta® est uniquement adapté à la préparation de cafés et de spécialités à base de café, au réchauffage de l‘eau et au réchauffage du lait à l‘extérieur de l‘appareil. L‘appareil est destiné à un usage domestique et non commercial. L‘utilisation réglementaire comprend, • la lecture attentive, la compréhension et le respect du mode d‘emploi. • en particulier le respect des consignes de sécurité. • l‘utilisation de CAFFEO® de Melitta® dans le cadre des conditions d‘utilisation décrites dans ce mode d‘emploi. 1.3 Utilisation non-réglementaire Une utilisation non-réglementaire a lieu si vous utilisez CAFFEO® de Melitta® dans un cadre différent des conditions d‘utilisation décrites dans ce mode d‘emploi. Avertissement ! Suite à un emploi non réglementaire, vous risquez de vous blesser ou de vous brûler avec l‘eau chaude ou la vapeur. Remarque Le fabricant ne peut être tenu responsable des dégâts survenus suite à un emploi non réglementaire. 84 Heft_Caffeo_Bistro_EU_2.3_041114.indd 84 04.11.2014 15:55:16 2 Consignes générales de sécurité FRANÇAIS L‘appareil satisfait aux directives européennes suivantes : – 2006 / 95 / CE (basse tension), – 2004 / 108 / CE (compatibilité électromagnétique), – 2011 / 65 / EU (RoHS), – 2009 / 125 / CE (Écodesign/ ErP). L‘appareil a été construit selon le niveau technologique le plus actuel. Il existe cependant des risques résiduels. Respecter les consignes de sécurité pour éviter tout danger. Melitta® n‘est pas responsable en cas de non respect du mode d‘emploi normal de l‘appareil. Veuillez lire attentivement les consignes suivantes. Le non respect de ces consignes risque de nuire à votre propre sécurité ainsi qu‘à celle de l‘appareil. Avertissement ! Danger dû au courant électrique Il y a danger de mort par choc électrique en cas d‘endommagement de l‘appareil ou du cordon d‘alimentation. Respecter les consignes de sécurité suivantes pour éviter tout danger dû au courant électrique : – Ne pas utiliser de cordon d‘alimentation endommagé. – Un cordon d‘alimentation endommagé ne doit être remplacé que par le fabricant, son service après vente ou une personne de même qualification. – Ne pas ouvrir de caches fixés par des vis sur le corps de l‘appareil. – N‘utiliser l‘appareil que quand il est en parfait état technique. – Un appareil défectueux ne doit être réparé que par un atelier 85 Heft_Caffeo_Bistro_EU_2.3_041114.indd 85 04.11.2014 15:55:16 agréé. Ne pas réparer l‘appareil soi-même. – Ne pas procéder soi-même à des modifications sur l‘appareil, ses éléments et ses accessoires. – Ne pas plonger l‘appareil dans l‘eau. Avertissement ! Risque de brûlure et d‘éclaboussures Les liquides et les vapeurs qui s‘échappent peuvent être brûlants. Des pièces de l‘appareil deviennent aussi brûlantes. Respecter les consignes de sécurité suivantes pour éviter toute éclaboussure et toute brûlure : – Éviter que les liquides et les vapeurs qui s‘échappent entrent en contact avec la peau. – Ne pas toucher les buses sur le bec verseur (sortie) pendant le fonctionnement. Avertissement ! Sécurité d‘ordre général Respecter les consignes de sécurité suivantes pour éviter tout dommage corporel et matériel : – Ne pas passer les mains à l‘intérieur de l‘appareil pendant son fonctionnement. – Tenir les enfants de moins de 8 ans à distance de l‘appareil et de son cordon d‘alimentation. – Cet appareil peut être utilisé par des enfants de plus de 8 ans et des personnes aux capacités physiques, sensorielles ou mentales réduites ou ne possédant que peu d‘expérience et de connaissances s‘ils sont surveillés ou qu‘is ont été instruits de l‘utilisation sûre de l‘appareil et comprennent les dangers en résultant. – Les enfants ne doivent pas jouer avec l‘appareil. Les enfants de moins de 8 ans ne doivent pas réaliser le nettoyage et la maintenance réservée aux utilisateurs. Les enfants de plus de 8 ans doivent être surveillés pendant le nettoyage et la 86 Heft_Caffeo_Bistro_EU_2.3_041114.indd 86 04.11.2014 15:55:16 3 Description de l‘appareil 3.1 Légende relative à l‘image A Numéro de l'image FRANÇAIS maintenance. – Débrancher l‘appareil quand il reste non surveillé pendant un temps prolongé. Explication 1 Plateau récolte-gouttes avec grille et bac de récupération du marc de café (à l'intérieur) 2 Mousseur à lait "Perfect Cappuccino" 3 Réservoir d'eau 4 Bouton de commande Intensité du café 5 Bouton de commande Vapeur 6 Molette pour la vapeur et la distribution d'eau chaude 7 Écran d'affichage 8 Réservoir de café en grains à 2 compartiments "Bean select" 9 Manette de sélection du café en grains "Bean Select" 10 Trappe pour café moulu avec couvercle 11 Touche Marche/Arrêt 12 Molette pour régler la quantité d’eau 13 Bouton de commande Préparation pour une tasse 14 Bouton de commande Préparation pour deux tasses 15 Bec d'écoulement réglable en hauteur 16 Flotteur pour indication du niveau d'eau dans le plateau récolte-gouttes 87 Heft_Caffeo_Bistro_EU_2.3_041114.indd 87 04.11.2014 15:55:17 3.2 Légende relative à l‘image B Numéro de l'image Explication 17 Cordon d'alimentation 18 Chambre d'extraction et plaque signalétique (derrière le couvercle) 19 Réglage de la finesse de la mouture 20 Interrupteur 3.3 Écran d‘affichage Symbole Signification Soupape de vapeur Affichage Explication /Demande s'allume Température de la vapeur atteinte Tourner la molette vapeur clignote Soupape ouverte Réservoir d'eau s'allume clignote Trappe pour café moulu s'allume Couvercle de la trappe pour café moulu ouvert La préparation du café moulu s'effectue en appuyant sur le bouton de commande Préparation pour une tasse s'allume 1 Grain : douce 2 Grains : normale 3 Grains : corsée 4 Grains : très corsée clignote Remplir le réservoir de café en grains, le clignotement s'arrête après la préparation du prochain café. s'allume Nettoyer l'appareil clignote Le programme de nettoyage automatique est en cours Intensité du café Nettoyer Remplir le réservoir d'eau 88 Heft_Caffeo_Bistro_EU_2.3_041114.indd 88 04.11.2014 15:55:17 Affichage Plateau récolte- s'allume gouttes et bac de récupération du marc de clignote café Détartrage 4 Explication /Demande Vider le plateau récolte-gouttes et le bac de récupération du marc de café Mettre le plateau récolte-gouttes et le bac de récupération du marc de café en place s'allume Détartrer l'appareil. clignote Le programme de détartrage automatique est en cours. FRANÇAIS Symbole Signification Mise en service Avant la première mise en service, veuillez effectuer les points suivants. Une fois tous ces points effectués, l‘appareil est prêt à fonctionner. Vous pouvez alors vous préparer un café. Lors de la première mise en service, nous vous conseillons de jeter les deux premières tasses préparées. 4.1 • Installation Installez l‘appareil sur une surface stable, plane et sèche. Garder une distance d‘environ 10 cm par rapport au mur ou à tout autre objet. Prudence ! • – Ne placez jamais l‘appareil sur des surfaces chaudes ni dans des pièces humides. – Ne transportez pas et ne stockez pas l‘appareil dans des moyens de transport ni dans des locaux à basses températures, car l‘eau résiduelle pourrait geler ou condenser et ainsi causer des dégâts à l‘appareil. Respecter les consignes page 116. Le bac de récupération du marc de café se trouve déjà dans le plateau récolte-gouttes. Veiller à ce que le plateau récolte-gouttes soit bien installé jusqu‘en butée dans l‘appareil. 89 Heft_Caffeo_Bistro_EU_2.3_041114.indd 89 04.11.2014 15:55:17 Remarques – Conservez les matériaux d‘emballage, y compris la mousse solide, pour le transport ou pour un éventuel retour afin d‘éviter tout dégât lié au transport. – Il est tout à fait normal qu‘avant la première mise en service, du café et des traces d‘eau se trouvent dans l‘appareil. Cela provient du fait que le fonctionnement de l‘appareil est contrôlé en usine. 4.2 • Branchement Branchez le cordon d‘alimentation dans une prise appropriée. Avertissement ! Risque d‘incendie ou d‘électrocution à cause d‘une mauvaise tension, de raccords ou cordons d‘alimentation inappropriés ou endommagés. – Veillez à ce que la tension corresponde à la tension indiquée sur la plaque signalétique de l‘appareil. Celle-ci se trouve à la droite de l‘appareil, derrière le couvercle (im. B, n° 18). – Veillez à ce que la prise soit conforme aux normes en vigueur relatives à la sécurité électrique. En cas de doute, s‘adresser à un électricien spécialisé. – N‘utilisez jamais de cordons d‘alimentation endommagés (isolation endommagée, fils dénudés). – Pendant la période de garantie, faire remplacer les câbles d‘alimentation endommagés uniquement par le fabricant puis par la suite uniquement par un technicien qualifié. 4.3 Remplir le réservoir de café en grains Le réservoir de café en grains à 2 compartiments „Bean select“ permet d‘utiliser en parallèle deux sortes différentes de café. Remplissez par ex. un compartiment avec des grains pour Expresso et l‘autre avec des grains d‘un décaféiné. Le levier basculant permet alors de passer confortablement d‘une variété à l‘autre. • Remplissez le réservoir de café en grains (im. A, nº 8) avec des grains de café frais. Chacun des deux compartiments peut contenir un maximum de 135 g de grains de café. 90 Heft_Caffeo_Bistro_EU_2.3_041114.indd 90 04.11.2014 15:55:17 • – Remplissez le réservoir de café en grains uniquement avec des grains de café. – Ne remplissez jamais le réservoir de café en grains avec des grains de café moulus, lyophilisés ou caramélisés. Sélectionnez le type de grains désiré en positionnant le levier basculant sur le compartiment correspondant. Avertissement ! Danger pour les personnes présentant une intolérance à la caféine. Étant donné qu‘une quantité résiduelle des grains utilisés précédemment est toujours présente au-dessus du moulin, les deux variétés se mélangent lors d‘un changement de type de grains. Pour cette raison, il se peut que les deux premières tasses contiennent encore du café avec caféine malgré le passage aux grains de café sans caféine. Ainsi, ce n‘est qu‘à partir de la troisième tasse après changement de grains que le café ne présente plus de caféine. FRANÇAIS Prudence ! Remarque Si le levier basculant est à la verticale lors du processus de préparation, aucun grain ne parvient dans le moulin. 4.4 Remplir le réservoir d‘eau • Relevez le couvercle du réservoir d‘eau (im. A, n° 3) et retirez le réservoir d‘eau de l‘appareil par le haut. • Remplir le réservoir d‘eau avec de l‘eau fraîche du robinet jusqu‘au repère Max. et le remettre en place. 91 Heft_Caffeo_Bistro_EU_2.3_041114.indd 91 04.11.2014 15:55:17 4.5 Première mise en marche Tous les conduits de l‘appareil ont été purgés et ventilés en usine. Pour cette raison, lors de la première mise en marche et après la phase de chauffe, le symbole s‘allume et l‘appareil doit être purgé par l‘intermédiaire de la pour la soupape soupape. La purge est uniquement nécessaire lors de la première mise en marche de l‘appareil. Pour cela, se référer à la page 116. • Amener l‘interrupteur (im. B, n°. 20) en position „I“. • Appuyez sur la touche Marche/Arrêt marche. pour mettre l‘appareil en → La touche Marche/Arrêt clignote. L‘appareil est en cours de chauffe. Le symbole de la soupape s‘allume à la fin du préchauffage. • Placer un récipient sous le Perfect Cappuccino et déplacer la buse de vapeur vers le bas jusqu’à ce qu‘elle se trouve sous le rebord du récipient. • Placez un deuxième récipient au-dessous du bec d‘écoulement. • Tourner la molette (im. A, n° 6) dans le sens des aiguilles d‘une montre pour ouvrir la soupape. → Le symbole de la soupape sous le Perfect Cappuccino. • clignote. L’eau s’écoule dans le récipient Dès que l‘eau arrête de s‘écouler et que le symbole de la soupape s‘allume, tourner la molette dans le sens inverse des aiguilles d‘une montre pour fermer la soupape. → L‘appareil procède à un nettoyage automatique ; de l‘eau chaude s‘écoule du bec d‘écoulement. La touche Marche/Arrêt s‘allume ensuite. L‘appareil est prêt à fonctionner. 92 Heft_Caffeo_Bistro_EU_2.3_041114.indd 92 04.11.2014 15:55:17 4.6 Appuyer à plusieurs reprises sur le bouton de commande Intensité du café afin de faire un choix entre les quatre niveaux d‘intensité possibles. → La sélection est indiquée via les symboles des grains d‘affichage. Affichage sur l‘écran FRANÇAIS • Réglage de l‘intensité du café Intensité du café Doux Normal (réglage par défaut) Corsé Très corsé • L‘arôme du café peut également être modifié en ajustant la finesse de la mouture. Pour cela, se référer à la page 106. 4.7 • Régler la quantité de préparation Tourner la molette pour régler la quantité de café (im. A, n° 12), afin de régler progressivement la quantité de préparation de 30 ml à 220 ml (bouton vers la gauche : 30 ml, bouton au centre : 125 ml, bouton vers la droite : 220 ml). 93 Heft_Caffeo_Bistro_EU_2.3_041114.indd 93 04.11.2014 15:55:18 • 5 Mise en marche et arrêt de l‘appareil 5.1 Mise en marche de l‘appareil Amener l‘interrupteur (im. B, n°. 20) en position „I“. → L‘appareil se trouve en mode Stand-by (veille). La touche Marche/Arrêt s‘allume en rouge. • Placez un récipient adapté sous le bec d‘écoulement. • Appuyez sur la touche Marche/Arrêt l‘appareil en marche. pour mettre → La touche Marche/Arrêt clignote. L‘appareil est en cours de chauffe. L‘appareil procède à un nettoyage automatique ; de l‘eau chaude s‘écoule du bec d‘écoulement. La touche Marche/Arrêt et le symbole des grains de café clignotent ensuite. L‘appareil est prêt à fonctionner. 5.2 Arrêt de l‘appareil • Placez si possible un récipient sous le bec d‘écoulement. • Appuyez sur la touche Marche/Arrêt mode Stand-by. pour commuter l‘appareil en → L‘appareil procède à un nettoyage automatique des circuits de café. Le compartiment de chauffe commute en position neutre. La touche Marche/ Arrêt s‘allume en rouge. • Amener l‘interrupteur (im. B, n°. 20) en position „0“ pour arrêter l‘appareil complètement. Remarques – A chaque mise en service, l‘appareil effectue un nettoyage automatique. – Arrêter l‘appareil par l‘intermédiaire de l‘interrupteur uniquement lorsqu‘il se trouve en mode Stand-by, car dans le cas contraire la chambre d‘extraction risque de ne plus se trouver dans la bonne position. 94 Heft_Caffeo_Bistro_EU_2.3_041114.indd 94 04.11.2014 15:55:18 Mise en place du filtre à eau Melitta® Claris® Le filtre à eau Melitta® Claris® élimine le calcaire et d‘autres polluants de l‘eau. Il convient de le mettre en place dans l‘appareil seulement après la première mise en service. Si vous utilisez le filtre, vous pourrez détartrer l‘appareil moins fréquemment et régler la dureté de l‘eau sur le niveau 1 (voir page 101). Grâce à la bonne protection contre le tartre, la durée de vie de votre appareil se voit rallongée. Le filtre à eau doit être changé régulièrement, au moins tous les 2 mois. Le filtre à eau est disponible dans le commerce spécialisé. • Régler le mois en cours sur la bague bleue située sur le dessus du filtre à eau Melitta® Claris®. Ceci permet de repérer facilement le moment où le filtre à eau doit être remplacé. • Placer le filtre à eau dans un verre contenant de l‘eau du robinet fraîche pendant quelques minutes avant de le mettre en place • Relevez le couvercle du réservoir d‘eau (im. A, n° 3) et retirez le réservoir d‘eau de l‘appareil par le haut. • Vider le réservoir d‘eau. • Vissez le filtre à eau Melitta® Claris® avec prudence dans le filetage au niveau du socle du réservoir d‘eau à l‘aide du dispositif de vissage, situé sur l‘extrémité inférieure de la cuillère à café fournie. • Remplir le réservoir d‘eau avec de l‘eau fraîche du robinet jusqu‘au repère Max. et le remettre en place. • Placer un récipient sous le Perfect Cappuccino et déplacer la buse de vapeur vers le bas jusqu’à ce qu‘elle se trouve sous le rebord du récipient. • Tourner la molette (im. A, n° 6) dans le sens des aiguilles d‘une montre pour ouvrir la soupape. FRANÇAIS 6 → L’eau s’écoule dans le récipient sous le Perfect Cappuccino. En raison de la fonction d‘arrêt automatique, vous devez ouvrir et fermer le déclencheur de soupape plusieurs fois. • Dès que le symbole du réservoir d’eau s‘allume, tourner la molette dans le sens inverse des aiguilles d‘une montre pour fermer la soupape. → L‘appareil est prêt à fonctionner. 95 Heft_Caffeo_Bistro_EU_2.3_041114.indd 95 04.11.2014 15:55:18 Remarque Le filtre à eau Melitta® Claris® ne doit pas rester à sec pendant une période prolongée. Nous recommandons de stocker le filtre à eau Melitta Claris dans un verre d‘eau au réfrigérateur en cas d‘une non-utilisation prolongée de l‘appareil. 7 Préparation d‘un expresso ou d‘un café long 7.1 Préparation d‘une tasse d‘expresso ou de café long Conditions préalables : l‘appareil est prêt à fonctionner (voir „Mise en marche et arrêt de l‘appareil“ page 94). L‘intensité de café et la quantité de préparation désirées sont réglées (voir 93). Le type de café désiré est sélectionné dans le réservoir de grains de café. • Placez un récipient adapté sous le bec d‘écoulement. • Appuyer sur le bouton de commande Préparation pour une tasse . → La mouture du café et la distribution du café démarrent. La distribution prend automatiquement fin lorsque la quantité de préparation réglée est atteinte. • Pour arrêter la distribution de café avant la fin, appuyer sur le bouton de commande Préparation pour une tasse . 7.2 Préparation de deux tasses d‘expresso ou de café long Conditions préalables : l‘appareil est prêt à fonctionner (voir „Mise en marche et arrêt de l‘appareil“ page 94). L‘intensité et la quantité de café souhaitées sont réglées. Le type de café désiré est sélectionné dans le réservoir de grains de café. • Placer deux tasses appropriées, l‘une à côté de l‘autre, sous le bec d‘écoulement. • Appuyer sur le bouton de commande Préparation pour deux tasses . → La mouture (deux fois) et la distribution du café démarrent. La distribution prend automatiquement fin lorsque la quantité de préparation réglée est atteinte. 96 Heft_Caffeo_Bistro_EU_2.3_041114.indd 96 04.11.2014 15:55:18 Pour arrêter la distribution de café avant la fin, appuyer sur le bouton de commande Préparation pour deux tasses . 7.3 Préparation d‘un expresso ou d‘un café long avec du café moulu Condition préalable : l‘appareil est prêt à fonctionner (voir „Mise en marche et arrêt de l‘appareil“ page 94). La quantité de préparation désirée est réglée. • Ouvrir le couvercle de la trappe pour café moulu (im. A, n° 10). → Le symbole de la trappe pour café moulu • clignote. FRANÇAIS • Remplissez au maximum une cuillère à café de café moulu frais dans la trappe pour café moulu. Prudence ! • – Remplissez la trappe pour café moulu uniquement de café moulu. Des produits instantanés risquent de coller dans la chambre d‘extraction. – Ne versez jamais plus d‘une cuillère à café (livrée avec l‘appareil) de café moulu, car sinon, la chambre d‘extraction risque de déborder. Fermez le couvercle de la trappe pour café moulu. → Le symbole de la trappe pour café moulu et le bouton de commande Préparation pour une tasse s‘allument. • Placez un récipient adapté sous le bec d‘écoulement. • Appuyer sur le bouton de commande Préparation pour une tasse . → Le café commence à couler. La distribution prend automatiquement fin lorsque la quantité de préparation réglée est atteinte. • Pour arrêter la distribution de café avant la fin, appuyer sur le bouton de commande Préparation pour une tasse . 97 Heft_Caffeo_Bistro_EU_2.3_041114.indd 97 04.11.2014 15:55:18 Remarque Si vous ne préparez pas de café dans les 90 secondes après avoir ouvert la trappe pour café moulu, l‘appareil passe à nouveau sur le fonctionnement avec grains de café et rejette le café moulu dans le bac de récupération du marc de café afin d‘éviter tout danger ultérieur lié à un trop-plein de la chambre d‘extraction. 8 Préparation de la mousse de lait Condition préalable : l‘appareil est prêt à fonctionner (voir „Mise en marche et arrêt de l‘appareil“ page 94). • Placer un récipient avec du lait sous le Perfect Cappuccino. Veiller à ce que le fouet du Perfect Cappuccino soit plongé dans le lait. • Remplir le récipient jusqu‘à un tiers au maximum car le volume de lait augmente considérablement lors de l‘émulsion. • Appuyer sur la touche de commande Vapeur . → La touche de commande de la vapeur clignote. L‘appareil est en cours de chauffe. Lorsque la température de vapeur est atteinte, le Bouton de commande Vapeur et le symbole de la soupape s‘allument. Avertissement ! Risque de brûlure car la buse vapeur, le flexible vapeur et le fouet sont chauds. Pendant l‘utilisation de la buse vapeur, ne jamais toucher le flexible vapeur ou le fouet du Perfect Cappuccino. • Tourner la molette (im. A, n° 6) dans le sens des aiguilles d‘une montre pour ouvrir la soupape. → Le symbole de la soupape et le bouton de commande Vapeur clignotent. Le fouet fait mousser le lait et le chauffe en même temps. Vous obtiendrez une mousse meilleure si vous effectuez un mouvement de haut en bas avec le mélangeur lors de l‘émulsion. 98 Heft_Caffeo_Bistro_EU_2.3_041114.indd 98 04.11.2014 15:55:18 Tourner la molette dans le sens inverse des aiguilles d‘une montre dans sa position fermée pour fermer la soupape et pour mettre fin au processus d‘émulsion. Le volume du lait doit avoir approximativement doublé et le récipient doit être légèrement chaud. • Appuyer le bouton de commande Vapeur pour passer du mode vapeur au mode de fonctionnement normal. • Attendre que la buse vapeur soit refroidie et la tourner avec le fouet dans le sens inverse des aiguilles d‘une montre pour la retirer du Perfect Cappuccino (im. E). • Retirer le fouet du Perfect Cappuccino de la buse vapeur vers le bas (im. F). • Nettoyer la buse vapeur et le fouet à l‘eau claire ou les mettre dans le lave-vaisselle. • Tourner la buse vapeur ainsi nettoyée avec le fouet dans le sens des aiguilles d‘une montre sur le Perfect Cappuccino jusqu‘à ce qu‘il s‘enclenche. FRANÇAIS • Remarque Nous recommandons d‘utiliser du lait froid avec une forte teneur en protéine. Pour obtenir une bonne mousse de lait, ce n‘est pas la teneur en graisse mais la teneur en protéine du lait qui est importante. 99 Heft_Caffeo_Bistro_EU_2.3_041114.indd 99 04.11.2014 15:55:19 9 Préparation de l‘eau chaude Condition préalable : l‘appareil est prêt à fonctionner (voir „Mise en marche et arrêt de l‘appareil“ page 94). • Placer un chiffon sous le Perfect Cappuccino afin d‘éponger l‘eau résiduelle qui pourrait éventuellement s‘écouler. • Retirer le fouet du Perfect Cappuccino de la buse vapeur vers le bas (im. F). • Placer un récipient sous la buse vapeur et déplacer celle-ci vers le bas jusqu‘à ce qu‘elle se trouve sous le rebord du récipient. • Tourner la molette (im. A, n° 6) dans le sens des aiguilles d‘une montre pour ouvrir la soupape. → Le symbole de la soupape vapeur dans le récipient. clignote. De l‘eau chaude s‘écoule de la buse • Lorsque la quantité d‘eau désirée est atteinte, tourner la molette dans le sens inverse des aiguilles d‘une montre pour fermer la soupape. • Attendre que la buse vapeur soit refroidie et insérer à nouveau le fouet par le bas sur la buse jusqu‘à ce qu‘il s‘enclenche. 100 Heft_Caffeo_Bistro_EU_2.3_041114.indd 100 04.11.2014 15:55:19 10 Réglages des fonctions Utiliser la bandelette de test fournie pour déterminer la dureté de l‘eau dans votre zone. Respecter les instructions sur l‘emballage de la bandelette de test. La dureté de l‘eau est réglée sur 4 en usine. Condition préalable: l‘appareil se trouve en mode Stand-by (voir „Mise en marche et arrêt de l‘appareil“ page 94). FRANÇAIS 10.1 Régler la dureté de l‘eau Régler la dureté de l‘eau de la manière suivante pour préserver la qualité de l‘appareil: • Appuyer simultanément sur le bouton de commande Préparation pour une tasse et sur le bouton de commande Vapeur jusqu‘à ce que les quatre boutons de commande s‘allument faiblement. • Appuyer à plusieurs reprises sur le bouton de commande Vapeur afin de faire un choix entre les quatre niveaux de dureté possibles. → Le bouton de commande Vapeur s‘allume clairement. Votre sélection de dureté de l‘eau d‘après le tableau apparaît sur l‘écran d‘affichage via le symbole des grains . Plage de dureté de l'eau • Propriétés °d °e °f Douce 0 - 10 0 - 13 0 - 18 Moyenne 10 - 15 13 - 19 18-27 Dure 15 - 20 19 - 25 27-36 Très dure (réglage d'usine) > 20 > 25 > 36 Appuyer sur la touche Marche /Arrêt sélectionnée. pour confirmer la dureté → Selon votre choix, 1 à 4 symboles de grains clignotent sur l‘écran d‘affichage. L‘appareil se trouve à nouveau en mode Stand-by. 101 Heft_Caffeo_Bistro_EU_2.3_041114.indd 101 04.11.2014 15:55:19 10.2 Régler le mode économie d‘énergie L‘appareil s‘allume automatiquement (selon le réglage) en mode économie d‘énergie après la dernière action (l‘appareil consomme ainsi considérablement moins d‘énergie qu‘en mode Veille). Différentes durées peuvent être réglées pour le mode économie d‘énergie. L‘appareil est réglé par défaut sur 15 minutes . Condition préalable: l‘appareil se trouve en mode Stand-by (voir „Mise en marche et arrêt de l‘appareil“ page 94). Régler le mode économie d‘énergie de la manière suivante : • Appuyer simultanément sur le bouton de commande Préparation pour une tasse et sur le bouton de commande Vapeur jusqu‘à ce que les quatre boutons de commande s‘allument faiblement. • Appuyer à plusieurs reprises sur le Bouton de commande Intensité afin de choisir entre les quatre temps possibles pour la du café minuterie. → Le bouton de commande Intensité du café s‘allume clairement. Votre sélection apparaît sur l‘écran d‘affichage via les symboles des grains . Affichage Temps 5 minutes 15 minutes (Réglage par défaut) 30 minutes Inactif • Appuyer sur la touche Marche/Arrêt sélectionné. pour confirmer le temps → Selon votre choix, 1 à 4 symboles de grains clignotent sur l‘écran d‘affichage. L‘appareil se trouve à nouveau en mode Stand-by. 102 Heft_Caffeo_Bistro_EU_2.3_041114.indd 102 04.11.2014 15:55:19 Remarque En appuyant sur n‘importe quelle touche, l‘appareil quitte le mode économie d‘énergie. La fonction de la touche pressée (par ex. préparation d‘un café) est directement exécutée, seule la phase de chauffe dure un peu plus longtemps. FRANÇAIS 10.3 Régler le mode Stand-by (veille) 30 minutes après la dernière action, l‘appareil passe automatiquement (selon le réglage) en mode Stand-by. Différentes durées peuvent être réglées pour le mode Stand-by. L‘appareil est réglé par défaut sur 30 minutes . Condition préalable: l‘appareil se trouve en mode Stand-by (voir „Mise en marche et arrêt de l‘appareil“ page 94). Régler le mode Stand-by de la manière suivante : • Appuyer simultanément sur le bouton de commande Préparation pour et sur le bouton de commande Vapeur jusqu‘à ce une tasse que les quatre boutons de commande s‘allument faiblement. • Appuyer à plusieurs reprises sur le bouton de commande Préparation pour deux tasses afin de choisir entre les quatre temps possibles pour le timer. → Le bouton de commande Bouton de commande préparation pour deux tasses s‘allume clairement. Votre sélection apparaît sur l‘écran d‘affichage via les symboles des grains . Affichage Temps 30 minutes (Réglage par défaut) 2 heures 4 heures 8 heures • Appuyer sur la touche Marche/Arrêt sélectionné. pour confirmer le temps 103 Heft_Caffeo_Bistro_EU_2.3_041114.indd 103 04.11.2014 15:55:19 → Selon votre choix, 1 à 4 symboles de grains clignotent sur l‘écran d‘affichage. L‘appareil se trouve à nouveau en mode Stand-by. Remarque En mode Stand-by, l‘appareil consomme considerablement moins d‘énergie. Nous recommandons toutefois de débrancher l‘appareil au niveau de l‘interrupteur en cas de non utilisation prolongée (par ex. pendant la nuit). 10.4 Réglage de la température de chauffe La température de chauffe est réglée par défaut sur le niveau 2 (moyenne ). Condition préalable: l‘appareil se trouve en mode Stand-by (voir „Mise en marche et arrêt de l‘appareil“ page 94). Régler la température de chauffe de la manière suivante : • Appuyer simultanément sur le bouton de commande Préparation pour et sur le bouton de commande Vapeur jusqu‘à ce une tasse que les quatre boutons de commande s‘allument faiblement. • Appuyer sur la touche de commande Préparation pour une tasse afin de choisir entre les trois températures de chauffe possibles. → Le Bouton de commande Préparation pour une tasse clairement. s‘allume → La sélection est indiquée via les symboles des grains d‘affichage. sur l‘écran Affichage Température de chauffe Basse Normale (Réglage par défaut) Elevée • Appuyer sur la touche Marche/Arrêt de chauffe sélectionnée. pour confirmer la température 104 Heft_Caffeo_Bistro_EU_2.3_041114.indd 104 04.11.2014 15:55:20 → Selon votre choix, 1 à 3 symboles de grains clignotent sur l‘écran d‘affichage. L‘appareil se trouve à nouveau en mode Stand-by. 10.5 Réinitialiser les réglages par défaut • Arrêter l‘appareil au niveau de l‘interrupteur. • Patienter jusqu‘à ce que le témoin rouge de la touche Marche / Arrêt s‘éteigne. • Appuyer simultanément sur le bouton de commande Intensité du café et sur le bouton de commande Préparation pour deux tasses . • Allumer en même temps l‘appareil par l‘interrupteur. FRANÇAIS Condition préalable: l‘appareil se trouve en mode Stand-by (voir „Mise en marche et arrêt de l‘appareil“ page 94). → Tous les réglages sont alors réinitialisés aux paramètres réglés par défaut. Résumé des réglages par défaut : Réglage des fonctions Réglage par défaut Intensité du café Normale Dureté de l'eau Niveau 4 Mode économie d'énergie Mode Stand-by Température de chauffe 15 minutes 30 minutes Moyenne 105 Heft_Caffeo_Bistro_EU_2.3_041114.indd 105 04.11.2014 15:55:20 10.6 Réglage de la finesse de la mouture La finesse de la mouture a été réglée de façon optimale par défaut. Pour cette raison, nous vous recommandons d‘ajuster la finesse de la mouture uniquement après 1 000 cafés environ (soit env. après 1 an). La finesse de la mouture peut être réglée uniquement pendant que le moulin fonctionne. Régler ainsi la finesse de la mouture immédiatement après le lancement d‘une préparation de café. Si l‘arôme du café n‘est pas suffisamment intense, nous recommandons une mouture plus fine. • Amener le levier (im. B, n° 19) dans une des trois positions (vu de l‘arrière de l‘appareil). Position du levier Finesse de la mouture gauche fine milieu moyenne droite épaisse (réglage par défaut) 106 Heft_Caffeo_Bistro_EU_2.3_041114.indd 106 04.11.2014 15:55:20 11 Entretien et maintenance • Nettoyez l‘appareil de l‘extérieur à l‘aide d‘un chiffon doux et humide et d‘un liquide vaisselle disponible dans le commerce. • Videz et nettoyez le plateau récolte-gouttes régulièrement ou, au plus tard, lorsque le flotteur (im. A, n° 16) ressort de la grille. • Nettoyez régulièrement le bac de récupération du marc de café, par exemple dans le lave-vaisselle. FRANÇAIS 11.1 Nettoyage courant Prudence ! – N‘utilisez jamais de chiffon, d‘éponge ou de détergent à récurer afin d‘éviter toute détérioration de la surface de l‘appareil. – Ne pas nettoyer le plateau récolte-gouttes au lave-vaisselle, au risque de le déformer. 11.2 Nettoyer le Perfect Cappuccino • Placer un chiffon sous le Perfect Cappuccino afin d‘éponger l‘eau résiduelle qui pourrait éventuellement s‘écouler. • Extraire la buse vapeur avec le fouet du Perfect Cappuccino en la tournant dans le sens inverse des aiguilles d‘une montre (im. E). • Retirer le fouet du Perfect Cappuccino de la buse vapeur vers le bas (im. F). • Nettoyer la buse vapeur et le fouet à l‘eau claire ou les mettre dans le lave-vaisselle. • Insérer à nouveau le fouet par le bas sur la buse vapeur jusqu‘à ce qu‘il s‘enclenche. • Tourner la buse vapeur ainsi nettoyée avec le fouet dans le sens des aiguilles d‘une montre sur le Perfect Cappuccino jusqu‘à ce qu‘elle s‘enclenche. 107 Heft_Caffeo_Bistro_EU_2.3_041114.indd 107 04.11.2014 15:55:20 Remarque En cas de nettoyage fréquent au lave-vaisselle, il se peut que le bac de récupération du marc de café et le Perfect Cappuccino changent légèrement de couleur. 11.3 Nettoyer la chambre d‘extraction. Condition préalable: l‘appareil se trouve en mode Stand-by (voir „Mise en marche et arrêt de l‘appareil“ page 94). Remarque Afin de garantir une protection optimale de votre appareil, nous vous recommandons de nettoyer la chambre d‘extraction une fois par semaine sous l‘eau du robinet. • Amener l‘interrupteur (im. B, n°. 20) en position „0“ pour arrêter l‘appareil complètement. • Saisissez le creux à la droite de l‘appareil (im. B, n° 18) et retirez le couvercle vers la droite. • Presser et maintenir le bouton rouge sur la poignée de la chambre d‘extraction enfoncé (im. H) puis tourner la poignée dans le sens des aiguilles d‘une montre jusqu‘en butée (de 75° environ). • Retirez la chambre d‘extraction de l‘appareil à l‘aide de la poignée. • Laissez la chambre d‘extraction en l‘état (ne pas déplacer ou tourner les éléments de la chambre d‘extraction). • Nettoyer l‘ensemble de la chambre d‘extraction à l‘eau courante sur tous les côtés. Veillez plus particulièrement à ce que la surface illustrée sur l‘image J ne présente pas de résidus de café. Prudence! Ne jamais nettoyer la chambre d‘extraction dans le lave-vaisselle. • Laisser la chambre d‘extraction s‘égoutter. • Le cas échéant, retirer les résidus de café des surfaces à l‘intérieur de l‘appareil sur lesquels la chambre d‘extraction repose. 108 Heft_Caffeo_Bistro_EU_2.3_041114.indd 108 04.11.2014 15:55:20 Insérez la chambre d‘extraction dans l‘appareil et verrouillez la chambre d‘extraction en tournant la poignée de la chambre d‘extraction jusqu‘à sa butée dans le sens inverse des aiguilles d‘une montre. • Insérez les deux languettes de verrouillage du couvercle à l‘arrière de l‘appareil et faites le basculer vers la gauche jusqu‘à ce qu‘il s‘enclenche. • Amener l‘interrupteur (im. B, n°. 20) en position „I“. • L‘appareil se trouve à nouveau en mode Stand-by. FRANÇAIS • 11.4 Programme de nettoyage automatique Le programme de nettoyage automatique élimine les résidus et les restes d‘huile de café ne pouvant pas être éliminés à la main. Il dure au total environ 15 minutes. . Pendant le programme, le symbole de nettoyage clignote Afin de garantir un nettoyage optimal, nous recommandons de nettoyer au préalable la chambre d‘extraction (voir page 108). Condition préalable: l‘appareil se trouve en mode Stand-by (voir „Mise en marche et arrêt de l‘appareil“ page 94). Prudence ! – Lancez le programme de nettoyage automatique tous les 2 mois ou après 200 tasses environ, ou au plus tard lorsque le symbole de nettoyage apparaît sur l‘écran d‘affichage. – Utiliser uniquement les pastilles de nettoyage de Melitta® pour les machines à café automatiques. Ces pastilles de nettoyage sont parfaitement adaptées au CAFFEO® de Melitta®. Tout autre produit de nettoyage risque d‘endommager l‘appareil. Lancer le programme de nettoyage automatique de la manière suivante : 1 Retirer le cas échéant le filtre à eau Melitta® Claris® du réservoir d‘eau (voir page 95). 2 Appuyer simultanément sur le bouton de commande Préparation pour une tasse et sur la touche Marche/Arrêt pendant environ 3 secondes. 109 Heft_Caffeo_Bistro_EU_2.3_041114.indd 109 04.11.2014 15:55:20 → Le symbole pour le nettoyage clignote. Le symbole du plateau récolte-gouttes s‘allume. 3 Videz le bac de récupération du marc de café et le plateau récoltegouttes. 4 Replacez le plateau récolte-gouttes sans le bac de récupération du marc de café et placez ce dernier sous le bec d‘écoulement. Phase 1 Pendant la phase 1, un symbole de grain de café s‘affiche à l‘écran. → Deux processus de nettoyage automatiques sont tout d‘abord exécutés. Le symbole de la trappe pour café moulu s‘allume. 5 Ouvrez le couvercle de la trappe pour café moulu. → Le symbole de la trappe pour café moulu 6 clignote. Insérer une pastille de nettoyage (im. G) et refermez le couvercle de la trappe pour café moulu. → Le symbole du réservoir d‘eau s‘allume. → Phase 1 est terminée. Phase 2 Pendant la phase 2, deux grains de café 7 s‘affichent à l‘écran. Relever le couvercle du réservoir d‘eau (im. A, n° 3) et retirer le réservoir de l‘appareil par la poignée vers le haut. Remplir le réservoir d‘eau avec de l‘eau fraîche du robinet jusqu‘au repère Max. et le remettre en place. → Le Bouton de commande Vapeur s‘allume. → Phase 2 est terminée. 110 Heft_Caffeo_Bistro_EU_2.3_041114.indd 110 04.11.2014 15:55:20 Phase 3 8 s‘affichent à l‘écran. Appuyer sur le bouton de commande Vapeur . → Le programme de nettoyage automatique démarre. Il dure environ 10 minutes. Le bouton de commande Vapeur s‘allume alors . 9 Vider le bac de récupération du marc de café et le replacer sous le bec d‘écoulement. 10 Appuyer sur le bouton de commande Vapeur . FRANÇAIS Pendant la phase 3, trois grains de café → Phase 3 est terminée. Phase 4 Pendant la phase 4, quatre grains de café s‘affichent à l‘écran. → Le programme de nettoyage automatique reprend. Cette opération dure environ 5 minutes. L‘eau sort du bec d‘écoulement et circule à l‘intérieur de l‘appareil jusque dans le plateau récolte-gouttes. Le symbole du plateau récolte-gouttes s‘allume alors. 11 Videz le bac de récupération du marc de café et le plateau récoltegouttes, puis remettez-les en place. → La touche Marche/Arrêt s‘allume après une brève phase de chauffe. Les boutons de commande et les symboles de grains s‘allument. L‘appareil est prêt à fonctionner. Remarque Si le symbole de la soupape s‘allume en cours de nettoyage : – Placer un récipient sous le Perfect Cappuccino et tourner la molette (im. A, n° 6) dans le sens des aiguilles d‘une montre pour ouvrir la soupape. clignote. – Le symbole de la soupape – Dès que le symbole de la soupape s‘allume en continu, tourner la molette dans le sens inverse des aiguilles d‘une montre pour fermer la soupape. – Le programme de nettoyage automatique reprend. 111 Heft_Caffeo_Bistro_EU_2.3_041114.indd 111 04.11.2014 15:55:21 11.5 Programme de détartrage automatique Le programme de détartrage automatique de l‘appareil élimine des résidus de calcaire dans l‘appareil. Il dure au total environ 15 minutes. Pendant le clignote. programme,le symbole Détartrer Condition préalable: l‘appareil se trouve en mode Stand-by (voir „Mise en marche et arrêt de l‘appareil“ page 94). Prudence! – Lancez le programme de détartrage automatique tous les 3 mois ou, apparaît sur l‘écran au plus tard, lorsqu‘une invitation au détartrage d‘affichage. – Utilisez uniquement le détartrant ANTI CALC Espresso Machines de Melitta®. Ce détartrant est parfaitement adapté au CAFFEO® de Melitta®. – N‘utilisez jamais de vinaigre ni tout autre produit de détartrage. Lancez de la manière suivante le programme de détartrage automatique : 1 Avant le détartrage, retirer - s‘il est présent - le filtre à eau Melitta® Claris® du réservoir d‘eau (voir page 95). 2 Appuyer simultanément sur le bouton de commande Préparation pour deux tasses et sur la touche Marche/Arrêt pendant environ 3 secondes. → Le symbole du détartrage gouttes s‘allume. clignote et le symbole du plateau récolte- Phase 1 Pendant la phase 1, un symbole des grains de café s‘affiche à l‘écran. 3 Videz le bac de récupération du marc de café et le plateau récoltegouttes. 4 Placer le plateau récolte-gouttes sans le bac de récupération du marc de café, placer le bac de récupération du marc de café sous le Perfect Cappuccino. → Le symbole du réservoir d‘eau s‘allume. 112 Heft_Caffeo_Bistro_EU_2.3_041114.indd 112 04.11.2014 15:55:21 Relever le couvercle du réservoir d‘eau (im. A, n° 3) et retirer le réservoir d‘eau de l‘appareil par la poignée vers le haut et le vider complètement. 6 Placer le détartrant (par exemple le détartrant liquide ANTI CALC Espresso Machines de Melitta®) dans le réservoir d‘eau conformément aux instructions présentes sur l‘emballage. FRANÇAIS 5 Avertissement ! Risque d‘irritation de la peau par le détartrant Respectez les consignes de sécurité et les quantités indiquées sur l‘emballage du détartrant. 7 Remettre le réservoir d‘eau en place. 8 Appuyer sur le bouton de commande Vapeur . → Phase 1 est terminée. Phase 2 Pendant la phase 2, deux grains de café s‘affichent à l‘écran. → Le programme de détartrage automatique démarre. L‘eau circule à l‘intérieur de l‘appareil jusque dans le plateau récolte-gouttes. Cette opération dure environ 10 minutes. Le symbole de la soupape s‘allume alors. 9 Retirer le fouet du Perfect Cappuccino de la buse vapeur vers le bas (im. F). 10 Positionner le Perfect Cappuccino de façon à ce que la buse vapeur soit dans le bac de récupération du marc de café. Avertissement ! Risque de brûlure car la buse vapeur et le fouet sont chauds Pendant l‘écoulement de l‘eau chaude, ne jamais toucher la buse vapeur ou le fouet du Perfect Cappuccino. 113 Heft_Caffeo_Bistro_EU_2.3_041114.indd 113 04.11.2014 15:55:21 11 Tourner la molette (im. A, n° 6) dans le sens des aiguilles d‘une montre pour ouvrir la soupape. → Le symbole de la soupape clignote. La solution de détartrant s‘écoule de la buse vapeur dans le récipient. Cette opération dure environ 10 minutes. → Le symbole du plateau récolte-gouttes et le symbole du réservoir d‘eau s‘allument ensuite car la solution de détartrage s‘est entièrement écoulée. 12 Videz le bac de récupération du marc de café et le plateau récoltegouttes. 13 Placer le plateau récolte-gouttes sans le bac de récupération du marc de café, placer le bac de récupération du marc de café sous le Perfect Cappuccino. 14 Rinçez soigneusement le réservoir d‘eau et remplissez-le d‘eau du robinet jusqu‘au repère Max., puis replacez-le. → Le Bouton de commande Vapeur s‘allume. 15 Appuyer sur le bouton de commande Vapeur . → Phase 2 est terminée. Phase 3 Pendant la phase 3, trois grains de café s‘affichent à l‘écran. → Le symbole de la soupape clignote. De l‘eau s‘écoule de la buse vapeur dans le récipient. Le symbole de la soupape s‘allume ensuite. 16 Tourner la molette dans le sens inverse des aiguilles d‘une montre pour fermer la soupape. → L‘eau circule à l‘intérieur de l‘appareil jusque dans le plateau récoltegouttes. Le symbole du plateau récolte-gouttes s‘allume alors. 17 Videz le bac de récupération du marc de café et le plateau récoltegouttes, puis remettez-les en place. 18 Attendre que la buse vapeur soit refroidie et insérer à nouveau le fouet par le bas sur la buse jusqu‘à ce qu‘il s‘enclenche. 114 Heft_Caffeo_Bistro_EU_2.3_041114.indd 114 04.11.2014 15:55:21 → La touche Marche/Arrêt s‘allume après une brève phase de chauffe. Les boutons de commande et les symboles de grains s‘allument. L‘appareil est prêt à fonctionner. FRANÇAIS 11.6 Détartrage du réservoir d‘eau Le réservoir d‘eau doit être détartré régulièrement afin de garantir un bon fonctionnement. • Relevez le couvercle du réservoir d‘eau (im. A, n° 3) et retirez le réservoir d‘eau de l‘appareil par le haut. • Avant le détartrage, retirer - s‘il est présent - le filtre à eau Melitta® Claris® du réservoir d‘eau (voir page 95). • Remplir le réservoir d‘eau avec un produit de détartrage disponible dans le commerce. Respecter les instructions du fabricant du produit de détartrage. • Rincer ensuite abondamment le réservoir d‘eau à l‘eau claire. • Le cas échéant, remonter le filtre à eau Melitta® Claris® dans le réservoir d‘eau (voir page 95). • Remplir le réservoir d‘eau avec de l‘eau fraîche du robinet jusqu‘au repère Max. et le remettre en place. 115 Heft_Caffeo_Bistro_EU_2.3_041114.indd 115 04.11.2014 15:55:21 12 Transport et fin de vie du produit 12.1 Préparation au transport, protection contre le gel et mesures en cas de non-utilisation prolongée Élimination de l‘eau dans l‘appareil et aération Avant tout transport et en cas de non-utilisation prolongée, nous recommandons d‘éliminer l‘eau présente dans l‘appareil et de l‘aérer. Ceci permet également de protéger l‘appareil contre les dégâts liés au gel. Condition préalable: l‘appareil se trouve en mode Stand-by (voir „Mise en marche et arrêt de l‘appareil“ page 94). • Placer un récipient sous le Perfect Cappuccino. • Appuyer simultanément sur le bouton de commande Vapeur la touche Marche/Arrêt pendant plus de 2 secondes. → Le bouton de commande Vapeur d‘eau s‘allume. • clignote. Le symbole du réservoir Relevez le couvercle du réservoir d‘eau (im. A, n° 3) et retirez le réservoir d‘eau de l‘appareil par le haut. → Le bouton de commande Vapeur • et sur clignote. Dès que le symbole de la soupape s‘allume dans l‘affichage, tourner la molette (im. A, n° 6) dans le sens des aiguilles d‘une montre pour ouvrir la soupape. → De la vapeur sort du Perfect Cappuccino. Le symbole de la soupape et le bouton de commande Vapeur clignotent. Dès que l‘appareil est vidé et aéré, le bouton de commande Vapeur et le symbole de la soupape s‘allument. • Tourner la molette dans le sens inverse des aiguilles d‘une montre pour fermer la soupape. → L‘appareil se trouve en mode Stand-by. • Remettre le réservoir d‘eau vide en place. 116 Heft_Caffeo_Bistro_EU_2.3_041114.indd 116 04.11.2014 15:55:22 • Arrêter l‘appareil complètement au niveau de l‘interrupteur. • Débrancher la prise de réseau. Remarque FRANÇAIS Le filtre à eau Melitta® Claris® ne doit pas rester à sec pendant une période prolongée. Nous recommandons de stocker le filtre à eau Melitta Claris dans un verre d‘eau au réfrigérateur en cas d‘une non-utilisation prolongée de l‘appareil. Transport • Éliminer l‘eau présente dans l‘appareil et l‘aérer. • Videz et nettoyez le plateau récolte-gouttes et le bac de récupération du marc de café. • Videz les réservoirs d‘eau et de café en grains. Aspirer les grains restés au fond, si nécessaire avec un aspirateur. • Si possible, transportez l‘appareil dans son emballage d‘origine, avec la mousse solide, afin d‘éviter tout dégât lié au transport. Prudence ! Ne transportez pas et ne stockez pas l‘appareil dans des moyens de transport ni dans des locaux à basses températures, car l‘eau résiduelle pourrait geler ou condenser et ainsi causer des dégâts à l‘appareil. Fin de vie du produit • Éliminez l‘appareil dans le respect de l‘environnement par l‘intermédiaire de systèmes de collecte appropriés. 117 Heft_Caffeo_Bistro_EU_2.3_041114.indd 117 04.11.2014 15:55:22 13 Remédier aux problèmes Problème Origine Mesure Le café coule au compte-goutte. Mouture trop fine Régler une finesse de mouture plus grosse. Nettoyer la chambre d'extraction. Détartrer éventuellement Lancer éventuellement le programme de nettoyage automatique. Le café ne coule pas. Le réservoir d'eau n'est pas rempli ou est mal positionné. Remplir le réservoir d'eau et contrôler son positionnement. Ouvrir éventuellement la soupape jusqu'à ce que l'eau s'écoule de l'appareil, puis la refermer. La chambre d'extraction est bouchée. Nettoyer la chambre d'extraction. Les grains de café ne tombent pas dans le moulin (grains trop gras). Taper légèrement sur le réservoir de café en grains. Le levier basculant se trouve à la verticale. Basculer le levier basculant vers la droite ou vers la gauche. Corps étranger dans le moulin Contacter la Hotline Bruit provenant du moulin Corps étranger dans le moulin Contacter la Hotline Les symboles des grains clignotent, bien que le réservoir de café en grains soit rempli. Il n'y a pas suffisamment de grains moulus dans la chambre d'extraction. Appuyer sur le bouton de commande Préparation pour ou deux tasses une tasse . Le moulin ne moud pas les grains de café. 118 Heft_Caffeo_Bistro_EU_2.3_041114.indd 118 04.11.2014 15:55:22 Origine Mesure Le symbole de la soupape s'allume inopinément. De l'air se trouve dans les conduites à l'intérieur de l'appareil. Ouvrir la soupape jusqu'à ce que l'eau s'écoule de l'appareil puis la refermer. Nettoyer éventuellement la chambre d'extraction. La chambre d'extraction ne peut plus être remise en place une fois retirée., La chambre d'extraction n'est pas verrouillée correctement. Vérifiez si la poignée de verrouillage de la chambre d'extraction est encliquetée correctement. L'entraînement n'est pas dans la bonne position. Arrêter l'appareil, puis le remettre en marche et ensuite appuyer simultanément sur les boutons de commande de Préparation pour une tasse et deux tasses pendant plus de 2 secondes. L'entraînement se met en position. Ensuite, réinsérez la chambre d'extraction en contrôlant son verrouillage correct. Les boutons de commande pour une tasse et deux tasses clignotent tour à tour avec la touche Marche /Arrêt La chambre d'extraction est absente ou est mal positionnée. Positionner correctement la chambre d'extraction. Trop-plein du compartiment de chauffe. Arrêter et rallumer l'appareil par l'interrupteur (renouveler l'opération si nécessaire) jusqu'à ce que le mode Standby s'affiche. Erreur de système Arrêter et rallumer l'appareil au niveau de l'interrupteur ; en cas d'échec, retourner l'appareil au Service Après-Vente . Clignotement continu de toutes les touches de commande FRANÇAIS Problème Merci de contacter le service consommateur Melitta®, si les solutions mentionnées ne vous ont pas aidées à résoudre le problème. France: 0970 805 105 Belgique/Luxembourg: 0032 9 331 52 30 119 Heft_Caffeo_Bistro_EU_2.3_041114.indd 119 04.11.2014 15:55:22 Gentile cliente! Complimenti per aver acquistato il Suo Melitta® CAFFEO®. Siamo lieti di poter Le dare il benvenuto come amante del caffè e buongustaio/a di Melitta® CAFFEO®. Grazie al Suo nuovo prodotto di qualità Melitta® CAFFEO® potrà godersi tante e particolari pause caffè. Si goda con tutti i sensi le specialità di caffè che preferisce e si lasci viziare. Lo schiumatore latte Perfect Cappuccino, con il quale potrà preparare una schiuma di latte fantastica per diverse specialità di caffè e il serbatoio chicchi a 2 camere Bean Select, che Le consente di scegliere tra due diversi tipi di chicchi, Le offriranno un piacere unico. Affinché il Suo Melitta® CAFFEO® riservi per lungo tempo a Lei e ai Suoi ospiti grandi soddisfazioni, la preghiamo di leggere e conservare scrupolosamente queste istruzioni per l’uso. Se ha bisogno di ulteriori informazioni o ha delle domande in merito al prodotto, la preghiamo di rivolgersi direttamente a noi oppure visiti il nostro sito Internet all’indirizzo www.melitta.ch. Le auguriamo quindi tanta gioia con la Sua nuova macchina per caffè superautomatica. Il Suo team Melitta® CAFFEO® ® Registered trademark of a company of the Melitta Group 120 Heft_Caffeo_Bistro_EU_2.3_041114.indd 120 04.11.2014 15:55:22 Sommario Indicazioni relative a queste istruzioni per l’uso ..................................123 1.1 1.2 1.3 2 3 Avvertenze di sicurezza generali ........................................................125 Descrizione dell’apparecchio ..............................................................128 3.1 3.2 3.3 4 7 Posizionamento ...................................................................................... 130 Collegamento ......................................................................................... 131 Riempimento del serbatoio chicchi......................................................... 131 Riempimento del serbatoio dell’acqua ................................................... 132 Prima accensione ................................................................................... 132 Regolazione dell’intensità caffè .............................................................. 133 Regolazione della quantità d’erogazione ............................................... 133 Accensione e spegnimento .................................................................134 5.1 5.2 6 Legenda della figura A............................................................................ 128 Legenda della figura B ........................................................................... 128 Display.................................................................................................... 129 Messa in funzione ...............................................................................130 4.1 4.2 4.3 4.4 4.5 4.6 4.7 5 Simboli che ricorrono nel testo di queste istruzioni per l’uso.................. 123 Utilizzo conforme .................................................................................... 124 Utilizzo non conforme ............................................................................. 124 ITALIANO 1 Accensione dell’apparecchio .................................................................. 134 Spegnimento dell’apparecchio ............................................................... 134 Inserimento del filtro acqua Melitta® Claris® ........................................135 Preparazione di Espresso o Café Crème ...........................................136 7.1 7.2 7.3 Preparazione di una tazza di Espresso o Café Crème .......................... 136 Preparazione di due tazze di Espresso o Café Crème .......................... 137 Preparazione di Espresso o Café Crème con caffè in polvere............... 138 8 Preparazione di schiuma di latte .........................................................139 9 Preparazione di acqua calda ..............................................................141 121 Heft_Caffeo_Bistro_EU_2.3_041114.indd 121 04.11.2014 15:55:22 10 Impostazioni di funzione .....................................................................142 10.1 10.2 10.3 10.4 10.5 10.6 Impostazione della durezza dell’acqua .................................................. 142 Impostazione della modalità risparmio energia ...................................... 143 Impostazione della modalità stand-by .................................................... 144 Regolazione della temperatura di ebollizione......................................... 145 Ripristino delle impostazioni di fabbrica ................................................. 146 Impostazione del grado di macinazione ................................................. 147 11 Cura e manutenzione..........................................................................148 11.1 11.2 11.3 11.4 11.5 11.6 Pulizia generale ...................................................................................... 148 Pulizia del Perfect Cappuccino............................................................... 148 Pulizia dell’unità bollitore ........................................................................ 149 Programma di pulizia.............................................................................. 150 Programma di decalcificazione .............................................................. 153 Decalcificazione del serbatoio dell’acqua............................................... 156 12 Trasporto e smaltimento .....................................................................157 12.1 Preparazione per il trasporto, protezione antigelo e provvedimenti da adottare in caso di non utilizzo per un lungo periodo di tempo .............. 157 13 Eliminazione dei guasti .......................................................................159 122 Heft_Caffeo_Bistro_EU_2.3_041114.indd 122 04.11.2014 15:55:22 1 Indicazioni relative a queste istruzioni per l’uso Per orientarsi meglio consigliamo di aprire le pagine pieghevoli all’inizio e alla fine di queste istruzioni per l’uso. 1.1 Simboli che ricorrono nel testo di queste istruzioni per l’uso ITALIANO I simboli di queste istruzioni per l’uso indicano particolari pericoli correlati all’utilizzo del Suo Melitta® CAFFEO® o le forniscono utili informazioni. Avvertenza! I testi accompagnati da questo simbolo contengono informazioni per la Sua sicurezza e indicano possibili pericoli d’incidente e lesioni. Prudenza! I testi accompagnati da questo simbolo contengono informazioni per evitare malfunzionamenti e indicano i possibili rischi di danni materiali. Nota I testi con questo simbolo contengono utili informazioni supplementari per l’utilizzo del Suo Melitta® CAFFEO®. 123 Heft_Caffeo_Bistro_EU_2.3_041114.indd 123 04.11.2014 15:55:22 1.2 Utilizzo conforme Melitta® CAFFEO® è adatto esclusivamente alla preparazione di caffè e specialità di caffè, al riscaldamento di acqua e al riscaldamento di latte all’esterno dell’apparecchio. L’apparecchio è destinato all’uso domestico e non a quello industriale. L’uso conforme comprende che: • Lei legga attentamente, comprenda e osservi le istruzioni per l’uso. • Lei si attenga in particolare alle avvertenze di sicurezza. • Lei impieghi Melitta® CAFFEO® nell’ambito delle condizioni di funzionamento descritte in queste istruzioni per l’uso. 1.3 Utilizzo non conforme Come uso non conforme si intende l’impiego di Melitta® CAFFEO® in modo diverso da come descritto nelle presenti istruzioni per l’uso. Avvertenza! A causa di un uso non conforme può ferirsi o scottarsi con l’acqua molto calda o il vapore. Nota Il produttore non risponde per danni da ricondursi a un utilizzo non conforme. 124 Heft_Caffeo_Bistro_EU_2.3_041114.indd 124 04.11.2014 15:55:23 2 Avvertenze di sicurezza generali La macchina da caffè è conforme alle seguenti direttive europee: – 2006 / 95 / CE (Bassa Tensione), – 2004 / 108 /CE (Compatibilità Elettromagnetica), – 2011 / 65 / UE (RoHS), – 2009 / 125 / CE (Ecodesign / ErP). Nonostante ciò ci sono rischi residui.Rispettare le avvertenze di sicurezza per evitare pericoli. Melitta® non si assume alcuna responsabilità per danni derivanti dalla mancata osservanza delle avvertenze di sicurezza. La preghiamo di leggere con attenzione le seguenti avvertenze. Se non le rispetta, può venire compromessa la Sua stessa sicurezza e quella dell’apparecchio. ITALIANO La macchina da caffè è costruita secondo lo stato più avanzato della tecnica. Avvertenza! Pericoli dovuti alla corrente elettrica In caso di danni alla macchina o al cavo di alimentazione sussiste il pericolo di morte a causa di scosse elettriche. Rispettare le seguenti avvertenze di sicurezza per evitare rischi causati da alta tensione. – Non utilizzare un cavo di alimentazione danneggiato. – Un cavo di alimentazione danneggiato dovrà essere sostituito esclusivamente dal produttore, dal suo servizio di assistenza o da altra persona adeguatamente qualificata. – Non aprire coperchi o coperture avvitati in maniera fissa sul corpo della macchina da caffè. – Utilizzare la macchina da caffè soltanto se è perfettamente funzionante e in perfetto stato tecnico. – Una macchina da caffè difettosa dovrà essere riparata 125 Heft_Caffeo_Bistro_EU_2.3_041114.indd 125 04.11.2014 15:55:23 esclusivamente da un‘officina autorizzata. Non riparare la macchina da soli. – Non apportare modifiche alla macchina da caffè, ai suoi componenti o agli accessori. – Non immergere la macchina da caffè in acqua. Avvertenza! Pericolo di ustioni e scottature I liquidi ed il vapore fuoriuscenti possono essere molto caldi. Anche alcune parti della macchina si riscaldano fortemente. Rispettare le seguenti avvertenze di sicurezza per evitare ustioni e scottature. – Evitare il contatto dei liquidi e dei vapori fuoriuscenti con la pelle. – Durante il funzionamento non toccare gli ugelli dell‘erogatore. 126 Heft_Caffeo_Bistro_EU_2.3_041114.indd 126 04.11.2014 15:55:23 Sicurezza generale Rispettare le seguenti avvertenze di sicurezza per evitare danni alle persone e danni materiali. – Durante il funzionamento della macchina da caffè non mettere le mani nel vano interno della macchina. – Tenere la macchina da caffè ed il cavo di alimentazione lontani dalla portata dei bambini al di sotto degli 8 anni. – L‘uso della presente macchina da caffè è consentito ai bambini al di sopra degli 8 anni come anche a persone con ridotte capacità psico-fisico-sensoriali o con esperienze e conoscenze insufficienti, premesso che queste persone vengano attentamente sorvegliate o siano state accuratamente istruite sull‘uso sicuro della macchina e siano a conoscenza dei pericoli risultanti. – Ai bambini è vietato giocare con la macchina da caffè. La pulizia e la manutenzione sono proibite ai bambini al di sotto degli 8 anni. I bambini al di sopra degli 8 anni devono essere sorvegliati per l‘esecuzione della pulizia e della manutenzione. – Staccare la macchina da caffè dall‘alimentazione elettrica se rimane incustodita a lungo. ITALIANO Avvertenza! 127 Heft_Caffeo_Bistro_EU_2.3_041114.indd 127 04.11.2014 15:55:23 3 Descrizione dell’apparecchio 3.1 Legenda della figura A Numero in figura Spiegazione 1 Vaschetta raccogligoccia con lamiera tazze e serbatoio fondi (interno) 2 Schiumatore latte “Perfect Cappuccino” 3 Serbatoio dell’acqua 4 Tasto di comando per l’intensità caffè 5 Tasto di comando per l’erogazione del vapore 6 Interruttore valvola per erogazione vapore e acqua calda 7 Display 8 Serbatoio chicchi a 2 camere “Bean Select” 9 Leva di ribaltamento per il serbatoio chicchi “Bean Select” 10 Contenitore del caffè con coperchio 11 Tasto ON/OFF 12 Regolatore della quantità di caffè 13 Tasto di comando per l’erogazione di una tazza 14 Tasto di comando per l’erogazione di due tazze 15 Erogatore regolabile in altezza 16 Galleggiante per l’indicazione del livello dell’acqua nella vaschetta raccogligoccia 3.2 Legenda della figura B Numero in figura Spiegazione 17 Cavo di rete 18 Unità bollitore e targhetta identificativa (dietro il coperchio) 19 Regolazione del grado di macinazione 20 Interruttore di rete 128 Heft_Caffeo_Bistro_EU_2.3_041114.indd 128 04.11.2014 15:55:23 Simbolo Display Significato Valvola vapore Serbatoio dell’acqua Contenitore del caffè Visualizzazione Spiegazione/Richiesta Si illumina Raggiunta la temperatura per l’erogazione del vapore Aprire valvola Lampeggia Valvola aperta Si illumina Riempimento serbatoio acqua Lampeggia Coperchio del contenitore del caffè aperto Si illumina L’erogazione del caffè in polvere avviene dopo la pressione del tasto di comando per ITALIANO 3.3 l’erogazione di una tazza Si illumina 1 chicco: leggero 2 chicchi: normale 3 chicchi: forte 4 chicchi: molto forte Lampeggia Riempire il serbatoio chicchi; il lampeggio termina dopo la successiva erogazione di caffè Si illumina Pulire l’apparecchio Lampeggia Programma di pulizia in corso Si illumina Svuotare la vaschetta raccogligoccia e il serbatoio fondi Lampeggia Inserire vaschetta raccogligoccia e serbatoio fondi Si illumina Decalcificare l’apparecchio Lampeggia Programma di decalcificazione in corso Intensità caffè Pulizia Vaschetta raccogligoccia e serbatoio fondi Decalcificazione 129 Heft_Caffeo_Bistro_EU_2.3_041114.indd 129 04.11.2014 15:55:23 4 Messa in funzione Per la prima messa in funzione eseguire le operazioni di seguito descritte. Quando sono state effettuate queste operazioni, l’apparecchio è pronto all’uso. È quindi possibile preparare il caffè. Consigliamo di buttare via le prime due tazze di caffè dopo la prima messa in funzione. 4.1 • Posizionamento Appoggiare l’apparecchio su di una superficie stabile, piana e asciutta. Mantenere una distanza di circa 10 cm dalla parete e da altri oggetti. Prudenza! – Non appoggiare mai l’apparecchio su superfici molto calde o in ambienti umidi. – Non trasportare o immagazzinare l’apparecchio in mezzi di trasporto o locali a bassa temperatura, poiché l’acqua residua potrebbe congelare o condensare e possono derivarne danni all’apparecchio. Osservare le note di cui a pagina 157. • Il serbatoio fondi si trova già nella vaschetta raccogligoccia. Fare attenzione che la vaschetta raccogligoccia sia inserita nell’apparecchio fino alla battuta. Indicazioni – Conservare il materiale d’imballaggio, compresa la schiuma solida, per i trasporti ed eventuali spedizioni di rinvio, per evitare danni a causa di trasporto. – È del tutto normale che prima della prima messa in funzione si trovino tracce di caffè e acqua nell’apparecchio. Ciò è dovuto al fatto che in fabbrica è stato verificato il suo perfetto funzionamento. 130 Heft_Caffeo_Bistro_EU_2.3_041114.indd 130 04.11.2014 15:55:24 4.2 • Collegamento Inserire il cavo di rete in una presa adatta. Avvertenza! Pericolo di incendio e di folgorazione elettrica a causa di una tensione di rete errata, collegamenti e cavo di rete errati o danneggiati – Assicurarsi che la tensione di rete corrisponda alla tensione di rete riportata sulla targhetta identificativa dell’apparecchio. La targhetta identificativa si trova sul lato destro dell’apparecchio dietro il coperchio (Fig. B, N. 18). Assicurarsi che la presa soddisfi le norme in vigore in materia di sicurezza elettrica. Nei casi dubbi rivolgersi a un elettricista specializzato. – Non utilizzare mai cavi di rete danneggiati (isolamento danneggiato, fili scoperti). – Fare sostituire i cavi di rete danneggiati esclusivamente dal produttore nel periodo di garanzia e in seguito esclusivamente da personale specializzato qualificato. 4.3 ITALIANO – Riempimento del serbatoio chicchi Grazie al serbatoio chicchi a 2 camere „Bean Select“ è possibile utilizzare parallelamente due diverse qualità di caffè. Riempire p.es. una camera con chicchi per Espresso e l’altra con chicchi per Café Crème. Tramite la leva di ribaltamento è poi possibile passare comodamente da una qualità all’altra. • Riempire il serbatoio chicchi (Fig. A, N. 8) con chicchi di caffè freschi. Ciascuna delle due camere ha una capacità massima di 135 g. Prudenza! • – Riempire il serbatoio chicchi esclusivamente con chicchi di caffè. – Non riempirlo mai con chicchi di caffè macinati, liofilizzati o caramellizzati. Selezionare la qualità di chicchi desiderata, mettendo la leva di ribaltamento sulla camera corrispondente. 131 Heft_Caffeo_Bistro_EU_2.3_041114.indd 131 04.11.2014 15:55:24 Avvertenza! Pericolo per le persone con intolleranza alla caffeina. Dato che al di sopra della macina rimangono sempre resti dei chicchi utilizzati prima, passando a un’altra qualità di chicchi le due qualità si mescolano. Per questo motivo, le prime due tazze dopo il passaggio ai chicchi decaffeinati possono contenere ancora caffè con caffeina. Quindi, solo la terza tazza di caffè preparata dopo il passaggio è senza caffeina. Nota Se la leva di ribaltamento è in verticale durante il processo di ebollizione, nella macina non vengono alimentati chicchi. 4.4 Riempimento del serbatoio dell’acqua • Sollevare il coperchio del serbatoio dell’acqua (Fig. A, N. 3) e rimuovere il serbatoio dall’apparecchio dall’alto. • Riempire il serbatoio dell’acqua fino alla demarcazione max. con acqua fredda di condotta e reinserirlo. 4.5 Prima accensione Tutti i tubi nell’apparecchio sono state svuotate e ventilate di fabbrica. Per questo motivo, alla prima accensione, dopo la fase di riscaldamento, si accende il simbolo della valvola e l’apparecchio deve essere sfiatato tramite la valvola. Lo sfiato è necessario solo alla prima messa in funzione dell’apparecchio e dopo lo svuotamento e la ventilazione. A questo proposito tenere presente pagina 157. • Portare l’interruttore di rete (Fig. B, N. 20) in posizione “I”. • Premere il tasto ON/OFF per accendere l’apparecchio. → Il tasto ON/OFF lampeggia. L’apparecchio si riscalda. Terminato il riscaldamento si illumina il simbolo della valvola . • Mettere un recipiente sotto il Perfect Cappuccino e spingere il tubo del vapore verso il basso fino a quando si trova al di sotto del bordo del recipiente. • Mettere un recipiente sotto l’erogatore. • Ruotare l’interruttore valvola (Fig. A, N. 6) in senso orario per aprire la valvola. 132 Heft_Caffeo_Bistro_EU_2.3_041114.indd 132 04.11.2014 15:55:24 → Il simbolo della valvola Perfect Cappuccino. • lampeggia. L’acqua fluisce nel recipiente sotto il Non appena l’acqua smette di fuoriuscire e il simbolo della valvola si illumina, ruotare l’interruttore valvola in senso antiorario per chiudere la valvola. → L’apparecchio effettua un lavaggio automatico che comporta la fuoriuscita di acqua calda dall’erogatore. Successivamente si illumina il tasto ON/OFF . L’apparecchio è pronto all’uso. • Regolazione dell’intensità caffè Premere più volte il tasto di comando per l’intensità caffè scegliere tra quattro possibili gradi di intensità. ITALIANO 4.6 per → La selezione effettuata viene visualizzata sul display dai simboli dei chicchi . Visualizzazione Intensità caffè Leggero Normale (impostazione di fabbrica) Forte Molto forte • L’aroma del caffè può essere modificato anche tramite la regolazione del grado di macinazione. A questo proposito tenere presente pagina 147. 4.7 • Regolazione della quantità d’erogazione Ruotare il regolatore della quantità caffè (Fig. A, N. 12), per regolare in modo continuo la quantità d’erogazione da 30 ml a 220 ml (regolatore verso sinistra: 30 ml, regolatore al centro: 125 ml, regolatore verso destra: 220 ml). 133 Heft_Caffeo_Bistro_EU_2.3_041114.indd 133 04.11.2014 15:55:24 • 5 Accensione e spegnimento 5.1 Accensione dell’apparecchio Portare l’interruttore di rete (Fig. B, N. 20) in posizione “I”. → L’apparecchio si trova in modalità stand-by. Il tasto ON/OFF di colore rosso. • Mettere un recipiente adatto sotto l’erogatore. • Premere il tasto ON/OFF si illumina per accendere l’apparecchio. → Il tasto ON/OFF lampeggia. L’apparecchio si riscalda. L’apparecchio effettua un risciacquo automatico che comporta la fuoriuscita di acqua calda dall’erogatore. Sucessivamente si illuminano il tasto ON/OFF e i simboli dei chicchi . L’apparecchio è pronto all’uso. 5.2 Spegnimento dell’apparecchio • Mettere un recipiente il più possibile sotto l’erogatore. • Premere il tasto ON/OFF stand-by. per portare l’apparecchio in modalità → L’apparecchio effettua un risciacquo automatico del tubo del caffè. La camera bollitore passa in stato di riposo. Il tasto ON/OFF si illumina di colore rosso. • Portare l’interruttore di rete (Fig. B, N. 20) in posizione “0” per spegnere completamente l’apparecchio. Indicazioni – Ad ogni accessione l’apparecchio effettua un risciacquo automatico. – Spegnere l’apparecchio solo tramite l’interruttore di rete, quando si trova in modalità stand-by, poiché altrimenti sussiste il rischio che l’unità bollitore non sia nella posizione corretta. 134 Heft_Caffeo_Bistro_EU_2.3_041114.indd 134 04.11.2014 15:55:24 6 Inserimento del filtro acqua Melitta® Claris® • Impostare il mese attuale sull’anello blu, in alto sul filtro dell’acqua Melitta® Claris®. In questo modo è possibile riconoscere facilmente quando deve essere sostituito il filtro dell’acqua Melitta® Claris®. • Mettere il filtro dell’acqua per alcuni minuti in un bicchiere con acqua fredda di condotta, prima di inserirlo. • Sollevare il coperchio del serbatoio dell’acqua (Fig. A, N. 3) e rimuovere il serbatoio dall’apparecchio dall’alto. • Svuotare il serbatoio dell’acqua. • Avvitare con cautela il filtro dell’acqua Melitta® Claris® sul filetto che si trova sul fondo del serbatoio dell’acqua utilizzando lo strumento di avvitamento, all’estremità inferiore del cucchiaio per il caffè fornito in dotazione. • Riempire il serbatoio dell’acqua fino alla demarcazione max. con acqua fredda di condotta e reinserirlo. • Mettere un recipiente sotto il Perfect Cappuccino e spingere il tubo del vapore verso il basso fino a quando si trova al di sotto del bordo del recipiente. • Ruotare l’interruttore valvola (Fig. A, N. 6) in senso orario per aprire la valvola. ITALIANO Il filtro dell’acqua Melitta® Claris® filtra il calcare e altre sostanze nocive presenti nell’acqua. Inserirlo nell’apparecchio solo dopo la prima messa in funzione. Se si utilizza il filtro, l’apparecchio deve essere sottoposto a decalcificazione più raramente ed è possibile regolare la durezza dell’acqua sul grado 1 (a questo riguardo tenere presente pagina 142). La protezione sicura contro la calcificazione prolunga la vita utile dell’apparecchio. Il filtro dell’acqua va sostituito con regolarità e al più tardi comunque dopo 2 mesi. Il filtro acqua è reperibile in commercio nei negozi specializzati. → L’acqua fluisce nel recipiente sotto il Perfect Cappuccino. A causa della funzione di stop automatica, è necessario aprire e chiudere più volte l‘interruttore valvola. • Non appena il simbolo per il serbatoio dell’acqua si illumina, ruotare l’interruttore valvola in senso antiorario per chiudere la valvola. 135 Heft_Caffeo_Bistro_EU_2.3_041114.indd 135 04.11.2014 15:55:24 → L’apparecchio è pronto all’uso. Nota Il filtro dell’acqua Melitta® Claris® non deve rimanere asciutto per un periodo di tempo molto lungo. Consigliamo pertanto di conservare il filtro dell’acqua Melitta® Claris® in un bicchiere d’acqua dentro il frigorifero nel caso in cui non si utilizzi l’apparecchio per un periodo di tempo molto lungo. 7 Preparazione di Espresso o Café Crème 7.1 Preparazione di una tazza di Espresso o Café Crème Premesse: L’apparecchio è pronto all’uso (vedere „Accensione e spegnimento“ a pagina 134). L’intensità caffè desiderata e la quantità d’erogazione sono regolati (vedere pagina 133). La qualità di caffè desiderata nel serbatoio chicchi è selezionata. • Mettere un recipiente adatto sotto l’erogatore. • Premere il tasto di comando per l’erogazione di una tazza . → Avviare il processo di macinazione e l’erogazione di caffè. L’erogazione termina automaticamente quando è raggiunta la quantità d’erogazione regolata. • Per interrompere anticipatamente l’erogazione di caffè, premere il tasto di comando per l’erogazione di una tazza . 136 Heft_Caffeo_Bistro_EU_2.3_041114.indd 136 04.11.2014 15:55:25 7.2 Preparazione di due tazze di Espresso o Café Crème Premesse: L’apparecchio è pronto all’uso (vedere „Accensione e spegnimento“ a pagina 134). L’intensità caffè desiderata e la quantità d’erogazione sono regolati. La qualità di caffè desiderata nel serbatoio chicchi è selezionata. • Mettere due recipienti adatti, uno accanto all’altro, sotto l’erogatore. • Premere il tasto di comando per l’erogazione di due tazze . • Per interrompere anticipatamente l’erogazione di caffè, premere il tasto . di comando per l’erogazione di due tazze di caffè ITALIANO → Avviare il duplice processo di macinazione e l’erogazione di caffè. L’erogazione termina automaticamente quando è raggiunta la quantità d’erogazione regolata. 137 Heft_Caffeo_Bistro_EU_2.3_041114.indd 137 04.11.2014 15:55:25 7.3 Preparazione di Espresso o Café Crème con caffè in polvere Premesse: L’apparecchio è pronto all’uso (vedere „Accensione e spegnimento“ a pagina 134). La quantità d’erogazione desiderata è regolata. • Aprire il coperchio del contenitore caffè (Fig. A, N. 10). → Il simbolo per il contenitore caffè • lampeggia. Riempire con un cucchiaio max. di caffè in polvere fresco il relativo contenitore. Prudenza! • – Riempire il contenitore caffè esclusivamente con caffè in polvere. I prodotti istantanei possono bloccare l’unità bollitore. – Non inserire mai più di un cucchiaio (fornito in dotazione con l’apparecchio) di caffè in polvere, poiché altrimenti l’unità bollitore viene riempita eccessivamente. Chiudere il coperchio del contenitore caffè. → Si illuminano i simboli del contenitore caffè l’erogazione di una tazza . e il tasto di comando per • Mettere un recipiente adatto sotto l’erogatore. • Premere il tasto di comando per l’erogazione di una tazza . → Si avvia l’erogazione caffè. Termina automaticamente quando è raggiunta la quantità d’erogazione regolata. • Per interrompere anticipatamente l’erogazione di caffè, premere il tasto di comando per l’erogazione di una tazza . Nota Se entro 90 secondi dall’apertura del contenitore caffè non viene erogato caffè, l’apparecchio ritorna in funzionamento con chicchi caffè ed espelle il caffè in polvere nel serbatoio fondi, per bypassare il rischio di un eccessivo riempimento a posteriori della camera bollitore. 138 Heft_Caffeo_Bistro_EU_2.3_041114.indd 138 04.11.2014 15:55:25 8 Preparazione di schiuma di latte Premessa: L’apparecchio è pronto all’uso (vedere „Accensione e spegnimento“ a pagina 134). • Mettere un recipiente contenente latte sotto il Perfect Cappuccino. Fare attenzione che il frullino del Perfect Cappuccino sia immerso nel latte. • Riempire il recipiente al massimo per un terzo, poiché il volume del latte aumenta notevolmente quando viene schiumato. • Premere il tasto di comando per l’erogazione del vapore → Il tasto di comando per l’erogazione del vapore lampeggia. L’apparecchio si riscalda. Quando viene raggiunta la temperatura del vapore, si illuminano il tasto di comando per l’erogazione del vapore simbolo della valvola . e il ITALIANO . Avvertenza! Pericolo di ustioni e ustioni da liquidi dovute al tubo del vapore, alla manichetta del vapore e al frullino molto caldi Non toccare mai il tubo del vapore, la manichetta del vapore o il frullino del Perfect Cappuccino durante l’utilizzo. • Ruotare l’interruttore valvola (Fig. A, N. 6) in senso orario per aprire la valvola. → Il simbolo della valvola e il tasto di comando per l’erogazione del vapore lampeggiano. Il frullino schiuma il latte e contemporaneamente lo riscalda. Si ottiene una schiuma migliore muovendo il frollino in alto e in basso quando si schiuma il latte. • Ruotare l’interruttore valvola in senso antiorario per chiudere la valvola e quindi terminare di schiumare il latte. Il volume del latte dovrebbe essersi quasi raddoppiato e il recipiente dovrebbe risultare caldo al tatto. • Premere il tasto di comando per l’erogazione del vapore per passare dalla modalità vapore alla normale modalità operativa. 139 Heft_Caffeo_Bistro_EU_2.3_041114.indd 139 04.11.2014 15:55:25 • Attendere fino a quando il tubo del vapore è raffreddato e ruotarlo poi con il frullino in senso antiorario per allontanarlo dal Perfect Cappuccino (Fig. E). • Rimuovere dal basso il frullino del Perfect Cappuccino dal tubo del vapore (Fig. F). • Risciacquare il tubo del vapore e il frullino sotto acqua corrente o in lavastoviglie. • Ruotare il tubo del vapore pulito con il frullino in senso orario per montarlo sul Perfect Cappuccino fino a quando scatta in posizione. Nota Consigliamo di utilizzare latte freddo con un contenuto proteico elevato. Per ottenere una buona schiuma di latte non è il contenuto di grassi bensì di proteine nel latte ad essere determinante. 140 Heft_Caffeo_Bistro_EU_2.3_041114.indd 140 04.11.2014 15:55:25 9 Preparazione di acqua calda • Porre un panno sotto il Perfect Cappuccino per raccogliere l’eventuale acqua residua che fuoriesce. • Rimuovere dal basso il frullino del Perfect Cappuccino dal tubo del vapore (Fig. F). • Mettere un recipiente sotto il tubo del vapore e spingere quest’ultimo verso il basso fino a quando si trova al di sotto del bordo del recipiente. • Ruotare l’interruttore valvola (Fig. A, N. 6) in senso orario per aprire la valvola. → Il simbolo della valvola vapore nel recipiente. lampeggia. Acqua calda fuoriesce dal tubo del • Non appena è stata raggiunta la quantità di acqua desiderata, ruotare l’interruttore valvola in senso antiorario per chiudere la valvola. • Attendere fino a quando il tubo del vapore è raffreddato e spingere nuovamente dal basso il frullino sul tubo del vapore fino a quando scatta in posizione. ITALIANO Premessa: L’apparecchio è pronto all’uso (vedere „Accensione e spegnimento“ a pagina 134). 141 Heft_Caffeo_Bistro_EU_2.3_041114.indd 141 04.11.2014 15:55:25 10 Impostazioni di funzione 10.1 Impostazione della durezza dell’acqua Utilizzare la striscia reattiva fornita in dotazione per determinare la durezza dell’acqua nella propria regione. Attenersi alle istruzioni riportate sull’imballaggio della striscia reattiva. L’impostazione di fabbrica per la durezza dell’acqua è 4. Premessa: L’apparecchio si trova in modalità stand-by (vedere „Accensione e spegnimento“ a pagina 134). Per preservare la qualità dell’apparecchio impostare la durezza dell’acqua come di seguito illustrato: • Premere contemporaneamente il tasto di comando per l’erogazione di una tazza e il tasto di comando per l’erogazione del vapore fino a quando i quattro tasti di comando si illuminano debolmente. • Premere più volte il tasto di comando per l’erogazione del vapore per scegliere tra i quattro possibili gradi di durezza dell’acqua. → Il tasto di comando per l’erogazione del vapore si illumina intensamente. La scelta della durezza dell’acqua in base alla tabella viene visualizzata sul display tramite i simboli dei chicchi . Grado di durezza dell’acqua 1: 2: 3: 4: • Proprietà °d °e °f Dolce 0 - 10 0 - 13 0 - 18 Medio 10 - 15 13 - 19 18-27 Dura 15 - 20 19 - 25 27-36 Molto dura lampeggiante (impostazione di fabbrica) Premere il tasto ON/OFF selezionata. > 20 > 25 > 36 per confermare la durezza dell’acqua 142 Heft_Caffeo_Bistro_EU_2.3_041114.indd 142 04.11.2014 15:55:25 → In base alla scelta, sul display lampeggiano da 1 a 4 simboli dei chicchi L’apparecchio si trova nuovamente in modalità stand-by. . 10.2 Impostazione della modalità risparmio energia Premessa: L’apparecchio si trova in modalità stand-by (vedere „Accensione e spegnimento“ a pagina 134). Impostare la modalità risparmio energia come di seguito illustrato: • Premere contemporaneamente il tasto di comando per l’erogazione di e il tasto di comando per l’erogazione del vapore fino una tazza a quando i quattro tasti di comando si illuminano debolmente. • Premere più volte il tasto di comando per l’intensità caffè scegliere tra i quattro possibili tempi per il timer. per → Il tasto di comando per l’intensità caffè si illumina intensamente. La selezione viene visualizzata sul display tramite i simboli dei chicchi Visualizzazione ITALIANO Dopo l’ultima azione, l’apparecchio passa automaticamente (a seconda dell’impostazione) in modalità risparmio energia (l’apparecchio consuma molta meno energia rispetto alla modalità pronto). Per la modalità risparmio energia è possibile impostare diversi tempi. Di fabbrica l’apparecchio è regolato su 15 minuti . . Tempo 5 minuti 15 minuti (impostazione di fabbrica) 30 minuti Disattivo • Premere il tasto ON/OFF per confermare il tempo selezionato. → In base alla scelta, sul display lampeggiano da 1 a 4 simboli dei chicchi per conferma. L’apparecchio si trova nuovamente in modalità stand-by. 143 Heft_Caffeo_Bistro_EU_2.3_041114.indd 143 04.11.2014 15:55:26 Nota Premendo un tasto qualsiasi, l’apparecchio esce dalla modalità risparmio energia. La funzione del tasto premuto (p.es. preparazione del caffè) viene eseguita direttamente, solo la fase di riscaldamento dura più a lungo. 10.3 Impostazione della modalità stand-by L’apparecchio passa automaticamente in modalità stand-by 30 minuti dopo l’ultima azione (a seconda dell’impostazione). Per la modalità stand-by è possibile impostare diversi tempi. Di fabbrica l’apparecchio è regolato su 30 minuti . Premessa: L’apparecchio si trova in modalità stand-by (vedere „Accensione e spegnimento“ a pagina 134). Impostare la modalità stand-by come di seguito illustrato: • Premere contemporaneamente il tasto di comando per l’erogazione di e il tasto di comando per l’erogazione del vapore fino una tazza a quando i quattro tasti di comando si illuminano debolmente. • Premere più volte il tasto di comando per l’erogazione di due tazze per scegliere tra quattro possibili tempi per il timer. → Il tasto di comando per l’erogazione di due tazze si illumina intensamente. La selezione viene visualizzata sul display tramite i simboli dei chicchi Visualizzazione . Tempo 30 minuti (impostazione di fabbrica) 2 ore 4 ore 8 ore • Premere il tasto ON/OFF per confermare il tempo selezionato. → In base alla scelta, sul display lampeggiano da 1 a 4 simboli dei chicchi per conferma. L’apparecchio si trova nuovamente in modalità stand-by. 144 Heft_Caffeo_Bistro_EU_2.3_041114.indd 144 04.11.2014 15:55:26 Nota In modalità stand-by l’apparecchio consuma molta meno energia. Tuttavia, consigliamo di spegnere l’apparecchio con l’interruttore di rete se non viene utilizzato per molto tempo (p.es. anche per la notte). 10.4 Regolazione della temperatura di ebollizione La regolazione di fabbrica per la temperatura di ebollizione è livello 2 (media ). Regolare la temperatura di ebollizione come di seguito illustrato: • Premere contemporaneamente il tasto di comando per l’erogazione di e il tasto di comando per l’erogazione del vapore fino una tazza a quando i quattro tasti di comando si illuminano debolmente. • Premere il tasto di comando per l’erogazione di una tazza scegliere tra tre possibili temperature di ebollizione. → Il tasto di comando per l’erogazione di una tazza intensamente. ITALIANO Premessa: L’apparecchio si trova in modalità stand-by (vedere „Accensione e spegnimento“ a pagina 134). per si illumina → La selezione effettuata viene visualizzata sul display tramite i simboli dei chicchi . Visualizzazione Temperatura di ebollizione Bassa Media (impostazione di fabbrica) Alta • Premere il tasto ON/ OFF ebollizione selezionata. per confermare la temperatura di 145 Heft_Caffeo_Bistro_EU_2.3_041114.indd 145 04.11.2014 15:55:26 → In base alla scelta, sul display lampeggiano da 1 a 3 simboli dei chicchi L’apparecchio si trova nuovamente in modalità stand-by. . 10.5 Ripristino delle impostazioni di fabbrica Premessa: L’apparecchio si trova in modalità stand-by (vedere „Accensione e spegnimento“ a pagina 134). • Spegnere l’apparecchio tramite l’interruttore di rete. • Attendere fino a quando la spia rossa del tasto ON/OFF • Premere contemporaneamente il tasto di comando per l’intensità caffè e il tasto di comando per l’erogazione di due tazze . • Accendere contemporaneamente l’apparecchio con l’interruttore di rete. si spegne. → Tutte le impostazioni sono ripristinate a quelle di fabbrica. Riepilogo delle impostazioni di fabbrica: Impostazione di funzione Impostazione di fabbrica Intensità caffè Normale Durezza dell’acqua Durezza dell’acqua 4 Modalità risparmio energia Modalità stand-by Temperatura di ebollizione 15 minuti 30 minuti Media 146 Heft_Caffeo_Bistro_EU_2.3_041114.indd 146 04.11.2014 15:55:26 10.6 Impostazione del grado di macinazione Il grado di macinazione è stato regolato in modo ottimale prima della fornitura. Consigliamo pertanto di regolarlo solo dopo aver preparato circa 1 000 caffè (ca. 1 anno). È possibile impostare il grado di macinazione solo mentre la macina è in funzione. Impostare quindi il grado di macinazione direttamente dopo l’avvio di un’erogazione di caffè. Se l’aroma del caffè non dovesse essere sufficientemente intenso, consigliamo di impostare un grado di macinazione più fine. Portare la leva (Fig. B, N. 19) in una delle tre posizioni (vista dal lato posteriore dell’apparecchio). Posizione della leva ITALIANO • Grado di macinazione Sinistra Fine Centro Medio Destra Grosso (impostazione di fabbrica) 147 Heft_Caffeo_Bistro_EU_2.3_041114.indd 147 04.11.2014 15:55:27 11 Cura e manutenzione 11.1 Pulizia generale • Pulire l’apparecchio dall’esterno con un panno morbido e inumidito e un detergente per stoviglie in commercio. • Svuotare e pulire regolarmente la vaschetta raccogligoccia, al più tardi quando il galleggiante (Fig. A, N. 16) sporge al di sopra della lamiera tazze. • Pulire regolarmente il serbatoio fondi, p.es. in lavastoviglie. Prudenza! – Non utilizzare panni abrasivi, spugne o detergenti per evitare danni della superficie dell’apparecchio. – Non lavare la vaschetta raccogligoccia in lavastoviglie, poiché altrimenti si possono verificare delle deformazioni. 11.2 Pulizia del Perfect Cappuccino • Porre un panno sotto il Perfect Cappuccino per raccogliere l’eventuale acqua residua che fuoriesce. • Ruotare il tubo del vapore con il frullino in senso antiorario per rimuoverlo dal Perfect Cappuccino (Fig. E). • Rimuovere dal basso il frullino del Perfect Cappuccino dal tubo del vapore (Fig. F). • Risciacquare il tubo del vapore e il frullino sotto acqua corrente o in lavastoviglie. • Spingere nuovamente dal basso il frullino sul tubo del vapore fino a quando scatta in posizione. • Ruotare il tubo del vapore pulito con il frullino in senso orario per montarlo sul Perfect Cappuccino fino a quando scatta in posizione. Nota Se il Perfect Cappuccino viene lavato spesso in lavastoviglie possono verificarsi lievi variazioni del colore sul serbatoio fondi e sul Perfect Cappuccino. 148 Heft_Caffeo_Bistro_EU_2.3_041114.indd 148 04.11.2014 15:55:27 11.3 Pulizia dell’unità bollitore Premessa: L’apparecchio si trova in modalità stand-by (vedere „Accensione e spegnimento“ a pagina 134). Nota Per proteggere in modo ottimale l’apparecchio, raccomandiamo di pulire l’unità bollitore una volta a settimana sotto acqua corrente di condotta. Portare l’interruttore di rete (Fig. B, N. 20) in posizione “0” per spegnere completamente l’apparecchio. • Afferrare l’apparecchio per l’incavo sul lato destro (Fig. B, N. 18) e rimuovere il coperchio verso destra. • Premere e tenere premuto il pulsante rosso sul manico dell’unità bollitore (Fig. H) e ruotare il manico in senso orario fino alla battuta (circa di 75°). • Estrarre l’unità bollitore dall’apparecchio con il manico. • Lasciare l’unità bollitore nel suo stato (non spostare o girare i componenti dell’unità bollitore). • Risciacquare accuratamente l’intera unità bollitore da tutti i lati sotto acqua corrente. Fare attenzione in particolare che la superficie rappresentata in Fig. J sia priva di resti di caffè. ITALIANO • Prudenza! Non lavare mai l’unità bollitore in lavastoviglie. • Lasciare sgocciolare l’unità bollitore. • Rimuovere eventualmente i resti di caffè dalle superfici all’interno dell’apparecchio sulle quali deve essere inserita l’unità bollitore. • Reinserire l’unità bollitore nell’apparecchio e ruotare il manico dell’unità bollitore in senso antiorario fino alla battuta per bloccare l’unità bollitore. • Inserire i due incastri del coperchio nella parte posteriore dell’apparecchio e ruotare il coperchio verso sinistra, fino a quando si blocca in posizione. • Portare l’interruttore di rete (Fig. B, N. 20) in posizione “I”. 149 Heft_Caffeo_Bistro_EU_2.3_041114.indd 149 04.11.2014 15:55:27 • L’apparecchio si trova nuovamente in modalità stand-by. 11.4 Programma di pulizia Il programma di pulizia rimuove i residui e i resti di olio di caffè che non possono essere eliminati manualmente. In totale dura circa 15 minuti. Durante l’intero lampeggia. processo il simbolo della pulizia Per ottenere risultati di pulizia ottimali consigliamo di pulire prima l’unità bollitore (vedere pagina 149). Premessa: L’apparecchio si trova in modalità stand-by (vedere „Accensione e spegnimento“ a pagina 134). Prudenza! – Effettuare il programma di pulizia ogni 2 mesi o dopo circa 200 tazze erogate, al più tardi comunque quando sul display si illumina il simbolo per . la pulizia – Utilizzare esclusivamente le pastiglie detergenti di Melitta® per macchine per caffè superautomatiche. Queste pastiglie sono realizzate specificatamente per Melitta® CAFFEO®. Se si utilizzano altri detergenti, possono derivarne danni all’apparecchio. Effettuare il programma di pulizia come di seguito illustrato: 1 Se presente, rimuovere il filtro dell’acqua Melitta® Claris® dal serbatoio dell’acqua (vedere pagina 132). 2 Premere contemporaneamente il tasto di comando per l’erogazione di una tazza e il tasto ON/OFF per circa 3 secondi. → Il simbolo della pulizia lampeggia. Il simbolo della vaschetta raccogligoccia si illumina. 3 Svuotare la vaschetta raccogligoccia e il serbatoio fondi. 4 Reinserire la vaschetta raccogligoccia senza il serbatoio fondi e mettere il serbatoio fondi sotto l’erogatore. Fase 1 Durante la fase 1, sul display viene visualizzato un simbolo dei chicchi . 150 Heft_Caffeo_Bistro_EU_2.3_041114.indd 150 04.11.2014 15:55:27 → Prima vengono effettuati due risciacqui automatici. si illumina. Il simbolo del contenitore caffè 5 Aprire il coperchio del contenitore caffè. → Il simbolo per il contenitore caffè 6 lampeggia. Inserire una pastiglia detergente (Fig. G) e chiudere il coperchio del contenitore caffè. → Il simbolo del serbatoio dell’acqua si illumina. Fase 2 Durante la fase 2, sul display vengono visualizzati due simboli dei chicchi 7 . Sollevare il coperchio del serbatoio dell’acqua (Fig. A, N. 3) e rimuovere il serbatoio dall’apparecchio dall’alto. Riempire il serbatoio dell’acqua fino alla demarcazione max. con acqua fredda di condotta e reinserirlo. → Si illumina il tasto di comando per l’erogazione del vapore ITALIANO → La fase 1 è terminata. . → La fase 2 è terminata. Fase 3 Durante la fase 3, sul display vengono visualizzati tre simboli dei chicchi . 8 Premere il tasto di comando per l’erogazione del vapore . → Si avvia il programma di pulizia. Questo processo dura circa 10 minuti. Si illumina quindi il tasto di comando per l’erogazione del vapore . 9 Svuotare il serbatoio fondi e metterlo nuovamente sotto l’erogatore. 10 Premere il tasto di comando per l’erogazione del vapore . → La fase 3 è terminata. 151 Heft_Caffeo_Bistro_EU_2.3_041114.indd 151 04.11.2014 15:55:27 Fase 4 Durante la fase 4, sul display vengono visualizzati quattro simboli dei chicchi . → Il programma di pulizia viene continuato. Questo processo dura circa 5 minuti. L’acqua fluisce dall’erogatore e all’interno dell’apparecchio nella vaschetta raccogligoccia. Si illumina quindi il simbolo della vaschetta raccogligoccia . 11 Svuotare la vaschetta raccogligoccia e il serbatoio fondi e reinserirli. → Il tasto ON/OFF si illumina dopo una breve fase di riscaldamento. I tasti di comando e i simboli dei chicchi si illuminano. L’apparecchio è pronto all’uso. Nota Se durante la pulizia si illumina il simbolo della valvola : – Mettere un recipiente sotto il Perfect Cappuccino e ruotare l’interruttore valvola (Fig. A, N. 6) in senso orario per aprire la valvola. – Il simbolo della valvola – si illumina in modo continuo, Non appena il simbolo della valvola ruotare l’interruttore valvola in senso antiorario per chiudere la valvola. lampeggia. – Il programma di pulizia viene continuato. 152 Heft_Caffeo_Bistro_EU_2.3_041114.indd 152 04.11.2014 15:55:27 11.5 Programma di decalcificazione Il programma di decalcificazione rimuove i residui di calcare all’interno dell’apparecchio. In totale dura circa 15 minuti. Durante l’intero processo il simbolo lampeggia. per la decalcificazione Premessa: L’apparecchio si trova in modalità stand-by (vedere „Accensione e spegnimento“ a pagina 134). – Effettuare il programma di decalcificazione ogni 3 mesi o quando il si illumina sul display. simbolo per la decalcificazione – Utilizzare esclusivamente i decalcificatori Melitta® ANTI CALC Espresso Machines. Questi prodotti per la decalcificazione sono realizzati specificatamente per Melitta® CAFFEO®. – Non utilizzare mai aceto o altro decalcificante. ITALIANO Prudenza! Effettuare il programma di decalcificazione come di seguito illustrato: 1 Se presente, rimuovere il filtro dell’acqua Melitta® Claris® dal serbatoio dell’acqua prima della decalcificazione (vedere pagina 132). 2 Premere contemporaneamente il tasto di comando per l’erogazione di due tazze e il tasto ON/OFF per circa 3 secondi. → Il simbolo per la decalcificazione raccogligoccia si illuminano. e il simbolo della vaschetta Fase 1 Durante la fase 1, sul display viene visualizzato un simbolo dei chicchi . 3 Svuotare la vaschetta raccogligoccia e il serbatoio fondi. 4 Reinserire la vaschetta raccogligoccia senza serbatoio fondi e mettere il serbatoio fondi sotto il Perfect Cappuccino. → Il simbolo del serbatoio dell’acqua 5 si illumina. Sollevare il coperchio del serbatoio dell’acqua (Fig. A, N. 3), rimuovere il serbatoio dall’apparecchio dall’alto e svuotarlo completamente. 153 Heft_Caffeo_Bistro_EU_2.3_041114.indd 153 04.11.2014 15:55:28 6 Inserire il decalcificante (p. es. il decalcificatore liquido Melitta® ANTI CALC Espresso Machines) nel serbatoio acqua in base alle indicazioni riportate sull’imballaggio. Avvertenza! Pericolo di irritazioni della pelle dovute al decalcificatore Rispettare le avvertenze di sicurezza e le indicazioni sulle quantità riportate sull’imballaggio del decalcificatore. 7 Reinserire il serbatoio dell’acqua. 8 Premere il tasto di comando per l’erogazione del vapore . → La fase 1 è terminata. Fase 2 Durante la fase 2, sul display vengono visualizzati due simboli dei chicchi . → Viene avviato il programma di decalcificazione. L’acqua fluisce all’interno dell’apparecchio nella vaschetta raccogligoccia. Questo processo dura circa 10 minuti. Quindi si illumina il simbolo della valvola . 9 Rimuovere dal basso il frullino del Perfect Cappuccino dal tubo del vapore (Fig. F). 10 Ruotare il Perfect Cappuccino in modo che il tubo vapore stia nel serbatoio fondi. Avvertenza! Pericolo di ustioni dovute al tubo del vapore o al frullino molto caldi Non toccare mai il tubo del vapore o il frullino del Perfect Cappuccino durante l’uscita di acqua calda. 11 Ruotare l’interruttore valvola (Fig. A, N. 6) in senso orario per aprire la valvola. 154 Heft_Caffeo_Bistro_EU_2.3_041114.indd 154 04.11.2014 15:55:28 → Il simbolo della valvola lampeggia. La soluzione di decalcificazione fluisce dal tubo del vapore nel recipiente. Questo processo dura circa 10 minuti. → Quindi si illuminano il simbolo della vaschetta raccogligoccia e il simbolo del serbatoio dell’acqua , poiché la soluzione di decalcificazione viene fatta circolare completamente. 12 Svuotare la vaschetta raccogligoccia e il serbatoio fondi. 13 Reinserire la vaschetta raccogligoccia senza serbatoio fondi e mettere il serbatoio fondi sotto il Perfect Cappuccino. → Si illumina il tasto di comando per l’erogazione del vapore 15 Premere il tasto di comando per l’erogazione del vapore ITALIANO 14 Risciacquare a fondo il serbatoio dell’acqua, riempirlo fino alla demarcazione max. con acqua fredda di condotta e reinserirlo. . . → La fase 2 è terminata. Fase 3 Durante la fase 3, sul display vengono visualizzati tre simboli dei chicchi . → Il simbolo della valvola lampeggia. L’acqua fluisce dal tubo del vapore nel recipiente. Quindi si illumina il simbolo della valvola . 16 Ruotare l’interruttore della valvola in senso antiorario per chiudere la valvola. → L’acqua fluisce all’interno dell’apparecchio nella vaschetta raccogligoccia. Si illumina quindi il simbolo della vaschetta raccogligoccia . 17 Svuotare la vaschetta raccogligoccia e il serbatoio fondi e reinserirli. 18 Attendere fino a quando il tubo del vapore è raffreddato e spingere nuovamente dal basso il frullino sul tubo del vapore fino a quando scatta in posizione. → Il tasto ON/OFF si illumina dopo una breve fase di riscaldamento. I tasti di comando e i simboli dei chicchi si illuminano. L’apparecchio è pronto all’uso. 155 Heft_Caffeo_Bistro_EU_2.3_041114.indd 155 04.11.2014 15:55:28 11.6 Decalcificazione del serbatoio dell’acqua Si dovrebbe decalcificare regolarmente il serbatoio dell’acqua per assicurare un funzionamento perfetto. • Sollevare il coperchio del serbatoio dell’acqua (Fig. A, N. 3) e rimuovere il serbatoio dall’apparecchio dall’alto. • Se presente, rimuovere il filtro dell’acqua Melitta® Claris® dal serbatoio dell’acqua prima della decalcificazione (vedere pagina 132). • Riempire il serbatoio dell’acqua con un decalcificante in commercio. Consigliamo il decalcificante liquido rapido di Swirl®. A questo riguardo attenersi alle istruzioni del produttore del decalcificante. • Risciacquare quindi accuratamente il serbatoio dell’acqua con acqua pulita. • Reinserire eventualmente il filtro dell’acqua Melitta® Claris® nel serbatoio dell’acqua (vedere pagina 132). • Riempire il serbatoio dell’acqua fino alla demarcazione max. con acqua fredda di condotta e reinserirlo. 156 Heft_Caffeo_Bistro_EU_2.3_041114.indd 156 04.11.2014 15:55:28 12 Trasporto e smaltimento 12.1 Preparazione per il trasporto, protezione antigelo e provvedimenti da adottare in caso di non utilizzo per un lungo periodo di tempo Svuotare e ventilare l’apparecchio Premessa: L’apparecchio si trova in modalità stand-by (vedere „Accensione e spegnimento“ a pagina 134). • Mettere un recipiente sotto il Perfect Cappuccino. • Premere contemporaneamente il tasto di comando per l’erogazione del vapore e il tasto ON/OFF più a lungo di 2 secondi. → Il tasto di comando per l’erogazione del vapore del serbatoio dell’acqua si illumina. • lampeggia. Il simbolo Sollevare il coperchio del serbatoio dell’acqua (Fig. A, N. 3) e rimuovere il serbatoio dall’apparecchio dall’alto. → Il tasto di comando per l’erogazione del vapore • ITALIANO In caso di non utilizzo per un lungo periodo di tempo e prima di trasportarlo, consigliamo di svuotare e ventilare l’apparecchio. In questo modo l’apparecchio è protetto anche dai danni causati dal gelo. lampeggia. Non appena sul display si illumina il simbolo della valvola , ruotare l’interruttore valvola (Fig. A, N. 6) in senso orario per aprire la valvola. → Dal Perfect Cappuccino fuoriesce vapore. Il simbolo della valvola e il tasto di comando per l’erogazione del vapore lampeggiano. Non appena l’apparecchio è svuotato e ventilato, si illuminano il tasto di comando per l’erogazione del vapore e il simbolo della valvola . • Ruotare l’interruttore valvola in senso antiorario per chiudere la valvola. → L’apparecchio si trova in modalità stand-by. • Reinserire il serbatoio dell’acqua vuoto. 157 Heft_Caffeo_Bistro_EU_2.3_041114.indd 157 04.11.2014 15:55:28 • Spegnere completamente l’apparecchio tramite l’interruttore di rete. • Estrarre la spina. Nota Il filtro dell’acqua Melitta® Claris® non deve rimanere asciutto per un periodo di tempo molto lungo. Consigliamo pertanto di conservare il filtro dell’acqua Melitta® Claris® in un bicchiere d’acqua dentro il frigorifero nel caso in cui non si utilizzi l’apparecchio per un periodo di tempo molto lungo. Trasporto • Svuotare e ventilare l’apparecchio. • Svuotare e pulire la vaschetta raccogligoccia e il serbatoio fondi. • Svuotare il serbatoio acqua e il serbatoio chicchi. Se fosse necessario, aspirare i chicchi sul fondo utilizzando un aspirapolvere. • Trasportare l’apparecchio il più possibile nell’imballaggio originale, compresa la schiuma solida per evitare danni a causa di trasporto. Prudenza! Non trasportare o immagazzinare l’apparecchio in mezzi di trasporto o locali a bassa temperatura, poiché l’acqua residua potrebbe congelare o condensare e possono derivarne danni all’apparecchio. Smaltimento • Smaltire l’apparecchio in modo ecologico tramite sistemi di raccolta adatti. 158 Heft_Caffeo_Bistro_EU_2.3_041114.indd 158 04.11.2014 15:55:28 Eliminazione dei guasti Guasto Causa Rimedio Il caffè fluisce solo a gocce. Grado di macinazione troppo fine. Regolare il grado di macinazione più grosso. Pulire l’unità bollitore. Eventualmente decalcificare. Eventualmente effettuare il programma di pulizia. Il caffè non fluisce. Serbatoio dell’acqua non riempito o non inserito correttamente. Riempire il serbatoio dell’acqua facendo attenzione che sia posizionato correttamente. Aprire eventualmente la valvola fino a quando acqua fuoriesce dall’apparecchio e richiudere la valvola. Unità bollitore intasata. Pulire l’unità bollitore. I chicchi non cadono nella macina (chicchi troppo oleosi). Dare dei colpetti al serbatoio chicchi. Leva di ribaltamento in verticale. Portare la leva di ribaltamento a destra o a sinistra. Corpi estranei nella macina. Contattare l’assistenza telefonica. Forte rumore proveniente dalla macina. Corpi estranei nella macina. Contattare l’assistenza telefonica. I simboli dei chicchi di caffè lampeggiano sebbene il serbatoio chicchi sia pieno. Chicchi non sufficientemente macinati nella camera bollitore. Premere il tasto di comando per l’erogazione di una tazza o di due tazze . Il simbolo della valvola si illumina in modo discontinuo. Nei tubi interni dell’apparecchio si trova aria. Aprire la valvola finché acqua fuoriesce dall’apparecchio e richiudere la valvola. Eventualmente pulire l’unità bollitore. La macina non macina chicchi di caffè. ITALIANO 13 159 Heft_Caffeo_Bistro_EU_2.3_041114.indd 159 04.11.2014 15:55:29 Guasto Causa Dopo la rimozione non si riesce più a inserire l’unità bollitore. I tasti di comando per l’erogazione di una e due tazze lampeggiano alternativamente al tasto ON/OFF L’unità bollitore non è bloccata correttamente. Verificare se il manico per il bloccaggio dell’unità bollitore è bloccata correttamente in posizione. L’azionamento non è in posizione corretta. Spegnere e riaccendere l’apparecchio e poi premere contemporaneamente i tasti di comando per l’erogazione di una e due tazze per oltre 2 secondi. L’azionamento si sposta in posizione. Reinserire quindi l’unità bollitore e verificare il corretto bloccaggio. L’unità bollitore manca o non è inserita correttamente. Inserire correttamente l’unità bollitore. Camera bollitore riempita eccessivamente. Spegnere e riaccendere l’apparecchio con l’interruttore di rete (eventualmente ripetere) fino a quando viene visualizzata la modalità standby. . Lampeggio continuo di tutti i tasti di comando. Rimedio Errore di sistema. Spegnere e accendere l’apparecchio con l’interruttore di rete; in caso d’insuccesso inviare l’apparecchio all’assistenza. Per ulteriori chiarimenti contattare la nostra hotline di assistenza al numero 062 388 98 49. 160 Heft_Caffeo_Bistro_EU_2.3_041114.indd 160 04.11.2014 15:55:29 Beste klant! Van harte gefeliciteerd met de aankoop van uw Melitta® CAFFEO®. Wij verheugen ons erop u als koffieliefhebber en Melitta® CAFFEO®-genieter te mogen begroeten. Met uw nieuwe kwaliteitsproduct Melitta® CAFFEO® zult u veel bijzondere koffiemomenten beleven. Geniet met al uw zintuigen van uw favoriete koffiespecialiteiten en laat u verwennen. De melkopschuimer Perfect Cappuccino, waarmee u geweldig melkschuim kunt bereiden voor diverse koffiespecialiteiten, en het 2-vaks-bonenreservoir “Bean Select”, waarbij u kunt kiezen tussen twee verschillende bonensoorten, zorgen voor een uniek genot. Hebt u behoefte aan meer informatie of hebt u nog vragen over dit product, neem dan direct contact met ons* op of bezoek ons op het internet via www.melitta.nl of www.melitta.be. Wij wensen u veel plezier met uw nieuwe volautomatische koffiemachine. Het Melitta® CAFFEO®-team NEDERLANDS Lees deze gebruiksaanwijzing aandachtig door en bewaar deze zorgvuldig, zodat u en uw gasten lang plezier zullen hebben van de Melitta® CAFFEO®. * Nederland: 0031 183 642 642 België: 0032 9 331 52 30 ® Registered trademark of a company of the Melitta Group 161 Heft_Caffeo_Bistro_EU_2.3_041114.indd 161 04.11.2014 15:55:29 Inhoudsopgave 1 Aanwijzingen bij deze gebruiksaanwijzing ..........................................164 1.1 1.2 1.3 2 3 Algemene veiligheidsinstructies ..........................................................166 Beschrijving van het apparaat.............................................................168 3.1 3.2 3.3 4 7 Plaatsing................................................................................................. 170 Aansluiten............................................................................................... 171 Bonenreservoir vullen............................................................................. 171 Watertank vullen ..................................................................................... 172 De eerste keer inschakelen .................................................................... 172 Koffiesterkte instellen ............................................................................. 173 Afgegeven hoeveelheid instellen............................................................ 173 In- en uitschakelen ..............................................................................174 5.1 5.2 6 Legenda bij afbeelding A ........................................................................ 168 Legenda bij afbeelding B ........................................................................ 168 Display.................................................................................................... 169 Ingebruikname ....................................................................................170 4.1 4.2 4.3 4.4 4.5 4.6 4.7 5 Symbolen in de tekst van deze gebruiksaanwijzing ............................... 164 Reglementair gebruik ............................................................................. 165 Niet-reglementair gebruik ....................................................................... 165 Apparaat inschakelen ............................................................................. 174 Apparaat uitschakelen ............................................................................ 174 Melitta® Claris®-waterfilter plaatsen.....................................................175 Espresso of Café Crème bereiden......................................................176 7.1 7.2 7.3 Een kop espresso of Café Crème bereiden ........................................... 176 Twee kopjes espresso of Café Crème bereiden .................................... 176 Espresso of Café Crème met gemalen koffie bereiden.......................... 177 8 Melkschuim bereiden ..........................................................................178 9 Heet water bereiden............................................................................179 162 Heft_Caffeo_Bistro_EU_2.3_041114.indd 162 04.11.2014 15:55:29 10 Functie-instellingen .............................................................................180 10.1 10.2 10.3 10.4 10.5 10.6 Waterhardheid instellen .......................................................................... 180 Energiebesparende modus instellen ...................................................... 181 Stand-bymodus instellen ........................................................................ 182 Zettemperatuur instellen......................................................................... 183 Resetten naar fabrieksinstellingen ......................................................... 184 Maalgraad instellen ................................................................................ 185 11 Onderhoud en verzorging ...................................................................186 11.1 11.2 11.3 11.4 11.5 11.6 Algemene reiniging................................................................................. 186 Perfect Cappuccino reinigen .................................................................. 186 Zetgroep reinigen ................................................................................... 187 Geïntegreerd reinigingsprogramma ....................................................... 188 Geïntegreerd ontkalkingsprogramma ..................................................... 191 Watertank ontkalken ............................................................................... 194 12.1 Voorbereiding voor het transport, vorstbescherming en maatregelen wanneer het apparaat gedurende langere tijd niet wordt gebruikt ......... 195 13 Storingen verhelpen ............................................................................197 NEDERLANDS 12 Transport en afvalverwijdering ............................................................195 163 Heft_Caffeo_Bistro_EU_2.3_041114.indd 163 04.11.2014 15:55:29 1 Aanwijzingen bij deze gebruiksaanwijzing Voor een betere oriëntatie vouwt u de openvouwbare pagina’s aan de voor- en achterkant van deze gebruiksaanwijzing open. 1.1 Symbolen in de tekst van deze gebruiksaanwijzing De symbolen in deze gebruiksaanwijzing wijzen u op bijzondere gevaren bij het gebruik van uw Melitta® CAFFEO® of geven u nuttige tips. Waarschuwing! Teksten met dit symbool bevatten informatie m.b.t. uw veiligheid en wijzen op mogelijke gevaren voor ongevallen of letsel. Voorzichtig! Teksten met dit symbool bevatten informatie over het vermijden van een verkeerde bediening en wijzen op mogelijke gevaren van materiële schade. Aanwijzing Teksten met dit symbool bevatten aanvullende, waardevolle informatie over het gebruik van uw Melitta® CAFFEO®. 164 Heft_Caffeo_Bistro_EU_2.3_041114.indd 164 04.11.2014 15:55:29 1.2 Reglementair gebruik De Melitta® CAFFEO® is uitsluitend bestemd voor de bereiding van koffie en koffiespecialiteiten, voor het verwarmen van water en het verwarmen van melk buiten het apparaat. Het apparaat is bedoeld voor huishoudelijk gebruik en niet voor commercieel ‘gebruik. Het reglementair gebruik omvat het volgende: • dat u de gebruiksaanwijzing aandachtig leest, begrijpt en opvolgt; • dat u met name de veiligheidsinstructies opvolgt; • dat u de Melitta® CAFFEO® gebruikt in overeenstemming met de gebruiksomstandigheden die in deze gebruiksaanwijzing worden beschreven. 1.3 Niet-reglementair gebruik NEDERLANDS Niet-reglementair gebruik is van toepassing wanneer u de Melitta® CAFFEO® op een andere wijze gebruikt dan in deze gebruiksaanwijzing is beschreven. Waarschuwing! Door niet-reglementair gebruik kunt u gewond raken of u verbranden door heet water of hete stoom. Aanwijzing De producent is niet aansprakelijk voor schade die het gevolg is van niet-reglementair gebruik. 165 Heft_Caffeo_Bistro_EU_2.3_041114.indd 165 04.11.2014 15:55:29 2 Algemene veiligheidsinstructies Het apparaat beantwoordt aan de volgende Europese Richtlijnen: – 2006 / 95 / EG (laagspanning), – 2004 / 108 / EG (elektromagnetische compatibiliteit), – 2011 / 65 / EU (RoHS), – 2009 / 125 / EG (Ecodesign/ ErP). Het apparaat is gebouwd volgens de actuele stand van de technische ontwikkeling. Toch bestaan er enkele restrisico‘s. Om risico‘s te vermijden, dient u de veiligheidsinstructies in acht te nemen. Melitta® aanvaardt geen aansprakelijkheid voor schade door het niet in acht nemen van veiligheidsinstructies. Lees de onderstaande aanwijzingen aandachtig door. Wanneer u de aanwijzingen niet opvolgt, kan dit uw eigen veiligheid en die van het apparaat negatief beïnvloeden. Waarschuwing! Gevaar door elektrische stroom Als het apparaat of het netsnoer beschadigd zijn, bestaat levensgevaar door een elektrische schok. Neem de volgende veiligheidsinstructies in acht om gevaren door elektrische stroom te vermijden: – Gebruik geen beschadigd netsnoer. – Een beschadigd netsnoer mag alleen worden vervangen door de fabrikant, diens servicedienst of een persoon met gelijkwaardige kwalificatie. – Open geen vastgeschroefde afdekpanelen op de behuizing van het apparaat. – Gebruik het apparaat alleen als het zich in een onberispelijke technische toestand bevindt. – Een defect apparaat mag alleen worden gerepareerd door een 166 Heft_Caffeo_Bistro_EU_2.3_041114.indd 166 04.11.2014 15:55:29 geautoriseerd bedrijf. Repareer het apparaat in geen geval zelf. – Breng geen veranderingen aan het apparaat, de bestanddelen of de accessoires aan. – Dompel het apparaat niet onder in water. Waarschuwing! Gevaar voor brandwonden Uittredende vloeistoffen en stoom kunnen zeer heet zijn. Delen van het apparaat worden ook zeer heet. Neem de volgende veiligheidsinstructies in acht om brandwonden te vermijden: – Vermijd huidcontact met de uittredende vloeistoffen en stoom. – Raak tijdens het gebruik de buisjes van de uitloop niet aan. Algemene veiligheid Neem de volgende veiligheidsinstructies in acht om letsels en materiële schade te vermijden: – Grijp tijdens het gebruik niet in het apparaat. – Het apparaat en het netsnoer moeten uit de buurt van kinderen onder 8 jaar worden gehouden. – Dit apparaat kan door kinderen vanaf 8 jaar en door personen met verminderde psychische, sensorische of mentale vaardigheden of een gebrek aan ervaring en kennis worden bediend indien deze onder toezicht staan of geïnformeerd werden over het veilige gebruik van het apparaat en de resulterende gevaren begrijpen. – Kinderen mogen niet met het apparaat spelen. Reiniging en onderhoud mogen niet worden uitgevoerd door kinderen onder de 8 jaar. Kinderen boven de 8 jaar moeten bij reiniging en onderhoud onder toezicht staan. – Scheid het apparaat van het stroomnet als het gedurende langere tijd niet onder toezicht staat. NEDERLANDS Waarschuwing! 167 Heft_Caffeo_Bistro_EU_2.3_041114.indd 167 04.11.2014 15:55:30 3 Beschrijving van het apparaat 3.1 Legenda bij afbeelding A Afbeeldingnummer Toelichting 1 Lekbakje met kopjesplateau en residubak (inwendig) 2 Melkopschuimer "Perfect Cappuccino" 3 Watertank 4 Instelknop Koffiesterkte 5 Instelknop Stoombereiding 6 Ventielschakelaar voor stoom- en heetwaterbereiding 7 Display 8 2-vaks-bonenreservoir "Bean Select" 9 Keuzeschakelaar voor bonenreservoir "Bean Select" 10 Vulkoker met deksel 11 Aan-/uit-knop 12 Instelknop voor de koffiehoeveelheid 13 Instelknop Bereiding van één kopje 14 Instelknop Bereiding van twee kopjes 15 In hoogte verstelbare uitloop 16 Vlotter voor de waterpeilweergave in het lekbakje 3.2 Legenda bij afbeelding B Afbeeldingnummer Toelichting 17 Netsnoer 18 Zetgroep en typeplaatje (achter het afdekpaneel) 19 Instelknop van de maalgraad 20 Netschakelaar 168 Heft_Caffeo_Bistro_EU_2.3_041114.indd 168 04.11.2014 15:55:30 3.3 Symbool Display Betekenis Stoomventiel Watertank Vulkoker Display Toelichting/verzoek is verlicht Temperatuur voor stoombereiding bereikt ventiel openen knippert Ventiel geopend is verlicht Watertank vullen knippert Deksel van de vulkoker geopend is verlicht Bereiding gemalen koffie gebeurt na indrukken van de instelknop is verlicht 1 boon: mild 2 bonen: normaal 3 bonen: sterk 4 bonen: zeer sterk knippert Bonenreservoir vullen; het knipperen eindigt na de eerste koffiebereiding. is verlicht Apparaat reinigen knippert Geïntegreerd reinigingsprogramma wordt uitgevoerd Koffiesterkte Reinigen Lekbakje en residubak Ontkalken is verlicht Lekbakje en residubak leegmaken knippert Lekbakje en residubak plaatsen is verlicht Apparaat ontkalken knippert Geïntegreerd ontkalkingsprogramma wordt uitgevoerd NEDERLANDS Bereiding van één kopje 169 Heft_Caffeo_Bistro_EU_2.3_041114.indd 169 04.11.2014 15:55:30 4 Ingebruikname Voer de onderstaande stappen uit voordat u het apparaat voor het eerst in gebruik neemt. Wanneer u deze stappen hebt uitgevoerd, is het apparaat klaar voor gebruik. U kunt dan koffie gaan bereiden. Wij adviseren u de beide eerste kopjes koffie na de eerste ingebruikname weg te gieten. 4.1 • Plaatsing Plaats het apparaat op een stabiele, vlakke en droge ondergrond. Houd een afstand van ongeveer 10 cm tot de muur en andere voorwerpen aan. Voorzichtig! – Plaats het apparaat nooit op hete oppervlakken of in vochtige ruimtes. – Vervoer of sla het apparaat niet op in voertuigen of ruimtes met lage temperaturen, omdat het restwater kan bevriezen of condenseren waardoor het apparaat beschadigd kan raken. Volg de instructies op pagina 195 op. • De residubak bevindt zich al in het lekbakje. Let erop dat het lekbakje tot aan de aanslag in het apparaat is geschoven. Aanwijzingen – Bewaar het verpakkingsmateriaal, inclusief het piepschuim, voor het transport en eventuele retourzendingen om transportschade te voorkomen. – Het is heel normaal dat er voor de eerste ingebruikname koffie- en waterresten in het apparaat aanwezig zijn. Dat komt doordat het apparaat in de fabriek op de juiste werking werd gecontroleerd. 170 Heft_Caffeo_Bistro_EU_2.3_041114.indd 170 04.11.2014 15:55:30 4.2 • Aansluiten Steek het netsnoer in een geschikt stopcontact. Waarschuwing! – Controleer of het stopcontact aan de geldende normen voor elektrische veiligheid voldoet. Neem in geval van twijfel contact op met een elektricien. – Gebruik nooit een beschadigd netsnoer (beschadigde isolatie, nietgeïsoleerde draden). – Laat beschadigde netsnoeren gedurende de garantieperiode uitsluitend door de producent en daarna alleen door gekwalificeerd, vakkundig personeel vervangen. 4.3 NEDERLANDS Brandgevaar en gevaar voor elektrische schokken door verkeerde netspanning, onjuiste of beschadigde aansluitingen en netsnoeren – Controleer of de netspanning overeenstemt met de spanning die op het typeplaatje van het apparaat wordt vermeld. Het typeplaatje bevindt zich aan de rechterkant van het apparaat achter het afdekpaneel (afb. B, nr. 18). Bonenreservoir vullen Met het 2-vaks-bonenreservoir “Bean Select” kunt u twee verschillende koffiesoorten naast elkaar gebruiken. Vul bijv. één vak met espressobonen en het andere met Café Crème-bonen. Via de selectiehendel kunt u dan gemakkelijk tussen de soorten wisselen. • Vul het bonenreservoir (afb. A, nr. 8) met verse koffiebonen. Elk vak kan met maximaal 135 g koffiebonen worden gevuld. Voorzichtig! • – Vul het bonenreservoir uitsluitend met koffiebonen. – Vul het bonenreservoir nooit met gemalen, gevriesdroogde of gekaramelliseerde koffiebonen. Kies de gewenste bonensoort door de selectiehendel op het betreffende vak in te stellen. 171 Heft_Caffeo_Bistro_EU_2.3_041114.indd 171 04.11.2014 15:55:30 Waarschuwing! Gevaar voor personen die geen cafeïne kunnen verdragen. Omdat er boven het maalwerk altijd een restje van de eerder gebruikte bonen blijft liggen, vindt er bij het omschakelen op een andere bonensoort een vermenging van beide soorten plaats. Daarom kunnen de eerste twee kopjes na het omschakelen op cafeïnevrije bonen nog cafeïnehoudende koffie bevatten. Het derde bereide kopje koffie na het omschakelen is dan ook pas volledig cafeïnevrij. Aanwijzing Wanneer de selectiehendel tijdens het zetten verticaal staat, komen er geen bonen in het maalwerk. 4.4 Watertank vullen • Klap het deksel van de watertank (afb. A, nr. 3) omhoog en trek de watertank naar boven uit het apparaat. • Vul de watertank tot aan de max.-markering met vers koud leidingwater en plaats deze weer terug. 4.5 De eerste keer inschakelen Alle leidingen in het apparaat werden in de fabriek ontwaterd en belucht. Daarom verlicht en is bij het eerste inschakelen na de opwarmfase het symbool Ventiel moet het apparaat via het ventiel ontlucht worden. Ontluchten is alleen nodig bij de eerste ingebruikname van het apparaat en na het ontwateren en beluchten. Zie hiervoor pagina 195. • Zet de netschakelaar (afb. B, nr. 20) op de positie “I”. • Druk op de aan-/uit-knop om het apparaat in te schakelen. → De aan-/uit-knop knippert. Het apparaat warmt op. Na het opwarmen is het symbool Ventiel verlicht. • Plaats een bakje onder de Perfect Cappuccino en schuif de stoombuis omlaag tot deze onder de rand van het bakje staat. • Plaats een kopje onder de uitloop. • Draai de ventielschakelaar (afb. A, nr. 6) met de wijzers van de klok mee om het ventiel te openen, zodra het display dit aangeeft. 172 Heft_Caffeo_Bistro_EU_2.3_041114.indd 172 04.11.2014 15:55:30 → Het symbool Ventiel Perfect Cappuccino. • knippert. Er stroomt water in het kopje onder de Zodra er geen water meer uitstroomt en het symbool Ventiel is verlicht, draait u de ventielschakelaar tegen de wijzers van de klok in om het ventiel te sluiten. → Het apparaat voert een automatische spoeling uit, waarbij heet water uit de uitloop stroomt. Vervolgens is de aan-/uit-knop verlicht. Het apparaat is klaar voor gebruik. • Koffiesterkte instellen Druk meerdere malen op de instelknop Koffiesterkte vier mogelijke sterktegraden te kiezen. → Uw keuze wordt door middel van de bonensymbolen weergegeven. Display om tussen de op het display Koffiesterkte NEDERLANDS 4.6 mild normaal (fabrieksinstelling) sterk zeer sterk • U kunt het koffiearoma ook via de instelling van de maalgraad veranderen. Zie hiervoor pagina 185. 4.7 • Afgegeven hoeveelheid instellen Draai de instelknop voor de koffiehoeveelheid (afb. A, nr. 12) om de afgegeven hoeveelheid traploos van 30 ml tot 220 ml in te stellen (instelknop linksom: 30 ml, instelknop in het midden: 125 ml, instelknop naar rechts: 220 ml). 173 Heft_Caffeo_Bistro_EU_2.3_041114.indd 173 04.11.2014 15:55:31 • 5 In- en uitschakelen 5.1 Apparaat inschakelen Zet de netschakelaar (afb. B, nr. 20) op de positie “I”. → Het apparaat staat in de stand-bymodus. De aan-/uit-knop verlicht. • Plaats een geschikt bakje onder de uitloop. • Druk op de aan-/uit-knop is rood om het apparaat in te schakelen. → De aan-/uit-knop knippert. Het apparaat warmt op. Het apparaat voert een automatische spoeling uit, waarbij heet water uit de uitloop stroomt. Vervolgens zijn de aan-/uit-knop en het bonensymbool verlicht. Het apparaat is klaar voor gebruik. 5.2 Apparaat uitschakelen • Plaats, indien mogelijk, een kopje onder de uitloop. • Druk op de aan-/uit-knop schakelen. om het apparaat in de stand-bymodus te → Het apparaat voert een automatische spoeling van de koffieweg uit. De zetgroep gaat in ruststand. De aan-/uit-knop is rood verlicht. • Zet de netschakelaar (afb. B, nr. 20) op de positie “0” om het apparaat volledig uit te schakelen. Aanwijzingen – Het apparaat voert bij elke inschakeling een automatische spoeling uit. – Schakel het apparaat alleen uit via de netschakelaar, wanneer het apparaat in de stand-bymodus staat, omdat er anders gevaar bestaat dat de zetgroep niet in de juiste positie staat. 174 Heft_Caffeo_Bistro_EU_2.3_041114.indd 174 04.11.2014 15:55:31 6 Melitta® Claris®-waterfilter plaatsen • Stel op de blauwe ring boven op de Melitta® Claris®-waterfilter de huidige maand in. Zo kunt u gemakkelijk herkennen wanneer de Melitta® Claris®-waterfilter vervangen moet worden. • Leg de waterfilter gedurende een paar minuten in een glas met vers leidingwater voordat u deze plaatst. • Klap het deksel van de watertank (afb. A, nr. 3) omhoog en trek de watertank naar boven uit het apparaat. • Giet, indien nodig, de watertank leeg. • Schroef de Melitta® Claris®-waterfilter met behulp van de schroefhulp aan de onderkant van het meegeleverde maatschepje voorzichtig in de schroefdraad onderaan de watertank. • Vul de watertank tot aan de max.-markering met vers koud leidingwater en plaats deze weer terug. • Plaats een bakje onder de Perfect Cappuccino en schuif de stoombuis omlaag tot deze onder de rand van het bakje staat. • Draai de ventielschakelaar (afb. A, nr. 6) met de wijzers van de klok mee om het ventiel te openen, zodra het ventiel dit aangeeft. NEDERLANDS Het Melitta® Claris®-waterfilter filtert kalk en andere schadelijke stoffen uit het water. Plaats deze na de eerste ingebruikname in het apparaat. Wanneer u de filter gebruikt, hoeft u het apparaat minder vaak te ontkalken en kunt u de waterhardheid op 1 instellen (zie hiervoor pagina 180). Door de veilige bescherming tegen verkalking wordt de levensduur van uw apparaat verlengd. De waterfilter moet echter regelmatig - uiterlijk na 2 maanden - vervangen worden. Het waterfilter is verkrijgbaar in de vakhandel. → Er stroomt water in het kopje onder de Perfect Cappuccino. Vanwege de automatische stopfunctie moet u de ventielschakelaar meerdere keren openen en sluiten. • Als het symbool Watertank is verlicht, draait u de ventielschakelaar tegen de wijzers van de klok in om het ventiel te sluiten. → Het apparaat is klaar voor gebruik. 175 Heft_Caffeo_Bistro_EU_2.3_041114.indd 175 04.11.2014 15:55:31 Aanwijzing De Melitta ® Claris®-waterfilter mag niet gedurende langere tijd droog staan. Wij adviseren u dan ook om, wanneer u het apparaat gedurende een langere periode niet gebruikt, de Melitta® Claris®-waterfilter in een glas water in de koelkast te bewaren. 7 Espresso of Café Crème bereiden 7.1 Een kop espresso of Café Crème bereiden Voorwaarden: het apparaat is gebruiksklaar (zie “In- en uitschakelen” op pagina 174). De gewenste koffiesterkte en de afgegeven hoeveelheid zijn ingesteld (zie pagina 173). De gewenste koffiesoort in het bonenreservoir is geselecteerd. • Plaats een geschikt kopje onder de uitloop. • Druk op de instelknop Bereiding van één kopje . → Het maalproces en de koffie-uitgifte starten. De uitgifte wordt automatisch beëindigd, wanneer de ingestelde, afgegeven hoeveelheid is bereikt. • Druk op de instelknop Bereiding van één kopje vroegtijdig af te breken. 7.2 om de koffie-uitgifte Twee kopjes espresso of Café Crème bereiden Voorwaarden: het apparaat is gebruiksklaar (zie “In- en uitschakelen” op pagina 174). De gewenste koffiesterkte en de afgegeven hoeveelheid zijn ingesteld. De gewenste koffiesoort in het bonenreservoir is geselecteerd. • Plaats twee geschikte kopjes naast elkaar onder de uitloop. • Druk op de instelknop Bereiding van twee kopjes . → Het dubbele maalproces en de uitgifte van koffie starten. De uitgifte wordt automatisch beëindigd, wanneer de ingestelde, afgegeven hoeveelheid is bereikt. • Druk op de instelknop Bereiding van twee kopjes uitgifte vroegtijdig af te breken. om de koffie- 176 Heft_Caffeo_Bistro_EU_2.3_041114.indd 176 04.11.2014 15:55:31 7.3 Espresso of Café Crème met gemalen koffie bereiden Voorwaarden: het apparaat is gebruiksklaar (zie “In- en uitschakelen” op pagina 174). De gewenste afgegeven hoeveelheid is ingesteld. • Klap het deksel van de vulkoker (afb. A, nr. 10) omhoog. → Het symbool Vulkoker • knippert. Vul de vulkoker met maximaal één maatschepje vers gemalen koffie. Voorzichtig! Vul de vulkoker uitsluitend met gemalen koffie. Instantproducten kunnen in de zetgroep blijven plakken. – Voeg nooit meer dan één maatschepje (bij het apparaat meegeleverd) toe, omdat de zetgroep anders te vol raakt. Sluit het deksel van de vulkoker. → Het symbool Vulkoker zijn verlicht. en de instelknop Bereiding van één kopje • Plaats een geschikt kopje onder de uitloop. • Druk op de instelknop Bereiding van één kopje NEDERLANDS • – . → De koffie-uitgifte begint. Deze wordt automatisch beëindigd, wanneer de ingestelde, afgegeven hoeveelheid is bereikt. • Druk op de instelknop Bereiding van één kopje vroegtijdig af te breken. om de koffie-uitgifte Aanwijzing Wanneer u binnen 90 seconden na het openen van de vulkoker geen koffie bereidt, schakelt het apparaat weer om naar het gebruik van koffiebonen en werpt het de gemalen koffie in de residubak om te voorkomen dat de zetkamer later te vol raakt. 177 Heft_Caffeo_Bistro_EU_2.3_041114.indd 177 04.11.2014 15:55:31 8 Melkschuim bereiden Voorwaarde: het apparaat is gebruiksklaar (zie “In- en uitschakelen” op pagina 174). • Plaats een bakje met melk onder de Perfect Cappuccino. Let erop dat de mixer van de Perfect Cappuccino in de melk is gedompeld. • Vul het bakje maximaal tot een derde, omdat bij het opschuimen het volume van de melk sterk toeneemt. • Druk op de instelknop Stoombereiding . → De instelknop Stoombereiding knippert. Het apparaat warmt op. Wanneer de stoomtemperatuur is bereikt, zijn de instelknop Stoombereiding en het symbool Ventiel verlicht. Waarschuwing! Gevaar voor verbranding en verschroeiing door hete stoombuis, hete stoomslang en hete mixer Raak tijdens het gebruik de stoombuis, de stoomslang of de mixer van de Perfect Cappuccino nooit aan. • Draai de ventielschakelaar (afb. A, nr. 6) met de wijzers van de klok mee om het ventiel te openen, zodra het display dit aangeeft. → Het symbool Ventiel en de instelknop Stoombereiding knipperen. De mixer schuimt de melk op en verwarmt deze gelijktijdig. U krijgt een beter schuimresultaat, wanneer u de mixer bij het opschuimen op en neer beweegt. • Draai de ventielschakelaar tegen de wijzers van de klok in om het ventiel te sluiten en daardoor het opschuimen te beëindigen. Het melkvolume moet zich ongeveer verdubbeld hebben en het bakje moet voelbaar verwarmd zijn. • Druk op de instelknop Stoombereiding naar de normale functie te wisselen. • Wacht tot de stoombuis is afgekoeld en draai de stoombuis met de mixer tegen de wijzers van de klok in weg van de Perfect Cappuccino (afb. E). om van de stoommodus 178 Heft_Caffeo_Bistro_EU_2.3_041114.indd 178 04.11.2014 15:55:32 • Draai de mixer van de Perfect Cappuccino naar beneden van de stoombuis los (afb. F). • Spoel de stoombuis en de mixer af onder stromend water of in de vaatwasser. • Draai de gereinigde stoombuis met mixer met de wijzers van de klok mee op de Perfect Cappuccino tot deze vastklikt. Aanwijzing Wij adviseren het gebruik van koude melk met een hoog eiwitgehalte. Voor goed melkschuim is niet het vetgehalte maar het eiwitgehalte van de melk doorslaggevend. Heet water bereiden • Voorwaarde: het apparaat is gebruiksklaar (zie “In- en uitschakelen” op pagina 174). • Leg een doek onder de Perfect Cappuccino om eventueel uitlopend restwater op te vangen. • Draai de mixer van de Perfect Cappuccino naar beneden van de stoombuis los (afb. F). • Plaats een bakje onder de stoombuis en schuif de stoombuis omlaag tot deze onder de rand van het bakje staat. • Draai de ventielschakelaar (afb. A, nr. 6) met de wijzers van de klok mee om het ventiel te openen, zodra het display dit aangeeft. → Het symbool Ventiel het bakje. NEDERLANDS 9 knippert. Er stroomt heet water uit de stoombuis in • Wanneer de gewenste waterhoeveelheid is bereikt, draait u de ventielschakelaar tegen de wijzers van de klok in om het ventiel te sluiten. • Wacht tot de stoombuis is afgekoeld en schuif de mixer weer van onderaf op de stoombuis tot deze vastklikt. 179 Heft_Caffeo_Bistro_EU_2.3_041114.indd 179 04.11.2014 15:55:32 10 Functie-instellingen 10.1 Waterhardheid instellen Gebruik de meegeleverde teststrook om de waterhardheid in uw gebied te bepalen. Let op de aanwijzingen op de verpakking van de teststrook. In de fabriek is de waterhardheid ingesteld op 4. Om de kwaliteit van het apparaat te behouden, stelt u de waterhardheid als volgt in: • Voorwaarde: het apparaat staat in de stand-bymodus (zie “In- en uitschakelen” op pagina 174). • druk gelijktijdig op de instelknop Bereiding van één kopje en op tot de vier bedieningstoetsen zwak zijn instelknop Stoombereiding verlicht. • Druk meerdere malen op de instelknop Stoombereiding de vier mogelijke waterhardheidsgraden te kiezen. om tussen → De instelknop Stoombereiding is helder verlicht. Uw keuze van de waterhardheid volgens de tabel wordt via de bonensymbolen op het display aangegeven. Bereik waterhardheid • Kenmerken °d °e °f zacht 0 - 10 0 - 13 0 - 18 gemiddeld 10 - 15 13 - 19 18-27 hard 15 - 20 19 - 25 27-36 zeer hard (fabrieksinstelling) > 20 > 25 > 36 Druk op de aan-/uit-knop bevestigen. om de geselecteerde waterhardheid te → Afhankelijk van de selectie knipperen 1 tot 4 bonensymbolen display. Het apparaat staat weer in de stand-bymodus. op het 180 Heft_Caffeo_Bistro_EU_2.3_041114.indd 180 04.11.2014 15:55:32 10.2 Energiebesparende modus instellen Het apparaat schakelt na de laatste activiteit automatisch (afhankelijk van de instelling) naar de energiebesparende modus (het apparaat verbruikt zo duidelijk minder energie dan in de stand-bymodus). U kunt verschillende tijden instellen voor de energiebesparende modus. In de fabriek is het apparaat op 15 minuten ingesteld. Stel de energiebesparende modus als volgt in: • Voorwaarde: het apparaat staat in de stand-bymodus (zie “In- en uitschakelen” op pagina 174). • en op druk gelijktijdig op de instelknop Bereiding van één kopje instelknop Stoombereiding tot de vier bedieningstoetsen zwak zijn verlicht. • Druk meerdere malen op de instelknop Koffiesterkte vier mogelijke tijden voor de timer te kiezen. om tussen de Display NEDERLANDS → De instelknop Koffiesterkte is helder verlicht. Uw keuze wordt door middel van de bonensymbolen op het display weergegeven. Tijd 5 minuten 15 minuten (fabrieksinstelling) 30 minuten uit • Druk op de aan-/uit-knop om de geselecteerde tijd te bevestigen. → Afhankelijk van de selectie knipperen 1 tot 4 bonensymbolen ter bevestiging op het display. Het apparaat staat weer in de stand-bymodus. Aanwijzing Door een willekeurige toets in te drukken, haalt u het apparaat uit de energiesparende modus. De functie van de ingedrukte toets (bijv. koffie bereiden) wordt direct uitgevoerd, alleen de opwarmfase duurt iets langer. 181 Heft_Caffeo_Bistro_EU_2.3_041114.indd 181 04.11.2014 15:55:32 10.3 Stand-bymodus instellen Het apparaat schakelt 30 minuten na de laatste activiteit (afhankelijk van de instelling) automatisch naar de stand-bymodus. U kunt voor de stand-bymodus verschillende tijden instellen. In de fabriek is het apparaat op 30 minuten ingesteld. Stel de stand-bymodus als volgt in: • Voorwaarde: het apparaat staat in de stand-bymodus (zie “In- en uitschakelen” op pagina 174). • druk gelijktijdig op de instelknop Bereiding van één kopje en op tot de vier bedieningstoetsen zwak zijn instelknop Stoombereiding verlicht. • Druk meerdere malen op de instelknop Bereiding van twee kopjes om tussen de vier mogelijke tijden voor de timer te kiezen. → De instelknop Bereiding van twee kopjes is helder verlicht. Uw keuze wordt door middel van de bonensymbolen op het display weergegeven. Display Tijd 30 minuten (fabrieksinstelling) 2 uur 4 uur 8 uur • Druk op de aan-/uit-knop om de geselecteerde tijd te bevestigen. → Afhankelijk van de selectie knipperen 1 tot 4 bonensymbolen ter bevestiging op het display. Het apparaat staat weer in de stand-bymodus. Aanwijzing In de stand-bymodus verbruikt het apparaat duidelijk minder energie. Wij adviseren echter om het apparaat, indien het langere tijd niet gebruikt wordt (bijv. ‘s nachts), via de netschakelaar uit te schakelen. 182 Heft_Caffeo_Bistro_EU_2.3_041114.indd 182 04.11.2014 15:55:32 10.4 Zettemperatuur instellen In de fabriek is de zettemperatuur ingesteld op stand 2 (gemiddeld ). Stel de zettemperatuur als volgt in: • Voorwaarde: het apparaat staat in de stand-bymodus (zie “In- en uitschakelen” op pagina 174). • druk gelijktijdig op de instelknop Bereiding van één kopje en op tot de vier bedieningstoetsen zwak zijn instelknop Stoombereiding verlicht. • Druk op de instelknop Bereiding van één kopje mogelijke zettemperaturen te kiezen. → De instelknop Bereiding van één kopje is helder verlicht. → Uw keuze wordt door middel van de bonensymbolen weergegeven. op het display Zettemperatuur NEDERLANDS Display om tussen drie laag gemiddeld (fabrieksinstelling) hoog • Druk op de aan-/uit knop bevestigen. om de geselecteerde zettemperatuur te → Afhankelijk van de selectie knipperen 1 tot 3 bonensymbolen display. Het apparaat staat weer in de stand-bymodus. op het 183 Heft_Caffeo_Bistro_EU_2.3_041114.indd 183 04.11.2014 15:55:33 10.5 Resetten naar fabrieksinstellingen • Voorwaarde: het apparaat staat in de stand-bymodus (zie “In- en uitschakelen” op pagina 174). • Schakel het apparaat via de netschakelaar uit. • Wacht tot het rode lampje in de aan-/uit-knop • Druk gelijktijdig de instelknop Koffiesterkte Bereiding van twee kopjes in. • Schakel het apparaat tegelijkertijd via de netschakelaar in. uitgaat. en de instelknop → Alle instellingen zijn nu gereset naar de fabrieksinstellingen. Overzicht van de standaardinstellingen: Functie-instelling Fabrieksinstelling Koffiesterkte normaal Waterhardheid Waterhardheid 4 Energiebesparende modus Stand-bymodus Zettemperatuur 15 minuten 30 minuten gemiddeld 184 Heft_Caffeo_Bistro_EU_2.3_041114.indd 184 04.11.2014 15:55:33 10.6 Maalgraad instellen De maalgraad werd voor de levering optimaal ingesteld. Wij adviseren u daarom de maalgraad pas na ongeveer 1000 koffiebereidingen (ongeveer 1 jaar) opnieuw in te stellen. U kunt de maalgraad alleen instellen, terwijl de molen draait. Stel de maalgraad dus direct na de start van de koffiebereiding in. Als het koffiearoma niet intensief genoeg is, adviseren wij instelling van een fijnere maalgraad. Zet de schakelaar (afb. B, nr. 19) in één van de drie posities (gezien vanuit de achterzijde van het apparaat). Stand schakelaar Maalgraad links fijn midden gemiddeld rechts grof (fabrieksinstelling) NEDERLANDS • 185 Heft_Caffeo_Bistro_EU_2.3_041114.indd 185 04.11.2014 15:55:33 11 Onderhoud en verzorging 11.1 Algemene reiniging • Reinig de buitenkant van het apparaat met een zachte vochtige doek en een gangbaar afwasmiddel. • Leeg en reinig het lekbakje regelmatig, uiterlijk wanneer de vlotter (afb. A, nr. 16) boven het kopjesplateau uitsteekt. • Reinig de residubak regelmatig, bijv. in de vaatwasser. Voorzichtig! – Gebruik geen schurende doekjes, sponsjes of reinigingsmiddelen om beschadigingen aan het oppervlak van het apparaat te voorkomen. – Reinig het lekbakje niet in de vaatwasser, want anders kunnen er vervormingen ontstaan. 11.2 Perfect Cappuccino reinigen • Leg een doek onder de Perfect Cappuccino om eventueel uitlopend restwater op te vangen. • Draai de stoombuis met de mixer tegen de wijzers van de klok in los van de Perfect Cappuccino (afb. E). • Draai de mixer van de Perfect Cappuccino naar beneden van de stoombuis los (afb. F). • Spoel de stoombuis en de mixer af onder stromend water of in de vaatwasser. • Schuif de mixer weer van onderaf op de stoombuis tot deze vastklikt. • Draai de gereinigde stoombuis met mixer met de wijzers van de klok mee op de Perfect Cappuccino tot deze vastklikt. Aanwijzing Bij frequent reinigen in de vaatwasser kunnen lichte kleurveranderingen in de residubak en de Perfect Cappuccino optreden. 186 Heft_Caffeo_Bistro_EU_2.3_041114.indd 186 04.11.2014 15:55:33 11.3 Zetgroep reinigen Aanwijzing • Voorwaarde: het apparaat staat in de stand-bymodus (zie “In- en uitschakelen” op pagina 174). • Zet de netschakelaar (afb. B, nr. 20) op de positie “0” om het apparaat volledig uit te schakelen. • Steek uw hand in de uitsparing aan de rechterkant van het apparaat (afb. B, nr. 18) en trek het afdekpaneel er naar rechts af. • Druk de rode knop op de greep van de zetgroep (afb. H) in en draai de greep met de wijzers van de klok mee tot aan de aanslag (circa 75°). • Trek de zetgroep aan de greep uit het apparaat. • Laat de zetgroep in dezelfde staat (beweeg of verdraai de onderdelen van de zetgroep niet). • Spoel de zetgroep als geheel onder stromend water zorgvuldig aan alle kanten af. Let er vooral op dat het in afb. J getoonde oppervlak vrij is van koffieresten. Voorzichtig! NEDERLANDS Voor een optimale werking van uw apparaat adviseren wij u de zetgroep eenmaal per week onder stromend leidingwater te reinigen. Reinig de zetgroep nooit in de vaatwasser. • Laat de zetgroep uitdruppelen. • Verwijder eventueel koffieresten van de oppervlakken aan de binnenkant van het apparaat waarop de zetgroep wordt geplaatst. • Plaats de zetgroep weer in het apparaat en draai de greep van de zetgroep tegen de wijzers van de klok in tot aan de aanslag om de zetgroep te vergrendelen. • Plaats de twee vergrendelingen van het afdekpaneel achter in het apparaat en zwenk het afdekpaneel naar links tot dit vastklikt. • Zet de netschakelaar (afb. B, nr. 20) op stand “I”. • Het apparaat staat weer in de stand-bymodus. 187 Heft_Caffeo_Bistro_EU_2.3_041114.indd 187 04.11.2014 15:55:33 11.4 Geïntegreerd reinigingsprogramma Het geïntegreerde reinigingsprogramma verwijdert afzettingen en resten van koffievet die niet met de hand kunnen worden verwijderd. Het duurt in totaal ongeveer 15 minuten. Tijdens dit hele proces knippert het symbool Reinigen . Voor een optimaal reinigingsresultaat adviseren wij u eerst de zetgroep te reinigen (zie pagina 187). Voorwaarde: het apparaat staat in de stand-bymodus (zie “In- en uitschakelen” op pagina 174). Voorzichtig! – Voer het geïntegreerde reinigingsprogramma elke 2 maanden of na ongeveer 200 gezette kopjes uit, uiterlijk echter als het symbool Reinigen op het display wordt verlicht. – Gebruik alleen de reinigingstabs van Melitta® voor volautomatische koffiemachines. Deze reinigingstabs zijn exact afgestemd op de Melitta® CAFFEO®. Wanneer u andere reinigingsmiddelen gebruikt, kan het apparaat beschadigd raken. Voer het geïntegreerde reinigingsprogramma als volgt uit: 1 verwijder - indien aanwezig - de Melitta® Claris®-waterfilter uit de watertank (zie pagina 175). 2 Houd gelijktijdig de instelknop Bereiding van één kopje uit-knop circa 3 seconden ingedrukt. → Het symbool Reinigen Het symbool Lekbakje en de aan-/ knippert. is verlicht. 3 Maak het lekbakje en de residubak leeg. 4 Plaats het lekbakje zonder de residubak weer terug en plaats de residubak onder de uitloop. 188 Heft_Caffeo_Bistro_EU_2.3_041114.indd 188 04.11.2014 15:55:33 Fase 1 Tijdens fase 1 wordt een bonensymbool op het display weergegeven. → Er worden eerst twee automatische spoelingen uitgevoerd. Het symbool Vulkoker is verlicht. 5 Open het deksel van de vulkoker. → Het symbool Vulkoker 6 knippert. Doe er een reinigingstab in (afb. G) en sluit het deksel van de vulkoker. → Het symbool Watertank is verlicht. → Fase 1 is beëindigd. Fase 2 Tijdens fase 2 worden op het display twee bonensymbolen Klap het deksel van de watertank (afb. A, nr. 3) omhoog en trek de watertank naar boven uit het apparaat. Vul de watertank tot aan de max.-markering met vers koud leidingwater en plaats deze weer terug. → De instelknop Stoombereiding NEDERLANDS 7 weergegeven. is verlicht. → Fase 2 is beëindigd. Fase 3 Tijdens fase 3 worden op het display drie bonensymbolen weergegeven. 8 Druk op de instelknop Stoombereiding . → Het geïntegreerde reinigingsprogramma start. Dit proces duurt ongeveer 10 minuten. Vervolgens is de instelknop Stoombereiding verlicht. 9 Leeg de residubak en plaats deze weer terug onder de uitloop. 10 Druk op de instelknop Stoombereiding . → Fase 3 is beëindigd. 189 Heft_Caffeo_Bistro_EU_2.3_041114.indd 189 04.11.2014 15:55:34 Fase 4 Tijdens fase 4 worden op het display vier bonensymbolen weergegeven. → Het geïntegreerde reinigingsproces wordt voortgezet. Dit proces duurt ongeveer 5 minuten. Er loopt dan heet water uit de uitloop en door het inwendige van het apparaat in het lekbakje. Vervolgens is het symbool Lekbakje verlicht. 11 Maak het lekbakje en de residubak leeg en plaats deze vervolgens weer terug. → De aan-/uit-knop is na een korte opwarmfase verlicht. De bedieningstoetsen en bonensymbolen zijn verlicht. Het apparaat is klaar voor gebruik. Aanwijzing Wanneer tijdens de reiniging het symbool Ventiel is verlicht: – plaatst u een bakje onder de Perfect Cappuccino en draait u de ventielschakelaar (afb. A, nr. 6) met de wijzers van de klok mee om het ventiel te openen, zodra het display dit aangeeft. knippert. – Het symbool Ventiel – continu is verlicht, draait u de Zodra het symbool Ventiel ventielschakelaar tegen de wijzers van de klok in om het ventiel te sluiten. – Het geïntegreerde reinigingsproces wordt voortgezet. 190 Heft_Caffeo_Bistro_EU_2.3_041114.indd 190 04.11.2014 15:55:34 11.5 Geïntegreerd ontkalkingsprogramma Het geïntegreerde ontkalkingsprogramma verwijdert kalkresten in het inwendige van het apparaat. Het duurt in totaal ongeveer 15 minuten. Gedurende het totale . proces knippert het symbool Ontkalken Voorwaarde: het apparaat staat in de stand-bymodus (zie “In- en uitschakelen” op pagina 174). Voorzichtig! – Voer het geïntegreerde ontkalkingsprogramma elke 3 maanden uit of als op het display wordt verlicht. het symbool Ontkalken – Gebruik uitsluitend ontkalkers van het type Melitta® ANTI CALC Espresso Machines. Deze ontkalkingsproducten zijn exact afgestemd op de Melitta® CAFFEO®. – Gebruik nooit azijn of andere ontkalkers. 1 verwijder - indien aanwezig - vóór het ontkalken de Melitta® Claris®waterfilter uit de watertank (zie pagina 175). 2 Houd gelijktijdig de instelknop Bereiding van twee kopjes gedurende circa 3 seconden ingedrukt. aan-/uit-knop → Het symbool Ontkalken en het symbool Lekbakje NEDERLANDS Voer het geïntegreerde ontkalkingsprogramma als volgt uit: en de zijn verlicht. Fase 1 Tijdens fase 1 wordt een bonensymbool op het display weergegeven. 3 Maak het lekbakje en de residubak leeg. 4 Plaats het lekbakje zonder de residubak weer terug en plaats de residubak onder de Perfect Cappuccino. → Het symbool Watertank 5 is verlicht. Klap het deksel van de watertank (afb. A, nr. 3) omhoog, trek de watertank naar boven uit het apparaat en maak deze volledig leeg. 191 Heft_Caffeo_Bistro_EU_2.3_041114.indd 191 04.11.2014 15:55:34 6 Doe de ontkalker (bijv. de Melitta® ANTI CALC Espresso Machines vloeibare ontkalker) volgens de aanwijzingen op de verpakking in de watertank. Waarschuwing! Gevaar van huidirritatie door ontkalker Neem de veiligheidsinstructies en de aangegeven hoeveelheden op de verpakking van de ontkalker in acht. 7 Plaats de watertank weer terug. 8 Druk op de instelknop Stoombereiding . → Fase 1 is beëindigd. Fase 2 Tijdens fase 2 worden op het display twee bonensymbolen weergegeven. → Het geïntegreerde ontkalkingsprogramma wordt gestart. Er stroomt water in het inwendige van het apparaat in het lekbakje. Dit proces duurt ongeveer 10 minuten. Vervolgens is het symbool Ventiel verlicht. 9 Draai de mixer van de Perfect Cappuccino naar beneden van de stoombuis los (afb. F). 10 Draai de Perfect Cappuccino zodanig dat de stoombuis in de residubak staat. Waarschuwing! Verbrandingsgevaar door hete stoombuis of hete mixer Raak tijdens de uitgifte van heet water de stoombuis, stoomslang of de mixer van de Perfect Cappuccino nooit aan. 11 Draai de ventielschakelaar (afb. A, nr. 6) met de wijzers van de klok mee om het ventiel te openen, zodra het display dit aangeeft. → Het symbool Ventiel knippert. Er stroomt ontkalkingsoplossing uit de stoombuis in het bakje. Dit proces duurt ongeveer 10 minuten. 192 Heft_Caffeo_Bistro_EU_2.3_041114.indd 192 04.11.2014 15:55:34 → Vervolgens zijn het symbool Lekbakje en het symbool Watertank verlicht, omdat de ontkalkingsoplossing volledig doorgelopen is. 12 Maak het lekbakje en de residubak leeg. 13 Plaats het lekbakje zonder de residubak weer terug en plaats de residubak onder de Perfect Cappuccino. 14 Spoel de watertank grondig uit, vul deze tot aan de max.-markering met vers leidingwater en plaats deze weer terug. → De instelknop Stoombereiding is verlicht. 15 Druk op de instelknop Stoombereiding . → Fase 2 is beëindigd. Fase 3 NEDERLANDS Tijdens fase 3 worden op het display drie bonensymbolen weergegeven. → Het symbool Ventiel knippert. Er stroomt water uit de stoombuis in het bakje. Vervolgens is het symbool Ventiel verlicht. 16 Draai de ventielschakelaar tegen de wijzers van de klok in om het ventiel te sluiten. → Er stroomt water in het inwendige van het apparaat in het lekbakje. Vervolgens is het symbool Lekbakje verlicht. 17 Maak het lekbakje en de residubak leeg en plaats deze vervolgens weer terug. 18 Wacht tot de stoombuis is afgekoeld en schuif de mixer weer van onderaf op de stoombuis tot deze vastklikt. → De aan-/uit-knop is na een korte opwarmfase verlicht. De bedieningstoetsen en bonensymbolen zijn verlicht. Het apparaat is klaar voor gebruik. 193 Heft_Caffeo_Bistro_EU_2.3_041114.indd 193 04.11.2014 15:55:34 11.6 Watertank ontkalken U moet de watertank regelmatig ontkalken om een goede werking te garanderen. • Klap het deksel van de watertank (afb. A, nr. 3) omhoog en trek de watertank naar boven uit het apparaat. • Verwijder - indien aanwezig - voor het ontkalken de Melitta® Claris®waterfilter uit de watertank (zie pagina 175). • Vul de watertank met een gangbare ontkalker. Wij adviseren het gebruik van de vloeibare snelontkalker van Melitta®. Let daarbij op de aanwijzingen van de producent van de ontkalker. • Spoel de watertank vervolgens grondig met schoon water. • Plaats eventueel de Melitta® Claris® -waterfilter weer in de watertank (zie pagina 175). • Vul de watertank tot aan de max.-markering met vers koud leidingwater en plaats deze weer terug. 194 Heft_Caffeo_Bistro_EU_2.3_041114.indd 194 04.11.2014 15:55:35 12 Transport en afvalverwijdering 12.1 Voorbereiding voor het transport, vorstbescherming en maatregelen wanneer het apparaat gedurende langere tijd niet wordt gebruikt Apparaat ontwateren en beluchten Wij adviseren om het apparaat, wanneer u het langere tijd niet gebruikt en voorafgaand aan een transport, te ontwateren en te beluchten. Dan is het apparaat ook tegen vorstschade beschermd. Voorwaarde: het apparaat staat in de stand-bymodus (zie “In- en uitschakelen” op pagina 174). • Plaats een bakje onder de Perfect Cappuccino. • Druk gelijktijdig meer dan 2 seconden op de instelknop Stoombereiding en de aan-/uit-knop . → De instelknop Stoombereiding verlicht. • is Klap het deksel van de watertank (afb. A, nr. 3) omhoog en trek de watertank naar boven uit het apparaat. → De instelknop Stoombereiding • knippert. Het symbool Watertank NEDERLANDS • knippert. Zodra het symbool Ventiel op het display is verlicht, draait u de ventielschakelaar (afb. A, nr. 6) met de wijzers van de klok mee om het ventiel te openen, zodra het display dit aangeeft. → Er komt stoom uit de Perfect Cappuccino. Het symbool Ventiel en de instelknop Stoombereiding knipperen. Zodra het apparaat ontwaterd en belucht is, zijn de instelknop Stoombereiding en het symbool Ventiel verlicht. • Draai de ventielschakelaar tegen de wijzers van de klok in om het ventiel te sluiten. → Het apparaat staat in de stand-bymodus. • Plaats de lege watertank terug. 195 Heft_Caffeo_Bistro_EU_2.3_041114.indd 195 04.11.2014 15:55:35 • Schakel het apparaat via de netschakelaar compleet uit. • Trek de stekker uit het stopcontact. Aanwijzing De Melitta ® Claris®-waterfilter mag niet gedurende langere tijd droog staan. Wij adviseren u dan ook om, wanneer u het apparaat gedurende een langere periode niet gebruikt, de Melitta® Claris®-waterfilter in een glas water in de koelkast te bewaren. Transport • Ontwater en belucht het apparaat. • Leeg en reinig het lekbakje en de residubak. • Leeg de watertank en het bonenreservoir. Zuig bonen die diep in het reservoir zitten, er, indien nodig, met een stofzuiger uit. • Vervoer het apparaat, indien mogelijk, in de originele verpakking, inclusief piepschuim, om transportschade te vermijden. Voorzichtig! Vervoer of sla het apparaat niet op in voertuigen of ruimtes met lage temperaturen, omdat het restwater kan bevriezen of condenseren waardoor het apparaat beschadigd kan raken. Afvalverwijdering • Verwijder het apparaat op een milieuvriendelijke manier via een geschikt inzamelsysteem. 196 Heft_Caffeo_Bistro_EU_2.3_041114.indd 196 04.11.2014 15:55:35 13 Storingen verhelpen Storing Oorzaak Maatregel Maalgraad te fijn. Maalgraad grover instellen. Zetgroep reinigen. Evt. ontkalken. Evt. geïntegreerd reinigingsprogramma uitvoeren. Koffie loopt niet door. Watertank niet gevuld of niet correct in het apparaat geplaatst. Watertank vullen en op juiste positie letten. Evt. ventiel openen tot er water uit het apparaat loopt en het ventiel weer sluiten. Zetgroep is verstopt. Zetgroep reinigen. Bonen vallen niet in het maalwerk (te vettige bonen). Licht op het bonenreservoir tikken. Selectiehendel staat verticaal. Zet de selectiehendel naar rechts of links. Vreemd voorwerp in het maalwerk Contact opnemen met de hotline. Maalwerk maakt veel lawaai Vreemd voorwerp in het maalwerk Contact opnemen met de hotline. De bonensymbolen knipperen, hoewel het bonenreservoir is gevuld. Niet voldoende gemalen koffiebonen in de zetkamer Instelknop Bereiding van één of Bereiding van kopje twee kopjes indrukken. Het symbool is op Ventiel een ongebruikelijk tijdstip verlicht. Er bevindt zich lucht in de leidingen in het inwendige van het apparaat. Ventiel openen tot er water uit het apparaat loopt en het ventiel weer sluiten. Evt. zetgroep reinigen. Maalwerk maalt geen koffiebonen. NEDERLANDS Koffie loopt slechts druppelsgewijs. 197 Heft_Caffeo_Bistro_EU_2.3_041114.indd 197 04.11.2014 15:55:35 Storing Oorzaak Maatregel Zetgroep kan na te zijn verwijderd niet meer worden teruggeplaatst. Zetgroep is niet correct vergrendeld. Controleer of de greep voor de vergrendeling van de zetgroep correct is vastgeklikt. Aandrijving staat niet in de juiste stand. Apparaat uit- en weer inschakelen en vervolgens gelijktijdig de instelknoppen Bereiding van één kopje en Bereiding van twee kopjes langer dan 2 seconden indrukken. De aandrijving gaat naar de beginstand. Vervolgens de zetgroep weer terugplaatsen en de controleren of de vergrendeling goed vastzit. Instelknoppen Bereiding van één kopje en Bereiding van twee kopjes knipperen afwisselend met de Zetgroep ontbreekt of is niet op de juiste manier geplaatst. Zetgroep op de juiste manier plaatsen. Zetkamer is te vol. Apparaat via netschakelaar uit- en weer inschakelen (indien nodig herhalen) totdat de stand-bymodus wordt weergegeven. Systeemfout Apparaat via netschakelaar uit- en inschakelen; indien dit niet lukt het apparaat contact opnemen met de hotline. aan-/uit-knop . Voortdurend knipperen van alle bedieningstoetsen Neemt u a.u.b. contact op met de Melitta® hotline, indien u het probleem niet heeft kunnen verhelpen met de hierboven genoemde oplossingen. Nederland: 0031 183 642 642 België: 0032 9 331 52 30 198 Heft_Caffeo_Bistro_EU_2.3_041114.indd 198 04.11.2014 15:55:35 Estimado/a cliente: Le felicitamos por la compra de una Melitta® CAFFEO®. Es un placer saludar a un amante del café, que sabrá disfrutar de Melitta® CAFFEO®. Con su nuevo producto de alta calidad Melitta® CAFFEO® podrá disfrutar de momentos memorables a la hora del café. Pruebe sus especialidades preferidas de café y disfrútelas con todos los sentidos. Déjese mimar. El emulsionador de leche Perfect Cappuccino® le ofrecerá una experiencia inigualable, con el que podrá preparar una espuma de leche de ensueño para distintas especialidades de café, así como el depósito de granos de café Bean Select® de dos cámaras, en el que podrá elegir entre dos clases de grano distintas. Para que junto con sus invitados pueda vivir innumerables experiencias placenteras con Melitta® CAFFEO® durante mucho tiempo, lea atentamente este manual de instrucciones y guárdalo bien. Para más información sobre el producto, puede ponerse en contacto con nosotros a través del teléfono +34 916622767, a través de Internet en www.melitta.es o a través de su distribuidor más cercano. Deseamos que disfrute con su nueva cafetera súper automática. ESPAÑOL Su equipo Melitta® CAFFEO® ® Marca registrada del grupo Melitta 199 Heft_Caffeo_Bistro_EU_2.3_041114.indd 199 04.11.2014 15:55:35 Índice de contenidos 1 Acerca de este manual de instrucciones ............................................202 1.1 1.2 1.3 Símbolos que aparecen en el texto del presente manual de instrucciones ..................................................................................... 202 Uso según lo previsto ............................................................................. 203 Uso indebido .......................................................................................... 203 2 Instrucciones generales de seguridad ................................................204 3 Descripción del aparato ......................................................................207 3.1 3.2 3.3 4 Puesta en marcha ...............................................................................209 4.1 4.2 4.3 4.4 4.5 4.6 4.7 5 Leyenda de la ilustración A..................................................................... 207 Leyenda de la ilustración B .................................................................... 207 Pantalla .................................................................................................. 208 Montaje................................................................................................... 209 Conexión ................................................................................................ 210 Llenado del depósito de granos de café ................................................ 210 Llenar el depósito de agua ..................................................................... 211 Primera conexión ................................................................................... 211 Ajuste de la intensidad del café.............................................................. 212 Ajuste de la cantidad de café dispensado .............................................. 212 Conexión y desconexión .....................................................................213 5.1 5.2 Conectar el aparato ................................................................................ 213 Desconectar el aparato .......................................................................... 213 6 Inserción del filtro de agua Melitta® Claris® .........................................214 7 Preparación de un Espresso o Café Crème .......................................215 7.1 7.2 7.3 Preparación de una taza de Espresso o Café Crème ............................ 215 Preparación de dos tazas de Espresso o Café Crème .......................... 215 Preparación de Espresso o Café Crème con café en polvo .................. 216 8 Preparación de espuma de leche .......................................................217 9 Preparar agua caliente........................................................................219 200 Heft_Caffeo_Bistro_EU_2.3_041114.indd 200 04.11.2014 15:55:35 10 Ajustes de funcionamiento ..................................................................220 10.1 10.2 10.3 10.4 10.5 10.6 Ajuste de la dureza del agua .................................................................. 220 Ajuste del modo de ahorro de energía ................................................... 221 Ajuste del modo standby ........................................................................ 222 Ajuste de la temperatura de preparación ............................................... 223 Restablecimiento de los ajustes de fábrica ............................................ 224 Ajustar el nivel de molido. ...................................................................... 225 11 Conservación y mantenimiento...........................................................226 11.1 11.2 11.3 11.4 11.5 11.6 Limpieza general .................................................................................... 226 Limpieza del “Perfect Cappuccino” ........................................................ 226 Limpieza de la unidad de preparación ................................................... 227 Programa de limpieza integrado ............................................................ 228 Programa de descalcificación integrado ................................................ 231 Eliminar la cal del depósito de agua....................................................... 234 12 Transporte y eliminación .....................................................................235 12.1 Preparación para el transporte, protección anticongelación y medidas durante períodos prolongados de inactividad ........................................ 235 ESPAÑOL 13 Subsanar averías ................................................................................237 201 Heft_Caffeo_Bistro_EU_2.3_041114.indd 201 04.11.2014 15:55:35 1 Acerca de este manual de instrucciones Para orientarse mejor, despliegue las hojas plegables de la cubierta delantera y trasera de este manual de instrucciones. 1.1 Símbolos que aparecen en el texto del presente manual de instrucciones Los símbolos que aparecen en este manual de instrucciones indican peligros especiales que pueden surgir durante el uso de una Melitta® CAFFEO® o proporcionan instrucciones útiles al respecto. Advertencia: Los textos con este símbolo contienen información para su seguridad e indican posibles peligros de accidente o lesiones. Precaución: Los textos con este símbolo contienen información sobre las acciones que se deben evitar durante el uso e indican posibles peligros de daños materiales. Indicación Los textos que presentan este símbolo contienen información importante adicional en relación al uso de una Melitta® CAFFEO®. 202 Heft_Caffeo_Bistro_EU_2.3_041114.indd 202 04.11.2014 15:55:35 1.2 Uso según lo previsto El Melitta® CAFFEO® está indicado únicamente para preparar café y especialidades de café, para calentar agua y para calentar leche fuera del aparato. El aparato es apto para su uso doméstico y no está previsto para su uso comercial. Se considera también uso previsto del aparato: • Leer atentamente el manual de instrucciones, así como la comprensión y cumplimiento de sus instrucciones. • Cumplir especialmente las instrucciones de seguridad. • Utilizar Melitta® CAFFEO® respetando las indicaciones de funcionamiento descritas en las instrucciones. 1.3 Uso indebido Se considera un uso indebido el uso de Melitta® CAFFEO® de un modo distinto al descrito en el manual de instrucciones. Advertencia: ESPAÑOL Si no utiliza el aparato conforme a lo previsto, puede sufrir lesiones o quemaduras debido al contacto con el agua o el vapor calientes. Indicación El fabricante no se hace responsable de los daños derivados del uso indebido. 203 Heft_Caffeo_Bistro_EU_2.3_041114.indd 203 04.11.2014 15:55:36 2 Instrucciones generales de seguridad El aparato corresponde con las siguientes directivas europeas: – 2006 / 95 / CE (baja tensión), – 2004 / 108 / CE (compatibilidad electromagnética), – 2011 / 65 / UE (RoHS), – 2009 / 125 / CE (ecodiseño/ ErP). El aparato se ha construido según el estado más actual de la técnica. Aún así existen peligros residuales. Con el fin de evitar peligros es preciso que observe las instrucciones de seguridad. Melitta® no asumirá responsabilidad alguna por daños debidos a la inobservancia de las instrucciones de seguridad. Lee atentamente las siguientes instrucciones. Si no se cumplen estas instrucciones puede poner en peligro su propia seguridad y la del aparato. Atención: Peligro por corriente eléctrica En caso de daños en el aparato o en el cable de alimentación, existe peligro de muerte por electrocución. Observe las siguientes instrucciones de seguridad a fin de evitar peligros por corriente eléctrica. – No utilice un cable de alimentación dañado. – Un cable de alimentación dañado solo deberá reemplazarse por el fabricante, su servicio de atención al cliente o una persona de similar cualificación. – No abra ninguna cubierta fijamente atornillada de la carcasa del aparato. – Utilice el aparato solamente si se encuentra en perfecto estado 204 Heft_Caffeo_Bistro_EU_2.3_041114.indd 204 04.11.2014 15:55:36 técnico. – Un aparato defectuoso solo deberá repararse por un taller autorizado. No repare el aparato por su cuenta. – No realice modificaciones en el aparato, sus componentes o sus accesorios. – No sumerja el aparato en agua. Atención: ESPAÑOL Peligro de sufrir quemaduras y escaldaduras Los líquidos y vapores salientes pueden estar muy calientes. Algunas partes del aparato también se calientan mucho. Observe las siguientes instrucciones de seguridad a fin de evitar quemaduras y escaldaduras. – Evite que los líquidos y vapores salientes entren en contacto con la piel. – No toque ninguna tobera de salida durante el funcionamiento. 205 Heft_Caffeo_Bistro_EU_2.3_041114.indd 205 04.11.2014 15:55:36 Atención: Seguridad general Observe las siguientes instrucciones de seguridad a fin de evitar daños personales y materiales. – No introduzca la mano en el interior del aparato durante el funcionamiento. – Mantenga el aparato y el cable de alimentación fuera del alcance de niños con menos de 8 años. – Este aparato solo podrá utilizarse por niños a partir de 8 años o por personas con capacidades físicas, sensorias o intelectuales reducidas o personas sin los conocimientos y la experiencia necesarios, si está presente una persona de vigilancia o si han sido instruidos en el manejo seguro del aparato y entienden los peligros que resulten al respecto. – No permita que los niños jueguen con el aparato. Los niños menores de 8 años no deberán llevar a cabo una limpieza o un mantenimiento. Los niños a a partir de 8 años deberán ser supervisados durante la limpieza y el mantenimiento. – Separe el aparato de la alimentación de corriente si permanece sin vigilancia durante un período prolongado. 206 Heft_Caffeo_Bistro_EU_2.3_041114.indd 206 04.11.2014 15:55:36 3 Descripción del aparato 3.1 Leyenda de la ilustración A Número de Explicación imagen Bandeja de goteo con reposatazas y recipiente de posos de café (interior) 2 Emulsionador de leche "Perfect Cappuccino" 3 Depósito de agua 4 Botón para regular la intensidad del café 5 Botón de suministro de vapor 6 Interruptor de válvula para el dispensado de vapor y agua caliente 7 Pantalla 8 Depósito de grano con doble cámara "Bean Select“ 9 Interruptor basculante para depósito de grano "Bean Select“ 10 Recipiente de café en polvo con tapa 11 Botón ON/OFF 12 Regulador de cantidad de café 13 Botón de suministro de una taza 14 Botón de suministro de dos tazas 15 Salida de café con regulación de altura 16 Interruptor de flotador para la indicación de nivel de llenado de agua en la bandeja de goteo 3.2 ESPAÑOL 1 Leyenda de la ilustración B Número de imagen Explicación 17 Cable de alimentación 18 Unidad de preparación y tabla de especificaciones (al dorso de la cubierta) 19 Regulación del nivel de molido 20 Interruptor de red 207 Heft_Caffeo_Bistro_EU_2.3_041114.indd 207 04.11.2014 15:55:36 3.3 Símbolo Pantalla Significado Válvula de vapor Indicación Explicación/petición se ilumina Temperatura de suministro de vapor alcanzada Abrir válvula parpadea Válvula abierta Depósito de agua se ilumina parpadea Depósito de café en polvo se ilumina Llenar el depósito de agua Tapa del depósito de café en polvo abierta El suministro de café en polvo se efectúa pulsando el botón de suministro de una taza se ilumina 1 grano: suave 2 granos: normal 3 granos: fuerte 4 granos: muy fuerte parpadea Llenar el depósito de granos de café; el parpadeo finaliza después del siguiente suministro de café. se ilumina Limpieza del aparato parpadea Programa de limpieza integrado en funcionamiento Intensidad del café Limpieza Bandeja de goteo se ilumina y recipiente de recogida de posos de café parpadea Descalcificación Vaciar la bandeja de goteo y el recipiente de recogida de posos de café Insertar la bandeja de goteo y el recipiente de recogida de posos de café se ilumina Eliminar la cal del aparato parpadea Programa de descalcificación integrado en funcionamiento 208 Heft_Caffeo_Bistro_EU_2.3_041114.indd 208 04.11.2014 15:55:37 4 Puesta en marcha Para la primera puesta en marcha lleve a cabo los siguientes pasos. Una vez realizadas estas operaciones, el aparato estará listo para funcionar. Ya puede preparar café. Le recomendamos que deseche las dos primeras tazas de café que prepare después de la primera puesta en marcha. 4.1 • Montaje Coloque el aparato sobre una superficie estable, plana y seca. Mantenga una distancia de aproximadamente 10 cm con respecto a la pared o a otros objetos. – Nunca coloque el aparato sobre superficies calientes ni en habitaciones húmedas. – No transporte ni guarde el aparato en medios de transporte o en habitaciones a bajas temperaturas, ya que el agua residual puede congelarse o condensarse y provocar daños en el aparato. Tenga en cuenta también las indicaciones de la página 235. • El recipiente de posos de café ya está colocado en la bandeja de goteo. Tenga presente que la bandeja de goteo debe insertarse hasta el tope en el aparato. Indicaciones – Guarde el material de embalaje incluyendo el espumillón para el transporte o para cualquier posible devolución para evitar daños durante el transporte. – Es algo muy normal que incluso antes de poner en marcha el aparato encuentre restos de café y de agua. Esto se debe a las pruebas realizadas en fábrica. ESPAÑOL Precaución: 209 Heft_Caffeo_Bistro_EU_2.3_041114.indd 209 04.11.2014 15:55:37 4.2 • Conexión Conecte el cable de alimentación en el enchufe adecuado. Advertencia: Peligro de incendio y peligro de electrocución al conectar el aparato a una tensión de alimentación de características incompatibles o mediante conectores o cables de alimentación incorrectos o dañados. – Asegúrese de que la tensión de alimentación coincide con la tensión que figura en la tabla de especificaciones del aparato. La tabla de especificaciones se encuentra en el lado derecho del aparato, en la parte trasera de la cubierta (fig. B, nº 18). – Asegúrese de que la toma de alimentación cumple la normativa vigente en materia de seguridad eléctrica. En caso de duda, consulte a un electricista autorizado. – Nunca utilice cables de alimentación dañados (aislamiento dañado, cables desprotegidos). – Durante el período de validez de la garantía, encargue al fabricante exclusivamente, y posteriormente a un técnico autorizado, la sustitución del cable de alimentación. 4.3 Llenado del depósito de granos de café Mediante el doble depósito de granos de café “Bean Select” puede utilizar dos variedades distintas de café a la vez. Llene, por ejemplo, una cámara de granos de café Espresso y la otra cámara con granos de Café Crème. La palanca situada entre ambos depósitos le permitirá alternar cómodamente entre los dos distintos tipos de granos de café. • Llene el depósito de granos de café (fig. A, nº 8) con nuevos granos de café. Cada compartimento puede llenarse con un máximo de 135 gr. de café en grano. Precaución: • – Solo debe llenar el depósito de granos de café con granos de café. – Nunca llene el depósito de granos de café con café molido, granos secos congelados o caramelizados. Seleccione la variedad de café deseada, colocando la palanca basculante sobre la cámara correspondiente. 210 Heft_Caffeo_Bistro_EU_2.3_041114.indd 210 04.11.2014 15:55:37 Advertencia: Peligro para personas con intolerancia a la cafeína. Como siempre quedan restos de los últimos granos de café utilizados sobre el mecanismo de molido, si cambia a una variedad distinta, ambas variedades se mezclarán. Por lo tanto, las dos primeras tazas después del cambio a granos de café descafeinados aún pueden contener café con cafeína. solo a partir de la tercera taza de café preparada después del cambio, el café estará libre de cafeína. Indicación Si la palanca se encuentra ajustada en posición vertical durante el proceso de preparación, no caerán granos de café en el mecanismo de molido. Llenar el depósito de agua • Abra la tapa del depósito de agua (fig. A, nº 3) tirando de ella hacia arriba y extraiga el depósito de agua del aparato. • Llene el depósito con agua fresca del grifo hasta la marca MAX y vuelva a insertarlo en el aparato. 4.5 Primera conexión El agua y el aire han sido evacuados de fábrica de todos los tubos del aparato. Por este motivo, la primera vez que se enciende el aparato, después de la fase y será necesario purgar de calentamiento, se ilumina el símbolo de la válvula el aire del aparato. La purga de aire únicamente es necesaria durante la primera puesta en marcha del aparato, así como después de purgar el agua y el aire. Consulte al respecto la página 235. • Ajuste el interruptor de encendido/apagado (fig. B, nº 20) en la posición “I“. • Pulse el botón ESPAÑOL 4.4 para encender el aparato. → El botón ON/OFF parpadea. El aparato se calienta. Después de calentar se ilumina el símbolo de la válvula . • Coloque un recipiente bajo el Perfect Cappuccino e inserte el tubo de vapor hacia abajo hasta que quede colocado bajo el borde del recipiente. • Coloque un recipiente bajo la salida. 211 Heft_Caffeo_Bistro_EU_2.3_041114.indd 211 04.11.2014 15:55:37 • Gire el interruptor de la válvula (fig. A, nº 6) en el sentido de las agujas del reloj para abrir la válvula. → El símbolo de la válvula parpadea. El agua caerá en el recipiente colocado bajo el Perfect Cappuccino. • En cuanto deje de caer agua y se ilumine el símbolo de la válvula, gire el interruptor de la válvula en el sentido contrario al de las agujas del reloj para cerrar la válvula → El aparato realiza un lavado automático y sale agua caliente por la salida. A continuación se ilumina el botón ON/OFF . El aparato está en standby. 4.6 • Ajuste de la intensidad del café Pulse varias veces el botón de intensidad del café entre los cuatro niveles de intensidad disponibles. para cambiar → La selección elegida se mostrará mediante los símbolos del grano de café en la pantalla. Indicación Intensidad del café suave media (ajuste de fábrica) fuerte muy fuerte • Puede modificar el aroma del café realizando el ajuste del nivel de molido. Consulte al respecto la página 225. 4.7 • Ajuste de la cantidad de café dispensado Gire el regulador de cantidad de café (fig. A, nº12) para ajustar la cantidad deseada mediante regulación continua de 30 ml a 220 ml (regulador a la izquierda: 30 ml, regulado central: 125 ml, regulador a la derecha: 220 ml). 212 Heft_Caffeo_Bistro_EU_2.3_041114.indd 212 04.11.2014 15:55:37 • 5 Conexión y desconexión 5.1 Conectar el aparato Ajuste el interruptor de encendido/apagado (fig. B, nº 20) en la posición “I“. → El aparato volverá a encontrarse en modo standby. El botón ON/OFF se ilumina en color rojo. • Coloque un recipiente apropiado bajo la salida. • Pulse el botón para encender el aparato. → El botón ON/OFF parpadea. El aparato se calienta. El aparato realiza un lavado automático y sale agua caliente por la salida. Finalmente se ilumina el botón ON/OFF y los símbolos de grano de café . El aparato está en standby. 5.2 Desconectar el aparato • Coloque un recipiente bajo la salida. • Pulse el botón ON/OFF para ajustar el aparato en standby. • ESPAÑOL → El aparato realizará un lavado automático de la línea de café. La cámara de preparado se ajustará en posición de reposo. El botón ON/OFF se ilumina en color rojo. Ajuste el interruptor ON/OFF (fig. B, nº 20) en la posición “0“, para apagar el aparato completamente. Indicaciones – Después de cada encendido, el aparato realiza un lavado automático. – solo se debe apagar el aparato pulsando el interruptor de alimentación si se encuentra en modo standby, ya que de lo contrario existe peligro de que la unidad de preparación no se encuentre colocada en la posición correcta. 213 Heft_Caffeo_Bistro_EU_2.3_041114.indd 213 04.11.2014 15:55:37 6 Inserción del filtro de agua Melitta® Claris® El filtro de aguar Melitta® Claris® filtra la cal y otras sustancias nocivas del agua. Insértelo en el aparato solo después de la primera puesta en marcha. Si utiliza el filtro, no necesitará eliminar la cal del aparato en mucho tiempo y podrá ajustar la dureza del agua al nivel de dureza 1 (tenga en cuenta al respecto la información de la página 220). Gracias a una imbatible protección frente a la acumulación de cal, se alarga la vida útil de su máquina de café. El filtro de agua debería cambiarse periódicamente, aunque como muy tarde después de 2 meses. El filtro de agua está disponible en los comercios especializados. • Ajuste el anillo azul del filtro de agua Melitta® Claris® en el mes actual. Así podrá saber con exactitud cuándo es necesario cambiar el filtro de agua Melitta® Claris®. • Coloque el filtro de agua en un vaso lleno de agua fresca del grifo durante algunos minutos antes de colocarlo. • Abra la tapa del depósito de agua (fig. A, nº 3) tirando de ella hacia arriba y extraiga el depósito de agua del aparato. • Vacíe el depósito de agua. • Enrosque el nuevo filtro de agua Melitta® Claris® mediante el elemento auxiliar del extremo inferior de la cucharilla de café incluida con cuidado en la rosca de la parte inferior del depósito de agua. • Llene el depósito con agua fresca del grifo hasta la marca MAX y vuelva a insertarlo en el aparato. • Coloque un recipiente bajo el Perfect Cappuccino e inserte el tubo de vapor hacia abajo hasta que quede colocado bajo el borde del recipiente. • Gire el interruptor de la válvula (fig. A, nº 6) en el sentido de las agujas del reloj para abrir la válvula. → El agua caerá en el recipiente colocado bajo el Perfect Cappuccino. La función automática de parada obliga a abrir y cerrar varias veces el interruptor de válvula. • En cuanto el símbolo del recipiente de agua se ilumine , gire el interruptor de válvula hacia la izquierda para cerrar la válvula. → El aparato está en standby. 214 Heft_Caffeo_Bistro_EU_2.3_041114.indd 214 04.11.2014 15:55:38 Indicación El filtro de agua Melitta® Claris® no debería permanecer seco durante un periodo de tiempo largo. Por este motivo, le recomendamos que guarde el filtro de agua Melitta® Claris® si no tiene previsto utilizar el aparato en un vaso de agua en el frigorífico 7 Preparación de un Espresso o Café Crème 7.1 Preparación de una taza de Espresso o Café Crème Condiciones: El aparato está en standby (véase “Conexión y desconexión“ en página 213). La intensidad y la cantidad de café deseadas están ajustadas (véase página 212). La variedad de café deseada en el depósito de granos de café está seleccionada. • Coloque un recipiente apropiado bajo la salida. • Pulse el botón de dispensado de una taza . → Iniciar el proceso de molido y de suministro de café. El suministro finaliza automáticamente cuando se haya alcanzado la cantidad de café ajustada. Para interrumpir el suministro de café antes, pulse el botón de . dispensado de una taza 7.2 Preparación de dos tazas de Espresso o Café Crème Condiciones: El aparato está en standby (véase “Conexión y desconexión“ en página 213). La intensidad y la cantidad del café deseadas están ajustadas. La variedad de café deseada en el depósito de granos de café está seleccionada. • Coloque dos tazas adecuadas juntas bajo la salida. • Pulse el botón de dispensado de dos tazas ESPAÑOL • . → Iniciar el proceso doble de molido y de dispensado de café. El suministro finaliza automáticamente cuando se haya alcanzado la cantidad de café ajustada. 215 Heft_Caffeo_Bistro_EU_2.3_041114.indd 215 04.11.2014 15:55:38 • Para interrumpir el suministro de café antes, pulse el botón de dispensado de dos tazas . 7.3 Preparación de Espresso o Café Crème con café en polvo Condiciones: El aparato está en standby (véase “Conexión y desconexión“ en página 213). Se ha ajustado la cantidad de café deseada. • Abra la tapa del recipiente de café en polvo (fig. A, nº10). → El símbolo del compartimento de café en polvo • parpadea. Llene el compartimento de café en polvo como máximo con una cucharada de café recién molido. Precaución: • – solo se debe llenar el recipiente de café en polvo con café en polvo. Los productos instantáneos pueden adherirse a la unidad de preparación. – Nunca llene más de una cucharada de café (se encuentra junto al aparato) en polvo, ya que de lo contrario la unidad de preparación rebosaría. Cierre la tapa del recipiente de café. → El símbolo de compartimento de café en polvo de una taza se iluminan. y el botón de dispensado • Coloque un recipiente apropiado bajo la salida. • Pulse el botón de dispensado de una taza . → Se inicia el suministro de café. El suministro finaliza automáticamente cuando se haya alcanzado la cantidad de café ajustada. • Para interrumpir el suministro de café antes, pulse el botón de dispensado de una taza . 216 Heft_Caffeo_Bistro_EU_2.3_041114.indd 216 04.11.2014 15:55:38 Indicación Si transcurren 90 segundos después de abrir el recipiente de café sin añadir café en polvo, el aparato volverá a ajustarse al modo de funcionamiento de granos de café y arrojará el café en polvo al recipiente de posos de café para evitar el riesgo de rebose de la cámara de preparado de café. 8 Preparación de espuma de leche Condición: El aparato está en standby (véase “Conexión y desconexión“ en página 213). • Coloque un recipiente con leche bajo el Perfect Cappucino. Procure que la boca del Perfect Cappuccino permanezca sumergida en la leche. • Llene el recipiente hasta un tercio como máximo, ya que al emulsionarse la leche su volumen aumenta en gran medida. • Pulse el botón dispensado de vapor . → El botón de suministro de vapor parpadea. El aparato se calienta. Una vez se alcanza la temperatura del vapor se ilumina el botón de suministro de vapor y el símbolo de la válvula . ESPAÑOL Advertencia: Peligro de quemaduras o escaldado ante el contacto con el vapor caliente que sale del tubo, del tubo flexible y la boca caliente Nunca debe tocar durante el uso el tubo de vapor, el tubo flexible de vapor o la boca del Perfect Cappucino. • Gire el interruptor de la válvula (fig. A, nº 6) en el sentido de las agujas del reloj para abrir la válvula. → El símbolo de la válvula y el botón de suministro de vapor parpadean. La boca emulsiona la leche y la calienta al mismo tiempo. Obtendrá una espuma óptima si durante el emulsionado agita la boca arriba y abajo. 217 Heft_Caffeo_Bistro_EU_2.3_041114.indd 217 04.11.2014 15:55:38 • Gire el interruptor de la válvula en el sentido contrario al de las agujas del reloj para cerrar la válvula y terminar de hacer espuma. El volumen de leche debería haberse duplicado aproximadamente y el recipiente debería haberse calentado notablemente. • Pulse el botón de suministro de vapor para cambiar del modo de vapor al modo de funcionamiento normal • Espere hasta que el tubo de vapor haya enfriado y, a continuación, gire el tubo de vapor con la boca hacia la izquierda del Perfect Cappuccino (fig. E). • Tire de la boca del Perfect Cappuccino desde el tubo de vapor hacia abajo (fig. F). • Lave el tubo de vapor y la boca bajo agua corriente o en el lavavajillas. • Enrosque el tubo de vapor limpio con su boca hacia la derecha en el Perfect Cappuccino hasta que quede correctamente enclavado. Indicación Le recomendamos utilizar leche fría con un porcentaje elevado de proteína. Para obtener una espuma de leche óptima no es determinante su contenido en grasa, sino en proteína. 218 Heft_Caffeo_Bistro_EU_2.3_041114.indd 218 04.11.2014 15:55:38 9 Preparar agua caliente Condición: El aparato está en standby (véase “Conexión y desconexión“ en página 213). • Coloque un paño bajo el Perfect Cappuccino para recoger el agua residual que pueda verterse. • Tire de la boca del Perfect Cappuccino desde el tubo de vapor hacia abajo (fig. F). • Coloque un recipiente bajo el tubo de vapor e inserte el tubo de vapor hacia abajo hasta que quede colocado bajo el borde del recipiente. • Gire el interruptor de la válvula (fig. A, nº 6) en el sentido de las agujas del reloj para abrir la válvula. → El símbolo de la válvula vapor al recipiente. parpadea. El agua caliente cae del tubo de En cuanto obtenga la cantidad de agua deseada, gire el interruptor de válvula hacia la izquierda para cerrar la válvula. • Espere hasta que el tubo de vapor se haya enfriado y empuje la boca desde abajo hacia el tubo de vapor, hasta que quede enclavada. ESPAÑOL • 219 Heft_Caffeo_Bistro_EU_2.3_041114.indd 219 04.11.2014 15:55:38 10 Ajustes de funcionamiento 10.1 Ajuste de la dureza del agua Utilice la tira de verificación adjunta para medir la dureza del agua en el lugar en el que reside. Tenga presentes las instrucciones que figuran en el embalaje de la tira de verificación. La dureza del agua viene ajustada de fábrica en el nivel 4. Condición: El aparato volverá a encontrarse en modo standby (véase “Conexión y desconexión“ en página 213). Ajuste la dureza del agua para cumplir las especificaciones de calidad del equipo del siguiente modo: • Pulse a la vez el botón de dispensado de una taza y el botón de suministro de vapor, hasta que los cuatro botones se iluminen débilmente. • Pulse varias veces el botón de suministro de vapor , para seleccionar entre los cuatro posibles niveles de dureza del agua. → El botón de suministro de vapor se ilumina en color brillante. La dureza del agua elegida según la tabla se mostrará mediante los símbolos del grano de café en la pantalla. Rango de dureza del agua • Propiedades °d °e °f blanda 0 - 10 0 - 13 0 - 18 media 10 - 15 13 - 19 18-27 dura 15 - 20 19 - 25 27-36 muy dura (ajuste de fábrica) > 20 > 25 > 36 Pulse el botón ON/OFF seleccionada. para confirmar la dureza del agua 220 Heft_Caffeo_Bistro_EU_2.3_041114.indd 220 04.11.2014 15:55:39 → En función de la selección realizada parpadearán de 1 a 4 símbolos de en la pantalla. El aparato volverá a encontrarse en modo grano de café standby 10.2 Ajuste del modo de ahorro de energía El aparato se ajusta automáticamente (en función del ajuste) en modo de ahorro de energía (el aparato consumirá así mucha menos energía que en modo standby) después de la última acción realizada, Puede ajustar varios horarios para el modo de ahorro de energía. El aparato viene ajustado de fábrica a 15 minutos . Condición: El aparato volverá a encontrarse en modo standby (véase “Conexión y desconexión“ en página 213). Ajuste el modo de ahorro de energía con los siguientes pasos: • Pulse a la vez el botón de dispensado de una taza y el botón de suministro de vapor, hasta que los cuatro botones se iluminen débilmente. • Pulse varias veces el botón de intensidad del café entre los horarios disponibles para el temporizador. para cambiar Indicación ESPAÑOL → El botón de intensidad de café se ilumina en color brillante. La selección elegida se mostrará mediante los símbolos del grao de café en la pantalla. Tiempo 5 minutos 15 minutos (ajuste de fábrica) 30 minutos OFF • Pulse el botón ON/OFF para confirmar el horario seleccionado. → En función de la selección realizada, parpadearán de 1 a 4 símbolos del grano de café en la pantalla a modo de confirmación. El aparato volverá a encontrarse en modo standby 221 Heft_Caffeo_Bistro_EU_2.3_041114.indd 221 04.11.2014 15:55:39 Indicación Pulsando el botón deseado, el aparato despertará del modo de ahorro de energía. La función del botón pulsado (p.ej. preparar café) se ejecuta directamente, aunque la fase de calentamiento durará un poco más de tiempo. 10.3 Ajuste del modo standby El aparato se ajusta automáticamente en el modo standby 30 minutos después de la última acción realizada (en función del ajuste). Es posible ajustar varios horarios para el modo standby. El aparato viene ajustado de fábrica para 30 minutos . Condición: El aparato volverá a encontrarse en modo standby (véase “Conexión y desconexión“ en página 213). Ajuste el modo standby de acuerdo con los siguientes pasos: • Pulse a la vez el botón de dispensado de una taza y el botón de suministro de vapor, ,hasta que los cuatro botones se iluminen débilmente. • Pulse varias veces el botón de dispensado de dos tazas para elegir el horario al que desea ajustar el temporizador de entre los cuatro horarios disponibles. → El botón de dispensado de dos tazas se ilumina en color brillante. La selección elegida se mostrará mediante los símbolos del grao de café en la pantalla. Indicación Tiempo 30 minutos (ajuste de fábrica) 2 horas 4 horas 8 horas • Pulse el botón ON/OFF para confirmar el horario seleccionado. 222 Heft_Caffeo_Bistro_EU_2.3_041114.indd 222 04.11.2014 15:55:39 → En función de la selección realizada, parpadearán de 1 a 4 símbolos del en la pantalla a modo de confirmación. El aparato volverá grano de café a encontrarse en modo standby Indicación En el modo de standby, la máquina consume mucha menos energía. Aun así, le recomendamos apagar el aparato pulsando el botón de encendido/apagado si no tiene previsto utilizarlo durante un largo período de tiempo (p.ej. durante la noche). 10.4 Ajuste de la temperatura de preparación La temperatura de preparación viene de fábrica ajustada en el nivel 2 (medio ). Condición: El aparato volverá a encontrarse en modo standby (véase “Conexión y desconexión“ en página 213). • Pulse a la vez el botón de dispensado de una taza y el botón de suministro de vapor, , hasta que los cuatro botones se iluminen débilmente. • Pulse el botón de suministro de una taza para elegir la temperatura de preparación de entre las tres temperaturas disponibles. → El botón de suministro de una taza se ilumina en color brillante. → La selección elegida se mostrará mediante los símbolos del grao de café en la pantalla. Indicación ESPAÑOL Ajuste la temperatura de preparación de acuerdo con los siguientes pasos: Temperatura de preparación baja media (ajuste de fábrica) alta 223 Heft_Caffeo_Bistro_EU_2.3_041114.indd 223 04.11.2014 15:55:39 • Pulse el botón ON/OFF para confirmar la temperatura de preparación seleccionada. → En función de la selección realizada parpadearán de 1 a 3 símbolos de grano de café en la pantalla. El aparato volverá a encontrarse en modo standby 10.5 Restablecimiento de los ajustes de fábrica Condición: El aparato volverá a encontrarse en modo standby (véase “Conexión y desconexión“ en página 213). • Apaga el aparato mediante el interruptor ON/OFF (encendido/ apagado). • Espere hasta que se apague la luz roja en el • Pulse al mismo tiempo el botón de intensidad del café . suministro de dos tazas • Apaga al mismo tiempo el aparato mediante el interruptor ON/OFF (encendido/apagado). botón ON/OFF. y el botón de → Todos los ajustes se restablecerán a los originales de fábrica. Vista general de los ajustes de fábrica: Ajuste de funcionamiento Ajuste de fábrica Intensidad del café normal Dureza del agua Dureza del agua 4 Modo ahorro de energía Modo Stand By Temperatura de preparación 15 minutos 30 minutos media 224 Heft_Caffeo_Bistro_EU_2.3_041114.indd 224 04.11.2014 15:55:39 10.6 Ajustar el nivel de molido. El nivel de molido viene ajustado de fábrica en el nivel óptimo. Por lo tanto, le recomendamos que reajuste el nivel de molido solo después de unas 1000 preparaciones de café (aprox. 1 año). Solo es posible ajustar el nivel de molido durante el funcionamiento del mecanismo de molido. Ajuste el nivel de molido directamente después del inicio de un dispensado de café. Si el aroma del café no fuera lo suficientemente intenso le recomendamos que ajustes un nivel de molido fino. Ajuste la palanca (fig. B, nº 19) en una de las tres posiciones (visto desde la parte trasera del aparato). Posición de la palanca Nivel de molido izquierda fino central media derecha grueso (ajuste de fábrica) ESPAÑOL • 225 Heft_Caffeo_Bistro_EU_2.3_041114.indd 225 04.11.2014 15:55:40 11 Conservación y mantenimiento 11.1 Limpieza general • Limpie el exterior del aparato con un paño suave y humedecido y con un lavavajillas normal. • Vacíe y limpie la bandeja de goteo periódicamente, como muy tarde, cuando el interruptor del flotador (fig. A, nº 16) sobresalga por el reposatazas. • Limpie el depósito de recogida de posos de café regularmente, p.ej. en el lavavajillas. Precaución: – No utilice paños, bayetas ni limpiadores agresivos para evitar dañar la superficie del aparato. – No lave la bandeja de goteo en el lavavajillas porque puede deformarse. 11.2 Limpieza del “Perfect Cappuccino” • Coloque un paño bajo el Perfect Cappuccino para recoger el agua residual que pueda verterse. • Gire el tubo de vapor con boca hacia la izquierda, apartándolo del Perfect Cappuccino (fig. E). • Tire de la boca del Perfect Cappuccino desde el tubo de vapor hacia abajo (fig. F). • Lave el tubo de vapor y la boca bajo agua corriente o en el lavavajillas. • Inserta la boca desde abajo en el tubo de vapor hasta que quede enclavada. • Enrosque el tubo de vapor limpio con su boca a derechas en el Perfect Cappuccino hasta que quede correctamente enclavado. Indicación Durante la limpieza periódica en el lavavajillas pueden producirse ligeras modificaciones en el color del recipiente de posos de café y en el Perfect Cappuccino. 226 Heft_Caffeo_Bistro_EU_2.3_041114.indd 226 04.11.2014 15:55:40 11.3 Limpieza de la unidad de preparación Condición: El aparato volverá a encontrarse en modo standby (véase “Conexión y desconexión“ en página 213). Indicación Para una protección óptima de su aparato, le recomendamos que limpie la unidad de preparación al menos una vez por semana lavándola bajo el agua del grifo. Ajuste el interruptor ON/OFF (fig. B, nº 20) en la posición “0“, para apagar el aparato completamente. • Tome el compartimento derecho del aparato (fig. B, nº 18) y tire de la cubierta hacia la derecha. • Mantenga pulsado el botón rojo del asa de la unidad de preparación (fig. H, nº 1) y gire el asa hacia la derecha hasta el tope (aprox. 75°). • Extraiga la unidad de preparación tirando del asa hasta sacarla del aparato. • No altere el estado de la unidad de preparación (no desplace ni gire los componentes de la unidad de preparación). • Lave la unidad de preparación completamente montada bajo el agua corriente, enjuagándola por todos los lados. Procure, en particular, que la superficie representada en la fig. J esté libre de restos de café. ESPAÑOL • Precaución: No laves jamás la unidad de preparación en el lavavajillas. • Deja secar la unidad de preparación. • Si fuera necesario, elimina los restos de café de las superficies en el interior del aparato sobre el que se coloca la unidad de preparación. • Vuelva a colocar la unidad de preparación en el aparato y gire el asa de la unidad de preparación en el sentido contrario al de las agujas del reloj hasta el tope para bloquear la unidad de preparación. • Coloque los dos dispositivos de bloqueo de la cubierta en la parte trasera del aparato y gire la cubierta a la izquierda hasta que quede enclavada. 227 Heft_Caffeo_Bistro_EU_2.3_041114.indd 227 04.11.2014 15:55:40 • Ajuste el interruptor de encendido/apagado (fig. B, nº 20) en la posición “I“. → El aparato volverá a encontrarse en modo standby 11.4 Programa de limpieza integrado El programa de limpieza integrado elimina los posos y restos de aceite del café que no pueden eliminarse a mano. Dura unos 15 minutos en total. Durante el proceso . completo el símbolo de limpieza parpadea Para unos resultados de limpieza óptimos, le recomendamos que limpie primero la unidad de preparación (consulte la página 227). Condición: El aparato volverá a encontrarse en modo standby (véase “Conexión y desconexión“ en página 213). Precaución: – Ejecute el programa de limpieza integrado cada 2 meses o después de 200 tazas preparadas, aunque como muy tarde cuando el símbolo de se ilumine en el campo de indicación. limpieza – Utilice exclusivamente las pastillas de limpieza de Melitta® para máquinas automáticas de café. Estas pastillas de limpieza se ajustan exactamente a la Melitta® CAFFEO®. Si utiliza cualquier otro limpiador pueden producirse daños en el aparato. Ejecute el programa de limpieza integrado de acuerdo con los siguientes pasos: 1 Extraiga, si procede, el filtro de agua Melitta® Claris® del depósito de agua (véase pág. 214). 2 Pulse al mismo tiempo el botón de dispensado de una taza botón ON/OFF durante unos 3 segundos. y el → El símbolo de la limpieza parpadea. El símbolo de la bandeja de goteo parpadea. 3 Vacíe la bandeja de goteo y el recipiente de posos de café. 4 Vuelva a insertar la bandeja de goteo sin el recipiente de posos de café y coloque el recipiente de posos de café bajo la salida. 228 Heft_Caffeo_Bistro_EU_2.3_041114.indd 228 04.11.2014 15:55:40 Fase 1 Durante la fase 1, se muestra en la pantalla un símbolo de grano de café . → Primero se ejecutan dos ciclos de lavado automáticos. El símbolo del compartimento de café en polvo se ilumina. 5 Abra la tapa del compartimento de café en polvo. → El símbolo del compartimento de café en polvo 6 parpadea. Introduzca una pastilla de limpieza (fig. G) y cierra de nuevo la tapa. → El símbolo del depósito de agua se ilumina. → La fase 1 ha concluido. Fase 2 Durante la fase 3 se muestran en la pantalla dos símbolos de grano de café . 7 Abra la tapa del depósito de agua (fig. A, nº 3) tirando de ella hacia arriba y extraiga el depósito de agua del aparato. Llene el depósito con agua fresca del grifo hasta la marca MAX y vuelva a insertarlo en el aparato. → El botón de suministro de vapor se ilumina. ESPAÑOL → La fase 2 ha concluido. Fase 3 Durante la fase 4 se muestran en la pantalla tres símbolos de grano de café . 8 Pulse el botón dispensado de vapor . → Se inicia el programa de limpieza integrado. Este proceso dura aproximadamente 10 minutos. A continuación, se ilumina el botón de suministro de vapor . 9 Vacíe el depósito de recogida de posos de café y vuelva a colocarlo bajo la salida. 229 Heft_Caffeo_Bistro_EU_2.3_041114.indd 229 04.11.2014 15:55:40 10 Pulse el botón dispensado de vapor . → La fase 3 ha concluido. Fase 4 Durante la fase 3 se muestran en la pantalla cuatro símbolos de grano de café . → Se reanuda el programa de limpieza integrado. Este proceso dura aproximadamente 5 minutos. El agua fluye de la salida así como del interior del aparato a la bandeja de goteo. A continuación se ilumina el símbolo de la bandeja de goteo . 11 Vacíe la bandeja de goteo y el recipiente de posos de café y vuélvalos a colocar. → El botón ON/OFF se ilumina después de una fase de calentamiento corta. Las teclas de operación y los símbolos de grano de café se iluminan. El aparato está en standby. Indicación Si durante la limpieza se ilumina el símbolo de la válvula : – Coloque un recipiente bajo el Perfect Cappuccino y gire hacia la derecha el interruptor de válvula (fig. A nº 6) para abrir la válvula. parpadea. – El símbolo de la válvula – de forma permanente, En cuanto el símbolo de la válvula se ilumine gire el interruptor de válvula hacia la izquierda para cerrar la válvula. – Se reanuda el programa de limpieza integrado. 230 Heft_Caffeo_Bistro_EU_2.3_041114.indd 230 04.11.2014 15:55:40 11.5 Programa de descalcificación integrado El programa de eliminación de cal integrado elimina los restos de cal del interior del aparato. Dura unos 15 minutos en total. Durante el proceso completo el símbolo de . descalcificación parpadea Condición: El aparato volverá a encontrarse en modo standby (véase “Conexión y desconexión“ en página 213). Precaución: – Ejecute el programa de descalcificación integrado cada 3 meses o si el se ilumina en el campo de indicación. símbolo de descalcificación – Utilice exclusivamente las pastillas de limpieza de Melitta® para máquinas automáticas de café. Estas pastillas de limpieza se ajustan exactamente a la Melitta® CAFFEO®. Si utiliza cualquier otro limpiador pueden producirse daños en el aparato. – Nunca utilice vinagre ni ningún otro descalcificador. Ejecute el programa descalcificador integrado de acuerdo con los siguientes pasos: 1 Si es posible, antes de llevar a cabo la descalcificación, retire el filtro de agua Melitta® Claris® del depósito de agua (véase página 214). 2 Pulse al mismo tiempo el botón de dispensado de dos tazas durante unos 3 segundos. botón ON/OFF y el símbolo de la bandeja de goteo ESPAÑOL → El símbolo de descalcificación se ilumina. y el Fase 1 Durante la fase 1, se muestra en la pantalla un símbolo de grano de café . 3 Vacíe la bandeja de goteo y el recipiente de posos de café. 4 Vuelva a insertar la bandeja de goteo sin el recipiente de posos de café y coloque el recipiente de posos de café bajo el Perfect Cappuccino. → El símbolo del depósito de agua 5 se ilumina. Abra la tapa del depósito de agua (fig. A, nº 3) tirando de ella hacia arriba y extraiga el depósito de agua del aparato y vacíelo completamente. 231 Heft_Caffeo_Bistro_EU_2.3_041114.indd 231 04.11.2014 15:55:41 6 Utilice el descalcificador en el depósito de agua (p.ej. Melitta® ANTI CALC para máquinas de espresso) conforme a las instrucciones que figura en el envase. Advertencia: Peligro de irritaciones en la piel debido el descalcificador. Tenga presentes las instrucciones de seguridad y las cantidades que figuran en el embalaje del descalcificador. 7 Vuelva a colocar el depósito de agua. 8 Pulse el botón dispensado de vapor . → La fase 1 ha concluido. Fase 2 Durante la fase 3 se muestran en la pantalla dos símbolos de grano de café . → Se inicia el programa de descalcificación integrado. El agua fluye en el interior del aparato hasta la bandeja de goteo. Este proceso dura aproximadamente 10 minutos. A continuación se ilumina el símbolo de la válvula . 9 Tire de la boca del Perfect Cappuccino desde el tubo de vapor hacia abajo (fig. F). 10 Gire el Perfect Cappuccino de forma que el tubo de vapor quede colocado en el recipiente de posos de café. Advertencia: Peligro de quemaduras debido al tubo de vapor caliente o a la boca caliente del tubo Nunca debe tocar durante la salida de agua caliente el tubo de vapor o la boca del Perfect Cappucino. 11 Gire el interruptor de la válvula (fig. A, nº 6) en el sentido de las agujas del reloj para abrir la válvula. → El símbolo de la válvula parpadea. El descalcificador sale a través del tubo de vapor cayendo en el recipiente. Este proceso dura aproximadamente 10 minutos. 232 Heft_Caffeo_Bistro_EU_2.3_041114.indd 232 04.11.2014 15:55:41 → A continuación se ilumina el símbolo de la bandeja de goteo y el símbolo del recipiente de agua , porque el descalcificador ha salido completamente. 12 Vacíe la bandeja de goteo y el recipiente de posos de café. 13 Vuelva a insertar la bandeja de goteo sin el recipiente de posos de café y coloque el recipiente de posos de café bajo el Perfect Cappuccino. 14 Enjuague el depósito de agua a fondo, rellénelo hasta la marca MÁX. con agua fresca del grifo y vuelva a colocarlo en su sitio. → El botón de suministro de vapor 15 Pulse el botón dispensado de vapor se ilumina. . → La fase 2 ha concluido. Fase 3 Durante la fase 4 se muestran en la pantalla tres símbolos de grano de café . → El símbolo de la válvula parpadea. El agua sale a través del tubo de vapor cayendo en el recipiente. A continuación se ilumina el símbolo de la válvula . 16 Gire el interruptor de válvula hacia la izquierda para cerrar la válvula. ESPAÑOL → El agua fluye en el interior del aparato hasta la bandeja de goteo. A continuación se ilumina el símbolo de la bandeja de goteo . 17 Vacíe la bandeja de goteo y el recipiente de posos de café y vuélvalos a colocar. 18 Espere hasta que el tubo de vapor se haya enfriado y empuje la boca desde abajo hacia el tubo de vapor, hasta que quede enclavada. 233 Heft_Caffeo_Bistro_EU_2.3_041114.indd 233 04.11.2014 15:55:41 → El botón ON/OFF se ilumina después de una fase de calentamiento corta. Los botones de operación y los símbolos de granos de café se iluminan. El aparato está en standby. 11.6 Eliminar la cal del depósito de agua. Debería eliminar la cal periódicamente del depósito de agua para garantizar un funcionamiento perfecto. • Abra la tapa del depósito de agua (fig. A, nº 3) tirando de ella hacia arriba y extraiga el depósito de agua del aparato. • Extraiga, si procede, antes de eliminar la cal, el filtro de agua Melitta® Claris® del depósito de agua (véase pág. 214). • Llene el depósito de agua con descalcificador común. Le recomendamos el eliminador de cal rápido líquido de Swirl®. Tenga presentes las instrucciones del fabricante del descalcificador. • A continuación, lave el depósito de agua con abundante agua corriente. • Si procede, vuelva a colocar el filtro de agua Melitta® Claris® en el depósito de agua (consulte la página 214). • Llene el depósito con agua fresca del grifo hasta la marca MAX y vuelva a insertarlo en el aparato. 234 Heft_Caffeo_Bistro_EU_2.3_041114.indd 234 04.11.2014 15:55:41 12 Transporte y eliminación 12.1 Preparación para el transporte, protección anticongelación y medidas durante períodos prolongados de inactividad Evacuación del agua y purga de aire del aparato Le recomendamos evacuar el agua del aparato y purgar el aire de su interior si no tiene previsto utilizar el aparato durante un largo período de tiempo. De este modo, el aparato quedará protegido frente a daños ocasionados por la escarcha. Condición: El aparato volverá a encontrarse en modo standby (véase “Conexión y desconexión“ en página 213). • Coloque un recipiente bajo el Perfect Cappucino. • Pulse al mismo tiempo el botón de suministro de vapor ON/OFF durante más de 2 segundos. → El botón de suministro de vapor agua se ilumina. Abra la tapa del depósito de agua (fig. A, nº 3) tirando de ella hacia arriba y extraiga el depósito de agua del aparato. → El botón de suministro de vapor • parpadea. El símbolo del depósito de parpadea. ESPAÑOL • y el botón En cuanto se ilumine el símbolo de la válvula en la pantalla, gire el interruptor de la válvula (fig. A, nº 6) hacia la derecha para abrir la válvula. → Sale vapor del Perfect Cappuccino. El símbolo de la válvula y el botón de suministro de vapor parpadean. En cuanto se ha purgado el agua y el aire del aparato, se ilumina el botón de suministro de vapor y el símbolo de la válvula . • Gire el interruptor de válvula hacia la izquierda para cerrar la válvula. → El aparato volverá a encontrarse en modo standby. • Vuelva a colocar el depósito de agua vacío. 235 Heft_Caffeo_Bistro_EU_2.3_041114.indd 235 04.11.2014 15:55:41 • Apague el aparato mediante el interruptor de encendido/apagado. • Desconecte el enchufe de alimentación. Indicación El filtro de agua Melitta® Claris® no debería permanecer seco durante un periodo de tiempo largo. Por este motivo, le recomendamos que guarde el filtro de agua Melitta® Claris® si no tiene previsto utilizar el aparato en un vaso de agua en el frigorífico Transporte • Evacuación del agua y purga de aire del aparato • Vacíe y limpie la bandeja de goteo y el recipiente de posos de café. • Vacíe el depósito de agua y el depósito de granos de café. Aspire los granos situados más al fondo, si fuera preciso, con un aspirador. • Transporte el aparato, a ser posible, en el embalaje original incluyendo la espuma dura para evitar daños durante el transporte. Precaución: No debe transportar ni guardar el aparato en medios de transporte o en habitaciones a bajas temperaturas, ya que el agua residual puede congelarse o condensarse y provocar daños en el aparato. Eliminación • Elimine el aparato de forma respetuosa con el medio ambiente utilizando los sistemas de recogida adecuados. 236 Heft_Caffeo_Bistro_EU_2.3_041114.indd 236 04.11.2014 15:55:42 Subsanar averías Avería Causa Medida El café cae solo en forma de gotas. Nivel de molido demasiado fino. Ajustar el nivel de molido a un nivel más grueso. Limpie la unidad de preparación. Si fuera necesario, elimine la cal Si fuera necesario, ejecute el programa de limpieza integrado El café no fluye. El depósito de agua no está lleno o no está correctamente insertado. Llenar el depósito de agua y procurar que quede bien colocado. Si fuera necesario, abra la válvula hasta que el agua salga del aparato y vuelva a cerrar la válvula. Unidad de preparación atascada. Limpie la unidad de preparación. Los granos no caen en el mecanismo de molido (los granos están demasiado aceitosos). Golpear ligeramente el depósito de granos de café. La palanca basculante está colocada en posición vertical. Ajustar la palanca basculante a la derecha o a la izquierda. Hay un cuerpo extraño en el mecanismo de molido Ponerse en contacto con el servicio técnico. El mecanismo de molido emite un alto nivel de ruido Hay un cuerpo extraño en el mecanismo de molido Ponerse en contacto con el servicio técnico. Los símbolos de los granos de café parpadean, aunque el recipiente de granos de café esté lleno. no hay suficientes granos Pulse el botón de operación de café molidos en la preparación de para cámara de preparado una o de dos tazas. El mecanismo de molido no muele los granos de café. ESPAÑOL 13 237 Heft_Caffeo_Bistro_EU_2.3_041114.indd 237 04.11.2014 15:55:42 Avería El símbolo de la se ilumina válvula fuera de la fila. Causa Medida Hay aire en el interior de los tubos internos del aparato. Si fuera necesario, abra la válvula hasta que el agua salga del aparato y vuelva a cerrar la válvula. Limpie la unidad de preparación. La unidad de La unidad de preparación preparación no se no está correctamente puede colocar después bloqueada. de haberla sacado. El accionamiento no se halla en la posición correcta. Los botones de dispensado de una y dos tazas parpadean de forma intermitente con el botón ON/OFF Apague y vuelva a encender el aparato y, luego, pulse las teclas de operación para el dispensado de una y dos tazas durante más de 2 segundos. El accionamiento se desplaza a su posición. A continuación, vuelva a colocar la unidad de preparación y asegúrese de que el bloqueo es correcto. La unidad de preparación Coloque la unidad de falta o no está colocada preparación correctamente correctamente Sobrecarga de la cámara de preparación. Apaga el aparato pulsando el interruptor de encendido/ apagado (si fuera preciso, repite la operación varias veces) hasta que se muestre el modo standby Fallo de sistema Apagar el interruptor de encendido/apagado del aparato y volver a encenderlo. Si esto no soluciona el fallo, envíe el aparato al servicio técnico. . todos los botones de operación parpadean de forma continua Comprobar, si el asa para el correcto bloqueo de la unidad de preparación está correctamente encajada. Si tiene alguna duda, póngase en contacto con nuestro servicio técnico en el teléfono +34 91 662 27 67. 238 Heft_Caffeo_Bistro_EU_2.3_041114.indd 238 04.11.2014 15:55:42 Vážená zákaznice, vážený zákazníku, Srdečně Vám blahopřejeme k zakoupení přístroje Melitta® CAFFEO®. Je nám potěšením pozdravit Vás jako milovníka kávy a labužníka Melitta® CAFFEO®. Se svým novým kvalitním přístrojem Melitta® CAFFEO® zažijete mnoho mimořádných okamžiků provoněných kávou. Vychutnávejte si své oblíbené kávové speciality všemi smysly a nechejte se hýčkat. O jedinečný požitek z kávy se stará zpěňovač mléka Perfect Cappuccino, se kterým můžete připravit pohádkovou mléčnou pěnu pro nejrůznější kávové speciality, a také dvoukomorový zásobník zrnkové kávy Bean Select, se kterým máte možnost volby mezi dvěma různými druhy zrnkové kávy. Aby přístroj Melitta® CAFFEO® sloužil Vám i Vašim hostům co nejdéle, prostudujte si pozorně návod k použití a pečlivě jej uschovejte. Potřebujete-li další informace nebo máte-li otázky k výrobku, obraťte se prosím přímo na nás nebo nás navštivte na internetové adrese www.melitta.cz. Přejeme Vám hodně radosti s Vaším novým plnoautomatickým kávovarem. ČESKY Váš tým Melitta® CAFFEO® ® Registrovaná obchodní známka společnosti skupiny Melitta Group 239 Heft_Caffeo_Bistro_EU_2.3_041114.indd 239 04.11.2014 15:55:42 Obsah 1 Upozornění k tomuto návodu k použití ...............................................242 1.1 1.2 1.3 2 3 Všeobecné bezpečnostní pokyny .......................................................244 Popis přístroje .....................................................................................247 3.1 3.2 3.3 4 7 Umístění ................................................................................................. 249 Připojení ................................................................................................. 250 Naplnění zásobníku zrnkové kávy.......................................................... 250 Naplnění zásobníku vody ....................................................................... 251 První zapnutí .......................................................................................... 251 Nastavení síly kávy ................................................................................ 252 Nastavení vydaného množství ............................................................... 252 Zapnutí a vypnutí ................................................................................253 5.1 5.2 6 Vysvětlivky k vyobrazení A ..................................................................... 247 Vysvětlivky k vyobrazení B ..................................................................... 247 Displej..................................................................................................... 248 Uvedení do provozu ............................................................................249 4.1 4.2 4.3 4.4 4.5 4.6 4.7 5 Symboly v textu tohoto návodu k použití ................................................ 242 Použití k určenému účelu ....................................................................... 243 Použití k jinému než určenému účelu..................................................... 243 Zapnutí spotřebiče.................................................................................. 253 Vypnutí spotřebiče .................................................................................. 253 Vložení vodního filtru Melitta® Claris® .................................................254 Příprava kávy Espresso nebo Café Crème.........................................255 7.1 7.2 7.3 Příprava jednoho šálku kávy Espresso nebo Café Crème ..................... 255 Příprava dvou šálků kávy Espresso nebo Café Crème .......................... 255 Příprava kávy Espresso nebo Café Crème z mleté kávy ....................... 256 8 Příprava mléčné pěny .........................................................................257 9 Příprava horké vody ............................................................................258 240 Heft_Caffeo_Bistro_EU_2.3_041114.indd 240 04.11.2014 15:55:42 10 Nastavení funkcí .................................................................................259 10.1 10.2 10.3 10.4 10.5 10.6 Nastavení tvrdosti vody .......................................................................... 259 Nastavení režimu úspory energie........................................................... 260 Nastavení pohotovostního režimu .......................................................... 261 Nastavení spařovací teploty ................................................................... 262 Obnovení továrního nastavení ............................................................... 263 Nastavení hrubosti mletí......................................................................... 264 11 Péče a údržba .....................................................................................265 11.1 11.2 11.3 11.4 11.5 11.6 Všeobecné čištění .................................................................................. 265 Čištění Perfect Cappuccino .................................................................... 265 Čištění spařovací jednotky ..................................................................... 266 Integrovaný čisticí program .................................................................... 267 Integrovaný odvápňovací program ......................................................... 270 Odvápnění zásobníku vody .................................................................... 273 12 Přeprava a likvidace............................................................................274 12.1 Příprava pro dopravu, ochrana proti mrazu a opatření při delším nepoužívání ............................................................................................ 274 ČESKY 13 Odstranění poruch ..............................................................................276 241 Heft_Caffeo_Bistro_EU_2.3_041114.indd 241 04.11.2014 15:55:42 1 Upozornění k tomuto návodu k použití Pro lepší orientaci si otevřete složené stránky na přední a zadní straně tohoto návodu k použití. 1.1 Symboly v textu tohoto návodu k použití Symboly v tomto návodu k obsluze Vás upozorňují na zvláštní nebezpečí při manipulaci s kávovarem Melitta® CAFFEO® nebo Vám poskytují užitečné informace. Výstraha! Texty označené tímto symbolem obsahují informace pro Vaši bezpečnost a upozorňují na možná nebezpečí nehody a úrazu. Pozor! Texty označené tímto symbolem obsahují informace o chybném ovládání, kterého je třeba se vyvarovat, a upozorňují na možná nebezpečí vzniku věcných škod. Upozornění Texty s tímto symbolem obsahují doplňující cenné informace k manipulaci s Vaším kávovarem Melitta® CAFFEO®. 242 Heft_Caffeo_Bistro_EU_2.3_041114.indd 242 04.11.2014 15:55:42 1.2 Použití k určenému účelu Kávovar Melitta® CAFFEO® je určen výhradně k přípravě kávy a kávových specialit a k ohřívání vody a mléka mimo přístroj. Spotřebič je určen k domácímu použití a nikoli k použití v podnikání. Součástí vymezení pojmu „použití k určenému účelu“ je rovněž: • pozorné přečtení, porozumění a dodržování návodu k obsluze. • dodržování zejména bezpečnostních pokynů. • použití kávovaru Melitta® CAFFEO® v rámci provozních podmínek, které jsou uvedeny v tomto návodu. 1.3 Použití k jinému než určenému účelu Použití k jinému než určenému účelu představuje použití kávovaru Melitta® CAFFEO® jiným způsobem, než tím, který je popsaný v tomto návodu k obsluze. Výstraha! Při použití kávovaru k jinému než určenému účelu si můžete přivodit poranění nebo opaření horkou vodou či párou. Upozornění ČESKY Výrobce neručí za škody způsobené použitím přístroje k jinému než určenému účelu. 243 Heft_Caffeo_Bistro_EU_2.3_041114.indd 243 04.11.2014 15:55:42 2 Všeobecné bezpečnostní pokyny Spotřebič odpovídá těmto evropským směrnicím: – 2006/95/ES (o elektrických zařízeních určených pro používání v určitých mezích napětí), – 2004/108/ES (o elektromagnetické kompatibilitě), – 2011/65/ES (RoHS), – 2009/125/ES (o požadavcích na design elektrických spotřebičů / ErP). Spotřebič je vyroben na základě nejnovějšího stavu technologie. Přesto se vyskytují zbytková nebezpečí. Abyste zabránili vzniku nebezpečí, musíte dodržovat bezpečnostní pokyny. Firma Melitta® nepřebírá žádnou odpovědnost za poškození vzniklá nedodržením bezpečnostních pokynů.Přečtěte si prosím pečlivě následující pokyny. Nedodržení pokynů může ohrozit Vaši bezpečnost a bezpečnost přístroje. 244 Heft_Caffeo_Bistro_EU_2.3_041114.indd 244 04.11.2014 15:55:42 Výstraha! ČESKY Nebezpečí zasažení elektrickým proudem Jestliže je spotřebič nebo síťový kabel poškozený, vzniká nebezpečí ohrožení života zasažením elektrickým proudem. Abyste zabránili ohrožení elektrickým proudem, dodržujte tyto bezpečnostní pokyny: – Nepoužívejte žádný poškozený síťový kabel. – Poškozený síťový kabel může vyměnit výhradně výrobce, jeho zákaznický servis nebo podobně kvalifikovaná osoba. – Neotevírejte žádné kryty, které jsou pevně přišroubované k tělesu spotřebiče. – Spotřebič používejte pouze tehdy, pokud je v bezvadném technickém stavu. – Vadný spotřebič může opravit pouze autorizovaná servisní dílna. Nikdy sami spotřebič neopravujte. – Na spotřebiči, jeho částech ani na dodávaném příslušenství neprovádějte žádné změny. – Spotřebič nikdy neponořujte do vody. 245 Heft_Caffeo_Bistro_EU_2.3_041114.indd 245 04.11.2014 15:55:43 Výstraha! Nebezpečí popálení a opaření Vytřikující kapaliny a páry mohou být velmi horké. Části spotřebiče mohou být také velmi horké. Abyste zabránili popálení a opaření, dodržujte tyto bezpečnostní pokyny: – Vyhněte se kontaktu pokožky s vystřikujícími kapalinami a parami. – Během provozu se na výtoku nedotýkejte žádné trysky. Výstraha! Všeobecná bezpečnost Abyste zabránili zranění osob a poškození věcí, dodržujte tyto bezpečnostní pokyny: – Během provozu nikdy nesahejte dovnitř spotřebiče. – Nedovolte dětem do 8 let věku, aby se dotýkaly spotřebiče a síťového kabelu. – Děti od 8 let věku a osoby se sníženými fyzickými, smyslovými nebo duševními schopnostmi nebo s nedostatkem zkušeností a znalostí smějí tento spotřebič používat pouze pod dozorem nebo pokud byly poučeny o bezpečném použití spotřebiče a jsou seznámeny s nebezpečími, které jsou spojeny s jeho používáním, a chápou je. – Děti si nesmějí se spotřebičem hrát. Děti do 8 let věku nesmějí provádět čištění a uživatelskou údržbu. Děti nad 8 let věku smějí spotřebič používat pouze pod dozorem. – Odpojte spotřebič od elektrického napájení v případě, že je delší dobu bez dozoru. 246 Heft_Caffeo_Bistro_EU_2.3_041114.indd 246 04.11.2014 15:55:43 3 Popis přístroje 3.1 Vysvětlivky k vyobrazení A Číslo obrázku Vysvětlení 1 Odkapávací miska s plochou na šálek a nádoba na výtlačky kávy (uvnitř) 2 Zpěňovač mléka „Perfect Cappuccino“ 3 Zásobník vody 4 Ovládací tlačítko síly kávy 5 Ovládací tlačítko výdeje páry 6 Spínač ventilu k odběru páry a horké vody 7 Displej 8 Dvoukomorový zásobník zrnkové kávy „Bean Select“ 9 Sklápěcí spínač k zásobníku zrnkové kávy „Bean Select“ 10 Šachta na mletou kávu s víkem 11 Tlačítko zap/vyp 12 Regulátor množství kávy 13 Ovládací tlačítko výdeje jednoho šálku 14 Ovládací tlačítko výdeje dvou šálků 15 Výškově nastavitelné trysky kávy 16 Plovák k indikaci výšky hladiny vody v odkapávací misce Vysvětlivky k vyobrazení B ČESKY 3.2 Číslo obrázku Vysvětlení 17 Síťový kabel 18 Spařovací jednotka a typový štítek (za krytem) 19 Nastavení hrubosti mletí 20 Hlavní vypínač 247 Heft_Caffeo_Bistro_EU_2.3_041114.indd 247 04.11.2014 15:55:43 3.3 Symbol Displej Význam Parní ventil Zásobník vody Šachta na mletou kávu Indikace Vysvětlení/pokyn Svítí Teplota výdeje páry dosažena Otevřete ventil Bliká Ventil otevřený Svítí Naplňte zásobník vody Bliká Víko šachty na mletou kávu je otevřené Svítí Odběr mleté kávy se provede stisknutím ovládacího tlačítka výdeje jednoho šálku Svítí 1 zrnko: slabá 2 zrnka: normální 3 zrnka: silná 4 zrnka: velmi silná Bliká Naplňte zásobník zrnkové kávy; blikání skončí po dalším odběru kávy. Svítí Vyčistěte přístroj Bliká Integrovaný čisticí program běží Svítí Vyprázdněte odkapávací misku a nádobu na výtlačky kávy Bliká Vložte odkapávací misku a nádobu na výtlačky kávy Svítí Proveďte odvápnění přístroje Bliká Integrovaný odvápňovací program běží Síla kávy Čištění Odkapávací miska a nádoba na výtlačky kávy Odvápňování 248 Heft_Caffeo_Bistro_EU_2.3_041114.indd 248 04.11.2014 15:55:43 4 Uvedení do provozu Při prvním uvedení přístroje do provozu proveďte prosím níže uvedené úkony. Po provedení těchto úkonů je přístroj připraven k provozu. Můžete si tedy připravit první kávu. Po prvním uvedení do provozu doporučujeme vylít první dva šálky kávy. 4.1 • Umístění Spotřebič umístěte na pevnou, rovnou a suchou plochu. Dodržujte vzdálenost asi 10 cm od zdi a od ostatních předmětů. Pozor! – Přístroj nikdy neumísťujte na horké plochy ani do vlhkých prostorů. – Nepřepravujte ani neukládejte přístroj v dopravních prostředcích nebo prostorách temperovaných na nízkou teplotu, protože by zbytková voda mohla zmrznout nebo kondenzovat a poškodit přístroj. Respektujte informace uvedené na straně 274. • Nádoba na výtlačky kávy je již v odkapávací misce. Dbejte na to, aby odkapávací miska byla až nadoraz zasunutá do přístroje. Upozornění Uschovejte si obalový materiál včetně tuhého pěnového materiálu pro přepravu a případné vrácení přístroje, abyste zamezili poškozením při přepravě. – Stopy kávy a vody v přístroji před jeho prvním uvedením do provozu jsou zcela běžné. Příčinou je skutečnost, že přístroj byl ve výrobním závodu zkoušen z hlediska bezvadné funkce. ČESKY – 249 Heft_Caffeo_Bistro_EU_2.3_041114.indd 249 04.11.2014 15:55:43 4.2 • Připojení Zasuňte zástrčku síťového kabelu do vhodné zásuvky. Výstraha! Nebezpečí požáru a úrazu elektrickým proudem při nesprávném síťovém napětí, nesprávných nebo poškozených přípojkách a síťových kabelech – Ujistěte se, že síťové napětí souhlasí s napětím uvedeným na typovém štítku spotřebiče. Typový štítek se nachází na pravé straně spotřebiče za krytem (obr. B, č. 18). – Ujistěte se, že zásuvka odpovídá platným normám o bezpečnosti elektrických zařízení. V případě pochybností se obraťte na odborného elektrikáře. – Nikdy nepoužívejte poškozené síťové kabely (poškozená izolace, obnažené vodiče). – Poškozené síťové kabely nechejte během záruční doby vyměnit výhradně výrobcem a po jejím uplynutí výhradně kvalifikovanými odbornými pracovníky. 4.3 Naplnění zásobníku zrnkové kávy Díky dvoukomorovému zásobníku zrnkové kávy „Bean Select“ můžete souběžně používat dva různé druhy kávy. Jednu komoru naplňte např. kávovými zrny Espresso a druhou zrny Café-Crème. Pomocí sklopné páčky pak můžete pohodlně střídat oba druhy kávy. • Naplňte zásobník zrnkové kávy (obr. A, č. 8) čerstvými kávovými zrny. Každou z obou komor lze naplnit nejvýše 135 g kávových zrn. Pozor! • – Zásobník zrnkové kávy plňte výhradně nemletou zrnkovou kávou. – Do zásobníku zrnkové kávy nikdy nevkládejte namletá, zmrazováním vysušená či karamelizovaná kávová zrna. Uvedením sklopné páčky do polohy příslušného zásobníku vyberete požadovaný druh kávových zrn. 250 Heft_Caffeo_Bistro_EU_2.3_041114.indd 250 04.11.2014 15:55:44 Výstraha! Nebezpečí pro osoby, které nesnášejí kofein. Jelikož nad mlecím zařízením se usazuje zbytkové množství dříve namletých kávových zrn, smíchají se při přepnutí na jiný druh kávových zrn oba druhy. Z tohoto důvodu mohou první dva šálky po přepnutí obsahovat kromě kávy bez kofeinu také kávu s kofeinem. Teprve třetí připravený šálek kávy po přepnutí je proto bez kofeinu. Upozornění Jestliže se sklopná páčka při spařování nachází ve svislé poloze, nedostanou se do mlecího zařízení žádná zrna. 4.4 Naplnění zásobníku vody • Odklopte víko zásobníku vody (obr. A, č. 3) a vytáhněte zásobník vody směrem vzhůru z přístroje. • Naplňte zásobník vody až po značku max. čerstvou vodou z vodovodu a opět ho nasaďte. 4.5 První zapnutí Všechna vedení v přístroji jsou z výroby odvodněna a naplněna vzduchem. Proto a přístroj se se při prvním zapnutí po zahřívací fázi rozsvítí symbol ventilu musí odvzdušnit prostřednictvím ventilu. Odvzdušnění je třeba provést pouze při prvním uvedení přístroje do provozu a také po prvním vypuštění vody z přístroje a zavzdušnění. Podrobné informace jsou uvedeny na straně 274. • Přepněte hlavní vypínač (obr. B, č. 20) do polohy „I“. • Zapněte přístroj stisknutím tlačítka zap/vyp . • Postavte nádobu pod Perfect Cappuccino a posuňte parní trysku dolů, aby se nacházela pod okrajem nádoby. • Pod trysky postavte nádobu. • Otočením spínačem ventilu (obr. A, č. 6) ve směru hodinových ručiček otevřete ventil. ČESKY → Tlačítko zap/vyp bliká. Přístroj se zahřeje. Po zahřátí se rozsvítí symbol ventilu . 251 Heft_Caffeo_Bistro_EU_2.3_041114.indd 251 04.11.2014 15:55:44 → Symbol ventilu • bliká. Voda teče do nádoby pod Perfect Cappuccino. Jakmile voda přestane vytékat a rozsvítí se symbol ventilu , otočte spínačem ventilu proti směru hodinových ručiček a ventil zavřete. → Spotřebič provede automatické propláchnutí, přičemž z trysek bude vytékat horká voda. Poté se rozsvítí tlačítko zap/vyp . Přístroj je připraven k provozu. 4.6 • Nastavení síly kávy Opakovaným stisknutím ovládacího tlačítka síly kávy mezi třemi možnými stupni síly kávy. → Výběr se na displeji zobrazí v podobě symbolů zrn Indikace lze vybírat . Síla kávy slabá normální (tovární nastavení) silná velmi silná • Kávové aroma můžete měnit také pomocí nastavení stupně mletí. Podrobné informace jsou uvedeny na straně 264. 4.7 • Nastavení vydaného množství Otočte regulátorem množství kávy (obr. A, č. 12) a plynule nastavte vydané množství v rozmezí 30 ml až 220 ml (regulátor doleva: 30 ml, regulátor uprostřed: 125 ml, regulátor doprava: 220 ml). 252 Heft_Caffeo_Bistro_EU_2.3_041114.indd 252 04.11.2014 15:55:44 • 5 Zapnutí a vypnutí 5.1 Zapnutí spotřebiče Přepněte hlavní vypínač (obr. B, č. 20) do polohy „I“. → Přístroj se nachází v pohotovostním režimu. Tlačítko zap/vyp červeně. • Pod trysky postavte vhodnou nádobu. • Zapněte přístroj stisknutím tlačítka zap/vyp svítí . → Tlačítko zap/vyp bliká. Přístroj se zahřeje. Spotřebič provede automatické propláchnutí, přičemž z trysek bude vytékat horká voda. Nakonec se rozsvítí tlačítko zap/vyp a symboly kávového zrna . Přístroj je připraven k provozu. 5.2 Vypnutí spotřebiče • Pokud je to možné, postavte nádobu pod trysky. • Stisknutím tlačítka zap/vyp režimu. uveďte přístroj do pohotovostního → Přístroj provede automatické propláchnutí částí, kudy protéká káva. Spařovací komora se uvede do klidové polohy. Tlačítko zap/vyp svítí červeně. • Přepněte hlavní vypínač (obr. B, č. 20) do polohy „0“. Tím spotřebič zcela vypnete. – Při každém zapnutí přístroj provede samočinné propláchnutí. – Přístroj vypínejte výhradně hlavním vypínačem, pokud se přístroj nachází v pohotovostním režimu. V opačném případě hrozí nebezpečí, že se spařovací jednotka nebude nacházet ve správné poloze. ČESKY Upozornění 253 Heft_Caffeo_Bistro_EU_2.3_041114.indd 253 04.11.2014 15:55:44 6 Vložení vodního filtru Melitta® Claris® Vodní filtr Melitta® Claris® filtruje z vody vápenaté složky a jiné škodlivé látky. Filtr vložte do přístroje teprve po jeho prvním uvedení do provozu. Pokud budete filtr používat, bude přístroj vyžadovat méně časté odvápňování a tvrdost vody se automaticky nastaví na stupeň tvrdosti 1 (podrobné informace k tomuto tématu jsou uvedeny na straně 259). Díky bezpečné ochraně proti usazování vodního kamene se prodlužuje životnost Vašeho přístroje. Vodní filtr byste měli vyměňovat pravidelně, nejpozději však vždy po uplynutí 2 měsíců. Vodní filtr lze koupit ve specializovaných prodejnách. • Pomocí modrého kolečka na horní části vodního filtru Melitta® Claris® nastavte aktuální měsíc. Tak snadno poznáte, kdy je třeba vodní filtr Melitta® Claris® vyměnit. • Nežli vodní filtr vložíte do přístroje, ponořte jej na několik minut do sklenice s vodou z vodovodu. • Odklopte víko zásobníku vody (obr. A, č. 3) a vytáhněte zásobník vody směrem vzhůru z přístroje. • Vyprázdněte nádržku na vodu. • Pomocí šroubovací pomůcky na dolním konci přiložené kávové lžičky zašroubujte vodní filtr Melitta® Claris® do závitu na dně zásobníku vody. • Naplňte zásobník vody až po značku max. čerstvou vodou z vodovodu a opět ho nasaďte. • Postavte nádobu pod Perfect Cappuccino a posuňte parní trysku dolů, aby se nacházela pod okrajem nádoby. • Otočením spínačem ventilu (obr. A, č. 6) ve směru hodinových ručiček otevřete ventil. → Voda teče do nádoby pod Perfect Cappuccino. S ohledem na funkci automatického vypnutí musíte ventilový spínač několikrát otevřít a zavřít. • Jakmile se symbol zásobníku vody rozsvítí, otočte spínačem ventilu proti směru hodinových ručiček a ventil zavřete. → Přístroj je připraven k provozu. 254 Heft_Caffeo_Bistro_EU_2.3_041114.indd 254 04.11.2014 15:55:44 Upozornění Vodní filtr Melitta® Claris® by neměl zůstat po delší dobu suchý. Proto doporučujeme vodní filtr Melitta® Claris® při delším nepoužívání přístroje ponořit do sklenice s vodou a takto jej uskladnit v chladničce. 7 Příprava kávy Espresso nebo Café Crème 7.1 Příprava jednoho šálku kávy Espresso nebo Café Crème Předpoklady: Přístroj je připraven k provozu (viz oddíl „Zapnutí a vypnutí“ na straně 253). Je nastavena požadovaná síla a vydané množství kávy (viz stranu 252). Je vybrán požadovaný druh kávy v nádobě na kávová zrna. • Pod trysky postavte vhodnou nádobu. • Stiskněte ovládací tlačítko výdeje jednoho šálku kávy . → Spustí se mletí a výdej kávy. Jakmile je dosaženo nastaveného množství kávy v šálku, výdej se automaticky ukončí. • Chcete-li výdej kávy předčasně ukončit, stiskněte ovládací tlačítko . výdeje jednoho šálku 7.2 Příprava dvou šálků kávy Espresso nebo Café Crème Předpoklady: Přístroj je připraven k provozu (viz oddíl „Zapnutí a vypnutí“ na straně 253). Je nastavena požadovaná síla a vydané množství kávy Je vybrán požadovaný druh kávy v nádobě na kávová zrna. Postavte dvě vhodné nádoby vedle sebe pod trysky. • Stiskněte ovládací tlačítko výdeje dvou šálků kávy . ČESKY • → Spustí se dvojité mletí a výdej kávy. Jakmile je dosaženo nastaveného množství kávy v šálku, výdej se automaticky ukončí. • Chcete-li výdej kávy předčasně ukončit, stiskněte ovládací tlačítko výdeje dvou šálků . 255 Heft_Caffeo_Bistro_EU_2.3_041114.indd 255 04.11.2014 15:55:44 7.3 Příprava kávy Espresso nebo Café Crème z mleté kávy Předpoklady: Přístroj je připraven k provozu (viz oddíl „Zapnutí a vypnutí“ na straně 253). Je nastaveno požadované vydané množství. • Otevřete víko šachty na mletou kávu (obr. A, č. 10). → Symbol šachty na mletou kávu • bliká. Do šachty na mletou kávu nasypte nejvýše kávovou lžičku čerstvé mleté kávy. Pozor! • – Šachtu na mletou kávu plňte výhradně mletou kávou. Instantní výrobky by mohly zalepit spařovací jednotku. – Nikdy nesypte více než jednu kávovou lžičku (je přiložena k přístroji) mleté kávy. V opačném případě se spařovací jednotka přeplní. Zavřete víko šachty na mletou kávu. → Symbol šachty na mletou kávu kávy se rozsvítí. a ovládací tlačítko výdeje jednoho šálku • Pod trysky postavte vhodnou nádobu. • Stiskněte ovládací tlačítko výdeje jednoho šálku kávy . → Spustí se výdej kávy. Jakmile je dosaženo nastaveného množství kávy v šálku, výdej se automaticky ukončí. • Chcete-li výdej kávy předčasně ukončit, stiskněte ovládací tlačítko výdeje jednoho šálku . Upozornění Jestliže do 90 sekund od otevření šachty na mletou kávu neodeberete kávu, přepne se přístroj opět do režimu provozu s kávovými zrny a mletá káva se vysype do nádoby na výtlačky kávy, aby se zabránilo pozdějšímu nebezpečí přeplnění pařicí komory. 256 Heft_Caffeo_Bistro_EU_2.3_041114.indd 256 04.11.2014 15:55:45 8 Příprava mléčné pěny Předpoklad: Přístroj je připraven k provozu (viz oddíl „Zapnutí a vypnutí“ na straně 253). • Postavte nádobu s mlékem pod Perfect Cappuccino. Dbejte na to, aby byl šlehač Perfect Cappuccino ponořen do mléka. • Nádobu naplňte nejvýše do jedné třetiny, neboť při zpěnění se objem mléka výrazně zvětší. • Stiskněte ovládací tlačítko výdeje páry . → Ovládací tlačítko výdeje páry bliká. Přístroj se zahřeje. Jakmile je dosažena teplota páry, rozsvítí se ovládací tlačítko výdeje páry a symbol ventilu . Výstraha! Nebezpečí popálení a opaření horkou parní tryskou, horkou parní hadičkou a horkým šlehačem Nikdy se během používání nedotýkejte parní trysky, parní hadičky ani šlehače Perfect Cappuccino. • Otočením spínačem ventilu (obr. A, č. 6) ve směru hodinových ručiček otevřete ventil. → Symbol ventilu a ovládací tlačítko výdeje páry blikají. Šlehač zpění mléko a současně ho ohřeje. Lepšího výsledku zpěnění dosáhnete, pokud budete šlehačem při zpěňování pohybovat nahoru a dolů. • Otočením ventilového spínače proti směru hodinových ručiček zavřete ventil a ukončete zpěňování. Objem mléka by se měl přibližně zdvojnásobit a nádoba by se měla citelně zahřát. • Stiskněte ovládací tlačítko výdeje páry do režimu běžného provozu přístroje. • Počkejte, až parní tryska vychladne, a potom trysku se šlehačem vyšroubujte proti směru hodinových ručiček z přístroje (obr. E). • Vytáhněte šlehač Perfect Cappuccino z parní trysky směrem dolů (obr. F). ČESKY ; tím přejdete z režimu páry 257 Heft_Caffeo_Bistro_EU_2.3_041114.indd 257 04.11.2014 15:55:45 • Omyjte parní trysku a šlehač pod tekoucí vodou nebo v myčce nádobí. • Našroubujte vyčištěnou parní trysku se šlehačem ve směru hodinových ručiček k Perfect Cappuccino, až tryska zaklapne. Upozornění Doporučujeme používat studené mléko s vysokým obsahem bílkovin. Pro dobrou mléčnou pěnu není rozhodující obsah tuku, nýbrž obsah bílkovin v mléce. 9 Příprava horké vody Předpoklad: Přístroj je připraven k provozu (viz oddíl „Zapnutí a vypnutí“ na straně 253). • Pod Perfect Cappuccino položte utěrku k zachycení případné vytékající zbytkové vody. • Vytáhněte šlehač Perfect Cappuccino z parní trysky směrem dolů (obr. F). • Postavte nádobu pod parní trysku a posuňte trysku dolů tak, aby se nacházela pod okrajem nádoby. • Otočením spínačem ventilu (obr. A, č. 6) ve směru hodinových ručiček otevřete ventil. → Symbol ventilu bliká. Z parní trysky vytéká horká voda do nádoby. • Jakmile načepujete požadované množství vody, otočte spínačem ventilu proti směru hodinových ručiček a zavřete ventil. • Počkejte, parní tryska vychladne, a znovu nasuňte šlehač zdola na trysku, až šlehač zaklapne. 258 Heft_Caffeo_Bistro_EU_2.3_041114.indd 258 04.11.2014 15:55:45 10 Nastavení funkcí 10.1 Nastavení tvrdosti vody Pro zjištění tvrdosti vody ve Vaší oblasti použijte přiložený testovací proužek. Dbejte pokynů k použití uvedených na obalu testovacího proužku. Z výroby je tvrdost vody nastavena na hodnotu 4. Předpoklad: Přístroj se nachází v pohotovostním režimu (viz oddíl „Zapnutí a vypnutí“ na straně 253). S ohledem na dlouhodobé zachování kvality přístroje nastavte tvrdost vody dle níže uvedených pokynů: • Stiskněte současně ovládací tlačítko výdeje jednoho šálku kávy a tlačítko výdeje páry , až se všechna čtyři tlačítka slabě rozsvítí. • Stiskněte opakovaně ovládací tlačítko výdeje páry ze čtyř možných stupňů tvrdosti vody. a vyberte jeden Rozsah tvrdosti vody • Vlastnosti °d °e °f Měkká 0 - 10 0 - 13 0 - 18 Střední 10 - 15 13 - 19 18-27 Tvrdá 15 - 20 19 - 25 27-36 Velmi tvrdá (tovární nastavení) > 20 > 25 > 36 Výběr tvrdosti vody potvrďte stisknutím tlačítka zap/vyp → Podle volby blikají na displeji 1 až 4 symboly kávového zrna přejde zpět do pohotovostního režimu. ČESKY → Ovládací tlačítko výdeje páry se jasně rozsvítí. Aktuální výběr tvrdosti vody je na displeji zobrazen symboly kávového zrna . . . Přístroj 259 Heft_Caffeo_Bistro_EU_2.3_041114.indd 259 04.11.2014 15:55:45 10.2 Nastavení režimu úspory energie Po poslední činnosti přístroj automaticky přejde (dle aktuálního nastavení) do režimu úspory energie (přístroj tak spotřebovává výrazně méně energie než v pohotovostním režimu). Pro přechod do režimu úspory energie lze nastavit různé časové lhůty. Z výroby je přístroj nastaven na lhůtu 15 minut . Předpoklad: Přístroj se nachází v pohotovostním režimu (viz oddíl „Zapnutí a vypnutí“ na straně 253). Lhůtu pro přechod přístroje do režimu úspory energie nastavte takto: • Stiskněte současně ovládací tlačítko výdeje jednoho šálku kávy a tlačítko výdeje páry , až se všechna čtyři tlačítka slabě rozsvítí. • Opakovaným stisknutím ovládacího tlačítka síly kávy ze čtyř možných lhůt časovače. → Ovládací tlačítko síly kávy se jasně rozsvítí. Výběr se na displeji zobrazí v podobě symbolů zrn Indikace vyberte jednu . Doba 5 minut 15 minut (tovární nastavení) 30 minut vyp • Výběr časové lhůty potvrďte stisknutím tlačítka zap/vyp . → Dle vybraného nastavení blikají na displeji 1 až 4 symboly kávového zrna . Přístroj přejde zpět do pohotovostního režimu. Upozornění Režim úspory energie zrušíte stisknutím libovolného tlačítka. Funkce stisknutého tlačítka (například příprava kávy) se provede přímo, jen zahřívací fáze trvá o něco déle. 260 Heft_Caffeo_Bistro_EU_2.3_041114.indd 260 04.11.2014 15:55:45 10.3 Nastavení pohotovostního režimu 30 minut po poslední akci (dle aktuálního nastavení) přístroj automaticky přejde do pohotovostního režimu. Pro přechod do pohotovostního režimu lze nastavit různé časové lhůty. Z výroby je přístroj nastaven na lhůtu 30 minut . Předpoklad: Přístroj se nachází v pohotovostním režimu (viz oddíl „Zapnutí a vypnutí“ na straně 253). Lhůtu pro přechod přístroje do pohotovostního režimu nastavte takto: • Stiskněte současně ovládací tlačítko výdeje jednoho šálku kávy a , až se všechna čtyři tlačítka slabě rozsvítí. tlačítko výdeje páry • Opakovaným stisknutím ovládacího tlačítka výdeje dvou šálků vyberte jednu ze čtyř možných lhůt časovače. → Ovládací tlačítko výdeje dvou šálků se jasně rozsvítí. Výběr se na displeji zobrazí v podobě symbolů zrn . Indikace Doba 30 minut (tovární nastavení) 2 hodiny 4 hodiny 8 hodin • Výběr časové lhůty potvrďte stisknutím tlačítka zap/vyp . → Dle vybraného nastavení blikají na displeji 1 až 4 symboly kávového zrna . Přístroj přejde zpět do pohotovostního režimu. ČESKY Upozornění V pohotovostním režimu přístroj spotřebovává výrazně méně energie. Přesto doporučujeme, není-li přístroj delší dobu používán (např. také přes noc), jej vypnout hlavním vypínačem. 261 Heft_Caffeo_Bistro_EU_2.3_041114.indd 261 04.11.2014 15:55:46 10.4 Nastavení spařovací teploty Z výroby je spařovací teplota nastavena na stupeň 2 (střední ). Předpoklad: Přístroj se nachází v pohotovostním režimu (viz oddíl „Zapnutí a vypnutí“ na straně 253). Při nastavení spařovací teploty postupujte takto: • Stiskněte současně ovládací tlačítko výdeje jednoho šálku kávy a tlačítko výdeje páry , až se všechna čtyři tlačítka slabě rozsvítí. • Opakovaným stisknutím tlačítka výdeje jednoho šálku ze tří možných nastavení spařovací teploty. → Ovládací tlačítko výdeje jednoho šálku se jasně rozsvítí. → Výběr se na displeji zobrazí v podobě symbolů zrn Indikace vyberte jedno . Spařovací teplota nízká střední (tovární nastavení) vysoká • Výběr spařovací teploty potvrďte stisknutím tlačítka zap/vyp → Podle volby blikají na displeji 1 až 3 symboly kávového zrna přejde zpět do pohotovostního režimu. . . Přístroj 262 Heft_Caffeo_Bistro_EU_2.3_041114.indd 262 04.11.2014 15:55:46 10.5 Obnovení továrního nastavení Předpoklad: Přístroj se nachází v pohotovostním režimu (viz oddíl „Zapnutí a vypnutí“ na straně 253). • Vypněte přístroj hlavním vypínačem. • Počkejte, až zhasne červená kontrolka na tlačítku zap/vyp • Stiskněte současně ovládací tlačítko síly kávy výdeje dvou šálků . • Současně zapněte přístroj hlavním vypínačem. . a ovládací tlačítko → Všechna nastavení se vrátí do stavu z výroby. Přehled továrních nastavení: Nastavení funkce Tovární nastavení Síla kávy Normální Tvrdost vody Tvrdost vody 4 Režim úspory energie Pohotovostní režim 30 minut Střední ČESKY Spařovací teplota 15 minut 263 Heft_Caffeo_Bistro_EU_2.3_041114.indd 263 04.11.2014 15:55:46 10.6 Nastavení hrubosti mletí Hrubost mletí byla optimálně nastavena před expedicí spotřebiče. Doporučujeme proto stupeň mletí seřídit teprve po přípravě přibližně 1 000 šálků kávy (cca. 1 rok). Hrubost mletí lze nastavit jen během chodu mlýnku. Hrubost mletí tedy nastavte bezprostředně po spuštění odběru kávy. Není-li aroma kávy dostatečně intenzivní, doporučujeme nastavit jemnější hrubost mletí. • Přepněte páčku (obr. B, č. 19) do jedné ze tří poloh (při pohledu ze zadní strany přístroje). Poloha páčky Stupeň mletí vlevo jemný uprostřed střední vpravo hrubý (tovární nastavení) 264 Heft_Caffeo_Bistro_EU_2.3_041114.indd 264 04.11.2014 15:55:46 11 Péče a údržba 11.1 Všeobecné čištění • Přístroj otírejte zvenku měkkým, navlhčeným hadříkem a běžným prostředkem k mytí nádobí. • Pravidelně čistěte a vyprazdňujte odkapávací misku, nejpozději jestliže plovák (obr. A, č. 16) vyčnívá nahoře z plechové plochy na šálek. • Pravidelně čistěte nádobu na výtlačky kávy (například ji umyjte v myčce nádobí). Pozor! – Abyste zabránili poškození povrchu přístroje, nikdy nepoužívejte utěrky na drhnutí, mycí houby ani čisticí prostředky. – Odkapávací misku nikdy nemyjte v myčce nádobí, protože by mohlo dojít k deformaci misky. • Pod Perfect Cappuccino položte utěrku k zachycení případné vytékající zbytkové vody. • Vyšroubujte parní trysku se šlehačem proti směru hodinových ručiček z Perfect Cappuccino (obr. E). • Vytáhněte šlehač Perfect Cappuccino z parní trysky směrem dolů (obr. F). • Omyjte parní trysku a šlehač pod tekoucí vodou nebo v myčce nádobí. • Nasuňte opět šlehač zespodu na parní trysku, až zaklapne. • Našroubujte vyčištěnou parní trysku se šlehačem ve směru hodinových ručiček k Perfect Cappuccino, až tryska zaklapne. Upozornění Při častém mytí v myčce nádobí může dojít k mírným změnám barvy nádoby na výtlačky kávy a Perfect Cappuccino. ČESKY 11.2 Čištění Perfect Cappuccino 265 Heft_Caffeo_Bistro_EU_2.3_041114.indd 265 04.11.2014 15:55:46 11.3 Čištění spařovací jednotky Předpoklad: Přístroj se nachází v pohotovostním režimu (viz oddíl „Zapnutí a vypnutí“ na straně 253). Upozornění Pro optimální ochranu přístroje doporučujeme spařovací jednotku jednou za týden vyčistit proudem čisté vody z vodovodu. • Přepněte hlavní vypínač (obr. B, č. 20) do polohy „0“. Tím spotřebič zcela vypnete. • Sáhněte do prohlubně na pravé straně přístroje (obr. B, č. 18) a sejměte kryt směrem doprava. • Dlouze stiskněte a držte červený knoflík na rukojeti spařovací jednotky (obr. H) a otočte rukojetí ve směru hodinových ručiček až nadoraz (asi o 75 °). • Vytáhněte spařovací jednotku za rukojeť z přístroje. • Nechte spařovací jednotku ve stavu, v jakém jste ji vyjmuli ze spotřebiče (nepohybujte ani neotáčejte díly spařovací jednotky). • Důkladně omyjte spařovací jednotku ze všech stran jako celek pod tekoucí vodou. Dávejte pozor především na to, aby na povrchu znázorněném na obrázku J nezůstaly výtlačky kávy. Pozor! Spařovací jednotku nikdy nemyjte v myčce nádobí. • Nechte spařovací jednotku okapat. • Odstraňte případné výtlačky kávy z ploch uvnitř přístroje, na které se nasazuje spařovací jednotka. • Spařovací jednotku vsaďte opět do přístroje a otočte rukojetí proti směru hodinových ručiček až nadoraz; tím spařovací jednotku zajistíte na místě. • Vložte dvě zajišťovací západky do přístroje a vychylte kryt doleva, až zaklapne na své místo. • Přepněte hlavní vypínač (obr. B, č. 20) do polohy „I“. 266 Heft_Caffeo_Bistro_EU_2.3_041114.indd 266 04.11.2014 15:55:46 • Přístroj přejde zpět do pohotovostního režimu. 11.4 Integrovaný čisticí program Integrovaný čisticí program odstraňuje usazeniny a zbytky kávového oleje, které nelze odstranit ručně. Celý program trvá přibližně 15 minut. Během celého procesu . bliká symbol čištění Pro optimální výsledek čištění doporučujeme nejdříve vyčistit spařovací jednotku (viz stranu 266). Předpoklad: Přístroj se nachází v pohotovostním režimu (viz oddíl „Zapnutí a vypnutí“ na straně 253). Pozor! – Integrovaný čisticí program spouštějte každé 2 měsíce nebo po přípravě 200 šálků, nejpozději však v okamžiku, kdy se na displeji zobrazí symbol . čištění – Používejte výhradně čisticí tablety Melitta® určené pro plnoautomatické kávovary. Tyto čisticí tablety jsou optimalizovány k použití v přístroji Melitta® CAFFEO®. Při použití jiných čisticích prostředků můžete způsobit poškození přístroje. Integrovaný čisticí program proveďte takto: 1 Vyjměte – je-li vložen – vodní filtr Melitta® Claris® ze zásobníku vody (viz stranu 254). 2 Stiskněte současně ovládací tlačítko výdeje jednoho šálku a podržte je stisknutá přibližně po 3 sekundy. zap/vyp svítí. 3 Vyprázdněte odkapávací misku a nádobu na výtlačky kávy. 4 Nasaďte opět odkapávací misku bez nádoby na výtlačky kávy a postavte sběrnou nádobu na výtlačky kávy pod trysku. ČESKY → Symbol čištění bliká. Symbol odkapávací misky a tlačítko 267 Heft_Caffeo_Bistro_EU_2.3_041114.indd 267 04.11.2014 15:55:47 Fáze 1 Během fáze 1 se na displeji zobrazuje jeden symbol kávového zrna . → Nejprve se provedou dva automatické výplachy. Symbol šachty na mletou svítí. 5 Otevřete víko šachty na mletou kávu. → Symbol šachty na mletou kávu 6 bliká. Vhoďte čisticí tabletu (obr. G) a zavřete kryt šachty na mletou kávu. → Symbol zásobníku vody svítí. → Fáze 1 je ukončena. Fáze 2 Během fáze 2 se na displeji zobrazují dva symboly kávového zrna 7 . Odklopte víko zásobníku vody (obr. A, č. 3) a vytáhněte zásobník vody směrem vzhůru z přístroje. Naplňte zásobník vody až po značku max. čerstvou vodou z vodovodu a opět ho nasaďte. → Ovládací tlačítko výdeje páry svítí. → Fáze 2 je ukončena. Fáze 3 Během fáze 3 se na displeji zobrazují tři symboly kávového zrna 8 Stiskněte ovládací tlačítko výdeje páry . . → Spustí se integrovaný čisticí program. Tento proces trvá přibližně 10 minut. Poté se rozsvítí ovládací tlačítko výdeje páry . 9 Vyprázdněte nádobu na výtlačky kávy a postavte ji opět pod trysky. 10 Stiskněte ovládací tlačítko výdeje páry . → Fáze 3 je ukončena. 268 Heft_Caffeo_Bistro_EU_2.3_041114.indd 268 04.11.2014 15:55:47 Fáze 4 . Během fáze 4 se na displeji zobrazují čtyři symboly kávového zrna → Integrovaný čisticí program pokračuje. Tento proces trvá přibližně 5 minut. Voda proudí z trysek a protéká vnitřkem přístroje do odkapávací misky. Poté se rozsvítí symbol odkapávací misky . 11 Vyprázdněte odkapávací misku a sběrnou nádobu na výtlačky kávy a znovu je vložte do přístroje. → Po provedení krátké zahřívací fáze se rozsvítí tlačítko zap/vyp . Rozsvítí se ovládací tlačítka a symboly kávového zrna . Přístroj je připraven k provozu. Upozornění Jestliže se během čištění rozsvítí symbol ventilu : – Postavte nádobu pod Perfect Cappuccino a otočte spínačem ventilu (obr. A, č. 6) ve směru hodinových ručiček a otevřete ventil. bliká. Symbol ventilu – rozsvítí trvale, otočte spínačem ventilu proti Jakmile se symbol ventilu směru hodinových ručiček a ventil zavřete. – Integrovaný čisticí program pokračuje. ČESKY – 269 Heft_Caffeo_Bistro_EU_2.3_041114.indd 269 04.11.2014 15:55:47 11.5 Integrovaný odvápňovací program Integrovaný program na odstranění vodního kamene odstraňuje zbytky vodního kamene uvnitř přístroje. Celý program trvá přibližně 15 minut. Během celého . procesu bliká symbol odvápnění Předpoklad: Přístroj se nachází v pohotovostním režimu (viz oddíl „Zapnutí a vypnutí“ na straně 253). Pozor! – Integrovaný odvápňovací program provádějte každé 3 měsíce, nebo . jakmile se na displeji rozsvítí symbol odvápnění – Používejte výhradně odvápňovací prostředek Melitta® ANTI CALC Espresso Machines. Tyto odvápňovací prostředky jsou optimalizovány k použití v přístroji Melitta® CAFFEO®. – Nikdy nepoužívejte ocet ani jiné odvápňovací prostředky. Integrovaný odvápňovací program proveďte takto: 1 Před odvápněním vyjměte – je-li vložen – vodní filtr Melitta® Claris® ze zásobníku vody (viz stranu 254). 2 Stiskněte současně ovládací tlačítko výdeje dvou šálků a podržte je stisknutá přibližně po 3 sekundy. zap/vyp → Symbol odvápnění a symbol odkapávací misky a tlačítko svítí. Fáze 1 Během fáze 1 se na displeji zobrazuje jeden symbol kávového zrna . 3 Vyprázdněte odkapávací misku a nádobu na výtlačky kávy. 4 Nasaďte opět odkapávací misku bez nádoby na výtlačky kávy a postavte nádobu na výtlačky kávy pod Perfect Cappuccino. → Symbol zásobníku vody 5 svítí. Odklopte víko zásobníku vody (obr. A, č. 3), vytáhněte zásobník vody směrem vzhůru z přístroje a zcela ho vyprázdněte. 270 Heft_Caffeo_Bistro_EU_2.3_041114.indd 270 04.11.2014 15:55:47 6 Dle pokynů na obalu vložte odvápňovací prostředek (například kapalný odvápňovací prostředek Melitta® ANTI CALC Espresso Machines) do zásobníku vody. Výstraha! Nebezpečí podráždění pokožky odvápňovacím prostředkem Dodržujte bezpečnostní pokyny a údaje o množství uvedené na obalu odvápňovacího prostředku. 7 Zásobník vody vložte do přístroje. 8 Stiskněte ovládací tlačítko výdeje páry . → Fáze 1 je ukončena. Fáze 2 Během fáze 2 se na displeji zobrazují dva symboly kávového zrna . → Integrovaný odvápňovací program se spustí. Voda proudí uvnitř přístroje do odkapávací misky. Tento proces trvá přibližně 10 minut. Poté se rozsvítí symbol ventilu . 9 Vytáhněte šlehač Perfect Cappuccino z parní trysky směrem dolů (obr. F). 10 Otočte Perfect Cappuccino tak, aby parní tryska byla ponořená ve sběrné nádobě na výtlačky kávy. Výstraha! Nebezpečí popálení o horkou parní trysku nebo o šlehač Během výdeje horké vody se nikdy nedotýkejte parní trysky ani šlehače Perfect Cappuccino. ČESKY 11 Otočením spínačem ventilu (obr. A, č. 6) ve směru hodinových ručiček otevřete ventil. → Symbol ventilu bliká. Z parní trysky vytéká odvápňovací roztok do nádoby. Tento proces trvá přibližně 10 minut. → Poté se rozsvítí symbol odkapávací misky , neboť odvápňovací roztok zcela protekl. a symbol zásobníku vody 271 Heft_Caffeo_Bistro_EU_2.3_041114.indd 271 04.11.2014 15:55:47 12 Vyprázdněte odkapávací misku a nádobu na výtlačky kávy. 13 Nasaďte opět odkapávací misku bez nádoby na výtlačky kávy a postavte nádobu na výtlačky kávy pod Perfect Cappuccino. 14 Zásobník vody důkladně propláchněte, naplňte ho až po značku max. čerstvou vodou z vodovodu a opět ho nasaďte. → Ovládací tlačítko výdeje páry svítí. 15 Stiskněte ovládací tlačítko výdeje páry . → Fáze 2 je ukončena. Fáze 3 . Během fáze 3 se na displeji zobrazují tři symboly kávového zrna → Symbol ventilu bliká. Z parní trysky vytéká voda do nádoby. Poté se rozsvítí symbol ventilu . 16 Otočte spínačem ventilu proti směru hodinových ručiček a zavřete ventil. → Voda proudí uvnitř přístroje do odkapávací misky. Poté se rozsvítí symbol odkapávací misky . 17 Vyprázdněte odkapávací misku a sběrnou nádobu na výtlačky kávy a znovu je vložte do přístroje. 18 Počkejte, parní tryska vychladne, a znovu nasuňte šlehač zdola na trysku, až šlehač zaklapne. → Po provedení krátké zahřívací fáze se rozsvítí tlačítko zap/vyp Rozsvítí se ovládací tlačítka a symboly kávového zrna . Přístroj je připraven k provozu. . 272 Heft_Caffeo_Bistro_EU_2.3_041114.indd 272 04.11.2014 15:55:48 11.6 Odvápnění zásobníku vody S ohledem na zachování bezvadné funkce přístroje doporučujeme vykonávat pravidelné odvápnění zásobníku vody. Odklopte víko zásobníku vody (obr. A, č. 3) a vytáhněte zásobník vody směrem vzhůru z přístroje. • Před odvápněním vyjměte – je-li vložen – vodní filtr Melitta® Claris® ze zásobníku vody (viz stranu 254). • Zásobník vody naplňte běžným odvápňovacím prostředkem. Doporučujeme používat tekutý rychloodvápňovací prostředek Swirl®. Řiďte se pokyny výrobce odvápňovacího prostředku. • Nakonec zásobník vody důkladně propláchněte čistou vodou. • Vložte vodní filtr Melitta® Claris® zpět do zásobníku vody (viz stranu 254). • Naplňte zásobník vody až po značku max. čerstvou vodou z vodovodu a opět ho nasaďte. ČESKY • 273 Heft_Caffeo_Bistro_EU_2.3_041114.indd 273 04.11.2014 15:55:48 12 Přeprava a likvidace 12.1 Příprava pro dopravu, ochrana proti mrazu a opatření při delším nepoužívání Vypuštění vody a zavzdušnění přístroje Při delším nepoužívání přístroje a před jeho přepravou doporučujeme vypustit z přístroje veškerou vodu a přístroj zavzdušnit. Tím přístroj ochráníte též před poškozením mrazem. Předpoklad: Přístroj se nachází v pohotovostním režimu (viz oddíl „Zapnutí a vypnutí“ na straně 253). • Postavte nádobu pod Perfect Cappuccino. • a tlačítko zap/vyp Stiskněte současně ovládací tlačítko výdeje páry a podržte je stisknutá po dobu delší než 2 sekundy. → Ovládací tlačítko výdeje páry • svítí. Odklopte víko zásobníku vody (obr. A, č. 3) a vytáhněte zásobník vody směrem vzhůru z přístroje. → Ovládací tlačítko výdeje páry • bliká. Symbol zásobníku vody bliká. Jakmile se na displeji rozsvítí symbol ventilu , otočte spínačem ventilu (obr. A, č. 6) ve směru hodinových ručiček a otevřete ventil. → Z Perfect Cappuccino začne vystupovat pára. Symbol ventilu a ovládací tlačítko výdeje páry blikají. Jakmile je z přístroje vypuštěna veškerá voda a přístroje je zavzdušněn, rozsvítí ovládací tlačítko výdeje páry a symbol ventilu . • Otočte spínačem ventilu proti směru hodinových ručiček a zavřete ventil. → Přístroj se nachází v pohotovostním režimu. • Prázdný zásobník vody nasaďte zpět. • Vypněte přístroj hlavním vypínačem. • Vytáhněte síťovou zástrčku. 274 Heft_Caffeo_Bistro_EU_2.3_041114.indd 274 04.11.2014 15:55:48 Upozornění Vodní filtr Melitta® Claris® by neměl zůstat po delší dobu suchý. Proto doporučujeme vodní filtr Melitta® Claris® při delším nepoužívání přístroje ponořit do sklenice s vodou a takto jej uskladnit v chladničce. Přeprava • Vypusťte z přístroje vodu a odvzdušněte jej. • Vyprázdněte a vyčistěte odkapávací misku a nádobu na výtlačky kávy. • Vyprázdněte zásobník vody a zásobník zrnkové kávy. Hluboko zapadlá kávová zrna případně vysajte vysavačem. • Přístroj přepravujte pokud možno v původním balení včetně tuhého pěnového materiálu, abyste zamezili poškození při přepravě. Pozor! Nepřepravujte ani neukládejte přístroj v dopravních prostředcích nebo prostorách temperovaných na nízkou teplotu, protože by zbytková voda mohla zmrznout nebo kondenzovat a poškodit přístroj. Likvidace Přístroj zlikvidujte šetrně k životnímu prostředí prostřednictvím vhodných sběrných středisek. ČESKY • 275 Heft_Caffeo_Bistro_EU_2.3_041114.indd 275 04.11.2014 15:55:48 13 Odstranění poruch Porucha Příčina Opatření Káva vytéká jen po kapkách. Příliš jemné mletí. Nastavte vyšší hrubost mletí. Vyčistěte spařovací jednotku. Dle potřeby proveďte odvápnění. Dle potřeby proveďte integrovaný čisticí program. Káva nevytéká. Nedostatečné množství vody nebo nesprávné usazení zásobníku vody. Naplňte zásobník vody a dbejte na jeho správné usazení. Dle potřeby otevřete ventil, až z přístroje začne vytékat voda, a poté ventil opět zavřete. Neprůchodná spařovací jednotka. Vyčistěte spařovací jednotku. Zrna nepadají do mlýnku (příliš olejnatá zrna). Lehce poklepejte na zásobník zrnkové kávy. Sklopná páčka se nachází ve svislé poloze. Uveďte sklopnou páčku do polohy vpravo nebo vlevo. Cizí předměty v mlýnku Kontaktujte servisní linku. Neobvyklý hluk Cizí předměty v mlýnku vycházející z mlýnku Kontaktujte servisní linku. Mlýnek nemele kávová zrna. Symboly kávových zrn blikají, ačkoli je zásobník zrnkové kávy plný. Nedostatečné množství namletých zrn ve spařovací komoře Stiskněte ovládací tlačítko nebo dvou výdeje jednoho šálků . Symbol ventilu svítí mimo pořadí. Ve vedeních uvnitř přístroje je vzduch. Otevřete ventil, až z přístroje začne vytékat voda, a poté ventil opět zavřete. Dle potřeby vyčistěte spařovací jednotku. 276 Heft_Caffeo_Bistro_EU_2.3_041114.indd 276 04.11.2014 15:55:48 Porucha Spařovací jednotku nelze po vyjmutí nasadit zpět. Ovládací tlačítka výdeje jednoho a dvou šálků kávy blikají střídavě s tlačítkem zap/vyp Příčina Spařovací jednotka není správně zajištěna. Zkontrolujte, zda je rukojeť pro zajištění spařovací jednotky správně zajištěná. Pohon není ve správné poloze. Přístroj vypněte a znovu zapněte a poté stiskněte současně ovládací tlačítka výdeje jednoho a dvou šálků a podržte je stisknutá po dobu delší než 2 sekundy. Pohon se přemístí do správné polohy. Poté vložte spařovací jednotku zpět do přístroje a zkontrolujte její správné zajištění. Spařovací jednotka není v přístroji nebo není správně nasazená. Vložte spařovací jednotku správně. Přeplněná spařovací komora. Vypněte a znovu zapněte přístroj hlavním spínačem (popř. opakujte), dokud přístroj nezačne signalizovat pohotovostní režim. Systémová chyba Přístroj vypněte a zapněte hlavním vypínačem. Jestliže vypnutí a zapnutí přístroje nepomůže, odešlete přístroj do servisu. . Průběžné blikání všech ovládacích tlačítek Opatření ČESKY Jestliže Vám výše uvedené řešení nepomohlo vyřešit Váš problém, zkontaktujte prosím zákaznickou linku Melitta®: 800 606 806. 277 Heft_Caffeo_Bistro_EU_2.3_041114.indd 277 04.11.2014 15:55:48 Vážená zákazníčka, vážený zákazník! Srdečne vám blahoželáme ku kúpe vášho vášho kávovaru Melitta® CAFFEO®. Tešíme sa, že vás môžeme pozdraviť ako milovníkov kávy a zástancov Melitta® CAFFEO®. S vaším novým kvalitným produktom Melitta® CAFFEO® zažijete veľa jedinečných kávových momentov. Vychutnajte si všetkými zmyslami svoje obľúbené kávové špeciality a nechajte sa rozmaznávať. O jedinečný pôžitok sa postará speňovač mlieka Perfect Cappucino, pomocou ktorého môžete pripravovať vynikajúcu mliečnu penu pre rôzne kávové špeciality a taktiež 2-komorový zásobník na zrnkovú kávu Bean Select, ktorý vám umožňuje voľbu medzi dvoma rôznymi druhmi zrnkovej kávy. Aby ste sa spolu so svojimi hosťami mohli dlho tešiť z kávovaru Melitta® CAFFEO®, prečítajte si pozorne tento návod na použitie a dobre ho uschovajte. V prípade, ak vám bude niečo nejasné alebo ak budete potrebovať ďalšie informácie o výrobku, obráťte sa priamo na nás alebo nás navštívte na našej internetovej stránke www.melitta.sk. Prajeme vám veľa radosti s vašim novým plnoautomatickým kávovarom. Váš kolektív Melitta® CAFFEO® ® Registered trademark of a company of the Melitta Group 278 Heft_Caffeo_Bistro_EU_2.3_041114.indd 278 04.11.2014 15:55:48 Obsah Informácie o tomto návode na použitie ...............................................281 1.1 1.2 1.3 2 3 Všeobecné bezpečnostné pokyny ......................................................283 Popis spotrebiča .................................................................................285 3.1 3.2 3.3 4 7 Umiestnenie ........................................................................................... 287 Pripojenie ............................................................................................... 288 Naplnenie zásobníka zrnkovej kávy ....................................................... 288 Naplnenie zásobníka vody ..................................................................... 289 Prvé zapnutie ......................................................................................... 289 Nastavenie sily kávy ............................................................................... 290 Nastavenie vydávaného množstva......................................................... 290 Zapnutie a vypnutie.............................................................................291 5.1 5.2 6 Legenda k obrázku A.............................................................................. 285 Legenda k obrázku B ............................................................................. 285 Displej..................................................................................................... 286 Uvedenie do prevádzky ......................................................................287 4.1 4.2 4.3 4.4 4.5 4.6 4.7 5 Symboly v texte tohto návodu na použitie .............................................. 281 Predpísané použitie................................................................................ 282 Neprípustné použitie .............................................................................. 282 Zapnutie spotrebiča ................................................................................ 291 Vypnutie spotrebiča ................................................................................ 291 Nasadenie vodného filtra Melitta® Claris® ...........................................292 Príprava Espressa alebo Café Crème ................................................293 7.1 7.2 7.3 Príprava šálky Espressa alebo Café Crème .......................................... 293 Príprava dvoch šálok Espressa alebo Café Crème................................ 293 Príprava Espressa alebo Café Crème s mletou kávou .......................... 294 8 Príprava mliečnej peny .......................................................................295 9 Príprava horúcej vody .........................................................................296 279 Heft_Caffeo_Bistro_EU_2.3_041114.indd 279 SLOVENSKY 1 04.11.2014 15:55:49 10 Nastavenia funkcií...............................................................................297 10.1 10.2 10.3 10.4 10.5 10.6 Nastavenie tvrdosti vody ........................................................................ 297 Nastavenie režimu úspory energie ......................................................... 298 Nastavenie pohotovostného režimu ....................................................... 299 Nastavenie teploty sparovania ............................................................... 300 Obnovenie nastavení z výroby ............................................................... 301 Nastavenie hrubosti mletia ..................................................................... 302 11 Ošetrovanie a údržba..........................................................................303 11.1 11.2 11.3 11.4 11.5 11.6 Všeobecné čistenie ................................................................................ 303 Čistenie speňovača mlieka Perfect Cappuccino .................................... 303 Čistenie sparovacej jednotky.................................................................. 304 Integrovaný čistiaci program .................................................................. 305 Integrovaný odvápňovací program ......................................................... 308 Odvápnenie zásobníka vody .................................................................. 311 12 Preprava a likvidácia ...........................................................................312 12.1 Príprava na prepravu, ochrana pred mrazom a opatrenia pri dlhšom nepoužívaní ............................................................................................ 312 13 Odstraňovanie porúch.........................................................................314 280 Heft_Caffeo_Bistro_EU_2.3_041114.indd 280 04.11.2014 15:55:49 1 Informácie o tomto návode na použitie Kvôli lepšej orientácii rozložte poskladané strany na prednej a zadnej strane tohto návodu na použitie. 1.1 Symboly v texte tohto návodu na použitie Symboly použité v tomto návode na použitie vás upozornia na zvláštne nebezpečenstvá pri zaobchádzaní s vašim kávovarom Melitta® CAFFEO® a poskytnú vám užitočné informácie. Výstraha! Texty označené týmto symbolom obsahujú informácie pre vašu bezpečnosť a upozorňujú na možné nebezpečenstvá nehôd a úrazov. Pozor! Texty označené týmto symbolom obsahujú informácie o nesprávnej obsluhe, ktorej sa treba vyhnúť a upozorňujú na možné nebezpečenstvá vecných škôd. Upozornenie 281 Heft_Caffeo_Bistro_EU_2.3_041114.indd 281 SLOVENSKY Texty označené týmto symbolom obsahujú cenné dodatočné informácie o zaobchádzaní s vašim kávovarom Melitta® CAFFEO®. 04.11.2014 15:55:49 1.2 Predpísané použitie Melitta® CAFFEO® je výlučne určený na prípravu kávy a kávových špecialít, na ohrev vody a taktiež na externý ohrev mlieka. Spotrebič je určený na domáce použitie a nie na použitie v prevádzkach. Predpísané použitie zahŕňa aj to, • že si pozorne prečítate tento návod na použitie, porozumiete mu a budete ho rešpektovať, • že budete rešpektovať bezpečnostné pokyny, • že budete kávovar Melitta® CAFFEO® používať v rámci prevádzkových podmienok špecifikovaných v tomto návode na použitie. 1.3 Neprípustné použitie Za neprípustné použitie sa považuje akékoľvek iné použitie kávovaru Melitta® CAFFEO®, ako je opísané v tomto návode na použitie. Výstraha! Pri neprípustnom použití sa môžete poraniť alebo obariť horúcou vodou alebo parou. Upozornenie Výrobca neručí za škody, ktoré je možné odvodiť z neprípustného použitia spotrebiča. 282 Heft_Caffeo_Bistro_EU_2.3_041114.indd 282 04.11.2014 15:55:49 2 Všeobecné bezpečnostné pokyny Spotrebič zodpovedá nasledujúcim európskym smerniciam: – 2006 / 95 / ES (Nízke napätie), – 2004 / 108 / ES (Elektromagnetická kompatibilita), – 2011 / 65 / EÚ (Obmedzenie používania niektorých nebezpečných látok v elektrických a elektronických zariadeniach), – 2009 / 125 / ES (Ekodizajn / ErP). Spotrebič je vyrobený podľa najnovšieho stavu techniky. Napriek tomu existujú zvyškové nebezpečenstvá. Aby sa zabránilo nebezpečenstvám, musia sa dodržiavať bezpečnostné pokyny. Za škody v dôsledku nedodržania bezpečnostných pokynov Melitta® neručí. Pozorne si prečítajte nasledujúce pokyny. Ak nebudete tieto pokyny dodržiavať, môžete tým ohroziť vlastnú bezpečnosť a bezpečnosť spotrebiča. Nebezpečenstvo spôsobené elektrickým prúdom Ak je spotrebič alebo sieťový kábel poškodený, hrozí nebezpečenstvo ohrozenia života v dôsledku zásahu elektrickým prúdom. Dodržiavajte nasledujúce bezpečnostné pokyny, aby sa zabránilo ohrozeniam spôsobeným elektrickým prúdom: – Nepoužívajte poškodený sieťový kábel. – Poškodený sieťový kábel smie vymieňať výhradne výrobca, jeho zákaznícky servis alebo podobne kvalifikovaná osoba. – Neotvárajte pevne priskrutkované kryty telesa spotrebiča. – Spotrebič používajte len vtedy, ak sa nachádza v technicky bezchybnom stave. – Chybný spotrebič sa smie opravovať výhradne autorizovanou 283 Heft_Caffeo_Bistro_EU_2.3_041114.indd 283 SLOVENSKY Výstraha! 04.11.2014 15:55:49 dielňou. Spotrebič neopravujte sami. – Na spotrebiči, na jeho komponentoch a na príslušenstve nevykonávajte žiadne zmeny. – Spotrebič neponárajte do vody. Výstraha! Nebezpečenstvo popálenia a obarenia Unikajúce kvapaliny a pary môžu byť veľmi horúce. Diely spotrebiča sa taktiež veľmi zahrievajú. Dodržiavajte nasledujúce bezpečnostné pokyny, aby sa zabránilo obareniam a popáleninám: – Zabráňte kontaktu kože s unikajúcimi kvapalinami a parami. – Počas prevádzky sa nedotýkajte dýz na výstupe. Výstraha! Všeobecná bezpečnosť Dodržiavajte nasledujúce bezpečnostné pokyny, aby sa zabránilo poraneniam osôb a vecným škodám: – Počas prevádzky nesiahajte do vnútra spotrebiča. – Spotrebič a jeho sieťový kábel sa musia udržiavať mimo dosahu osôb mladších ako 8 rokov. – Tento spotrebič sa smie používať deťmi staršími ako 8 rokov, ako aj osobami so zníženými fyzickými, senzorickými alebo mentálnymi schopnosťami alebo s nedostatkom skúseností a vedomostí iba vtedy, keď sú pod dozorom alebo boli poučené ohľadne bezpečného použitia spotrebiča a chápu nebezpečenstvá z toho vznikajúce. – Deti sa so spotrebičom nesmú hrať. Čistenie a užívateľskú údržbu nesmú vykonávať deti mladšie ako 8 rokov. Deti staršie ako 8 rokov musia byť pri čistení a užívateľskej údržbe pod dozorom. – Spotrebič odpojte od napájania elektrickým prúdom, ak je dlhšiu dobu bez dozoru. 284 Heft_Caffeo_Bistro_EU_2.3_041114.indd 284 04.11.2014 15:55:49 3 Popis spotrebiča 3.1 Legenda k obrázku A Číslo obrázku Vysvetlenie 1 Odkvapkávacia miska s plechom na šálky a nádobkou na kávové výlisky (vo vnútri) 2 Speňovač mlieka „Perfect Cappuccino“ 3 Zásobník vody 4 Tlačidlo pre silu kávy 5 Tlačidlo pre výdaj pary 6 Spínač ventilu pre výdaj pary a horúcej vody 7 Displej 8 2-komorový zásobník zrnkovej kávy „Bean Select“ 9 Klopný spínač zásobníka zrnkovej kávy „Bean Select“ 10 Šachta na mletú kávu s vekom 11 Tlačidlo zap/vyp 12 Regulátor množstva kávy 13 Tlačidlo pre výdaj jednej šálky kávy 14 Tlačidlo pre výdaj dvoch šálok kávy 15 Výškovo nastaviteľný výstup 16 Plavák na indikáciu výšky hladiny vody v odkvapkávacej miske 3.2 Legenda k obrázku B 17 Sieťový kábel 18 Sparovacia jednotka a typový štítok (za krytom) 19 Nastavenie stupňa hrubosti mletia 20 Hlavný vypínač 285 Heft_Caffeo_Bistro_EU_2.3_041114.indd 285 SLOVENSKY Číslo obrázku Vysvetlenie 04.11.2014 15:55:49 3.3 Symbol Displej Význam Parný ventil Zásobník vody Šachta na mletú kávu Zobrazenie Vysvetlenie/výzva svieti Teplota pre výdaj pary je dosiahnutá otvoriť ventil bliká Ventil je otvorený svieti Naplňte zásobník vody bliká Veko šachty na mletú kávu je otvorené svieti Výdaj mletej kávy sa realizuje po stlačení tlačidla pre výdaj jednej šálky kávy svieti 1 kávové zrno: jemná 2 kávové zrná: normálna 3 kávové zrná: silná 4 kávové zrná: veľmi silná bliká Naplňte zásobník zrnkovej kávy, kontrolka prestane blikať pri najbližšom výdaji kávy svieti Vyčistite spotrebič bliká Prebieha integrovaný čistiaci program svieti Vyprázdnite odkvapkávaciu misku a nádobku na kávové výlisky bliká Nasaďte odkvapkávaciu misku a nádobku na kávové výlisky svieti Odvápnite spotrebič bliká Prebieha integrovaný odvápňovací program Sila kávy Čistenie Odkvapkávacia miska a nádobka na kávové výlisky Odvápňovanie 286 Heft_Caffeo_Bistro_EU_2.3_041114.indd 286 04.11.2014 15:55:50 4 Uvedenie do prevádzky Pri prvom uvedení do prevádzky vykonajte, prosím, následne opísané kroky. Po vykonaní týchto krokov je spotrebič pripravený na prevádzku. Následne môžete pristúpiť k príprave kávy. Pri prvom uvedení kávovaru do prevádzky vám odporúčame prvé dve šálky kávy vyliať. 4.1 • Umiestnenie Spotrebič postavte na stabilnú, rovnú a suchú plochu. Dodržte odstup cca 10 cm od steny a iných predmetov. Pozor! – Spotrebič nikdy neinštalujte na horúcich plochách alebo vo vlhkých miestnostiach. – Spotrebič neprepravujte ani neskladujte v dopravných prostriedkoch alebo miestnostiach s nízkou teplotou, inak by mohla zvyšková voda zamrznúť alebo kondenzovať a poškodiť spotrebič. Dodržiavajte pokyny uvedené na strane 312. • Nádobka na kávové výlisky sa už nachádza v odkvapkávacej miske. Dbajte na to, aby bola odkvapkávacia miska zasunutá do spotrebiča až na doraz. – Obalový materiál vrátane tvrdej peny uschovajte pre prepravu a neskoršie spätné zásielky, aby sa zamedzilo poškodeniu spotrebiča pri preprave. – Je normálne, ak sa pred prvým uvedením do prevádzky nachádzajú v spotrebiči stopy kávy a vody. Je to spôsobené tým, že spotrebič bol vo výrobe testovaný na bezchybnú funkciu. 287 Heft_Caffeo_Bistro_EU_2.3_041114.indd 287 SLOVENSKY Upozornenia 04.11.2014 15:55:50 4.2 • Pripojenie Sieťový kábel zastrčte do vhodnej zásuvky. Výstraha! Nebezpečenstvo vzniku požiaru a zásahu elektrickým prúdom v dôsledku nesprávneho sieťového napätia, nesprávnych alebo poškodených prípojok a sieťového kábla. – Zabezpečte, aby sa sieťové napätie zhodovalo s napätím uvedeným na typovom štítku spotrebiča. Typový štítok sa nachádza na pravej strane spotrebiča za krytom (obr. B, č. 18). – Zabezpečte, aby zásuvka zodpovedala platným normám týkajúcim sa elektrickej bezpečnosti. V prípade pochybností sa obráťte na elektrotechnika. – Nikdy nepoužívajte poškodený sieťový kábel (poškodená izolácia, holé vodiče). – Poškodený sieťový kábel nechajte počas doby trvania záruky vymeniť len prostredníctvom výrobcu a po jej uplynutí len prostredníctvom kvalifikovaného odborného personálu. 4.3 Naplnenie zásobníka zrnkovej kávy Vďaka 2-komorovému zásobníku zrnkovej kávy „Bean Select“ môžete súbežne používať dva rôzne druhy kávy. Jednu komoru naplňte napr. zrnkovou kávou Espresso a druhú zrnkovou kávou Café-Crème. Pomocou sklopnej páčky môžete potom pohodlne prepínať medzi oboma druhmi kávy. • Zásobník zrnkovej kávy (obr. A, č. 8) naplňte čerstvými kávovými zrnami. Do každej z oboch komôr je možné naplniť maximálne 135 g kávových zŕn. Pozor! • – Do zásobníka zrnkovej kávy plňte výhradne kávové zrná. – Do zásobníka nikdy neplňte zomleté kávové zrná, kávové zrná sušené vymrazovaním alebo karamelizované kávové zrná. Zvoľte požadovaný druh zrnkovej kávy tým, že sklopnú páčku nastavíte na požadovanú komoru. 288 Heft_Caffeo_Bistro_EU_2.3_041114.indd 288 04.11.2014 15:55:50 Výstraha! Nebezpečenstvo pre osoby s kofeínovou intoleranciou. Keďže nad mlecím ústrojenstvom zostáva vždy určité zvyškové množstvo zrnkovej kávy, ktorá bola mletá ako posledná, dochádza pri prepnutí na iný druh kávy k zmiešaniu obidvoch druhov kávy. Z tohto dôvodu môžu po prepnutí na bezkofeínovú kávu prvé dve šálky obsahovať ešte kofeínovú kávu. Až tretia pripravená šálka po prepnutí je bez kofeínu. Upozornenie Ak sa sklopná páčka nachádza pri sparovaní vo zvislej polohe, nedostanú sa do mlynčeka žiadne kávové zrná. 4.4 Naplnenie zásobníka vody • Veko zásobníka vody (obr. A, č. 3) vyklopte nahor a zásobník vody vytiahnite zo spotrebiča von smerom nahor. • Zásobník vody naplňte čerstvou vodou až po značku max. a znova ho vložte dnu. 4.5 Prvé zapnutie Všetky potrubia v spotrebiči boli výrobcom zbavené vody a zavzdušnené. Preto pri prvom zapnutí spotrebiča po uplynutí fázy nahrievania svieti symbol pre ventil a vy musíte spotrebič prostredníctvom ventilu odvzdušniť. Odvzdušnenie je potrebné iba pri prvom uvedení spotrebiča do prevádzky a tiež po odvodnení a zavzdušnení. Prihliadajte pritom na stranu 312. • Hlavný vypínač (obr. B, č. 20) prepnite do pozície „I“. • Stlačte tlačidlo zap/vyp , aby ste spotrebič zapli. • Pod speňovač mlieka Perfect Cappuccino umiestnite nádobku a posuňte parnú rúrku nadol tak, aby ležala pod úrovňou okraja nádobky. • Pod výstup umiestnite nádobku. • Pre otvorenie ventilu otočte spínač ventilu (obr. A, č. 6) v smere hodinových ručičiek. 289 Heft_Caffeo_Bistro_EU_2.3_041114.indd 289 SLOVENSKY → Tlačidlo zap/vyp bliká. Spotrebič začne ohrievať. Po ohriatí sa rozsvieti symbol pre ventil . 04.11.2014 15:55:50 → Symbol pre ventil bliká. Do nádobky umiestnenej pod speňovačom mlieka Perfect Cappucino tečie voda. • Hneď ako prestane vytekať voda a svieti symbol pre ventil , otočte spínačom ventilu proti smeru hodinových ručičiek, aby sa ventil zatvoril. → Spotrebič vykoná automatické prepláchnutie, pričom z výstupu vytečie horúca voda. Následne svieti tlačidlo zap/vyp . Spotrebič je pripravený na prevádzku. 4.6 • Nastavenie sily kávy Viac krát stlačte tlačidlo pre silu kávy zo štyroch možných stupňov sily kávy. , aby ste si zvolili jeden → Váš výber sa zobrazuje pomocou symbolov kávových zŕn Zobrazenie na displeji. Sila kávy jemná normálna (továrenské nastavenie) silná veľmi silná • Chuť kávy môžete meniť aj nastavením hrubosti mletia. Prihliadajte pritom na stranu 302. 4.7 • Nastavenie vydávaného množstva Pre plynulé nastavenie vydávaného množstva kávy od 30 ml do 220 ml otáčajte regulátorom množstva kávy (obr. A, č. 12) (otočenie regulátora doľava: 30 ml, regulátor v stredovej polohe: 125 ml, otočenie regulátora doprava: 220 ml). 290 Heft_Caffeo_Bistro_EU_2.3_041114.indd 290 04.11.2014 15:55:50 • 5 Zapnutie a vypnutie 5.1 Zapnutie spotrebiča Hlavný vypínač (obr. B, č. 20) prepnite do pozície „I“. → Spotrebič sa nachádza v pohotovostnom režime. Tlačidlo zap/vyp načerveno. • Pod výstup umiestnite vhodnú nádobku. • Stlačte tlačidlo zap/vyp svieti , aby ste spotrebič zapli. → Tlačidlo zap/vyp bliká. Spotrebič začne ohrievať. Spotrebič vykoná automatické prepláchnutie, pričom z výstupu vytečie horúca voda. Následne svieti tlačidlo zap/vyp a symboly kávových zŕn . Spotrebič je pripravený na prevádzku. 5.2 Vypnutie spotrebiča • Pod výstup umiestnite vhodnú nádobku. • Stlačte tlačidlo zap/vyp , aby sa spotrebič prepol do pohotovostného režimu. → Spotrebič vykoná automatické prepláchnutie kávového okruhu. Sparovacia komora sa uvedie do pokojovej polohy. Tlačidlo zap/vyp svieti načerveno. • Hlavný vypínač (obr. B, č. 20) prepnite do pozície „0“, aby sa spotrebič kompletne vypol. – Spotrebič vykoná pri každom zapnutí automatické prepláchnutie. – Ak sa spotrebič nachádza v pohotovostnom režime, vypínajte ho len pomocou hlavného vypínača, inak hrozí nebezpečenstvo, že sparovacia jednotka nebude v správnej polohe. 291 Heft_Caffeo_Bistro_EU_2.3_041114.indd 291 SLOVENSKY Upozornenia 04.11.2014 15:55:50 6 Nasadenie vodného filtra Melitta® Claris® Vodný filter Melitta® Claris® filtruje vápnik a iné škodlivé látky z vody. Do spotrebiča ho, prosím, vložte až po prvom uvedení do prevádzky. Ak použijete tento filter, nemusíte kávovar tak často odvápňovať a môžete tvrdosť vody nastaviť na stupeň 1 (pozri k tomu stranu 297). Vďaka tejto bezpečnej ochrane pred vodným kameňom sa predĺži životnosť vášho spotrebiča. Vodný filter by sa mal vymieňať v pravidelných intervaloch – najneskôr však po 2 mesiacoch. Vodný filter je možné zakúpiť v špecializovanom obchode. • Na modrom krúžku, ktorý sa nachádza v hornej časti vodného filtra Melitta® Claris®, nastavte aktuálny mesiac. Takto ľahko zistíte, kedy je potrebné vymeniť vodný filter Melitta® Claris®. • Predtým ako vodný filter použijete, umiestnite ho na niekoľko minút do pohára s čerstvou vodou z vodovodu. • Veko zásobníka vody (obr. A, č. 3) vyklopte nahor a zásobník vody vytiahnite zo spotrebiča von smerom nahor. • Zásobník vyprázdnite. • Vodný filter Melitta® Claris® opatrne naskrutkujte do závitu na dne zásobníka vody pomocou skrutkovacieho prípravku na dolnom konci dodávanej kávovej odmerky. • Zásobník vody naplňte čerstvou vodou až po značku max. a znova ho vložte dnu. • Pod speňovač mlieka Perfect Cappuccino umiestnite nádobku a posuňte parnú rúrku nadol tak, aby ležala pod úrovňou okraja nádobky. • Pre otvorenie ventilu otočte spínač ventilu (obr. A, č. 6) v smere hodinových ručičiek. → Do nádobky umiestnenej pod speňovačom mlieka Perfect Cappucino tečie voda. Na základe automatickej funkcie zastavenia musíte viackrát otvoriť a zatvoriť spínač ventilu. • Hneď ako sa rozsvieti symbol pre zásobník vody , otočte spínačom ventilu proti smeru hodinových ručičiek, aby sa ventil zavrel. → Spotrebič je pripravený na prevádzku. 292 Heft_Caffeo_Bistro_EU_2.3_041114.indd 292 04.11.2014 15:55:51 Upozornenie Vodný filter Melitta® Claris® by nemal ostať dlhší čas suchý. V prípade, ak spotrebič dlhší čas nepoužívate, odporúčame vodný filter Melitta® Claris® uchovávať v pohári s vodou v chladničke. 7 Príprava Espressa alebo Café Crème 7.1 Príprava šálky Espressa alebo Café Crème Predpoklady: Spotrebič je pripravený na prevádzku (pozri „Zapnutie a vypnutie“ na strane 291). Je nastavená požadovaná sila kávy a vydávané množstvo kávy (pozri stranu 290). Na zásobníku zrnkovej kávy je zvolený požadovaný druh kávy. • Pod výstup umiestnite vhodnú nádobku. • Stlačte tlačidlo pre výdaj jednej šálky kávy . → Proces mletia a výdaja kávy sa spustí. Výdaj kávy sa automaticky ukončí, ak sa dosiahne nastavené vydávané množstvo kávy. • Ak chcete výdaj kávy predčasne ukončiť, stlačte tlačidlo pre výdaj jednej šálky kávy . 7.2 Príprava dvoch šálok Espressa alebo Café Crème Predpoklady: Spotrebič je pripravený na prevádzku (pozri „Zapnutie a vypnutie“ na strane 291). Je nastavená požadovaná sila kávy a vydávané množstvo kávy. Na zásobníku zrnkovej kávy je zvolený požadovaný druh kávy. • Pod výstup umiestnite vedľa seba dve vhodné nádobky. • Stlačte tlačidlo pre výdaj dvoch šálok kávy . • Ak chcete výdaj kávy predčasne ukončiť, stlačte ovládacie tlačidlo pre výdaj dvoch šálok kávy . 293 Heft_Caffeo_Bistro_EU_2.3_041114.indd 293 SLOVENSKY → Spustí sa dvojnásobný proces mletia a výdaja kávy. Výdaj kávy sa automaticky ukončí, ak sa dosiahne nastavené vydávané množstvo kávy. 04.11.2014 15:55:51 7.3 Príprava Espressa alebo Café Crème s mletou kávou Predpoklady: Spotrebič je pripravený na prevádzku (pozri „Zapnutie a vypnutie“ na strane 291). Je nastavené vydávané množstvo kávy. • Otvorte veko šachty pre mletú kávu (obr.A, č. 10). → Symbol šachty pre mletú kávu • bliká. Do šachty na mletú kávu naplňte maximálne jednu kávovú odmerku čerstvej mletej kávy. Pozor! • – Do šachty pre mletú kávu plňte výhradne mletú kávu. Instantné výrobky môžu spôsobiť zalepenie sparovacej jednotky. – Nikdy neplňte väčšie množstvo mletej kávy ako je jedna kávová odmerka (priložená k spotrebiču), inak môže dôjsť k preplneniu sparovacej jednotky. Zavrite veko šachty pre mletú kávu. → Symbol šachty pre mletú kávu svietia. a tlačidlo na výdaj jednej šálky kávy • Pod výstup umiestnite vhodnú nádobku. • Stlačte tlačidlo pre výdaj jednej šálky kávy . → Spustí sa výdaj kávy. Výdaj kávy sa automaticky ukončí, ak sa dosiahne nastavené vydávané množstvo kávy. • Ak chcete výdaj kávy predčasne ukončiť, stlačte tlačidlo pre výdaj jednej šálky kávy . Upozornenie Ak v priebehu 90 sekúnd po otvorení šachty pre mletú kávy nenecháte pripraviť kávu, prepne sa spotrebič opäť do režimu zrnkovej kávy a vyhodí zomletú kávu do nádobky na kávové výlisky, aby sa zamedzilo nebezpečenstvu preplnenia sparovacej komory. 294 Heft_Caffeo_Bistro_EU_2.3_041114.indd 294 04.11.2014 15:55:51 8 Príprava mliečnej peny Predpoklad: Spotrebič je pripravený na prevádzku (pozri „Zapnutie a vypnutie“ na strane 291). • Pod speňovač mlieka Perfect Cappuccino umiestnite nádobku s mliekom. Dbajte na to, aby bol šľahač speňovača Perfect Cappuccino ponorený do mlieka. • Nádobku naplňte maximálne do jednej tretiny, pretože sa objem mlieka pri šľahaní značne zväčší. • Stlačte tlačidlo pre výdaj pary . → Tlačidlo pre výdaj pary bliká. Spotrebič začne ohrievať. Ak je dosiahnutá teplota pary, svieti tlačidlo výdaja pary a symbol pre ventil . Výstraha! Nebezpečenstvo popálenia a obarenia na horúcej parnej rúrke, parnej hadici alebo na horúcom šľahači Počas prevádzky sa nikdy nedotýkajte parnej rúrky, parnej hadice alebo šľahača speňovača Perfect Cappuccino. • Pre otvorenie ventilu otočte spínač ventilu (obr. A, č. 6) v smere hodinových ručičiek. • Na uzavretie ventilu a tým aj na ukončenie speňovania otočte ventilovým spínačom proti smeru hodinových ručičiek. Objem mlieka by sa mal približne zdvojnásobiť a nádoba by mala byť citeľne ohriata. • Na prepnutie z režimu pary do normálneho režimu stlačte tlačidlo . pre výdaj pary • Počkajte, kým parná rúrka vychladne a potom ju spolu so šľahačom odskrutkujte proti smeru hodinových ručičiek zo speňovača mlieka Perfect Cappuccino (obr. E). 295 Heft_Caffeo_Bistro_EU_2.3_041114.indd 295 SLOVENSKY → Symbol pre ventil a tlačidlo pre výdaj pary bliká. Šľahač mlieko spení a súčasne ho ohreje. Lepšie spenenie dosiahnete, ak budete šľahačom počas speňovania pohybovať hore a dole. 04.11.2014 15:55:51 • Šľahač speňovača Perfect Cappuccino stiahnite smerom nadol z parnej rúrky (obr. F). • Parnú rúrku a šľahač opláchnite pod tečúcou vodou alebo v umývačke riadu. • Vyčistenú parnú rúrku naskrutkujte spolu so šľahačom v smere hodinových ručičiek na speňovač mlieka Perfect Cappucino tak, aby sa zaistila. Upozornenie Odporúčame používať studené mlieko s vysokým obsahom bielkovín. Na dosiahnutie optimálnej mliečnej peny nie je rozhodujúci obsah tuku, ale obsah bielkovín v mlieku. 9 Príprava horúcej vody Predpoklad: Spotrebič je pripravený na prevádzku (pozri „Zapnutie a vypnutie“ na strane 291). • Pod speňovač mlieka Perfect Cappuccino umiestnite utierku, aby ste zachytili prípadne unikajúcu zvyškovú vodu. • Šľahač speňovača Perfect Cappuccino stiahnite smerom nadol z parnej rúrky (obr. F). • Pod parnú rúrku umiestnite vhodnú nádobku a parnú rúrku posuňte nadol tak, aby ležala pod úrovňou okraja nádobky. • Pre otvorenie ventilu otočte spínač ventilu (obr. A, č. 6) v smere hodinových ručičiek. → Symbol pre ventil bliká. Z parnej rúrky tečie do nádobky horúca voda. • Ak je dosiahnuté požadované množstvo vody, otočte ventilovým spínačom proti smeru hodinových ručičiek, aby sa ventil zatvoril. • Počkajte, kým parná rúrka vychladne a opäť na ňu zospodu nasuňte šľahač tak, aby sa zaistil. 296 Heft_Caffeo_Bistro_EU_2.3_041114.indd 296 04.11.2014 15:55:51 10 Nastavenia funkcií 10.1 Nastavenie tvrdosti vody Na stanovenie tvrdosti vody vo vašej oblasti použite priložené testovacie prúžky. Dodržiavajte, prosím, pokyny uvedené na obale testovacích prúžkov. Z výroby je nastavená tvrdosť vody 4. Predpoklad: Spotrebič sa nachádza v pohotovostnom režime (pozri „Zapnutie a vypnutie“ na strane 291). Na zachovanie kvality spotrebiča nastavte tvrdosť vody nasledovným spôsobom: • Stlačte súčasne tlačidlo pre výdaj jednej šálky kávy výdaj pary , kým sa slabo rozsvietia štyri tlačidlá. a tlačidlo pre • , aby ste si zvolili jeden Stlačte viac krát tlačidlo pre výdaj pary zo štyroch možných stupňov tvrdosti vody. → Tlačidlo pre výdaj jednej šálky kávy svieti jasným svetlom. Váš výber tvrdosti vody podľa tabuľky sa zobrazí na displeji pomocou symbolov kávových zŕn . Rozsah tvrdosti vody • Vlastnosti °d °e °f mäkká 0 - 10 0 - 13 0 - 18 stredná 10 - 15 13 - 19 18-27 tvrdá 15 - 20 19 - 25 27-36 veľmi tvrdá (továrenské nastavenie) > 20 > 25 > 36 Na potvrdenie zvoleného stupňa tvrdosti vody stlačte tlačidlo zap/vyp . 297 Heft_Caffeo_Bistro_EU_2.3_041114.indd 297 SLOVENSKY → V závislosti od výberu bliká na displeji jeden až štyri symboly kávových zŕn . Spotrebič sa nachádza opäť v pohotovostnom režime. 04.11.2014 15:55:52 10.2 Nastavenie režimu úspory energie Spotrebič sa po poslednej činnosti (podľa nastavenia) automaticky prepne do režimu úspory energie (spotrebič tak spotrebováva výrazne menej energie ako v pohotovostnom režime). Pre režim úspory energie môžete nastaviť rôzne časy. Z výroby je spotrebič nastavený na 15 minút . Predpoklad: Spotrebič sa nachádza v pohotovostnom režime (pozri „Zapnutie a vypnutie“ na strane 291). Režim úspory energie nastavíte takto: • Stlačte súčasne tlačidlo pre výdaj jednej šálky kávy a tlačidlo pre výdaj pary , kým sa slabo rozsvietia štyri tlačidlá. • Stlačte viac krát tlačidlo pre silu kávy , aby ste si zvolili jeden zo štyroch možných časov pre nastavenie časovača. → Tlačidlo pre silu kávy svieti jasným svetlom. Váš výber sa zobrazuje pomocou symbolov kávových zŕn Zobrazenie na displeji. Čas 5 minút 15 minút (továrenské nastavenie) 30 minút vypnuté • Na potvrdenie zvoleného času stlačte tlačidlo zap/vyp . → V závislosti od výberu bliká na displeji jeden až štyri symboly kávových zŕn pre potvrdenie. Spotrebič sa nachádza opäť v pohotovostnom režime. Upozornenie Stlačením ľubovoľného tlačidla spotrebič „zobudíte“ z režimu úspory energie. Funkcia stlačeného tlačidla (napr. príprava kávy) sa priamo vykoná, len fáza nahrievania trvá o niečo dlhšie. 298 Heft_Caffeo_Bistro_EU_2.3_041114.indd 298 04.11.2014 15:55:52 10.3 Nastavenie pohotovostného režimu Spotrebič sa 30 minút po poslednej činnosti (podľa nastavenia) automaticky prepne do pohotovostného režimu. Pre pohotovostný režim môžete nastaviť rôzne časy. Z výroby je spotrebič nastavený na 30 minút . Predpoklad: Spotrebič sa nachádza v pohotovostnom režime (pozri „Zapnutie a vypnutie“ na strane 291). Pohotovostný režim nastavíte takto: • Stlačte súčasne tlačidlo pre výdaj jednej šálky kávy , kým sa slabo rozsvietia štyri tlačidlá. výdaj pary a tlačidlo pre • Stlačte viac krát tlačidlo pre výdaj dvoch šálok kávy , aby ste si zvolili jeden zo štyroch možných časov pre nastavenie časovača. → Tlačidlo pre výdaj dvoch šálok kávy svieti jasným svetlom. Váš výber sa zobrazuje pomocou symbolov kávových zŕn na displeji. Zobrazenie Čas 30 minút (továrenské nastavenie) 2 hodiny 4 hodiny 8 hodín • Na potvrdenie zvoleného času stlačte tlačidlo zap/vyp . → V závislosti od výberu bliká na displeji jeden až štyri symboly kávových zŕn pre potvrdenie. Spotrebič sa nachádza opäť v pohotovostnom režime. Upozornenie 299 Heft_Caffeo_Bistro_EU_2.3_041114.indd 299 SLOVENSKY V pohotovostnom režime spotrebováva spotrebič výrazne menej energie. Odporúčame vám však, aby ste spotrebič pomocou hlavného vypínača vypli, ak ho dlhší čas nepoužívate (napr. aj cez noc). 04.11.2014 15:55:52 10.4 Nastavenie teploty sparovania Z výroby je teplota sparovania nastavená na stupeň 2 (stredná ). Predpoklad: Spotrebič sa nachádza v pohotovostnom režime (pozri „Zapnutie a vypnutie“ na strane 291). Teplotu sparovania nastavíte takto: • Stlačte súčasne tlačidlo pre výdaj jednej šálky kávy a tlačidlo pre výdaj pary , kým sa slabo rozsvietia štyri tlačidlá. • Stlačte viac krát tlačidlo pre výdaj jednej šálky kávy zvolili jednu z troch možných teplôt sparovania. → Tlačidlo pre výdaj jednej šálky kávy svieti jasným svetlom. → Váš výber sa zobrazuje pomocou symbolov kávových zŕn Zobrazenie , aby ste si na displeji. Teplota sparovania nízka stredná (továrenské nastavenie) vysoká • Stlačte tlačidlo zap/vyp sparovania. , aby ste potvrdili zvolenú teplotu → V závislosti od výberu bliká na displeji jeden až tri symboly kávových zŕn . Spotrebič sa nachádza opäť v pohotovostnom režime. 300 Heft_Caffeo_Bistro_EU_2.3_041114.indd 300 04.11.2014 15:55:52 10.5 Obnovenie nastavení z výroby Predpoklad: Spotrebič sa nachádza v pohotovostnom režime (pozri „Zapnutie a vypnutie“ na strane 291). • Vypnite spotrebič pomocou hlavného vypínača. • Počkajte, kým zhasne červená kontrolka tlačidla zap/vyp • Stlačte súčasne tlačidlo pre silu kávy šálok kávy . • Súčasne zapnite spotrebič na hlavnom vypínači. . a tlačidlo pre výdaj dvoch → Všetky nastavenia sa obnovia na továrenské nastavenia. Prehľad nastavení z výroby: Nastavenie funkcie Továrenské nastavenie Sila kávy normálna Tvrdosť vody tvrdosť vody 4 Pohotovostný režim Teplota sparovania 15 minút 30 minút stredná 301 Heft_Caffeo_Bistro_EU_2.3_041114.indd 301 SLOVENSKY Režim úspory energie 04.11.2014 15:55:52 10.6 Nastavenie hrubosti mletia Hrubosť mletia bola pred dodaním optimálne nastavená. Z tohto dôvodu vám odporúčame hrubosť mletia dolaďovať až po cca 1000 pripravených kávach (približne 1 rok). Hrubosť mletia môžete nastavovať len počas činnosti mlynčeka. Hrubosť mletia preto nastavujte bezprostredne po spustení výdaja dávky. Ak by aróma kávy nebola dostatočne intenzívna, odporúčame vám nastaviť stupeň jemnejšieho mletia. • Nastavte páčku (obr. B, č. 19) do jednej z troch možných polôh (pri pohľade na spotrebič zozadu). Poloha páčky Hrubosť mletia vľavo jemná v strede stredná vpravo hrubá (továrenské nastavenie) 302 Heft_Caffeo_Bistro_EU_2.3_041114.indd 302 04.11.2014 15:55:53 11 Ošetrovanie a údržba 11.1 Všeobecné čistenie • Spotrebič očistite zvonka mäkkou, navlhčenou handričkou a bežne dostupným prostriedkom na umývanie riadu. • Pravidelne vyprázdňujte a čistite odkvapkávaciu misku, najneskôr však vtedy, ak plavák (obr. A, č. 16) vyčnieva hore z plechu na šálky. • Pravidelne čistite nádobku na kávové výlisky, napr. v umývačke riadu. Pozor! – Nepoužívajte abrazívne utierky, hubky ani čistiace prostriedky, aby sa zamedzilo poškodeniu povrchu spotrebiča. – Odkvapkávaciu misku nečistite v umývačke riadu, pretože môže dôjsť k deformovaniu. 11.2 Čistenie speňovača mlieka Perfect Cappuccino • Pod speňovač mlieka Perfect Cappuccino umiestnite utierku, aby ste zachytili prípadne unikajúcu zvyškovú vodu. • Parnú rúrku spolu so šľahačom otočte proti smeru hodinových ručičiek zo speňovača Perfect Cappuccino (obr. E). • Šľahač speňovača Perfect Cappuccino stiahnite smerom nadol z parnej rúrky (obr. F). • Parnú rúrku a šľahač opláchnite pod tečúcou vodou alebo v umývačke riadu. • Šľahač znova nasuňte zospodu na parnú rúrku tak, aby sa zaistil. • Vyčistenú parnú rúrku naskrutkujte spolu so šľahačom v smere hodinových ručičiek na speňovač mlieka Perfect Cappucino tak, aby sa zaistila. Pri častom čistení v umývačke riadu môže dôjsť k miernym farebným zmenám na nádobke na kávové výlisky a na speňovači mlieka Perfect Cappuccino. 303 Heft_Caffeo_Bistro_EU_2.3_041114.indd 303 SLOVENSKY Upozornenie 04.11.2014 15:55:53 11.3 Čistenie sparovacej jednotky Predpoklad: Spotrebič sa nachádza v pohotovostnom režime (pozri „Zapnutie a vypnutie“ na strane 291). Upozornenie Na optimálnu ochranu vášho spotrebiča vám odporúčame jeden krát za týždeň vyčistiť sparovaciu jednotku. • Hlavný vypínač (obr. B, č. 20) prepnite do pozície „0“, aby sa spotrebič kompletne vypol. • Siahnite do priehlbeniny na pravej strane spotrebiča (obr. B, č. 18) a stiahnite kryt smerom doprava. • Stlačte a podržte stlačený červený gombík na rukoväti sparovacej jednotky (obr. H) a otočte rukoväťou v smere hodinových ručičiek až na doraz (o cca 75°). • Sparovaciu jednotku vytiahnite za rukoväť zo spotrebiča. • Sparovaciu jednotku nechajte v danom stave (nepohybujte ani neotáčajte prvkami sparovacej jednotky). • Sparovaciu jednotku dôkladne opláchnite ako celok zo všetkých strán pod tečúcou vodou. Dbajte najmä na to, aby plocha znázornená na obr. J bola zbavená zvyškov kávy. Pozor! Sparovaciu jednotku nikdy nečistite v umývačke riadu. • Zo sparovacej jednotky nechajte odkvapkať vodu. • V prípade potreby odstráňte zvyšky kávy z vnútorných plôch spotrebiča, na ktoré sa nasadzuje sparovacia jednotka. • Sparovaciu jednotku opäť nasaďte do spotrebiča a rukoväťou sparovacej jednotky otočte proti smeru hodinových ručičiek až na doraz, aby sa sparovacia jednotka zaistila. • Vložte obe úchytky krytu vzadu do spotrebiča a kryt sklopte doľava tak, aby sa zaistil. • Hlavný vypínač (obr. B, č. 20) prepnite do pozície „I“. 304 Heft_Caffeo_Bistro_EU_2.3_041114.indd 304 04.11.2014 15:55:53 • Spotrebič sa nachádza opäť v pohotovostnom režime. 11.4 Integrovaný čistiaci program Integrovaný čistiaci program odstraňuje usadeniny a zvyšky kávového oleja, ktoré nie je možné odstrániť ručne. Program trvá približne 15 minút. Počas celého . procesu bliká symbol pre čistenie Na dosiahnutie optimálneho výsledku čistenia vám odporúčame vopred vyčistiť sparovaciu jednotku (pozri stranu 304). Predpoklad: Spotrebič sa nachádza v pohotovostnom režime (pozri „Zapnutie a vypnutie“ na strane 291). Pozor! – Integrovaný čistiaci program vykonávajte každé 2 mesiace alebo po cca 200 šálkach pripravených sparením, najneskôr však vtedy, ak sa . na displeji rozsvieti symbol re čistenie – Používajte len čistiace tablety Melitta® pre plnoautomatické kávovary. Tieto čistiace tablety sú presne nastavené na kávovar Melitta® CAFFEO®. Ak použijete iné čistiace prostriedky, môže dôjsť k poškodeniu spotrebiča. Integrovaný čistiaci program vykonajte takto: 1 Zo zásobníka vody odstráňte vodný filter Melitta® Claris®, ak je k dispozícii (pozri stranu 292). 2 Tlačidlo pre výdaj jednej šálky kávy vyp na približne 3 sekundy. svieti. 3 Vyprázdnite odkvapkávaciu misku a nádobku na kávové výlisky. 4 Vložte späť odkvapkávaciu misku bez nádobky na kávové výlisky a nádobku na kávové výlisky umiestnite pod výstup. 305 Heft_Caffeo_Bistro_EU_2.3_041114.indd 305 SLOVENSKY → Symbol pre čistenie bliká. Symbol pre odkvapkávaciu misku stlačte súčasne s tlačidlom zap/ 04.11.2014 15:55:53 Fáza 1 Počas fázy 1 sa na displeji zobrazuje symbol jedného kávového zrna . → Najskôr sa vykonajú dva automatické procesy prepláchnutia. Symbol pre šachtu na mletú kávu svieti. 5 Otvorte veko šachty pre mletú kávu. → Symbol šachty pre mletú kávu 6 bliká. Vhoďte jednu čistiacu tabletu (obr. G) a zatvorte veko šachty na mletú kávu. → Symbol pre zásobník vody svieti. → Fáza 1 je ukončená. Fáza 2 Počas fázy 2 sa na displeji zobrazujú symboly dvoch kávových zŕn 7 . Veko zásobníka vody (obr. A, č. 3) vyklopte nahor a zásobník vody vytiahnite zo spotrebiča von smerom nahor. Zásobník vody naplňte čerstvou vodou až po značku max. a znova ho vložte dnu. → Tlačidlo pre výdaj pary svieti. → Fáza 2 je ukončená. Fáza 3 Počas fázy 3 sa na displeji zobrazuje symbol troch zŕn 8 Stlačte tlačidlo pre výdaj pary . . → Spustí sa integrovaný čistiaci program. Tento proces trvá cca 10 minút. Následne svieti tlačidlo pary . 9 Vyprázdnite nádobku na kávové výlisky a postavte ju pod výstup. 10 Stlačte tlačidlo pre výdaj pary . → Fáza 3 je ukončená. 306 Heft_Caffeo_Bistro_EU_2.3_041114.indd 306 04.11.2014 15:55:53 Fáza 4 Počas fázy 4 sa na displeji zobrazuje symbol štyroch zŕn . → Integrovaný čistiaci program pokračuje. Tento proces trvá cca 5 minút. Z výstupu ako aj z vnútra spotrebiča vytečie do odkvapkávacej misky voda. Následne svieti symbol pre odkvapkávaciu misku . 11 Vyprázdnite odkvapkávaciu misku a nádobku na vodu a znova ich vložte. → Po krátkej fáze nahrievania svieti tlačidlo zap/vyp . Tlačidlá a symboly kávových zŕn svietia. Spotrebič je pripravený na prevádzku. Upozornenie Ak počas čistenia svieti symbol pre ventil : – Pod speňovač mlieka Perfect Cappuccino umiestnite vhodnú nádobku a otočte ventilovým spínačom (obr. A, č. 6) v smere hodinových ručičiek, aby sa otvoril ventil. Symbol pre ventil , otočte ventilovým Hneď ako neprerušovane svieti symbol pre ventil spínačom proti smeru hodinových ručičiek, aby sa zavrel ventil. – Integrovaný čistiaci program pokračuje. 307 Heft_Caffeo_Bistro_EU_2.3_041114.indd 307 SLOVENSKY bliká. – – 04.11.2014 15:55:53 11.5 Integrovaný odvápňovací program Integrovaný odvápňovací program odstraňuje usadeniny vodného kameňa vo vnútri spotrebiča. Program trvá približne 15 minút. Počas celého procesu bliká symbol pre . odvápňovanie Predpoklad: Spotrebič sa nachádza v pohotovostnom režime (pozri „Zapnutie a vypnutie“ na strane 291). Pozor! – Integrovaný odvápňovací program vykonávajte každé 3 mesiace alebo ak . sa na displeji rozsvieti symbol pre odvápňovanie – Používajte výhradne odvápňovací prostriedok Melitta® ANTI CALC Espresso Machines. Tieto odvápňovacie výrobky sú presne nastavené na kávovar Melitta® CAFFEO®. – Nikdy nepoužívajte ocot ani iné odvápňovacie prostriedky. Integrovaný odvápňovací program vykonajte takto: 1 Pred odvápňovaním odstráňte zo zásobníka vody vodný filter Melitta® Claris®, ak je k dispozícii (pozri stranu 292). 2 Tlačidlo pre výdaj dvoch šálok kávy na približne 3 sekundy. vyp → Symbol odvápňovania stlačte súčasne s tlačidlom zap/ a symbol pre odkvapkávaciu misku svietia. Fáza 1 Počas fázy 1 sa na displeji zobrazuje symbol jedného kávového zrna . 3 Vyprázdnite odkvapkávaciu misku a nádobku na kávové výlisky. 4 Vložte späť odkvapkávaciu misku bez nádobky na kávové výlisky a nádobku na kávové výlisky umiestnite pod Perfect Cappuccino. → Symbol pre zásobník vody 5 svieti. Veko zásobníka vody (obr. A, č. 3) vyklopte nahor a zásobník vody vytiahnite zo spotrebiča von smerom nahor. 308 Heft_Caffeo_Bistro_EU_2.3_041114.indd 308 04.11.2014 15:55:54 6 Do zásobníka vody dajte odvápňovací prostriedok (napr. tekutý odvápňovací prostriedok Melitta® ANTI CALC Espresso Machines) podľa pokynov na obale. Výstraha! Nebezpečenstvo podráždenia pokožky odvápňovacím prostriedkom Dodržiavajte bezpečnostné pokyny a údaje o množstvách uvedené na obale odvápňovacieho prostriedku. 7 Opäť nasaďte zásobník vody. 8 Stlačte tlačidlo pre výdaj pary . → Fáza 1 je ukončená. Fáza 2 Počas fázy 2 sa na displeji zobrazujú symboly dvoch kávových zŕn . → Integrovaný odvápňovací program sa spustí. Voda preteká vnútrom spotrebiča do odkvapkávacej misky. Tento proces trvá cca 10 minút. Následne sa rozsvieti symbol pre ventil . 9 Šľahač speňovača Perfect Cappuccino stiahnite smerom nadol z parnej rúrky (obr. F). 10 Speňovač mlieka Perfect Cappuccino otočte tak, aby parná rúrka ústila do nádobky na kávové výlisky. Výstraha! Nebezpečenstvo popálenia na horúcej parnej rúrke alebo horúcom šľahači Počas dávkovania horúcej vody sa nikdy nedotýkajte parnej rúrky ani šľahača speňovača mlieka Perfect Cappuccino. 11 Pre otvorenie ventilu otočte spínač ventilu (obr. A, č. 6) v smere hodinových ručičiek. → Následne svieti symbol pre odkvapkávaciu misku a symbol pre zásobník vody , pretože odvápňovací roztok kompletne pretiekol spotrebičom. 309 Heft_Caffeo_Bistro_EU_2.3_041114.indd 309 SLOVENSKY → Symbol pre ventil bliká. Odvápňovací roztok vytečie z parnej rúrky do nádobky. Tento proces trvá cca 10 minút. 04.11.2014 15:55:54 12 Vyprázdnite odkvapkávaciu misku a nádobku na kávové výlisky. 13 Vložte späť odkvapkávaciu misku bez nádobky na kávové výlisky a nádobku na kávové výlisky umiestnite pod Perfect Cappuccino. 14 Zásobník vody naplňte čerstvou vodou až po značku max. a znova ho vložte dnu. → Tlačidlo pre výdaj pary svieti. 15 Stlačte tlačidlo pre výdaj pary . → Fáza 2 je ukončená. Fáza 3 . Počas fázy 3 sa na displeji zobrazuje symbol troch zŕn → Symbol pre ventil bliká. Voda vytečie z parnej rúrky do nádobky. Následne sa rozsvieti symbol pre ventil . 16 Na zatvorenie ventilu otočte ventilovým spínačom proti smeru hodinových ručičiek. → Voda preteká vnútrom spotrebiča do odkvapkávacej misky. Následne svieti symbol pre odkvapkávaciu misku . 17 Vyprázdnite odkvapkávaciu misku a nádobku na vodu a znova ich vložte. 18 Počkajte, kým parná rúrka vychladne a opäť na ňu zospodu nasuňte šľahač tak, aby sa zaistil. → Po krátkej fáze nahrievania svieti tlačidlo zap/vyp Tlačidlá a symboly kávových zŕn svietia. Spotrebič je pripravený na prevádzku. . 310 Heft_Caffeo_Bistro_EU_2.3_041114.indd 310 04.11.2014 15:55:54 11.6 Odvápnenie zásobníka vody • Veko zásobníka vody (obr. A, č. 3) vyklopte nahor a zásobník vody vytiahnite zo spotrebiča von smerom nahor. • Pred odvápňovaním odstráňte zo zásobníka vody vodný filter Melitta® Claris®, ak je k dispozícii (pozri stranu 292). • Zásobník vody naplňte bežne dostupným odvápňovacím prostriedkom. Odporúčame vám použiť tekutý rýchloodvápňovací prostriedok značky Swirl®. Dodržiavajte pritom pokyny výrobcu odvápňovacieho prostriedku. • Zásobník vody následne dôkladne vypláchnite čistou vodou. • Prípadne opäť nasaďte vodný filter Melitta® Claris® do zásobníka vody (pozri stranu 292). • Zásobník vody naplňte čerstvou vodou až po značku max. a znova ho vložte dnu. 311 Heft_Caffeo_Bistro_EU_2.3_041114.indd 311 SLOVENSKY Zásobník vody pravidelne odvápňujte, aby sa zaručila bezchybná funkcia spotrebiča. 04.11.2014 15:55:54 12 Preprava a likvidácia 12.1 Príprava na prepravu, ochrana pred mrazom a opatrenia pri dlhšom nepoužívaní Odvodnenie a zavzdušnenie spotrebiča Ak spotrebič dlhšiu dobu nepoužívate a tiež pred prepravou vám odporúčame zbaviť spotrebič vody a zavzdušniť ho. Takto ho ochránite pred škodami spôsobenými mrazom. Predpoklad: Spotrebič sa nachádza v pohotovostnom režime (pozri „Zapnutie a vypnutie“ na strane 291). • Pod speňovač mlieka Perfect Cappuccino umiestnite vhodnú nádobku. • Súčasne stlačte tlačidlo pre výdaj pary na dlhšie ako 2 sekundy. → Tlačidlo pre výdaj pary • bliká. Symbol pre zásobník vody svieti. Veko zásobníka vody (obr. A, č. 3) vyklopte nahor a zásobník vody vytiahnite zo spotrebiča von smerom nahor. → Tlačidlo pre výdaj pary • a tlačidlo zap/vyp bliká. Hneď ako sa na displeji rozsvieti symbol pre ventil , otočte ventilovým spínačom (obr. A, č. 6) v smere hodinových ručičiek, aby sa ventil otvoril. → Zo speňovača mlieka Perfect Cappuccino uniká para. Symbol pre ventil a tlačidlo pre výdaj pary bliká. Hneď ako je spotrebič zbavený vody a zavzdušnený, svieti tlačidlo pre výdaj pary a symbol pre ventil • Na zatvorenie ventilu otočte ventilovým spínačom proti smeru hodinových ručičiek. → Spotrebič sa nachádza v pohotovostnom režime. • Prázdny zásobník vody znovu vráťte späť. 312 Heft_Caffeo_Bistro_EU_2.3_041114.indd 312 04.11.2014 15:55:54 • Vypnite kompletne spotrebič pomocou hlavného vypínača. • Vytiahnite sieťovú zástrčku. Upozornenie Vodný filter Melitta® Claris® by nemal ostať dlhší čas suchý. V prípade, ak spotrebič dlhší čas nepoužívate, odporúčame vodný filter Melitta® Claris® uchovávať v pohári s vodou v chladničke. Preprava • Zbavte spotrebič vody a zavzdušnite ho. • Vyprázdnite a očistite odkvapkávaciu misku a nádobku na kávové výlisky. • Vyprázdnite zásobník vody a zásobník zrnkovej kávy. Hlbšie zapadnuté kávové zrná prípadne povysávajte vysávačom. • Spotrebič prepravujte podľa možnosti v originálnom obale vrátane tvrdej peny, aby sa zamedzilo jeho poškodeniu pri preprave. Pozor! Spotrebič neprepravujte ani neskladujte v dopravných prostriedkoch alebo miestnostiach s nízkou teplotou, inak by mohla zvyšková voda zamrznúť alebo kondenzovať a poškodiť spotrebič. Likvidácia Spotrebič zlikvidujte ekologickým spôsobom prostredníctvom vhodného zberného systému. 313 Heft_Caffeo_Bistro_EU_2.3_041114.indd 313 SLOVENSKY • 04.11.2014 15:55:54 13 Odstraňovanie porúch Porucha Príčina Opatrenie Káva vyteká len po kvapkách. Hrubosť mletia je príliš jemná. Nastavte hrubšiu hrubosť mletia. Vyčistite sparovaciu jednotku. Prípadne ju odvápnite. V prípade potreby spustite integrovaný čistiaci program. Káva nevyteká. Zásobník vody nie je naplnený alebo nie je správne vložený. Zásobník vody naplňte a dbajte na jeho správne umiestnenie. Prípadne otvorte ventil, kým zo spotrebiča nevytečie voda a ventil opäť zatvorte. Sparovacia jednotka je upchatá. Vyčistite sparovaciu jednotku. Mlynček nemelie kávové zrná. Kávové zrná nepadajú do Zľahka poklepte na zásobník mlynčeka (príliš olejové zrnkovej kávy. zrná). Sklopná páčka je vo zvislej polohe. Sklopte sklopnú páku doprava alebo doľava. Cudzí predmet v mlecom ústrojenstve. Kontaktujte servisnú linku. Mlynček vydáva hlučné zvuky Cudzí predmet v mlecom ústrojenstve. Kontaktujte servisnú linku. Symboly kávových blikajú zŕn napriek tomu, že je zásobník zrnkovej kávy naplnený. V sparovacej komore sa Stlačte tlačidlo pre výdaj nachádzajú nedostatočne jednej šálky kávy zomleté kávové zrná alebo dvoch šálok kávy Symbol pre ventil svieti mimo poradie. Vo vedeniach vo vnútri spotrebiča sa nachádza vzduch. . Otvorte ventil, kým zo spotrebiča nevytečie voda a ventil opäť zatvorte. Prípadne vyčistite sparovaciu jednotku. 314 Heft_Caffeo_Bistro_EU_2.3_041114.indd 314 04.11.2014 15:55:55 Porucha Príčina Opatrenie Sparovaciu jednotku nie je možné po odobratí opäť nasadiť. Sparovacia jednotka nie je správne zaistená. Prekontrolujte, či sa správne zaistila rukoväť pre blokovanie sparovacej jednotky. Pohon nie je v správnej pozícii. Spotrebič vypnite a opäť zapnite a následne súčasne stlačte tlačidlá pre výdaj jednej a dvoch šálok šálky kávy kávy na dobu dlhšie ako 2 sekundy. Pohon sa presunie do pozície. Následne opäť nasaďte sparovaciu jednotku a prekontrolujte správne zablokovanie. Tlačidlá pre výdaj jednej šálky kávy a dvoch šálok kávy striedavo blikajú s tlačidlom Sparovacia jednotka chýba alebo nie je správne nasadená. Nasaďte správne sparovaciu jednotku. Sparovacia komora je preplnená. Pomocou hlavného vypínača spotrebič vypnite a znova ho zapnite, kým sa nezobrazí pohotovostný režim. Systémová chyba Pomocou hlavného vypínača spotrebič vypnite a znova ho zapnite, v prípade neúspechu spotrebič zašlite do servisu zap/vyp . Všetky ovládacie tlačidlá nepretržite blikajú 315 Heft_Caffeo_Bistro_EU_2.3_041114.indd 315 SLOVENSKY Ak Vám vyššie uvedené riešenie nepomohlo vyriešiť Váš problém, skontaktujte prosím zákaznícku linku Melitta®: 800 606 806. 04.11.2014 15:55:55 Heft_Caffeo_Bistro_EU_2.3_041114.indd 316 04.11.2014 15:55:55