1
Page 4
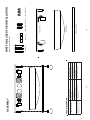
1. Fixture Pan
12. Fixture Ground Wire
11. White Fixture Wire
10. Wire Nuts
13. Supply Ground Wire
9. White Supply Wire
6. Outlet Box
Fig. 2
Fig. 3
15. Black Fixture Wire
10. Wire Nuts
14. Black Supply Wire
8. Fixture Mounting
Screws
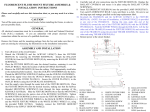
2. Pull the power supply wires out from the Outlet Box (#6). Attach the Black Supply Wire (#14)
to the Black Fixture Wire (#15) and the White Supply Wire (#9) to the White Fixture Wire
(#11) using Wire Nuts (#10). Connect the Fixture Ground Wire (#12) and the Supply Ground
Wire (#13) together using a Wire Nut (#10).
(Fig. 3) Wrap all wire connections with electrical
tape for a more secure connection. Note: If you have electrical questions, consult your local
electrical code for approved grounding methods.
1. Thread the Fixture Mounting Screws (#8) into the ceiling box, as shown. (Fig. 2)
INSTALLATION INSTRUCTIONS:
INSTALLATION:
8. Fixture
Mounting
Screw
Fig. 4-1
Fig. 4
--1
16. Keyhole Slot
Page 5
Bottom View
8. Fixture
Mounting
Screw
8. Fixture Mounting Screw
1. Fixture Pan
6. Outlet Box
7. Ceiling
16. Keyhole Slot
5. Installation is complete. Turn on power at the circuit breaker or fuse box. Turn the light switch
on to activate the fixture.
4. Twist the Fixture Pan (#1) clockwise, so that the Fixture Mounting Screws (#8) slide into the
narrow ends of the Keyhole Slots (#16). Tighten the Fixture Mounting Screws (#8) so that the
Fixture Pan (#1) is secured flush against the Ceiling (#7). (Fig. 4 and 4-1)
3. Carefully, tuck all the wires and wire connec tions into the Outlet Box (#6). Place the Fixture
Pan (#1) over the Outlet Box (#6) and onto the Fixture Mounting Screws (#8), making sure they
feed through the Keyhole Slots (#16). (Fig. 4)
INSTALLATION INSTRUCTIONS:
(Continued)