1
This document is intended for reference only, by qualified electricians and should not be considered a substitute for national, state and local
electrical codes.
Safety Warnings
• THIS PRODUCT MUST BE INSTALLED BY A QUALIFIED ELECTRICIAN IN ACCORDANCE WITH THE NEC, STATE AND LOCAL CODES.
• DO NOT USE A FIXTURE IF THE HOUSING, LENS OR POWER CABLES ARE DAMAGED.
• TO AVOID RISK OF AN ELECTRICAL SHOCK, PLEASE SHUT OFF THE MAIN POWER BEFORE INSTALLING AND WIRING THIS UNIT.
• DO NOT ATTEMPT TO OPEN THIS FIXTURE AS IT CONTAINS NO USER SERVICEABLE PARTS.
A. Selecting a Power Supply
For compliant operation, mac LEDS fixtures must be operated with a suitable UL listed Class 2 power supply. Please select a
power supply that is compatible with your lighting requirements. The power supply selected can either drive a single fixture or
a series of multiple connected fixtures. Proper power supply selection is determined by the wattage of the fixtures installed and
this selection is the sole responsibility of the installer. Do not exceed the wattage limits of the power supply. The total wattage
of the series or string of fixtures is additive and must be lower in value than the power supply rating. The installer can purchase
the power supply from any supplier offering a suitable Class 2 power supply, or through mac LEDS.
B. Installing the Power Supply
1)
Identify the location for the power supply.
2)
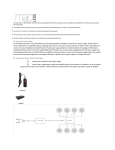
When using a single power supply and multiple fixtures, the fixtures are installed in series or in an array
format. The fixtures may be ordered with accessories (see Figure 1). Use the connector cables (see Figure 2) when
distance is needed between fixtures. Use the connector (see Figure 3) when end-to-end installation is needed to
provide uniform and smooth light distribution. Use the DC receptacle when formatting an array series (see Figure 4).
Figure 1:
Connector Accessory
DC Receptacle Accessory
Figure 2:
Figure 3:
Connector Cable Accessory
Figure 4:
C. Installing mac LEDS SNAP flatLOfixture
1)
Fixtures mount by affixing the included bracket with screw. Thefixtures can be mounted in an enclosed
area using any orientation necessary for proper productillumination. Consult professionals and
state/local codes to confirm size and type of hardware tosecure the fixture properly to the mounting
surface (see Figure 5).
Figure 5:
D. Making Electrical Connections
If you wish to hard wire the power supply direct to the AC mains, have a qualified electrician connect the line voltage to the
input side of the power supply in accordance with national, state and local electrical codes.
1) Isolate from the mains supply before installation
2) Wire the LED fixture onto the DC output of the driver using the pigtail.
RED= positive
BLACK= negative
3) Wire the input to AC 120 line/mains
WHITE- neutral
BLACK= line or hot
OR
BLUE= neutral
BROWN= line or hot
4) A standard TRIAC dimmer may be used on the AC/line side if a dimmable driver has been used.
Limited Warranty
Mac LEDS (the “Manufacturer”) warrants to the original buyer, with proof of purchase, (the “Buyer”) that each product manufactured and
sold by Manufacturer (the “Product”) will be free from defects in the material and workmanship in its intended use (normal wear and tear
excepted).This warranty covers Manufacturer’s LED components operated on Manufacturer power supplies for a period of THREE YEARS from
(the invoice date) from Manufacturer. This warranty does not cover damage caused by tampering with or unauthorized use of or abnormal
stress of the product. Unauthorized use or abnormal use or stress includes operation or use of the product in an operating environment that
exceeds the limitations specified in the Manufacturer’s specifications. This warranty applies to the Buyer. If you have any questions or
concerns, please contact mac LEDS:
www.macleds.com
[email protected]
P) 888.908.3521
F) 585.672.6134