1
Warnings
Read all instructions carefully before use. Save these instructions
for future reference.
• To avoid electric shock, do not handle the unit or adapter with
wet hands.
• Do not use where unit is exposed to water or moisture.
• Dropping, shock or pressure may cause permanent damage to
the unit.
• Avoid high heat from any source. Leaving the unit in direct
sunlight or in a hot car may cause serious damage.
• Keep the unit free of dust and contamination that could cause
damage.
• Avoid high humidity, dampness or liquid spills.
• Do not attempt to repair, disassemble or modify this unit.
• Unplug included AC adapter when not in use.
1
Features
• Charges and plays all compatible iPod models.
• Built-in digital AM/FM tuner.
• Audio-In for playing MP3, CD or other audio sources.
• Alarm clock features dimmable LCD and Snooze/Nap
functions.
• Wake up to iPod tunes, the FM radio or a buzzer alarm.
• Comes with full-function IR remote control.
• Holds settings during a power outage
(requires 2 AA batteries).
2
Supplied Accessories
• Certified AC/DC adaptor
• Dock adaptors (for different iPod types)
• 3.5mm Jack LINE-IN cable
• Remote Control
• AM antenna
• Quick Guide
• User Manual
• Warranty Card
3
Control Panel
8
9
10
11
7
6
12
5
3
Dock connector
1
2
4
DC 15V
16
13
Pigtail
14
17
15
4
Controls (see Control Panel)
1.
•
•
•
•
Power/ Tuner/Clock Set
switches the system on or go to standby mode
deactivates the sleep or nap function
adjusts clock/alarm time
adjusts radio tunes
2. Dock Connector
• Connector for iPod
3. Snooze / Nap
• switches off the alarm for a 9 minute period
• activates/deactivates Nap function in standby mode
4.
•
•
•
Volume/Treble/Bass Adjust
adjusts the sound level
adjusts the Treble or Bass level
presses to select Treble or Bass
5.
•
•
•
Audio Mode
selects different play modes between iPod and aux
starts/pauses playback in the iPod/aux mode
stops playback in the iPod/aux mode
5
Controls (see Control Panel)
6. Sleep
• activates/deactivates the sleep function
7. Alarm Set
• sets up/confirms the time of alarm
8. Alarm Mode
• Selects the alarm mode among beep, radio and iPod
9. Alarm One / Two
• activates/ confirms alarm 1/alarm 2 time setting
• switches off alarm 1/alarm 2 time
10. Time Set
•
activates/confirms clock time setting
11. AM/FM
•
switches to radio mode
•
selects between AM and FM
6
Controls (see Control Panel)
12. Dimmer
•
changes the brightness of the LCD
13. AM Antenna
•
improves AM reception
14. Battery Compartment
• AA battery compartment
15. Pigtail
•
improves FM reception
16. LINE IN jack (3.5 mm)
•
connects to external audio source
17. DC IN jack
•
socket for AC/DC adaptor
7
AC Adapter
Plug the adapter connector into the jack on rear of the unit,
and plug the AC adapter into standard outlet.
Installing Backup Batteries
To save and restore clock settings in case of a power
interruption, install 2 AA batteries into the battery
compartment at the bottom of the unit.
8
Basic Operation
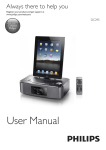
When the power adaptor is connected, OSS-101 is in
standby mode. In standby mode, the screen and back light
will be on. While Time set, Alarm one/ two, Dimmer
functions are available. At the first connection, the screen
will show 12:00 (factory default).
Switching on the system
• Press and release the Power/ Tuner/Clock Set knob,
if iPod is disconnected OSS-101 will be in aux mode
with 20db volume (factory default).
Switching the system to standby mode
• In any mode, press and release Power/ Tuner/Clock Set knob
9
Basic Operation
Select iPod playback
• Press the Audio Mode button to switch between
aux and iPod mode
Volume/Treble/Bass Adjust
• Press and release the Volume/Treble/Bass Adjust knob,
to switch between those modes
• Turn the knob to adjust level up and down
Adjusting LCD brightness
• Press Dimmer once or more. The brightness of the
display can be adjusted:
Bright → Medium → Low → Off→Bright.
10
Remote Control Buttons
Standby: Power on/off.
Mute: Cuts volume level to 0db.
Audio: Selects between iPod, Aux,
AM and FM.
Treble/Bass: Press once to select audio
treble level, press twice to select audio
bass level; to set level, turn the Volume/
Treble/Bass Adjust Knob or Vol +/ Vol –.
Alarm 1/2: Activates alarms, same function
as “Alarm One/Two” on control panel.
Alarm Mode: Selects iPod, radio or
beeper alarm.
Alarm Set: Enters alarm time mode.
To set, turn the Power/ Tuner/Clock
Set Knob.
Menu: Enters iPod functions*.
11
Remote Control Buttons
Enter: Selects a function; play a selected song*.
Sleep: Selects a sleep period of 15, 30, 45 or 60
minutes.
Snooze/ Nap: During Alarm mode, when alarm
is a ctivated, the button turns off the alarm for
9 minutes; under standby mode, choose from
15, 30, 45 or 60 minutes
nap duration, before alarm's activation.
Vol +/ Vol –: Turns volume level up and down.
/ : PLAY/PAUSE: press to start playback;
press again to pause*.
: PREVIOUS: goes to previous song; press
and hold to reverse the song*.
: NEXT: goes to next song; press and hold
to fast forward the song*.
/ : UP/DOWN: scrolls through functions;
select radio station frequency*.
*Subject to playing mode.
Note: / key on control panel may change
the volume of iPod, but does not affect the
output volume of OSS-101.
12
Playing iPod
1. Remove the top cover off the dock
2. Make sure that you have powered on iPod.
3. Snap the compatible iPod into the dock connector.
4. OSS-101 will play iPod automatically after iPod is connected.
On OSS-101’s display, “iPod” is displayed when iPod is connected.
Note: OSS-101 will charge the power of iPod automatically in audio
mode while iPod is connected.
Setting the Clock
1. To enter HOUR mode, press the Time Set button. The hour
flashes on the display.
2. To set the hour, turn the Power/ Tuner/Clock Set knob until
you reach the desired time.
3. To confirm and enter MINUTE mode, press the Time Set
button again. The minutes flash on the display.
4. To set minutes, turn the Power/ Tuner/Clock Set knob until
you reach the desired time.
5. To confirm and exit, press the Time Set button again.
13
Setting the Alarm
Two different alarm times can be set. This can be useful when you
need to be woken up at a different time. And you can set different
wake-up modes: iPod, Radio and Beep.
1. To enter Alarm 1, press the Alarm One/Two button once. “al1”
appears on the display.
2. To set Alarm 1, press the Alarm Set button twice. The alarm hour
flashes.
3. Turn the Power/ Tuner/Clock Set knob until you reach the desired
hour.
4. To confirm and enter ALARM MINUTES mode, press the Alarm
Set button again. The alarm minutes flash on the display.
5. Turn the Power/ Tuner/Clock Set knob until you reach the desired
minutes.
6. To confirm, press the Alarm Set button again.
7. To enter Alarm 2, press the Alarm One/Two button again. “al2”
appears on the display.
8. To set Alarm 2, repeat steps 2-6.
Note: To switch on both Alarm 1 and Alarm 2, press the Alarm One/
Two button again. “al1” and “al2” appear on the display. To cancel
the alarms, press the Alarm One/Two button once more.
Alarm Mode
1. Press the Alarm Mode button until the desired setting is reached
2. The corresponding symbol appears on the display.
3. When the alarm sounds, press any button (except SNOOZE/NAP)
to switch off. The alarm settings will remain saved.
14
Snooze/nap
Snooze Function
To activate the SNOOZE function, press the Snooze/Nap button when
the alarm sounds. The alarm turns off and “snooze” appears on the
display.
The alarm sounds again after 9 minutes.
Nap Function
1. In standby mode, with no alarm set, to select a NAP period of 15,
30, 45 or 60 minutes, press the Snooze/Nap button 1, 2, 3 or 4 times,
respectively.
The alarm sounds automatically at the time selected.
2. To switch off the NAP function, press the Snooze/Nap button
again.
Sleep Function
1. During iPod or radio play, to select a Sleep period of 15, 30, 45 or
60 minutes, press the SLEEP button 1, 2, 3 or 4 times, respectively.
The music turns off automatically at the time selected.
2. To turn off the Sleep function, press the Sleep button again.
15
Radio Operation
1. To switch between AM and FM bands, press the AM/FM button.
2. To locate a desired frequency, turn the Power/ Tuner/Clock Set
knob.
Other External Mode
The speaker can also be used with other external sound sources, to
do this:
1. Press Audio Mode to select aux mode.
2. Use the LINE-IN cable to connect OSS-101’s LINE IN jack to
an AUDIO OUT or headphone jack on external sound source
(such as MP3 or CD player).
16