1
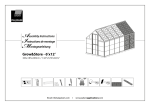
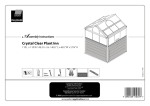
A
I
M
ssembly Instructions
nstructions de montage
ontageanleitung
Essence 8’x12’ - TwinWall Glazing
366x242.5x231cm / 144"x95½"x91"
Email: [email protected]
I
www.palramapplications.com
EN
a
IMPORTANT
Please read these instructions carefully before you start to assemble this greenhouse.
Keep these instructions in a safe place for future reference.
a
Customer Service
For assistance with assembly or for replacement parts – please log onto our website
or call our service line (number is on the title page).
Additional information can be found at our website: www.palramapplications.com
a
•
•
•
•
•
•
•
•
•
•
•
•
Safety Advice
It is of utmost importance to assemble all of the parts according to the directions.
Do not skip any step.
We strongly recommend using work gloves during assembly.
Always wear shoes and safety goggles when working with extruded aluminium.
If using a step ladder or power tools ensure that you follow the manufacturer’s safety
advice.
Do not touch overhead power cables with the aluminium profiles.
Do not attempt to assemble the greenhouse in windy or wet conditions.
Dispose of all plastic bags safely keep them out of reach of small children.
Keep children away from the assembly area.
Do not lean against or push the greenhouse during construction.
Do not position your greenhouse in an area exposed to excessive wind.
Do not attempt to assemble this greenhouse if you are tired, have taken drugs or
alcohol or if you are prone to dizzy spell.
Hot items such as recently used grills, blowtorches etc. must not be stored in the
greenhouse. Ensure there are no hidden pipes or cables in the ground before
inserting the pegs.
This product is designed to use as greenhouse only.
Before Assembly
This is a multi-part assembly best achieved by
two people. Allow at least half a day for assembly
process.
Selecting a site - the greenhouse must be ,
positioned and fixed on a flat level surface.
Choose a sunny position away from overhanging
trees.
We are strongly recomend to fix your greenhouse
directly to a solid concrete foundation. When
doing that use the pre drilled holes in the metal
base supplied.
Take out all components parts of the packages.
Sort the parts and check against the contents
parts list.
During assembly parts should be laid out close at
hand. Keep all small parts (screws etc.) in a bowl
so they do not get lost.
In purpose to facilitate parts’ identification and
assembly process, all-positioned profiles are
used in this greenhouse. As a result some
apertures in the profiles are not
used during assembly.
a
During Assembly
Carry out the assembly steps in the order
set out in the instructions.
Step 1: Make sure the base is square by
measuring the diagonals and level by
using a spirit level.
Step 5: Part 7063 is the greenhouse
threshold. Fixing it determines the front
side of the greenhouse.
Steps 8: The oval hole in the crossbars
A256 should always be assembled to the
base of the greenhouse.
Steps 47: Decide on the windows’
location before assembly. Windows
can be installed in two of the indicated
options.
Step 79: Firmly connect the
greenhouse to a level final position
immediately after completion of the
assembly.
•
a
Care & Maintenance
When your greenhouse needs to be cleaned, use a mild detergent solution and rinse with
cold clean water. DO NOT use acetone, abrasive cleaners or other special detergents to
clean the clear panels. It is recommended to check periodically that
roof panels caps (plastic part 329 & profile 981) are set in place.
a
Tools & Equipment
• Tape measure
• Work gloves
• Lubricant
• Phillips head screwdriver
• Step ladder
• Drill bit
• Large hammer
• Spanner
• T001 - Special tool for Screws 411 and nuts 412
• Screws 411 and nuts 412 are used throughout the assembly process.
• Screws 411 are to be assembled from the outside and nuts 412 from the inside of the
greenhouse.
• If not specified otherwise, do not fasten screws and nuts (411 & 412) more than 2-3 turns
•
only. Do not tighten them until completion of the panels’ assembly.
These 2 icons indicate if screws’ tightening is required or not.
However, in some steps, temporary tightening of a few screws may be needed to prevent
a profile from falling till it will be fully connected in the next steps.
FR
IMPORTANT !
Veuillez lire attentivement ces instructions avant de commencer à monter votre serre.
Conservez ces instructions en lieu sûr pour toute consultation ultérieure.
a
Service clientèle
Pour toute assistance concernant le montage de la serre ou ses pièces de rechange –
veuillez consulter notre site Internet ou appeler notre service technique (dont le numéro
de téléphone figure sur la couverture de la brochure).
Pour en savoir plus, n’hésitez pas à visiter notre site Internet : www.palramapplications.com
a
Consignes de sécurité
• Très important ! Veuillez suivre scrupuleusement les instructions de cette brochure
et réaliser les étapes dans l’ordre énoncé.
• Nous recommandons vivement le port de gants de protection pendant le montage.
• Portez toujours des chaussures de travail et des lunettes de protectrion lorsque vous travaillez des pièces en aluminium extrudé.
• Lors de l’utilisation d’une échelle ou d’outils électriques, assurez-vous de bien suivre les
consignes de sécurité du fabricant.
• Veillez à ne pas toucher de câbles aériens avec les profilés en aluminium.
• N’essayez pas de monter la serre s’il y a du vent ou s’il fait humide.
• Jetez tous les sacs en plastique en appliquant les règles de sécurité et maintenez-les hors de portée des jeunes enfants.
• Eloignez les enfants de la zone d’assemblage.
• Ne vous appuyez pas contre la serre et ne la poussez pas pendant le montage.
• Ne positionnez pas la serre dans un endroit trop exposé au vent.
• N’essayez pas de monter la serre si vous êtes fatigué, si vous êtes sous l’effet de drogues, de médicaments ou d’alcool ou encore si vous êtes sujet aux vertiges.
• Les objets chauds tels qu’un barbecue, un chalumeau ou autre article ayant été récemment utilisés, ne doivent pas être rangés dans la serre.
• Avant de planter les piquets, assurez-vous qu’aucun tuyau ni câble n’est enterré à l’endroit sélectionné pour l’installation.
• Ce produit est conçu pour servir de serre exclusivement.
a
Entretien & Maintenance
Pour nettoyer votre serre, utilisez une solution détergente douce et à rincez à l’eau claire et
froide. NE PAS utiliser d’acétone ni de produits nettoyants ou autres détergents spéciaux pour
nettoyer les panneaux clairs. Il est recommandé de vérifier régulièrement que les couvrejoints des panneaux du toit sont bien en place (pièces en plastique 329 & profilé 981).
a
•
•
•
•
•
Outils & Equipement
Mètre (ruban)
Gants de travail
Lubrifiant
Tournevis cruciforme (Philips)
Escabeau
• Perceuse
• Grand marteau
• Clé à écrous
• T001 – outil spécial pour vis 411 et écrous 412
a
Avant le montage
EIl s’agit d’un assemblage à pièces multiples
qu’il est préférable de réaliser à deux personnes
et auquel il fait consacrer au moins une demijournée.
Sélection du site – la serre doit être montée et
fixée sur une surface plane.
Choisissez un emplacement ensoleillé et éloigné
d’éventuels arbres susceptibles de la surplomber.
Nous recommandons vivement de fixer la serre
directement à de solides fondations en béton.
Pour ce faire, utilisez les trous déjà percés dans le
châssis métallique fourni.
Sortez toutes les pièces de leurs emballages.
Triez-les et comparez-les avec la liste des pièces
pour vérifiez que tout y est.
Lors de l’assemblage, les pièces doivent être
disposées à portée de main. Gardez toutes les
petites pièces (vis, etc.) dans un récipient pour
éviter de les perdre.
a
Pendant le montage
Procédez au montage étape par étape,
en respectant l’ordre énoncé dans cette
brochure.
Etape 1 : Assurez-vous que le châssis est
bien carré en mesurant les diagonales,
et vérifiez sa mise à niveau à l’aide d’un
niveau à bulle.
Etape 5 : Partie 7063 est le seuil à effet
de serre. Qu’il détermine la fixation de la
face avant de l’effet de serre.
Etapes 8 : L’ouverture ovale des barres
transversales A256 doit toujours être
placé du côté du châssis de la serre.
Etapes 47 : Choisissez l’emplacement
de la fenêtre avant le montage, parmi les
options indiquées.
Etape 79 : Immédiatement après avoir
terminé l’assemblage, fixez solidement
la serre en position finale, parfaitement
horizontale.
Pour faciliter l’identification des pièces et la
procédure de montage, les profilés
utilisés pour la construction
de cette serre sont tous
déjà en place.
En conséquence,
certaines ouvertures des
profilés restent inutilisées
pendant le montage.
Les vis 411 et écrous 412 servent tout au long de la procédure.
l Les vis 411 se placent à l’extérieur et les écrous 412 à l’intérieur de la serre.
l S’il n’est pas spécifié autrement, Ne serrez les vis et écrous (411 & 412) que de 2 à 3 tours,
pas plus. Ne les serrez pas tant que l’assemblage n’est pas complètement terminé, sauf
indication contraire. Ces deux icônes indiquent si le serrage des vis est nécessaire ou non.
l Cependant, la réalisation de certaines étapes peut nécessiter le serrage provisoire de
quelques vis pour empêcher un profilé de tomber en attendant qu’il soit entièrement
intégré à l’ensemble de la structure dans les étapes suivantes.
DE
WICHTIG
Bitte lesen Sie diese Anweisungen sorgfältig durch, bevor Sie mit dem Aufbau des
Gewächshauses beginnen.
Heben Sie diese Anweisungen an einem sicheren Ort auf, um später auf sie zurückgreifen
zu können.
a
Kundendienst
Für Hilfe bei dem Aufbau oder für Ersatzteile – können Sie sich entweder auf unserer
Webseite einloggen oder unseren Kundendienst anrufen (die Nummer steht auf der
Titelseite).
Weitere Informationen finden Sie auf unserer Webseite: www.palramapplications.com
a
l
l
l
l
l
l
l
l
l
l
l
l
l
Sicherheitshinweise
Es ist von grösster Wichtigkeit, alle Teile genau gemäss den Anweisungen zusammenzubauen.
Lassen Sie keinen Schritt aus.
Wir empfehlen wärmstens, während des Aufbaus Arbeitshandschuhe zu tragen.
Tragen Sie immer Schuhe und eine Schutzbrille, wenn Sie mit stranggepresstem
Aluminium arbeiten.
Wenn Sie eine Stufenleiter oder Elektrowerkzeuge benutzen, achten Sie darauf,
die Sicherheitshinweise des Herstellers zu befolgen.
Berühren Sie mit den Aluminiumprofilen keine Oberleitungen.
Versuchen Sie nicht, das Gewächshaus bei windigem oder regnerischem
Wetter zusammenzubauen.
Entsorgen Sie alle Plastiktüten sicher und bewahren sie ausserhalb der Reichweite
von kleinen Kindern auf.
Halten Sie Kinder vom Aufbaubereich fern.
Während des Aufbaus sollten Sie sich nicht gegen das Gewächshaus lehnen oder es drücken.
Bauen Sie Ihr Gewächshaus nicht an Orten mit hoher Windbelastung auf.
Versuchen Sie nicht, dieses Gewächshaus aufzubauen wenn Sie müde sind, unter
dem Einfluss von Drogen oder Alkohol stehen oder zu Schwindelanfällen neigen.
Heisse Geräte wie kürzlich benutzte Grills, Schneidbrenner usw. dürfen nicht
im Gewächshaus gelagert werden. Vergewissern Sie sich vor Einsetzen der Pflöcke,
dass sich keine versteckten Rohre oder Kabel im Boden befinden.
Dieses Produkt ist nur für den Einsatz als Gewächshaus geeignet.
a
Pflege und Wartung
Benutzen Sie eine milde Reinigungslösung für die Reinigung Ihres Gewächshauses und
spülen es danach mit kaltem, sauberen Wasser ab. Benutzen Sie AUF KEINEN FALL Azeton,
Scheuermittel oder andere spezielle Reinigungsmittel, um die klaren Platten zu reinigen.
a
Werkzeuge & Ausrüstung
Maßband
Arbeitshandschuhe
l Plastik- oder Gummihammer
l Schmiermittel
l Kreuzschitzschraubenzieher
l Stufenleiter
l Bohrer
l Grosser Hamme
Schere
Schlüssel
l T001
l
l
l
l
a
Vor dem Zusammenbau
Diese ist eine Mehrteilige Montage. Der
Zusammenbau der Teile wird am besten
von zwei Leuten bewältigt. Rechnen Sie
mit mindestens einem halben Tag für den
Zusammenbau.
Wahl des Standorts - das Gewächshaus
muss auf einem flachen ebenen Untergrund
aufgebaut und fixiert werden. Wählen Sie eine
sonnige Stelle ohne überhängende Bäume.
Wir empfehlen Ihnen sehr Ihr Gewächshaus
direkt auf einem soliden Betonfundament zu
befestigen. Dazu sollten Sie die vorgebohrten
Löcher in der gelieferten Metallbasis benutzen.
Nehmen Sie alle Teile aus der Verpackung.
Sortieren Sie die Teile und überprüfen Sie sie
mit Hilfe der Inhaltsliste auf Vollständigkeit.
Während des Aufbaus sollten die Teile in Ihrer
Nähe auf dem Boden ausgelegt werden.
Bewahren Sie alle kleinen Teile (Schrauben
usw.) in einer Schüssel auf, sodass sie nicht
verloren gehen.
Um die Identifikation der Teile zu erleichtern
und um die Montage zu vereinfachen,
werden gleiche Profile in
verschiedene Positionen
eingebaut, sodass bei manchen
Positionen einige Löcher dieser
Profile während der Montage
nicht verwendet werden.
a Während des Zusammenbaus
Führen Sie den Aufbau in der in den
Gebrauchsanweisungen aufgeführten
Reihenfolge Schritt per Schritt aus.
Schritt 1: Vergewissern Sie sich, dass die
Basis sowohl quadratisch als auch waagrecht
ist, indem Sie die Diagonalen messen und
die Basis mit einer Wasserwaage prüfen.
Schritt 5: Teil 7063 sind in der
Rückseite des Gewächshaus und deren
Festsetzung bestimmt die Vorderseite des
Gewächshauses.
Schritte 8: Das ovale Loch in den
Querbalken A256 sollte immer auf die Basis
des Gewächshauses montiert werden.
Schritte 47: Entscheiden sie über die
genaue Lageposition des Fensters vor
dessen Einbau. Das Fenster kann in einer der
angegebenen Optionen installiert werden.
Schritt 79: Befestigen Sie das Gewächshaus
auf eine endgültige Position direkt nach
Beendigung des Aufbaus auf einem
waagrechten Untergrund.
Les vis 411 et écrous 412 servent tout au long de la procédure.
l Les vis 411 se placent à l’extérieur et les écrous 412 à l’intérieur de la serre.
l S’il n’est pas spécifié autrement, Ne serrez les vis et écrous (411 & 412) que de 2 à 3 tours,
pas plus. Ne les serrez pas tant que l’assemblage n’est pas complètement terminé, sauf
indication contraire. Ces deux icônes indiquent si le serrage des vis est nécessaire ou non.
l Cependant, la réalisation de certaines étapes peut nécessiter le serrage provisoire de
quelques vis pour empêcher un profilé de tomber en attendant qu’il soit entièrement
intégré à l’ensemble de la structure dans les étapes suivantes.
Conte nts
Item
7071
7073
Inc./cm
Qty.
Item
Inc./cm
Qty.
1
7069
2
7070
2
972
4
973
2
10
993
10
7068
4
983
1
994
1
7075
1
995
1
7074
1
Contents
Inc./cm
Item
Qty.
Item
Inc./cm
Qty.
996
4
7058
2
7076
4
7059
2
966
6
7060
3
256
8
7063
2
991
2
990
2
7061
1
989
2
981
12
7062
2
Contents
Item
7064
7072
992
984
3017
Inc./cm
Qty.
Item
Qty.
Item
Qty.
Item
Qty.
286
4
7082
2
318 (PVC)
(+4)
06
1
7067
2
7009 (PVC)
(+1)
07
1
96
6
328
37
08
2
7066
2
292
2
288
10
459
3
456
6
7065
1
T001
1
926
6
24
1
4
6
4
2
4
Conte nts
Item
Qty.
7083
1
7084
1
7085
1
7086
7088
1
M4 x 50mm
Item
Qty.
343
Item
M4
Item
Qty.
586
2
582
4
7079
2
581
16
329
344L
2
344R
2
99
2
22
Qty.
588
1
583
3
584
3
7159
1
7160
1
10
7078
10
1
1
Item
2
7160
423
Qty.
22
4
2
Conte nts
Item
Qty.
463
6
462
Item
Qty.
207
411
M6
(+14)
461
M6
(+2)
412
M6
(+16)
6
464
36
12
28
422
M4
(+2)
465
M4
(+1)
428
M4x10mm
(+1)
24
4
248
8
447
(+1)
4008
24
411
(+1)
10
0
1
2
3
4
b
b
a
a
366 cm / 144”
366 cm / 144”
242 cm / 95”
a = b
242 cm / 95”
a = b
1
7058
447
x2
7059
x2
x4
7058
/ 7059
447
x4
2
7063
x2
412
x4
411
x4
7063
7063
7063
7063
3
7063
+
7063
7058
7059
x1
x1
a
4008
x4
b
7063
7058
/
7059
c
7059
4008
7058
7063
7058
4008
/
7059
4
7058
7059
x1
412
x2
7058
411
x1
7060
x1
x2
a + b
7060
b
a + b
7060
a
7059
7060
5
7060
412
x2
7060
7060
x4
411
x4
6
412
411
x13
x13
a
b
a
b
b
a
c
c
c
a
a
a
b
a
b
a
7
996
412
x4
x8
411
x8
996
411
412
8
256
412
x8
411
x8
x8
a
x4
a
a
a
a
256
256
9
995
412
x1
411
x1
x1
a
b
995
b
995
995
c
256
256
a + c
10
286
412
x1
a
411
x2
x2
b
286
286
a
b
11
994
412
x1
x1
411
x1
a
b
994
b
994
994
c
256
a + c
256
12
286
x1
412
x2
411
x2
286
286
13
7071
x1
7071
7071
14
7075
x1
412
411
x1
a
x1
b
7075
b
7075
7075
c
256
256
a + c
15
286
x1
412
411
x2
x2
286
a
286
b
a
b
16
7074
x1
412
411
x1
a
x1
b
7074
7074
b
7074
c
256
7074
256
a + c
17
286
x1
412
x2
286
286
411
x2
18
993
x4
a
993
993
993
993
a
a
993
a
a
19
412
x4
411
x4
a
411
a
a
a
256
993
a
256
b
256
b
256
256
b
b
b
20
581
7160
x2
x2
7160
7160
581
7160
581
/
581
21
581
x2
581
581
581
22
972
08
x4
292
x2
412
x8
a
411
x2
x8
a
292
972
972
292
972
972
b
b
08
08
x2
23
581
993
x6
x3
a
993
b
581
b
581
b
581
b
581
b
581
581
b
a
a
a
581
993
24
318
PVC
x6
a
a
a
a
a
a
318
PVC
a
581
25
412
x5
411
x5
a
a
a
a
a
a
26
x1
972
972
972
27
a
972
a
b
b
b
b
b
c
b
972
c
972
28
581
993
x6
x3
a
993
b
7011
b
7011
b
7011
b
7011
b
7011
b
7011
b
a
a
581
993
29
318
PVC
x6
a
a
a
a
a
a
a
318
PVC
581
30
412
x5
411
x5
a
a
a
a
a
a
31
972
x1
972
a + b
972
a
a
a
a
a
a
a + b
972
32
4008
x2
412
x1
411
x1
a
4008
b
a
x2
a
b
411
+
412
33
7072
412
x4
411
x8
x8
x4
7072
7072
7072
411
+
412
7072
7072
a
b
34
584
583
x1
x1
7068
x1
583
584
583
584
7068
7068
35
7076
412
x2
x2
411
x2
a
a
7076
a
7076
7076
b
c
b
c
36
7061
412
x1
x3
411
x3
a
a
7061
a
b
b
7061
7061
37
7072
412
x2
a
x4
x2
a
7072
7072
a
411
b
b
411
a
7072
b
x4
b
+
412
38
584
x1
583
x1
a
7076
7064
584
a
7064
583
a
584
39
a
412
x2
411
b
x2
a+b
a+b
c
d
c
c
d
40
7076
x2
588
412
411
x4
x1
x4
a
a
588
7076
7076
588
a
b
b
c
d
7076
d
c
e
e
41
584
583
x1
412
x2
7064
x1
411
x1
x2
a
a
7064
b
7064
7064
7064
b
584
7076
b
583
584
42
412
a
411
x2
x2
a
b
a
b
b
43
973
x2
07
x1
412
411
x4
x4
a
973
973
07
a
a
973
973
07
44
06
412
x1
x4
411
x4
a
a
973
411
b
973
b
973
06
a
411
973
45
412
x10
411
x10
a
411
a
a
412
a
a
b
b
411
412
46
412
973
x1
973
a
411
a
973
a
973
x4
x4
47
EN
GR
FR
SP
Window Location
Fenster Standort
Fenêtre Emplacement
Ventana Ubicación
48
288
412
7073
x4
x8
411
x4
x8
a
b
411
7073
7073
7073
288
412
288
288
288
x4
x2
49
7073
x4
412
411
x4
411
412
x4
a
a
a
7073
b
7073
7073
a
a
7073
b
b
b
7073
1
2
50
990
x2
x2
412
x2
a
x4
411
x4
990
990
a
95
a
cm
7
/3
990
3 /8
”
411
51
7079
a
x2
7079
b
b
7079
a
b
a
990
7079
52
981
a
x2
981
x2
b
b
981
a
c
c
981
53
7073
412
x6
x4
411
x4
a
7073
b
a
b
a
b
993
a
7073
b
a
7073
a
7073
a
7073
7073
b
1
b
b
2
54
7078
x10
318
PVC
318
PVC
x10
a
a
318
PVC
7078
7078
55
7078
+
981
318
PVC
x1
x1
b
a
981
7078
7078
981
981
7078
56
7078
+
318
PVC
x9
981
x9
318
PVC
a
7078
981
7078
981
7078
981
981
7078
b
7078
981
7078
7078
7078
981
981
7078
981
7078
981
981
c
981
57
329
4043
x10
a
a
a
a
a
+
+
+
+
+
x10
b
b
b
a
b
a
b
a
a
a
a
+
+
+
+
+
b
b
b
b
b
b
329
329
4043
b
4043
58
992
x4
a
x4
586
x2
x2
3017
3017
992
3017
a
3017
a
992
992
b
b
992
b
992
586
3017
586
59
989
x2
991
4008
x2
x8
x2
4008
989
a
4008
a
a
b
586
989
4008
b
991
991
b
4008
4008
4008
60
586
x2
7009
x4
586
586
586
x2
7009
7009
586
61
99
a
x2
22
22
2
x4
22
22
99
1
a
a
99
b
99
b
99
b
2
x2
1
22
62
464
422
x12
x24
465
x24
422
464
465
a
a
a
a
a
a
464
a
464
63
582
x4
a
7160
x1
7159
7069
x1
b
7159
7081
x2
a
b
7080
7160
582
582
582
7069
582
7069
7069
64
7068
x3
983
x1
7068
7068
983
983
7068
/
7068
65
7070
x2
a
b
7070
a + b
a + b
a
a
411
x8
66
4008
x4
7066
984
x2
x2
x2
b
a
984
7066
984
4008
a
b
4008
67
411
a
x31
x10
a
b
c
c
x8
d
b
x3
d
983
7068
x10
68
7062
4008
x2
x2
x4
b
a
a
4008
7062
b
7062
c
c
7062
4008
7062
69
7065
288
x1
412
x6
x21
a
288
a
a
a
a
411
x4
b
a
983
x4
411
x2
b
7068
411
411
a
x2
7065
a
a
153 cm
60 2/8 ”
x6
93.6 cm
36 7/8 ”
462
16.8 cm
6 5/8 ”
70
412
x12
a
a
462
a
a
a
71
7086
x1
a
7085
x1
7084
x1
7086
412
7083
x1
983
7088
7085
b
x1
7088
M4 x 50mm
7084
423
7085
x1
423
412
x2
7083
72
7082
x2
7067
428
x2
422
x4
M4x10mm
x4
M4
a
a
422
412
428
7067
7082
b
422
428
983
7068
412
b
412
x4
M6
73
463
a
x6
464
a+b
a+b
0
180
a+b
a+b
b
463
a+b
a+b
x2
74
344L
344R
x2
343
x2
b
343
343
344L
447
x2
x4
a
344
447
344L
b
a
a
344R
a
b
343
75
926
461
x6
x12
412
411
x24
a
x12
b
926
926
461
461
c
411
b +c
a +c
b +c
76
966
x6
a
966
x6
a
a
a
77
456
x6
461
x12
412
a
411
x24
x12
b
456
a+b+c
a+b+c
966
x6
c
461
78
459
461
x3
x12
412
x12
a
a
a
a
x3
79
M96
P328
x6
x36
a
M96
or
b
a
b
b
a
b
b
b
b
b
P328
Version1_11/2011
a
b