1
Item #589-776
Model #GFS00470C
USE AND CARE GUIDE
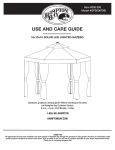
CHRISTY GAZEBO
Questions, problems, missing parts? Before returning to the store,
call Customer Service.
1-888-628-1888
HOMEDEPOT.COM
Table of Contents
Table of Contents .......................................................... 2
Warranty ......................................................................... 2
What is Covered .......................................................................2
What is Not Covered ................................................................2
Safety Information .........................................................2
Pre-Assembly ................................................................ 3
Planning Assembly ..................................................................3
Hardware Included ...................................................................3
Package Contents ....................................................................4
Assembly ....................................................................... 5
Care and Cleaning .......................................................18
Warranty
1 YEAR FRAME AND FABRIC WARRANTY
WHAT IS COVERED
We warrant the frame and fabric to be free of manufacturing defects to the original purchaser for one year.
WHAT IS NOT COVERED
It remains the customer’s responsibility for freight and packaging charges to and from our service center. This warranty does not cover
commercial use, hardware, acts of nature, fire, freezing and abusive use. In addition, purchased parts are not covered under this warranty.
We reserve the right to make substitutions with similar merchandise, if the model in question is no longer in production.
Contact the Customer Service Team at 1-888-628-1888 or visit www.HomeDepot.com.
Safety Information
WARNING: Keep all flame and heat sources away
from this gazebo fabric.
!
CAUTION: This gazebo is made for the explicit purpose of
providing limited outdoor sunshade and is not to be used
as a toy, shelter, or tent.
WARNING: The application of any foreign substance to
the gazebo fabric may render the flame-resistant
properties ineffective.
!
CAUTION: Do not locate the gazebo near any open
flame.
WARNING: This gazebo is made with fabric that meets
CPAI - 84 specifications for flame resistance. It is not
fire proof. The fabic will burn if left in continuous
contact with any flame source.
CAUTION: Do not use the gazebo as a support.
CAUTION: Do not shake, lean, or climb on the gazebo.
CAUTION: Children under the age of 10 who are near
the gazebo should be supervised by a competent
adult at all times.
2
Pre-Assembly
PLANNING ASSEMBLY
Read all instructions before assembly.
To avoid damaging this product, assemble it on a soft, nonabrasive surface such as carpet or cardboard.
NOTE: More than one person may be required to
assemble this product.
HARDWARE INCLUDED
NOTE: Hardware not shown to actual size.
AA
Part
AA
BB
CC
DD
EE
BB
Description
M6X15 Bolt and washer
M6X35 Bolt and washer
M6X40 Bolt and washer
M6X48 Bolt and washer
M6 Nut
DD
CC
EE
Quantity
36
Part
16
20
12
12
GG
FF
HH
II
3
FF
Description
Ground spike
Wrench
Hex wrench
M6 Plastic washer
GG
HH
II
Quantity
8
2
1
16
HOMEDEPOT.COM
Please contact 1-877-527-0313 for further assistance.
Pre-Assembly (continued)
PACKAGE CONTENTS
N
G
M
E
A
C
L
F
B
D
H
I
O
P
Q
K
J
R
Part
Description
Quantity
A
Long top cross bar
2
B
Long connector bar
2
C
D
E
F
G
H
I
J
K
L
M
N
O
P
Q
R
Short top cross bar
Short connector bar
Lower long canopy spoke
Canopy frame
Upper canopy spoke
Flat tube
Fabric hanger
Side panel J
Side panel K
Lower short canopy spoke
Lower canopy hub
Upper canopy hub
Small fabric cover
Large fabric cover
Netting
Plastic ring
2
2
4
4
4
8
8
4
4
4
1
1
1
1
4
40
4
l
Assembly
1 Assembling the upper canopy
Insert the four upper canopy spokes (G) into the upper canopy hub (N).
N
G
N
G
5
HOMEDEPOT.COM
Please contact 1-888-628-1888 for further assistance.
l (continued)
Assembly
2 Assembling the lower canopy
Insert the four lower long canopy spokes (E) into the four long tubes of the lower canopy hub (M).
Insert the four canopy frames (F) into the four short tubes of the lower canopy hub (M).
Insert the four lower short canopy spokes (L) into the four long tubes of the lower long canopy spokes (E).
Make sure all push pins are in place.
M
E
M
M
E
E
F
F
E
F
E
F
F
L
E
6
l (continued)
Assembly
3 Attaching the upper canopy to the lower canopy
Insert the upper canopy spokes (G) into the lower long canopy spokes (E).
G
G
E
E
7
HOMEDEPOT.COM
Please contact 1-888-628-1888 for further assistance.
l (continued)
Assembly
4 Assembling the cross bar
Attach the long top cross bar (A) to the short top cross bar (C) using M6x15 bolts and washers (AA).
Repeat for second long top cross bar (A) and short top cross bar (C).
C
A
C
A
AA
8
l (continued)
Assembly
5 Assembling the connector bar
Attach the long connector bar (B) to the short connector bar (D) using M6x15bolts and washers (AA).
Repeat for the second long connector bar (B) and short connector bar (D).
D
B
B
D
AA
9
HOMEDEPOT.COM
Please contact 1-888-628-1888 for further assistance.
l (continued)
Assembly
6 Attaching the fabric hangers
Attach the fabric hangers (I) to the top cross bars (A and C) and connector bars (B and D) using M6x40 bolts and washers (CC)
with M6 plastic washers (II).
C
II
A
I
CC
D
B
10
l (continued)
Assembly
7 Attaching the cross bars to the connector bars
Insert the top cross bars (A and C) into the connector bars (B and D).
D
A
C
C
B
A
D
B
D
B
C
A
11
HOMEDEPOT.COM
Please contact 1-888-628-1888 for further assistance.
l (continued)
Assembly
8 Attaching the canopy frame to the connector bars
Attach the canopy frame (F) to the short connector bars (D) using M6x15 bolts and washers (AA).
Repeat for the remaining canopy frames (F).
Attach the lower short canopy spoke (L) to the long connector bar (B) and short top cross bar (C) using M6x40 bolts and washers (CC).
Repeat for the remaining lower short canopy spokes (L).
F
D
B
L
CC
C
F
L
B
D
AA
C
12
l (continued)
Assembly
9 Inserting the flat tubes into the fabric cover
Insert the flat tubes (H) into the large fabric cover (P).
P
H
P
H
13
HOMEDEPOT.COM
Please contact 1-888-628-1888 for further assistance.
l (continued)
Assembly
10
Attaching the fabric cover
Insert the upper canopy spoke (G) into the small fabric cover (O).
Attach the large fabric cover (P) to the top cross bars (A and C) and connector bars (B and D) by inserting M6x15 bolts and washers (AA)
through the large fabric cover (P), the flat tube (H), and into the top cross bars (A and C) and connector bars (B and D).
Stick the netting of the small fabric cover (O) to the edges of the large fabric cover (P).
P
G
O
O
O
P
O
A
B
D
P
AA
C
H
P
C
14
l (continued)
Assembly
11 Assembling the side panels
Connect the side panels (K and J) by lining up the labels near the top, middle, and bottom of the panels and connecting them with
M6x48 bolts and washers (DD) with M6 nuts (EE).
Repeat for the remaining sets of the side panels (K and J).
K
J
K
EE
15
J
DD
HOMEDEPOT.COM
Please contact 1-888-628-1888 for further assistance.
l (continued)
Assembly
12 Attaching the cross bar and connector to the side panels
Attach the long top cross bar (A) to the side panel (K), and the short connector bar (D) to the side panel (J) using M6x35 bolts
and washers (BB).
Repeat for the remaining sets of the side panels (K and J).
A
D
J
K
D
A
J
K
BB
BB
16
l (continued)
Assembly
13 Hanging the netting
Put the nettings (Q) onto the top cross bars (A and C) and connector bars (B and D) using the plastic rings (R).
R
I
A
Q
B
Q
17
HOMEDEPOT.COM
Please contact 1-888-628-1888 for further assistance.
l (continued)
Assembly
14 Grounding the gazebo
Pound the ground spikes (FF) through the holes on the flat bars on the bottom of panels (J and K).
K
J
J
K
FF
Ca
are and
d Cleaning
For best results, clean the frame and fabric with a damp cloth and dry thoroughly. This will help prevent mildew by
removing dirt particles that may accumulate.
Do not clean with abrasive materials, bleach, or solvents.
Store the gazebo in a dry, sheltered place when not in use.
Keep the gazebo out of fire, extreme heat, freezing conditions, and inclement weather such as rain, hail, sleet, snow, or wind.
18
Questions, problems, missing parts? Before returning to the store,
call Customer Service.
1-888-628-1888
HOMEDEPOT.COM
Retain this manual for future use.
Artículo Núm. 589-776
Modelo Núm. GFS00470C
GUÍA DE USO Y MANTENIMIENTO
GLORIETA CHRISTY
¿Preguntas, problemas o piezas faltantes?
Antes de regresar a la tienda, llama al Servicio al Cliente.
1-888-628-1888
HOMEDEPOT.COM
Tabla de Contenido
Preensamblaje............................................................... 3
Planificar el Ensamblaje...........................................................3
Contenido del Paquete .............................................................3
Tabla de Contenido....................................................... 2
Garantía ......................................................................... 2
Qué Cubre la Garantía ..............................................................2
Qué No Cubre la Garantía.........................................................2
Información de Seguridad ............................................ 2
Ensamblaje ....................................................................5
Mantenimiento y Limpieza .........................................18
Garantía
GARANTÍA DE 1 AÑO PARA EL ARMAZÓN Y LA TELA
QUÉ CUBRE LA GARANTÍA
Le garantizamos al comprador original que el armazón y la tela no presentarán defectos de fabricación durante un año.
QUÉ NO CUBRE LA GARANTÍA
El cliente es responsable de los cargos por flete y empaque desde y hacia nuestro centro de servicio. Esta garantía no cubre el uso comercial,
herrajes, daños por desastres naturales, incendios, congelamiento y uso abusivo del producto. Además, las piezas compradas aparte no están
cubiertas bajo esta garantía. Nos reservamos el derecho de sustituir el producto por mercancía similar, si el modelo en cuestión ya no se
fabrica.
Comuníquese con el Equipo de Servicio al Cliente por el teléfono 1-888-628-1888 o visite www.HomeDepot.com.
Información de Seguridad
ADVERTENCIA: ¡Mantén toda fuente de calor y fuego
alejada
!
PRECAUCIÓN: Esta glorieta ha sido diseñada con el propósito
explícito de brindar protección solar limitada en exteriores y
no para ser usada como juguete, refugio o tienda.
ADVERTENCIA: Si se le aplican sustancias extrañas a la
tela de la glorieta, las propiedades de resistencia a las
llamas pueden perder su eficacia.
!
PRECAUCIÓN: No instales la glorieta cerca de ninguna
llama expuesta.
ADVERTENCIA: Esta glorieta está hecha de una tela que cumple
con las especificaciones CPAI - 84 relacionadas con la
resistencia contra las llamas. No es ignífuga. La tela se quemará
ante el contacto continuo con cualquier fuente de calor.
PRECAUCIÓN: No uses la glorieta para apoyarte.
PRECAUCIÓN: No sacudas, te apoyes o subas sobre la
glorieta.
PRECAUCIÓN: Cuando los niños menores de 10 años estén
cerca de la glorieta, un adulto responsable debe vigilarlos
en todo momento.
2
Preensamblaje (continuación)
PLANIFICAR EL ENSAMBLAJE
Leer todas las instrucciones antes de ensamblar.
Para evitar dañar el artículo, ensámblalo sobre una superficie suave, no abrasiva, como una alfombra o cartón.
NOTA: Se puede necesitar más de una persona para
ensamblar completamente este producto.
HERRAJES INCLUIDOS
NOTA: No se muestra el tamaño real de los herrajes.
AA
Part
Pieza
AA
BB
CC
DD
EE
BB
Description
Descripción
Perno y arandela M6x15
Perno y arandela M6x35
Perno y arandela M6x40
Perno y arandela M6x48
Tuerca M6
DD
CC
EE
Quantity
Cantidad
36
Part
Pieza
16
20
12
12
GG
FF
HH
II
3
FF
GG
Description
Descripción
Estaca de tierra
Llave
Llave hexagonal
Arandela de plastico M6
HH
II
Quantity
Cantidad
8
2
1
16
HOMEDEPOT.COM
Para más ayuda, por favor, llama al 1-888-628-1888.
Preensamblaje (continuación)
CONTENIDO DEL PAQUETE
N
G
M
E
A
C
L
F
B
D
H
I
O
P
Q
K
J
R
Pieza
A
Descripción
Barra transversal larga superior
Cantidad
2
B
Barra conectora larga
2
C
D
E
F
G
H
I
J
K
L
M
N
O
P
Q
R
Barra transversal corta superior
Barra conectora corta
Radio largo de la cubierta inferior
Armazón de la cubierta
Radio de la cubierta superior
Tubo plano
Soporte de tela
Panel lateral J
Panel lateral K
Radio corto de la cubierta inferior
Centro de la cubierta inferior
Centro de la cubierta superior
Cubierta pequeña de tela
Cubierta grande de tela
Malla
Argolla de plástico
2
2
4
4
4
8
8
4
4
4
1
1
1
1
4
40
4
l
Ensamblaje
1 Cómo ensamblar la cubierta superior
Inserta los cuatro radios de la cubierta superior (G) en el centro de esta (N).
N
G
N
G
5
HOMEDEPOT.COM
Para más ayuda, por favor, llama al 1-888-628-1888.
l
Ensamblaje
(continuación)
2 Cómo ensamblar la cubierta inferior
Inserta los cuatro radios cortos de la cubierta inferior (E) en los cuatro tubos largos del centro de la cubierta inferior (M).
Inserta los cuatro armazones de la cubierta (F) en los cuatro tubos cortos del centro de la cubierta inferior (M).
Inserta los cuatro radios cortos de la cubierta inferior (L) en los cuatro tubos largos de los radios largos de la cubierta inferior (E).
Verifica que todas las clavijas a presión estén en su lugar.
M
E
M
M
E
E
F
F
E
F
E
F
F
L
E
6
l
Ensamblaje
(continuación)
3 Cómo montar la cubierta superior en la cubierta inferior
Inserta los tres radios de la cubierta superior (G) en los radios largos de la cubierta inferior (E).
G
G
E
E
7
HOMEDEPOT.COM
Para más ayuda, por favor, llama al 1-888-628-1888.
l
Ensamblaje
(continuación)
4 Cómo ensamblar barra transversal
Une la barra transversal larga superior (A) con la barra transversal corta superior (C) con pernos M6x15 y arandelas (AA).
Repite para las segundas barras transversales larga y corta superiores.
C
A
C
A
AA
8
l
Ensamblaje
(continuación)
5 Cómo ensamblar la barra conectora
Sujeta la barra conectora larga (B) a la barra conectora corta (D) con pernos M6x15 y arandelas (AA).
Repite para las segundas barras conectoras larga (B) y corta (D).
D
B
B
D
AA
9
HOMEDEPOT.COM
Para más ayuda, por favor, llama al 1-888-628-1888.
Ensamblaje (continuación)
6 Cómo sujetar los soportes de tela
Sujeta los soportes de la tela (I) a las barras transversales superiores (A y C) y barras y conectoras (B y D) usando pernos M6x40
y arandelas (CC) con arandelas de plástico M6 (II).
C
II
A
I
CC
D
B
10
l
Ensamblaje
(continuación)
7 Cómo ensamblar las barras transversales a las barras conectoras
Inserta las barras transversales superiores (A y C) en las barras conectoras (B y D).
D
A
C
C
B
A
D
B
D
B
C
A
11
HOMEDEPOT.COM
Para más ayuda, por favor, llama al 1-888-628-1888.
l
Ensamblaje
(continuación)
8 Cómo sujetar el armazón de la cubierta a las barras conectoras
Sujeta el armazón de la cubierta (F) a las barras conectoras cortas (D) con pernos M6x15 y arandelas (AA).
Repite para los armazones de la cubierta restantes (F).
Sujeta el radio corto de la cubierta inferior (L) a la barra conectora larga (B) y la barra transversal corta superior (C) con pernos M6x40
y arandelas (CC).
Repite para los radios cortos restantes de la cubierta inferior (L).
F
D
B
L
CC
C
F
L
B
D
AA
C
12
l
Ensamblaje
(continuación)
9 Cómo insertar los tubos planos en la cubierta de tela
Inserta los tubos planos (H) en la cubierta grande de tela (P).
P
H
P
H
13
HOMEDEPOT.COM
Para más ayuda, por favor, llama al 1-888-628-1888.
Ensamblaje (continuación)
10
Cómo instalar la cubierta de tela
Inserta el radio de la cubierta superior (G) en la cubierta de tela pequeña (O).
Inserta la cubierta grande de tela (P) en las barras transversales superiores (A y C) y en las barras conectoras (B y D) colocando pernos
M6x15 y arandelas (AA)a través de la cubierta grande de tela (P) y el tubo plano (H), y dentro de las barras transversales superiores
(A y C) y las barras conectoras (B y D).
Une la malla de la cubierta pequeña de tela (O) con los bordes de la cubierta grande de tela (P).
P
G
O
O
O
P
O
A
B
D
P
AA
C
H
P
C
14
l
Ensamblaje
(continuación)
11 Cómo montar los paneles laterales
Conecta los paneles (K y J) alineando las etiquetas cerca de los extremos superior, medio e inferior de los paneles y conectándolos
con pernos M6x48 y arandelas (DD) con tuercas M6 (EE).
Repite para el resto de los juegos de paneles laterales (K y J).
K
J
K
EE
15
J
DD
HOMEDEPOT.COM
Para más ayuda, por favor, llama al 1-888-628-1888.
l
Ensamblaje
(continuación)
12 Cómo montar la barra transversal y la conectora en los paneles laterales
Une la barra transversal larga superior (A) en el panel lateral (K), y la barra conectora corta (D) en el panel lateral (J) con pernos
M6x35 y arandelas (BB).
Repite para el resto de los juegos de paneles laterales (K y J).
A
D
J
K
D
A
J
K
BB
BB
16
l
Ensamblaje
(continuación)
13 Cómo colgar la malla
Coloca las mallas (Q) sobre las barras transversales superiores (A y C) y las barras conectoras (B y D) con argollas de plástico (R).
R
I
A
Q
B
Q
17
HOMEDEPOT.COM
Para más ayuda, por favor, llama al 1-888-628-1888.
Ensamblaje (continuación)
14 Cómo colocar la glorieta en la tierra
Martilla las estacas para tierra (FF) a través de los orificios en las barras planas de la parte inferior de los paneles (J y K).
K
J
J
K
FF
Mantenimiento y Limpieza
Para mejores resultados, limpia el armazón y la tela con un paño húmedo y sécalos completamente. Esto ayudará a prevenir la
aparición de moho al quitar las partículas de polvo que puedan acumularse.
No limpiar con materiales abrasivos, blanqueador o solventes.
Almacena la glorieta en un lugar seco y protegido cuando no esté en uso.
Mantén la glorieta alejada del fuego, el calor extremo, condiciones de congelamiento e inclemencias del tiempo como lluvia, granizo,
aguanieve, nieve o viento.
18
¿Preguntas, problemas o piezas faltantes?
Antes de regresar a la tienda, llama al Servicio al Cliente.
1-888-628-1888
HOMEDEPOT.COM
Conserva este manual para uso en el futuro.