1
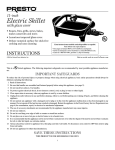
12-inch Electric
Foldaway
Skillet
®
™
Electric Skillet
• Roasts, pan fries, grills, stews, bakes,
makes casseroles and more.
• Luxurious tempered glass cover lets you
see what’s inside.
• Removable base for easy cleaning and
storage.
• Great for use as a buffet server.
• Handy spout for pouring liquids. Doubles
as a spoon holder.
Estas instrucciones también están disponibles en español.
Para obtener una copia impresa:
• Descargue en formato PDF en www.GoPresto.com/espanol.
• Envíe un mensaje de correo electrónico a [email protected].
• Llame al 1-800-877-0441, oprima 2 y deje un mensaje.
Visit us on the web at www.GoPresto.com
Instructions
This is a
©2013 National Presto Industries, Inc.
Listed appliance. The following important safeguards are recommended by most portable appliance manufacturers.
IMPORTANT SAFEGUARDS
To reduce the risk of personal injury or property damage, when using electrical appliances basic safety precautions should always be
followed, including the following:
1. Read all instructions.
2. Warning: To reduce the risk of fire, do not plug in with base assembly removed.
3. Be sure that handles are assembled and fastened properly before using this appliance. See instructions regarding handles on
page 2.
4. Do not touch hot surfaces. Use handles or knobs.
5. To protect against electrical shock, do not immerse heat control, cord, or plug in water or other liquid.
6. Close supervision is necessary when any appliance is used by or near children.
7. Unplug from outlet when not in use and before cleaning. Allow to cool before putting on or taking off parts, and before cleaning
the appliance.
8. Do not operate any appliance with a damaged cord or plug or in the event the appliance malfunctions or has been damaged in
any manner. Return the appliance to the Presto Factory Service Department for examination, repair, or electrical or mechanical
adjustment.
9. The use of accessory attachments not recommended by the appliance manufacturer may cause injuries.
10. This appliance is not intended for deep frying foods.
11. Do not use outdoors.
12. Do not let cord hang over edge of table or counter or touch hot surfaces.
13. Do not place on or near a hot gas or electric burner or in a heated oven.
14. It is recommended that this appliance not be moved when it contains hot oil or other hot liquid. If it must be moved when it
contains hot oil or other hot liquid, use extreme caution.
15. Always attach heat control to appliance first, then plug cord into the wall outlet. To disconnect, turn control to “OFF” then
remove plug from wall outlet.
16. Do not use appliance for other than intended use.
SAVE THESE INSTRUCTIONS
THIS PRODUCT IS FOR HOUSEHOLD USE ONLY.
1
Important Cord Information
This appliance has a polarized plug (one blade is wider than the other). To reduce the risk of electric shock, this plug is intended to fit
into a polarized outlet only one way. If the plug does not fit fully into the outlet, reverse the plug. If it still does not fit, contact a qualified
electrician. Do not attempt to modify the plug in any way.
A short power supply cord (or cord set) is provided to reduce the risk resulting from becoming entangled in or tripping over a longer
cord. Extension cords may be used if care is properly exercised in their use.
If an extension cord is used, the marked electrical rating of the extension cord should be at least as great as the electrical rating of the
appliance. The extension cord should be arranged so that it will not drape over the counter top or table top where it can be pulled on by
children or tripped over unintentionally.
Connect the power supply cord to a 120VAC electrical outlet only.
Before the First Use
As received, the skillet base and cover will be nested inside the pan. The cover handle will also be
inside the pan, wrapped in paper. Remove all packing material and then wash the skillet according
to the “Care and Cleaning” instructions on page 3.
Important: Before using your skillet, it must be fully assembled as instructed below.
1. Place the removable base on a flat surface with the rubber feet down. The Presto logo should
be right side up and facing you. Lift the handles and fold them out to the fully extended
position (Fig. A).
2. Set the skillet pan onto the base so the heat control is on the right and the pour spout is in
the front. The supports should fit into the recessed areas on the base (Fig. B).
3. Attach the base to the pan by rotating the handles towards the pan until you hear the latches
lock into place (Fig. C). When properly assembled, you should not be able to lift the pan
off of the base.
4. Attach the cover handle to the cover. Remove the two screws from the handle. For easiest
alignment, hold the handle so the screw holes are facing up. Position the inverted cover
over the handle and align the cover holes with the handle holes. Insert the two screws
through the holes. Using a Phillips type screwdriver, fasten handle to cover until it is secure.
Note: Continuing to tighten handle, once it is secure, can result in stripping of screws or
cracking of handle or cover.
How To Use
Fig. A
Handle
Presto logo
How to Assemble
Recessed areas
Fig. B
Supports
Recessed area
Handle
latch
Fig. C
Caution: This product is not intended to melt wax, gels, plastics, glue, or other materials for making candles or for other hobbyist
activities, or in any commercial or business application.
1. Place assembled skillet on a dry, level, heat resistant surface.
2. Insert the Control Master® heat control probe into the skillet so the two electrical pins on the skillet are fully inserted into the
heat control. Connect cord to a 120VAC electrical wall outlet only.
3. Turn Control Master® heat control to desired temperature (see page 3 for cooking temperatures). Remove cover and preheat
skillet. Pilot light goes off when selected temperature is reached (this takes approximately 5 to 10 minutes).
Note: As the skillet heats up, you may hear a clicking sound; this is due to the expansion of the metal as it heats. It is normal.
You may also notice this sound as the unit cools down.
4. Prepare food for cooking. Because the skillet features a ceramic nonstick surface, food may be prepared with little or no oil.
Note: Avoid using no stick cooking sprays as they may cause the cooking surface to become tacky.
5. Place food in skillet and cook according to the temperature-timetable (page 3). Heat should be adjusted according to personal
preference and particular food being cooked. During cooking, pilot light will go on and off indicating desired temperature is
being maintained.
The pouring spout may be used as a handy spoon rest and spatula holder during cooking. For best results use heat-resistant
nylon, plastic, or wooden utensils in the skillet. Do not use metal utensils as they may scratch the ceramic nonstick surface and
also become hot if left in the skillet during cooking. Do not cut foods on the cooking surface.
Caution: When the cover is placed on the skillet and the contents are boiling, it is normal for some steam to vent from the pour
spout. Do not reach for the handles when steam is venting from the spout. Contact with steam can cause burns.
6. Turn heat control to OFF when cooking is completed. Unplug heat control from wall outlet then from appliance. Allow skillet
to cool before cleaning.
2
Care and Cleaning
Before initial use and after each subsequent use, wash the skillet pan and cover in hot, soapy water. Do not use steel wool or abrasive
kitchen cleaners. Rinse and dry thoroughly. The cover can also be washed in an automatic dishwasher.
Note: Repeated washings in an automatic dishwasher will cause the nonstick properties of the ceramic coating to slowly diminish. In
addition, the bottom of the pan will likely discolor due to the caustic nature of the dishwasher detergent.
Do not immerse Control Master® heat control in water or let it come in contact with any liquid.
Rubber feet
To disassemble the skillet for cleaning and storage:
1. Using your thumbs, push the handle latches away from the skillet and rotate the handles
down until they rest on the counter.
2. Lift the skillet pan off of the base and clean as described above.
3. For compact storage, rotate the handles up and inward and place the base in the pan inverted
so the rubber feet are facing up (Fig. D). Then place the cover upright onto the pan.
Fig. D
Glass Cover Care and Use Instructions
Do not use cover if it is chipped or cracked. Handle cover carefully and avoid impact.
Do not handle hot cover with wet towel or place hot cover on a cold or wet surface.
Allow cover to cool before washing. This cover is dishwasher safe. Keep the cover clean. Do not use steel wool cleaning pads or abrasive
powders which can scratch or weaken the glass. Nonabrasive pads or powders may be used if necessary. Do not scrape or gouge glass
with hard or sharp utensils.
CAUTION: Failure to follow these instructions could cause immediate breakage or breakage at a later date for no apparent
reason, which may result in personal injury or property damage.
Periodically check the screws on the cover handle for looseness. Retighten, if necessary. CAUTION: Overtightening can result in stripping of screws or cracking of handle or cover.
IMPORTANT: To ensure continued accuracy of the Control Master® heat control, avoid rough handling in use and storage.
Temperature–Timetable
Food
FRYING
Bacon
Canadian Bacon
Chicken
Eggs, Fried
Eggs, Scrambled
Fish
French Toast
Ham, ½˝ thick
Ham, ¾˝ thick
Hamburgers, ½˝ thick
Minute Steak
Pork Chops, ½˝ thick
Setting
Approximate
Cooking Time
300°–325°F
275°–300°F
325°–350°F
250°–275°F
250°–275°F
325°–375°F
300°–325°F
325°–350°F
325°–350°F
325°–375°F
375°–400°F
325°–375°F
8–10 minutes
3–4 minutes
25–40 minutes
3–5 minutes
3–5 minutes
5–10 minutes
4–6 minutes
10–12 minutes
14–16 minutes
8–12 minutes
4–5 minutes
15–20 minutes
Food
Setting
Approximate
Cooking Time
FRYING (continued)
Pork Chops, ¾˝ thick
Potatoes, Cottage Fried
Sausage, Link
Sausage, Precooked
Sandwiches, Grilled
Steak, Beef 1˝ thick, rare
Steak, Beef 1˝ thick, medium
Steak, Beef 1½˝ thick, rare
Steak, Beef 1½˝ thick, medium
Baking
325°–375°F
300°–350°F
300°–325°F
325°–350°F
300°–325°F
350°–400°F
350°–400°F
350°–400°F
350°–400°F
20–25 minutes
10–12 minutes
20–30 minutes
10–12 minutes
5–10 minutes
6–7 minutes
10–12 minutes
8–10 minutes
18–20 minutes
Pancakes
350°–400°F
2–3 minutes
SIMMERING*
In an electric skillet, foods will heat to simmering at some point between the Warm setting and 200°F. Heat the skillet at 350°F until the food
boils; then place cover on pan and reduce the heat to simmer level by turning the heat control down until the pilot light goes out.
BRAISING OR POT ROASTING
This cooking method involves browning food, usually meat or vegetables in oil, butter, margarine, etc. and then simmering in a small amount of
liquid over low heat. To brown meat and/or vegetables use a temperature between 325°F and 350°F. After browning, simmer as instructed above.
HOLDING TEMPERATURE (after cooking period): Warm
*Add additional liquid during cooking, if necessary, to obtain desired consistency.
3
Consumer Service Information
If you have any questions regarding the operation of your Presto® appliance or need parts for your appliance, contact us by any of
these methods:
• Call 1-800-877-0441 weekdays 8:00 AM to 4:00 PM (Central Time)
• Email us through our website at www.GoPresto.com/contact
• Write: National Presto Industries, Inc.
Consumer Service Department
3925 North Hastings Way
Eau Claire, WI 54703-3703
When contacting the Consumer Service Department, please indicate the model number and the series code for the skillet. These numbers
can be found on the bottom of the plug guard.
Please record this information:
Model Number _________________
Series Code _________________
Date Purchased ____________
Inquiries will be answered promptly by telephone, email, or letter. When emailing or writing, please include a phone number and a time
when you can be reached during weekdays if possible.
The Presto Factory Service Department is equipped to service PRESTO® appliances and supply genuine PRESTO® parts. Genuine PRESTO®
replacement parts are manufactured to the same exacting quality standards as PRESTO® appliances and are engineered specifically to
function properly with its appliances. Presto can only guarantee the quality and performance of genuine PRESTO® parts. “Look-alikes”
might not be of the same quality or function in the same manner. To ensure that you are buying genuine PRESTO® replacement parts,
look for the PRESTO® trademark.
Canton Sales and Storage Company
Presto Factory Service Department
555 Matthews Dr.
Canton, MS 39046-3251
PRESTO® Limited Warranty
(Applies Only in the United States and Canada)
This quality PRESTO appliance is designed and built to provide many years of satisfactory performance under normal
household use. Presto pledges to the original owner that should there be any defects in material or workmanship during the
first year after purchase, we will repair or replace it at our option. Our pledge does not apply to damage caused by shipping.
Outside the United States and Canada, this limited warranty does not apply.
To obtain service under the warranty, please call our Consumer Service Department at 1-800-877-0441. If unable to resolve
the problem, you will be instructed to send your PRESTO® appliance to the Presto Factory Service Department for a quality inspection; shipping costs will be your responsibility. When returning an appliance, please include your name, address,
phone number, and the date you purchased the appliance as well as a description of the problem you are encountering with
the appliance.
We want you to obtain maximum enjoyment from using this PRESTO® appliance and ask that you read and follow the
instructions enclosed. Failure to follow instructions, damage caused by improper replacement parts, abuse, misuse, or neglect
will void this pledge. This warranty gives you specific legal rights, and you may also have other rights which vary from
state to state. This is Presto’s personal pledge to you and is being made in place of all other express warranties.
®
NATIONAL PRESTO INDUSTRIES, INC.
Eau Claire, WI 54703-3703
Form 76-159A
4