1
SEF-1850
SEF-1850-8
EYESAVER ®
Combination Faucet
1
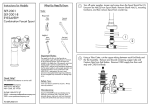
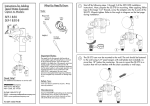
Turn off water supply. Verify diameter of hole in countertop is a
minimum of 1-1/4”. Install mounting studs into base of faucet.
2
Install bottom washer over hoses and slide up to meet the base of
the faucet. Place hoses through hole in countertop/sink one at a time.
Place faucet with studs through hole.
Crescent
Wrench
Flat Head
Screwdriver
The supply line for this unit shall provide an
uninterruptible supply of flushing fluid at a minimum
of 30 psi flowing pressure. If shut off valves are
installed in the supply line of the eyewash, provisions
shall be made to prevent unauthorized shut off.
ANSI Z358.1 requires that all emergency equipment
shall be tested weekly to verify proper operation and
inspected annually to assure conformance with
ANSI Z358.1 requirements. Be sure to read
instructions thoroughly before beginning installation.
Do not overtighten any connections or damage may
occur.
Cover your drain to prevent loss of parts. Always
wear eye protection.
®
Keep the EYESAVER faucet looking new by cleaning
it periodically with a soft cloth. Avoid abrasive
cleaners, steel wool, and harsh chemicals as these
will dull the finish and void your warranty.
92-SEF-1850-R3
3
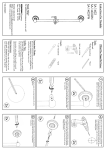
From beneath countertop, slide the rubber mounting washer, then
brass mounting washer over the mounting studs. Thread two (2) brass
nuts onto mounting studs. Align faucet square to sink and tighten
mounting nuts.
5
Locate the other blue hose attached to faucet, and connect it to the “F”
port on the the supply tee. Tighten.
6
Retrieve the 6” long blue hose from the box and connect it to the
remaining port off the tee. Tighten.
1
2
3
4
Locate blue supply hose with the tag reading “EYEWASH”. Connect
to the “E” port of the supply tee (with check valves) and tighten.
CAUTION: HOSES PROVIDED INCLUDE RUBBER COMPRESSION
WASHERS FOR SEALING. DO NOT OVERTIGHTEN.
7
Connect the short blue hose from the tee to the cold supply valve, and
the red (hot) supply hose to the hot supply valve.
9
Before installing aerator, turn on both hot and cold faucet
handles. This will clear out any debris from the supply lines.
HOT
COLD
8
Tighten both supply connections. Open both supply valves and
check for leaks.
NOTE: If shut off valves are installed in the supply line of the eyewash,
provisions shall be made to prevent unauthorized shut off.
10
Close both hot and cold faucet handles. The aerator can now be
installed. Tighten first by hand, followed by the supplied aerator
wrench.
11
Lift eyewash handle to activate the eyewash and test for proper
operation. See chart and notes at right.
12
The faucet spout was designed to swivel from left to right. If a
non-swivel spout is preferred, remove top cover from body. Next,
remove allen head set screw from position “1” as seen below.
Center the spout between the handles and install the previously
removed set screw into position “2” and tighten (DO NOT
OVERTIGHTEN). Replace cap.
1
2
Eyewash Flow Data
A
SEF-1850
SEF-1850-8
FLOWING
PRESSURE
PLUME
DISTANCE "A"
FLOW RATE
psi
bar
gpm
L/min
in.
30
2.07
2.14
8.1
40
2.76
2.25
50
3.45
60
4.14
70
80
FLOWING
PRESSURE
FLOW RATE
PLUME
DISTANCE "A"
cm.
psi
bar
gpm
L/min
in.
cm.
12
30.5
30
2.07
2.15
8.1
17
43.2
8.5
13
33.0
40
2.76
2.24
8.5
18
45.7
2.49
9.4
15
38.1
50
3.45
2.47
9.3
20
50.8
2.70
10.2
18
45.7
60
4.14
2.71
10.3
23
58.4
4.83
2.95
11.2
21
53.3
70
4.83
2.95
11.2
27
68.6
5.52
3.09
11.7
24
61.0
80
5.52
3.13
11.8
29
73.7
NOTE: If plume heights are low, check to ensure that your supply valves are
fully open. If there is a noticeable height difference between the two plumes,
remove the aerators and flow controls and remove any debris that would
inhibit the flow of water.
ROUGH-IN MEASUREMENTS
FRONT VIEW
SEF-1850 SIDE VIEW (LESS HOSES)
9"
130°
5-1/2"
4-1/2"in
4-7/8"
2-5/8"
6" MIN FROM WALL
OR OBSTRUCTION
65°
5-1/8"
7-5/8"
8"
6-3/8"
1-1/4" MINIMUM HOLE SIZE
20” (SEF-1850)
18” (SEF-1850-8)
(3 HOSES)
HOT HOSE
24” MIN - 36” MAX
COUNTERTOP HEIGHT
2" MAX. DECK HEIGHT
5-1/4"
2-1/4"
SEF-1850-8 SIDE VIEW (LESS HOSES)
COLD HOSE
11”
7-1/2"
COLD SUPPLY
EYEWASH HOSE
8-7/8"
12°
6-7/8"
6” LONG HOSE
6" MIN FROM WALL
OR OBSTRUCTION
65°
HOT SUPPLY
REPAIR PARTS
RPG04-0408
CROSS HANDLE GROUP WITH SCREWS, WASHERS, AND INDEX BUTTONS
RPG05-0532-CA
PERFECT VALVE CARTRIDGE ONLY (RED)
RPG05-0533-CA
PERFECT VALVE CARTRIDGE ONLY (BLUE)
G05-0872-PC
1.5 GPM FAUCET AERATOR
RPG05-0908
EYEWASH AERATORS, FLOW CONTROL ADAPTERS, ADAPTER WASHERS, AND FLOW CONTROLS
RPG04-0409
EYEWASH HANDLE WITH YELLOW TEXT AND SET SCREW
RPG05-0910
UPPER EYEWASH COVER WITH FLIP CAPS
RPG05-0909
EYEWASH CARTRIDGE
RPG49-0009
SPOUT QUAD RINGS (3) AND FRICTION WASHER (2)
G01-0053
MOUNTING HARDWARE GROUP
RPG41-0120
SPOUT INDEX BUTTON
RPG41-0285
HANDLE INDEXES AND SCREWS
G05-0627
CHECK VALVE (FOR TEE)
12°
10-7/8"
10"
7-1/4"
2-1/4"
2" MAX DECK HEIGHT
NOTE: UNLESS OTHERWISE SPECIFIED, ALL INLETS ARE 3/8”
COMPRESSION WITH FEMALE THREADS. UNLESS OTHERWISE SPECIFIED,
ALL DIMENSIONS ARE IN INCHES AND ARE SUBJECT TO CHANGE
WITHOUT NOTICE.