1
TM
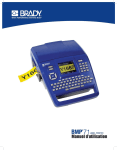
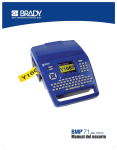
LABEL PRINTER
TUTORIAL
LABEL PRINTER
MOBILE P
Tutorial
The tutorial is divided into eight lessons, some lessons building on techniques and processes
learned in a previous lesson. For the first time user, it is important to perform the lessons in
order, from first to last.
At the beginning of every lesson, the preferred media (continuous or die cut) is listed, as well
as the part number for that media. For best results, follow the guidelines. The section of the
user’s manual addressing the techniques used in the particular lesson is also listed.
Each lesson provides step-by-step instructions on how to achieve the desired results. Some
lessons present multiple ways to accomplish a certain task. Where appropriate, a graphic
representation displays indicating how your label should look if you followed the steps
correctly.
The following lessons are contained in this tutorial.
Lesson 1. Create a 2-Line Label . . . . . . . . . . . . . . . . . . . . . . . . . . . . . . . . 3
Lesson 2. Adding Symbols, Subscript, Frame . . . . . . . . . . . . . . . . . . . . . 6
Lesson 3. Adding Serialization . . . . . . . . . . . . . . . . . . . . . . . . . . . . . . . . . 9
Lesson 4. Save and Open a File . . . . . . . . . . . . . . . . . . . . . . . . . . . . . . . 13
Lesson 5. Create Multiple Labels . . . . . . . . . . . . . . . . . . . . . . . . . . . . . . 14
Lesson 6. Rotating Data . . . . . . . . . . . . . . . . . . . . . . . . . . . . . . . . . . . . . 16
Lesson 7. Barcodes . . . . . . . . . . . . . . . . . . . . . . . . . . . . . . . . . . . . . . . . . 17
Lesson 8. Add Areas . . . . . . . . . . . . . . . . . . . . . . . . . . . . . . . . . . . . . . . . 19
8/12/09
BMP71 Tutorial
YXXXXXX
Lesson 1. Create a 2-Line Label
Lesson 1. Create a 2-Line Label
Media to use: Continuous or M71-31-423
This lesson shows you how to create a simple 2-line label, adding formatting attributes, and
previewing the label before printing. For more information on the techniques used in this
lesson, refer to the Getting Started section (starting on page 35) and the Printing section
(starting on page 79) of the user’s manual.
Entering text
1. On the first line of the label, enter: HOT.
2. To access a new line, press Enter
.
3. On the second line of the label, enter: WATER
Changing Font Size
1. Using up/down navigation keys, place the cursor anywhere on the first line.
2. Press Font
.
3. Using up/down navigation keys, choose: 20 Pt.
4. Press Enter
or OK
.
Highlight Text
1. Using up/down navigation keys, place the cursor on the second line.
2. Using left/right navigation keys, place the cursor at the beginning or end of the line.
3. Hold [Shift] while pressing left/right navigation keys, highlight the word: WATER.
BMP71 Tutorial
3
4
Lesson 1. Create a 2-Line Label
Bold a Word
1. Press Font
.
2. Using left/right navigation keys, choose: Bold.
3. Using up/down navigation keys, choose: ON.
4. Press Enter
or OK
.
5. Press left or right navigation key to remove highlighting.
Custom Font Size
1. With the cursor still on the word WATER, press Font
2. Using up/down navigation keys, choose: Custom.
3. Enter: 18.
4. Press Enter
or OK
.
Preview the Label
1. Press Print Preview
BMP71 Tutorial
.
.
Lesson 1. Create a 2-Line Label
Depending on media used, your label should look like this:
2. Press Clear/Esc
to exit Print Preview.
Note
The contents of this lesson are used in Lesson 2. DO NOT CLEAR THE
CONTENTS OF THIS LESSON!
BMP71 Tutorial
5
6
Lesson 2. Adding Symbols, Subscript, Frame
Lesson 2. Adding Symbols, Subscript, Frame
Media to use: Continuous or M71-31-423
In this lesson you will learn how to add symbols (small graphics), place text in subscript form,
and add a frame around the label. For more information on the techniques used in this lesson,
refer to the Formatting section (starting on page 41) of the user’s manual.
Note
This exercise uses the label created in Lesson 1. Please complete Lesson 1 before
continuing.
Add a Symbol
1. Using navigation keys, place the cursor at the beginning of line 1.
2. Press Symbol
.
3. The Arrows category should already be selected. If not, use left/right navigation keys to
select category: Arrows.
4. Press Enter
or OK
.
5. Using navigation keys, select a left pointing arrow from the grid.
6. Press Enter
or OK
.
7. Using navigation keys, place the cursor at the end of line 1.
8. Press Symbol
.
9. Choose category: Arrows.
10. Press Enter
or OK
.
11. Using navigation keys, select a right pointing arrow from the grid.
12. Press Enter
BMP71 Tutorial
or OK
.
Lesson 2. Adding Symbols, Subscript, Frame
Deleting Text
1. Using navigation keys, place the cursor at the end of line 2.
2. Press Backspace
enough times to delete the word: WATER.
Turn Off Bold
Because the Bold attribute may still be turned on:
1. Press Font
.
2. Using left/right navigation keys, choose: Bold.
3. Using up/down navigation keys, choose: OFF.
4. Press Enter
or OK
.
Text in Subscript
1. Enter the letter: H.
2. Press Subscript
, then enter the number 2, followed by the letter O.
Framing a Label
1. Press Label
.
2. Using left/right navigation keys, choose: Frame.
(Continually press the navigation keys until the FRAME option comes into view.)
3. Using up/down navigation keys, choose: Rect Wide.
4. Press Enter
or OK
.
Note
The frame will not display on the editing screen, but can be viewed in Print
Preview or upon printing the label.
BMP71 Tutorial
7
8
Lesson 2. Adding Symbols, Subscript, Frame
Print the Label
1. Press Print
.
Your label should look like this:
Clear Label
1. Press Clear/Esc
.
2. Choose Delete All Labels.
BMP71 Tutorial
3. Press Enter
or OK
.
4. Press Enter
or OK
again to confirm the deletion.
Lesson 3. Adding Serialization
Lesson 3. Adding Serialization
Media to use: Continuous or M71-31-423
This lesson shows you how to apply serialization to labels and redefine the sequence
numbering. For more information on the techniques used in this lesson, refer to the
Formatting-Serialization section (starting on page 69) of the user’s manual.
AutoSize
Ensure that Auto sizing is on. (The status bar will display an ‘A’ in front of the font size.) If
Auto sizing is NOT on:
1. Press Font
.
2. Choose Auto.
3. Press Enter
or OK
.
Add Serialization
1. Press Serial
.
2. In Start Value field, enter: 1.
3. Press down navigation key to move to the End Value field.
4. In the End Value field, enter: 10.
5. Press down navigation key to move to the Increment field.
6. In the Increment field, enter: 3.
7. Navigate to the OK button at the bottom of the screen and press Enter
or
OK
How many labels are there? ____________ (Check the status bar.)
BMP71 Tutorial
9
10
Lesson 3. Adding Serialization
*Add Separator Line
Note
Perform this task ONLY if using continuous media. If using M71-31-423 media,
proceed to Print Labels.
1. Press Adv Print
.
2. Navigate to the Separator field and press Enter
or OK
to open the drop
down list.
3. Using up/down navigation keys, select Line and press Enter
or OK
4. Navigate to the OK button at the bottom of the screen and press Enter
OK
Note
Pressing [OK] or [ENTER} on the OK button of the Adv Print dialog box will
immediately print the labels using the selected parameters of Adv Print.
Print Labels
1. Press Print
.
Notice how four labels print, the numbers incremented by 3.
BMP71 Tutorial
.
or
Lesson 3. Adding Serialization
Two Sequence Serialization
1. Press Serial
.
2. Navigate to the Add Seq 2 option box.
3. Press Enter
or OK
to place a checkmark in the Add Seq 2 option box.
4. Navigate to the Start Value field of Sequence 2 and enter: A.
5. Press down navigation key to move to the End Value field of Sequence 2 and enter: E.
6. Press down navigation key to move to the Increment field of Sequence 2 and enter: 2
7. Navigate to the OK button at the bottom of the screen and press Enter
or
OK
Print Labels
1. Press Print
.
Your labels, upon printout, should look like this:
BMP71 Tutorial
11
12
Lesson 3. Adding Serialization
Linked Serialization
1. Press Serial
.
2. Navigate to the Linked option box.
3. Press Enter
or OK
to place a checkmark in the Linked option box.
4. Navigate to the OK button at the bottom of the screen and press Enter
OK
How many labels are there? ____________ (Check the status bar.)
Print Preview
1. Press
.
Your labels, in Print Preview, should look like this:
Move Between Labels
To view the other labels in the serialization, within Print Preview:
1. Press up/down navigation keys.
2. Press Clear/Esc
to exit Print Preview.
Note
The contents of this lesson are used in Lesson 4. DO NOT CLEAR THE
CONTENTS OF THIS LESSON!
BMP71 Tutorial
or
Lesson 4. Save and Open a File
Lesson 4. Save and Open a File
Media to use: Continuous or M71-31-423
This lesson shows you how to save labels as a file, for use at a later date. You also learn how to
clear all labels from the screen, reverting back to General Mode with only one label available,
with default settings. For more information on the techniques used in this lesson, refer to the
File Management section (starting on page 75) of the user’s manual.
Note
This lesson saves the labels created in Lesson 3. Please complete that lesson before
continuing.
Save Data
1. Press File
.
2. Choose Save. (It should already be selected.)
3. Press Enter
or OK
.
4. Enter the file name: SERIAL
5. Press Enter
or OK
.
Clear Label
1. Press Clear/Esc
.
2. Choose Delete All Labels.
3. Press Enter
or OK
.
4. Press Enter
or OK
again to confirm the deletion.
Open a File
1. Press File
.
2. Choose Open.
3. Navigate to Serial. (It should already be highlighted.)
4. Press Enter
or OK
.
BMP71 Tutorial
13
14
Lesson 5. Create Multiple Labels
Lesson 5. Create Multiple Labels
Media to use: Continuous or M71-31-423
This lesson shows you how to add labels to a file and move between the different labels. For
more information on the techniques used in this lesson, refer to the Formatting, Label section
(starting on page 51) of the user’s manual.
Make sure your screen is clear of all other data before preceding with this lesson.
Adding Labels
1. On a blank screen, enter: FLAMMABLE
2. Press Label
.
3. Choose Add.
4. Press Enter
or OK
.
Notice the number of labels in the status bar. What label are you on? ___________
5. On the second label, enter: TOXIC.
6. Press Label
.
7. Choose Add and press Enter
or OK
8. On this 3rd label, enter: HAZARD
Use the following shortcut to add another label:
9. Press Add Label
10. On this 4th label, enter: WARNING
BMP71 Tutorial
.
.
Lesson 5. Create Multiple Labels
Move Between Labels
Move to the different labels using the menu:
1. Press Label
.
2. Choose Goto.
3. Enter: 2
4. Press Enter
or OK
.
Note
The current label is listed in the status bar at the top of the screen.
OR, use the following shortcuts:
5. To move to the previous label, press Previous Label
6. To move to the next label, press Next Label
.
.
Clear Label
1. Press Clear/Esc
.
2. Choose Delete All Labels.
3. Press Enter
or OK
.
4. Press Enter
or OK
again to confirm the deletion.
BMP71 Tutorial
15
16
Lesson 6. Rotating Data
Lesson 6. Rotating Data
Media to use: Continuous or M71-31-423
This lesson shows you how to rotate data on the label. For more information on the techniques
used in this lesson, refer to the Formatting, Label section (starting on page 51) of the user’s
manual.
Rotate Data
1. On a blank screen, enter: 123
2. Press Print
.
3. After printing, press Label
.
4. Choose Rotate.
5. Choose 180°.
6. Press Enter
or OK
7. Press Print
.
Compare the two labels.
BMP71 Tutorial
.
Lesson 7. Barcodes
Lesson 7. Barcodes
Media to use: Continuous or M71-31-423
This lesson shows you how to add and edit a barcode on a label containing text. For more
information on the techniques used in this lesson, refer to the Formatting, Barcode section
(starting on page 66) of the user’s manual.
Barcode Setup
1. Clear all labels from the editing screen.
2. Press Setup
.
3. Choose Barcode.
4. Press Enter
or OK
.
5. Use navigation keys to access the Human Readable option box.
6. Press Enter
or OK
.
7. Use up/down navigation keys to select: Below.
8. Press Enter
or OK
.
9. Navigate to the OK button at the bottom of the screen and press Enter
or
OK
10. Press Clear/Esc
to exit the Setup menus.
BMP71 Tutorial
17
18
Lesson 7. Barcodes
Enter a Barcode
If using M71-31-423 media
1. Press Font
If using Continuous media:
1. Use Autosize (default).
.
2. Choose size 14 pt.
3. Press Enter
or OK
4. Press Barcode
.
.
5. Enter the data: 1234578
6. Press Barcode
7. Press Enter
.
, then type the word: WHITE
Edit the Barcode
1. Navigate to the left of the number 7 in the barcode.
2. Enter: 6.
Your label should look like this:
Print Label
1. Press Print
BMP71 Tutorial
.
Lesson 8. Add Areas
Lesson 8. Add Areas
Media to use: Continuous (Areas cannot be added to die cut labels.)
This lesson shows you how to add multiple areas to a single label and format each area
separately from the others. For more information on the techniques used in this lesson, refer to
the Formatting, Area section (starting on page 51) of the user’s manual.
Add Areas
1. Clear the screen of all labels.
2. Press Symbol
.
3. Choose Prohibition category and press Enter
or OK
4. Choose a No Smoking symbol, then press Enter
5. Press Area
or OK
.
.
.
6. Choose Add.
7. Press Enter
or OK
.
The editing screen displays only one area at a time. The newly added area displays as a blank
screen.
8. Press Font
.
9. Enter: 36
Notice how the Custom menu option is immediately accessed.
BMP71 Tutorial
19
20
Lesson 8. Add Areas
10. Press Enter
or OK
..
11. Enter text: NO SMOKING
Use the following shortcut to add another area:
12. Press Add Area
SHIFT
13. Press Symbol
+
+ LABEL
AREA
.
.
14. Choose Fire category and press Enter
or OK
15. Choose a Fire symbol, then press Enter
or OK
Move Between Areas
1. Press Area
.
2. Choose Goto.
3. Enter: 1
4. Press Enter
or OK
.
Change Justification
1. Press Font
.
2. Enter: 72, then press Enter
3. Press Area
or OK
.
.
4. Choose V. Justify.
5. Choose Top, then press Enter
BMP71 Tutorial
or OK
.
.
.
Lesson 8. Add Areas
Use the following shortcut to move to the next area:
6. Press Next Area
, twice.
You should be on Area #3.
Note
Watch the status bar to determine which area you are on.
7. Press Font
.
8. Enter: 72, then press Enter
9. Press Area
or OK
.
.
10. Choose V. Justify.
11. Choose Bottom, then press Enter
or OK
.
Frame an Area
Use the following shortcut to move to the previous area:
1. Press Previous Area
.
You should be on Area #2. Check the status bar for confirmation.
2. Press Area
.
3. Choose Frame.
4. Choose Rounded Medium, then press Enter
or OK
.
BMP71 Tutorial
21
22
Lesson 8. Add Areas
Print Preview and Print
1. Press Print Preview
.
To move through the print preview:
2. Press left/right navigation keys.
To print the label, from Print Preview:
3. Press Print
.
Your label should look like this:
Clear Area
1. Press Area
.
2. Choose Goto.
3. Enter: 3
4. Press Enter
5. Press Clear/Esc
or OK
.
.
6. Choose Clear Area Data, then press Enter
or OK
.
Notice the data is cleared from the area, but the area remains. (Check the status bar. You
should still have three areas.)
BMP71 Tutorial
Lesson 8. Add Areas
Clear Label
1. Press Clear/Esc
.
2. Choose Use Label Defaults, then press Enter
or OK
.
Notice all data and areas are removed. (Check the status bar. You should have one label with
only one area.)
BMP71 Tutorial
23