Transcript
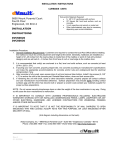
INSTALLATION INSTRUCTIONS
WALL PASS THRU UNITS – BOTTOM HOLD
9800 Mount Pyramid Court
Fourth Floor
Englewood, CO 80112
INSTALLATION
Tools and Materials that may be required:
• 4, 10/32 Screws (provided).
• Phillips head screw driver
• Other tools/materials may also be
necessary depending upon actual
installation
INSTRUCTIONS
DVWM0062SH
Installation Procedure:
1. Determine the location of the Top Pass Thru-Wall Vault unit. The Top Vault is dVault Product Number
DVWM0062S and is sold separately.
General Installation: Wall Pass Thru units may be installed in finished or unfinished walls (such as a garage wall).
IMPORTANT NOTE: If installation is intended for a finished wall, it is very important to consult with licensed
professionals. Finished walls may conceal electrical, plumbing or other elements that may be hazardous requiring
licensed professional installation.
Other installations such as pillars or gated entryways may require a mason or ironworker. Always consult with a
professional prior to installing your wall pass thru unit.
2. Install optional package drop hold with four Phillips head machine screws (4, 10/32” X 1/2”). Open the key-locked
access door to gain access and see assembly holes. Align the bottom hold with the pem nut holes in the Top
Vault. Install all four screws and tighten as needed (Caution: Do not over tighten screws).
3. Check installation for airways and gaps that may require insulation, flashing, sealing and/or trim work.
NOTE: Do not veneer security-drop door or alter the weight of the door mechanisms in any way. Doing so may
cause the door mechanisms to malfunction.
IT IS IMPORTANT TO CONSULT WITH LICENSED PROFESSIONALS WHEN INSTALLING WALL-MOUNT
UNITS IN EXISTING OR FINISHED WALLS. WARNING: FINISHED WALLS MAY CONCEAL ELECTRICAL
WIRING, PLUMBING AND/OR OTHER HAZARDOUS ELEMENTS.
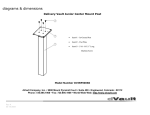
(installation diagram on the back)
Rev B
01-16-2012