Transcript
Mounting and Use Instructions
Thank you for purchasing this premium locking mailbox. We know you'll be satisfied with the years of
service it will provide. If you have any questions about how to mount or use this mailbox, or if you need
any replacement parts, please call us directly at (800) 464-7491 or contact us as
www.architecturalmailboxes.com.
Mounting your new mailbox
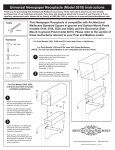
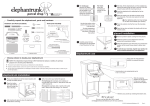
1
While holding the opened box against
the wall at the desired location, mark
the wall at the top of each top
mounting hole. Use a level to make
sure the box is positioned correctly.
2
Drill into the wall at each marked location. Use
a 1/4" drill bit for brick or other masonry wall.
Use a 1/16" drill bit for wood wall.
1/4" masonry bit
- or 1/16" wood bit
X2
4
X2
A) Mount the box temporarily using two screws in the
top holes.
B) Mark the wall at the center of the two bottom holes
and remove the box by sliding it off the two top screws.
C) Repeat steps 2 and 3 for the two bottom holes.
3
For brick or other masonry wall,
insert a plastic anchor
(included) into each hole. Tap
in gently if necessary. This step
is not required if mounting on a
wood wall.
D) Securely remount the box using all 4 included
screws.
X2
Using your new mailbox
INCOMING MAIL - Your new mailbox is equipped with an incoming slot for mail delivery. The slot is large enough to fit
many commonly delivered items, such as videocassettes and bank check boxes.
KEYS - Your new mailbox comes with two keys. The keys allow access to the mail storage compartment. To retrieve
incoming mail, simply open the access door with the key.
ARCHITECTURAL MAILBOXES
(800) 464-7491 www.architecturalmailboxes.com
© 2003, Architectural Mailboxes