Transcript
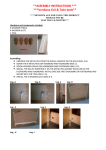
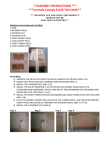
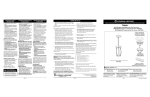
INSTALLATION INSTRUCTIONS FOR 5/8” SINGLE ROD SET
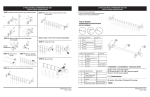
ADAPTER PACK (A) - Finials with a post
NOTE: These instructions are for finials with a post that use ADAPTER PACK ® .
If your finial is a hollow slide-on type, please see the reverse side of these instructions and use ADAPTER PACK ® .
=>
SI
Place brackets against wall at desired locations.
2
instruction at the bottom of the page.
istance
re DIS
> Meas u
a
. +
ana”
wu...
+
PA ——
X
M
If screws are going directly into wood trim or
Mark screw holes with pencil. Be sure marks are wall stubs, drill a 1/8” pilot hole at pencil marks.
level across opening. If screwing into drywall, follow drywall anchor
pa AS
ASSEMBLE ROD
Assemble the rod by inserting and sliding the smaller
diameter rod into the larger diameter rod. For a three
piece rod, place the single rod size in the center
position.
ATTACHING DRAPERY
Slide the drapery onto the pole.
>”
ATTACHING FINIALS Extend rod to desired width. Lift rod with drapery and drop into brackets.
There are two sizes of adapters included. For a three piece rod, there is Adjust draperies to desired position.
only one size of adapters.
à.
Push corresponding insert into each end of
rod with the fin side going into the pole and the
flatted end facing out.
FLATTED END FIN SIDE
b
Attach finials by pushing the end of the finial post into
the end of the plastic insert until completely snug.
Rotate finial on rod for proper alignment if required.
AB HE
ZZ
DRYWALL ANCHOR
INSTALLATION
Extra adapters pack can be discarded.
If screws are going directly into wood trim or wall studs - drill 1/8” (3mm) holes and install screws through bracket.
If screws are going into hollow wall - drill 3/16” (5mm) holes and push or lightly hammer plastic anchors into holes.
Then install screws through brackets. Do not tighten screws too much - just snug is best.
AN
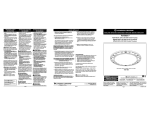
INSTALLATION INSTRUCTIONS FOR 5/8” SINGLE ROD SET
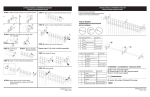
ADAPTER PACK (B) - Hollow Slide-on Finial
NOTE: These instructions are for hollow slide-on finials that use ADAPTER PACK ® :
If your finials are with a post type, please see the reverse side of these instructions and use ADAPTER PACK ® .
NS
«+
=
level across opening.
a
+
ap”
If screwing into drywall, follow drywall anchor
instruction at the bottom of the page.
sure Distance
. Mea
RACE
o*
PA ——
X
M
Place brackets against wall at desired locations. If screws are going directly into wood trim or
Mark screw holes with pencil. Be sure marks are wall stubs, drill a 1/8” pilot hole at pencil marks.
ASSEMBLE ROD
Assemble the rod by inserting and sliding the smaller
diameter rod into the larger diameter rod. For a three
piece rod, place the single rod size in the center
position.
ATTACHING DRAPERY
Slide the drapery onto the pole.
> rs”
Drapery—"
ATTACHING FINIALS
There are two sizes of adapters included. For a three piece rod, there is
only one size of adapters.
a
Insert the finial adapter into the rod with it's larger
partitioned side entering the rod first
т
Extend rod to desired width. Lift rod with drapery and drop into brackets.
Adjust draperies to desired position.
b.
Press finials onto the end of the plastic adapter until
completely snug.
SE
DRYWALL ANCHOR
INSTALLATION
Extra adapters pack can be discarded.
If screws are going directly into wood trim or wall studs - drill 1/8” (3mm) holes and install screws through bracket.
If screws are going into hollow wall - drill 3/16” (6mm) holes and push or lightly hammer plastic anchors into holes.
Then install screws through brackets. Do not tighten screws too much - just snug is best.
AO