1
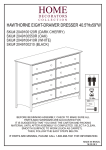
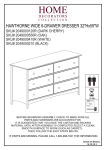
HAWTHORNE 4 + 2 DRAWER CHEST 48.5"Hx37”W
SKU# 3064000120R - DARK CHERRY
SKU# 3064000550R - OAK
SKU# 3064000410R - WHITE
SKU# 3064000210 - BLACK
60 Min.
BEFORE BEGINNING ASSEMBLY, CHECK TO MAKE SURE ALL
PARTS AND HARDWARE ARE ACCOUNTED FOR.
IT IS SUGGESTED THAT YOU SAVE THE CARTON AND PACKING
MATERIAL UNTIL AFTER ASSEMBLY IS COMPLETED SELECT A CLEAN,
SMOOTH SURFACE TO WORK (SUCH AS CARPET).
THEN, FOLLOW THE EASY STEPS BELOW.
IF PARTS ARE MISSING, PLEASE CALL 1-800-998-7021 FOR INFORMATION.
MADE IN BRAZIL
16 02 04 2
1
4
16
12
15
4
3
14
13
12
13
2
13
13
13
37
5
6
32
34
31
36
35
x2
33
31
32
30
x4
Part#
1
2
3
4
5
6
16
12
15
14
13
30
31
32
33
34
35
36
37
Qty
1
1
1
2
1
1
1
2
1
1
5
4
6
6
4
4
2
2
1
Description
Top
Left Side
Right Side
Rail
Front Rail
Bottom Panel
Divider
Back Panel
Panel Connector
Rail
Rail
Large Drawer Front
Left Drawer Side
Right Drawer Side
Large Drawer Bottom
Large Drawer Back
Small Drawer Front
Small Drawer Bottom
Small Drawer Back
Sizes (w x d x h)
37 3/8¨ X
47 1/8¨ X
47 1/8¨ X
15 15/16¨ X
32 9/16¨ X
32 9/16¨ X
17 1 / 2¨ X
42 1 / 2¨ X
42 1 / 2¨ X
32 5/16¨ X
32 5/8¨ X
32 1 / 2¨ X
15 9/16¨ X
15 9/16¨ X
31 9/16¨ X
31 1/16¨ X
15 13/16¨ X
14 7/8¨ X
14 7/16¨ X
19¨ X
17 13/16¨ X
17 13/16¨ X
1 9/16¨ X
2 1 / 2¨ X
16 5/8¨ X
8 5/16¨ X
16 5/8¨ X
13/16¨ X
1 9/16¨ X
1 9/16¨ X
7 3/8¨ X
6 15/16¨ X
6 15/16¨ X
15 1 / 2¨ X
6 15/16¨ X
7 3/8¨ X
15 1 / 2¨ X
6 15/16¨ X
3/4¨
1 5/8¨
1 5/8¨
11/16¨
11/16¨
1/8¨
1 9/16¨
1/8¨
1/4¨
11/16¨
11/16¨
9/16¨
9/16¨
9/16¨
1/8¨
9/16¨
9/16¨
1/8¨
9/16¨
A
1/4¨ x 1 3/16¨
50
B
31
C
31
D
E
1/8¨ x 1 3/16¨
1/16¨ x 7/8¨
F
G
HARDWARE PACK
30
10
1/8¨ x 1 3/16¨
10
10
H
I
48
1/8¨ x 5/8¨
10
STEP
1. Prepare for future assembly by:
* Insert wood dowels (A) into all drawer sides (31) & (32)
* Insert wood dowels (A) into all rails (4), (13 & (14)
* Insert wood dowels (A) into the side parts (2) & (3)
* Insert wood dowels (A) into the divider (16)
* screw mini-fix pins (B) into the top panel (1)
* screw mini-fix pins (B) into the side parts (2) & (3)
* screw mini-fix pins (B) into the rails (13) & (14)
* screw mini-fix pins (B) into the divider (16)
1
B
B
B
B
16
B
A
A
A
B
B
A
B
1
B
B
B
B
B
B
A
X2
4
B
2
B
B
B
A
B
A
A
B
32
X6
B
B
B
A
3
B
A
31
A
B
A
B
X6
B
A
A
A
B
14
B
A
A
B
13
A
13
B
X5
A
A
A
B
X50
X31
STEP
2
2. Using the dowels and mini-fix pins previously attached in step
1 as guide, assemble the rails (4) & (14) to divider(16) as shown.
Secure the rails to the divider using mini-fix drums (C) in a
clockwise motion as shown:
14
4
C
C
C
C
4
X3
16
C
STEP
3
3. Using the dowels and mini-fix pins previously attached in step
1 as guide, assemble the rails (4), (13) & (14) to side(2) as shown.
Next align and attach the side (3) making sure all dowels and holes
are matched up.
Secure the rails to the sides using mini-fix drums (C) in a clockwise
motion as shown:
C
4
2
C
14
C
C
13
C
C
4
13
C
C
13
13
C
13
C
C
C
C
X12
13
3
C
STEP
4. Attach the front rail (5) to the bottom rail (13) using the
mini-fix pins as guides, secure using mini-fix drums (C) as shown.
4
5
C
C
C
5
C
C
X3
STEP
5
5. Secure the bottom panel (6) using nails (E) as shown.
E
E
6
E
E
E
E
E
E
E
X8
STEP 6
6. Attach the top panel (1) and secure using mini-fix drums (C)
as shown.
C
C
2
C
1
C
C
C
C
C
3
C
X9
7. Turn your chest upright and secure the last rail (13) using
mini-fix drums (C) as shown.
STEP 7
C
C
13
C
C
X4
C
13
C
STEP
8
8. Using dowels as your guide, aling and attach a left (31) and a
right (32) drawer side to a drawer front (35) as shown. Secure using
screws (D) as show.
D
35
31
x2
D
D
D
32
X8
STEP
9
9. Slide in the drawer bottom (36) as shown.
36
x2
S T E P 10
10. Align and attach the drawer back (37) as shown, secure using
screws (D).
D
D
D
X8
37
D
D
x2
11. Attach the drawer knobs (F) to the drawer front (35) using screws
(G) as shown. Then, attach the plastic drawer stop (H) to the drawer
back (37) using screw (I) as shown.
S T E P 11
I
H
I
37
H
F
37
G
X2
G
35
F
x2
X2
I
H
X2
X2
12. Using dowels as your guide, aling and attach a left (31) and a
right (32) drawer side to a drawer front (30) as shown. Secure using
screws (D) as show.
S T E P 12
D
31
30
x4
D
D
32
D
X16
S T E P 13
13. Slide in the drawer bottom (33) as shown.
33
x4
S T E P 14
14. Align and attach the drawer back (34) as shown, secure using
screws (D).
D
D
34
x4
D
D
D
X16
S T E P 15
15. Attach the drawer knobs (F) to the drawer front (30) using screws
(G) as shown. Then, attach the plastic drawer stop (H) to the drawer
back (34) using screw (I) as shown.
I
I
H
H
34
F
34
G
I
H
X8
F
30
G
G
x4
F
X8
I
H
X8
S T E P 16
X8
16. Slide in the drawers. To remove the drawer you must press
down the drawer stop as shown.
30
30
30
30
S T E P 17
17. Slide in the drawers. To remove the drawer you must press
down the drawer stop as shown.
35
35
S T E P 18
18. Complete the assembly of your chest by nailing the back panel
(12) using nails (E).
E
15
E
E
E
E
E
E
E
E
E
12
E
E
E
12
E
E
E
E
E
E
E
E
E
E
X22
STEP
1
Tipping restraint
Instructions
D
TIPPING RESTRAINT
HARDWARE
AA
B
1
C
• 1 nylon strap
B
B
1
• 1 ½”screw
C
C
1
D
D
2
Ø6
• 1 plastic screw anchor
• 2 wall brackets
E
1
• 1 small screw
E
D
• When properly installed, this hardware can provide
protection against the unexpected tipping of furniture.
• Attach one of the mounting brackets “D” securely to
the back top edge of the unit using the short screw “E”.
• Mark the location on the wall for mounting the second bracket "D".
Drill the appropriate sized hole in the wall and insert the plastic screw anchor "C".
Then secure the bracket to the wall using screw "B".
• Place the unit so the bracket on the back edge of unit is in line with the bracket on the wall.
STEP
2
A
• Lace the end of the nylon restraint strap “A” through
each bracket. Bring both ends together and slide the beaded
end of the strap through the keyhole shaped slot on the other
end. Pull down on the beaded end until it snap-locks into the keyhole.
• Check to make sure the strap is securely laced and locked to the brackets.