1
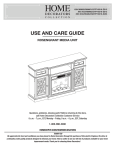
1000 026 182/24BV2982-C248
USE AND CARE GUIDE
AITKEN BATHROOM VANITY
Questions, problems, missing parts? Before returning to the store,
call Home Decorators Collection Customer Service
8 a.m. - 6 p.m., EST, Monday - Friday
1-800-986-3460
HOMEDEPOT.COM/HOMEDECORATORS
THANK YOU
We appreciate the trust and confidence you have placed in Home Decorators Collection through the purchase of this bathroom vanity. We strive
to continually create quality products designed to enhance your home. Visit us online to see our full line of products available for your home
improvement needs. Thank you for choosing Home Decorators Collection!
Table of Contents
Safety Information ..................................................... 2
Warranty ..................................................................... 3
Pre-Installation .......................................................... 4
Hardware Included ............................................................ 4
Package Contents ...............................................................4
Installation ..................................................................5
Care and Cleaning .....................................................9
Replacement Parts ..................................................10
Safety Information
Please read and understand this entire manual before attempting to assemble, operate or install
the product.
WARNING: Some steps are more easily handled with two
adults.
WARNING: Assembly and unpacking requires two adults.
CAUTION: Before installation, carefully use scissors or a
utility knife to cut and unwrap all parts. Make sure you do not
discard the hardware.
CAUTION: Use care when installing your new vanity; take
your time and follow the installation instructions closely.
2
Warranty
1 Year Limited Warranty: The manufacturer warrants this product to be free from manufacturing and material defects for a period of one
year from date of purchase, subject to the following conditions and limitations:
1.
Install and operate this Bathroom Vanity in accordance with the installation and operating instructions furnished with the product
at all times. Any unauthorized repair, alteration, willful abuse, accident, or misuse of the product shall nullify this warranty.
2.
This warranty is non-transferable and is made to the original owner, provided that the purchase was made through an authorized
supplier of the product.
3.
The warranty is limited to the repair or replacement of part(s) found to be defective in material or workmanship, provided that
such part(s) have been subjected to normal conditions of use and service, after said defect is confirmed by the manufacturer’s
inspection.
4.
The manufacturer may, at its discretion, fully discharge all obligations with respect to this warranty by refunding the wholesale
price of the defective part(s).
5.
Any installation, labor, construction, transportation, or other related costs/expenses arising from defective part(s), repair,
replacement, or otherwise of same, will not be covered by this warranty, nor shall the manufacturer assume responsibility
for same.
6.
The owner/user assumes all other risks, if any, including the risk of any direct, indirect or consequential loss or damage arising out
of the use, or inability to use the product, except as provided by law.
7.
All other warranties – expressed or implied – with respect to the product, its components and accessories, or any obligations/
liabilities on the part of the manufacturer are hereby expressly excluded.
8.
The manufacturer neither assumes, nor authorizes any third party to assume on its behalf, any other liabilities with respect to
the sale of the product.
9.
The warranties as outlined within this document do not apply to non accessories used in conjunction with the installation of
this product.
10. This warranty gives you specific legal rights, and you may also have other rights which vary from state to state.
This warranty is void if:
a. There has been unauthorized alteration, willful abuse, accident, or misuse of the product.
b. You do not have the original receipt of purchase.
IF WARRANTY SERVICE IS NEEDED
Contact the customer service department at 1-800-986-3460,
8 a.m.-6 p.m., EST, Monday-Friday. Make sure you have your warranty, your sales receipt,
location of purchase and the model/serial number of your product.
Shade variations and patterns are an inherent characteristic of Stone (e.g. Granite, Cultured Marble). Stone Tops will vary from product
to product.
Use caution when placing items on the stone surface such as soap or any fragranced material. Use a soap dish, coaster or similar item
to protect the surface if placing any soap or fragranced products on the stone. If soap or fragranced products
come in contact with the Stone Top, rinse the surface with water and dry using a soft non-abrasive cloth.
There are Stone Care products available at your local home center store which should be used periodically to clean and
protect the Stone Top. Follow the manufacturers directions on how to use.
Do not use products to clean the Stone Top that contain acetone, lemon, vinegar or other acids as these may cause
damage to the stone surface.
3
HOMEDEPOT.COM/HOMEDECORATORS
Please contact 1-800-986-3460 for further assistance.
Pre-Installation
HARDWARE INCLUDED
AA
BB
CC
DD
EE
FF
Part
Description
Part Number
Quantity
AA
Bolt
N/A
4
BB
Lock Washer
N/A
4
CC
Flat Washer
PH-WSRBLK001
4
DD
Towel Bar with Screws
N/A
1
EE
Faucet and Drain Kit
N/A
1
FF
Hex Wrench
N/A
1
GG
Touch-up Pen
N/A
1
PACKAGE CONTENTS
B
E
A
B
C
Part
Description
D
Quantity
A
Vanity
1
B
Sink
1
C
Left Leg
1
D
Right Leg
1
E
Vanity Top
1
4
GG
Installation
1
2
Attaching the legs
Securing the legs to the vanity
Secure the legs by inserting bolts (AA) with lock washers
(BB) and flat washers (CC) through the pre-drilled holes
in the vanity (A) and into the legs (C and D).
Tighten with the hex wrench (FF).
Place the vanity (A) face down on a scratch free surface.
Insert the left leg (C) and right leg (D) into the corners
of the vanity as shown.
A
CC
BB
AA
FF
A
C
D
5
HOMEDEPOT.COM/HOMEDECORATORS
Please contact 1-800-986-3460 for further assistance.
Installation (continued)
3
4
Positioning the vanity against the
wall
Adjusting the levelers
Turn the levelers on the bottom of the vanity until the
vanity is sitting level on the ground.
Find and mark locations of wall studs behind the
permanent location of the vanity (A).
Place the vanity (A) against the wall in the
desired permanent location.
Be sure the vanity (A) location is accessible to
water supply and drain lines before mounting.
A
NOTE: It is very important that your unit
is level. After moving your unit to its final
location, you may need to adjust the floor
levelers.
6
Installation (continued)
6
5 Securing the vanity to the wall
Attaching the towel bar
Attach the towel bar (DD) by screwing in screws from
inside the vanity (A) as shown.
WARNING: The vanity needs to be
mounted to the wall to prevent accidental
tipping.
NOTE: If possible, secure the vanity (A)
to two wall studs for increased stability.
Drill two holes through the vanity (A) mounting
area.
Use proper hardware (not included) to secure the
vanity (A) to at least one wall stud.
The other attachment point can be to drywall
with a toggle bolt.
DD
7
HOMEDEPOT.COM/HOMEDECORATORS
Please contact 1-800-986-3460 for further assistance.
Installation (continued)
8
the vanity top to
7 Attaching
the vanity
Preparing the sink
Clean the bottom surface of the sink (B) to prepare for
bonding to the vanity top (E).
Make sure the sink (B) is completely dry before
applying adhesive (not included).
Apply a uniform bead of adhesive around the bottom
outer ring of the sink (B).
Be sure to follow the adhesive directions.
WARNING: It is recommended two
adults handle the stone top to prevent
personal injury or damage to the stone.
Prepare the vanity top (E) for bonding to the vanity
(A) by cleaning the top surface of the vanity (A).
Make sure the vanity (A) is completely dry.
Apply proper adhesive bead (not included) on the
top surface of the vanity (A).
Be sure to follow adhesive instructions.
Carefully lower the vanity top (E) onto the vanity (A).
The vanity top (E) should be pushed all the way
back until it contacts the wall.
Allow adhesive to dry completely before continuing
assembly.
$'
E
B
9(
(6,
$'+
(
,9
6
+(
A
8
Installation (continued)
the sink, faucet, and drain
9 Attaching
kit to the vanity
NOTE: Install the faucet and drain set
according to the manufacturer’s
directions.
EE
NOTE: Assembly instructions for the
faucet and drain kit (EE) are enclosed in
the faucet and drain kit box.
B
Carefully lower the sink (B) onto the vanity top (E).
Align the sink's drain hole with the inner hole of
the vanity top (E).
Follow the manufacturer's enclosed assembly
instructions for faucet and drain kit installation.
E
Care and Cleaning
Dust the vanity regularly with a soft, non-lint producing cloth or household dusting product.
You can clean the vanity with a gentle, non-abrasive household cleaner.
Make sure to dry the wood immediately with a soft cloth or towel.
Tips for using touch-up pen (GG): For scratches, stroke in direction of scratch; for worn areas,
stroke in direction of wood grain. Rub excess colorant promptly with a soft cloth.
Do not use the touch-up pen on the vanity top!
9
HOMEDEPOT.COM/HOMEDECORATORS
Please contact 1-800-986-3460 for further assistance.
Replacement Parts
For replacement parts, call our customer service department at 1-800-986-3460, 8 a.m.-6 p.m., EST, Monday-Friday.
Part
Description
Part Number
Qty
HH
Leveler
PH-LVRBLK001
2
HH
10
Questions, problems, missing parts? Before returning to the store call
Home Depot Customer Service
8 a.m. - 6 p.m., EST, Monday-Friday
1-800-986-3460
HOMEDEPOT.COM/HOMEDECORATORS
RETAIN THIS MANUAL FOR FUTURE USE.
1000 026 182/24BV2982-C248
GUÍA DE USO Y CUIDADO
VANITORY AITKEN
¿Preguntas, problemas, piezas faltantes? Antes de devolver el producto a la tienda,
comuníquese con el servicio de atención al cliente de Home Decorators Collection
de lunes a viernes de 8 a. m. a 6 p. m., hora estándar del Este
al 1-800-986-3460.
HOMEDEPOT.COM/HOMEDECORATORS
GRACIAS
Le agradecemos la confianza que deposita en Home Decorators Collection mediante la compra de este vanitory. Nos esforzamos
constantemente por crear productos de calidad diseñados para mejorar su hogar. Visítenos en línea para ver nuestra línea completa de
productos disponibles para satisfacer sus necesidades de mejora en el hogar. ¡Gracias por elegir Home Decorators Collection!
Índice
Información de seguridad......................................... 2
Garantía ...................................................................... 3
Antes de la instalación .............................................. 4
Tornillería incluida ............................................................ 4
Contenido del paquete .......................................................4
Instalación ..................................................................5
Cuidado y limpieza .....................................................9
Repuestos .................................................................10
Información de seguridad
Lea y comprenda este manual en su totalidad antes de ensamblar, operar o instalar el producto.
ADVERTENCIA: Algunos pasos pueden llevarse a cabo más
fácilmente si hay dos adultos.
ADVERTENCIA: Son necesarios dos adultos para realizar el
ensamblaje y el desembalaje.
PRECAUCIÓN: Antes de la instalación, utilice un par de
tijeras o un cúter para cortar y desembalar todas las piezas.
Asegúrese de no desechar la tornillería.
PRECAUCIÓN: Instale su nuevo vanitory con cuidado;
tómese su tiempo y siga cuidadosamente las instrucciones de
instalación.
2
Garantía
Garantía limitada de 1 año: El fabricante garantiza este producto contra defectos en materiales y fabricación durante un período de un
año desde la fecha de compra, sujeto a las siguientes condiciones y limitaciones:
1.
Instale y opere este vanitory según las instrucciones de instalación y operación que se proporcionan con el producto.
en todo momento. Cualquier arreglo, alteración, abuso deliberado, accidente o uso inadecuado del producto invalidará esta
garantía.
2.
Esta garantía no es transferible y se otorga al comprador original, siempre que la compra se haya realizado a través de un
proveedor autorizado del producto.
3.
La garantía se limita al arreglo o reemplazo de piezas que presenten defectos en material o mano de obra, siempre que estas
piezas hayan estado sujetas a condiciones normales de uso y mantenimiento, luego de que dicho defecto sea confirmado
mediante inspección del fabricante.
4.
El fabricante puede, a su criterio, cumplir con todas sus obligaciones con respecto a esta garantía mediante el reembolso del
precio de venta al por mayor de las piezas defectuosas.
5.
Esta garantía no cubrirá ningún costo ni gasto de instalación, trabajo, construcción, transporte, ni ningún otro costo o gasto
relacionado que surja de piezas defectuosas, arreglos, reemplazos o cuestiones similares; el fabricante no asumirá ninguna
responsabilidad ante estos casos.
6.
El propietario o usuario asume todo otro riesgo, si existiese, lo que incluye el riesgo de cualquier pérdida o daño directo, indirecto o
resultante que surja del uso, o incapacidad de uso, del producto, excepto lo establecido por la ley.
7.
Toda otra garantía, expresa o implícita, con respecto al producto, sus componentes y accesorios, o cualquier obligación o
responsabilidad por parte del fabricante queda por el presente excluida.
8.
El fabricante tampoco asume, ni autoriza a un tercero a asumir en su nombre, ninguna otra responsabilidad con respecto a
la venta del producto.
9.
Las garantías según se mencionan en este documento no se aplican a los accesorios que se utilicen junto a la instalación de
este producto.
10. Esta garantía le otorga derechos legales específicos y puede gozar de otros derechos que varían de un estado a otro.
Esta garantía queda anulada ante los siguientes casos:
a. Si existe alteración, abuso deliberado, accidente o uso inadecuado del producto.
b. Si no posee el recibo de compra original.
SI NECESITA SERVICIO CUBIERTO POR LA GARANTÍA
Comuníquese con el departamento de atención al cliente al 1-800-986-3460,
de lunes a viernes de 8 a. m. a 6 p. m., hora estándar del Este. Asegúrese de contar con su garantía, su recibo de compra,
el lugar de compra y el número de modelo o serie de su producto.
Las variaciones en tonos y los patrones son características inherentes de la piedra (por ejemplo, granito, mármol). Las encimeras varían
de un producto a otro.
Tenga cuidado al colocar artículos sobre la superficie de piedra, como jabón o cualquier producto con perfume. Utilice una jabonera,
un portavasos o un artículo similar para proteger la superficie al colocar cualquier jabón o producto con perfume sobre la piedra. Si el
jabón o productos con perfume toman contacto con la encimera de piedra, enjuague la superficie con agua y séquela con un paño suave
y no abrasivo.
Existen productos para cuidar la piedra disponibles en su tienda local de productos para el hogar que deben utilizarse periódicamente
para limpiar y proteger la encimera de piedra. Siga las instrucciones del fabricante sobre su uso.
No utilice productos para limpiar la encimera de piedra que contengan acetona, limón, vinagre ni otros ácidos que puedan
dañar la superficie de piedra.
3
HOMEDEPOT.COM/HOMEDECORATORS
Comuníquese al 1-800-986-3460 para obtener más ayuda.
Antes de la instalación
TORNILLERÍA INCLUIDA
AA
BB
CC
DD
EE
FF
GG
Pieza
Descripción
Número de pieza
Cantidad
AA
Perno
N/D
4
BB
Arandela de seguridad
N/D
4
CC
Arandela plana
PH-WSRBLK001
4
DD
Barra para toalla con tornillos
N/D
1
EE
Kit de grifo y desagüe
N/D
1
FF
Llave hexagonal
N/D
1
GG
Lápiz para retoques
N/D
1
CONTENIDO DEL PAQUETE
B
E
A
B
C
Pieza
Descripción
D
Cantidad
A
Vanitory
1
B
Grifo
1
C
Pata izquierda
1
D
Pata derecha
1
E
Encimera del vanitory
1
4
Instalación
1
2
Unión de las patas
Aseguramiento de las patas
a la encimera
Asegure las patas insertando los pernos (AA) con las
arandelas de seguridad (BB) y las arandelas planas (CC)
a través de los agujeros pretaladrados en el vanitory (A)
y en las patas (C y D).
Ajuste con la llave hexagonal (FF).
Coloque el vanitory (A) boca abajo en una superficie en
perfecto estado.
Inserte la pata izquierda (C) y pata derecha (D) en las
esquinas del vanitory, como se muestra.
A
CC
BB
AA
FF
A
C
D
5
HOMEDEPOT.COM/HOMEDECORATORS
Comuníquese al 1-800-986-3460 para obtener más ayuda.
Instalación (continuación)
3
4
Posicionamiento del vanitory contra
la pared
Regular los niveladores
Gire los niveladores que se encuentran en la parte de
abajo del vanitory hasta que esté apoyado de forma
pareja en el piso.
Encuentre y marque las ubicaciones de las
columnas detrás de la ubicación permanente del
vanitory (A).
Coloque el vanitory (A) contra la pared en la
ubicación permanente deseada.
Asegúrese de que la ubicación del vanitory (A)
sea accesible para el suministro de agua y las
líneas de desagüe antes de su montaje.
A
NOTA: Es muy importante que su unidad
esté nivelada. Luego de mover la unidad
hasta su ubicación final, quizás deba
regular los niveladores de piso.
6
Instalación (continuación)
6
5 Fijar el vanitory a la pared
Sujeción de la barra para toalla
Sujete la barra para toalla (DD) con los tornillos desde
dentro del vanitory (A), como se muestra.
ADVERTENCIA: El vanitory debe
montarse a la pared para evitar que se
caiga accidentalmente.
NOTA: De ser posible, fije el vanitory (A) a
dos columnas para una mayor estabilidad.
Taladre dos agujeros en el área de montaje del
vanitory (A).
Utilice las herramientas apropiadas (no incluidas)
para asegurar el vanitory (A) a, al menos, una
columna.
El otro punto de sujeción puede ser un panel de
yeso con un perno acodado.
DD
7
HOMEDEPOT.COM/HOMEDECORATORS
Comuníquese al 1-800-986-3460 para obtener más ayuda.
Instalación (continuación)
de la encimera del vanitory
8
7 Unión
con el vanitory
Preparación del lavabo
Limpie la superficie inferior del grifo(B) como
preparación antes de su unión con la encimera del
vanitory (E).
Asegúrese de que el lavabo (B) esté completamente
seco antes de aplicar el adhesivo (no incluido).
Aplique una cantidad uniforme de adhesivo alrededor
del anillo exterior inferior del grifo (B).
Asegúrese de seguir las instrucciones del adhesivo.
ADVERTENCIA: Se recomienda que dos
adultos se encarguen de la encimera de piedra
para prevenir el daño personal o el daño a la
piedra.
Prepare la encimera del vanitory (E) para su unión
con el vanitory (A). Para ello, limpie la superficie
superior del vanitory (A).
Asegúrese de que el vanitory (A) esté
completamente seco.
Aplique una cantidad uniforme de adhesivo (no
incluido) en la superficie superior del vanitory (A).
Asegúrese de seguir las instrucciones del adhesivo.
Baje cuidadosamente la encimera del vanitory (E)
hasta el vanitory (A).
La encimera del vanitory (E) debe estar
completamente en contacto con la pared.
Deje secar el adhesivo completamente antes de
continuar con la instalación.
$'
E
B
9(
(6,
$'+
(
,9
6
+(
A
8
Instalación (continuación)
del kit de lavabo, grifo y
9 Unión
desagüe al vanitory
NOTA: Instale el grifo y el conjunto de
desagüe según las instrucciones del
fabricante.
EE
NOTA: Las instrucciones de ensamblaje
para el kit de grifo y desagüe (EE) están
adjuntas en la caja del kit.
B
Baje cuidadosamente el grifo(B) hacia la
encimera del vanitory (E). Alinee el agujero de
desagüe del grifo con el agujero interno de la
encimera del vanitory (E).
Siga las instrucciones de ensamblaje adjuntas
del fabricante para la instalación del kit de grifo
y desagüe.
E
Cuidado y limpieza
Quite el polvo del vanitory con frecuencia, con un paño suave que no largue pelusas o con un producto para quitar el polvo.
Puede limpiar el vanitory con un limpiador suave y no abrasivo.
Asegúrese de secar la madera de inmediato con una toalla o un paño suave.
Consejos para el uso del lápiz para retoques (GG): Para rayones, pincele en dirección del rayón; para áreas desgastadas,
pincele en dirección de las vetas de la madera. Quite el exceso de colorante con un paño suave.
¡No utilice el lápiz para retoques en la encimera del vanitory!
9
HOMEDEPOT.COM/HOMEDECORATORS
Comuníquese al 1-800-986-3460 para obtener más ayuda.
Repuestos
Para obtener repuestos, llame a nuestro departamento de atención al cliente al 1-800-986-3460, de lunes a viernes de 8 a. m. a 6 p. m.,
hora estándar del Este.
Pieza
Descripción
Número de pieza
Cantidad
HH
Nivelador
PH-LVRBLK001
2
HH
10
¿Preguntas, problemas, piezas faltantes? Antes de devolver el producto a la tienda,
comuníquese con el servicio de atención al cliente de Home Depot
de lunes a viernes de 8 a. m. a 6 p. m., hora estándar del Este
al 1-800-986-3460.
HOMEDEPOT.COM/HOMEDECORATORS
CONSERVE ESTE MANUAL COMO REFERENCIA EN EL FUTURO.