Transcript
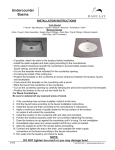
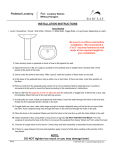
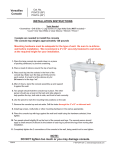
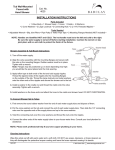
Above Counter
Basins
INSTALLATION INSTRUCTIONS
Tools Needed
• Pencil • Wrench •
• Screwdriver • Drill & Bits • Silicone Sealant •
Parts Needed
• Faucet • Drain Assembly • Supply Pipe & Fittings • Drain Pipe, Trap & Fittings •
Planning the Layout
If there are no pre-drilled faucet holes, decide where you want the faucet to be in relation to the
sink. Once you’ve decided on a vessel sink/faucet layout, make a template of the counter top
(cardboard will work best for your template). Then, mark the appropriate location for the sink
drainage and faucet holes. Draw everything out and make any necessary changes prior to drilling
and cutting.
Making the Cuts
After you’ve created and marked your template, lay it out over the counter top and make the
necessary marks directly onto the counter top. The best way to do this is to cut out your final
marks on your template so you can draw directly onto the vanity. After you’ve marked the vanity
top, make the necessary cuts. Once the cuts have been made, take your sink and faucet and
place them onto the vanity to make sure everything lines up. Make any necessary alterations to
your cuts until everything lines up perfectly.
Securing the Sink
If your vanity came with specific installation instructions regarding securing your sink and faucet,
follow them accordingly. If it didn’t, all you need to do is; attach a mounting ring (for glass vessels
ONLY), position the sink, then seal and tighten everything down. If you’re dealing with a glass
vessel sink, you need to provide a cushion of some sort between the sink and the counter.
Silicone works as a great cushion for glass vessel sinks but you can also use a small piece of
rubber if you wish.
NOTE: DO NOT tighten too much or you may damage basin.
8/27/12
P 847•244•1234
www.barclayproducts.com