1
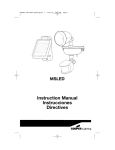
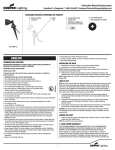
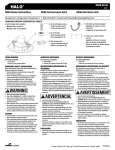
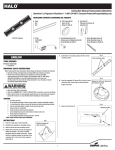
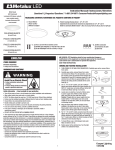
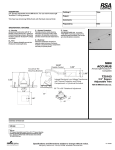
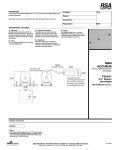
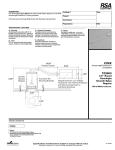
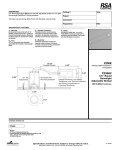
Instruction Manual / Directives Questions? / Questions ? 1-800-334-6871 [email protected] PACKAGING CONTENTS/CONTENU DU PAQUET A.Light fixture L’appareil d’éclairage B. Mounting bracket Support de fixation C.Gasket Joint E. (3) Wire nuts (3) Serre-fils F. D.(2) #6-32 x 3/4 in. and (2) #8-32 x 3/4 in. (use the size that fits your junction box) (2) Vis de boite de jonction no 6-32 x 19 mm (3/4 po) et (2) vis de boite de jonction no 8-32 x 19 mm (3/4 po) (utilisez la taille qui convient à votre boîte de connexion) G. (2) Decorative screw cover caps (2) Capuchons décoratifs vissés (2) #8-32 x 1-1/4 in. cover mounting screws Vis d’assemblage du couvercle no 8-32 x 32 mm (1 1/4 po) FSL2030LC (Bronze) MOUNTING AND WIRING YOUR FIXTURE ENGLISH 1 WARNING: Risk of electric shock. Disconnect power at fuse or circuit breaker before installing or servicing. NOTE: Fixture can be wall or eave mounted (Fig. 1). ITEMS REQUIRED (Purchase separately) • Phillips screwdriver • Outdoor weatherproof silicone caulking Wall mount IMPORTANT SAFETY INSTRUCTIONS When using product, basic precautions should always be followed, including the following: • Heed all warnings, including below warnings AND those included on product. • Save these instructions and warnings. • For outdoor use only. • cULus LISTED for wet location. • Disassembling your fixture will void the warranty. • Your fixture is prewired and preassembled for easy installation. Eave mount NOTE: Coverplate mounts to recessed mounted standard junction boxes (Fig. 2). Junction box must be at least 1-1/2 inch in depth for proper installation for recessed mount application. WARNING • Read and follow these instructions. • Risk of fire/electric shock. If not qualified, consult an electrician. • Disconnect power at fuse or circuit breaker before installing or servicing. 2 1. Line up the holes on the mounting bracket (B) with the holes on your junction box. Using either (2) #6 screws or (2) #8 screws (D) (depending on size of the holes in your junction box), attach the mounting bracket (B) to your junction box (Fig. 3). CAUTION • Connect fixture to a 120 volt, 60 Hz power source. Any other connection voids the warranty. • Fixture should be installed by persons with experience in household wiring or by a qualified electrician. The electrical system, and the method of electrically connecting the fixture to it, must be in accordance with the National Electrical Code and local building codes. • Fixture designed for wall or eave mount to a junction box only. Mount fixture to a grounded, recessed-mounted standard junction box marked for use in wet locations. • Do not mount below 5 feet. SAVE THESE INSTRUCTIONS. 3 1-1/2 in. 1-1/2 in. Round Octagonal B D D 2. Thread fixture wires through coverplate gasket (C) (Fig. 4). 4 E B C FOR BEST RESULTS Junction box A • Install light 10-15 feet above the ground. • When installing two fixtures on one switch, make sure the switch is rated for at least a 1 A inductive load. E 1 3. Connect fixture black wire to house black wire and fixture white wire to house white wire using wire nuts (E) provided. 4. Connect house ground wire and fixture ground wire to the mounting bracket (B) using the green ground screw on the mounting bracket. 5. Attach fixture (A) to the mounting bracket (B) using (2) #8 x 1-1/4 in. screws (F) provided. Be sure no loose wires remain sticking out from underneath the coverplate. Insert the decorative screw cover caps (G) into the screw holes on the coverplate for a finished appearance (Fig. 5). 6. Apply silicone caulk around the edges of the coverplate to provide a watertight seal from rain and moisture. 7. Turn on power at main fuse/breaker box. IMPORTANTES INSTRUCTIONS DE SÉCURITÉ Des précautions de base doivent être suivies lors de l’utilisation de ce produit, incluant : • Respectez tous les avertissements, y compris les avertissements ci-dessous ET ceux qui sont inscrits sur l’étiquette d’avertissement. • Conservez ces instructions et ces avertissements. • Pour utilisation à l’extérieur seulement. • Homologué C-UL US pour utilisation à des endroits mouillés. • Le démontage de l’appareil annule la garantie. • Votre appareil d’éclairage est pré-câblé et pré-assemblé pour une installation facile. 5 A F G AVERTISSEMENT F • Lisez et suivez ces instructions. • Risque d’incendie/de choc électrique. Si vous n’êtes pas qualifié, consultez un électricien. • Coupez le courant au fusible ou au disjoncteur avant installation ou entretien. G TROUBLESHOOTING Problem Cause / Solution PRÉCAUTION Light does not come ON. No power to the fixture. • Check if circuit breaker tripped. • Confirm wall switch is ON. TURN OFF POWER BEFORE CONTINUING. Wiring to the unit is loose. • Confirm wiring is properly secured. • Raccorder l’appareil d’éclairage à une alimentation 120 V, 60 Hz. Toute autre connexion annule la garantie.) • L’appareil d’éclairage doit être installé par un électricien ou une personne chevronnée en câblage domestique. Le système électrique et la méthode de connexion électrique de l’appareil d’éclairage doivent être conformes au Code national de l’électricité et aux codes locaux du bâtiment. • L’appareil d’éclairage conçu pour les installations murales ou sur l’avant-toit à une boîte de jonction exclusivement. Raccorder le luminaire à un boitier de jonction encastré et mis à la terre standard et marqué pour une utilisation sous des conditions humides. • Ne pas installer à une hauteur inférieure à 1,52 m (5 pi). CONSERVEZ CES INSTRUCTIONS ET CES AVERTISSEMENTS. 2-YEAR LIMITED WARRANTY THE FOLLOWING WARRANTY IS EXCLUSIVE AND IN LIEU OF ALL OTHER WARRANTIES, WHETHER EXPRESS, IMPLIED OR STATUTORY INCLUDING, BUT NOT LIMITED TO, ANY WARRANTY OF MERCHANTABILITY OR FITNESS FOR ANY PARTICULAR PURPOSE. Cooper Lighting, LLC (“Cooper Lighting”) warrants to customers that, for a period of two years from the date of purchase, Cooper Lighting’s products will be free from defects in materials and workmanship. The obligation of Cooper Lighting under this warranty is expressly limited to the provision of replacement products. This warranty is extended only to the original purchaser of the product. A purchaser’s receipt or other proof of date of original purchase acceptable to Cooper Lighting. This is required before warranty performance shall be rendered. This warranty does not apply to Cooper Lighting products that have been altered or repaired or that have been subjected to neglect, abuse, misuse or accident (including shipping damages). This warranty does not apply to products not manufactured by Cooper Lighting which have been supplied, installed, and/or used in conjunction with Cooper Lighting products. Damage to the product caused by replacement bulbs or corrosion or discoloration of brass components are not covered by this warranty. LIMITATION OF LIABILITY: IN NO EVENT SHALL COOPER LIGHTING BE LIABLE FOR SPECIAL, INDIRECT, INCIDENTAL, OR CONSEQUENTIAL DAMAGES (REGARDLESS OF THE FORM OF ACTION, WHETHER IN CONTRACT, STRICT LIABILITY, OR IN TORT INCLUDING NEGLIGENCE), NOR FOR LOST PROFITS; NOR SHALL THE LIABILITY OF COOPER LIGHTING FOR ANY CLAIMS OR DAMAGE ARISING OUT OF OR CONNECTED WITH THESE TERMS OR THE MANUFACTURE, SALE, DELIVERY, USE, MAINTENANCE, REPAIR OR MODIFICATION OF COOPER LIGHTING PRODUCTS, OR SUPPLY OF ANY REPLACEMENT PARTS THEREFORE, EXCEED THE PURCHASE PRICE OF COOPER LIGHTING PRODUCTS GIVING RISE TO A CLAIM. NO LABOR CHARGES WILL BE ACCEPTED TO REMOVE OR INSTALL FIXTURES. To obtain warranty service, please contact Cooper Lighting, LLC, at 1-800-334-6871, press option 2 for Customer Service, or via e-mail [email protected] and include the following information: • Name, address and telephone number • Date and place of purchase • Catalog and quantity purchase • Detailed description of problem All returned products must be accompanied by a Return Goods Authorization Number issued by the Company and must be returned freight prepaid. Any product received without a Return Goods Authorization Number from the Company will be refused. Cooper Lighting, LLC is not responsible for merchandise damaged in transit. Repaired or replaced products shall be subject to the terms of this warranty and are inspected when packed. Evident or concealed damage that is made in transit should be reported at once to the carrier making the delivery and a claim filed with them. POUR DES RÉSULTATS OPTIMAUX • Installer le luminaire de 3,05 à 4,57 m (10 à 15 pi) au-dessus du sol. • Lors de l’installation de deux luminaires sur un seul interrupteur, s’assurer que la caractéristique nominale de charge inductive de cet interrupteur est d’au moins 1 ampère. MONTAGE ET CÂBLAGE DU LUMINAIRE AVERTISSEMENT : Risque de choc électrique. Coupez le courant au fusible ou au disjoncteur avant installation ou entretien. REMARQUE : L’appareil d’éclairage peut être monté sur le murale o sur l’avant toit (Fig. 1). Installation murale Installation sur avant-toit REMARQUE : La plaque de couvercle s’installe aux boîtiers de jonction encastrés standards. Le boitier de jonction doit être à une profondeur d’au moins 3,8 cm (1 1/2 po) pour répondre à une installation encastrée (Fig. 2). 2 1-1/2 po Ronde Reproductions of this document without prior written approval of Cooper Lighting, LLC are strictly prohibited. For assistance, call 1-800-334-6871 or e-mail us at [email protected]. Printed in China 1 1. Aligner les trous du support de fixation (B) avec les trous du boîtier de jonction. Utiliser (2) vis No. 6 ou (2) vis No. 8 (D) (en fonction de la dimension des trous du boîtier de jonction), fixer le support de fixation (B) sur le boîtier de jonction (Fig. 3). FRANÇAIS ARTICLES NÉCESSAIRES (à acheter séparément) • Tournevis cruciforme • Agent d’étanchéité à base de silicone clair à l’épreuve des intempéries 3 B D D 2 1-1/2 po Octogonale Pour faire une réclamation au titre de la garantie, veuillez appeler Cooper Lighting, LLC, au 1 800 334 6871, en choisissant l’option 2 pour le Service à la clientèle, ou envoyer un courriel à [email protected] et fournir les renseignements ci-après : • Nom, adresse et numéro de téléphone • Date et lieu de l’achat • Numéro de catalogue et quantité achetée • Description détaillée du problème Tout produit retourné doit comporter un numéro d’autorisation de retour de produit fourni par l’entreprise et être expédié port payé. Nous refuserons tout produit qui n’est pas accompagné d’un numéro d’autorisation de retour de produit fourni par l’entreprise. Cooper Lighting, LLC n’est pas responsable de la marchandise endommagée durant le transport. Les produits réparés ou remplacés seront soumis aux modalités de la présente garantie et seront inspectés au moment d’être emballés. Tout dommage apparent ou non survenant pendant le transport doit être signalé immédiatement au transporteur effectuant la livraison et une réclamation doit être adressée à ce dernier. 2. Faites passer les fils de la pièce fixe dans le joint du couvercle de protection (C) (Fig. 4). 4 E B C Boîtier de jonction A E 3. Connecter le fil noir de la lampe au fil noir de la maison et le fil blanc de la lampe au fil blanc de la maison avec les serre-fils (E) fournis. 4. Raccorder le fil de mise à la terre domestique et le fil de mise à la terre du luminaire au support de fixation (B) en utilisant la vis de mise à la terre verte du support de fixation. 5. Fixer le luminaire au support de fixation en utilisant les deux (2) vis no 8 x 3,2 cm (1 1/4 po) (F) fournies. S’assurer qu’aucun fil lâche ne demeure coincé sous la plaque du couvercle. Insérer les capuchons décoratifs vissés (G) dans les trous de vis de la plaque de couvercle pour parfaire l’apparence (Fig. 5). 6. Appliquer un joint silicone autour des bords de la plaque de couvercle et dans toutes les ouvertures pour former un joint imperméable protégeant de la pluie et de l’humidité. 7. Rebranchez l’électricité au disjoncteur principal. La reproduction de ce document est strictement interdite sans l’autorisation préalable par écrit de Cooper Lighting, LLC. Pour assistance, appelez le 1-800-334-6871 ou envoyez-nous un courriel à [email protected]. Imprimé au Chine Customer First Center 1121 Highway 74 South, Peachtree City, GA 30269 www.cooperlighting.com © 2012 Cooper Lighting, LLC 5 A F G F G Dépannage Problème Cause / Mesure Corrective L’appareil d’éclairage ne s’allument pas. Le luminaire n’est pas sous tension. • Vérifiez que le disjoncteur n’a pas été déclenché. • Vérifiez que l’interrupteur est allumé. METTRE HORS CIRCUIT AVANT DE CONTINUER. Le câblage du dispositif est lâche. • Vérifier le câblage et reconnecter au besoin. GARANTIE LIMITÉE DE 2 ANS LA PRÉSENTE GARANTIE CONSTITUE LA SEULE GARANTIE POUR CE PRODUIT ET PRÉVAUT SUR TOUTE AUTRE GARANTIE, QU’ELLE SOIT EXPRESSE OU TACITE Y COMPRIS, SANS TOUTEFOIS S’Y LIMITER, TOUTE GARANTIE DE QUALITÉ MARCHANDE ET POUR UN USAGE PARTICULIER. Cooper Lighting, LLC («Cooper Lighting») garantit à ses clients, pendant une période de trois ans à compter de la date d’achat, que ses produits Cooper Lighting sont exempts de tout défaut de matériaux et de fabrication. En vertu de la présente garantie, l’obligation de Cooper Lighting se limite expressément à fournir des produits de remplacement. La présente garantie n’est proposée qu’à l’acheteur initial du produit. Cooper Lighting requiert un reçu ou autre preuve d’achat qu’elle jugera acceptable sur lequel est indiquée la date de l’achat initial. Cette preuve d’achat est requise pour obtenir l’exécution de la garantie. La garantie ne s’applique pas aux produits Cooper Lighting qui ont été modifiés ou réparés, ou qui ont fait l’objet d’une négligence ou d’un usage abusif ou inapproprié, ou qui ont été endommagés en raison d’un accident (y compris durant le transport). Cette garantie ne s’applique pas aux produits qui ne sont pas fabriqués par Cooper Lighting et qui ont été fournis, installés et/ou utilisés avec des produits Cooper Lighting. Les dommages au produit causés par une ampoule de rechange ou la corrosion, et la décoloration des pièces de laiton ne sont pas couverts par cette garantie. LIMITATION DES RESPONSABILITÉS : COOPER LIGHTING NE SERA EN AUCUN CAS TENU RESPONSABLE DES DOMMAGES SPÉCIAUX, INDIRECTS, ACCESSOIRES ET CONSÉCUTIFS (QUELLE QUE SOIT LA RAISON, MÊME SI CETTE RESPONSABILITÉ REPOSE SUR UN CONTRAT, LA RESPONSABILITÉ STRICTE, OU DES DÉLITS, Y COMPRIS LA NÉGLIGENCE), NI POUR LA PERTE DE PROFITS, ET MÊME SI LA RESPONSABILITÉ DE COOPER LIGHTING POUR DES RÉCLAMATIONS OU DES DOMMAGES FAIT SUITE À LA PRÉSENTE GARANTIE OU EST LIÉE AUX MODALITÉS DES PRÉSENTES, À LA FABRICATION, À LA VENTE, À LA LIVRAISON, À L’UTILISATION, À L’ENTRETIEN, À LA RÉPARATION, OU À LA MODIFICATION DE PRODUITS COOPER LIGHTING, OU À LA FOURNITURE DE TOUTE PIÈCE DE RECHANGE CONNEXE, LE COÛT DES DOMMAGES NE PEUT DÉPASSER LE COÛT D’ACHAT DU PRODUIT COOPER LIGHTING FAISANT L’OBJET DE LA RÉCLAMATION AU TITRE DE LA PRÉSENTE GARANTIE. AUCUN FRAIS DE MAIN-D’OEUVRE NE SERA REMBOURSÉ POUR ENLEVER OU INSTALLER UN LUMINAIRE. 3 07/12 825-0775